Odoo 19, the open-source business management software suite, enables organizations to streamline their operations through a comprehensive range of applications. Although Odoo is commonly deployed on Linux servers, setting it up on Windows is a simple process that delivers the full power of this advanced ERP system to Windows users.
Why Odoo 19 on Windows?
Linux remains a preferred platform for running Odoo because of its reliability and performance, but many users are more comfortable with the Windows environment. Installing Odoo 19 on Windows gives businesses and developers the opportunity to utilize its features without configuring a Linux server. This adaptability makes Odoo more approachable for a wider group of users, particularly those who rely on Windows for everyday activities.
Step-by-Step Installation Guide for Odoo 19
- Install Python – Ensure the required version of Python is installed and properly added to the system path.
- Install PostgreSQL – Set up PostgreSQL as the database backend for Odoo.
- Configure pgAdmin4 and PSQL – Manage and configure your PostgreSQL databases using pgAdmin4 or the PSQL command-line tool.
- Install C++ Build Tools – Use Visual Studio Tools to install the necessary C++ kit for compiling Odoo dependencies.
- Download Odoo 19 from GitHub – Clone the Odoo 19 source code from the official GitHub repository.
- Install PyCharm – Set up PyCharm IDE for efficient Odoo development.
- Configure Odoo 19 in PyCharm – Create and configure a development environment in PyCharm tailored for Odoo 19.
Step 1: Python Installation
Ensure Python is not already installed on your system before proceeding with the installation. Run the command python --version in the Command Prompt.
- If Python is installed, it will display a version number such as “Python 3.xx.x”.
- If Python is not installed, you will receive an error message like:“'python' is not recognized as an internal or external command, operable program, or batch file.”
For Odoo 19, you need Python 3.12 or the latest version. If your system has a version below 3.12, or Python is not installed, download the installer from the Python Downloads.
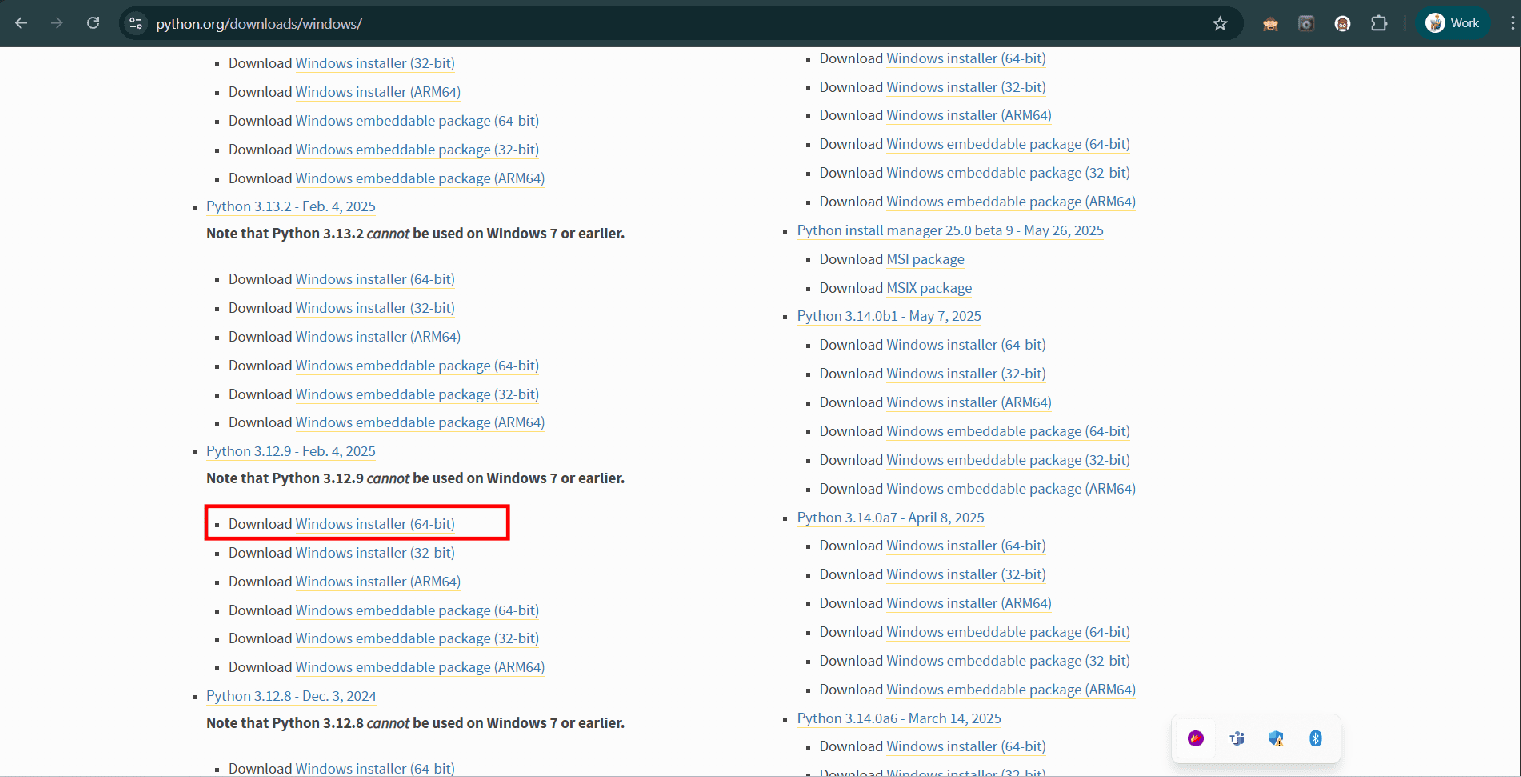
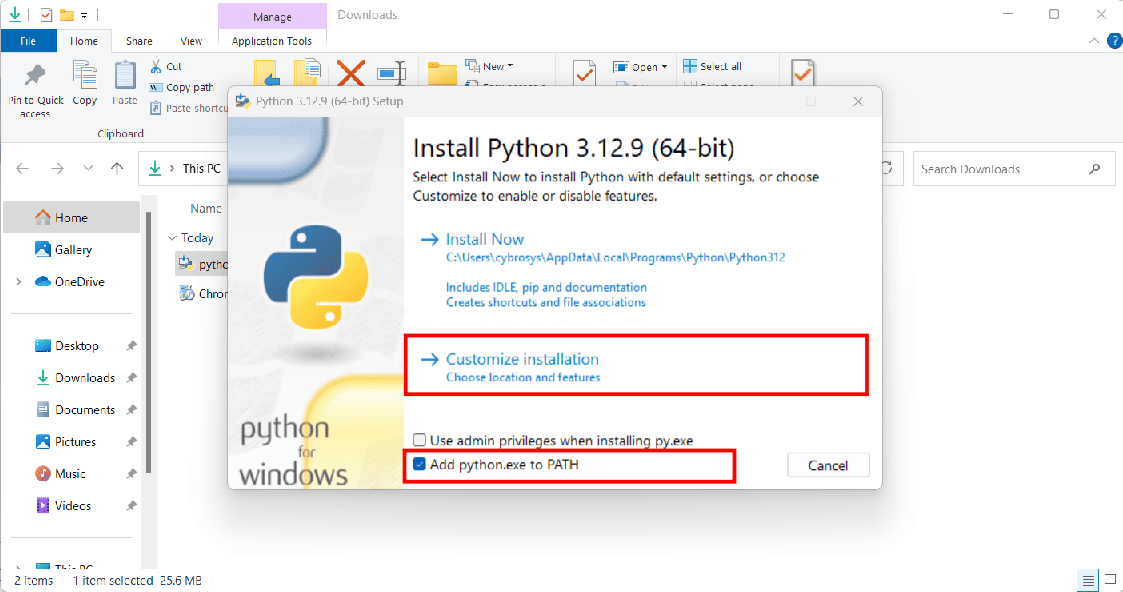
Download the installer and open its containing folder. Once the folder is open, you'll see the downloaded .exe file. During installation, select the "Custom Installation" option and Make sure to check the box that says "Add Python 3.12 to PATH".
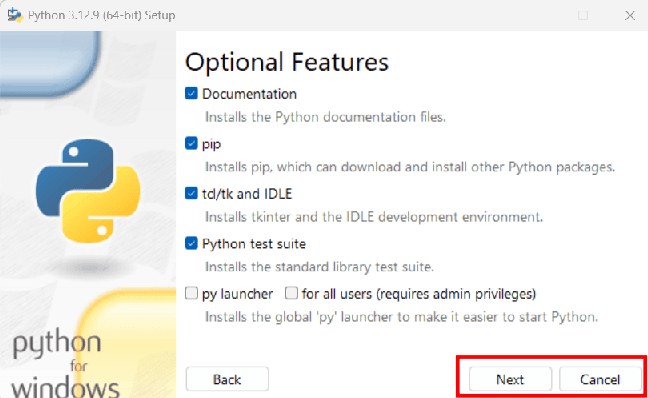
On the Optional Features page, select all available checkboxes and click “Next”.
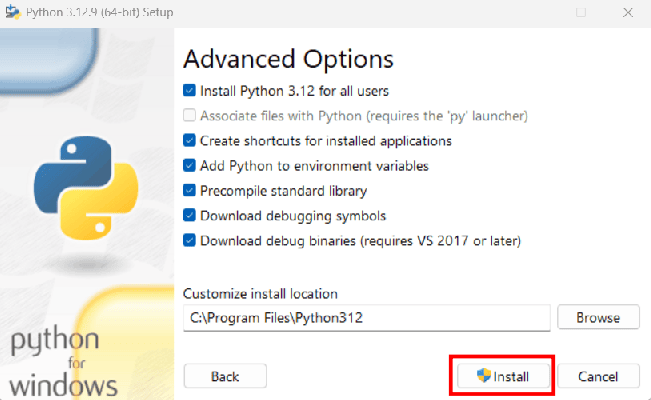
In the Advanced Options section, enable the first five options by checking their boxes, then proceed by clicking “Install".
Step 2: Install PostgreSQL
To install PostgreSQL on your system, go to the official PostgreSQL website and download the installer from then follow the installation instructions.
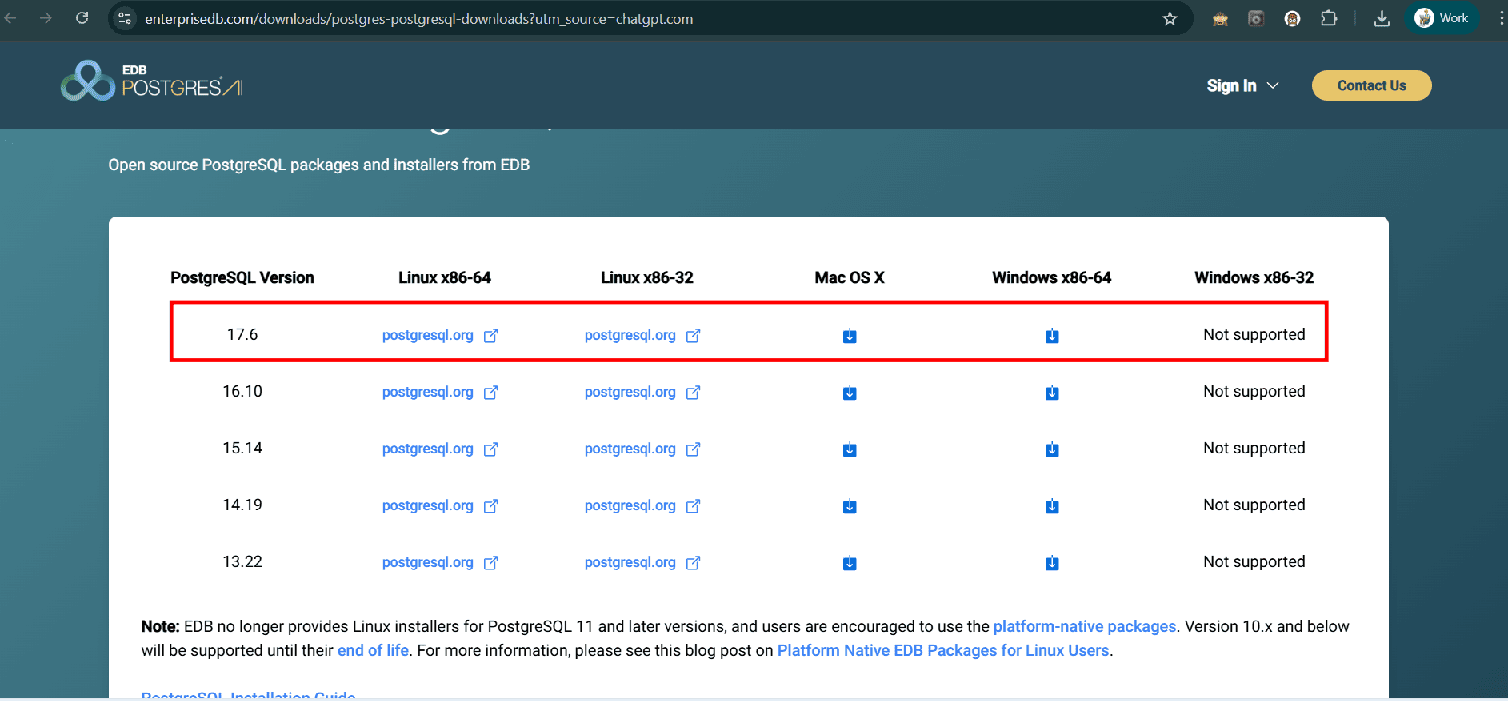
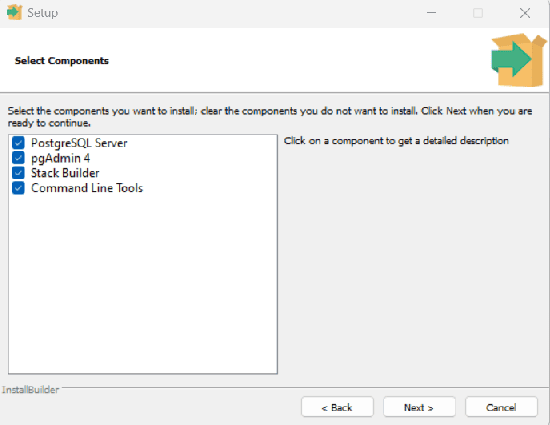
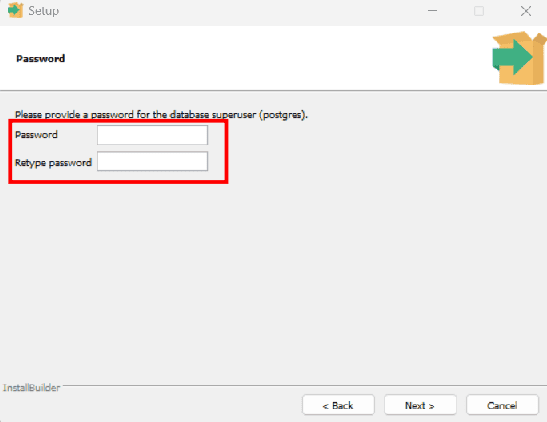
It is recommended to install PostgreSQL version 16 or later. Click the download icon under the “Windows x86-64” section to begin the download. Once downloaded, run the installer. On the “Select Components” page, ensure that you check all available checkboxes. On the “Password” page, set a password for the superuser account. Leave all other settings at their default values and continue with the installation.
To do that, click the Next button, and you will see the window below
After enabling this option, click the Next button, and you will be able to set the password.
Once the PostgreSQL installation is complete, the Stack Builder wizard will automatically launch. This tool allows you to install additional components and extensions for PostgreSQL. In the wizard, navigate to the "Database Drivers" category and select all the available applications listed there. After selecting the components, follow the prompts to finish the installation process and complete the wizard.

Step 3: Configuring pgAdmin 4 and PSQL
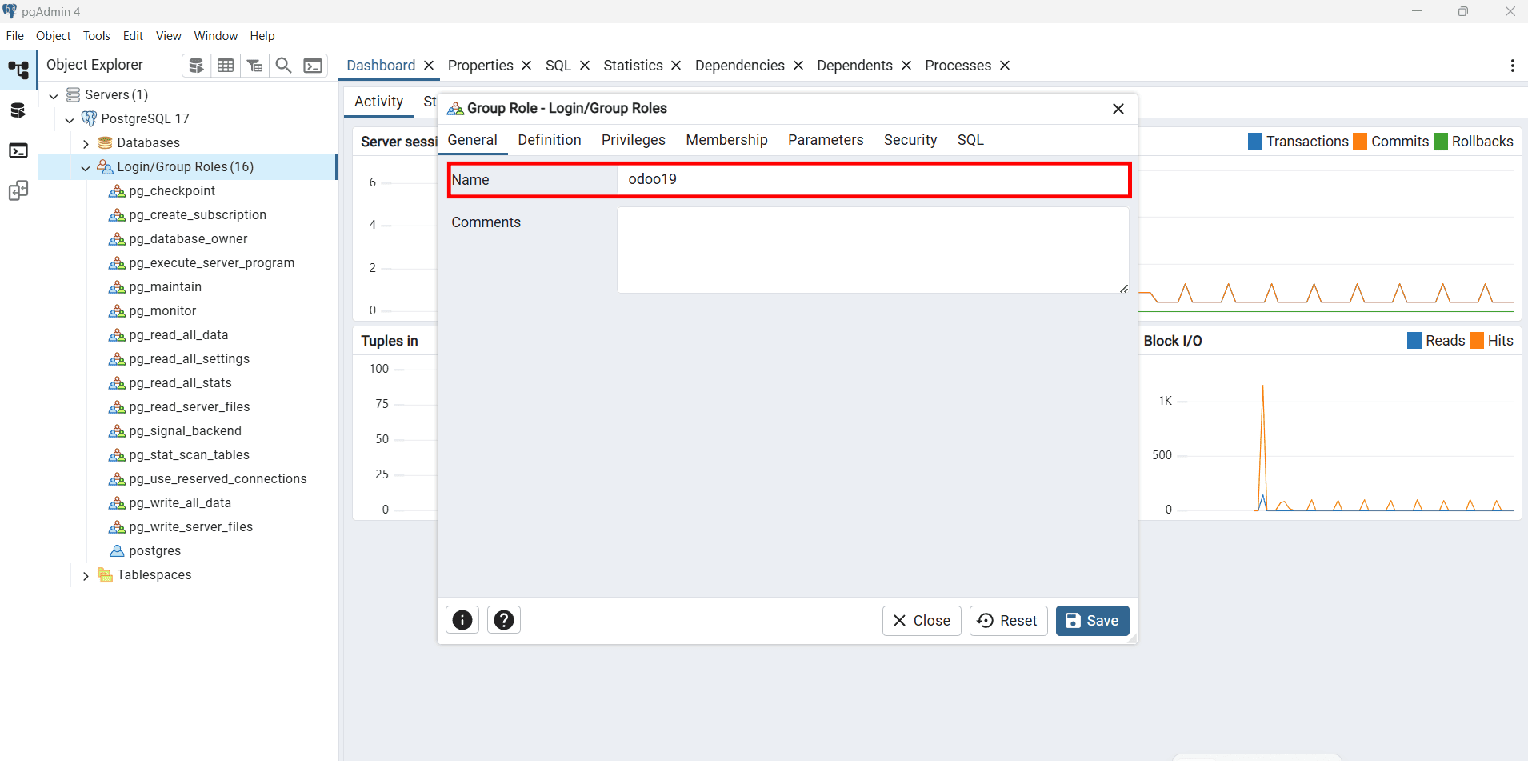
During the PostgreSQL installation, pgAdmin 4 was selected on the "Select Components" page, so it has already been installed on your system. To begin configuration, launch pgAdmin 4. On the left-hand side, in the Object Explorer, expand the "Servers" section. You will be prompted to enter a master password to secure pgAdmin—this is used to encrypt and store your saved connection credentials. Next, under the expanded "Servers" tree, locate and expand the PostgreSQL instance (commonly labeled as “PostgreSQL” or “Postgres”). Within this, find the “Login/Group Roles” section. Right-click on "Login/Group Roles" and choose "Create" > "Login/Group Role" to define a new role. You can assign a name, set privileges, and configure role settings based on your needs.
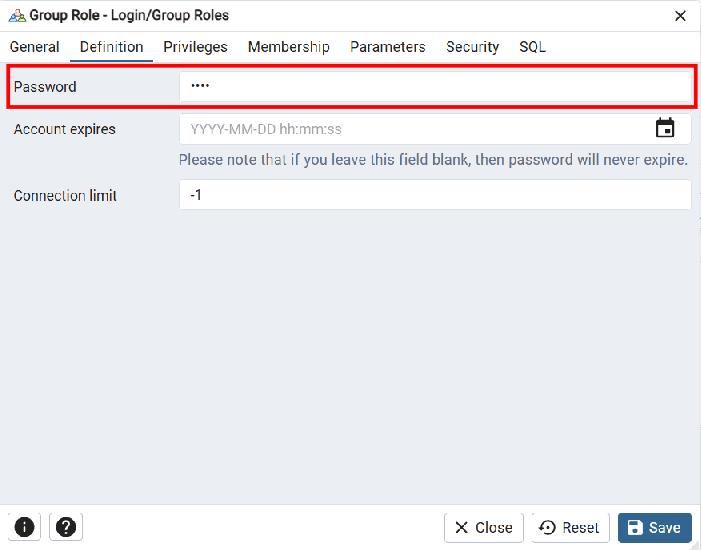
In the "Create – Login/Group Role" window, navigate to the “Definition” tab. Here, you can set a password for the new role. This password will be required when connecting to the PostgreSQL server using this role, so make sure to choose a secure and memorable one.
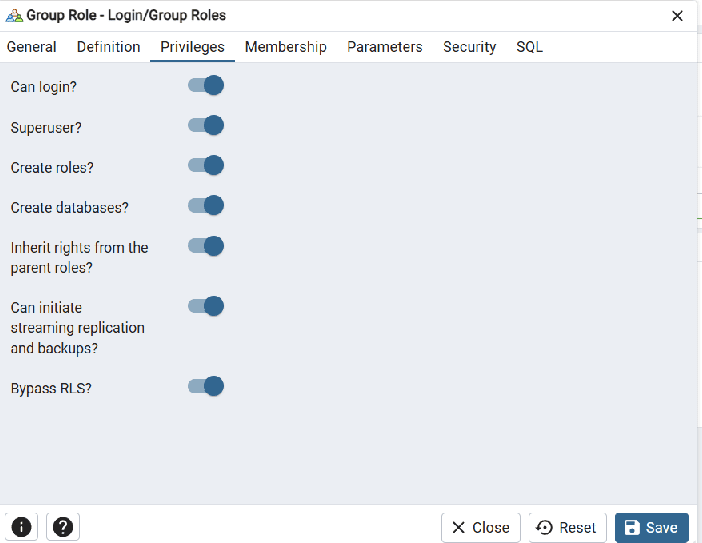
Enable all options from the “Privileges” tab.
Step 4: Installing the C++ Build Tools via Visual Studio
C++ is a core programming language essential for developing Windows applications. Visual Studio Build Tools provide a robust set of compilers, libraries, and development tools needed to create desktop applications, background services, and various components using C++. To get started, download the C++ Build Tools installer from the official Visual Studio website:
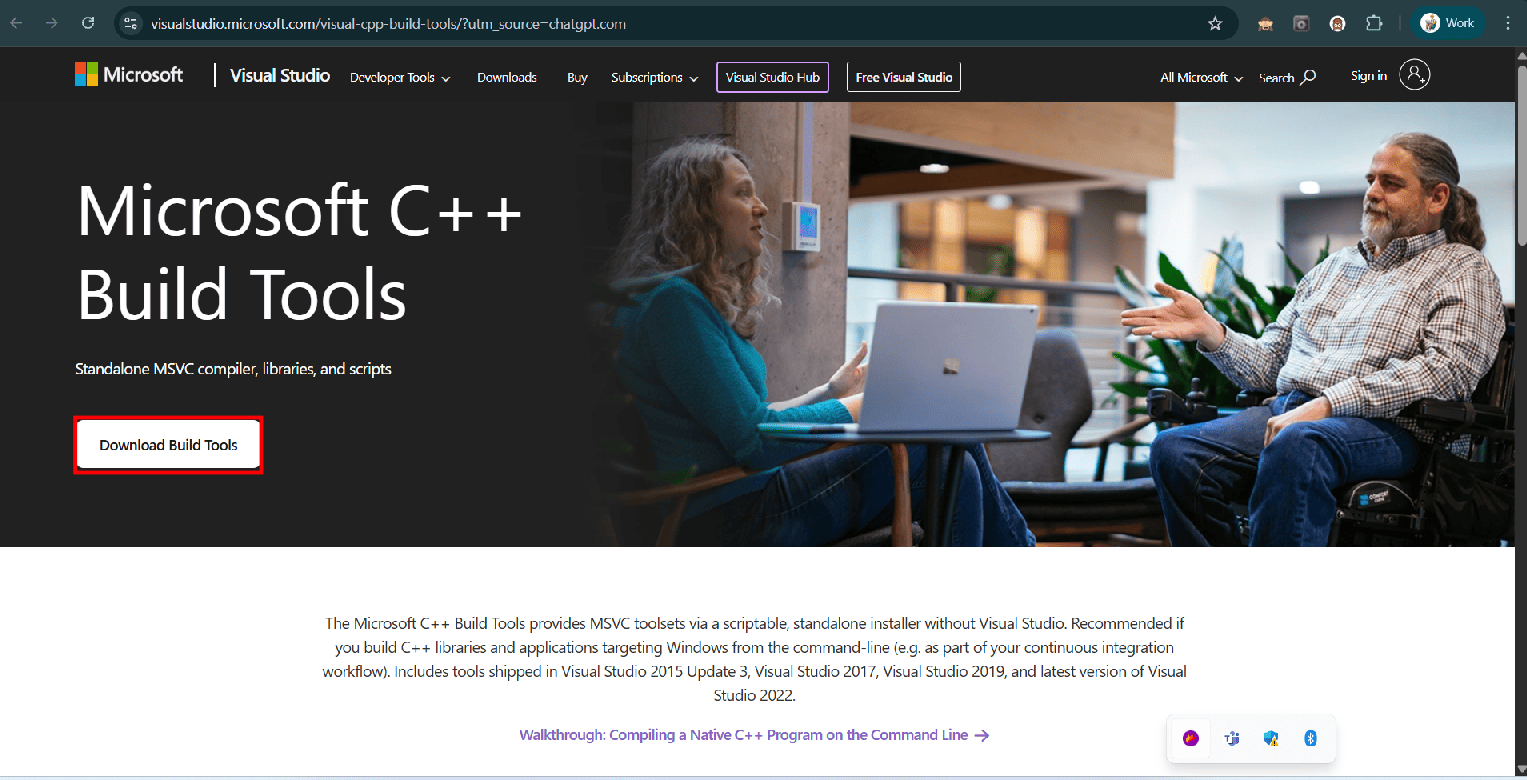
During the installation process, select the "Desktop development with C++" workload. Additionally, under the Optional Components section, ensure that you check the components as shown in the reference image or figure provided. These components are essential for a complete C++ development environment.
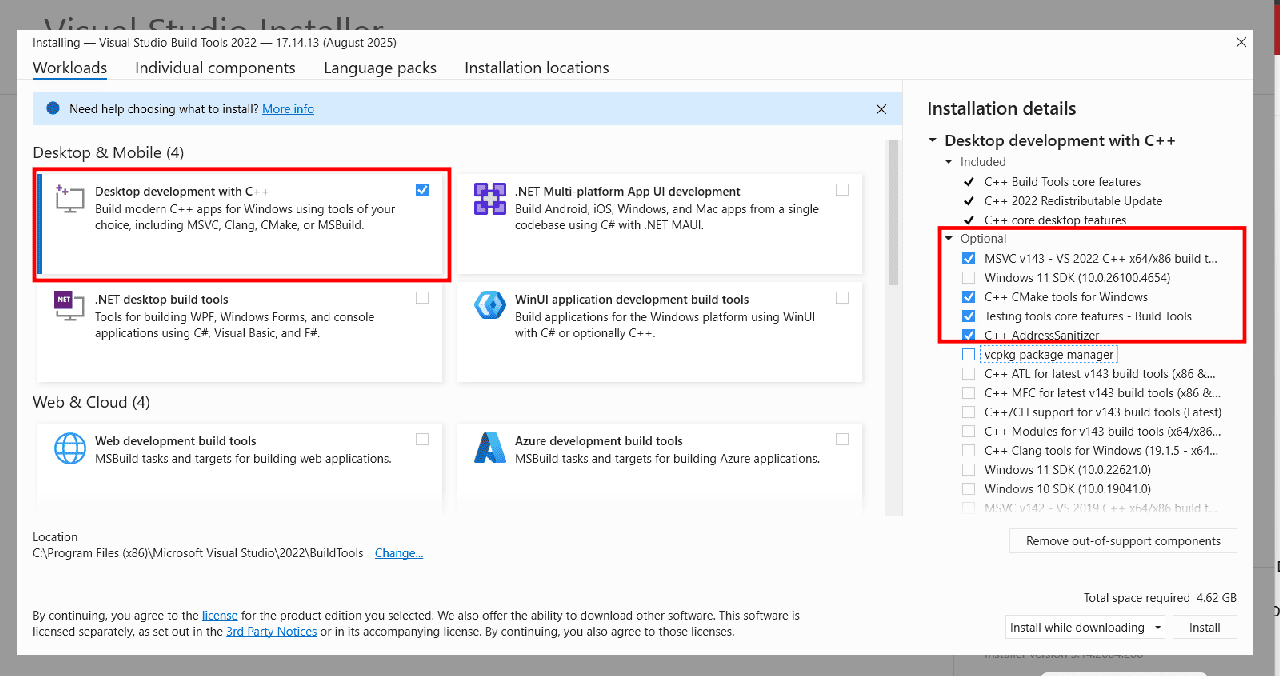
Once all required components are selected, proceed to complete the installation. After the installation finishes, restart your computer to ensure all changes and configurations take effect properly.
Step 5: Downloading Odoo 19 from GitHub
Getting Odoo 19 from GitHub is a straightforward process. Start by visiting the official GitHub.In the search bar at the top of the page, type “Odoo” and press Enter. From the search results, click on the first repository listed—this is typically the official Odoo repository, as shown in the reference image below.

Click the link, then confirm the branch shown is 19. Click the “Code” button, and you will see the “Download ZIP” option for Odoo 19. Extract it and save it in a safe location (preferably in the home directory).
Step 6: PyCharm Installation
| Component | Minimum Requirement |
| RAM | 4 GB of free RAM |
| CPU | Any modern CPU |
| Disk Space | 3.5 GB |
| Monitor Resolution | 1024 × 768 |
If your system meets the above requirements, you can download the PyCharm Community Edition from the official JetBrains website:

Select the installation options as shown in the figure during the PyCharm installation.
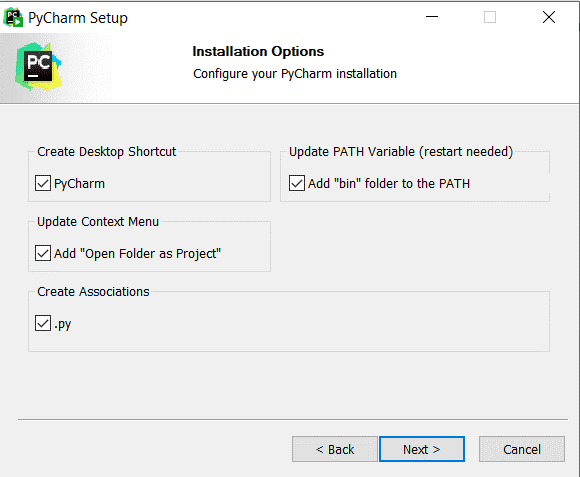
Complete the installation.
Step 7: Setting Up Odoo 19 Development Environment in PyCharm
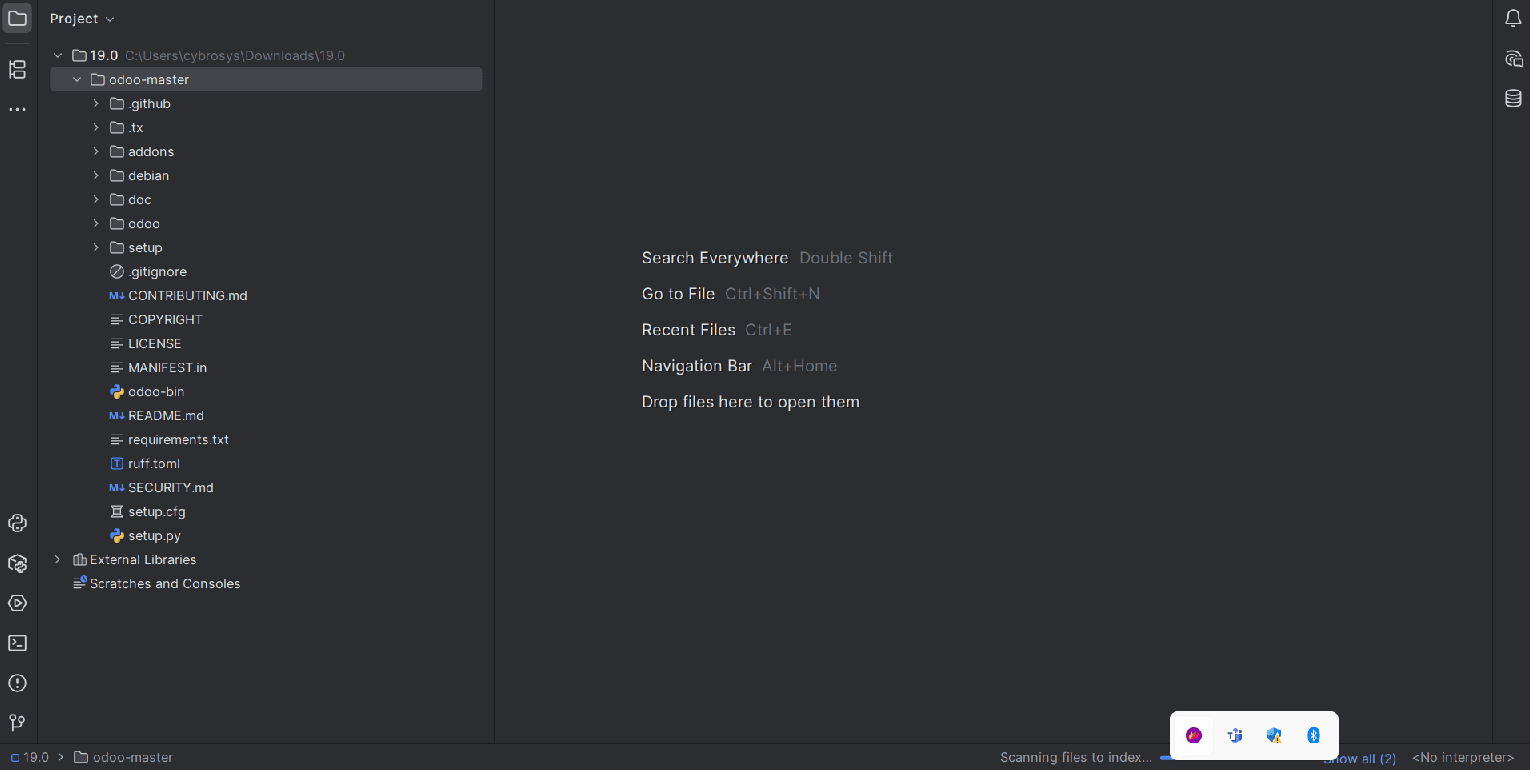
This is the final step in configuring Odoo 19, setting up the development environment. To do this, launch PyCharm from your applications, then select “Open an existing project.”
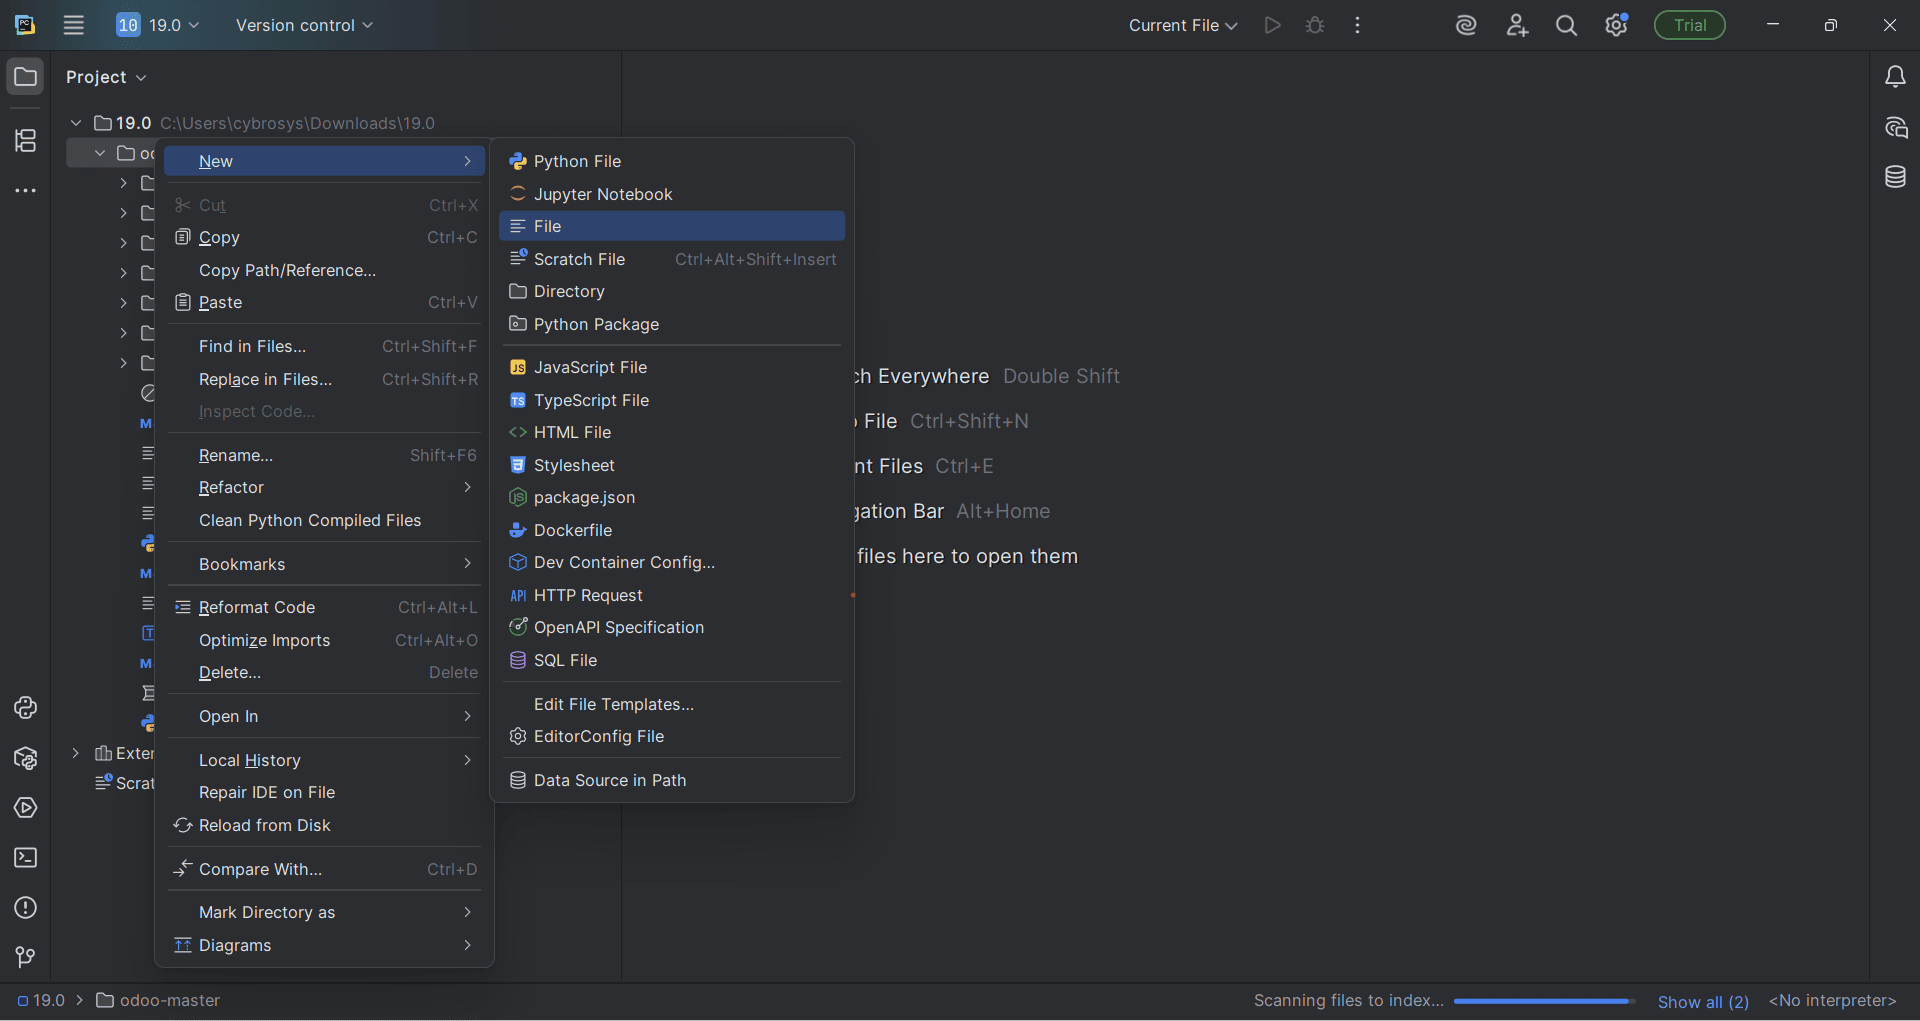
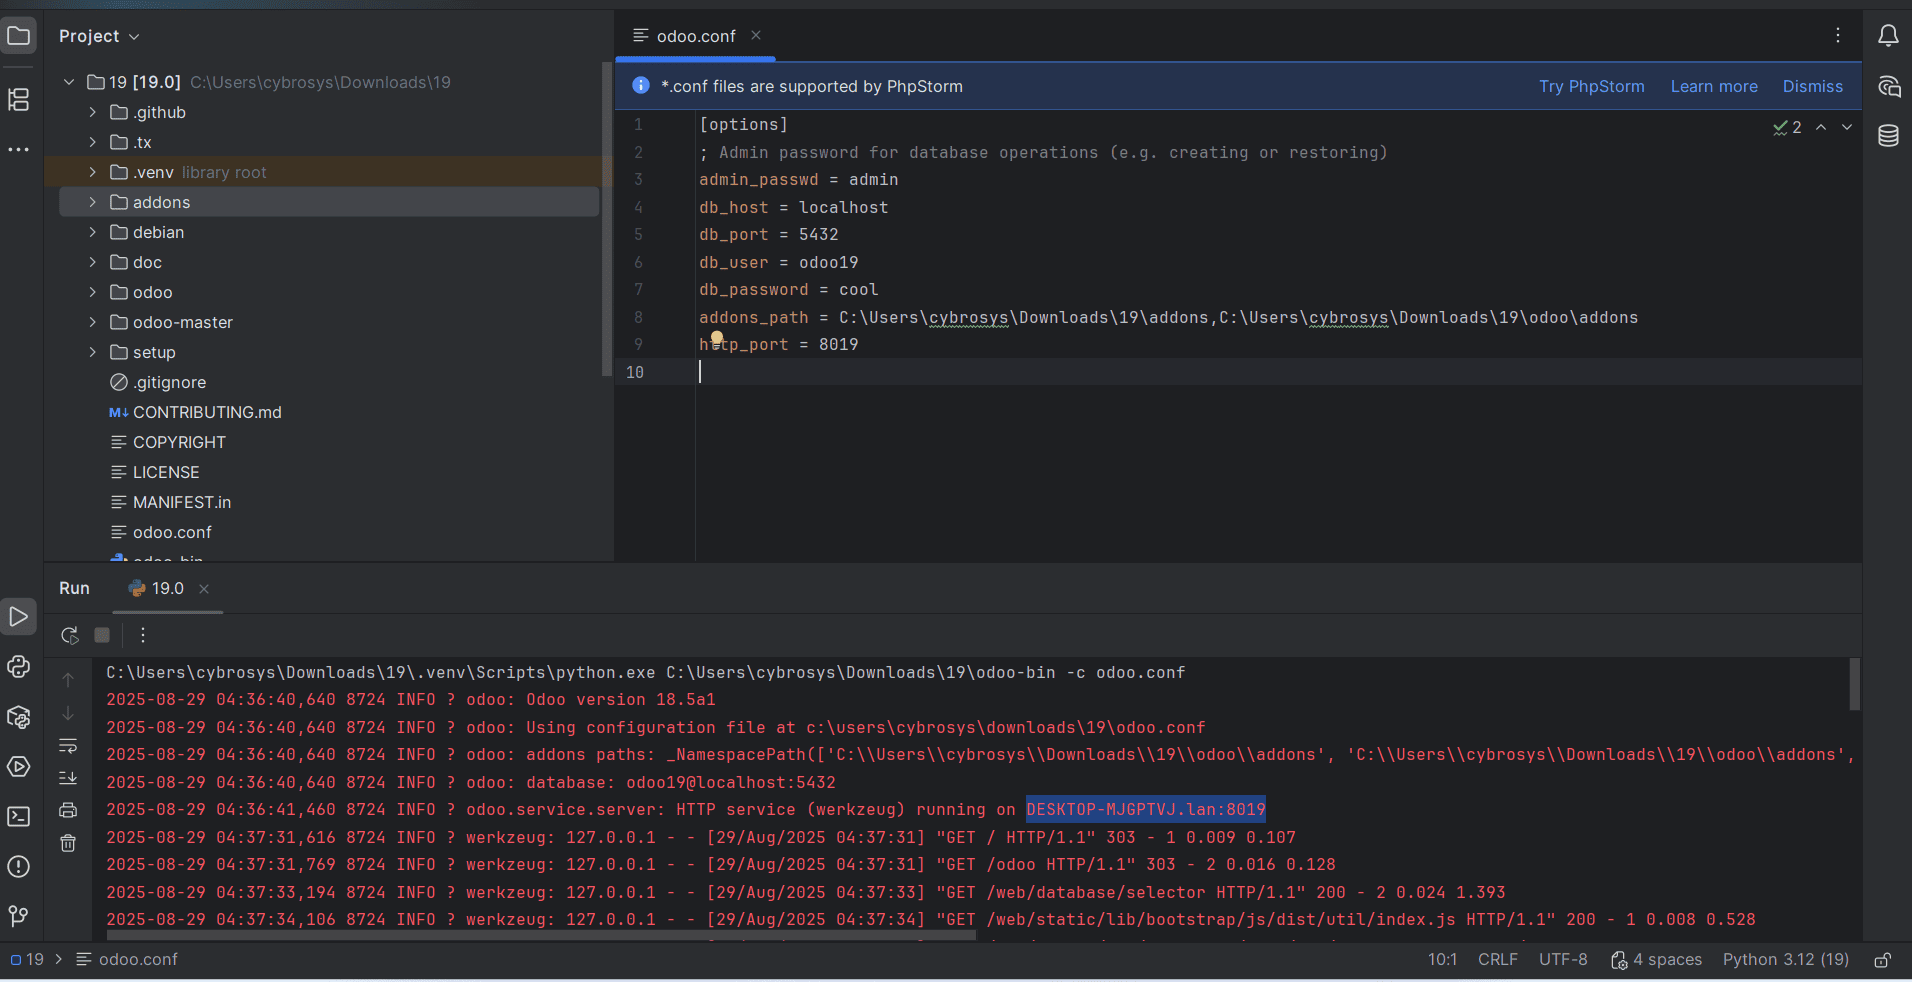
Create an odoo.conf file inside the directory by right-clicking on the Odoo-19 folder from the project tab (left side).
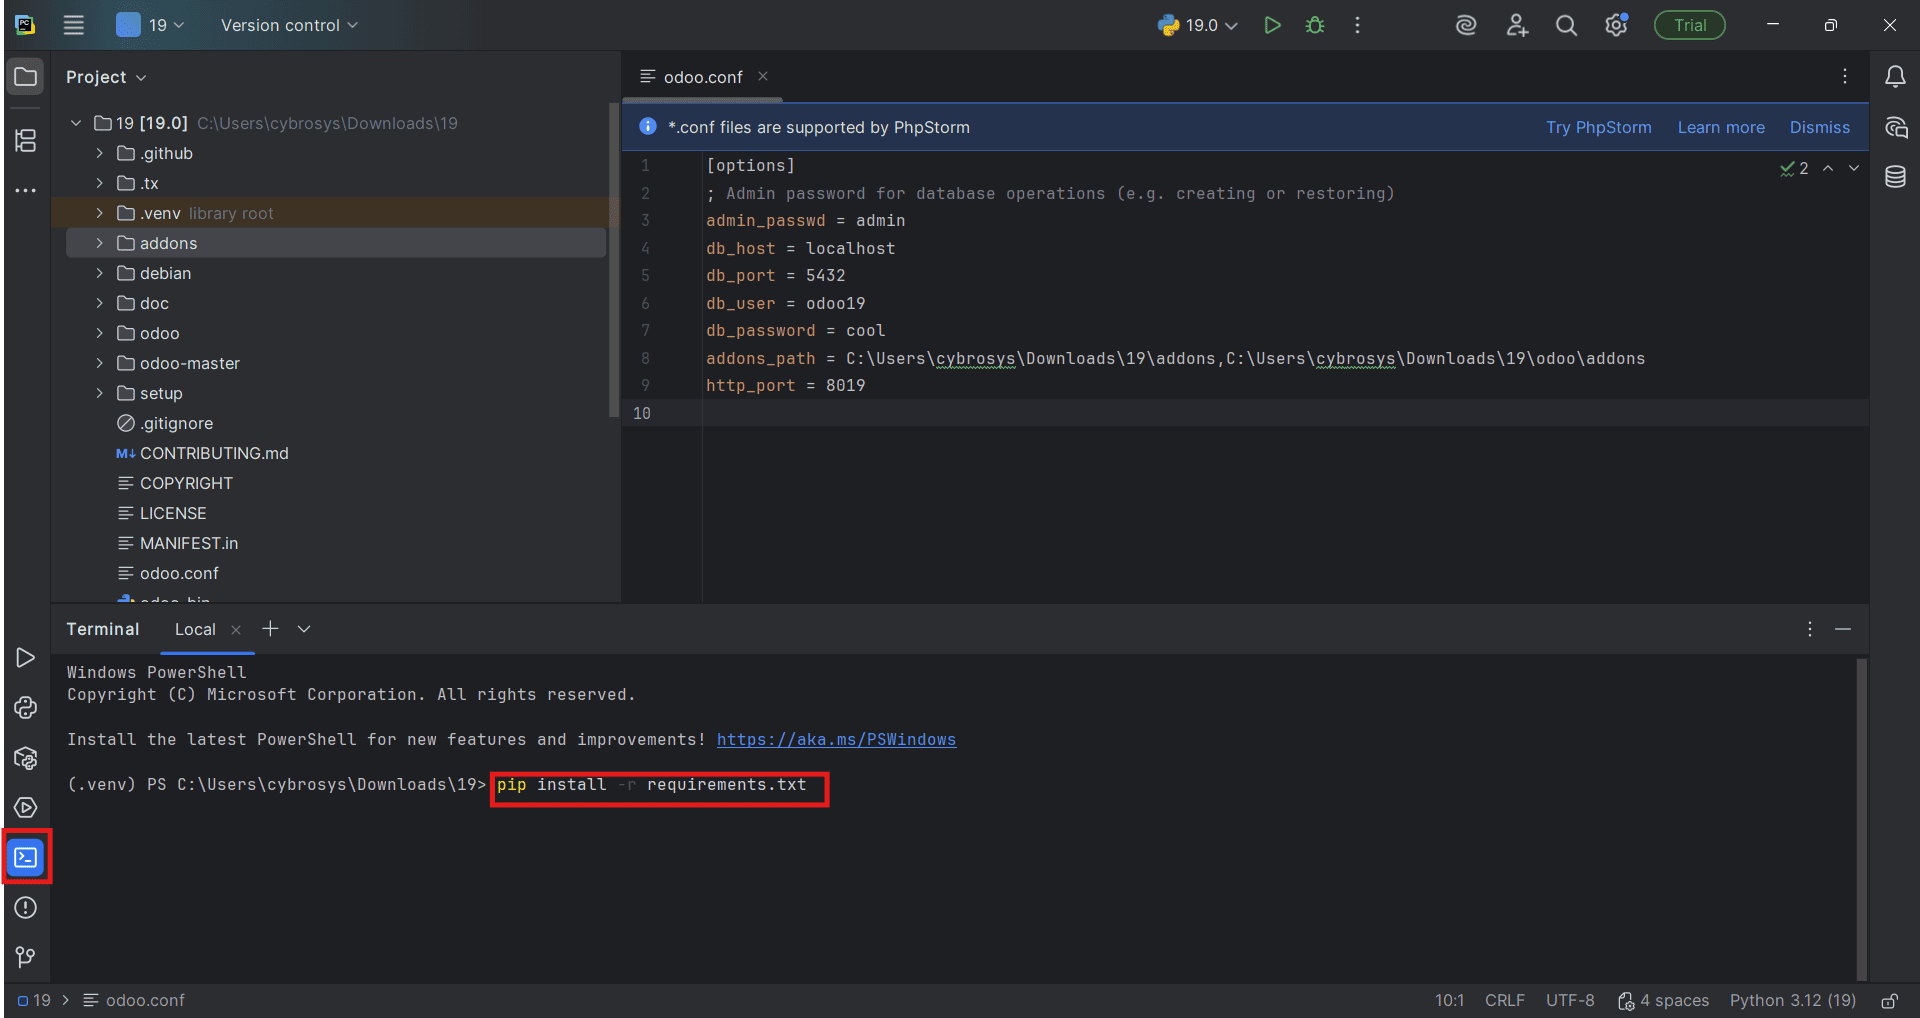
Paste these codes inside it.
[options]
; Is This The Password That Allows Database Operations:
admin_passwd = admin
db_host = localhost
db_port = 5432
db_user = odoo19
db_password = cool
Addons_pathC:\Users\cybrosys\Downloads\19\addons,C:\Users\cybrosys\Downloads\19\odoo\addons
http_port = 8019
Update the db_user and db_password to the values set during PostgreSQL configuration using pgAdmin.Also, update the addons path to point to the addons directory located inside the extracted odoo-19.0 folder.
Next, configure the Python Interpreter by navigating to: Settings > Project Settings > Python Interpreter.
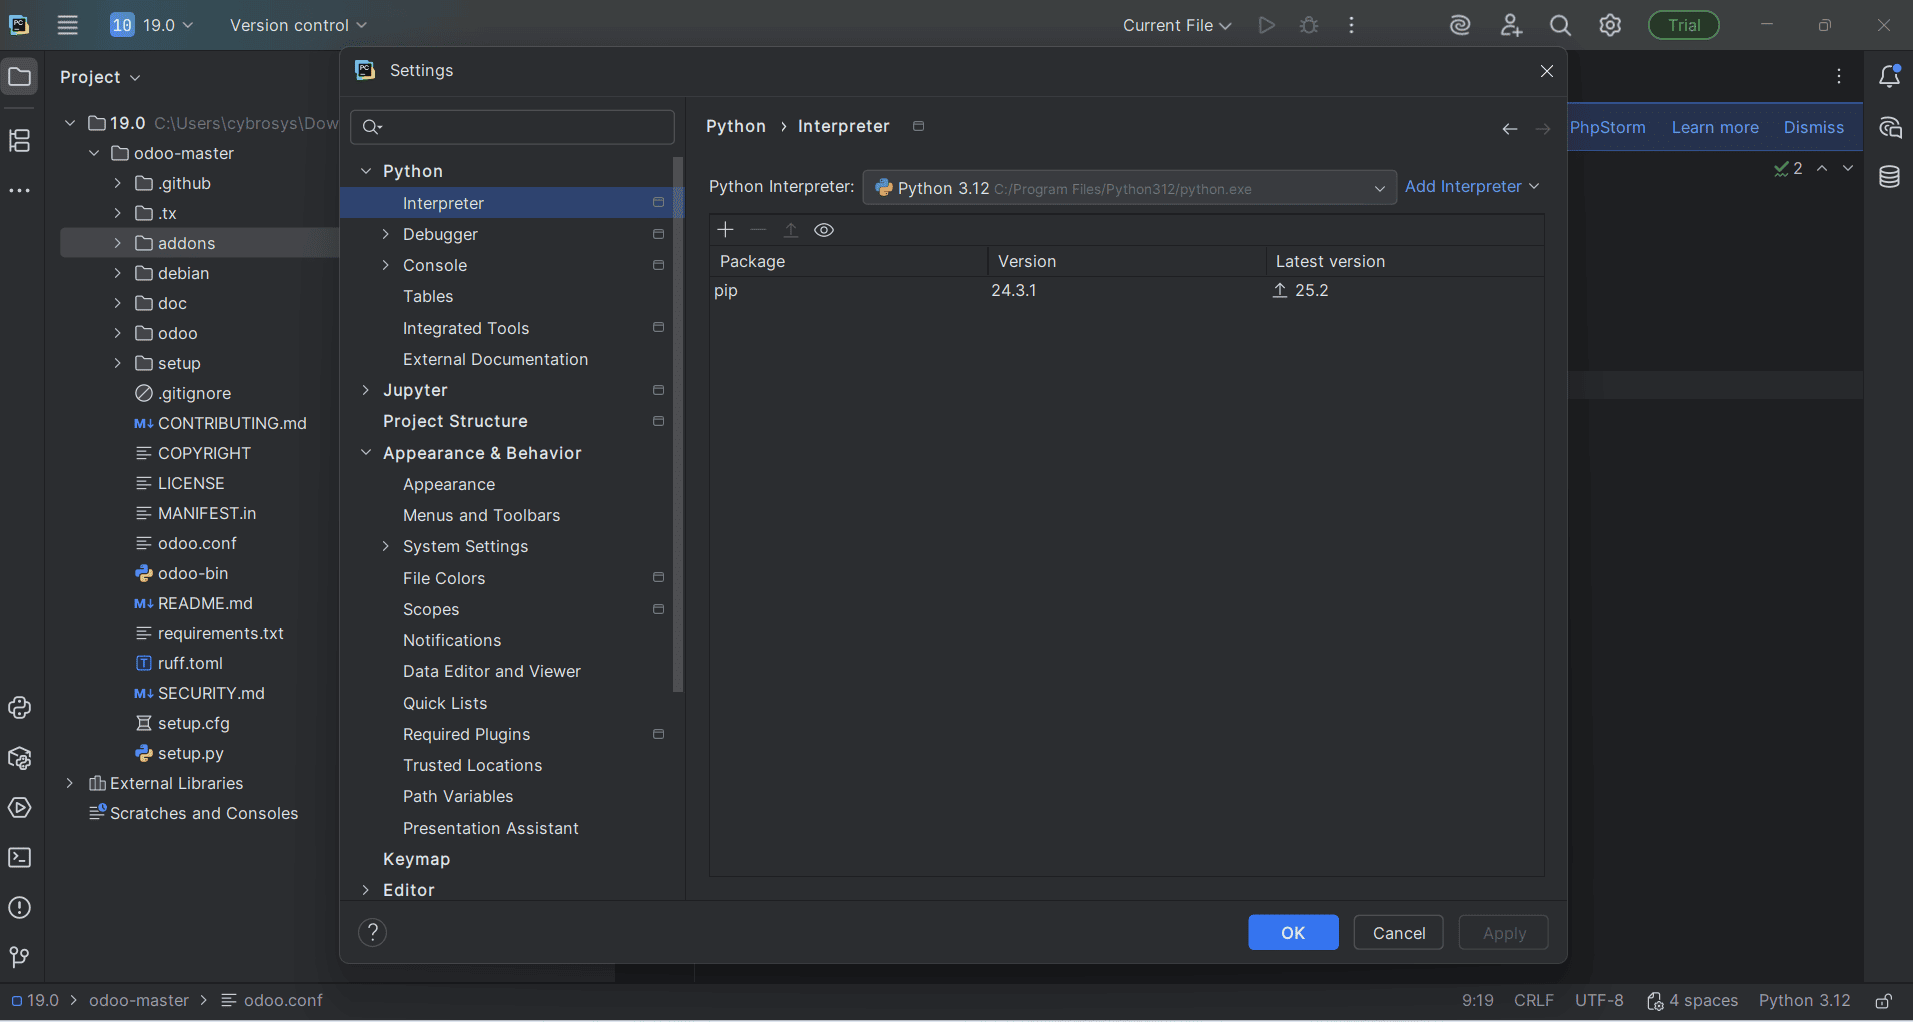
Click on “Add Interpreter” within the Python Interpreter settings panel.
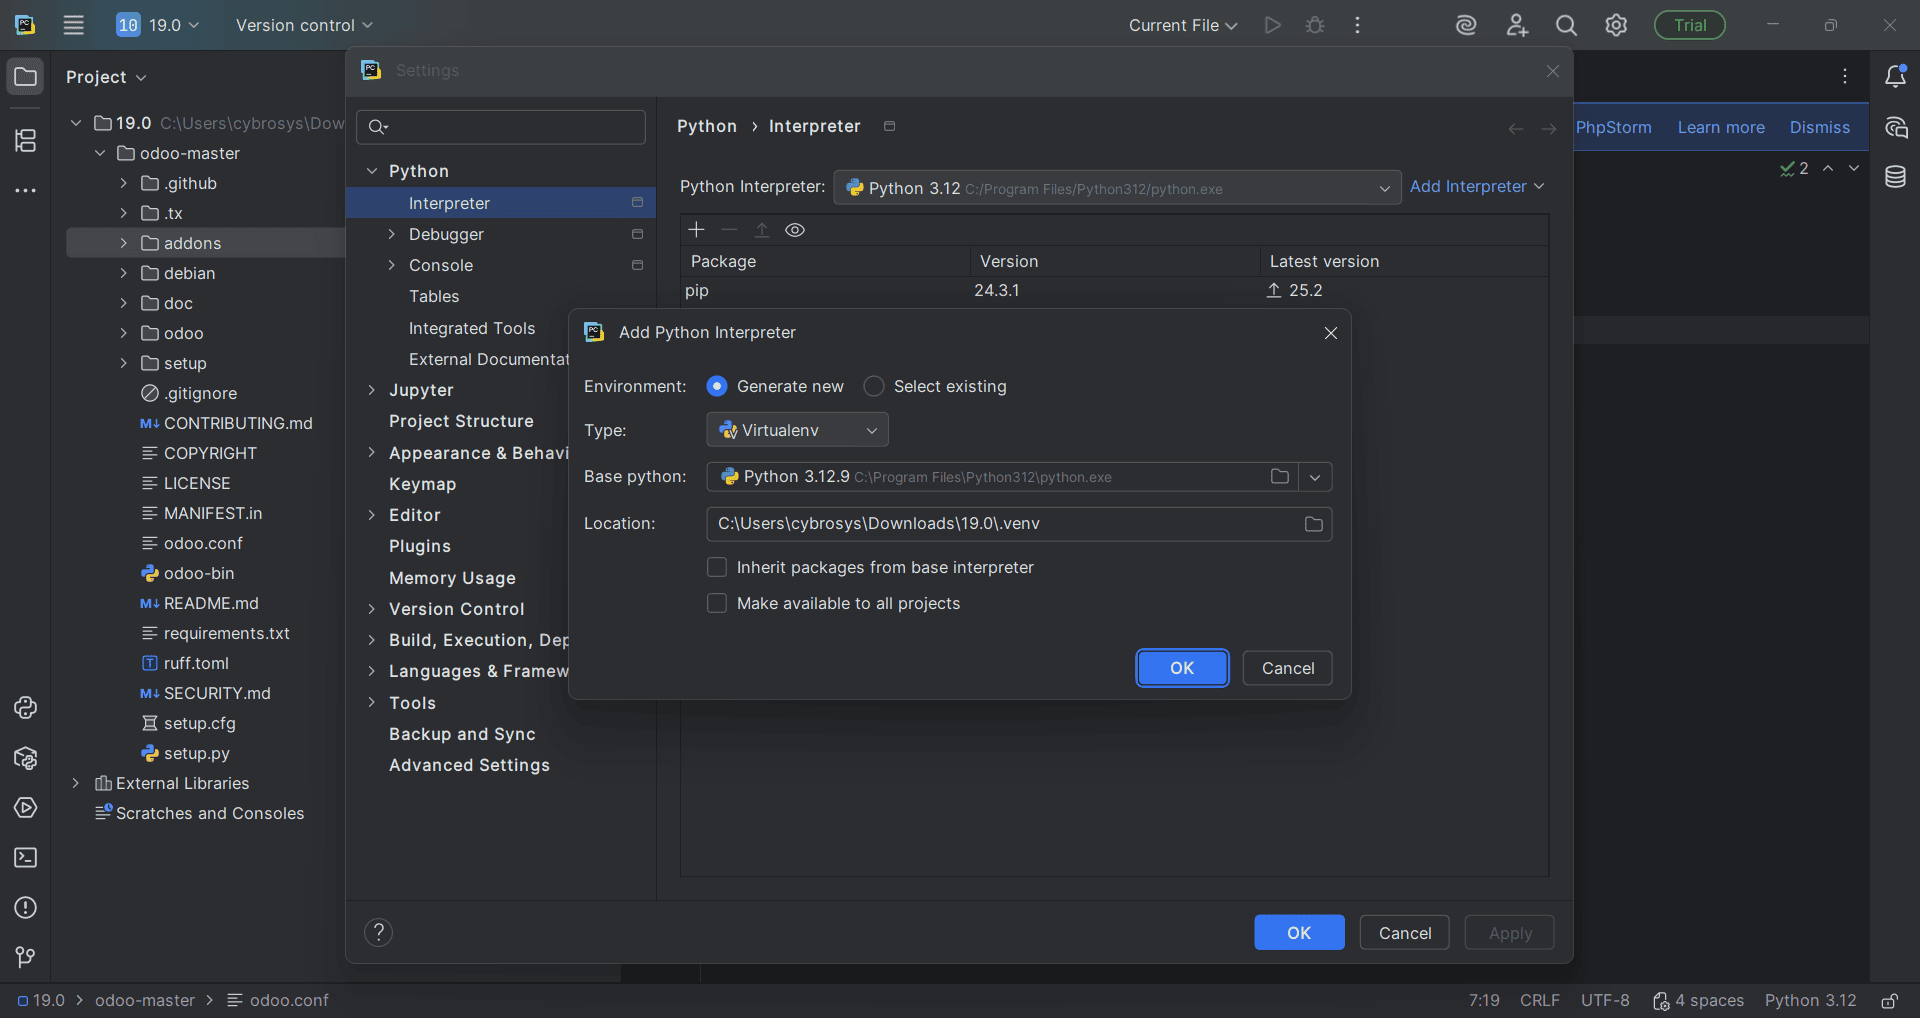
Now, select “System Interpreter” as the interpreter type (as shown in the figure), then click OK to proceed.
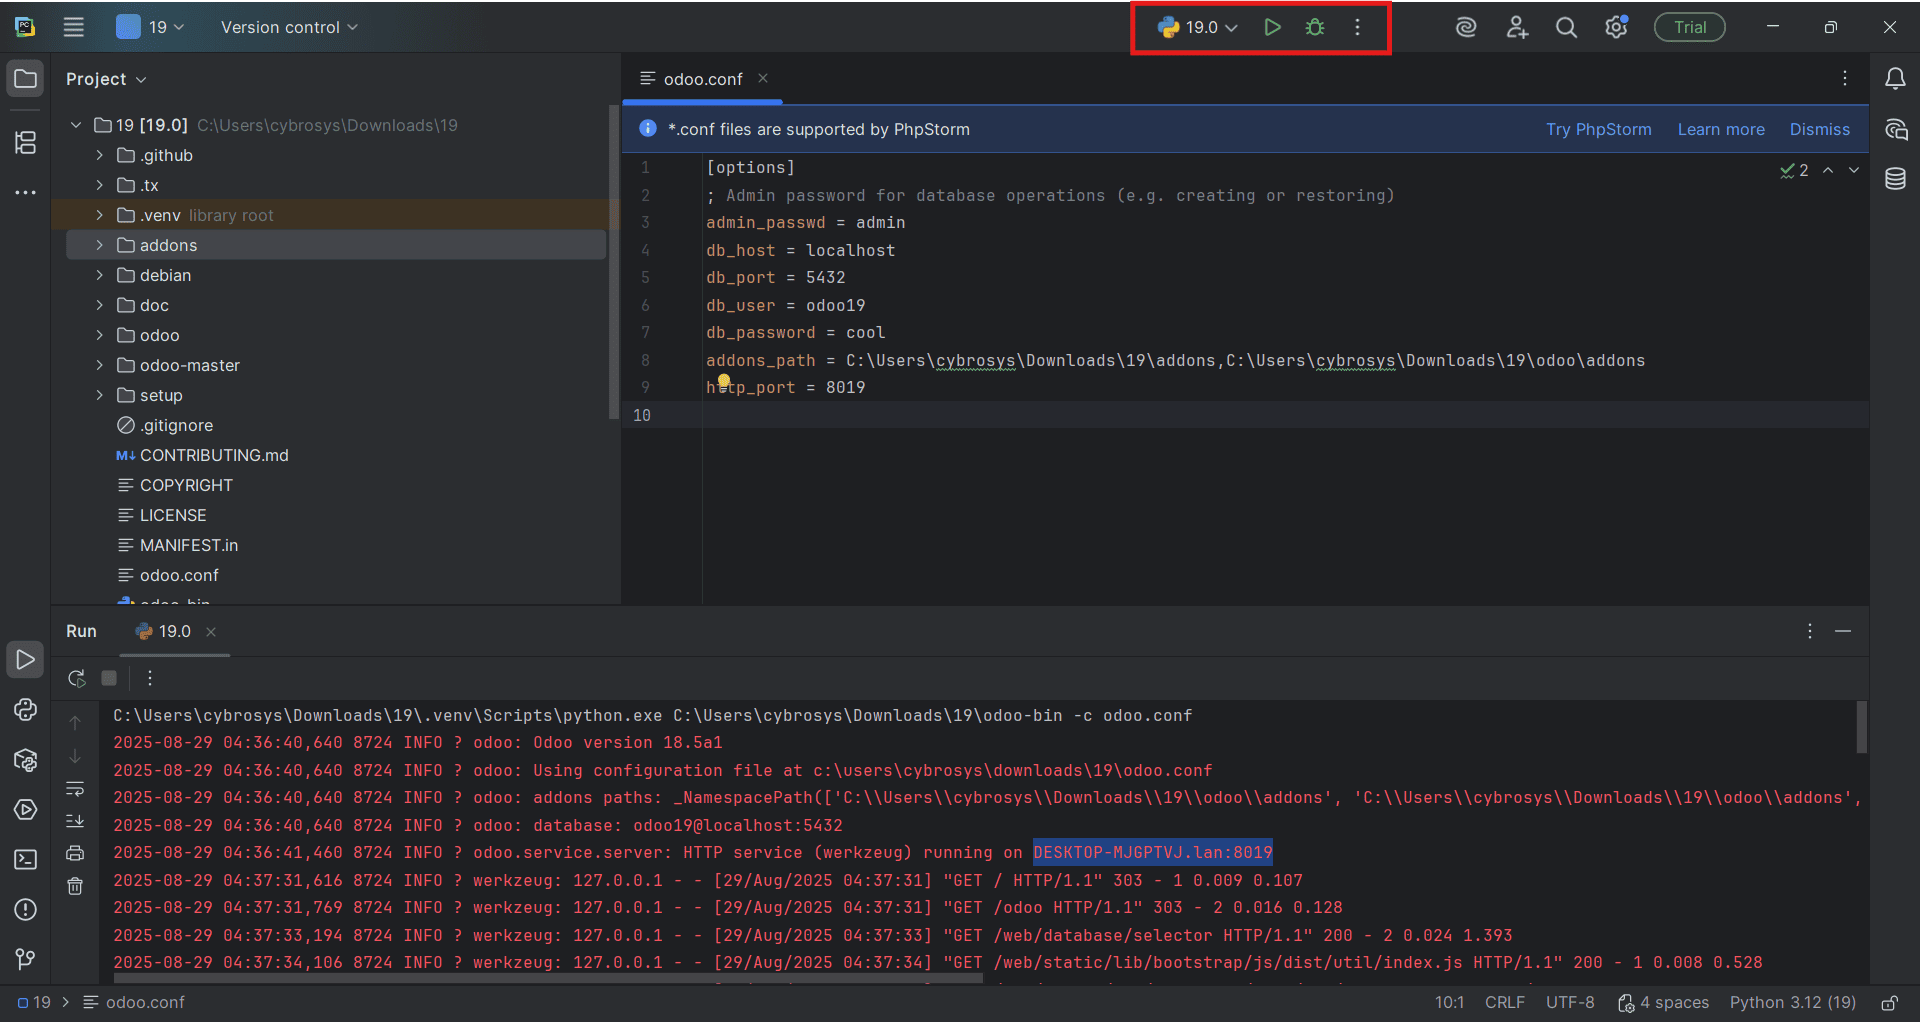
Finally, we need to create a run configuration for launching the Odoo 19 instance. To do this, under the “Current File” option, select “Edit Configurations.”
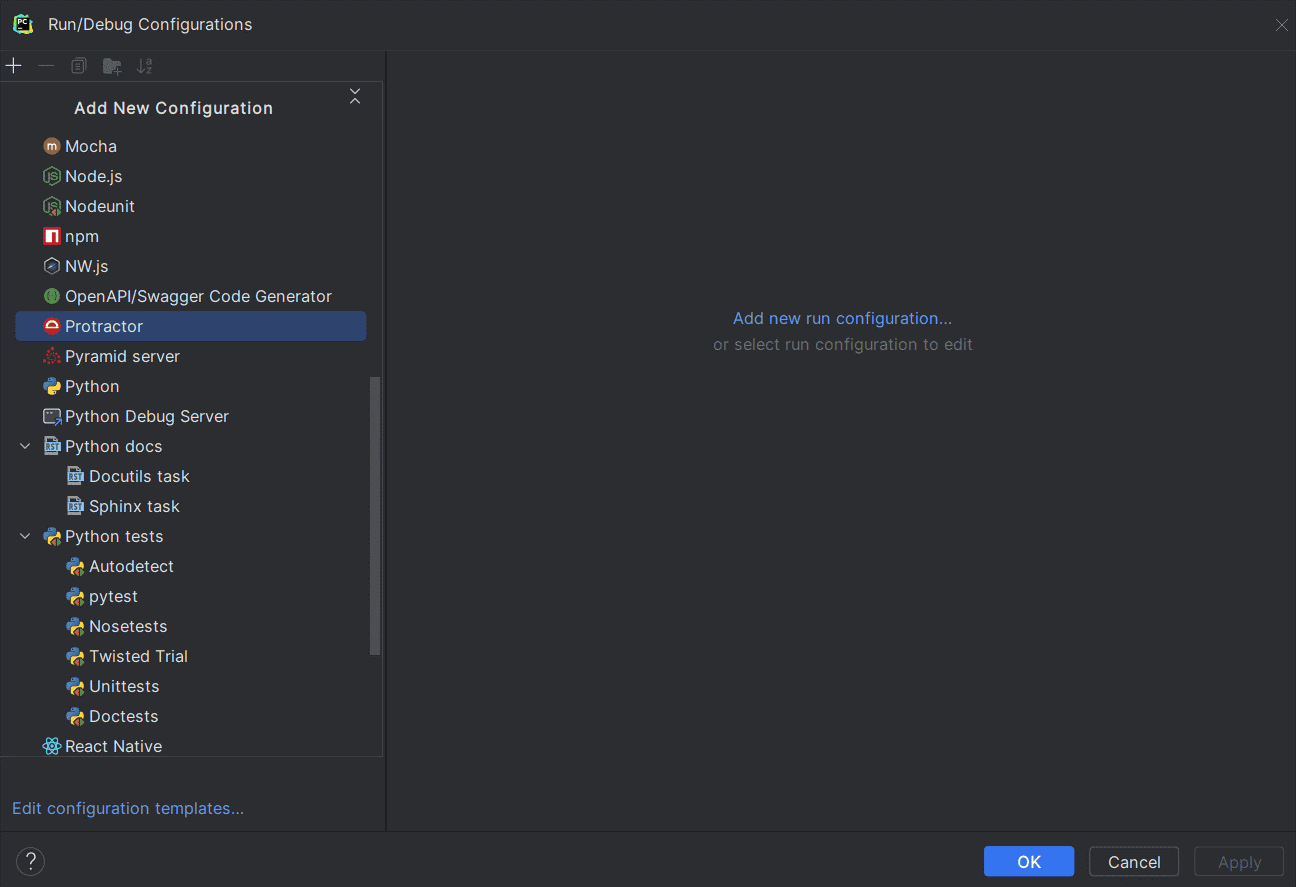
Click the plus (+) icon in the top-left corner of the Run/Debug Configurations window, then select Python from the list of available configuration types.
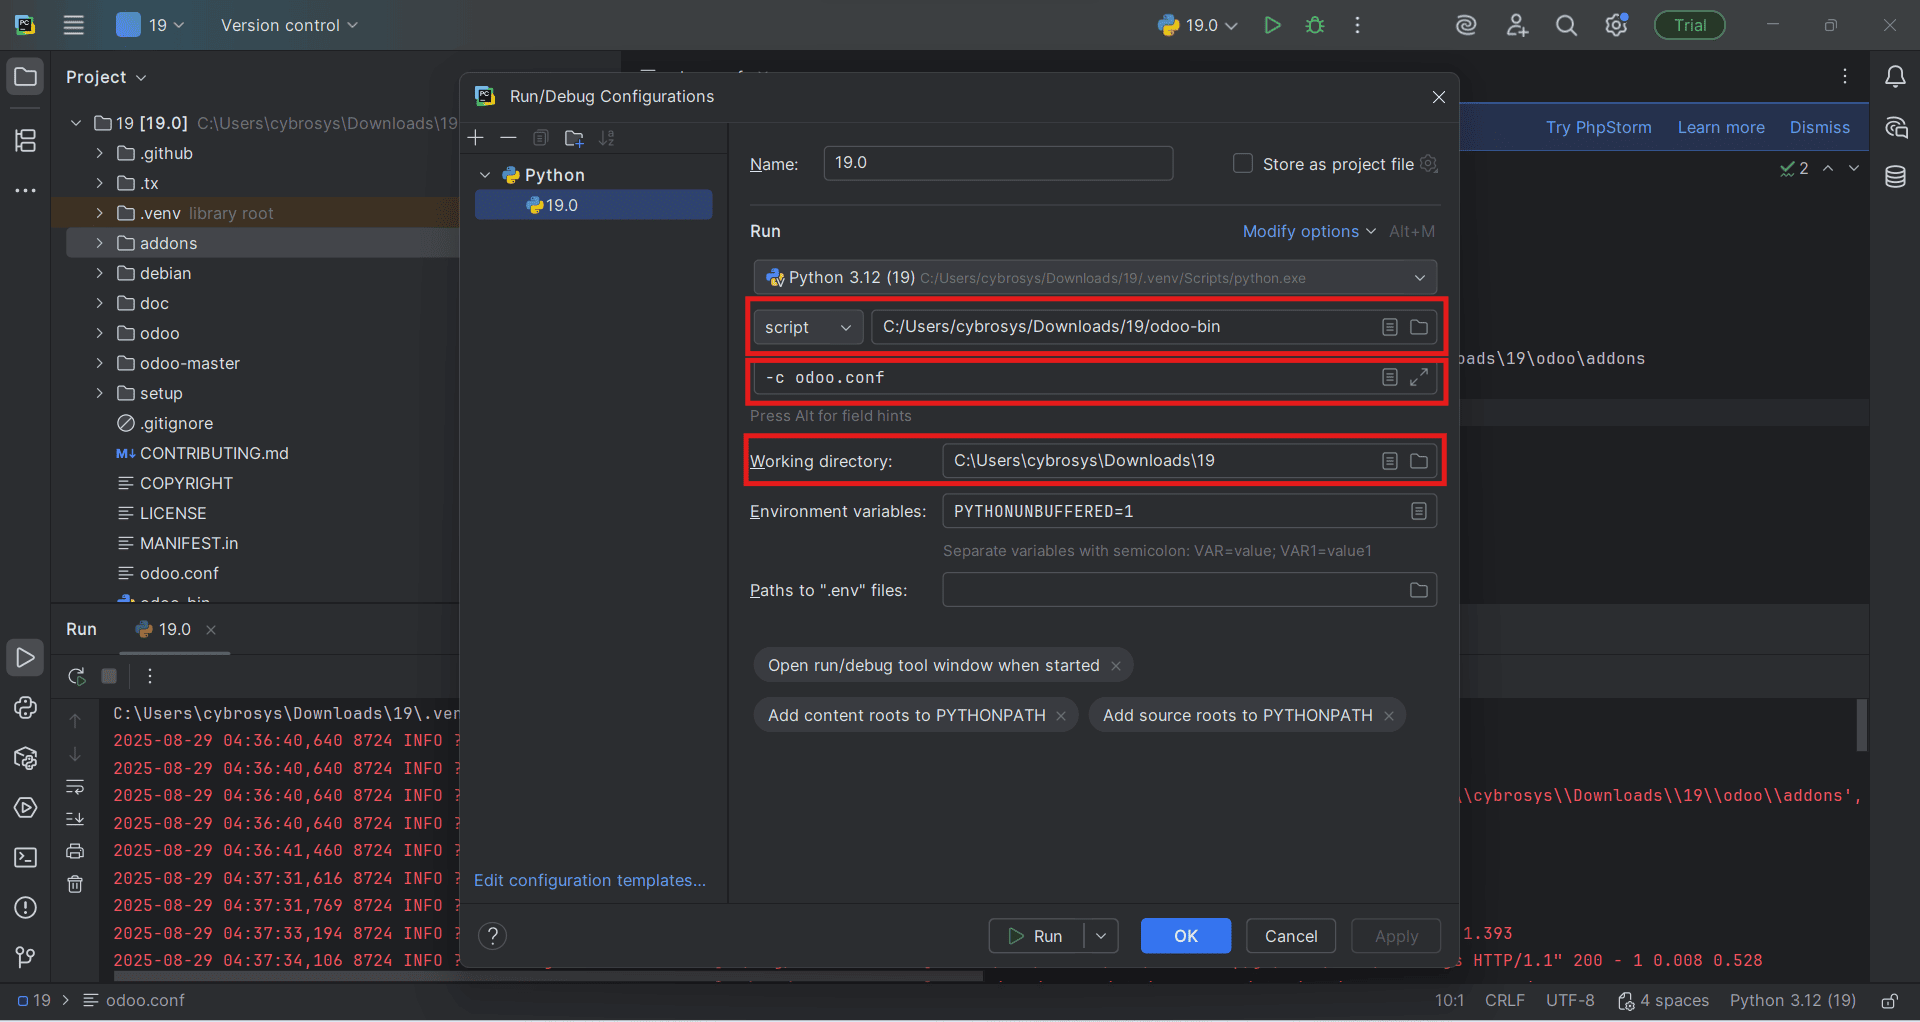
Fill in the required details in the configuration window as shown in the figure:
- Name: Enter a suitable name for the configuration.
- Script Path: Browse and select the odoo-bin file from the extracted Odoo-19 project directory.
- Python Interpreter: Set the interpreter if it isn't already selected.
- Working Directory: Choose the root folder of the extracted Odoo-19 project.
- Parameters: -c odoo.conf
Once everything is set, click Apply, then OK.
Open the Terminal in PyCharm, and run the following command to install the required packages. Run the command below for install requirements.
pip install -r requirements.txt
Make sure you're in the root directory of the extracted Odoo-19 project, where the requirements.txt file is located.
Now, you can simply click the green Run button in PyCharm to start Odoo with your odoo.conf configuration file.
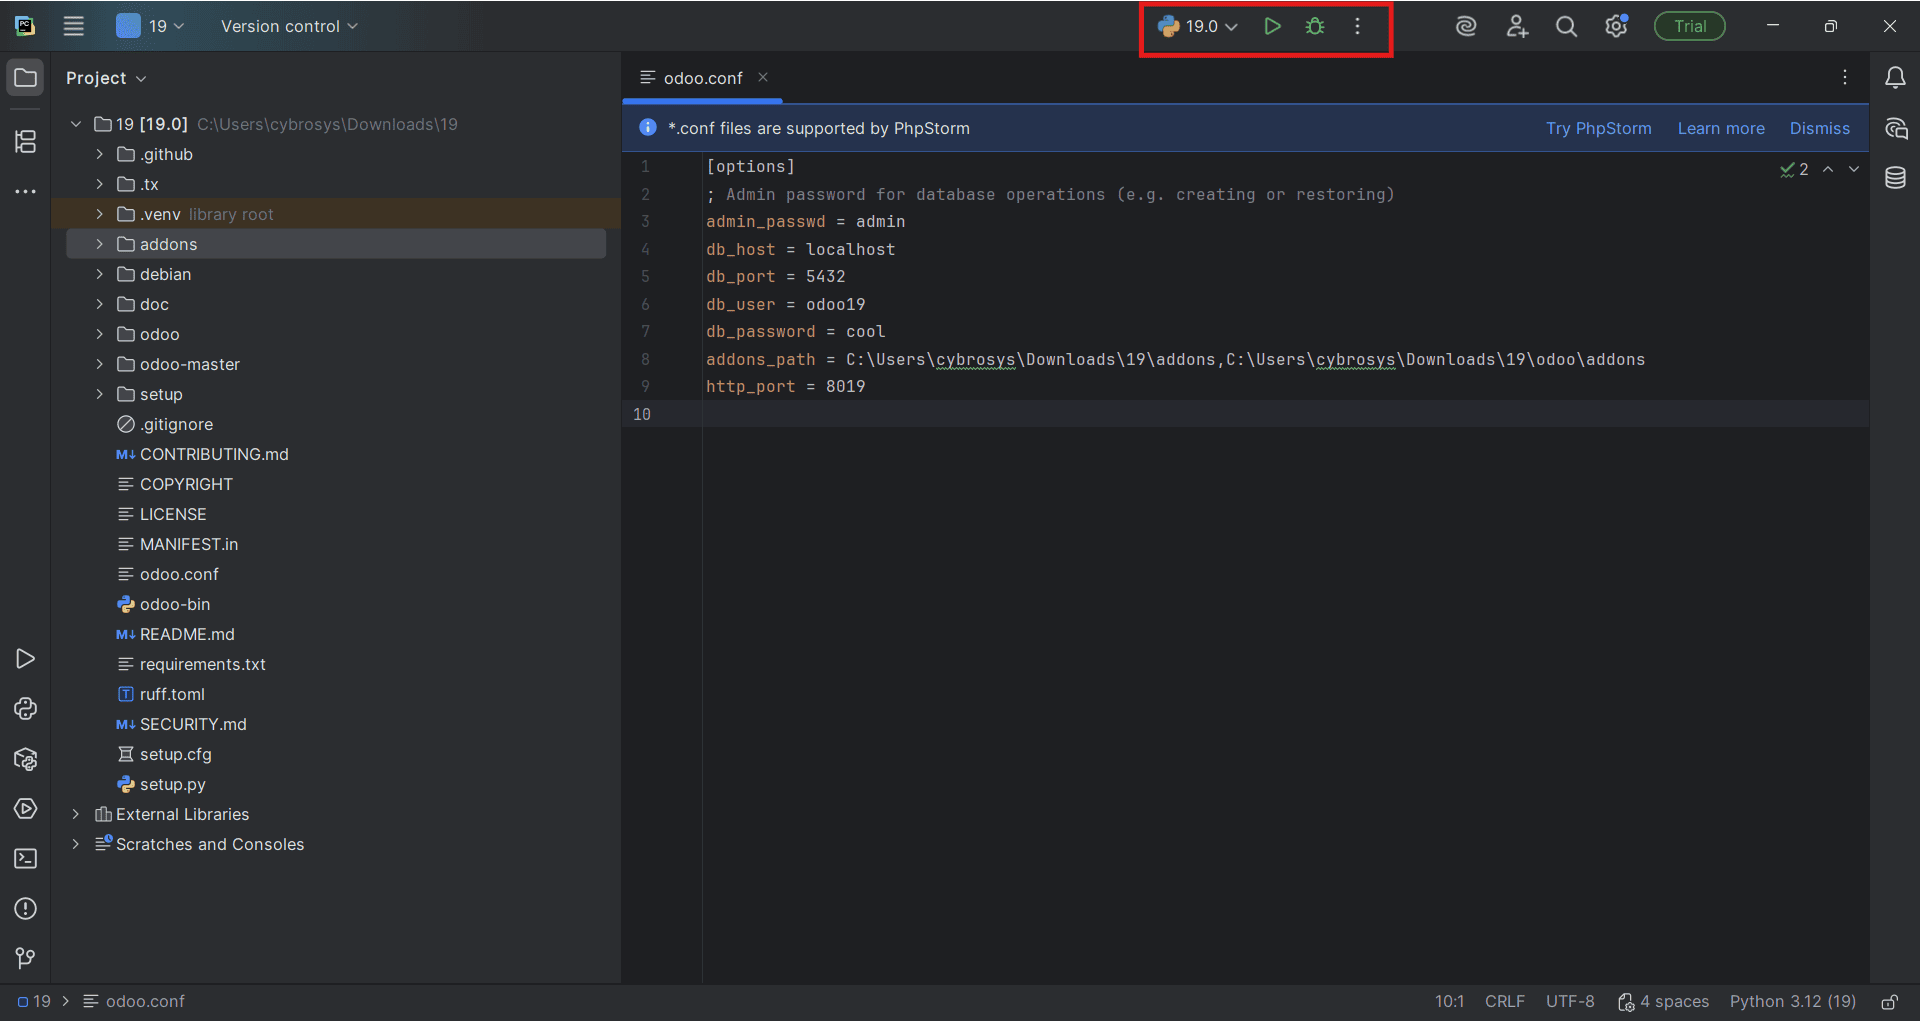
After clicking Run, the logs should show in the Run window in PyCharm, and you should be able to access Odoo in your browser at http://localhost:8019.
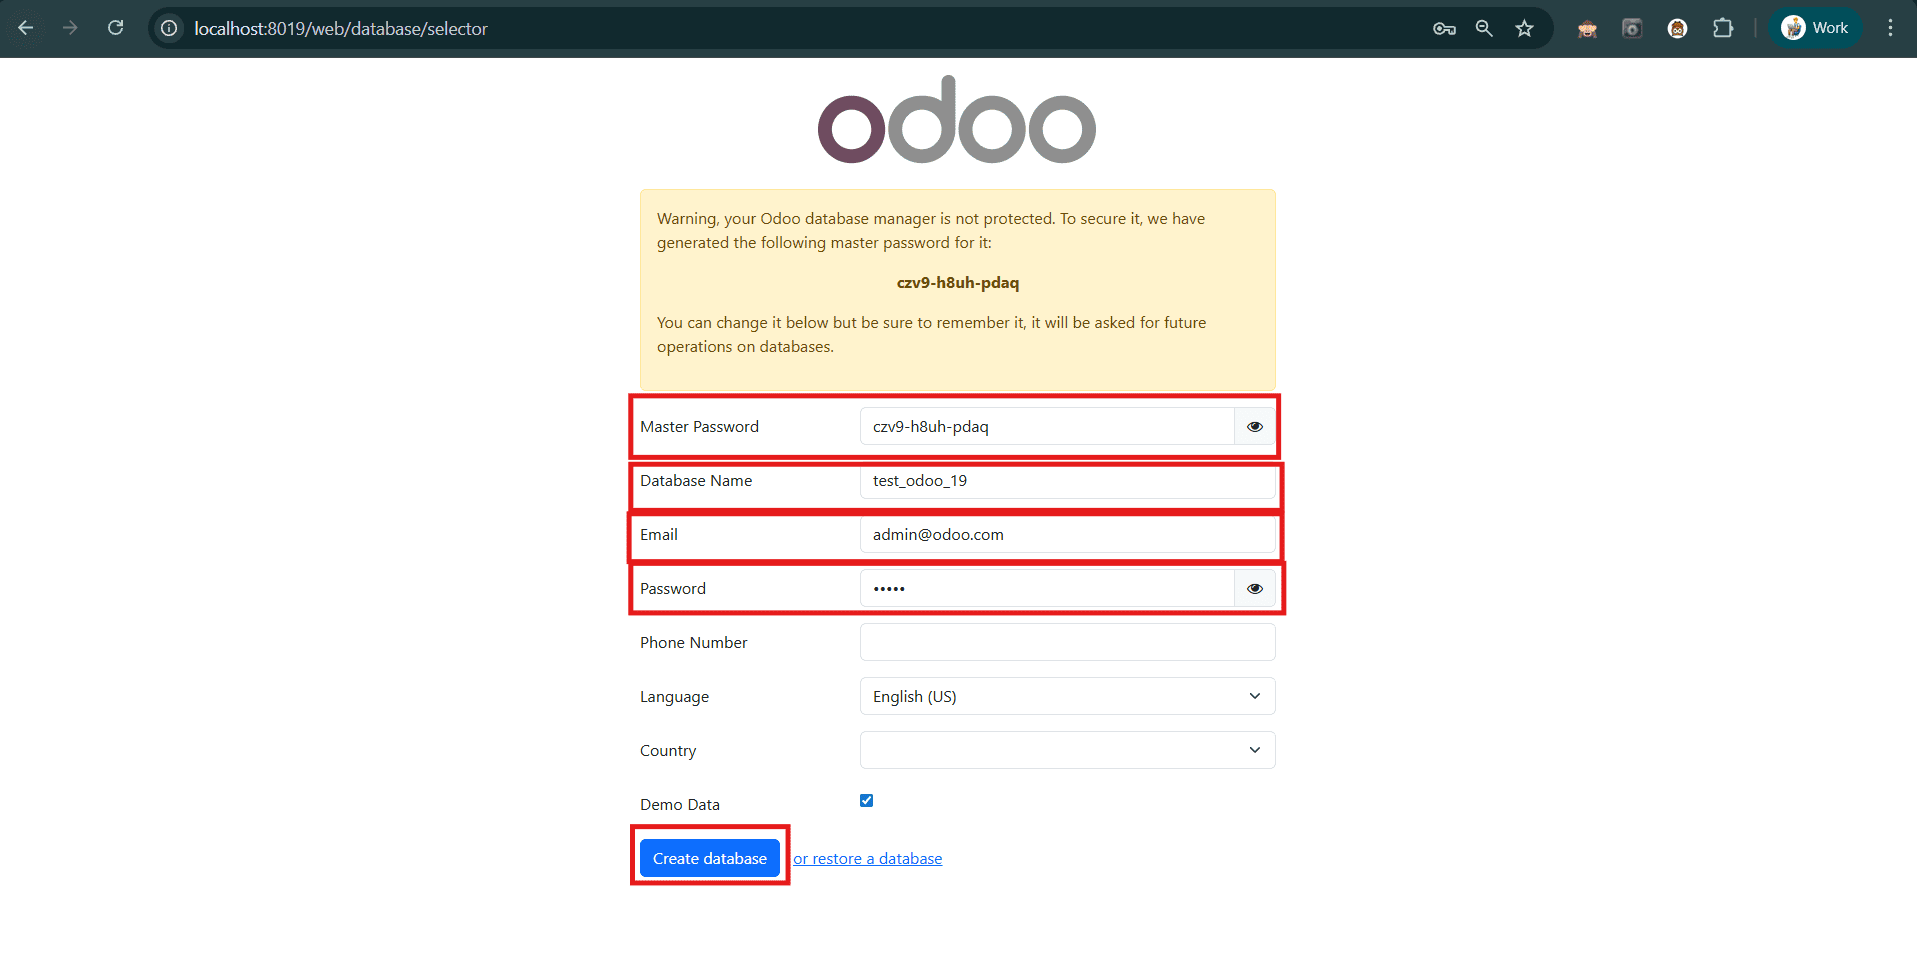
You’ll See the “Create Database” Screen
You’ll be prompted to fill in the following:
Master Password: Set the master password (from your odoo.conf ? admin_passwd).
Database Name: Choose any name, e.g., my_test_db.
Email: This will be the admin user’s login. Example: admin@example.com.
Password: Set the password for the admin user.
Confirm Password: Re-enter the password.
Language: (Optional) Select your preferred language
Country: (Optional) Select your country.
Demo data: (Optional) Uncheck this if you want a clean database.
- Once you fill everything out, click the “Create database” button.
- Odoo will initialize and redirect you to the main dashboard.
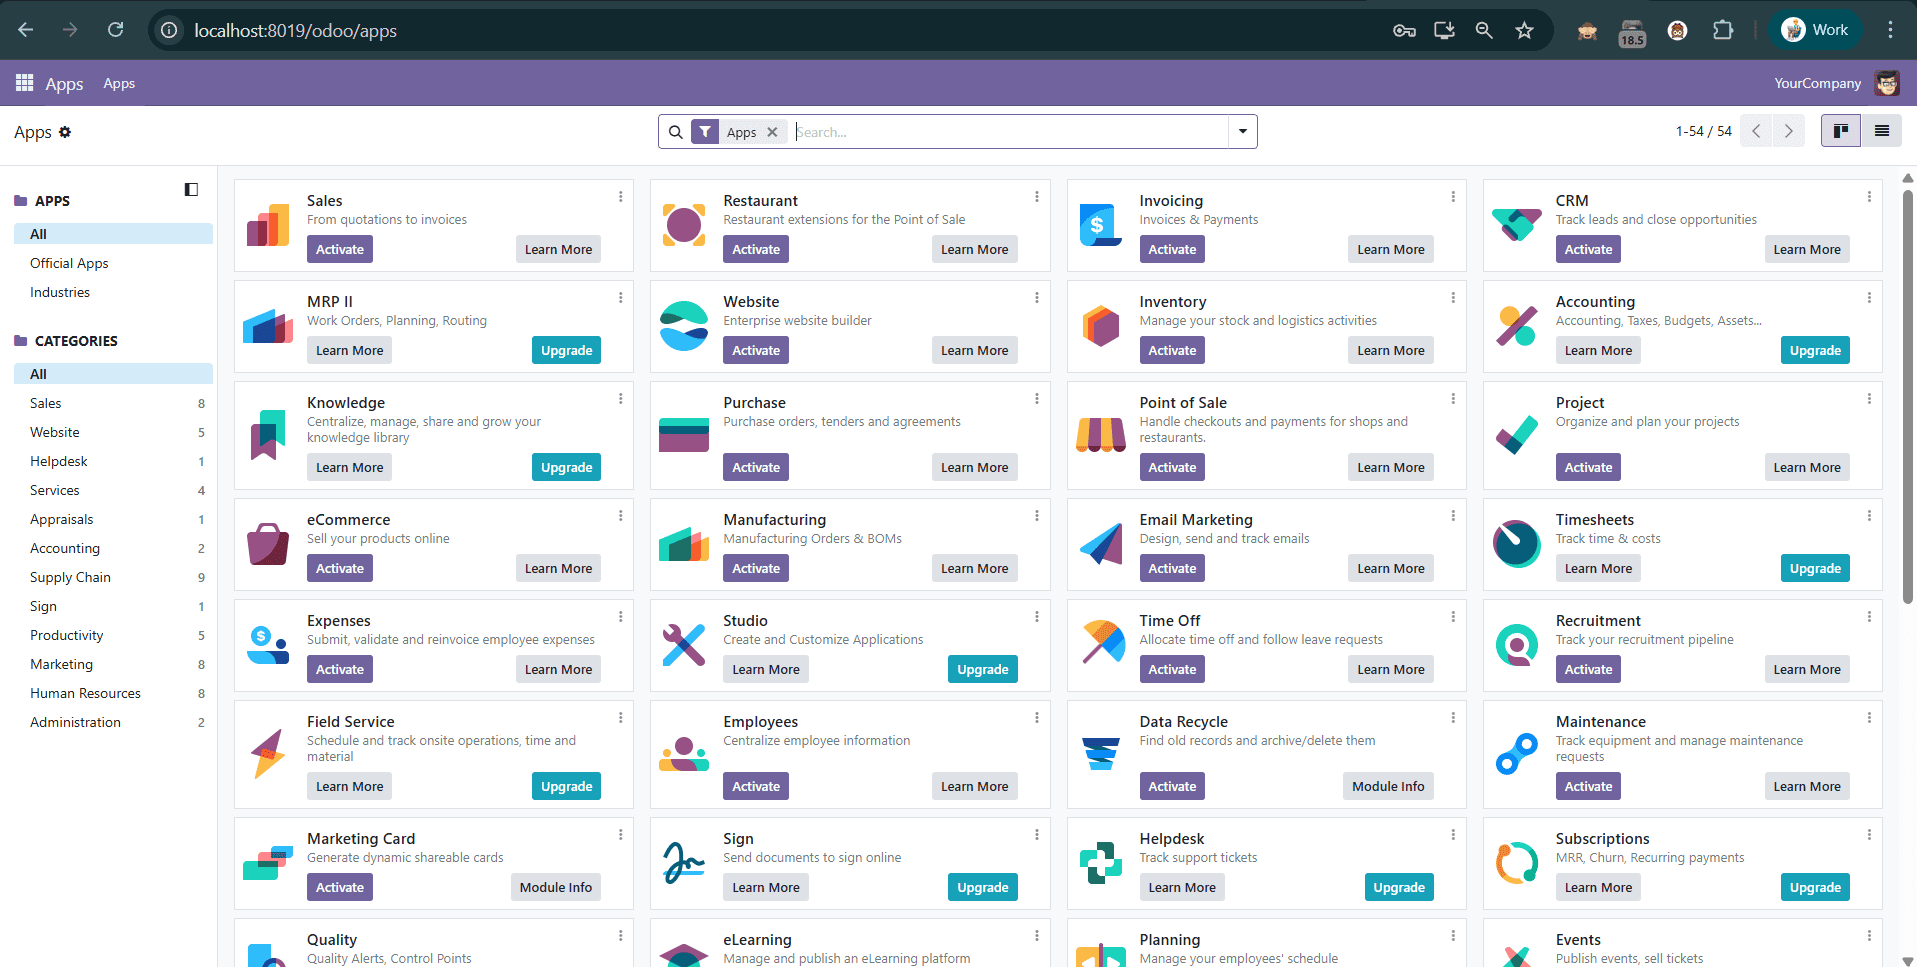
Install your favorite apps and enjoy the complete Odoo experience.
To read more about What are the Expected Features in Odoo 19 ERP Software, refer to our blog What are the Expected Features in Odoo 19 ERP Software.