In many sales scenarios, businesses require customers to pay a portion of the total amount in advance before delivering products or completing services. These advance payments, commonly known as down payments, help improve cash flow, reduce financial risk, and confirm customer commitment. Odoo 19 Sales provides built-in functionality to manage down payments efficiently, seamlessly integrating them with sales orders, invoices, and accounting.
With Odoo 19, users can easily configure down payment options, generate advance invoices based on a fixed amount or a percentage of the sales order, and automatically reconcile these payments with the final invoice. This ensures accurate financial tracking while maintaining transparency for both the company and the customer. Understanding how down payments work in Odoo 19 Sales is essential for businesses that deal with custom orders, large projects, or long delivery cycles, as it streamlines the billing process and enhances overall sales and accounting control.
In this blog, let’s see how down payments are processed in Odoo 19.
Configuring Down Payments
Users of the Odoo 19 Sales module can set up and tailor down payment options for their sales operations through the Settings submenu under the Configuration menu.

Under the sales tab, you can see the ‘Down Payment Product’ option, where you can choose a product used for down payments. Here we are choosing ‘FedEx International’ as the down payment option.
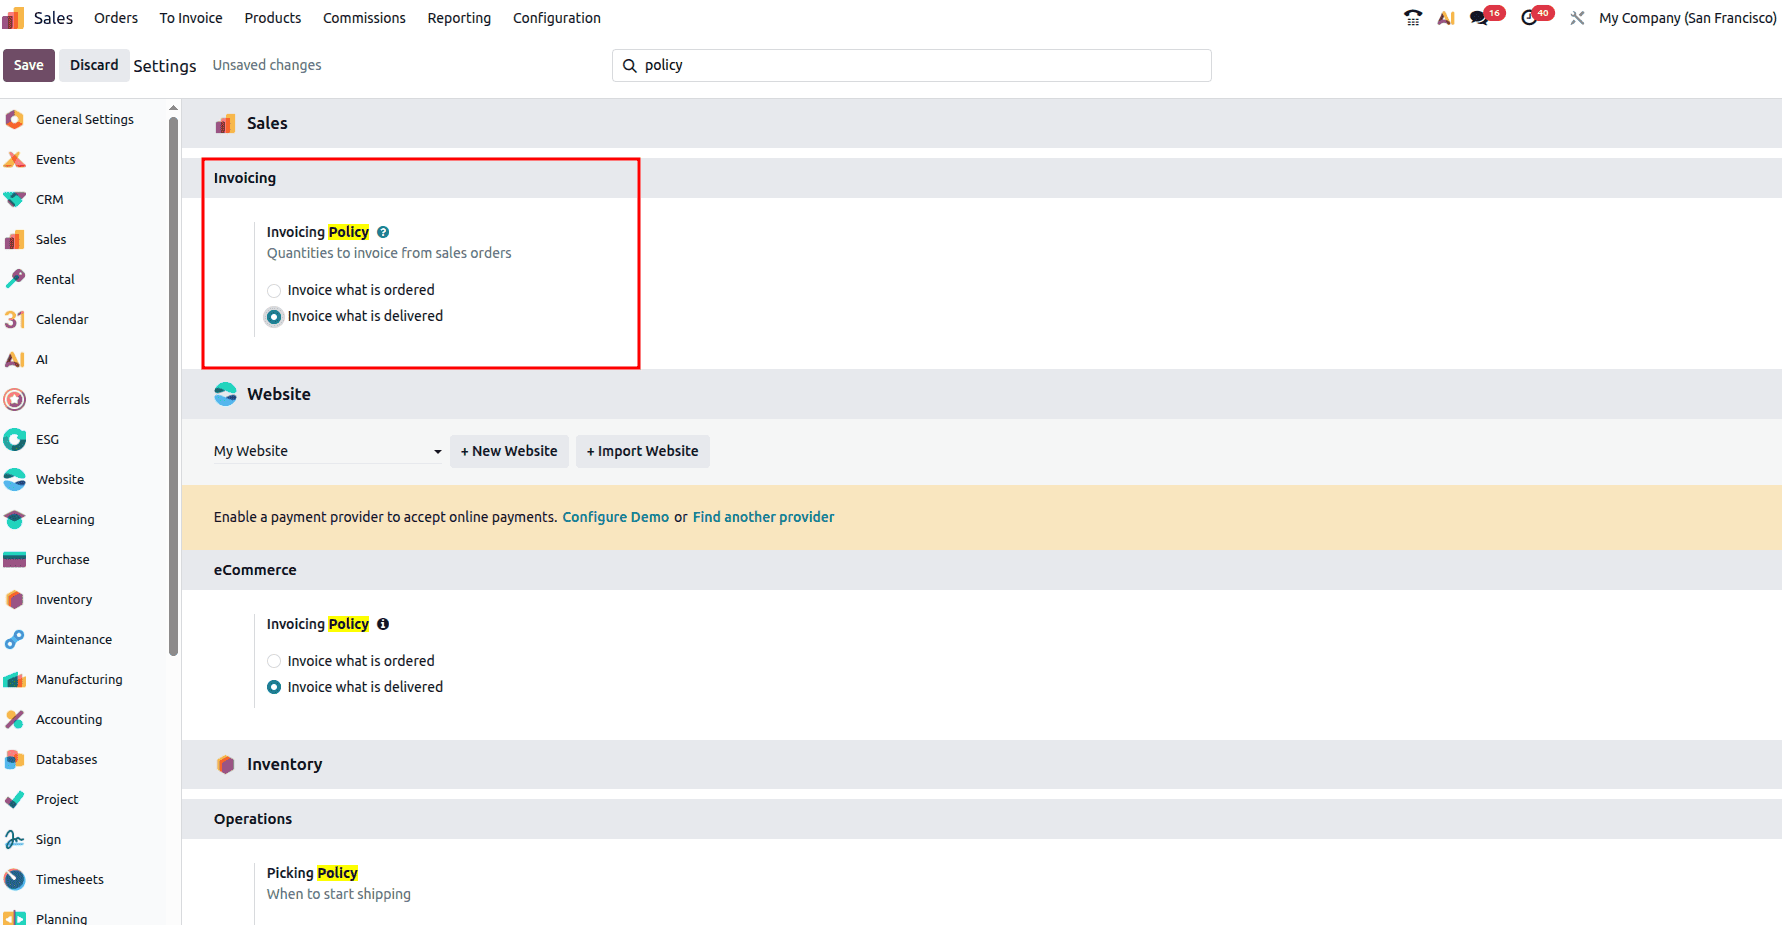
Also, we can set the “Invoicing Policy” feature, which can be seen under the ‘Invoicing’ section. Here, we will see the functionality of advance payments based on the delivered quantity invoicing policy. So we can choose the “Invoice what is delivered” from the “Invoicing Policy” option. Now, we need to create a Sales order and see how this works.
Once you make the changes, you can save the changes.
Creating a Sales Order
Let’s start by creating a new sales order. For that go to the ‘Orders’ menu in the Sales module.
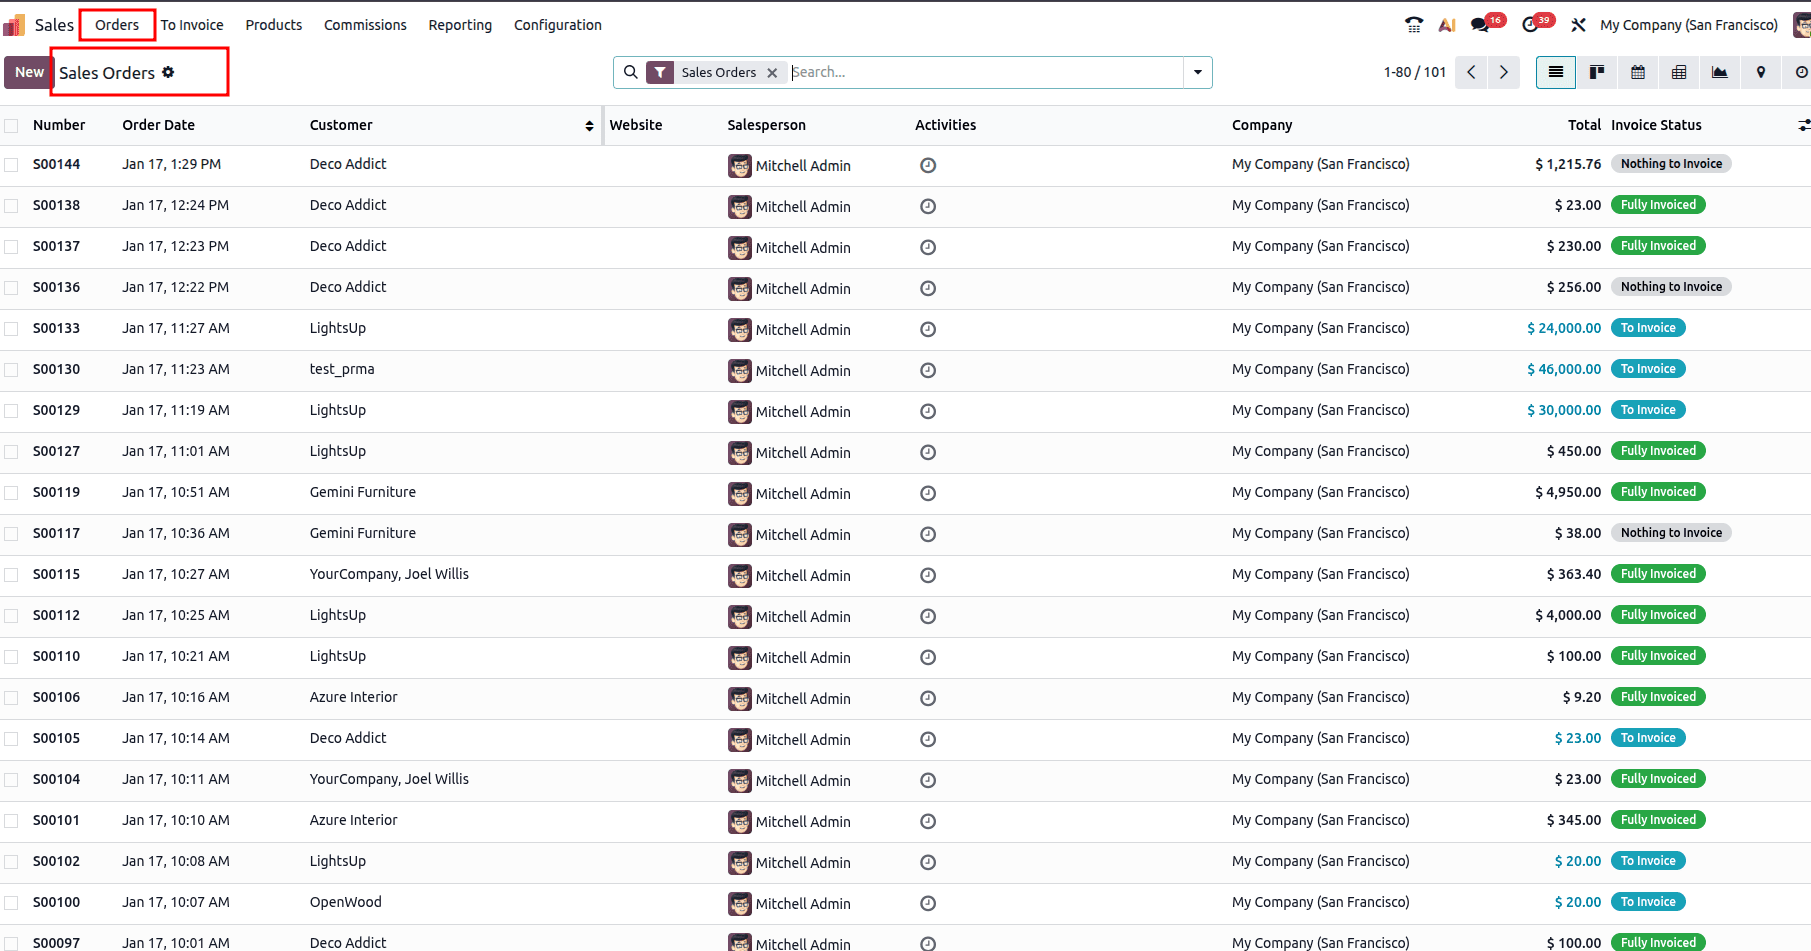
When you open the Orders, you will be able to see all the created sales orders listed.
Now we can create a new sale order using the New button and can fill all the required data in the form.
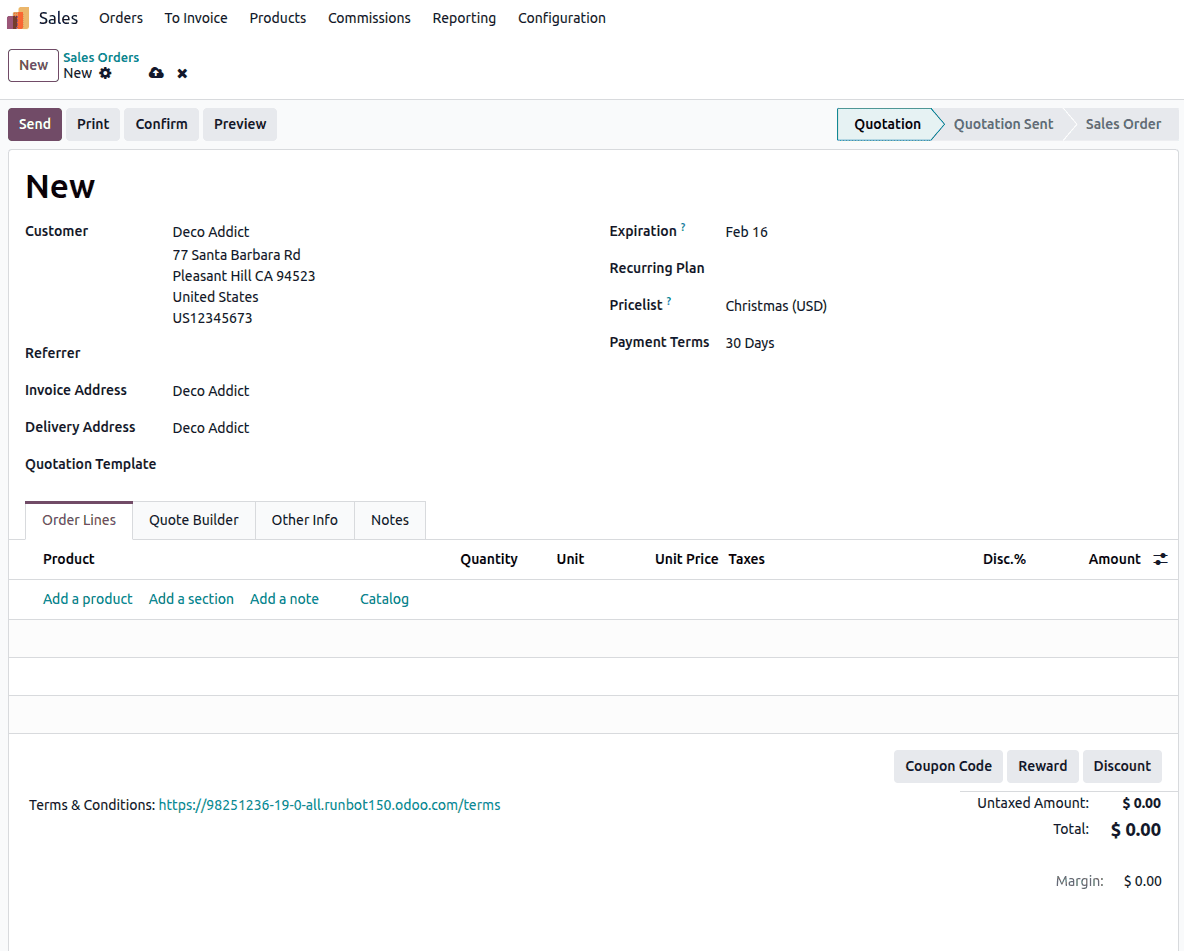
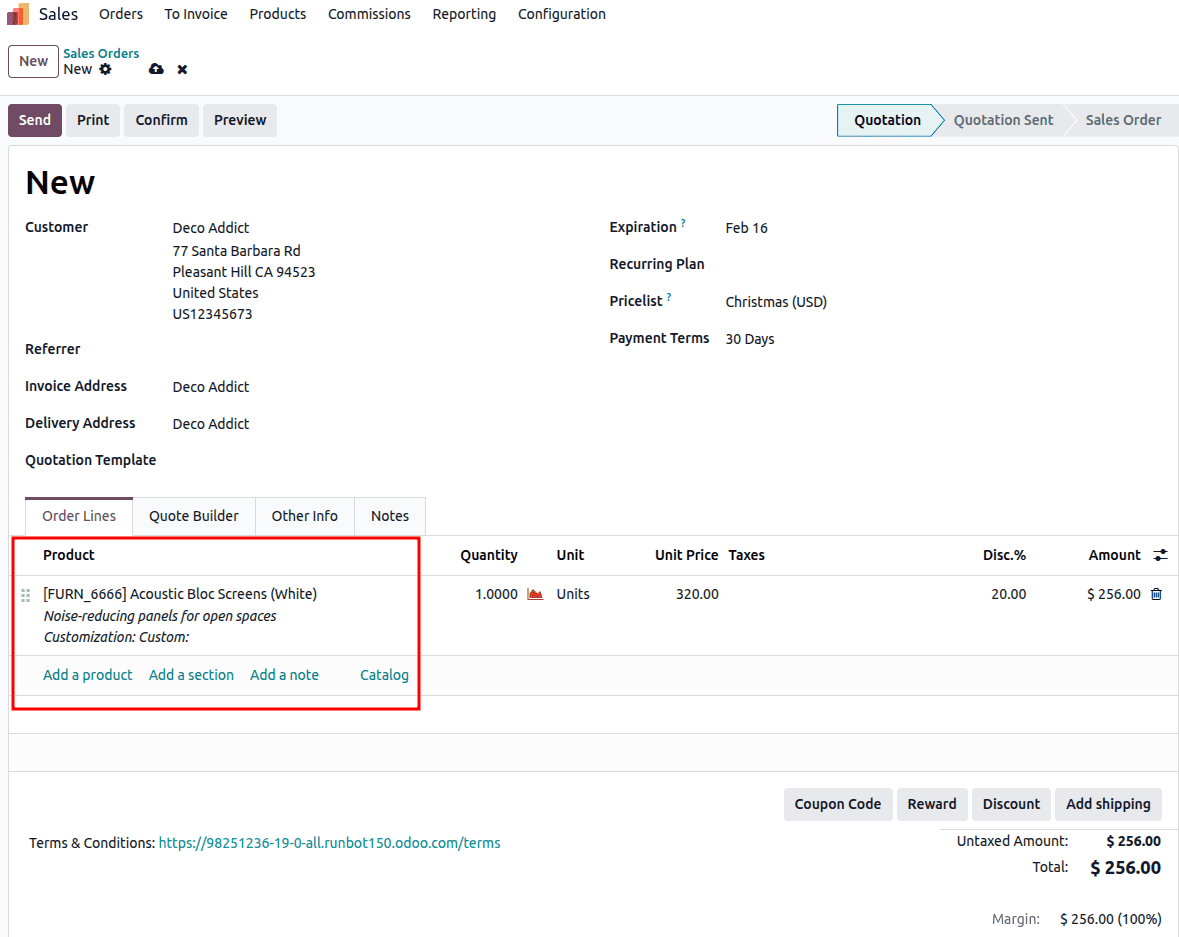
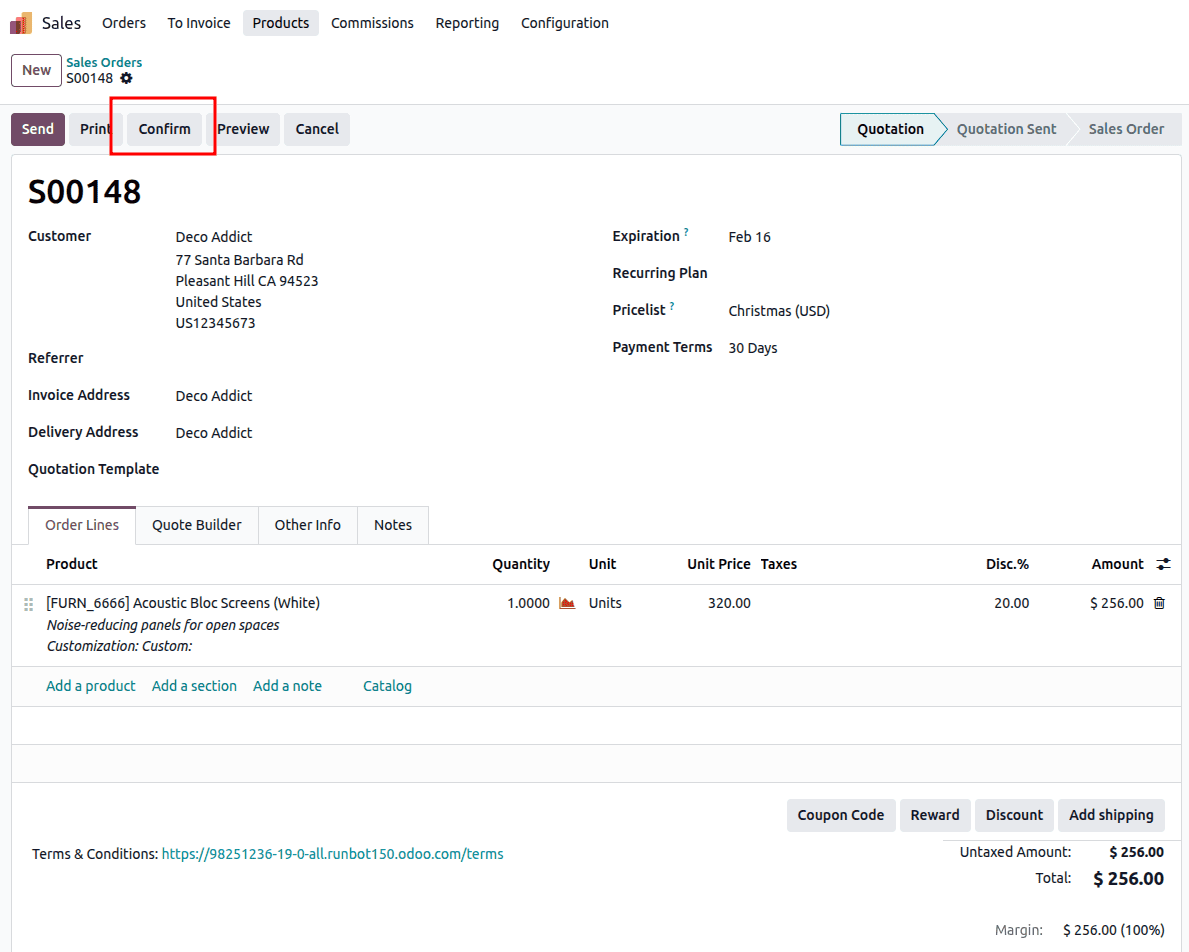
In the ‘Order Lines’ tab, you can add a product for this sale order. Also you can choose the product from the ‘Catalog’ option too.
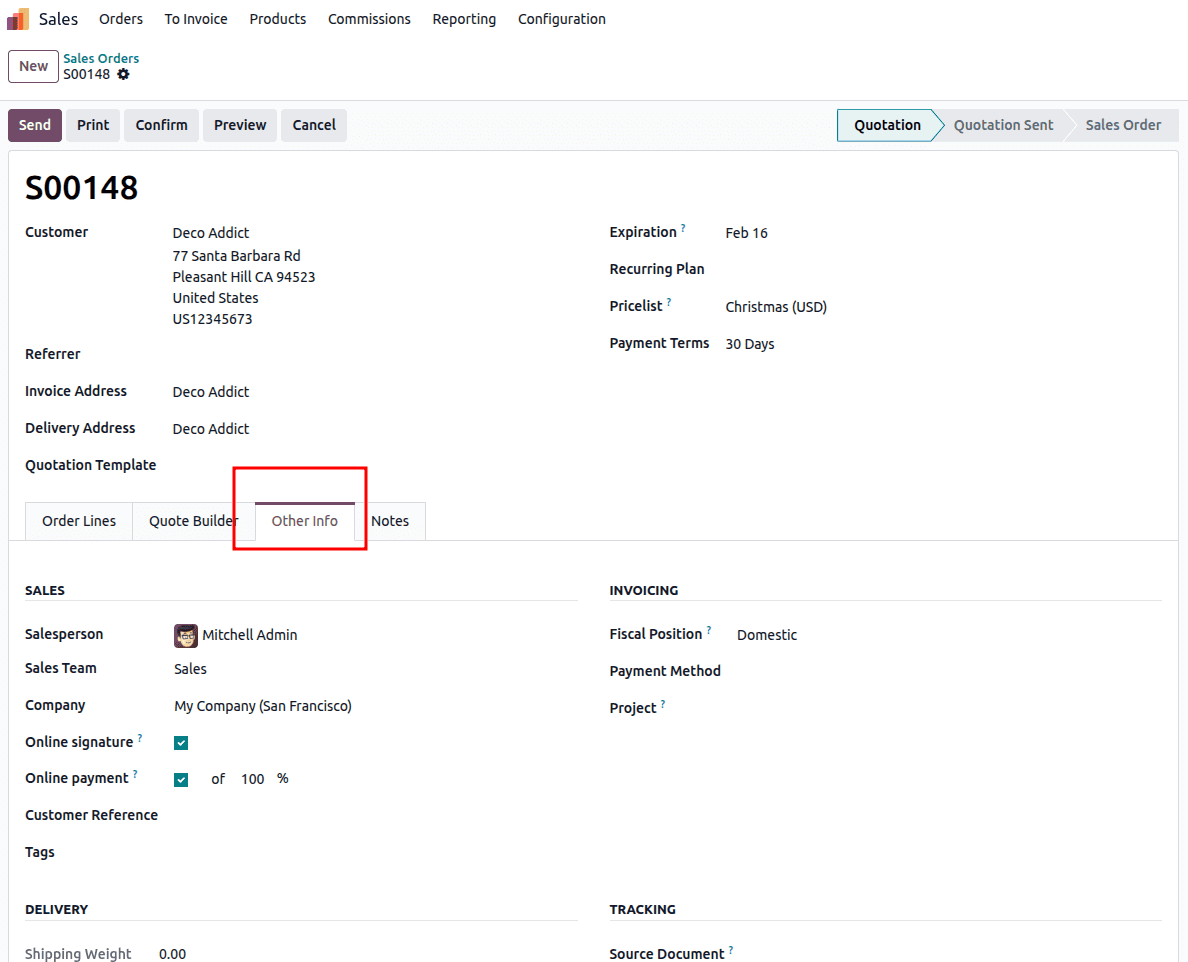
In the ‘Other Info’ tab, you will be able to see the details regarding the Sales, Subscription, Invoicing, Delivery, and Tracking.
Once you fill all the required details, you can click on the ‘Confirm’ button to confirm the sale order.
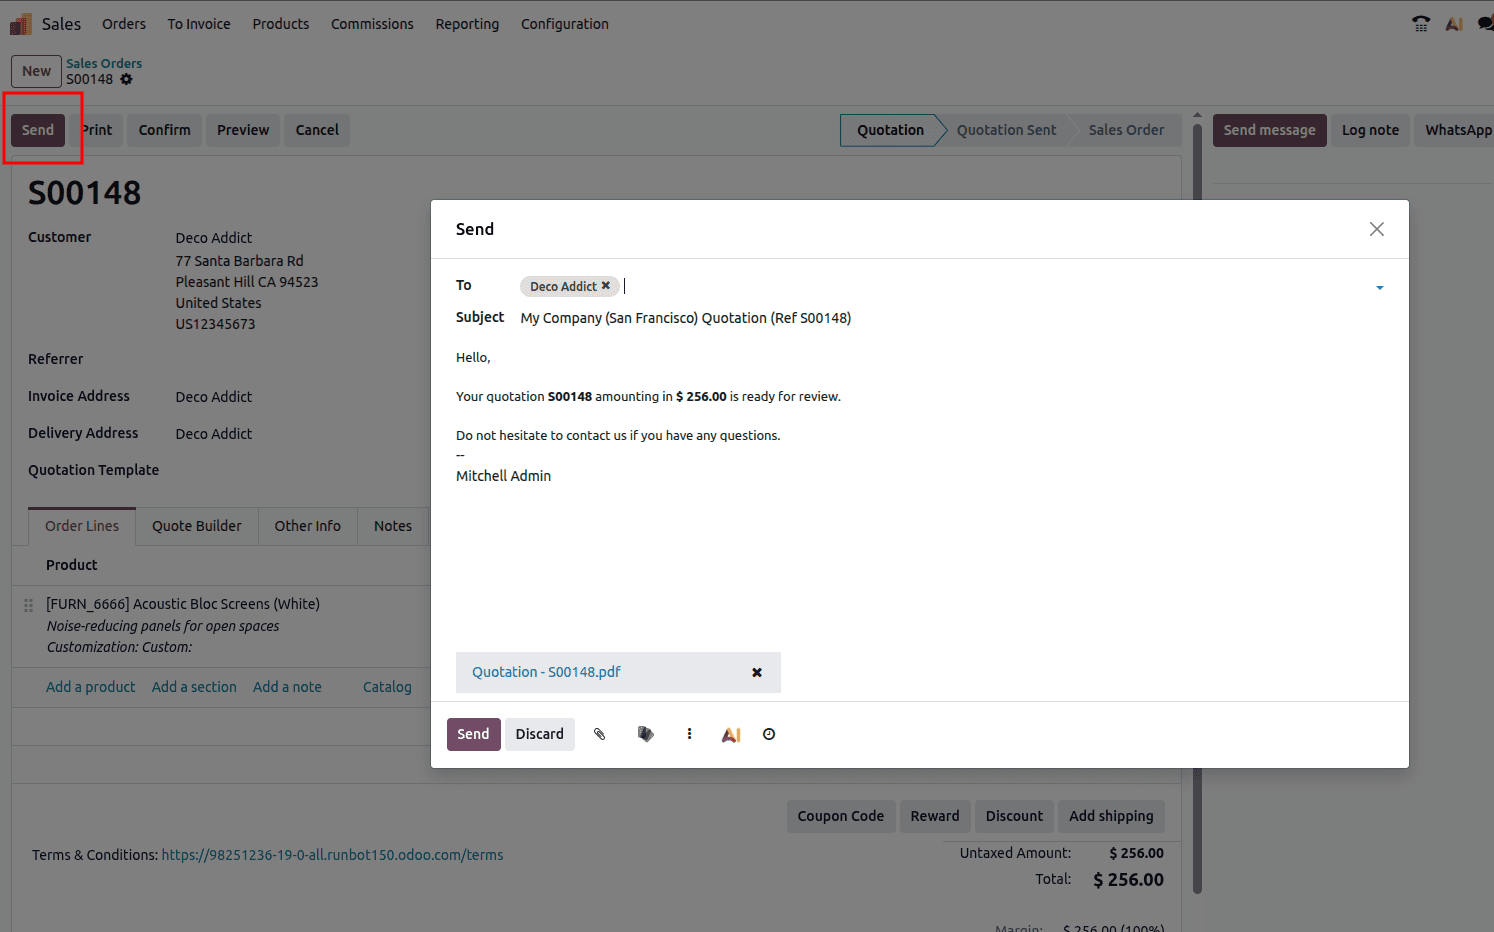
You can also send the details of this sale order by clicking on ‘Send’ button.
Creating Invoices and making Down Payments
Now, let’s create an invoice for the sale order created. You can do this by clicking the ‘Create Invoice’ button in the above sale order.
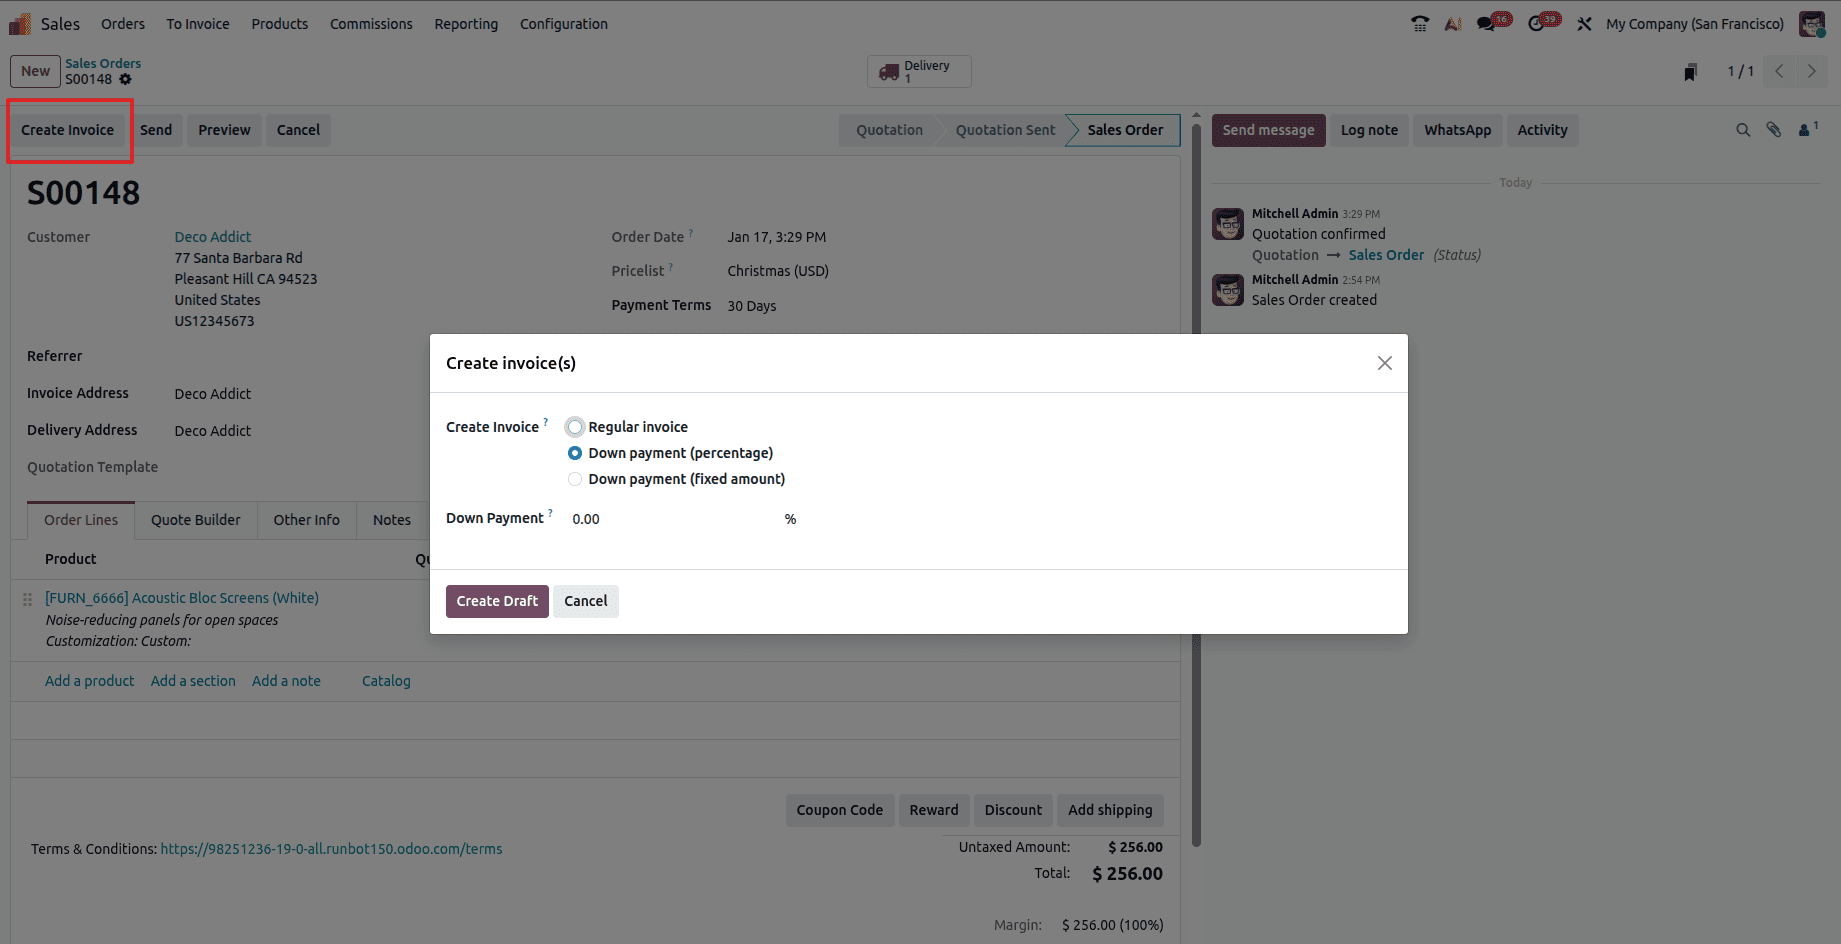
Once you click on the button, a pop-up will appear as shown in the above screenshot, where you will have three options, such as ‘Regular Invoice’,’Down Payment(Percentage)’, ‘Down Payment(Fixed amount)’.
There are two ways to configure a down payment: you can either apply a percentage of the order value or specify a fixed amount. Both methods are flexible and can be adapted to meet particular service requirements. By selecting the “Down Payment (Percentage)” option, the user can define a percentage of the untaxed total that must be paid upfront before the remaining balance is invoiced.
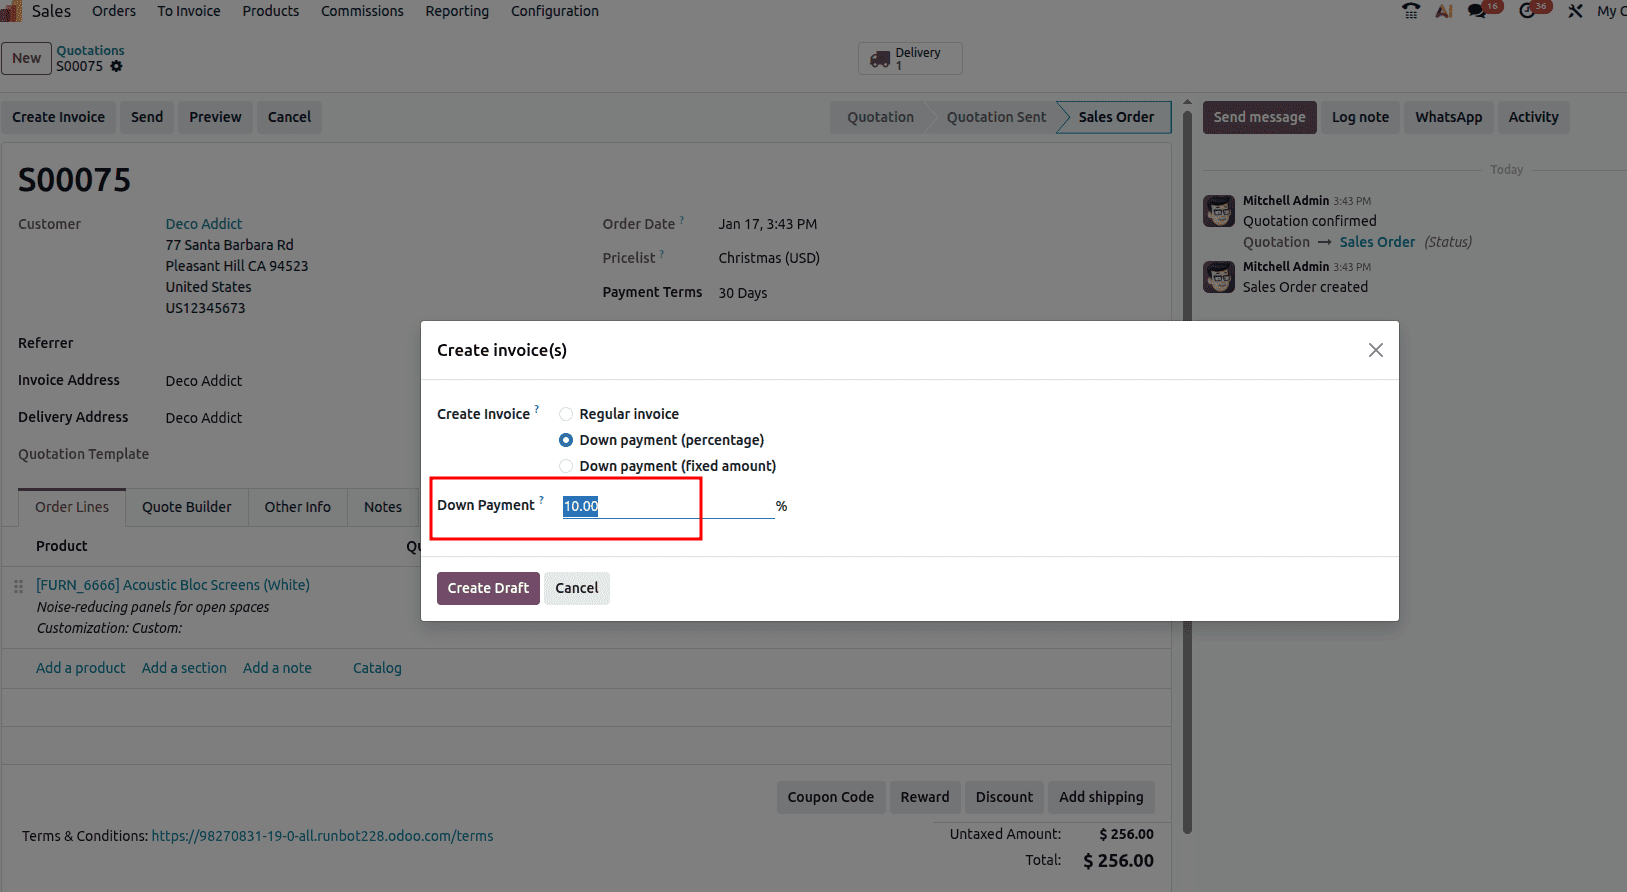
Here, I have given 10% of the total amount as a down payment. After that, you can click on the ‘Create Draft’ button so that a draft invoice will be created.
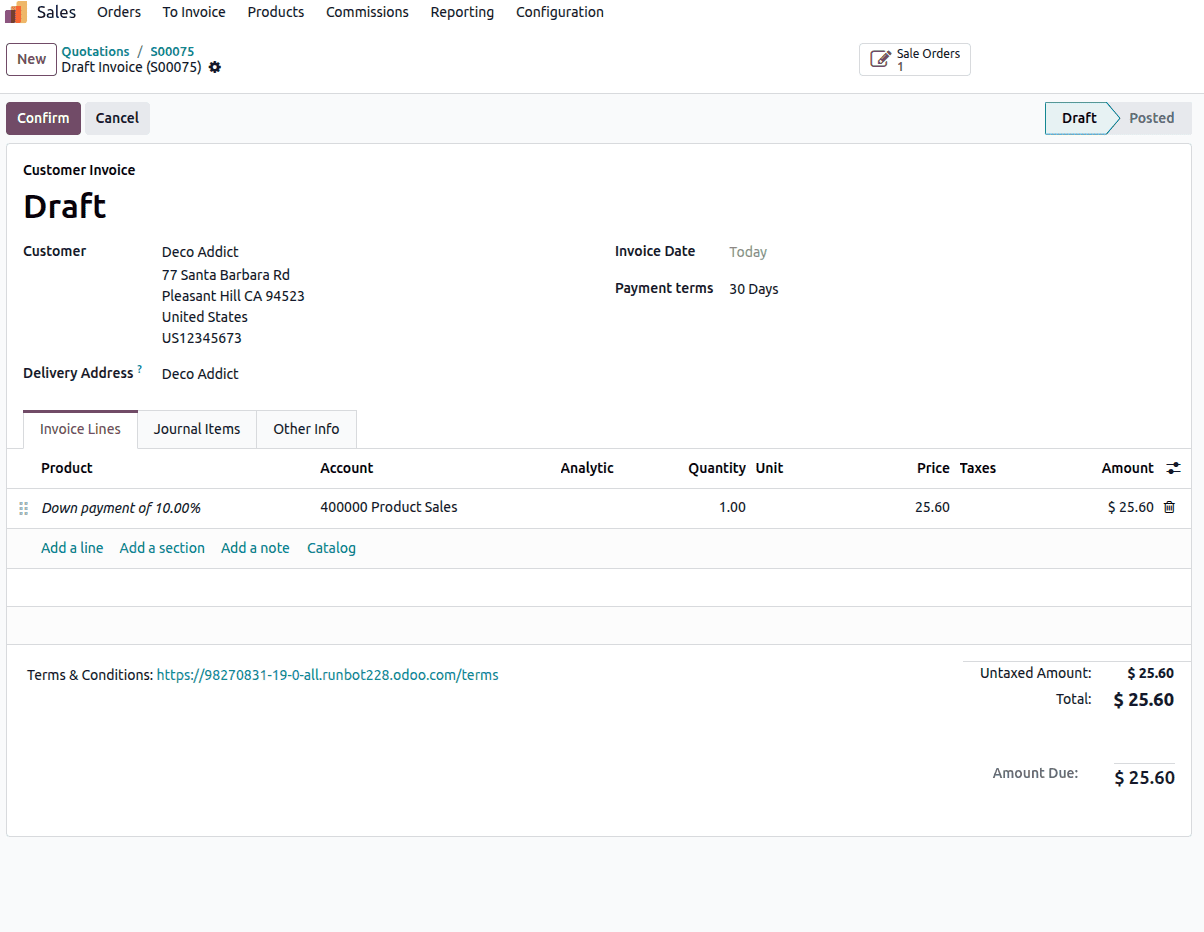
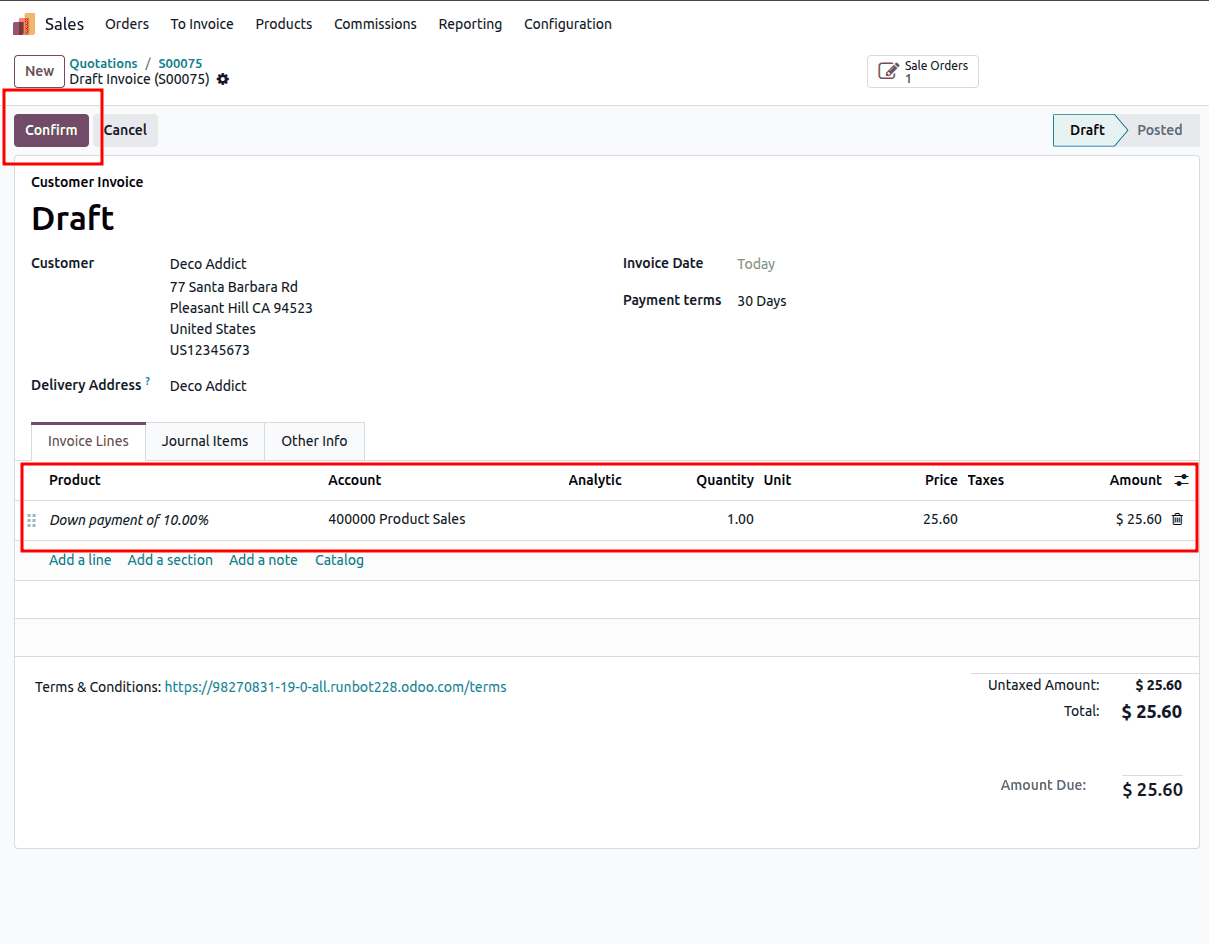
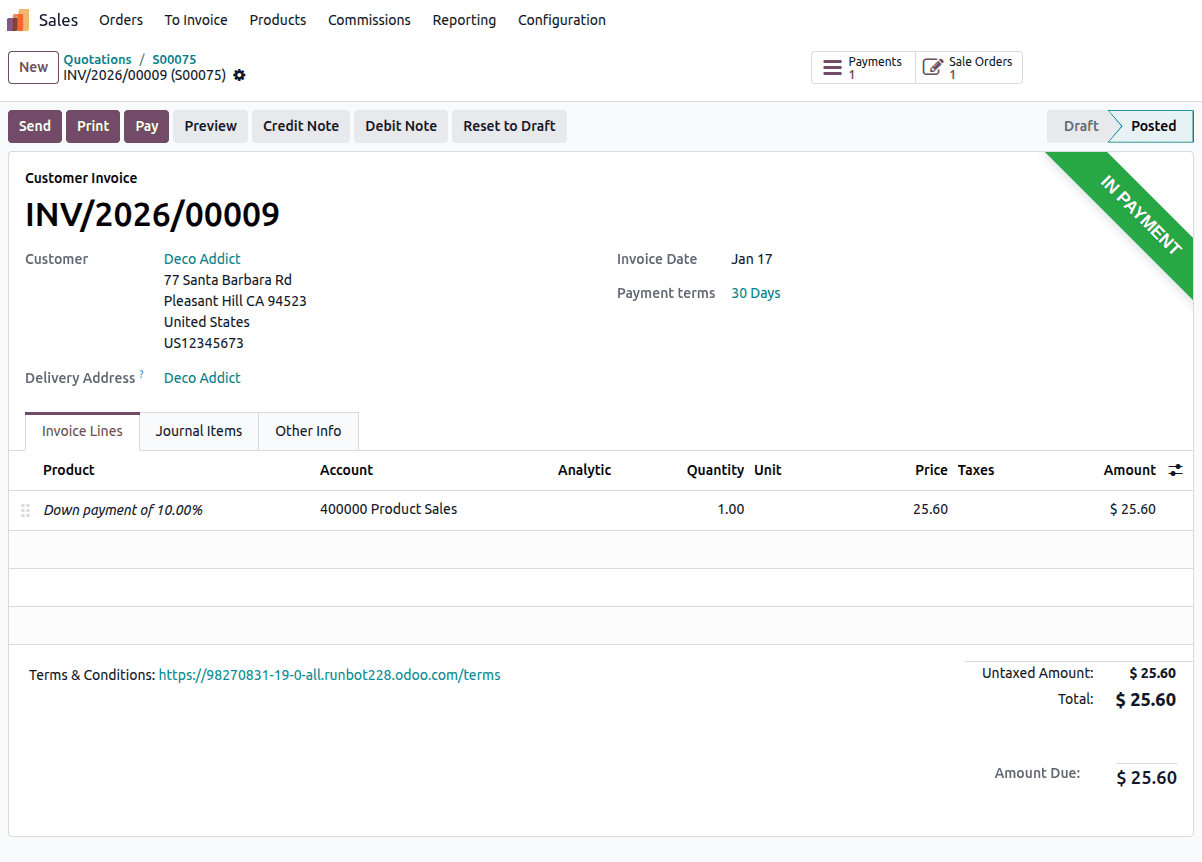
The Draft Invoice outlines all details related to the down payment, including the amount the customer agreed to pay at the beginning of the order. In the “Invoice Lines” tab, you can review information such as the subtotal, assigned account, unit price, applicable taxes, and the selected down payment percentage. The total invoice amount is calculated by adding the Untaxed Amount to the Tax Amount.
If the company policy requires receiving the initial down payment before delivering the goods or services, click “Confirm” to validate the invoice. After reviewing and ensuring that all information is correct, proceed by clicking “Register Payment” to record the payment.
Once the invoice is confirmed, click on the ‘Pay’ button. When you click on the button, a pop-up will appear with the payment details.
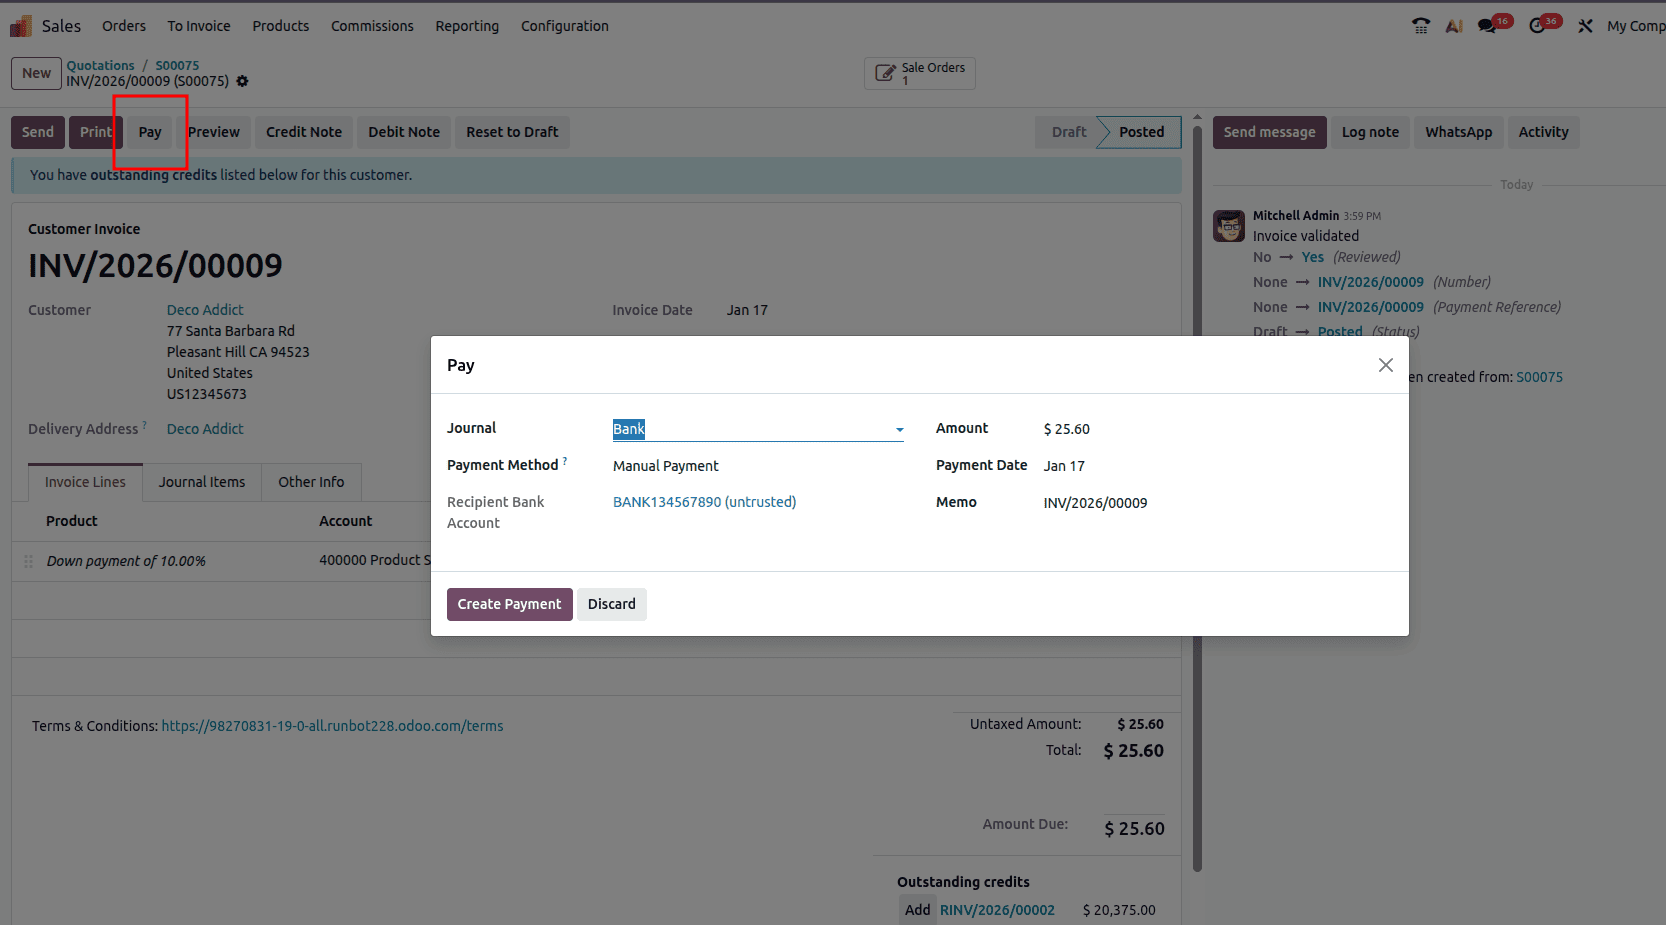
Here, all the details, such as Journal, Payment Method, Recipient Bank Account, Amount, Payment Date, and Memo will be auto-filled. Once you verify the information, you can proceed to the next step by clicking on the ‘Create Payment’ button.
After the payment has been made, an ‘In Payment’ ribbon will appear in the invoice as shown in the screenshot below.
Generate Invoice for the Downpayment
When the company’s invoice policy is set to “Invoice what is delivered,” the user must wait until the delivery is confirmed, as the invoice will be based on the quantity actually delivered compared to the ordered quantity. The delivery can be updated by opening the Sale Order using the smart button at the top of the form view and then accessing the Delivery smart button, as illustrated below.

In the corresponding sale order, you will see a ‘Delivery’ smart button in which we can access the delivery created for this sale order.
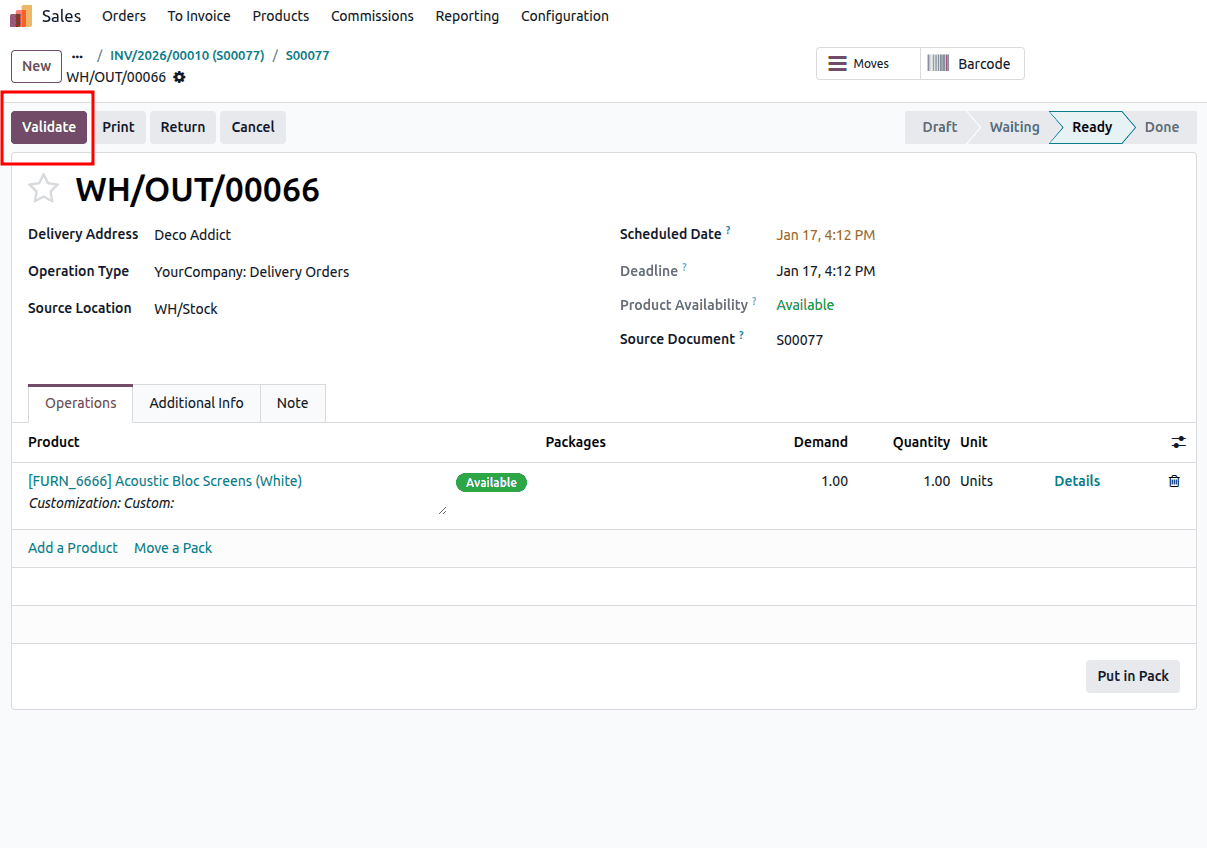
In this, you can click on the ‘Validate’ button to validate the delivery. Once the delivery is validated, go back to the corresponding sale order from which you can create an invoice for the remaining amount since the buyer validated the delivery.

From here, you can follow the similar pattern done above. Click on the ‘Create Invoice’ button, where you will have the above given pop-up. In that you can click on the ‘Create Draft’ button to create the draft entry of the invoice. Once the draft is created, you can cross-check the invoice details and confirm the invoice.
You can manage the invoices and delivery details from the “Delivery” and “Invoices” smart buttons, respectively, from the Sale Order.
In this way, we can create and manage Down Payments using the Odoo 19 Sales module. It provides a flexible and efficient way to manage advanced customer payments while maintaining accurate sales and accounting records.
Down payments in Odoo 19 Sales provide a practical and flexible way to secure commitments, improve cash flow, and reduce financial risk before completing an order. By leveraging Odoo’s built-in down payment options, whether as a fixed amount or a percentage, businesses can seamlessly integrate advance invoicing into their sales workflow without disrupting delivery or final billing. When configured correctly, down payments remain transparent for both sales teams and customers, ensuring accurate accounting and smooth reconciliation. Overall, mastering down payments in Odoo 19 helps organizations maintain better financial control while delivering a professional and reliable sales experience.
To read more about How to Set Up and Process Down Payments in Odoo 18 Sales, refer to our blog How to Set Up and Process Down Payments in Odoo 18 Sales.