In Odoo 19, sequence numbers play an important role in assigning unique identifiers to records across different models. These identifiers can be customized with elements like prefixes, suffixes, or number padding, helping you maintain a clear and consistent structure for tracking records. You’ll find sequence numbers used throughout Odoo in places like invoices, sales orders, purchase orders, products, and many other areas where organized record-keeping is essential.
In this guide, we’ll walk through how to create a date-based sequence number in Odoo 19. To illustrate this process, we’ll set up a simple Hospital Management module in which every OP ticket generated in the system receives a unique reference number.
Why Use Sequence Numbers?
Sequence numbers play a key role in giving each record a distinct identifier, which helps maintain clarity, consistency, and proper traceability across business workflows. Whether it’s invoices, orders, or product entries, sequence numbers make it easier to manage records without duplication and give businesses better control over their transactions.
They also support cleaner reporting, smoother data integration across systems, and stronger data integrity overall. Since each entry can be traced through its lifetime, sequence numbers help create a reliable audit trail—making it easier to spot errors, resolve discrepancies, and reduce the chances of fraudulent activities.
Benefits of Using Sequence Numbers
- Uniqueness: Guarantees that every record is clearly distinguishable.
- Traceability: Makes it simple to follow the movement or status of any record.
- Customization: Allows you to design numbering formats that match your operational style or branding needs.
Step 1: Define the Model
First, you need to create the model where the sequence will be applied. In this example, we’ll build a model for hospital_management to represent OP tickets, and then configure a sequence that automatically generates a unique reference number for each ticket.
from odoo import _,api, fields, models
class HospitalManagement(models.Model):
   _name = 'hospital.management'
   _description = 'Sample Model'
   _inherit = ['mail.thread', 'mail.activity.mixin']

   name = fields.Char(string='Name', required=True)
   reference_number = fields.Char(string='Sequence',copy=False,default="New",readonly=True, required=True)
   description = fields.Text(string='Description')
   date = fields.Date(string='Date')
   active = fields.Boolean(string='Active', default=True)
   state = fields.Selection([
       ('draft', 'Draft'),
       ('confirmed', 'Confirmed'),
       ('done', 'Done')
   ], string='State', default='draft', tracking=True)

   @api.model_create_multi
   def create(self, vals):
       """Create records using provided values."""
       for rec in vals:
           code = self.env['ir.sequence'].next_by_code('hospital.registration')
           rec['reference_number'] = code
       res = super().create(vals)
       return res
Explanation of Code:
- reference_number: A character field with a default value of 'New.' This field will store the unique identifier for each ticket.
- create: Overrides the create method to assign a sequence-generated identifier to reference_number each time a new record is created.
Step 2: Define the Sequence in XML
With the model ready, the next step is to create a sequence that will be used by the hospital.management model. This configuration is added inside an XML file placed in your module’s data directory.
Create a file named ir_sequence_data.xml and add the following content:
<?xml version="1.0" encoding="UTF-8" ?>
<odoo>
   <record id="ir_sequence_hospital_registration" model="ir.sequence">
       <field name="name">Op Ticket Reference Numbers</field>
       <field name="code">hospital.registration</field>
       <field name="prefix">OP/%(year)s/</field>
       <field name="padding">5</field>
       <field name="number_next">1</field>
       <field name="number_increment">1</field>
       <field name="company_id" eval="False"/>
   </record>
</odoo>
Explanation of XML Fields
- id: Unique identifier for the sequence record.
- name: Descriptive name for the sequence (e.g.,Op Reference Numbers).
- code: This associates the sequence with our hospital.management model.
- prefix: A prefix for the reference number (e.g., OP ).
- padding: Defines the number of digits in the sequence.
- number_next: The starting number for the sequence.
- number_increment: The increment step for the sequence.
Step 3: Test the Sequence Generation
Once your model and sequence are set up, go to your newly created model in Odoo (you may need to add a menu item for it in your module). Create a new record, and you should see the Reference Number field automatically filled with a unique sequence value.
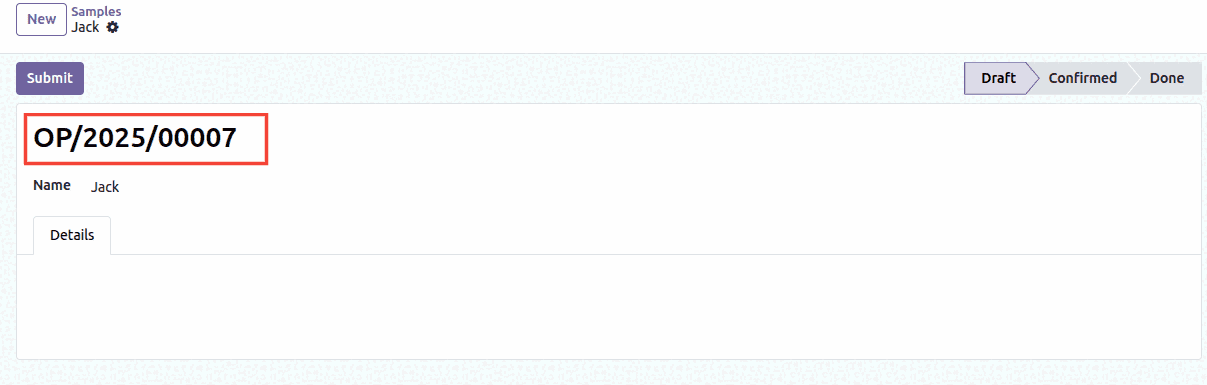
Here, we’ve added %(year)s to the sequence, which automatically inserts the current year (with the full century) into the reference number. That’s why the generated value appears as OP/2025/00007.
| Code | Explanation |
| %(year)s | Current Year with Century |
| %(y)s | Current Year without Century |
| %(month)s | Month |
| %(day)s | Day |
| %(doy)s | Day of the Year |
| %(woy)s | Week of the Year |
| %(weekday)s | Day of the Week (0:Monday) |
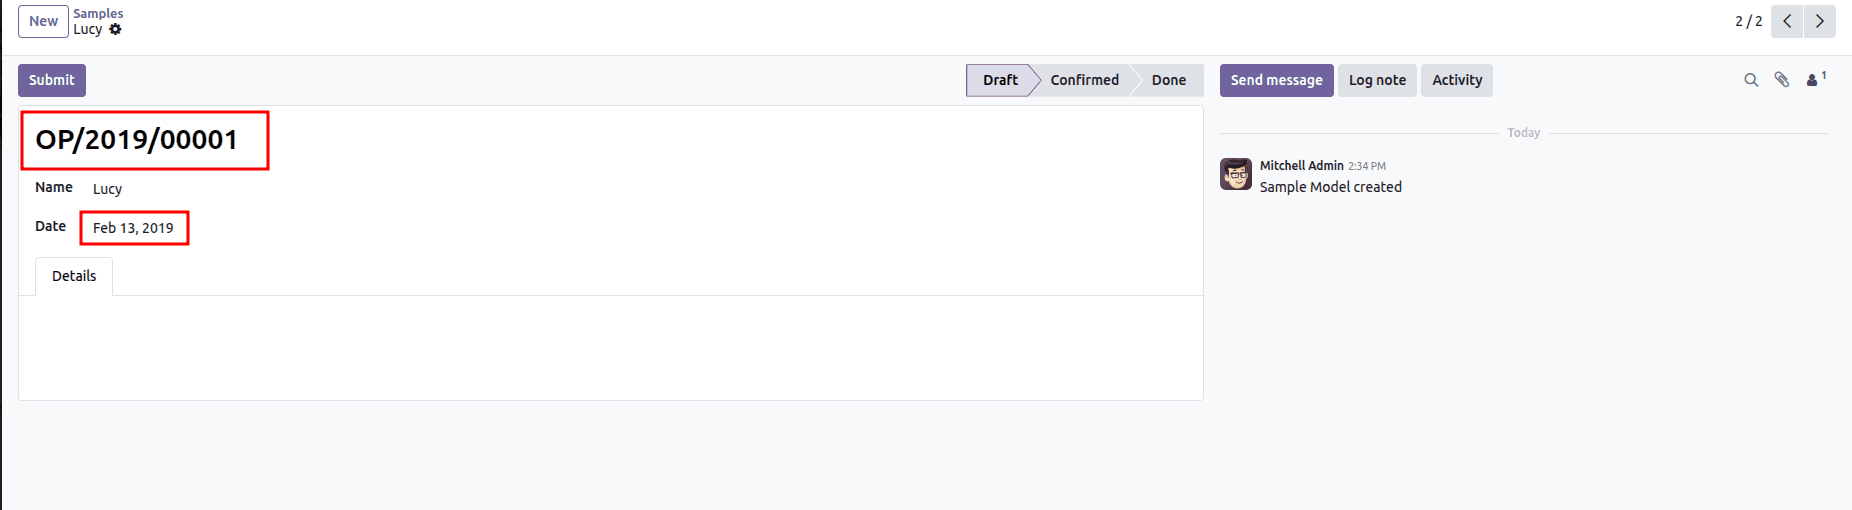
Additionally, You Can Include a Selected Date from the Form’s Date Field in the Sequence
You can make your sequence even smarter by adding the date selected in the form directly into the generated number. This helps keep your records cleaner and makes each entry easier to identify at a glance.
To enable this, simply turn on use_date_range in the sequence setting:
<field name="use_date_range" eval="True"/>
For the final step, adjust your create method so the chosen date is passed to the sequence generator using sequence_date:
@api.model_create_multi
def create(self, vals):
   """Create records using provided values."""
   for rec in vals:
       rec_date = rec['date']
       code = self.env['ir.sequence'].next_by_code('hospital.registration',   sequence_date = rec_date)
       rec['reference_number'] = code
   res = super().create(vals)
   return res
What this setup does is create a new date range automatically every time a new year is selected in the date field. For each of these date ranges, the sequence starts again from 1, ensuring clean yearly numbering. This way, all reference numbers are neatly grouped and organized based on their respective date ranges.

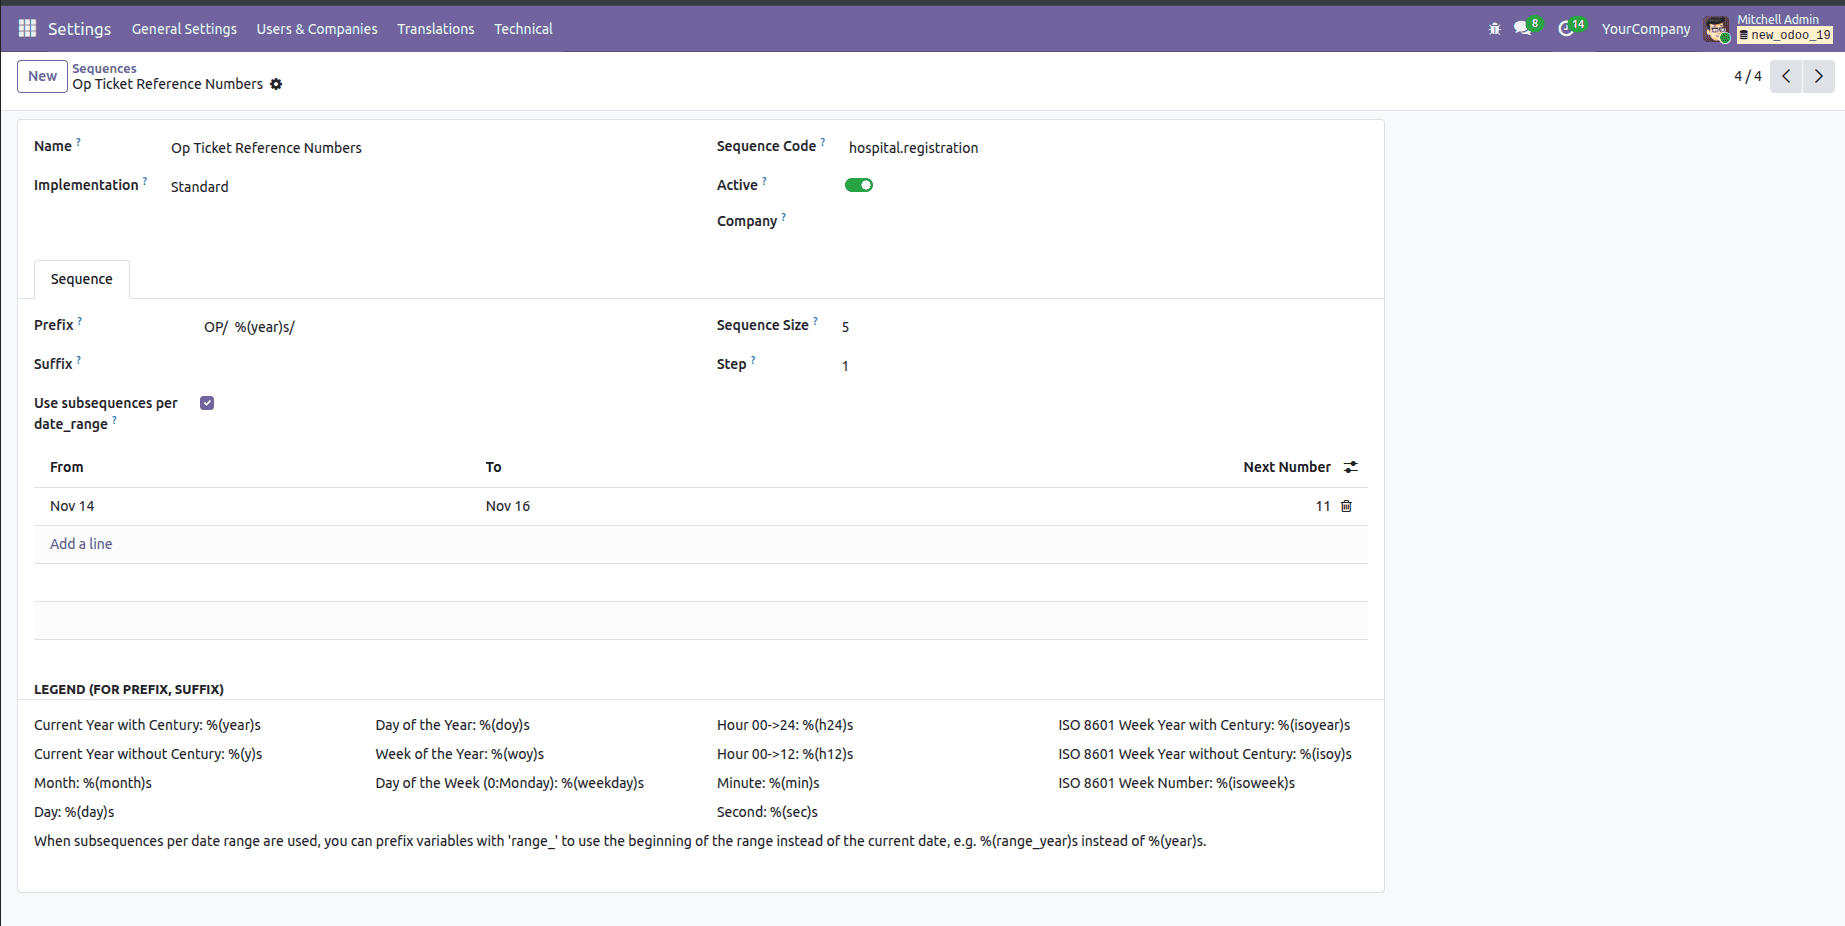
Alternatively, you can open the sequence form view directly from Settings > Technical > Sequences.
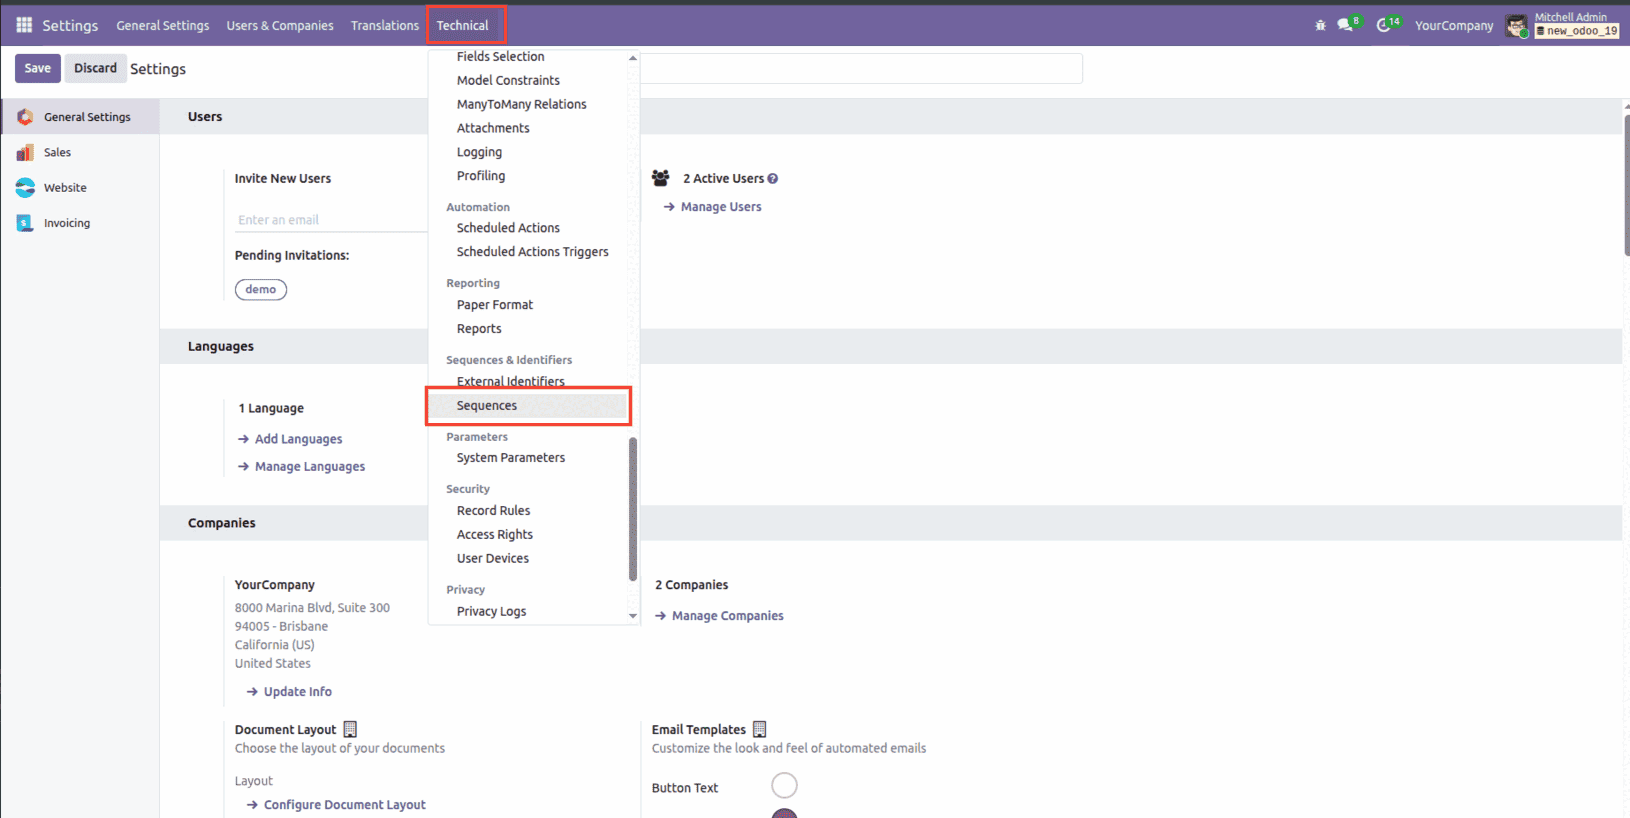
You’ll find the sequence record created from your XML there, and you can make any adjustments you need right from the interface.
Conclusion
Setting up date-based sequence numbers in Odoo 19 is a simple yet powerful way to keep your records organized and easy to trace. Whether you choose to configure sequences through XML or adjust them directly from the settings menu, Odoo gives you the flexibility to match your workflow. By adding date ranges and dynamic elements like the current year or month, you can ensure your sequence numbers reset automatically and stay meaningful throughout the year. With this setup in place, your documents—whether they’re tickets, invoices, or any custom records—remain structured, consistent, and effortlessly manageable.
To read more about How to Create Sequence Numbers in Odoo 18, refer to our blog How to Create Sequence Numbers in Odoo 18.