If you use Odoo for your business operations and SharePoint for document storage, integrating the two can save time and streamline your workflow. Microsoft Graph API makes this possible by providing a single endpoint to access Microsoft 365 services, including SharePoint.
In this guide, we’ll walk you through the basics, from creating credentials to making your first API call from Odoo, so you can start connecting and experimenting.
1. Prerequisites
Before you begin, make sure you have:
- Access to a Microsoft 365 account with SharePoint
- Administrator permissions to create an Azure App Registration
2. Step 1: Create an Azure App Registration
To allow Odoo to talk to SharePoint, we need to register an application in Azure Active Directory.
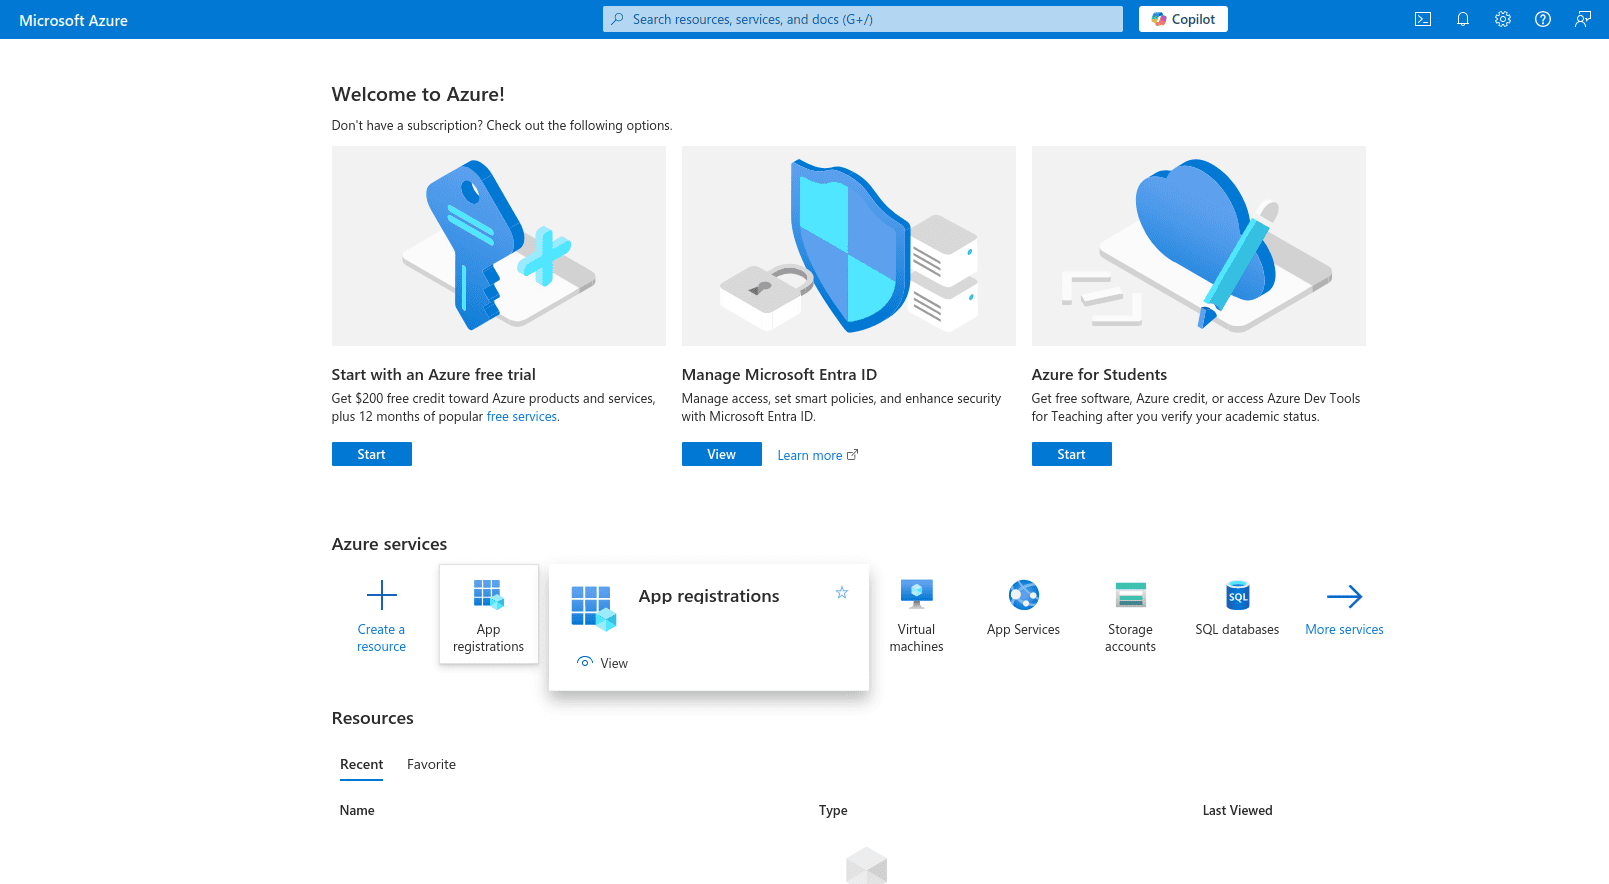
- Log in to the Azure Portal.
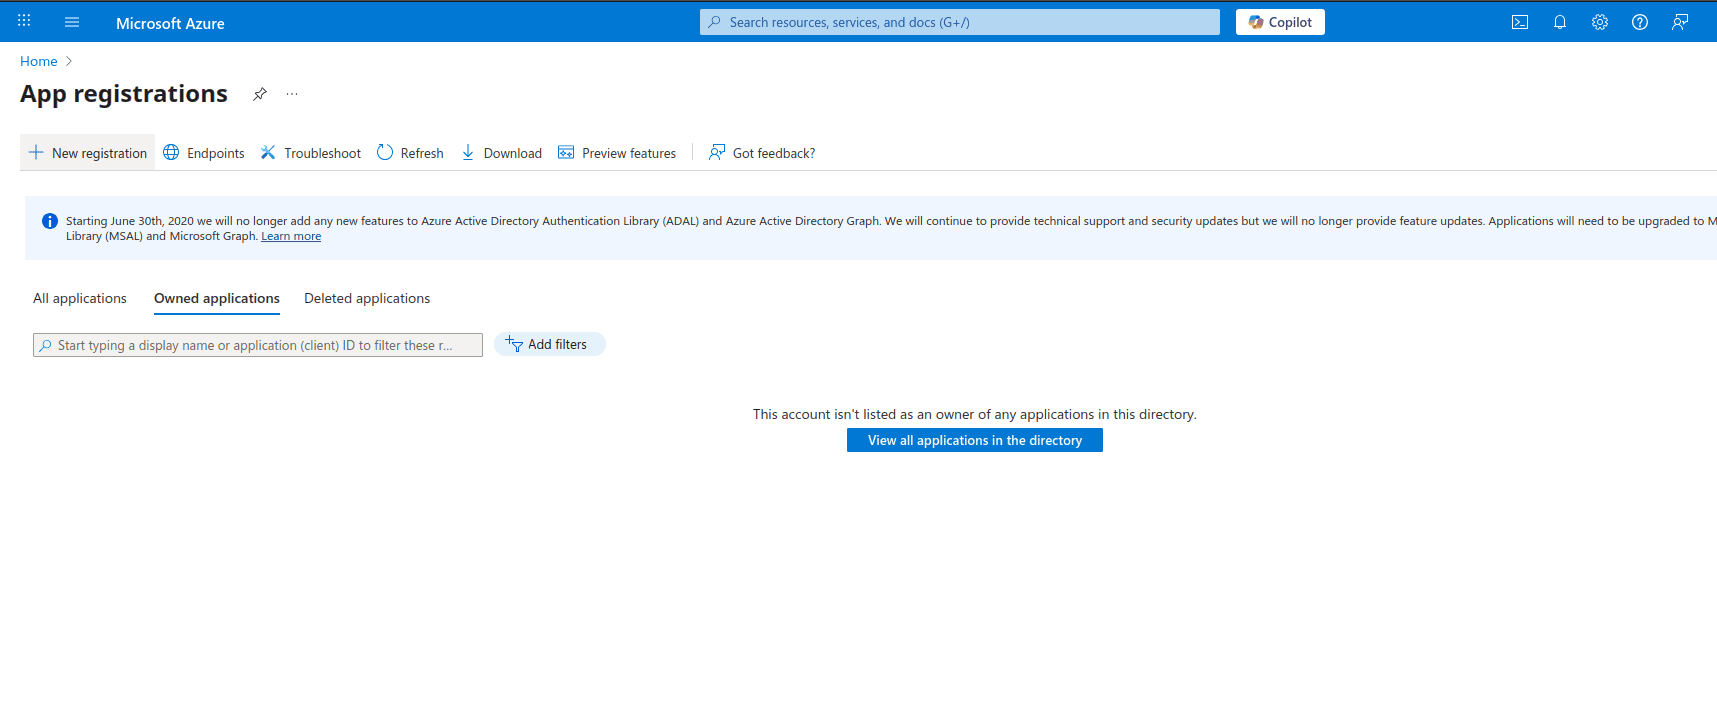
- Go to Azure Active Directory > App registrations > New registration.
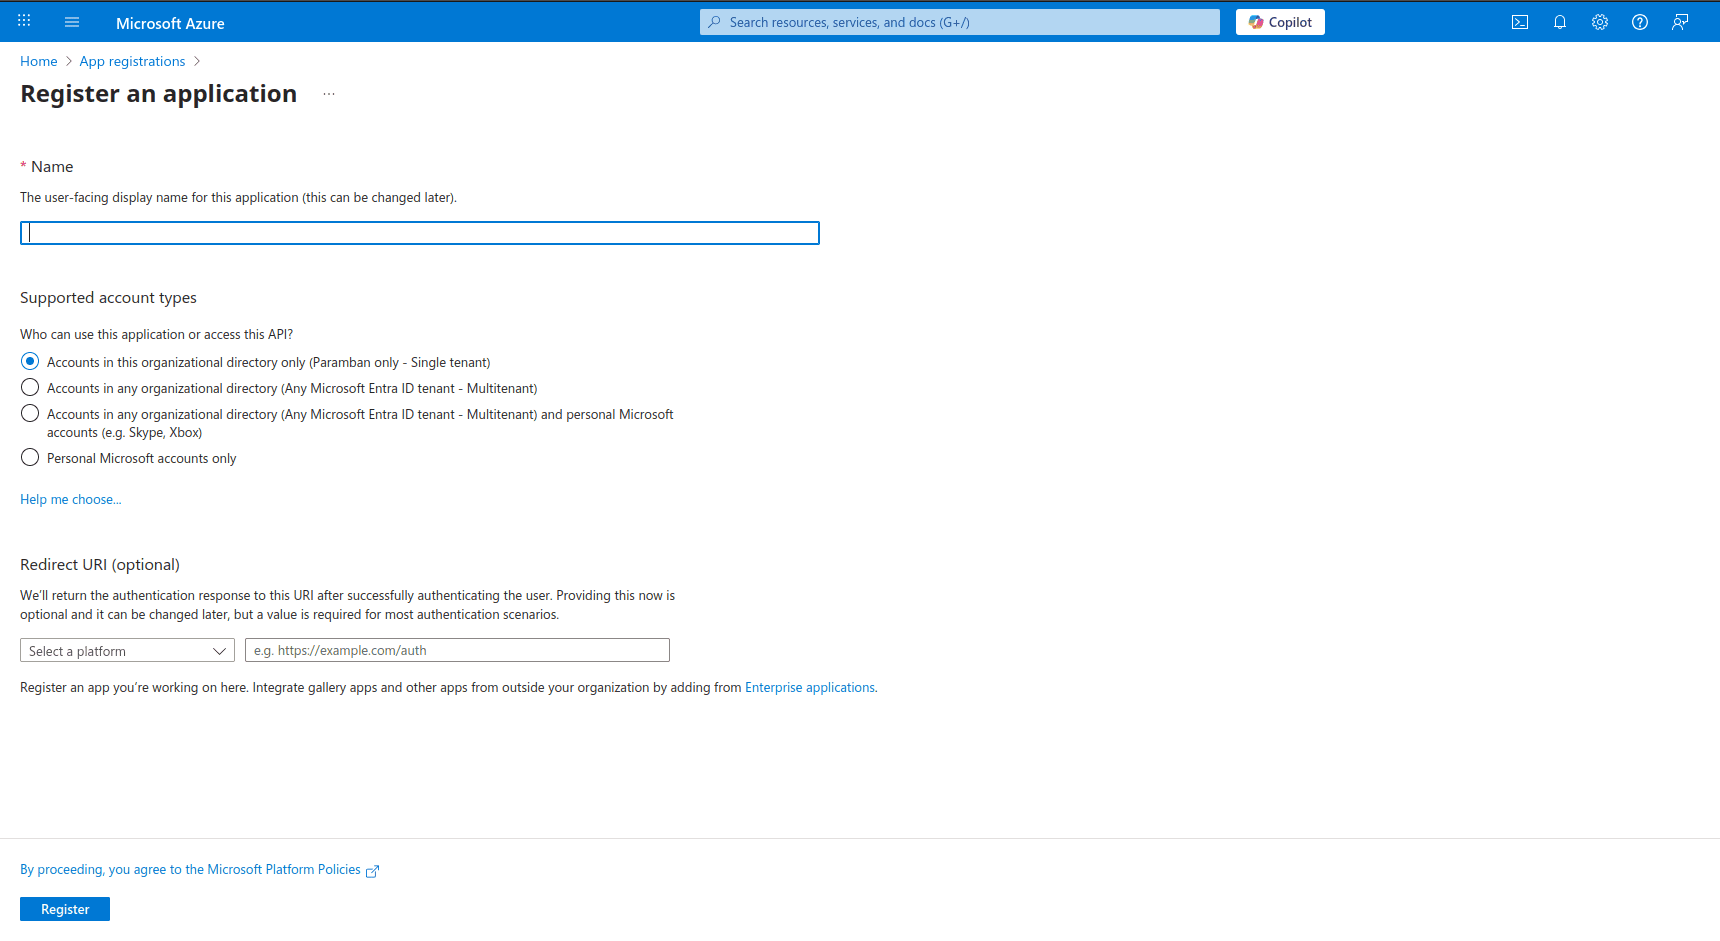
- Give your app a name (e.g., Odoo SharePoint Integration).
- Choose Accounts in this organizational directory only as the supported account type.
- Click Register.
Click the New Registration button.
Enter the Name, select the account types, and (optionally) provide a Redirect URI, then click the Register button.
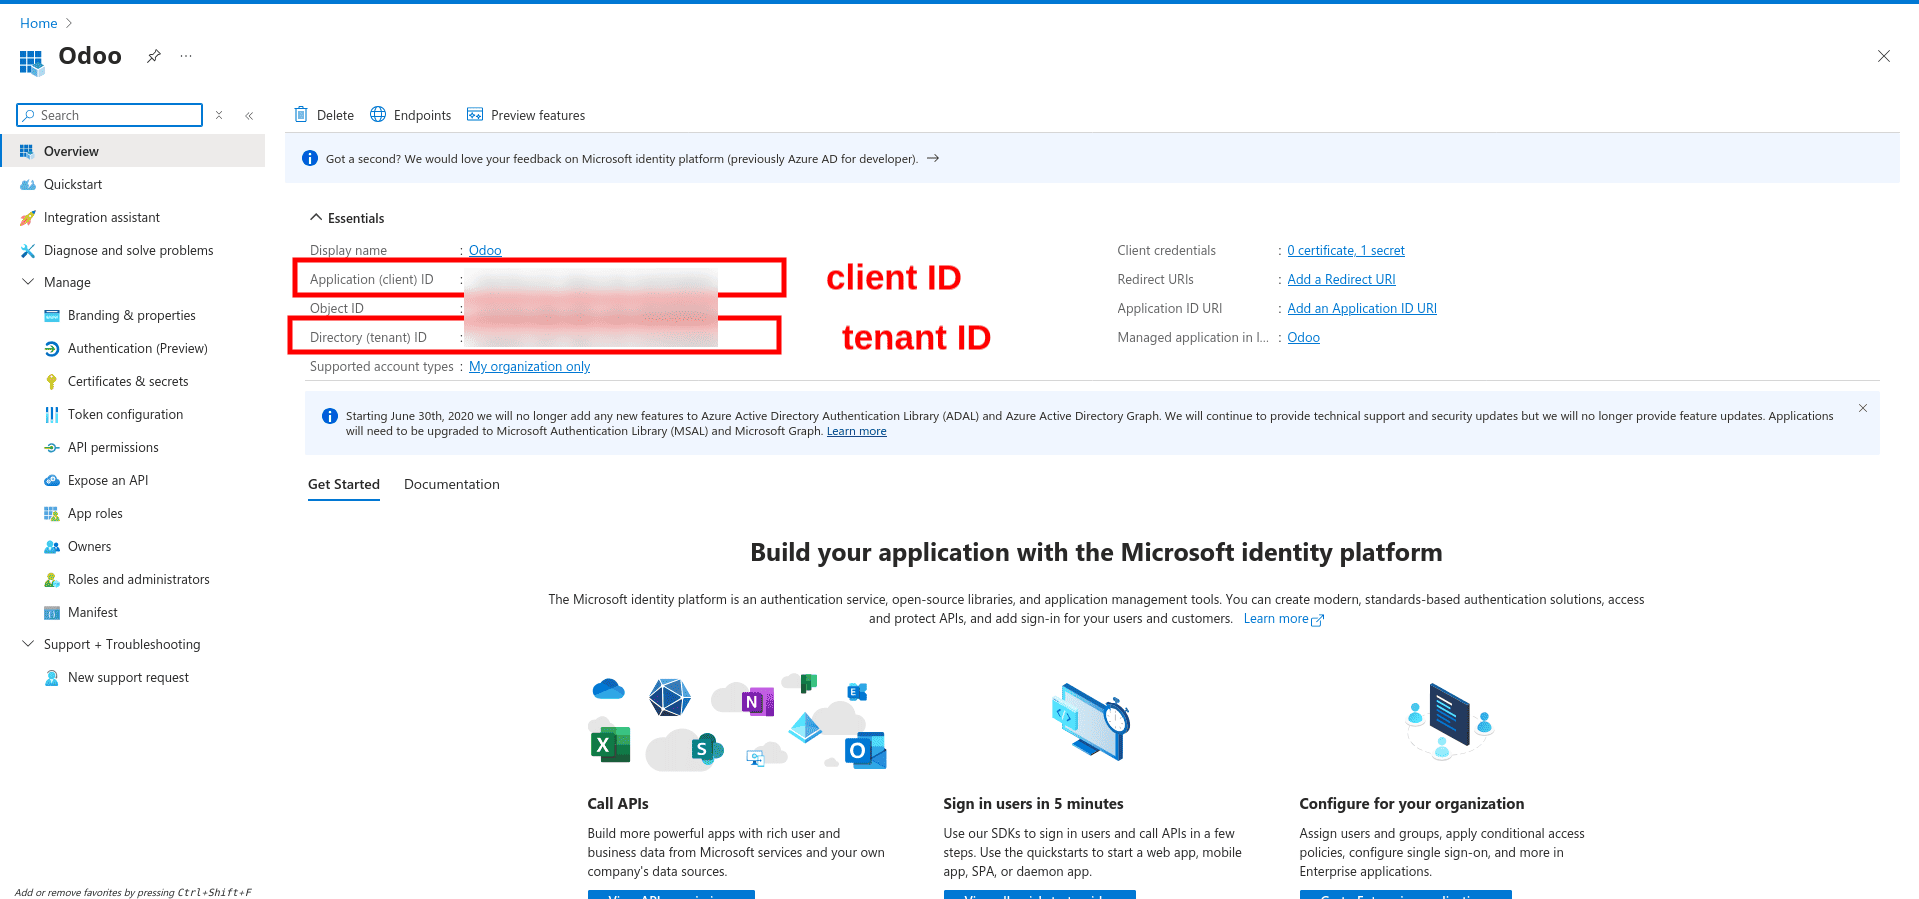
After registration, you will receive the credentials as shown below.
3. Step 2: Configure API Permissions
Next, grant the app permission to access SharePoint.
- Inside your app, go to API Permissions > Add a permission.
- Choose Microsoft Graph > Application permissions.
- Add:
- Sites.ReadWrite.All (Full access to SharePoint sites and documents)
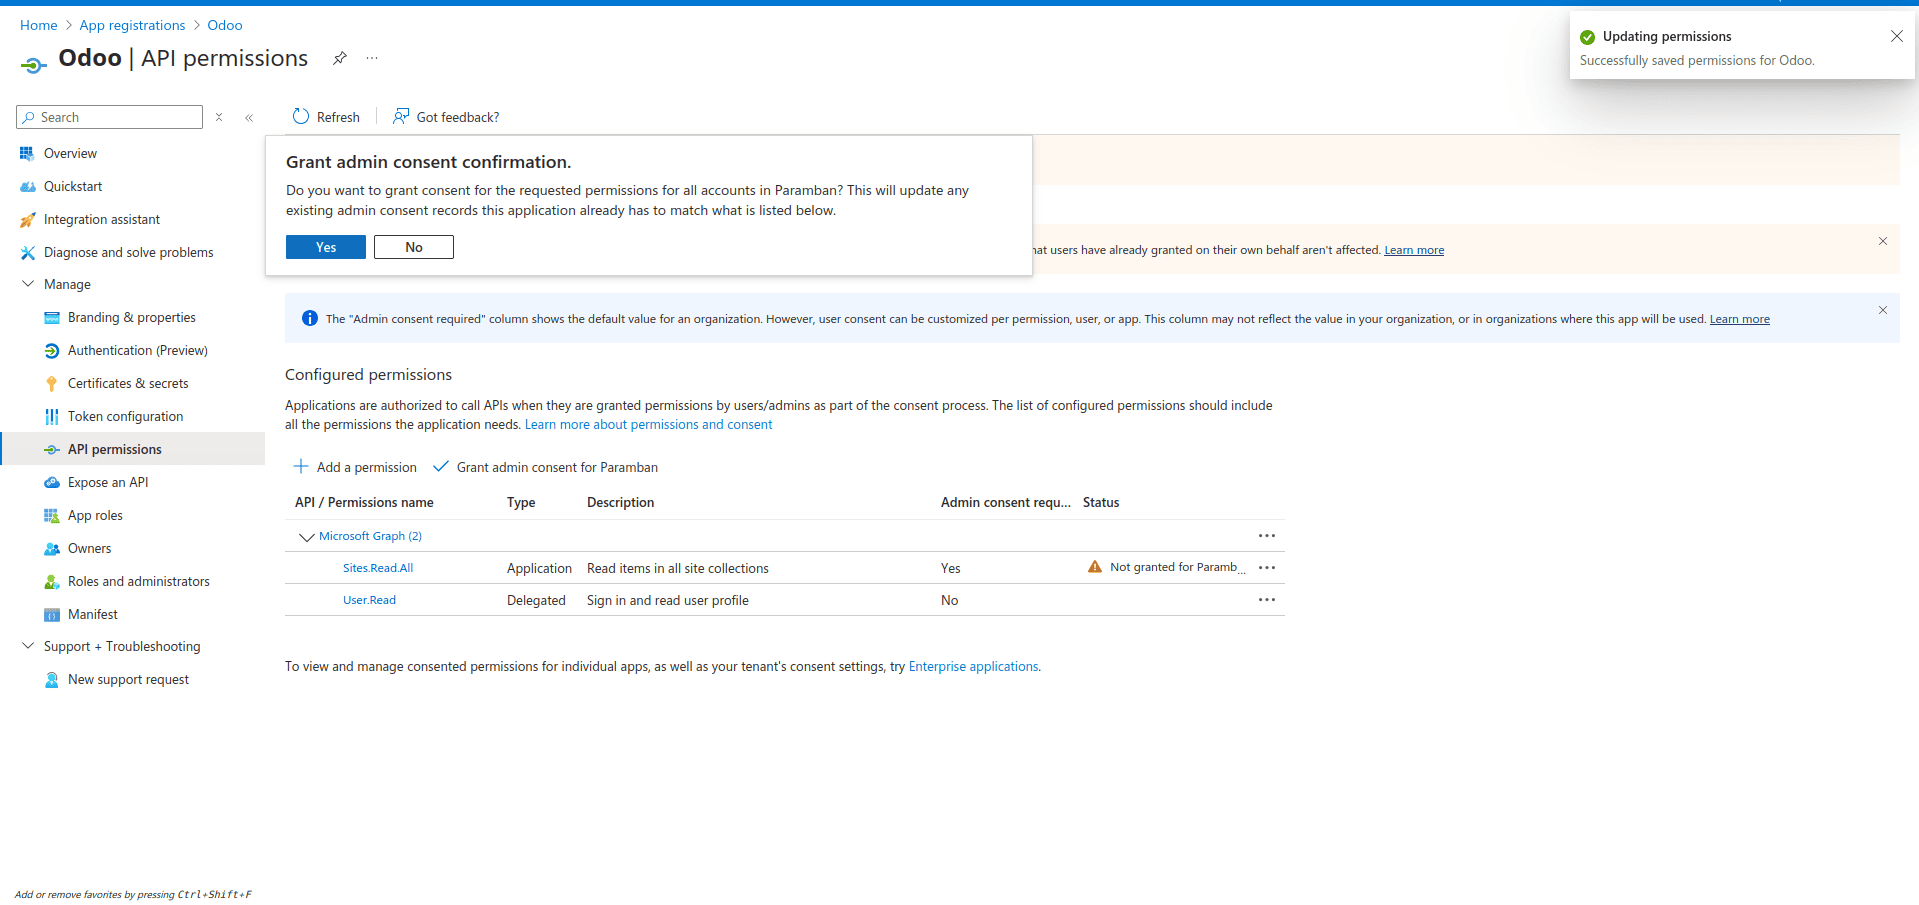
- Click Grant admin consent.
Open the API permissions view, click Add a permission, then select the required permissions. Then click Add permissions.
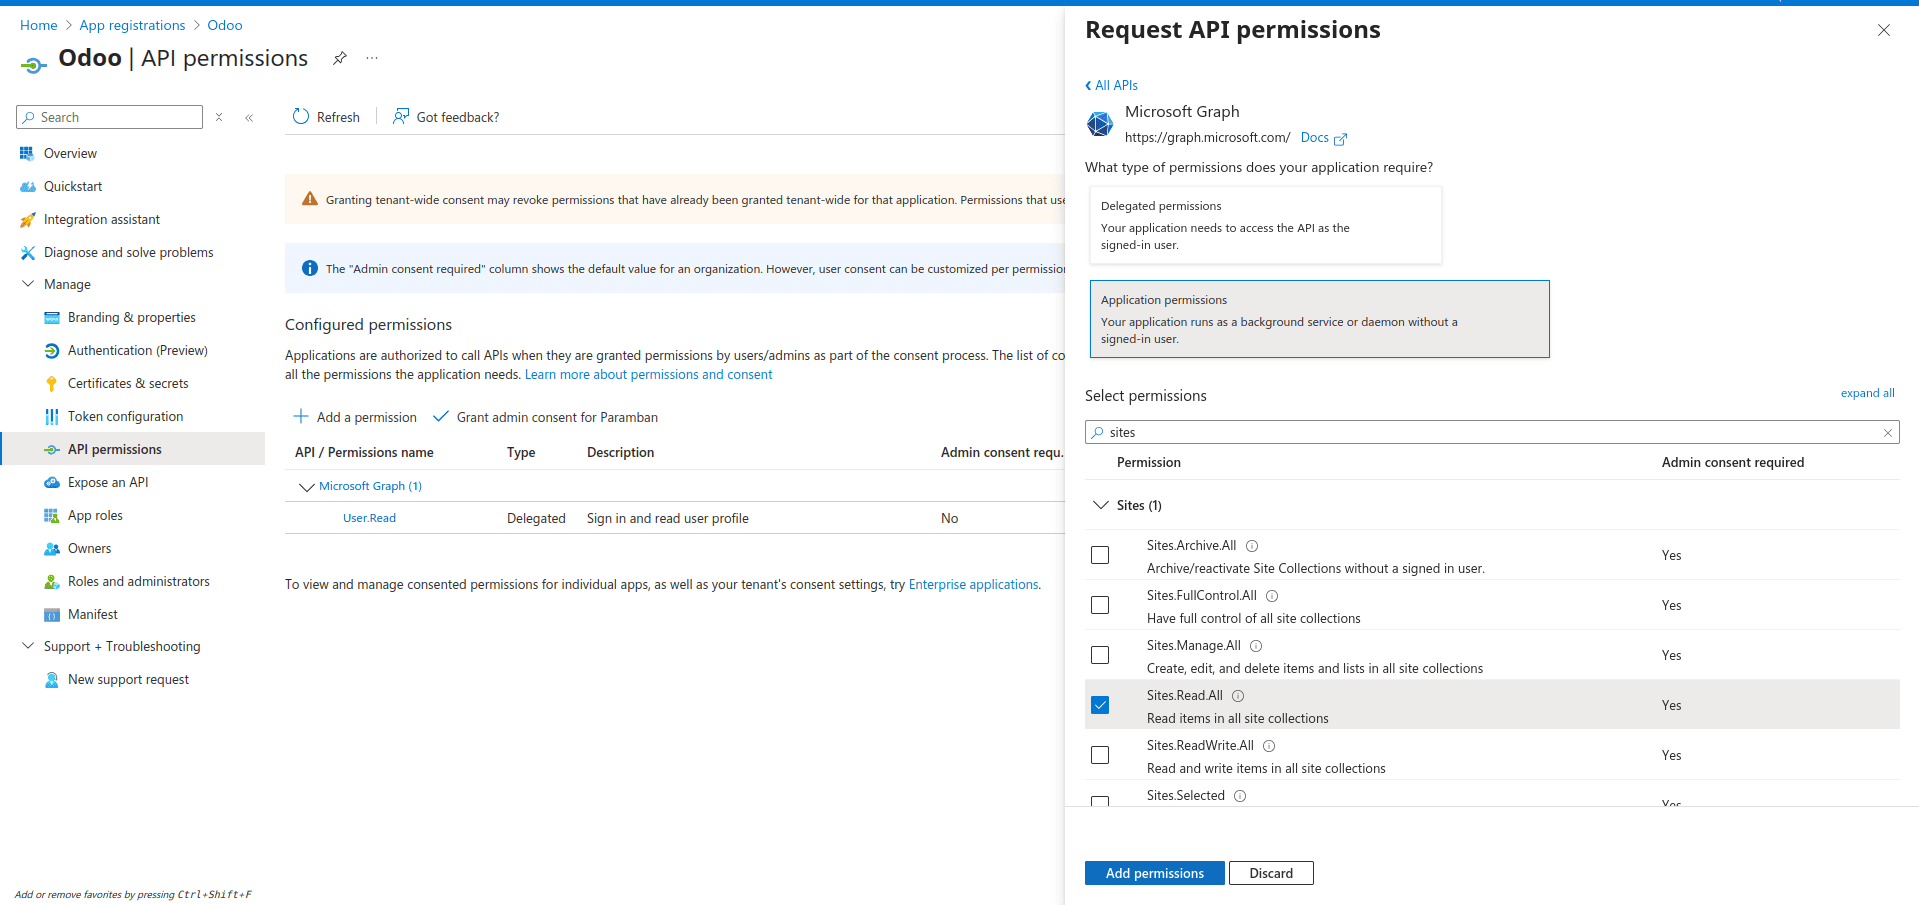
Click the Grant admin consent button to grant admin consent.
4. Step 3: Create Client Secret
The client secret works like a password for your app.
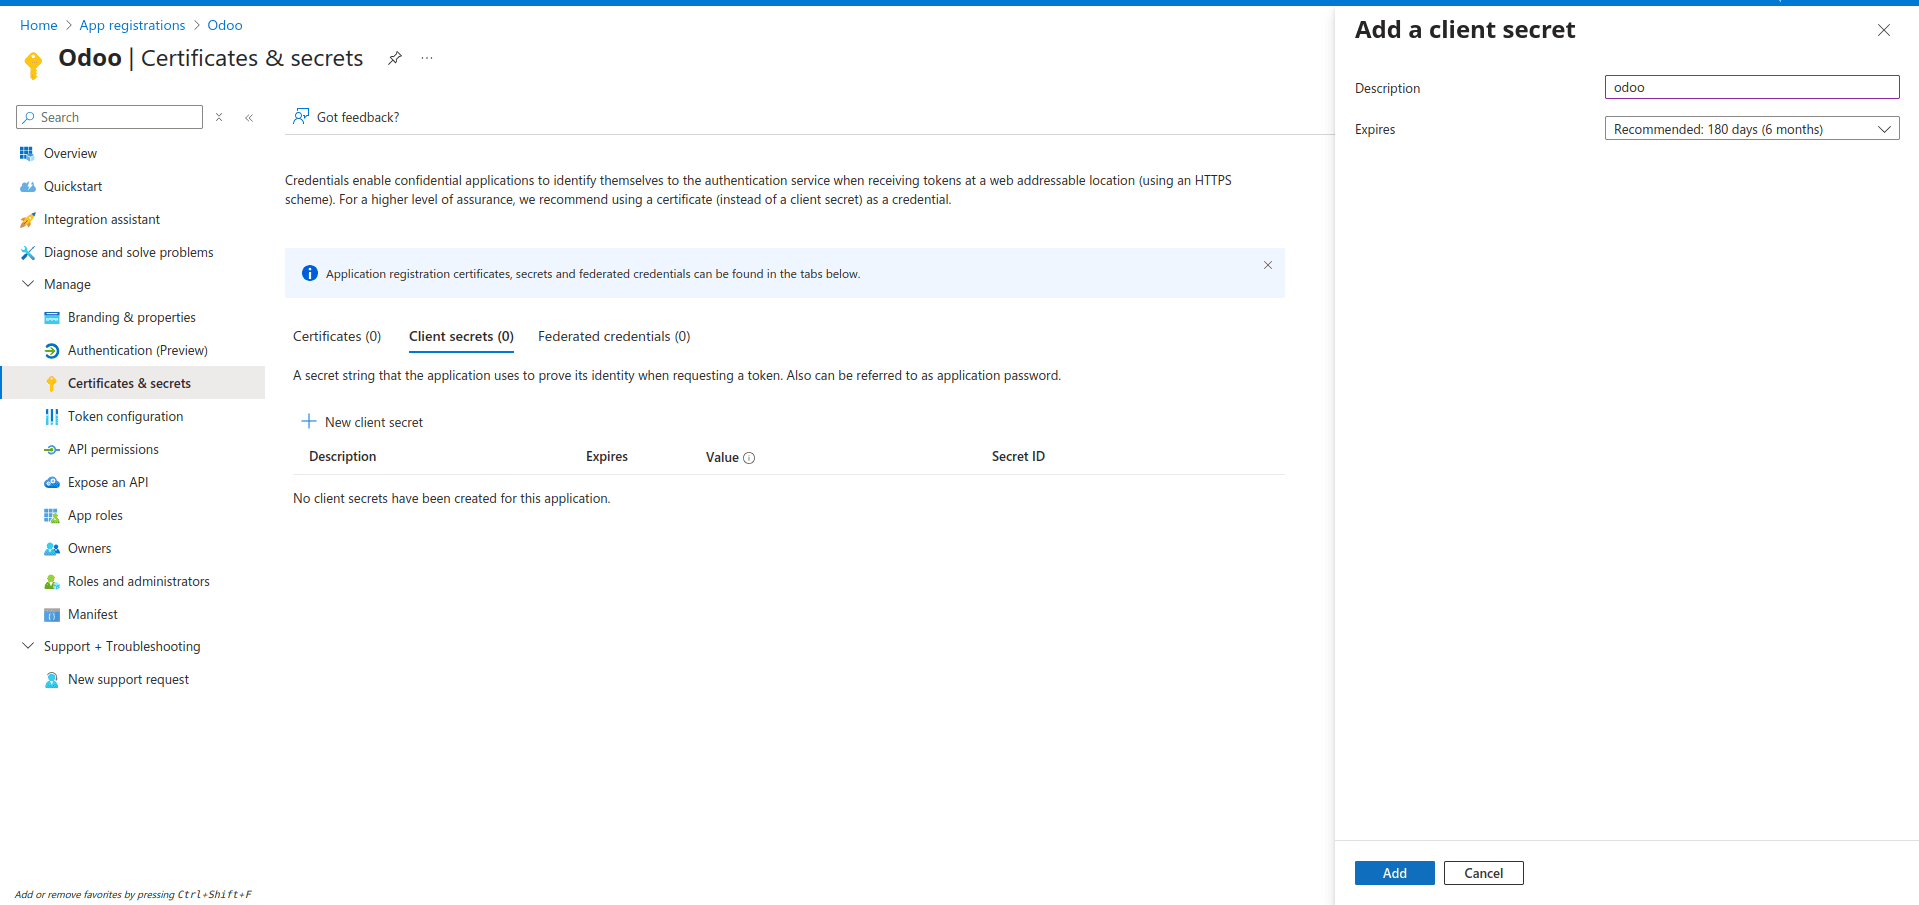
- Go to Certificates & secrets > New client secret.
- Enter a description (e.g., OdooSecret), choose an expiry period, and click Add.
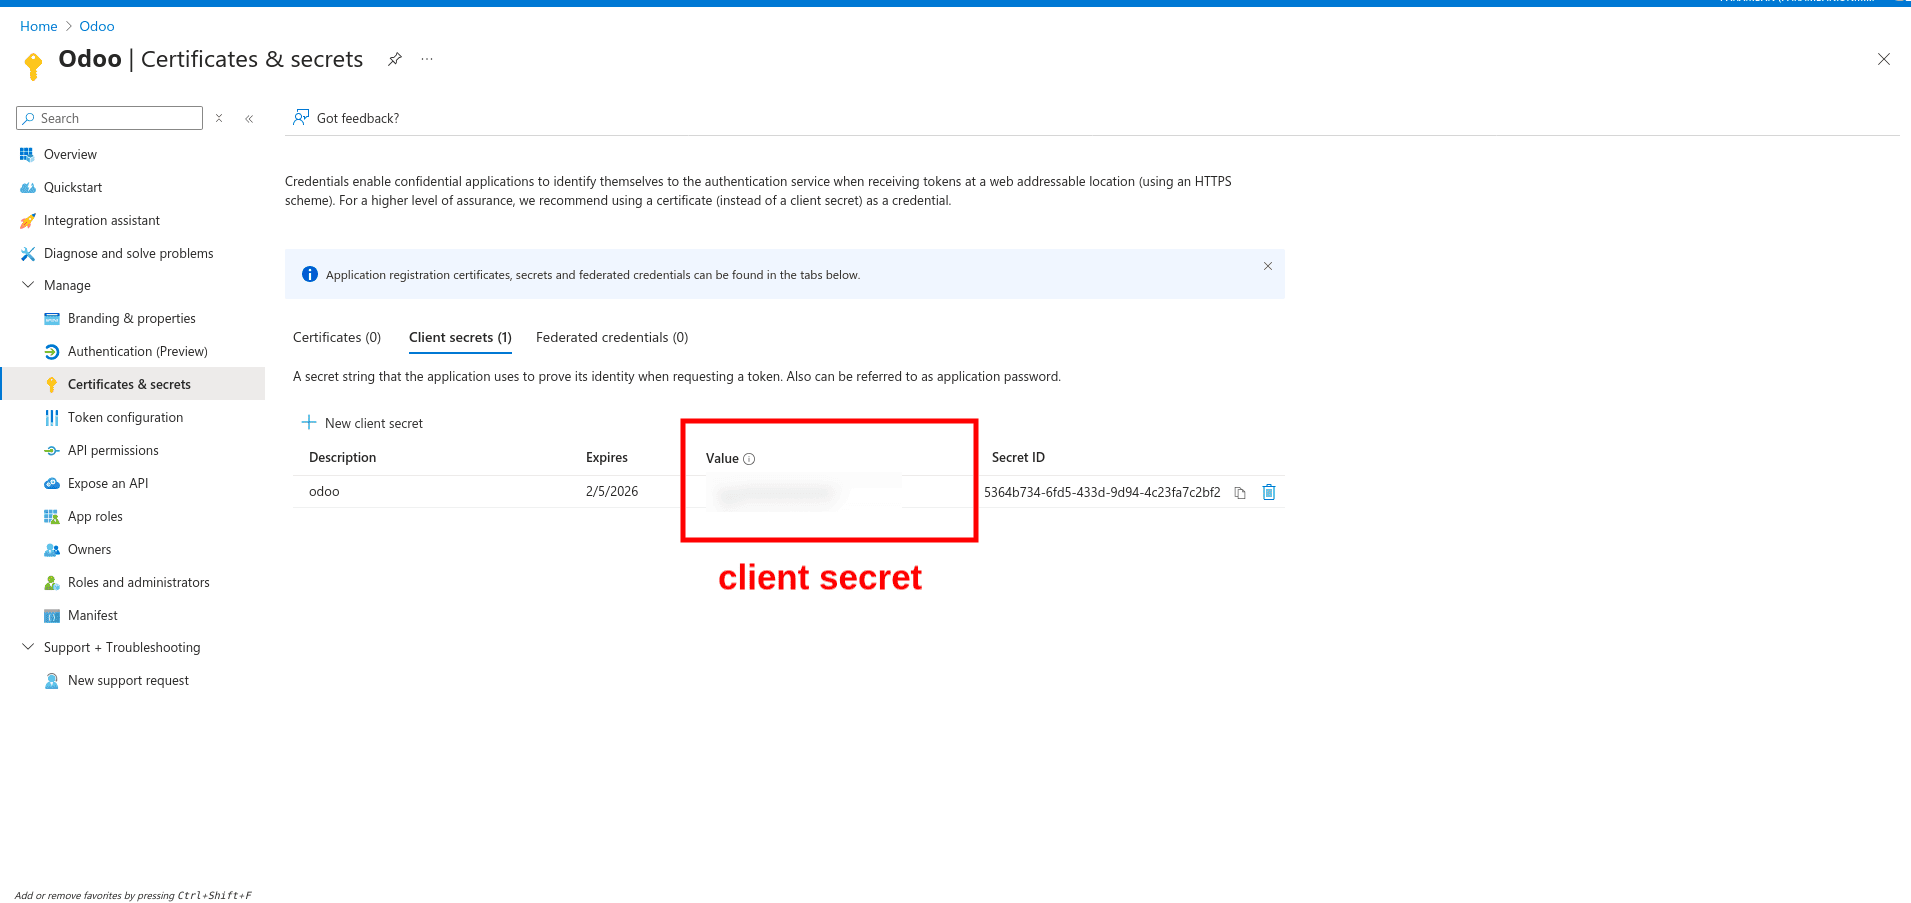
- Copy the Value immediately; you won’t see it again.
Open the Certificates & secrets view, click New client secret, then enter a description and select the expiration period. Finally, click Add.
The generated client secret will appear in the list view. You can copy it from there, as shown below.
5. Step 4: Store Credentials in Odoo
You’ll need these values:
- Client ID
- Client Secret
- Tenant ID (found in Azure Active Directory > Overview)
- Tenant Name (e.g., mycompany)
- SharePoint Site Name (e.g., Documents)
- Drive Name (the SharePoint document library name)
Store them in Odoo’s System Parameters (Settings > Technical > Parameters > System Parameters):
| Key | Value |
| sharepoint_folder_integration.client_id | <your-client-id> |
| sharepoint_folder_integration.client_secret | <your-client-secret> |
| sharepoint_folder_integration.tenant_id | <your-tenant-id> |
| sharepoint_folder_integration.tenant_name | <your-tenant-name> |
| sharepoint_folder_integration.site_name | <your-site-name> |
| sharepoint_folder_integration.drive_name | <your-drive-name> |
6. Step 5: Generate an Access Token from Odoo
Once credentials are stored, you can use Python’s requests library inside Odoo to request a token from Microsoft.
import requests
url = f"https://login.microsoftonline.com/{tenant_id}/oauth2/v2.0/token"
data = {
    'grant_type': 'client_credentials',
    'client_id': client_id,
    'client_secret': client_secret,
    'scope': 'https://graph.microsoft.com/.default'
}
response = requests.post(url, data=data)
token = response.json()['access_token']
print(token)
If everything is correct, you’ll receive an access token — this is required for all Graph API calls.
7. Step 6: Making Your First Graph API Calls
With the token, you can now interact with SharePoint.
Example 1: Get Site ID
headers = {'Authorization': f'Bearer {token}'}
url = f"https://graph.microsoft.com/v1.0/sites/{tenant_name}.sharepoint.com:/sites/{site_name}"
response = requests.get(url, headers=headers)
print(response.json())
Example 2: Get Drive (Document Library) ID
url = f"https://graph.microsoft.com/v1.0/sites/{site_id}/drives"
response = requests.get(url, headers=headers)
print(response.json())
Example 3: List Files in a Folder
url = f"https://graph.microsoft.com/v1.0/sites/{site_id}/drives/{drive_id}/root:/Documents:/children"
response = requests.get(url, headers=headers)
print(response.json())
Response Example:
{
  "@odata.context": "https://graph.microsoft.com/v1.0/$metadata#drives('b!d34f8a7cc1234567890abcd12345678')/items",
  "value": [
   {
      "@odata.type": "#microsoft.graph.driveItem",
      "id": "01XYZ1234567890ABC",
      "name": "ProjectPlan.docx",
      "webUrl": "https://mycompany.sharepoint.com/sites/ProjectX/Shared%20Documents/ProjectPlan.docx",
      "createdDateTime": "2025-07-28T09:30:00Z",
      "lastModifiedDateTime": "2025-07-30T16:20:00Z",
      "size": 56012,
      "file": {
        "mimeType": "application/vnd.openxmlformats-officedocument.wordprocessingml.document"
      }
    }
    }
  ]
}
8. Next Steps
Once you can authenticate and make API calls, you can:
- Upload files to SharePoint from Odoo
- Sync Odoo records with SharePoint folders
- Automate document creation during sales, CRM, or project workflows
Conclusion
Integrating Odoo with SharePoint via Microsoft Graph API opens the door to powerful document automation.
In this guide, you learned how to:
- Set up Azure credentials
- Store them securely in Odoo
- Generate an access token
- Make basic API calls to SharePoint
From here, you can expand the integration for custom workflows, like automatically creating folders, uploading contracts, or syncing reports.
To read more about How to Use Odoo 18 Webhooks to Connect External Systems, refer to our blog How to Use Odoo 18 Webhooks to Connect External Systems.