In many business workflows, such as point-of-sale (POS) systems, label printing, or automated document generation, you often need a reliable way to send print jobs directly to a physical printer without any manual intervention.
However, web browsers and most cloud apps can’t print directly to local devices for security reasons.
This is where QZ Tray provides the solution.
QZ Tray is an open-source, cross-platform utility that acts as a secure bridge between your applications and local printers. It supports both raw printer commands (like ESC/POS, ZPL, or CPCL) and standard document printing (like PDFs or images).
In this guide, we’ll set up QZ Tray on a Linux machine and use Node.js to build a small server that can receive print requests and forward them to any connected printer. Here’s what we’ll cover:
- Install QZ Tray on Linux – to enable communication with your system’s printers.
- Connect printers using Node.js and expose a printing API with Express – allowing applications to send print jobs over HTTP.
In simple terms, your Linux system will become a centralized printing server.
Remote applications or services will be able to send an HTTP request (with the printer name and data), and your local QZ Tray will handle the actual printing process — automatically and securely.
Step 1: Install QZ Tray on Linux
QZ Tray is the bridge between your Node.js application and the printers connected to your Linux machine. It runs as a background service, listening for secure WebSocket connections from applications that send print jobs.
From the official website https://qz.io download the application or install it directly using the command
wget -qO - qz.sh | bash
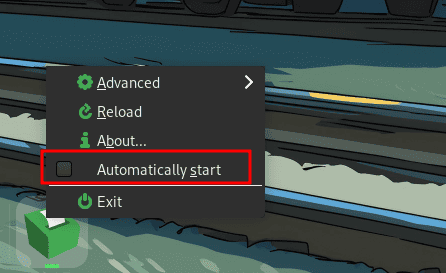
Now open the QZ Tray application to start the service. Using the checkbox shown below we can automatically start QZ Tray on startup of the system.
Right now, all the printing functions in QZ Tray ask for user permission before printing. To make the process automatic without user input we need to generate a certificate, as mentioned in the documentation https://qz.io/docs/generate-certificate.
Step 2: Setting Up Printing Server
First, we need to install node and npm in our linux machine.
sudo apt update
sudo apt install nodejs npm -y
Verify the installation using
node -v
npm -v
Now we can create our project directory and install dependencies.
mkdir print_server
cd print_server
npm init -y
Make sure the type in the package.json file is “module” instead of “commonjs”.
Now we need to install the required packages.
npm install express qz-tray ws
Here’s a minimal server.js file code for connecting to QZ Tray using express
import express from "express";
import qz from "qz-tray";
import ws from "ws";
// Initialize Express
const app = express();
app.use(express.json({ limit: "10mb" }));
const port = 3000;
// Tell QZ to use the 'ws' library for WebSocket connections
qz.api.setWebSocketType(ws);
// Connect to QZ Tray on the Linux machine
async function connectQZ() {
  try {
    await qz.websocket.connect();
    console.log("Connected to QZ Tray");
  } catch (err) {
    console.error("Failed to connect to QZ Tray:", err.message);
  }
}
// Run the connection
await connectQZ();
// Printing API
app.post("/print", async (req, res) => {
  try {
    // Ensure QZ Tray is connected
    if (!qz.websocket.isActive()) {
      return res.status(500).json({ message: "QZ Tray Offline" });
    }
    const data = req.body.data; // print data (PDF base64, raw text, etc.)
    // Get default printer
    const printer = await qz.printers.getDefault();
    // Simple pdf printing config
    const config = qz.configs.create(printer);
    // Send print command
    await qz.print(config, data);
    res.status(200).json({ message: "Print successful" });
  } catch (err) {
    res.status(500).json({ error: err.message });
  }
});
// Start the server
app.listen(port, async () => {
  console.log(`Server running at http://localhost:${port}`);
});
Run the server using:
node server.js
Now we can write a simple python code to test if the endpoint is working.
import base64
import requests

with open("test.pdf", "rb") as f:
    pdf_data = base64.b64encode(f.read()).decode("utf-8")
response = requests.post(
    "http://localhost:3000/print",
    json={"data": pdf_data},
    headers={
        "Content-Type": "application/json"
    }
)
print(response.status_code, response.text)
If everything is configured correctly, running this Python script will send the PDF and QZ Tray will receive the print job, and then your default printer will print the document.
This confirms that your central print server is functioning. Now that the API is tested manually, the next step is to run it continuously in the background—even after reboots or crashes.
This is where PM2, a process manager for Node.js, becomes very useful. To install pm2 run the following command globally:
sudo npm install -g pm2
Now start our server.js file with
pm2 start server.js --name print-server
Now our printing server will run in the background. Now we need to ensure the printing server starts automatically when our system reboots.
pm2 startup
This command will output a command; copy it and run it in bash. Then run
pm2 save
Now your print server is fully automated.
You now have a fully functional centralized printing server, capable of receiving print requests from anywhere—POS systems, ERPs, mobile apps, or cloud-based platforms.
To read more about How to Connect External Devices to Odoo 18 Point of Sales, refer to our blog How to Connect External Devices to Odoo 18 Point of Sales