Website forms in Odoo 18 are flexible and easy to customize, but in real business scenarios, simple text fields are often not enough. Often, users need to select multiple related records—such as interests, tags, services, or categories—directly from a website form.
This is where Many2Many fields become extremely useful.
In this blog, we will go through the complete implementation process of adding a Many2Many field to an Odoo 18 website form. We’ll start by creating a custom module, defining the backend model, extending the website form, processing the submitted values, and finally installing and testing the module.
Why Use Many2Many Fields in Website Forms?
A Many2Many field allows one record to be linked with multiple records from another model. When this relationship is exposed on a website form, it opens up several possibilities, such as:
- Allowing users to select multiple interests during registration
- Assigning multiple tags to a website submission
- Choosing more than one service or category in a contact form
- Avoiding duplicate fields while collecting structured data
Overall, this approach improves data accuracy, flexibility, and user experience.
Step 1: Create a Custom Module
The first step is to create a new custom module inside your Odoo addons directory. This module will handle both backend logic and frontend form customization.
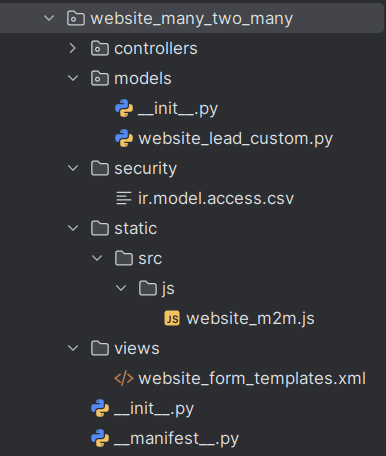
This structure follows Odoo 19 development standards and keeps frontend, backend, and security concerns cleanly separated.
Step 2: Define the Module Manifest
Create the __manifest__.py file to describe and register your module.
# -*- coding: utf-8 -*-
{
   "name": "Website Many2Many Form",
   "version": "19.0.1.0.0",
   "category": "Website",
   "summary": "Add Many2Many fields to Odoo 19 website forms",
   "description": """
       This module demonstrates how to add and handle Many2Many fields
       in Odoo 19 website forms with backend processing.
   """,
   "depends": ["website","crm",],
   "data": [
       "security/ir.model.access.csv",
       "views/website_form_templates.xml",
   ],
   "assets": {
       "web.assets_frontend": [
           "website_m2m_form/static/src/js/website_m2m.js",
       ],
   },
   "installable": True,
   "application": False,
   "license": "LGPL-3",
}
Step 3: Create the Model
Now define a model that includes a Many2Many field.
For this example, users will select multiple CRM tags from the website.
# -*- coding: utf-8 -*-
from odoo import models, fields
class WebsiteLead(models.Model):
   _name = "website.lead.custom"
   _description = "Website Lead with Tags"
   name = fields.Char(string="Name")
   tag_ids = fields.Many2many(
       'crm.tag',      # Related model
       'lead_tag_rel', # Relation table
       'lead_id', 'tag_id',
       string="Tags"
   )
This field allows each website submission to be linked with multiple tags.
Step 4: Add Access Rights
Since website users are public, you must allow record creation.
id,name,model_id:id,group_id:id,perm_read,perm_write,perm_create,perm_unlink
access_website_lead_custom,website.lead.custom,model_website_lead_custom,,1,1,1,1
Step 5: Extend the Website Form (XML)
Next, inherit the Contact Us form and add a multi-select dropdown.
<?xml version="1.0"?>
<odoo>
   <template id="website_m2m_form_template" inherit_id="website.contactus">
       <xpath expr="//form" position="attributes">
           <attribute name="action">/contactus/m2m</attribute>
       </xpath>
       <xpath expr="//input[@name='name']" position="after">
           <div class="form-group mt-3">
               <label for="tag_ids">Tags</label>
               <select name="tag_ids" id="tag_ids"
                       class="form-control" multiple="multiple">
                   <t t-foreach="request.env['crm.tag'].sudo().search([])" t-as="tag">
                       <option t-att-value="tag.id">
                           <t t-esc="tag.name"/>
                       </option>
                   </t>
               </select>
           </div>
       </xpath>
   </template>
</odoo>
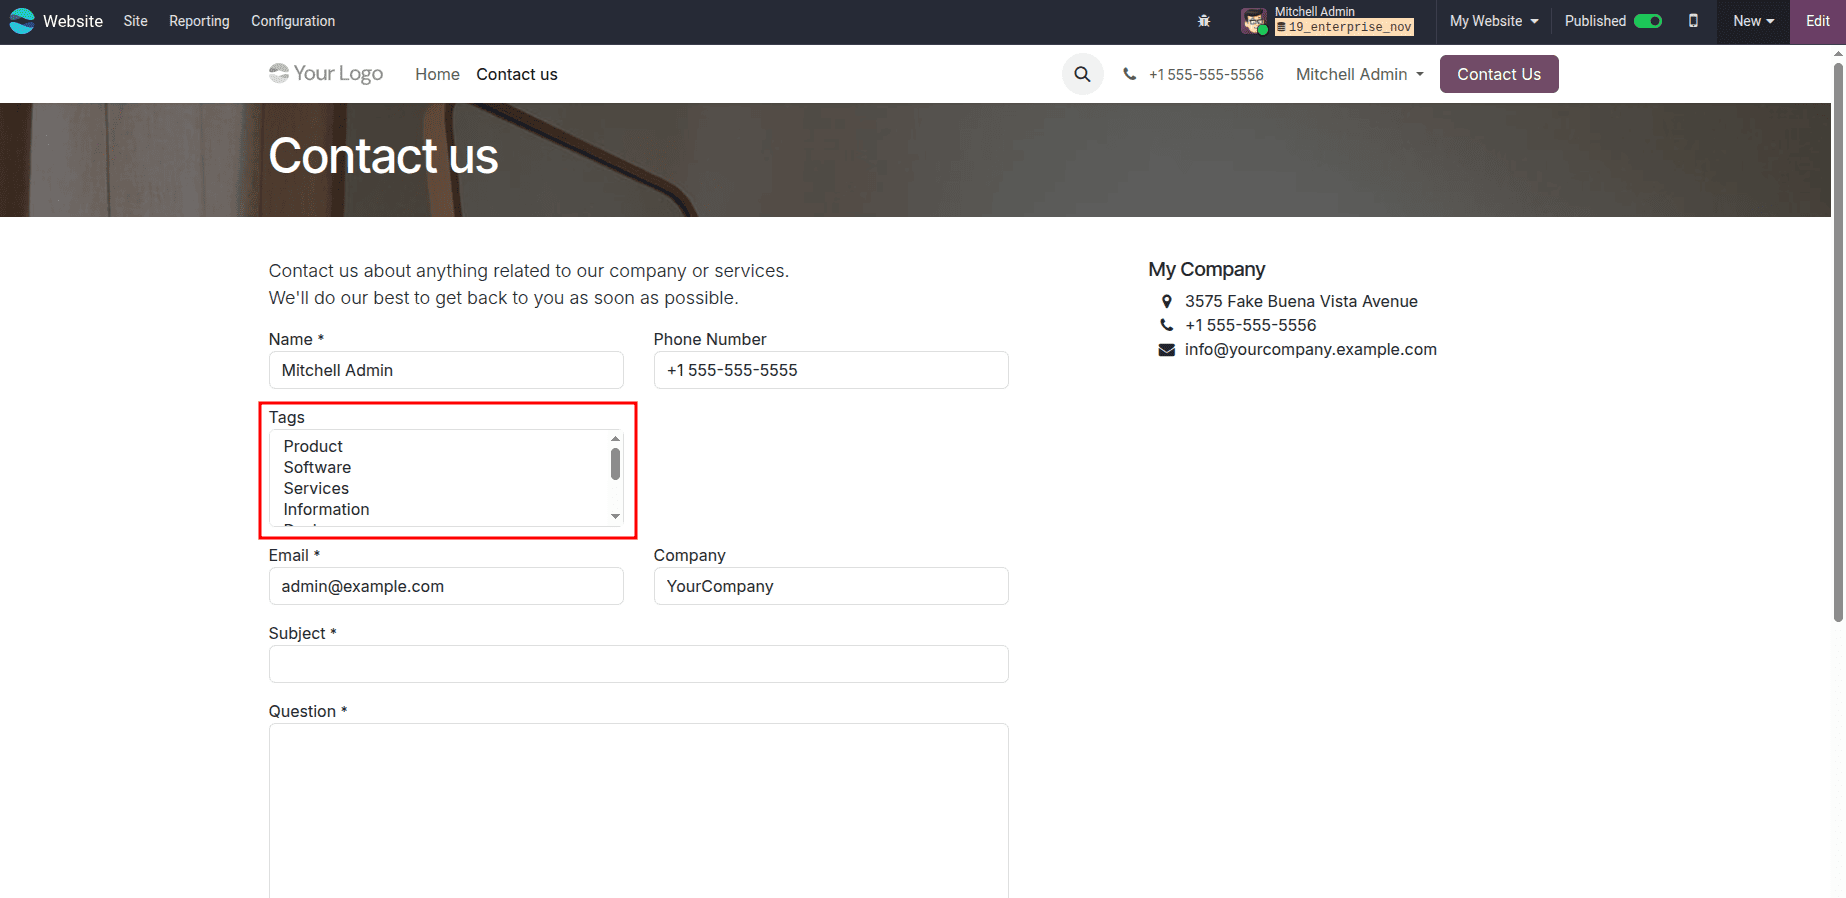
The multiple="multiple" attribute ensures users can select more than one option.
Step 6: Enhance the UI with JavaScript (Optional)
For better usability, you can enhance the dropdown using JavaScript.
odoo.define('website_m2m_form.m2m_widget', function (require) {
   "use strict";
   const publicWidget = require('web.public.widget');
   publicWidget.registry.M2MSelectWidget = publicWidget.Widget.extend({
       selector: '#tag_ids',
       start: function () {
           if ($(this.selector).length) {
               $(this.selector).select2({
                   placeholder: "Select multiple tags",
                   width: '100%'
               });
           }
       },
   });
});
This makes the field searchable and easier to use on large datasets.
Step 7: Handle Form Submission in a Controller
Now capture and save the selected Many2Many values.
from odoo import http
from odoo.http import request
class WebsiteFormController(http.Controller):
   @http.route('/contactus/m2m', type='http', auth='public', website=True, methods=['POST'])
   def website_m2m_form(self, **post):
       tag_ids = post.getlist('tag_ids')
       tag_ids = list(map(int, tag_ids)) if tag_ids else []
       request.env['website.lead.custom'].sudo().create({
           'name': post.get('name'),
           'tag_ids': [(6, 0, tag_ids)],
       })
       return request.redirect('/thank-you')
The (6, 0, tag_ids) command replaces the entire Many2Many relation with the selected values.
Step 8: Install the Module
- Restart the Odoo server
- Enable Developer Mode
- Go to Apps > Update Apps List
- Search for Website Many2Many Form
- Click Install
Once installed, your Contact Us page will support Many2Many selections.
By creating a dedicated module, defining a Many2Many field, extending the website form, and handling submissions through a controller, you can easily add multi-selection capabilities to Odoo 19 website forms. This approach keeps your implementation clean, scalable, and fully aligned with Odoo’s framework standards.
With optional UI enhancements and backend validation, this pattern can be reused across multiple website forms and business scenarios.
To read more about How to Add Many2Many Fields in Odoo17 Website Form, refer to our blog How to Add Many2Many Fields in Odoo17 Website Form.