Odoo 20 is the latest generation of Odoo’s open-source business management platform, bringing together a wide range of applications for managing everyday business operations. From sales and accounting to inventory, manufacturing, and website management, Odoo provides businesses with a unified platform for handling their processes.
Odoo is often deployed on Linux servers in production environments, but Windows is also a convenient choice for developers who want to build and test Odoo locally. A Windows-based setup allows developers to work with the Odoo source code, create custom modules, and debug their changes without needing a separate Linux machine.
In this guide, we’ll walk through the steps to set up an Odoo 20 development environment on Windows using PyCharm, including the required dependencies, PostgreSQL configuration, source code setup, and PyCharm configuration.
Prerequisites
For Odoo 20 development on Windows + PyCharm, the basic requirements are:
| Requirement | Recommended |
| Windows | Windows 10/11 64-bit |
| Python | 3.12+ |
| PostgreSQL | 16+ |
| Git | Latest 64-bit |
| PyCharm | Community/Professional, current version |
| Node.js + npm | Needed for some frontend/RTL tooling |
| wkhtmltopdf | 0.12.6 for PDF reports |
| RAM | 8 GB minimum; 16 GB recommended |
| Storage | 20–30 GB free recommended |
Step 1: Install Python
Python is required to run the Odoo server and its supporting packages. Odoo 20 requires Python 3.12 or later.
First, check whether Python is already installed on your system by opening Command Prompt and running:
python --version
If the installed version is older than the required version, download the installer from the Python Downloads.
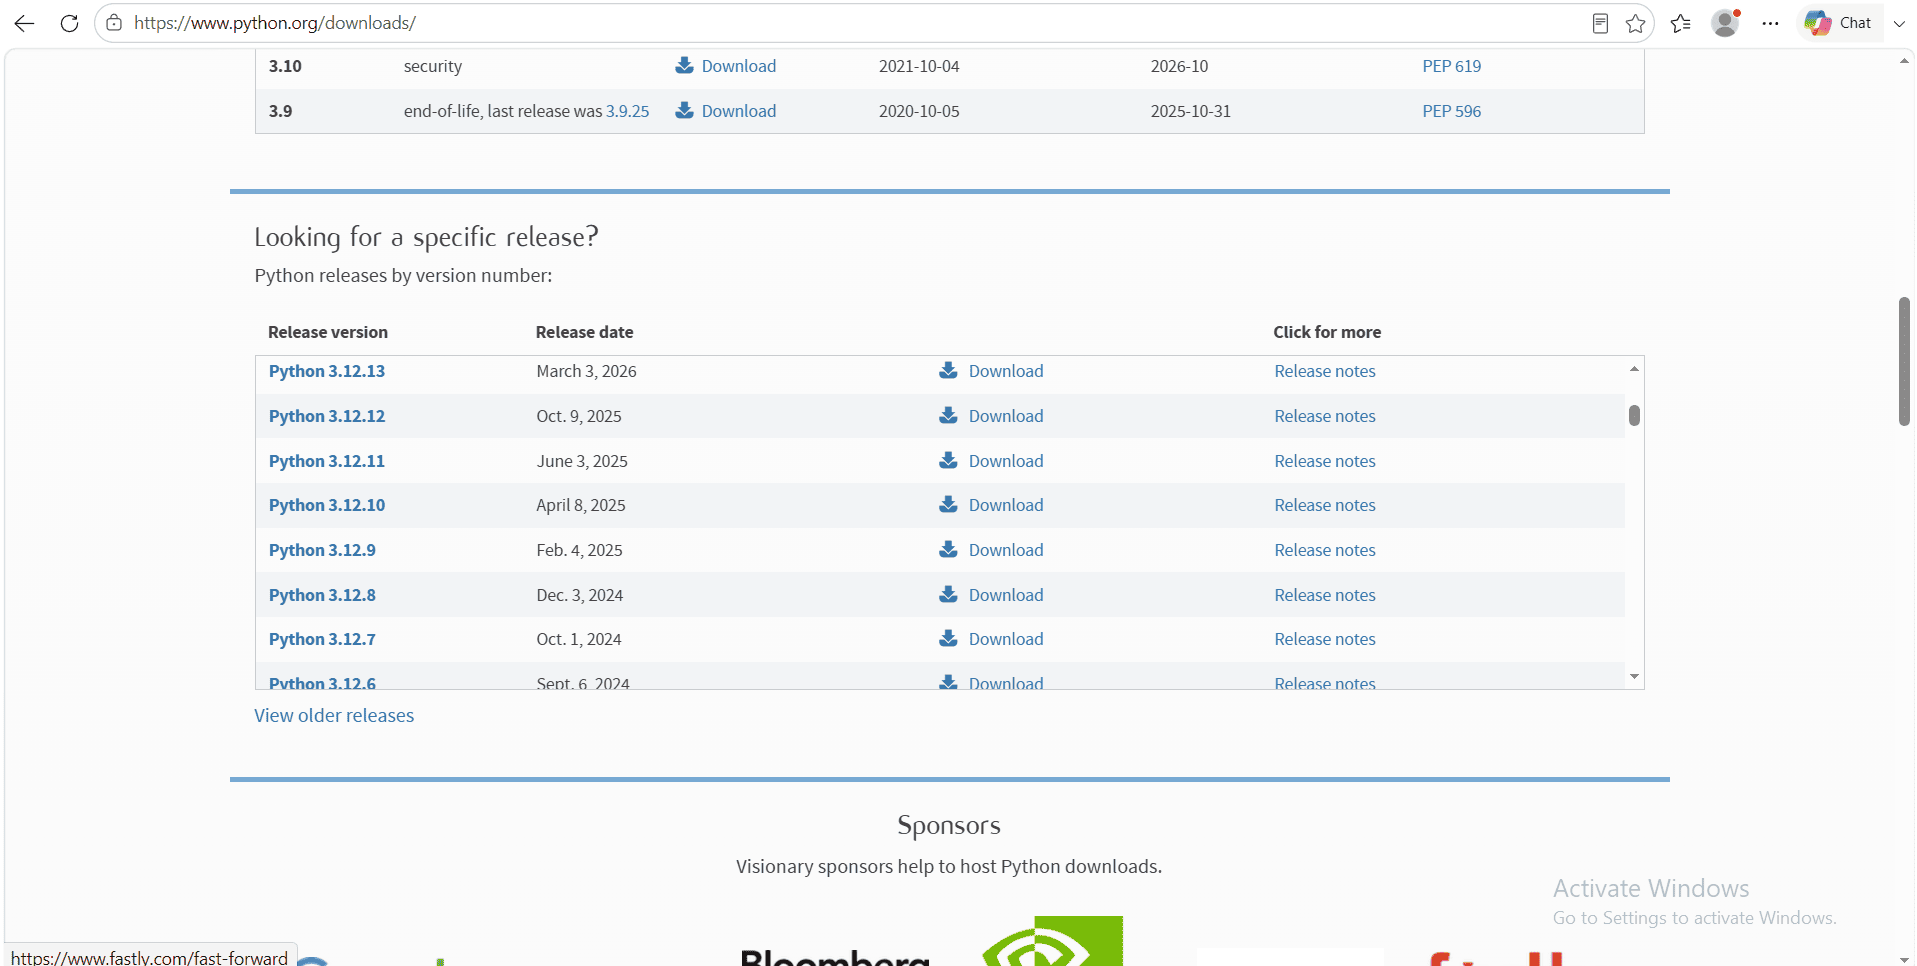
Choose the python version you want to install.
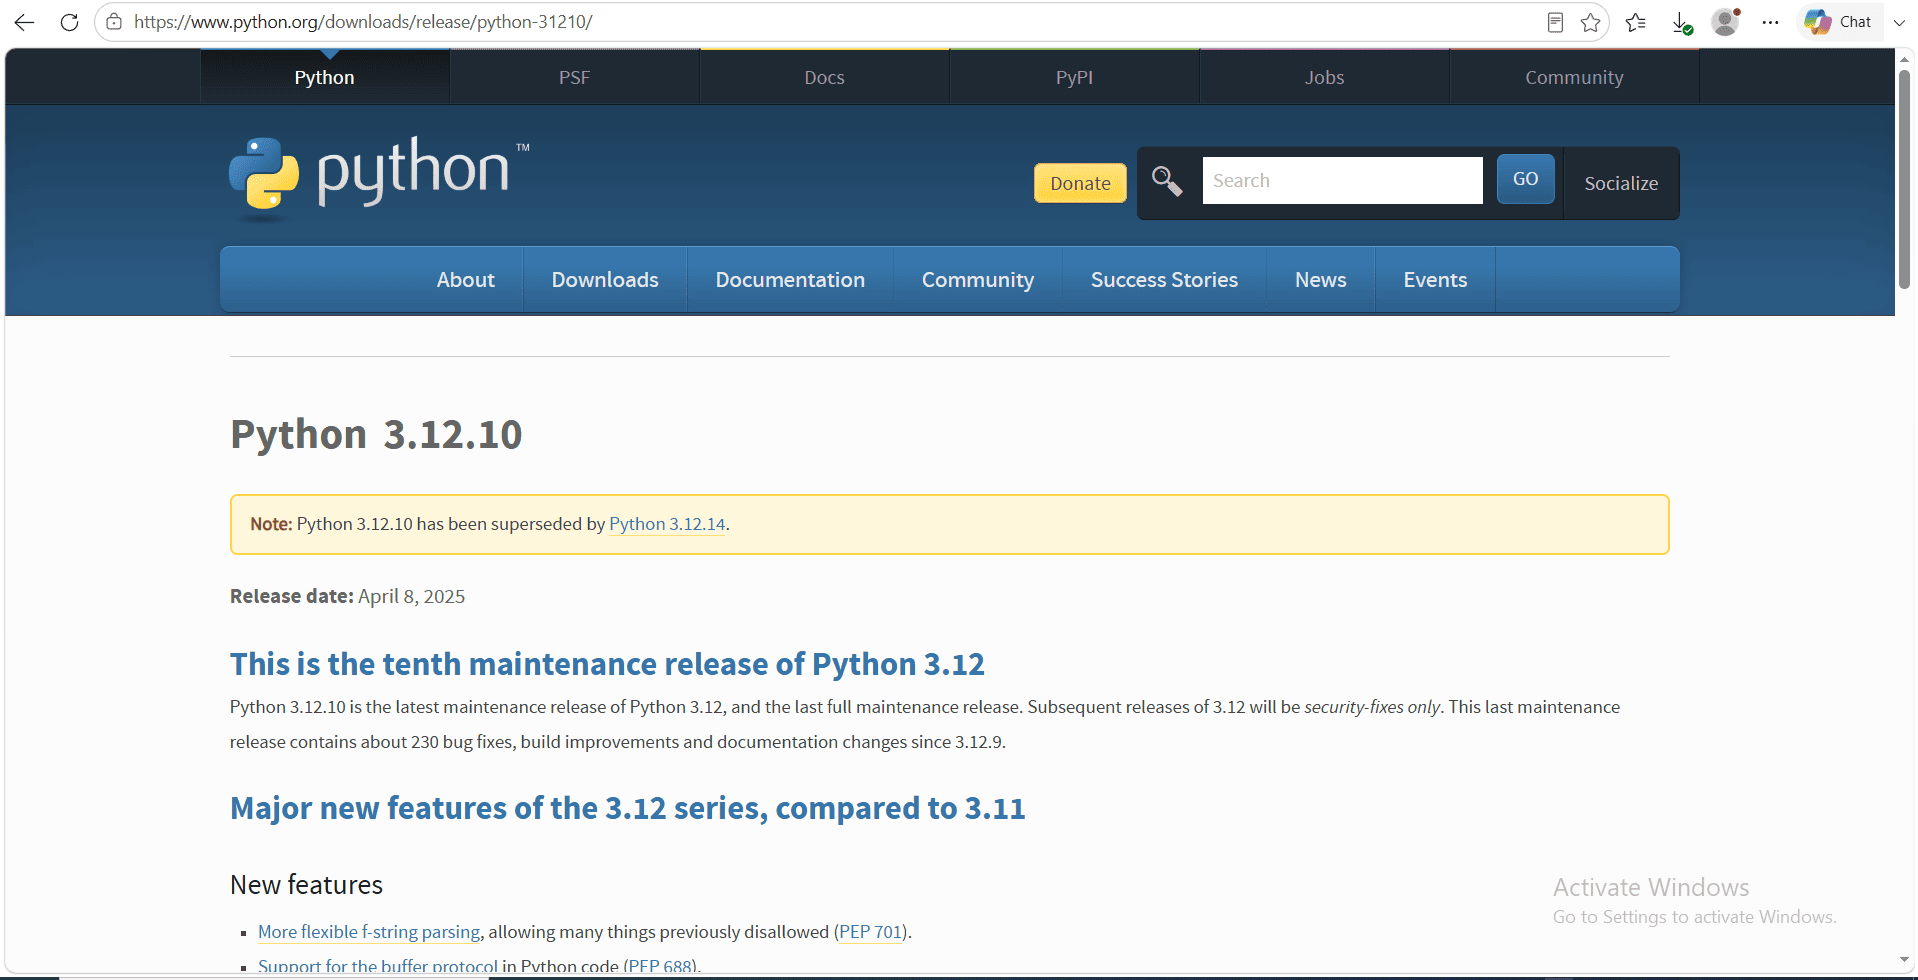
When scroll down you can see the windows installer(64). Choose that.
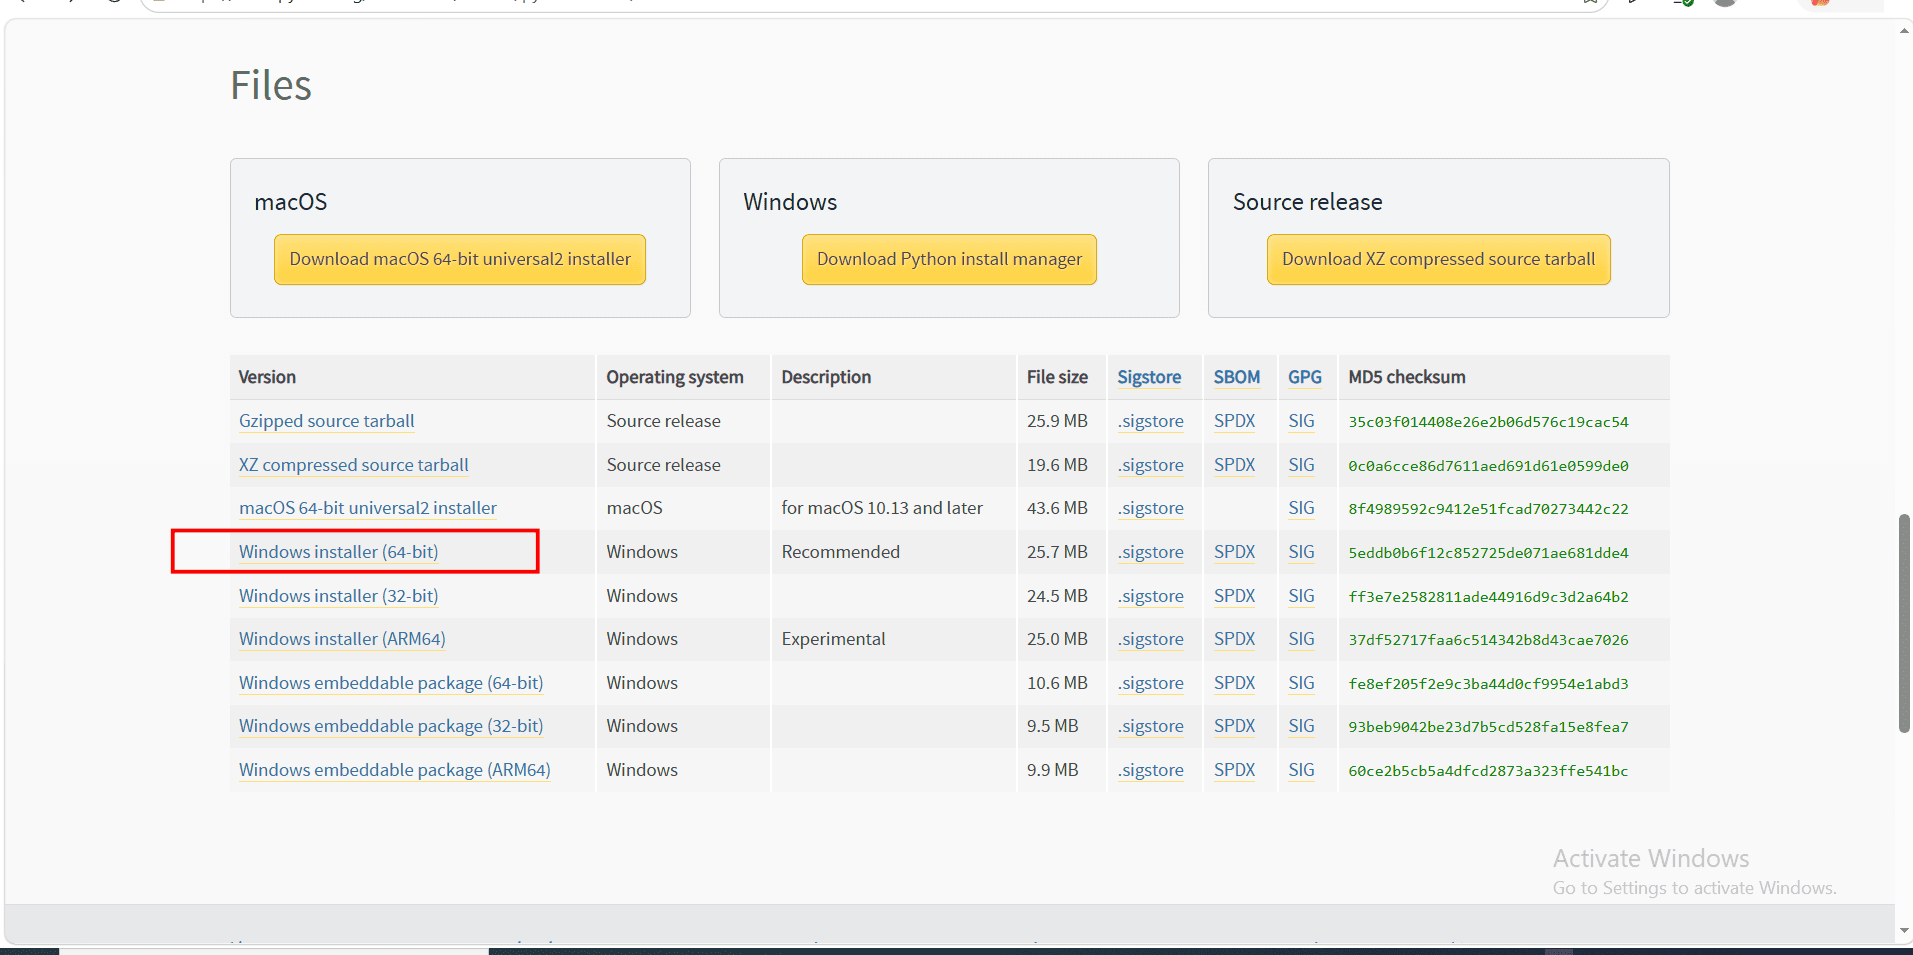
After downloading the installer, open it from the downloads folder in the system.
Select “Custom Installation” during the setup process, and make sure “Add Python 3.12 to PATH” is checked before proceeding with the installation.
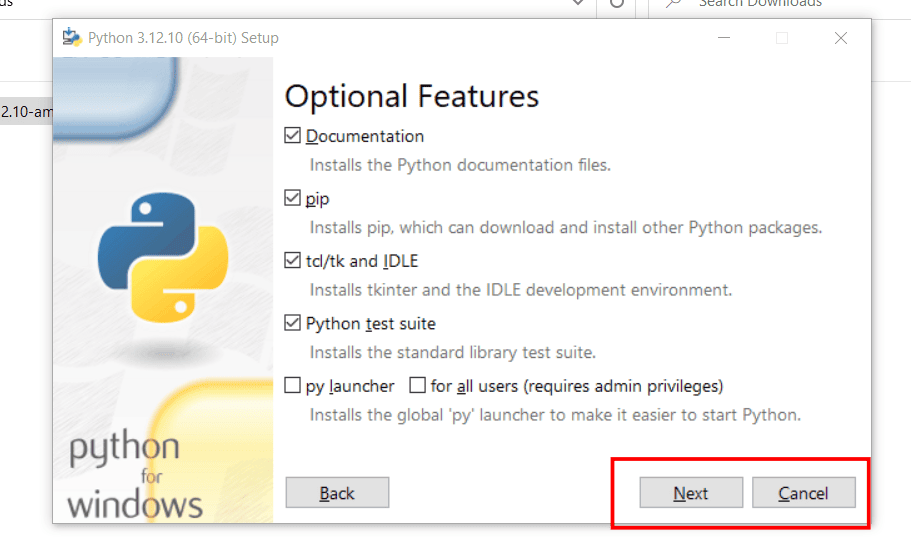
On the Optional Features page, select all available checkboxes like the given image and click “Next”.
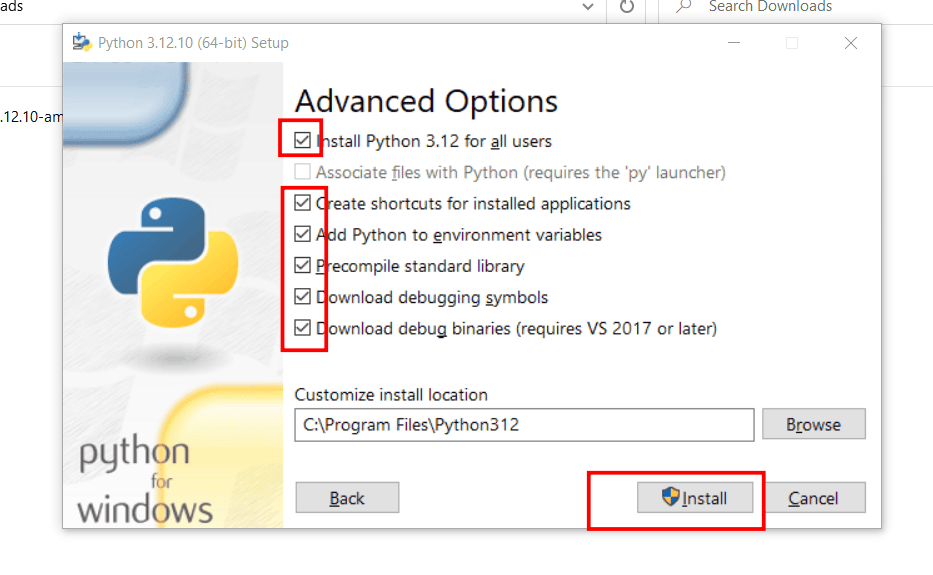
Under Advanced Options, select the first five checkboxes and then click “Install” to continue.
Step 2: Install PostgreSQL
To install PostgreSQL on your system, go to the official PostgreSQL website and download the installer from then follow the installation instructions.
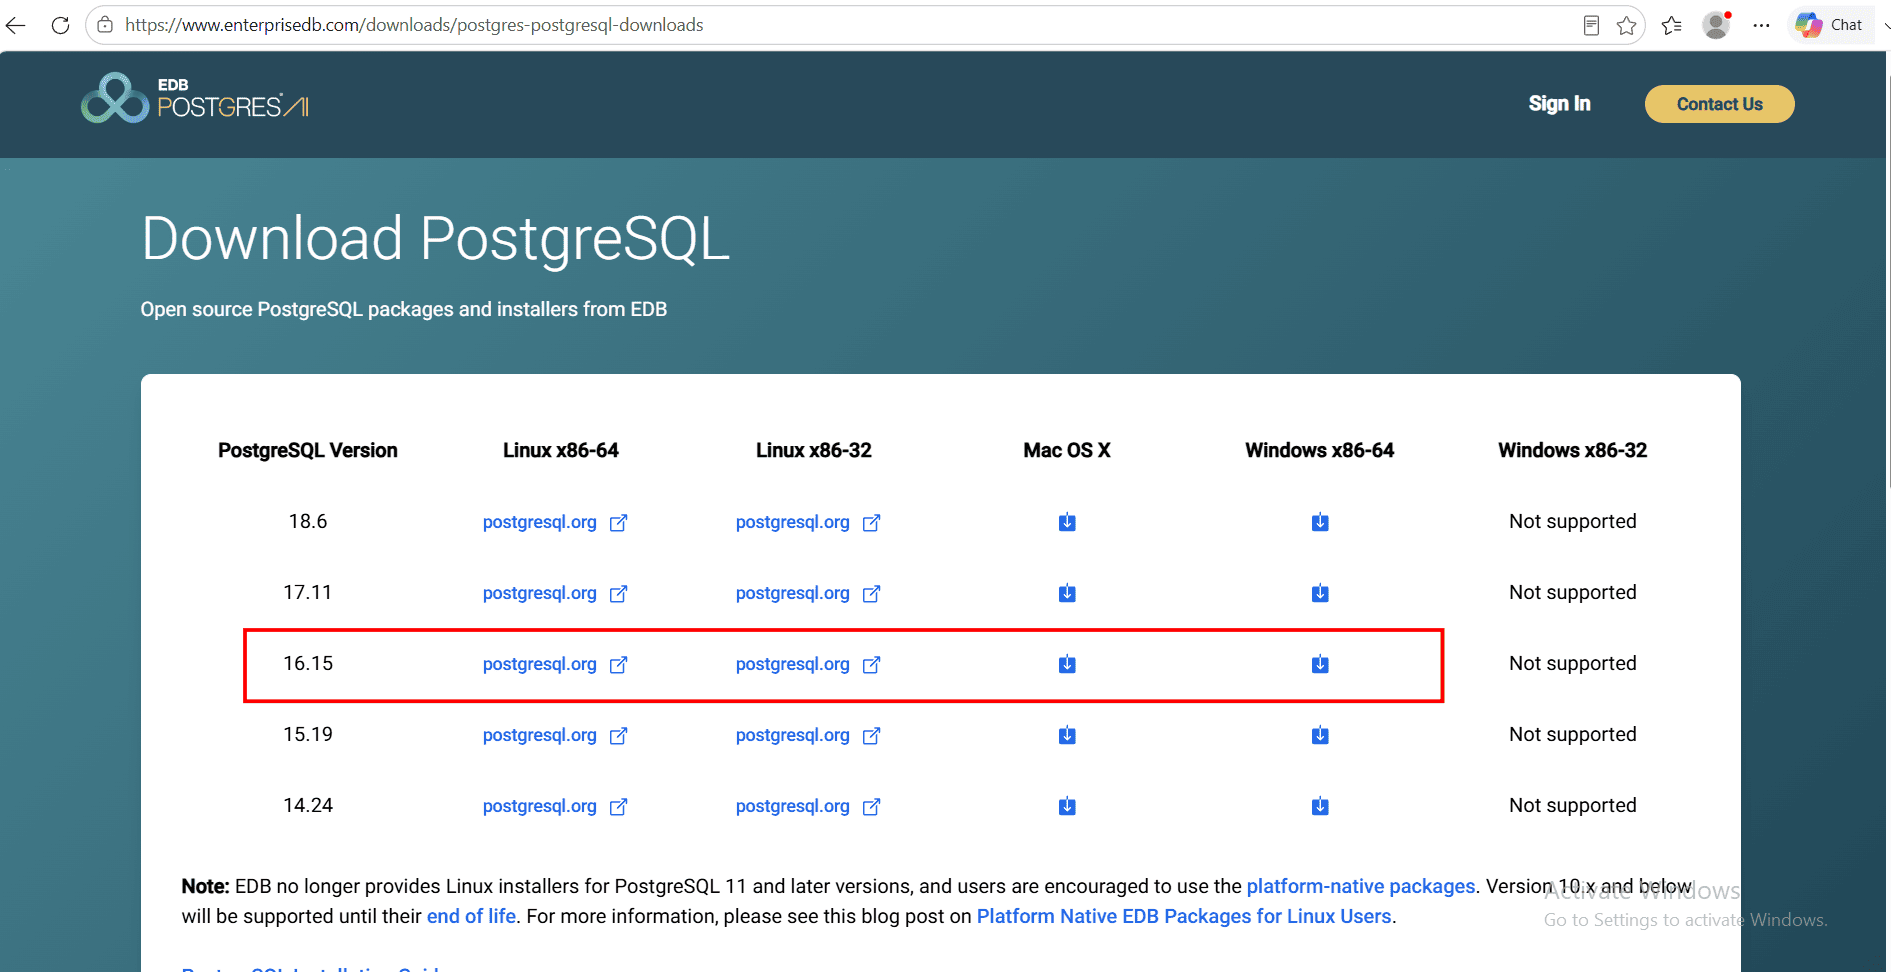
For the best compatibility, it is recommended to use PostgreSQL 16 or a newer version. On the download page, find the “Windows x86-64” section and click the download icon to start downloading the installer.
Once downloaded, run the installer.
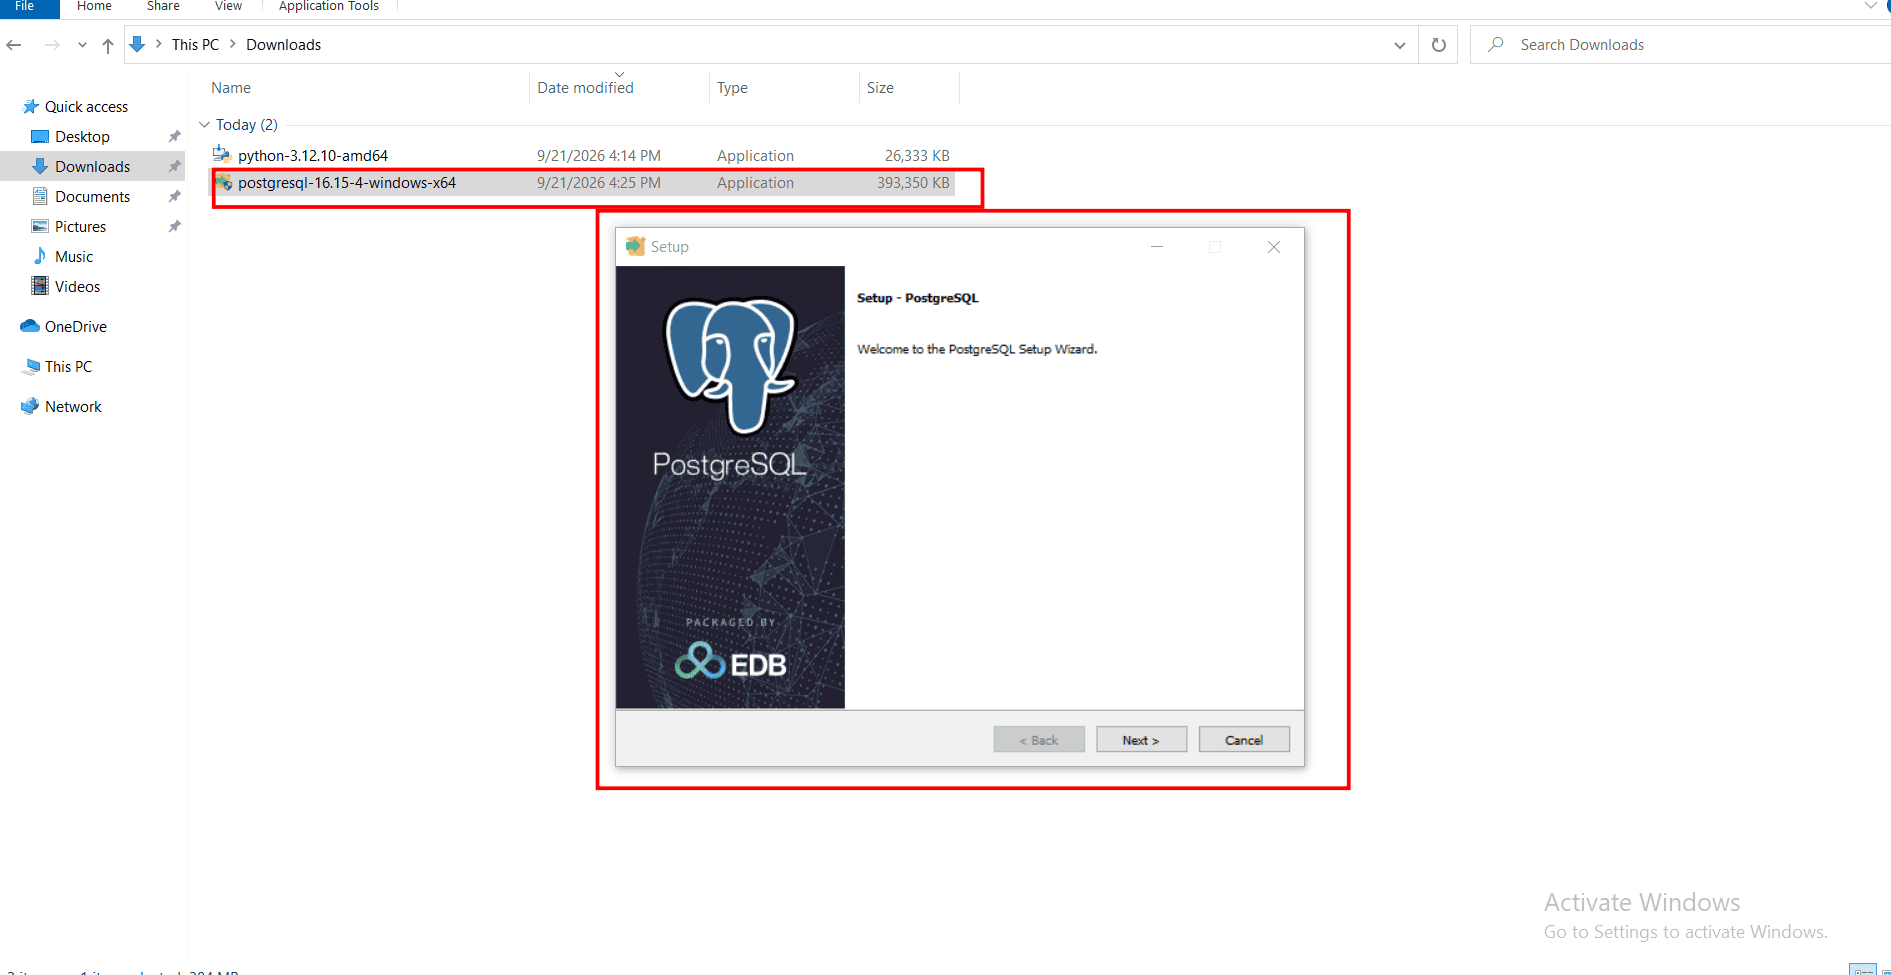
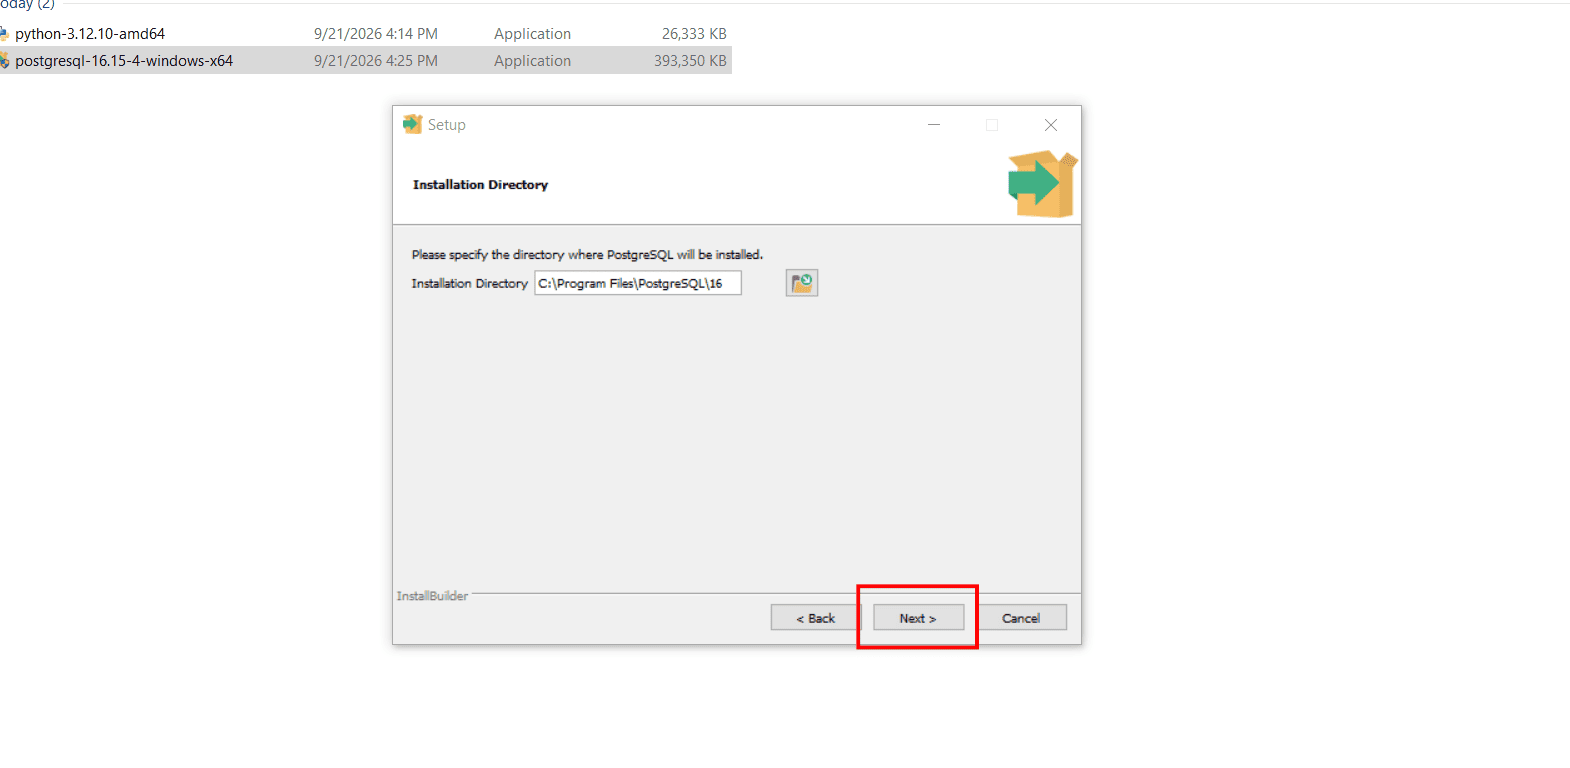
click the Next button to start the setup process.
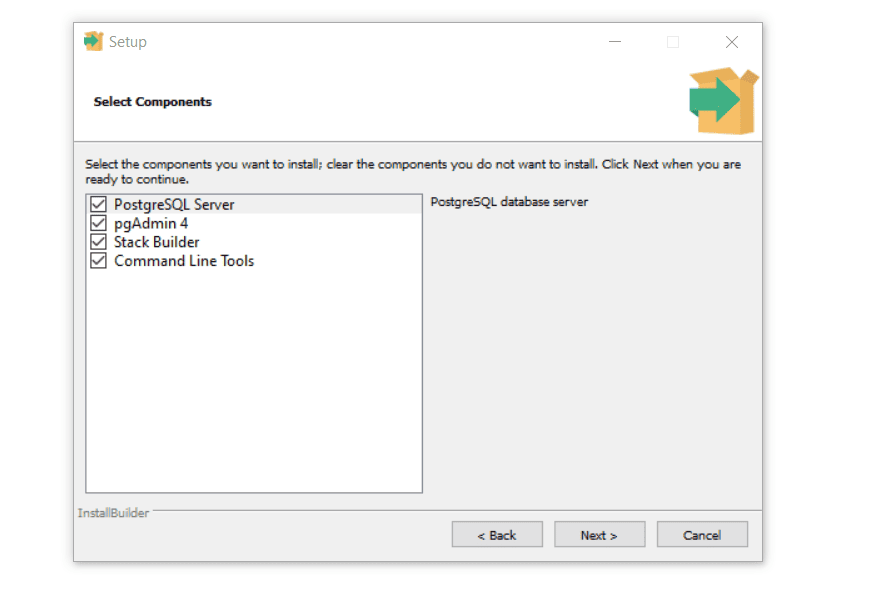
On the “Select Components” page, ensure that you check all available checkboxes.
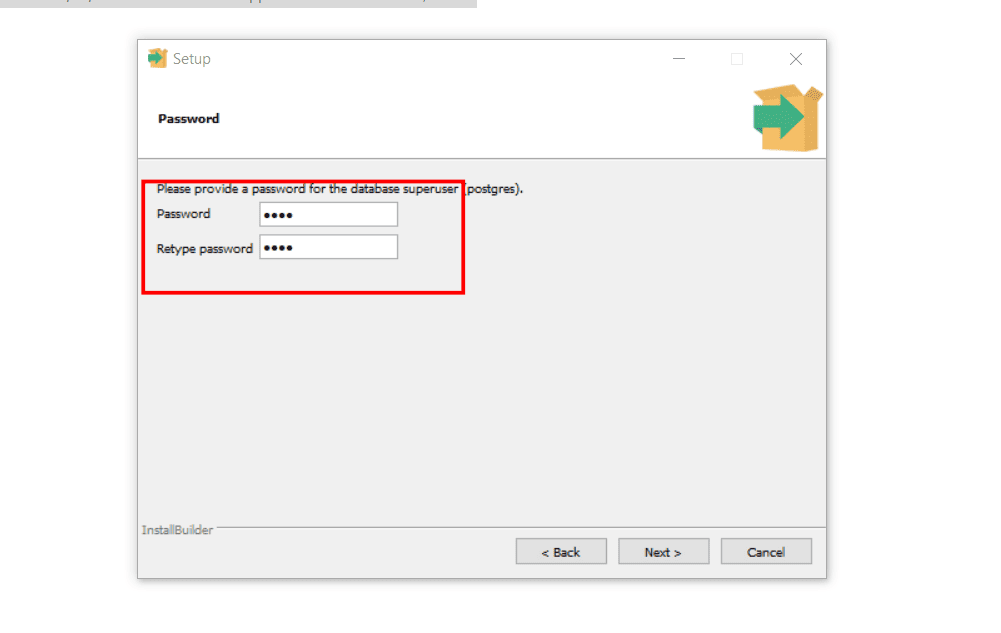
After enabling this option, click the Next button, and you will be able to set the password for the superuser account. Leave all other settings at their default values and continue with the installation.
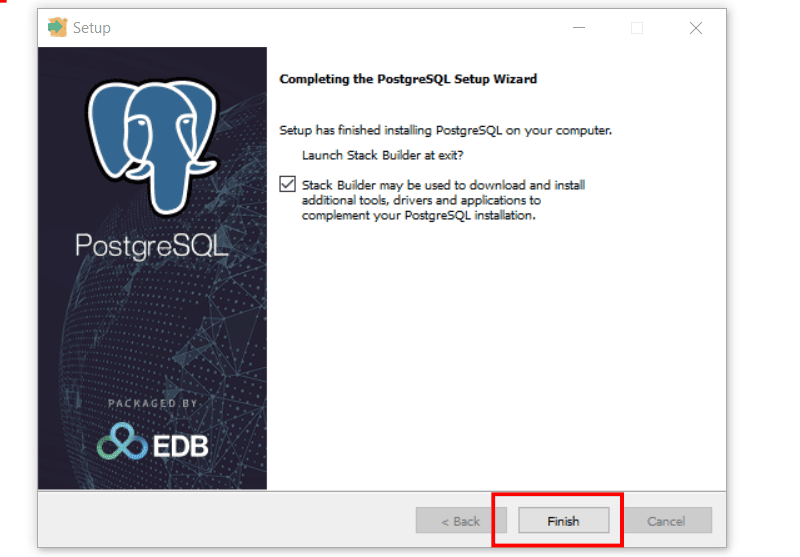
After finishing the installation, a postgresql setup wizard will appear. Untick the Stack builder download and click on Finish.
Check your computer pgadmin is installed now.
Step 3: Configuring pgAdmin 4 and PSQL
Since pgAdmin 4 was included during the PostgreSQL installation under “Select Components,” it should already be available on your system. Open pgAdmin 4 to start the configuration.
In the Object Explorer on the left, expand “Servers.” pgAdmin will then ask you to create a master password, which is used to protect and encrypt your saved database connection credentials.
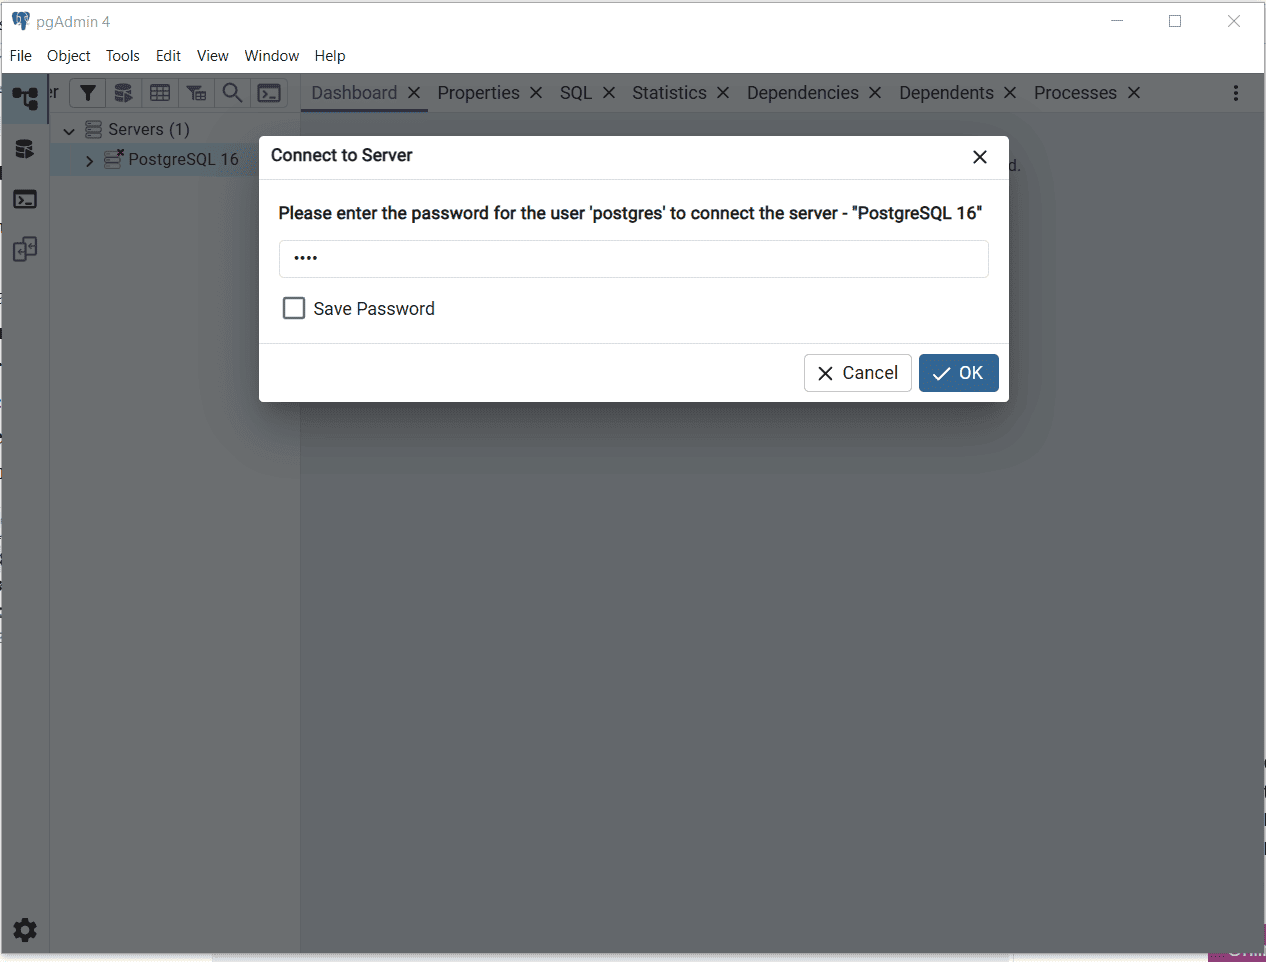
After expanding “Servers,” open your PostgreSQL instance, which is usually displayed as “PostgreSQL” or “Postgres.” Then locate “Login/Group Roles.” Right-click it and select Create > Login/Group Role to add a new role. Enter the required role name and configure its privileges and other settings according to your requirements.
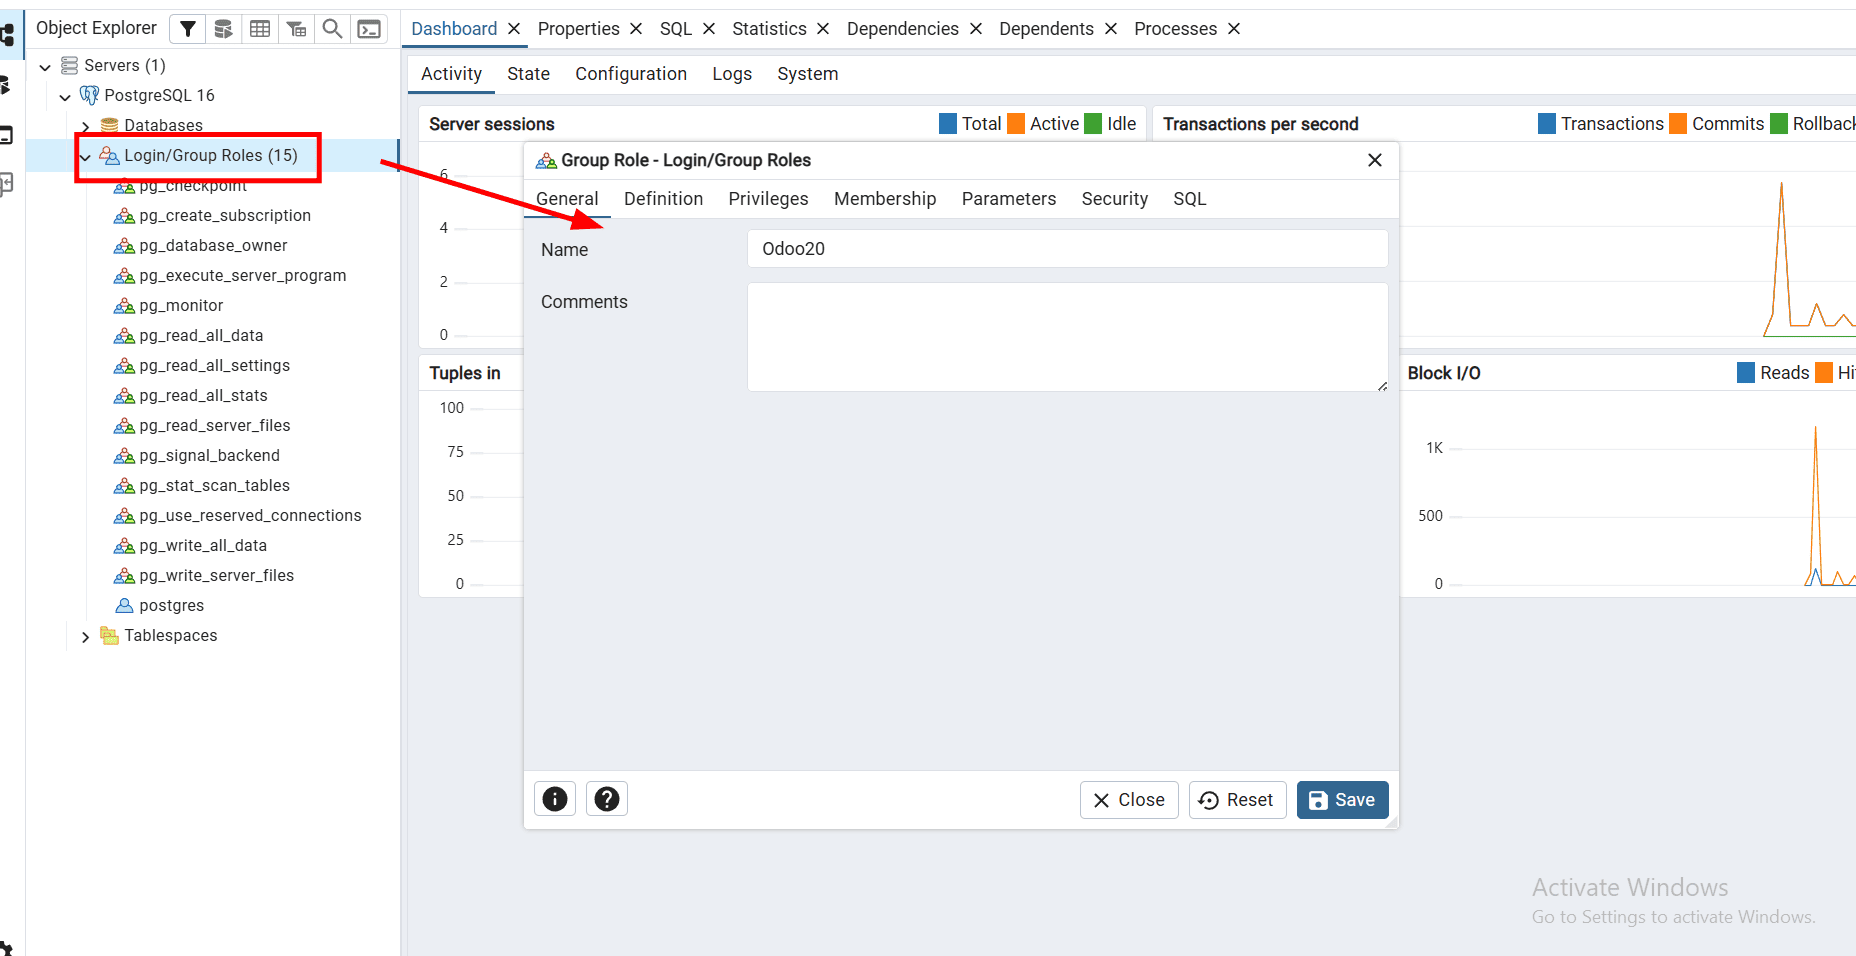
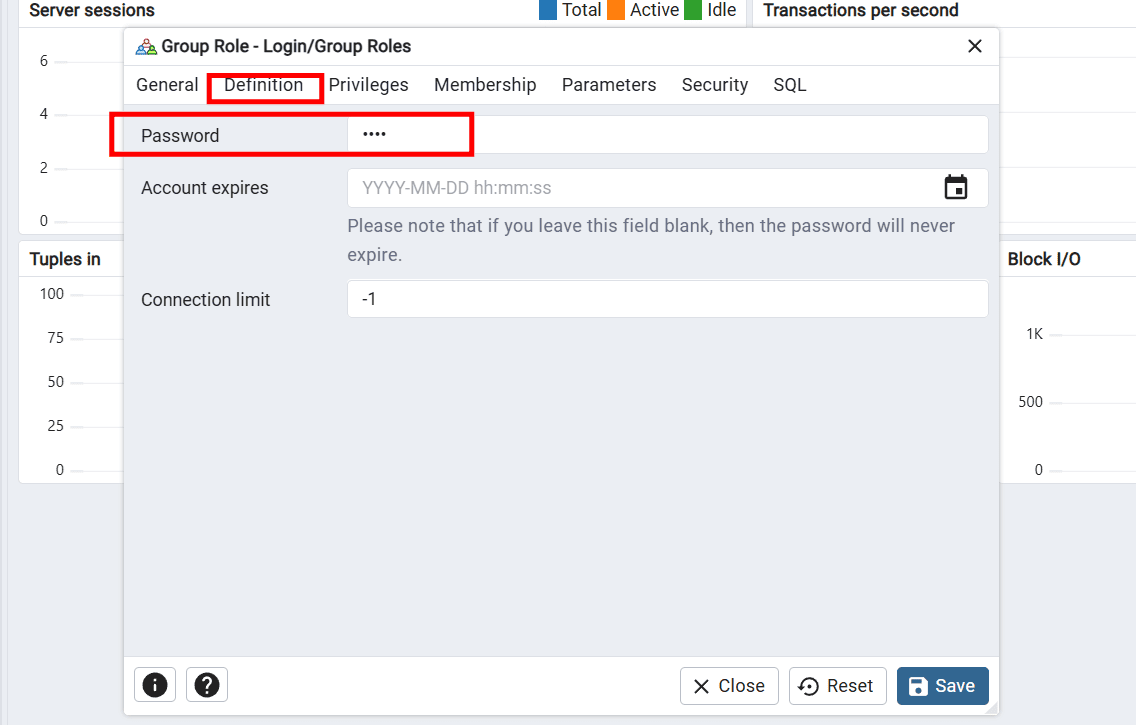
In the Create - Login/Group Role window, open the Definition tab and enter a password for the new PostgreSQL role. This password will be used to authenticate the role when connecting to the PostgreSQL server, so choose a strong password and keep it safe for later configuration.
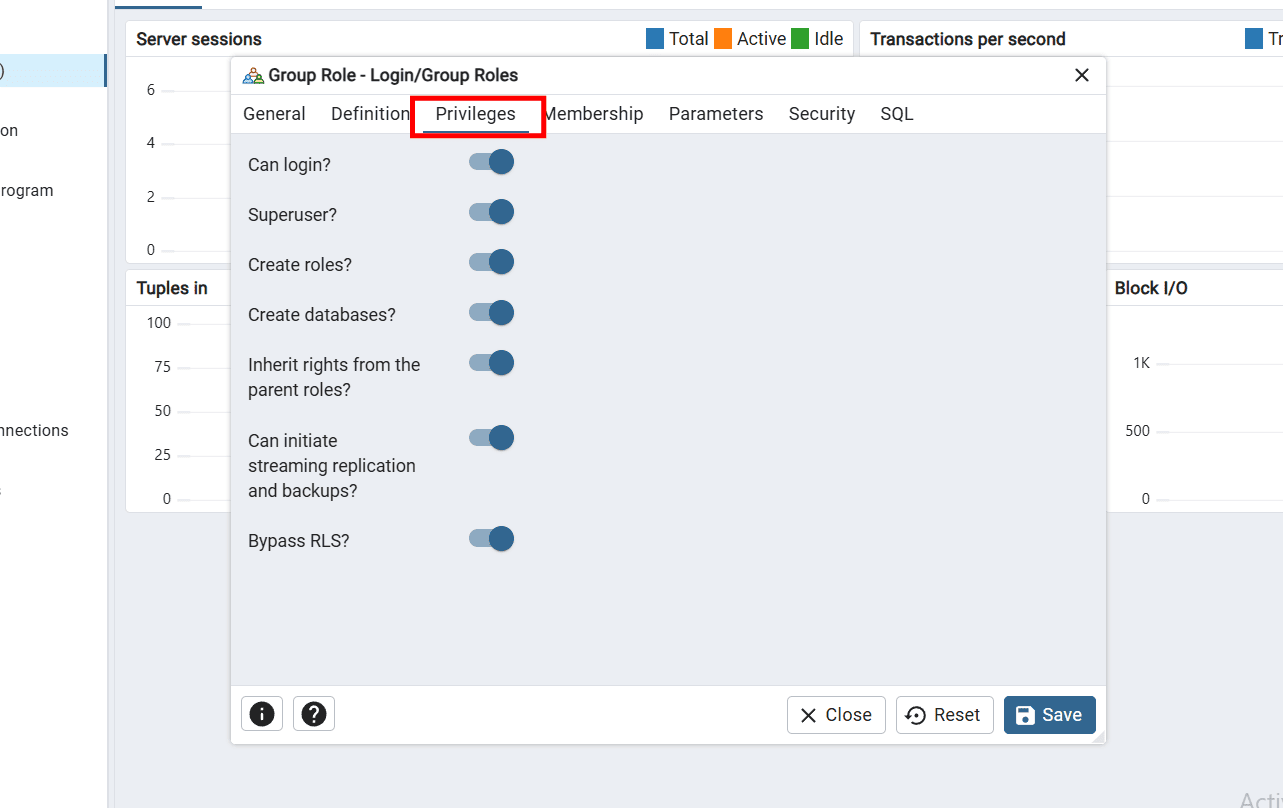
Enable all options from the “Privileges” tab.
Step 4: Installing the C++ Build Tools
Odoo 20 is primarily developed in Python, so a C++ compiler is not required for every Odoo installation. However, some Python dependencies and PostgreSQL extensions contain native C/C++ code and may need to be compiled on Windows.
Visual Studio C++ Build Tools provides the MSVC compiler and Windows SDK required for this compilation.
C++ Build Tools may be required when:
- Installing a Python dependency that does not have a compatible pre-built Windows wheel.
- Building native Python packages from source.
- Installing the pgvector PostgreSQL extension required for Odoo AI features.
For a basic Odoo 20 development setup, you may not use the C++ compiler directly. However, installing the Desktop development with C++ workload provides a complete build environment and helps avoid compilation errors when native dependencies are required.
To get started, download the C++ Build Tools installer from the official Visual Studio website:
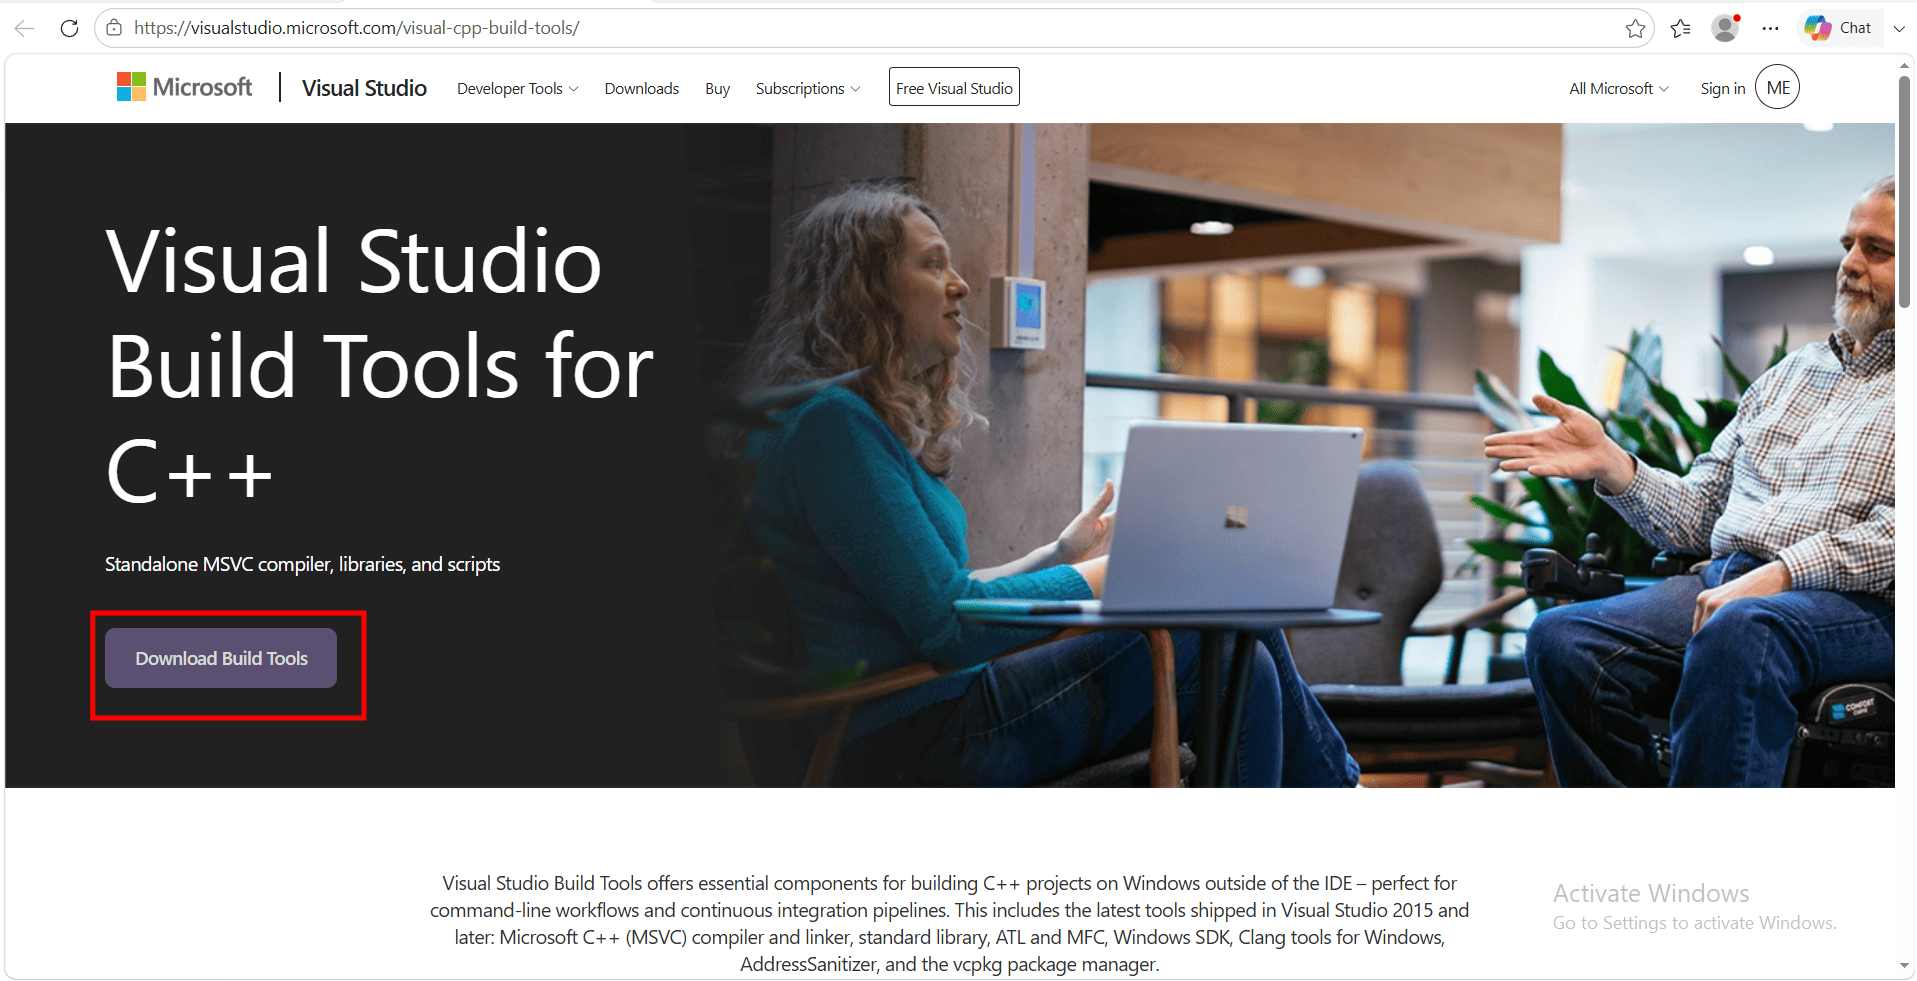
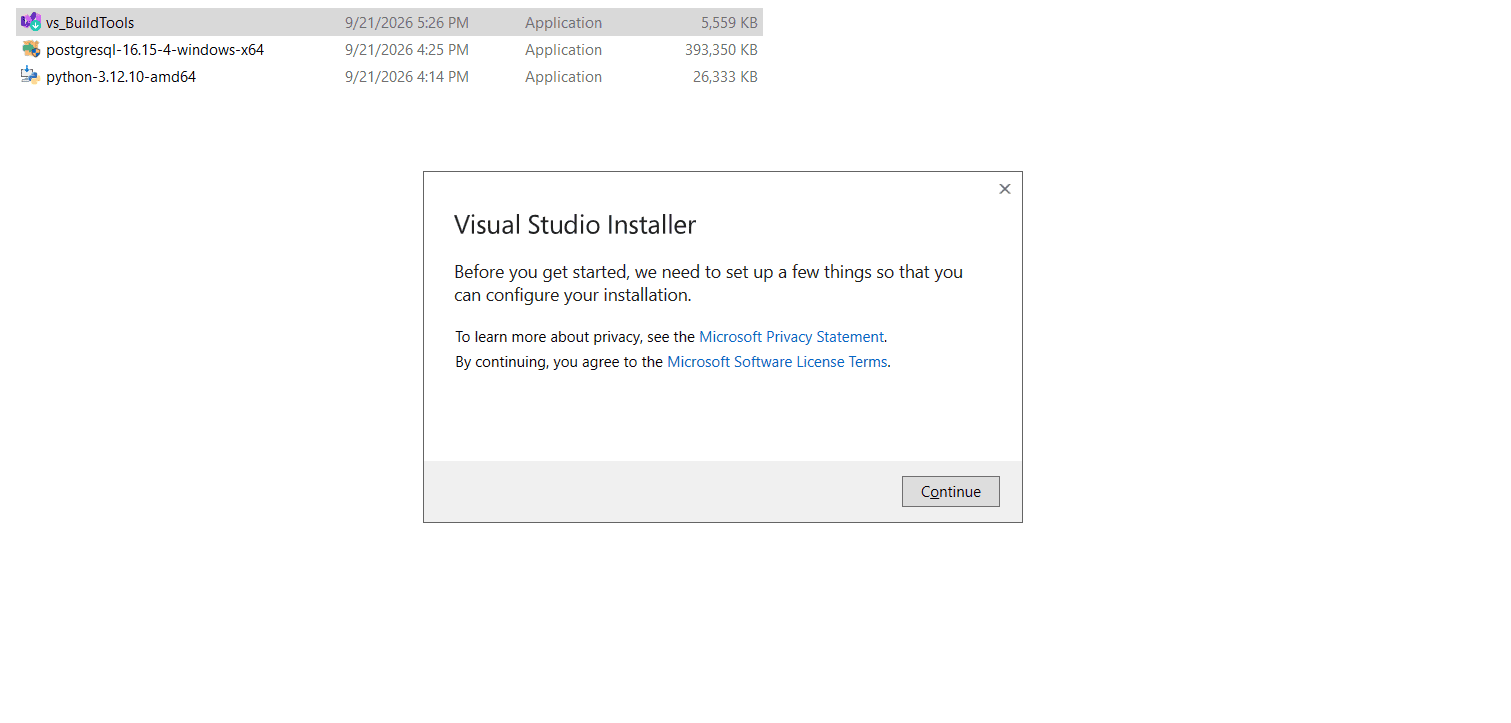
After downloading, launch the BuildTools from downloads.
During the installation, select the “Desktop development with C++” workload. In the Optional Components section, select the required components shown in the reference image. These packages provide the necessary tools for setting up a complete C++ development environment.
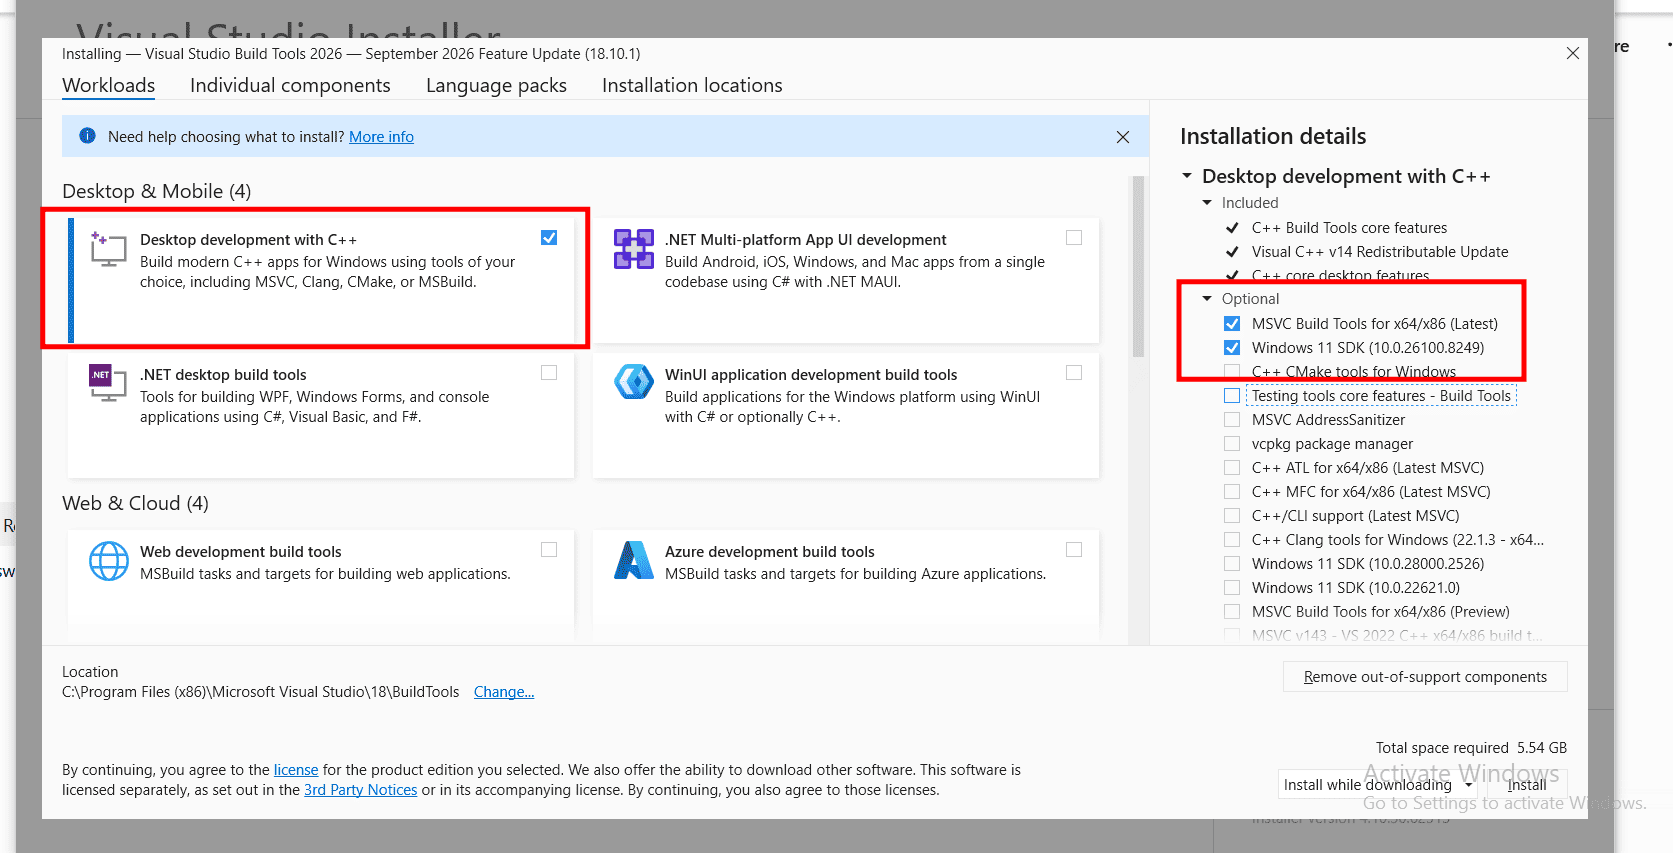
After selecting all the required components, continue with the installation and wait for it to finish. Once the installation is complete, restart your computer so that the newly installed tools and configuration changes are applied correctly.
Step 5: Download Odoo 20 from GitHub
Downloading Odoo 20 from GitHub is simple. First, open the official Odoo GitHub repository. Use the search bar at the top of the page and enter “Odoo”, then press Enter. From the search results, select the first repository, which is generally the official Odoo repository shown in the reference image.
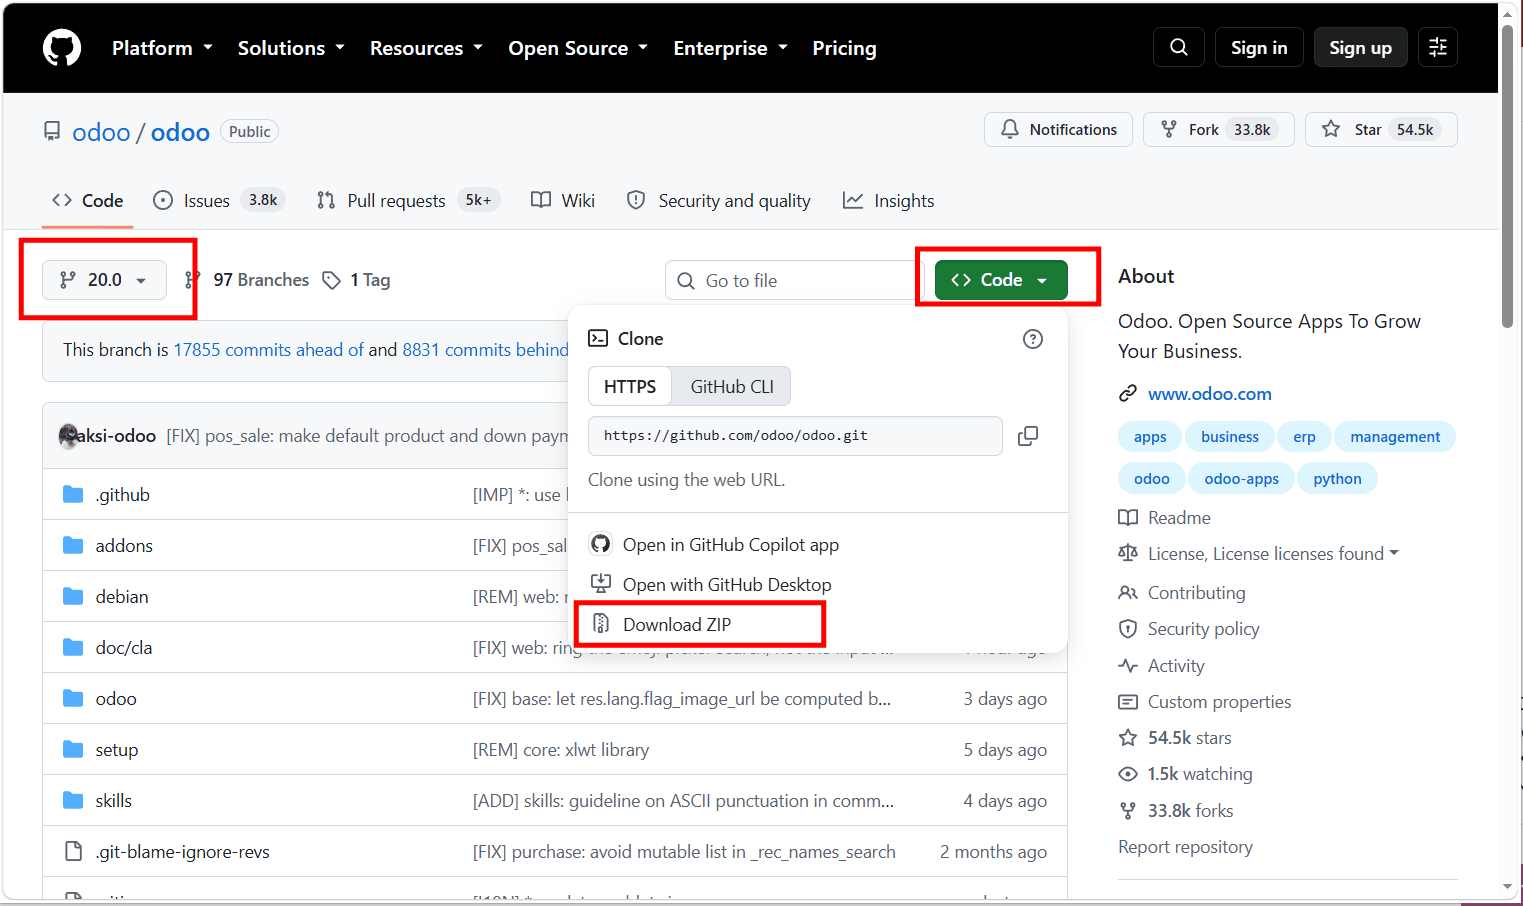
Open the repository and make sure the selected branch is 20.0. Next, click the “Code” button and choose “Download ZIP” to download the Odoo 20 source code. Once the download is complete, extract the ZIP file and store the Odoo folder in a secure, easy-to-access location, preferably your home directory.
Step 6: PyCharm Installation
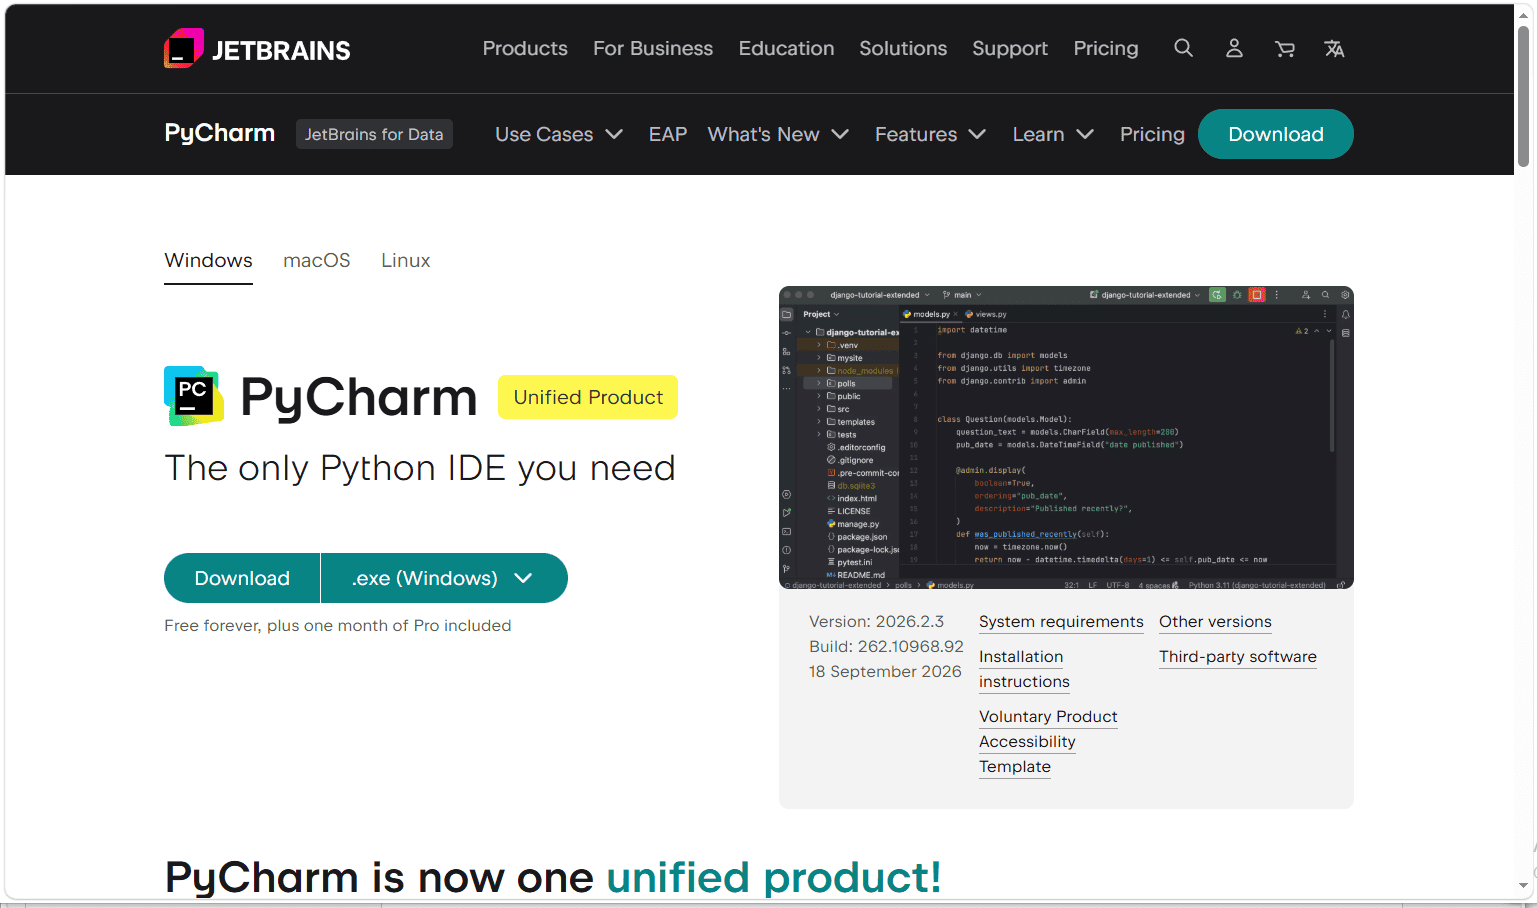
You can download the PyCharm Community Edition from the official JetBrains website:
Select the installation options as shown in the figure during the PyCharm installation.
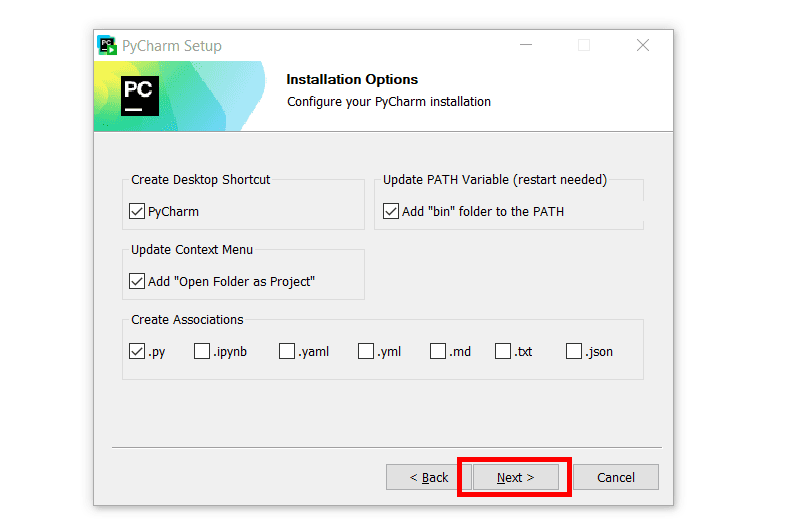
Complete the installation process by just clicking the Next buttons. After finishing the installation, search for PyCharm in Apps.
Step 7: Open Odoo 20 in PyCharm
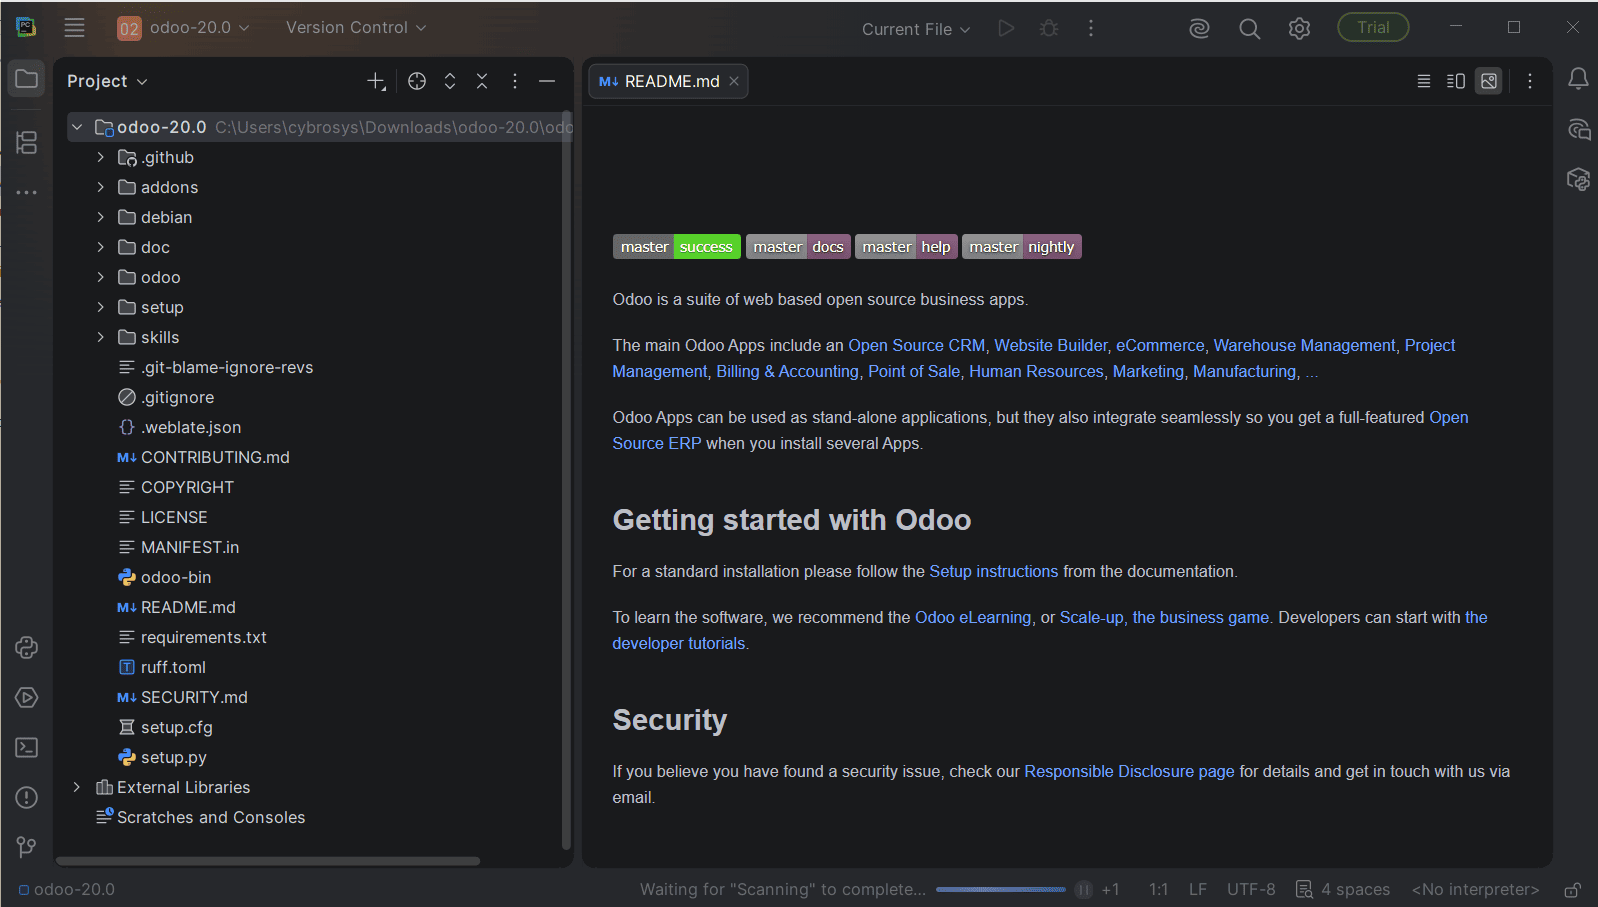
This is the final step in configuring Odoo 20, setting up the development environment. To do this, launch PyCharm from your applications, then select Open and click on the downloaded Odoo 20 extracted file.
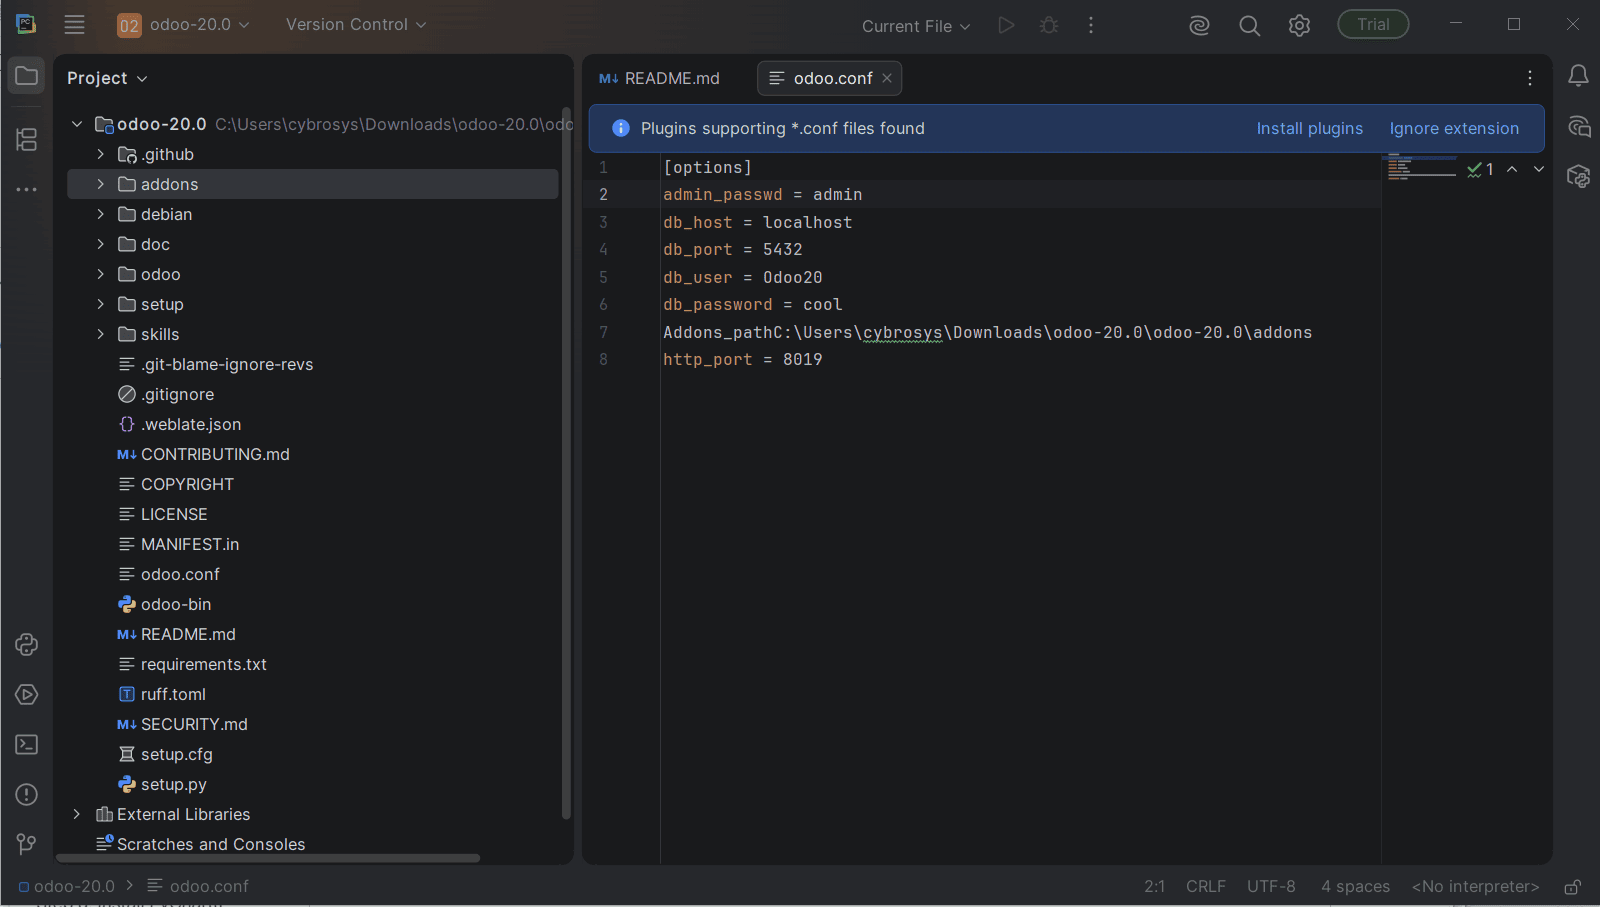
Create an odoo.conf file inside the directory by right-clicking on the Odoo-20.0 folder from the project tab (left side).
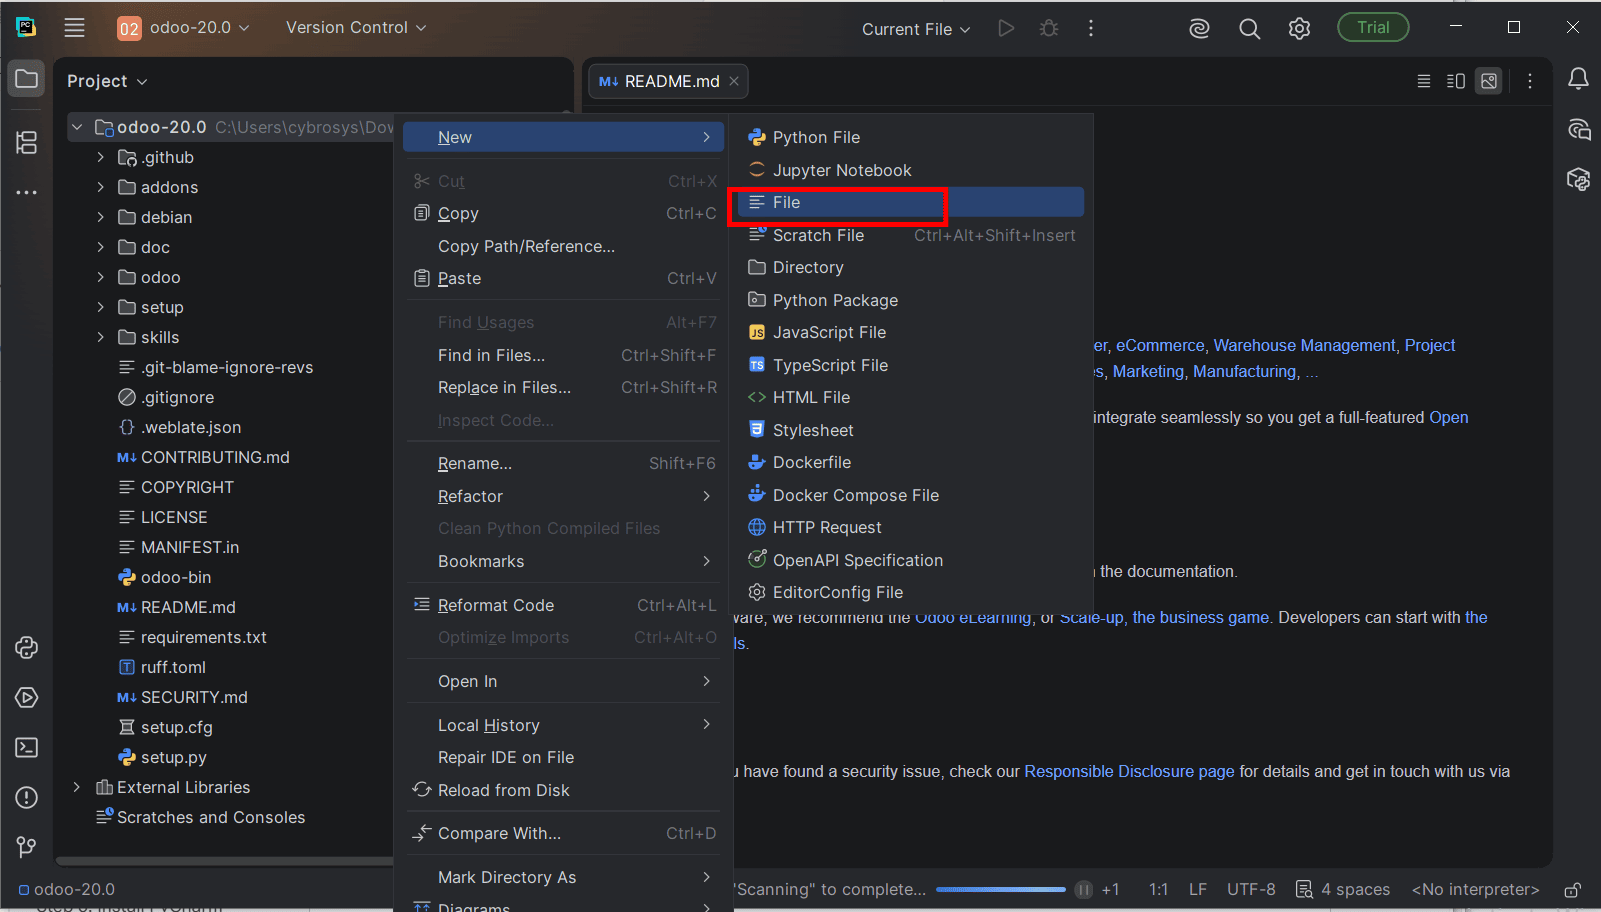
Paste this code inside it.
[options]
admin_passwd = admin
db_host = localhost
db_port = 5432
db_user = Odoo20
db_password = cool
Addons_pathC:\Users\cybrosys\Downloads\odoo-20.0\addons
http_port = 8019
Set db_user and db_password to the credentials you created during the PostgreSQL setup in pgAdmin. Then, update the addons_path so that it points to the addons directory inside the extracted odoo-20.0 folder.
A virtual environment keeps Odoo's Python dependencies isolated from other Python projects on your computer.
Open the PyCharm terminal and navigate to the Odoo directory. Then create and activate a new virtual environment.
cd C:\odoo-20.0
python -m venv .venv
.venv\Scripts\activate
Change the “.venv” to your name. After activation, install required python packages from the file requirements.txt .
python -m pip install --upgrade pip
pip install -r requirements.txt
First, open the root directory of the extracted Odoo-20.0 project. Make sure this is the folder containing the requirements.txt file.
Then, open the Python interpreter settings in PyCharm by going to Settings > Project Settings > Python Interpreter and configure the interpreter for the project.
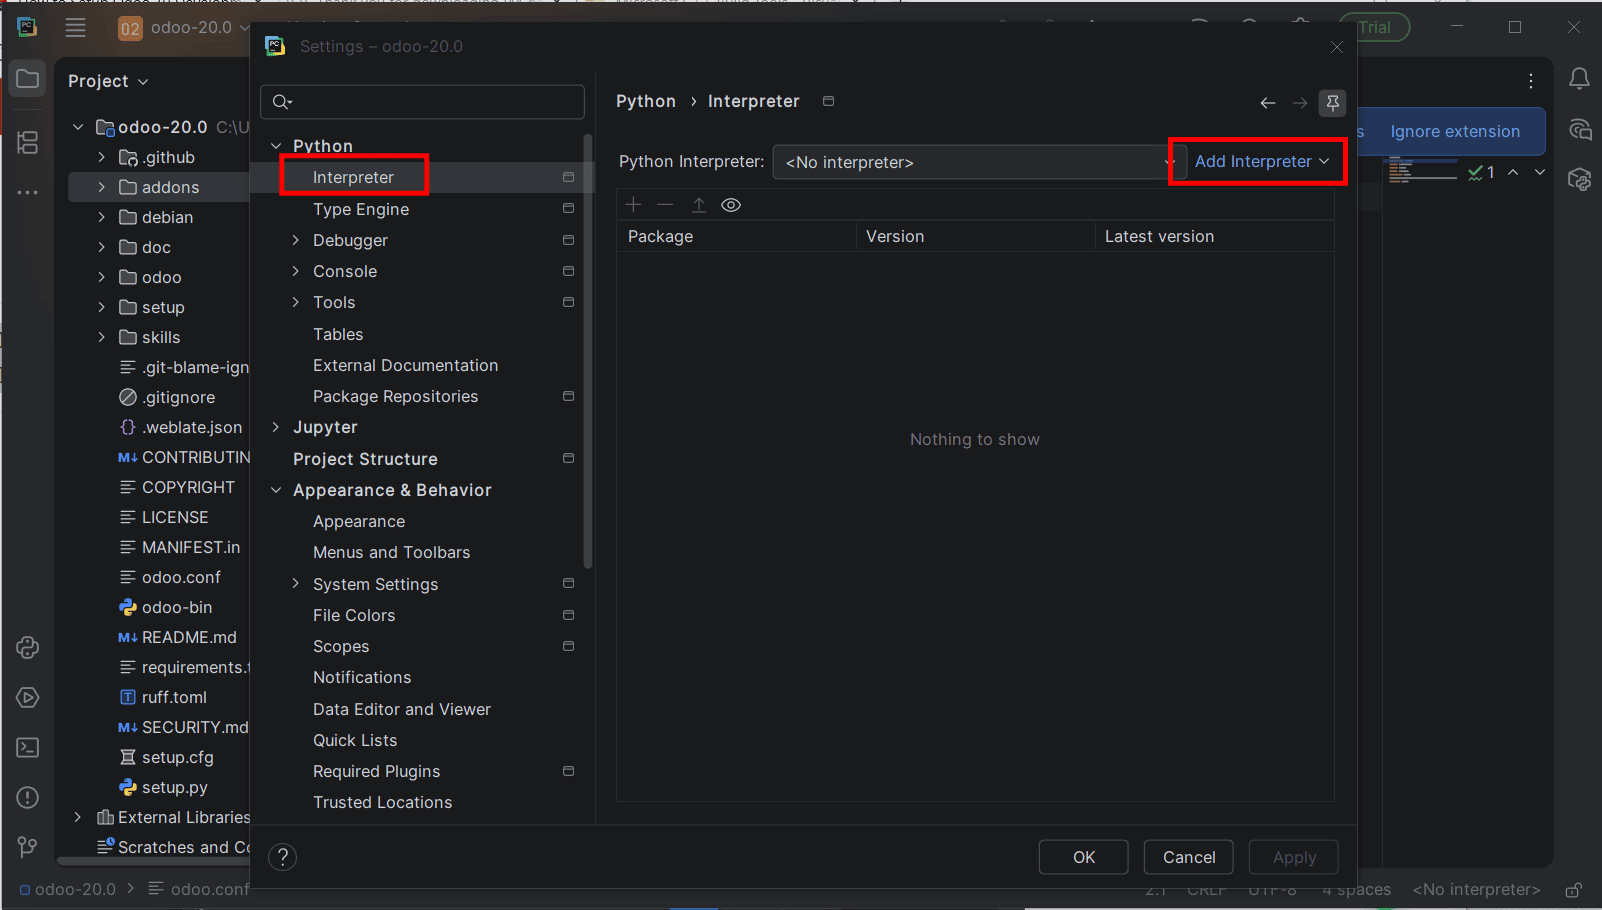
Click on “Add Interpreter” within the Python Interpreter settings panel.
Click on the Select existing button and choose the python.exe from the Odoo 20 virtual environment (.venv).
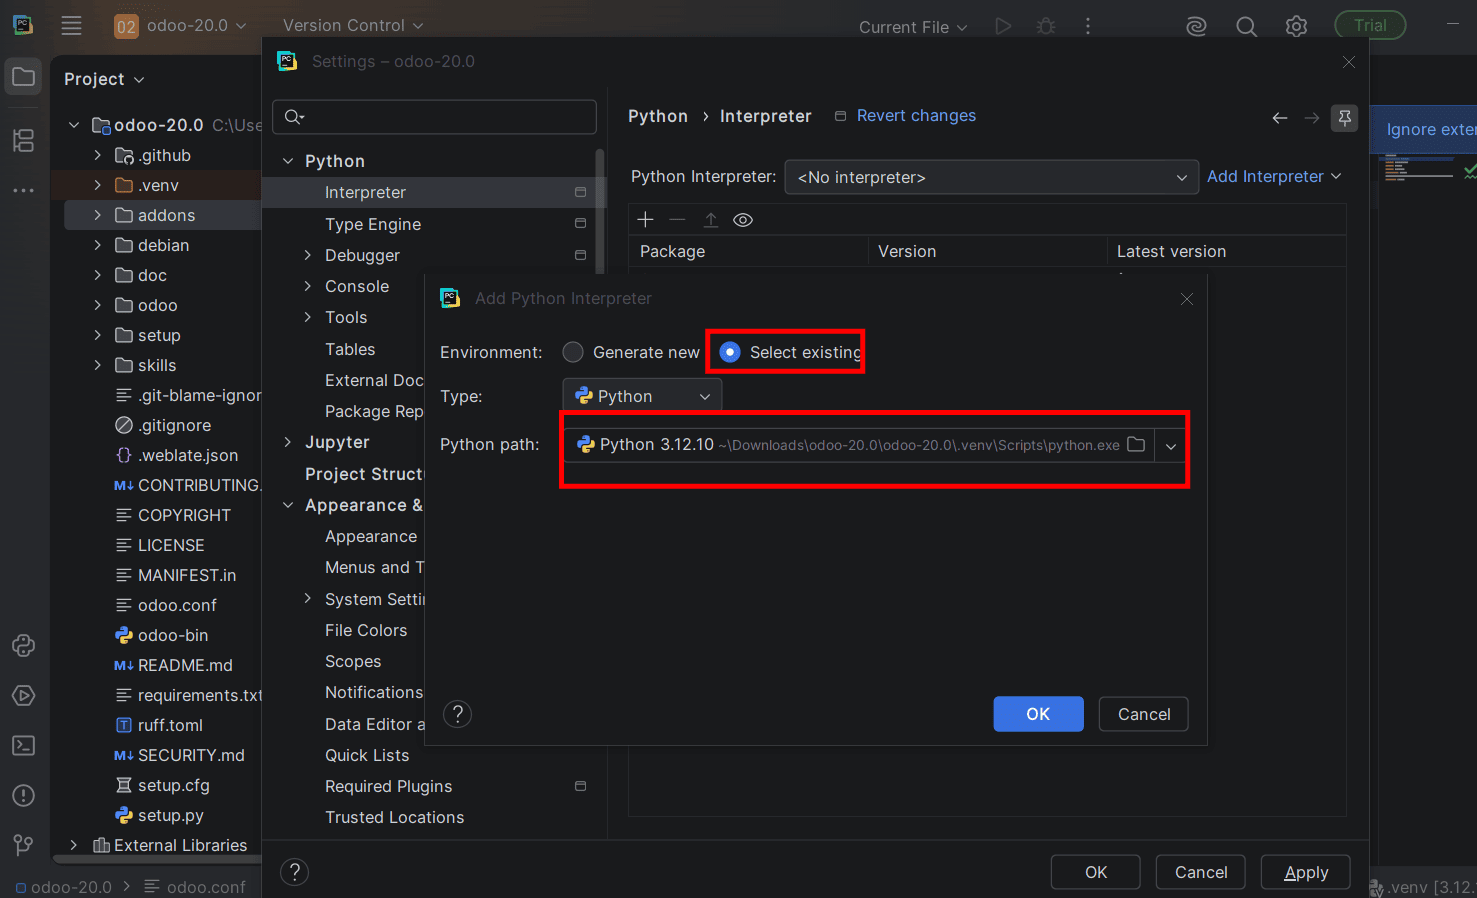
Then click OK to proceed.
Finally, we need to create a run configuration for launching the Odoo 20 instance. To do this, under the “Current File” option, select “Edit Configurations.”
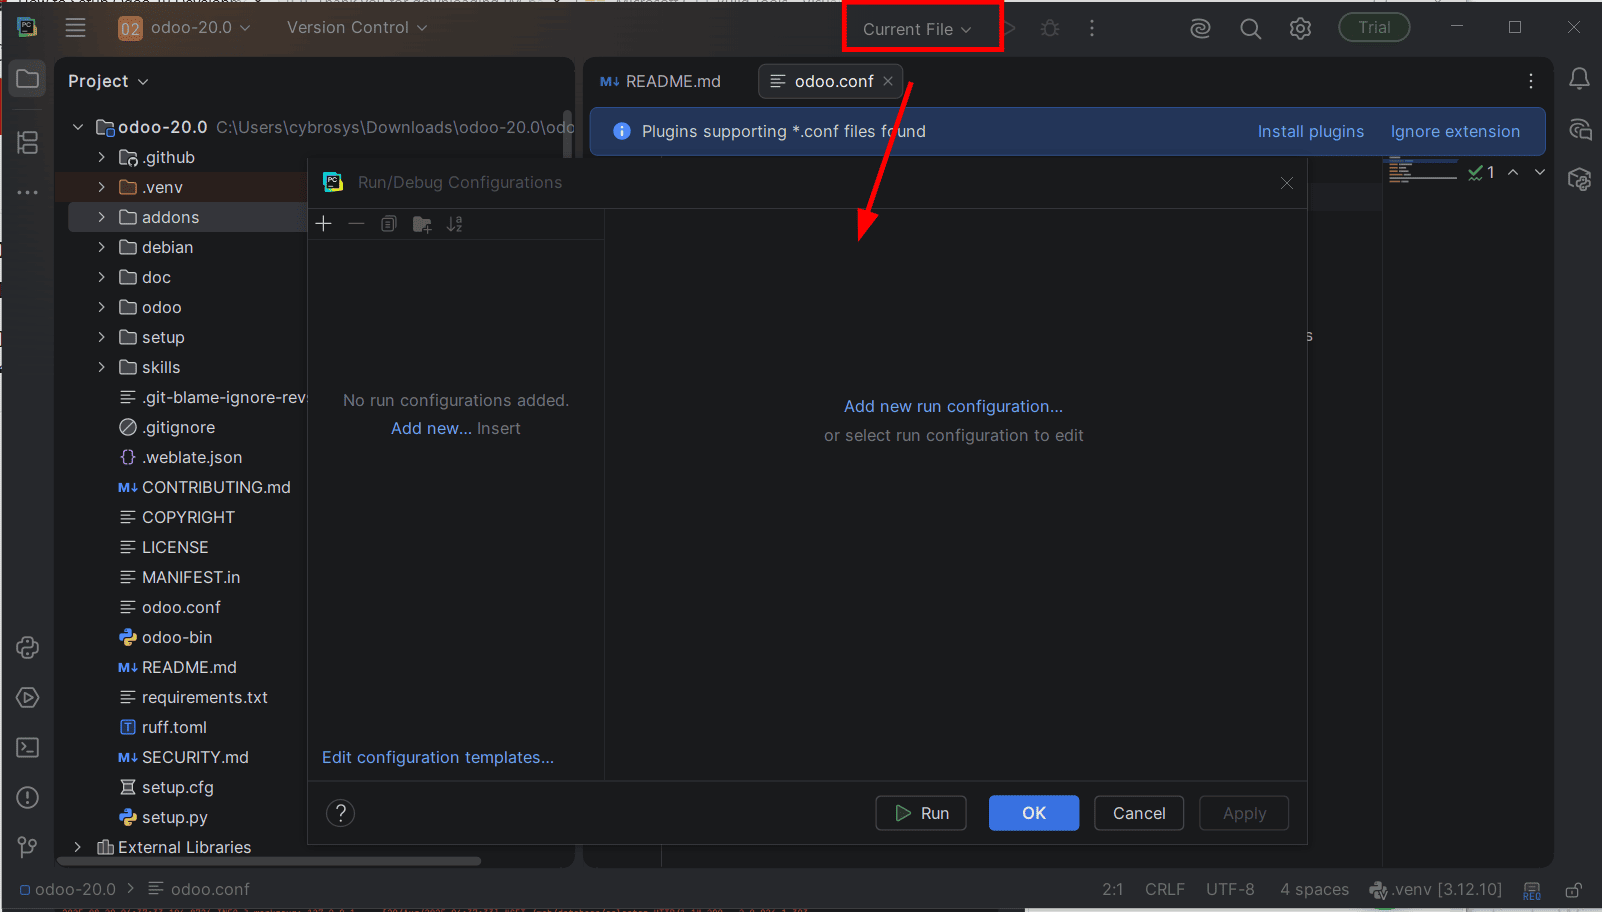
In the Run/Debug Configurations window, click the plus (+) icon in the top-left corner and select Python from the available configuration types.
Configure the new run configuration using the following settings:
- Name: Enter a name for the configuration.
- Script Path: Browse and select the odoo-bin file from the extracted Odoo-20 project directory.
- Python Interpreter: Select the appropriate Python interpreter if one has not already been configured.
- Parameters: -c odoo.conf
- Working Directory: Set this to the root directory of the extracted Odoo 20 project.
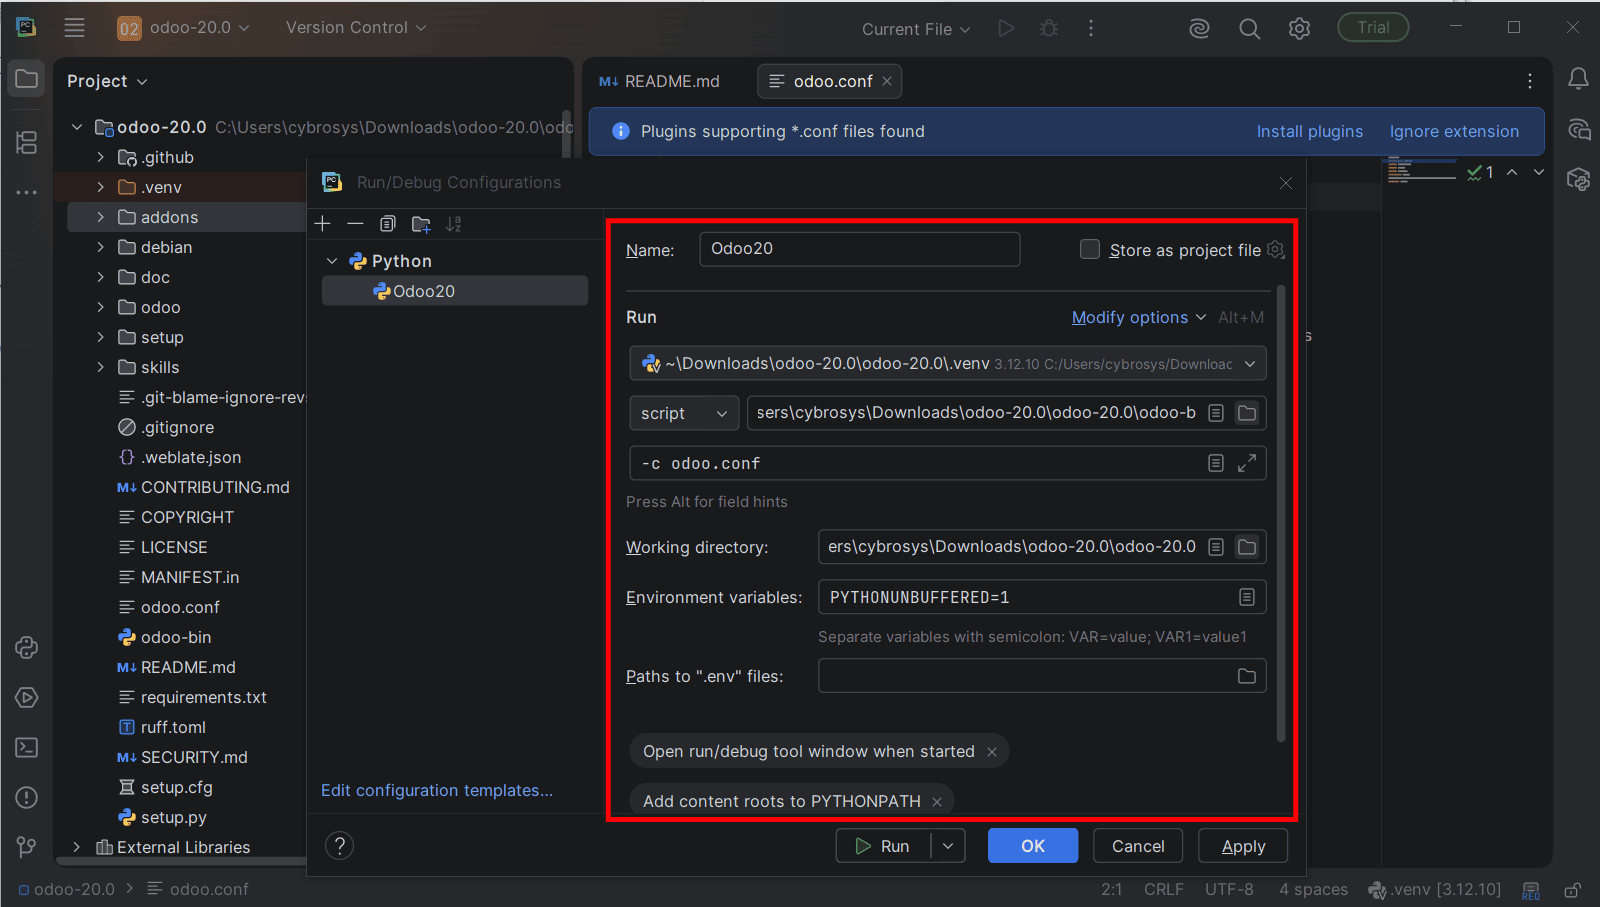
After configuring all the settings, click “Apply” and then “OK” to save the changes.
The development environment is now ready.
Your development environment is now ready. In PyCharm, click Run to start the Odoo server. If the configuration is correct, the server logs will appear in the Run window.
Since the HTTP port is set to 8019, open the following address in your browser: http://localhost:8019
The Odoo database management page will appear when the server starts for the first time.
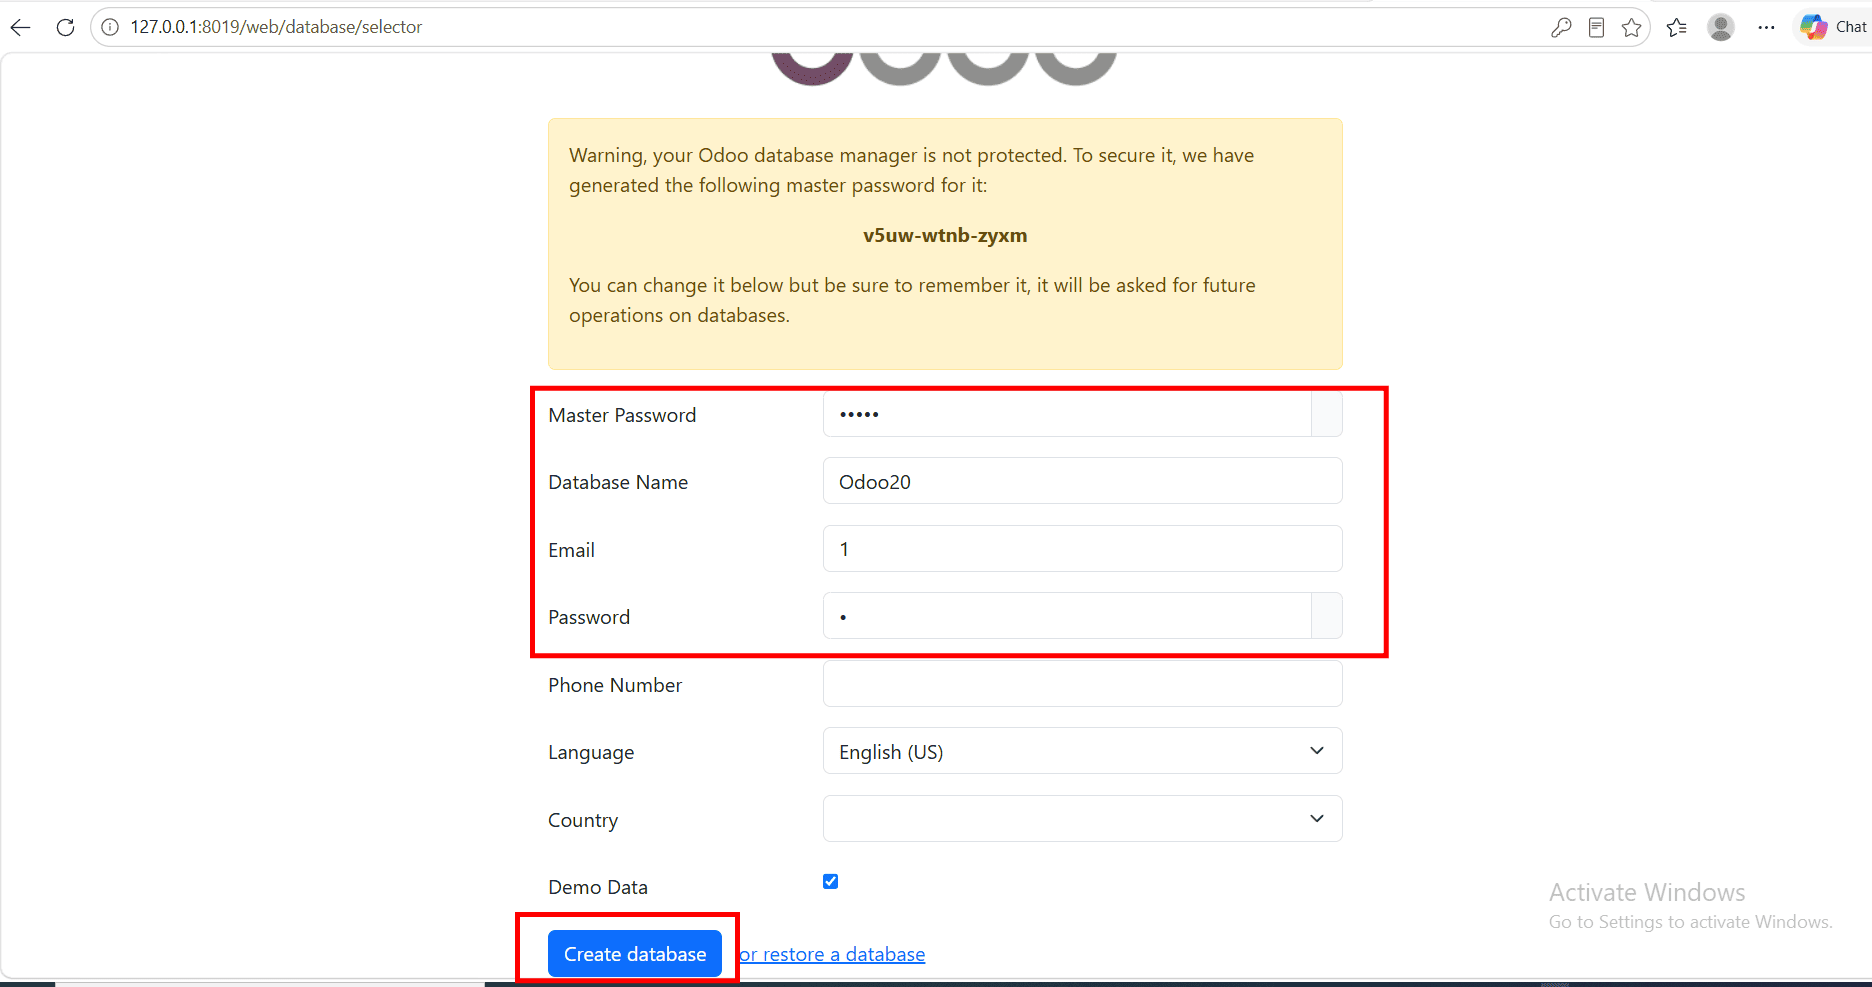
- Master Password: Enter the master password specified in your odoo.conf file under admin_passwd.
- Database Name: Add your database name here
- Email: admin users login email
- Password: admin user password
- Language: (Optional) Choose your preferred language if required.
- Country: (Optional) Select your country if applicable.
- Demo data: (Optional) Leave this unchecked if you want to create a clean database without sample records.
Create database
Once the database is created, Odoo will initialize it and automatically take you to the main dashboard.
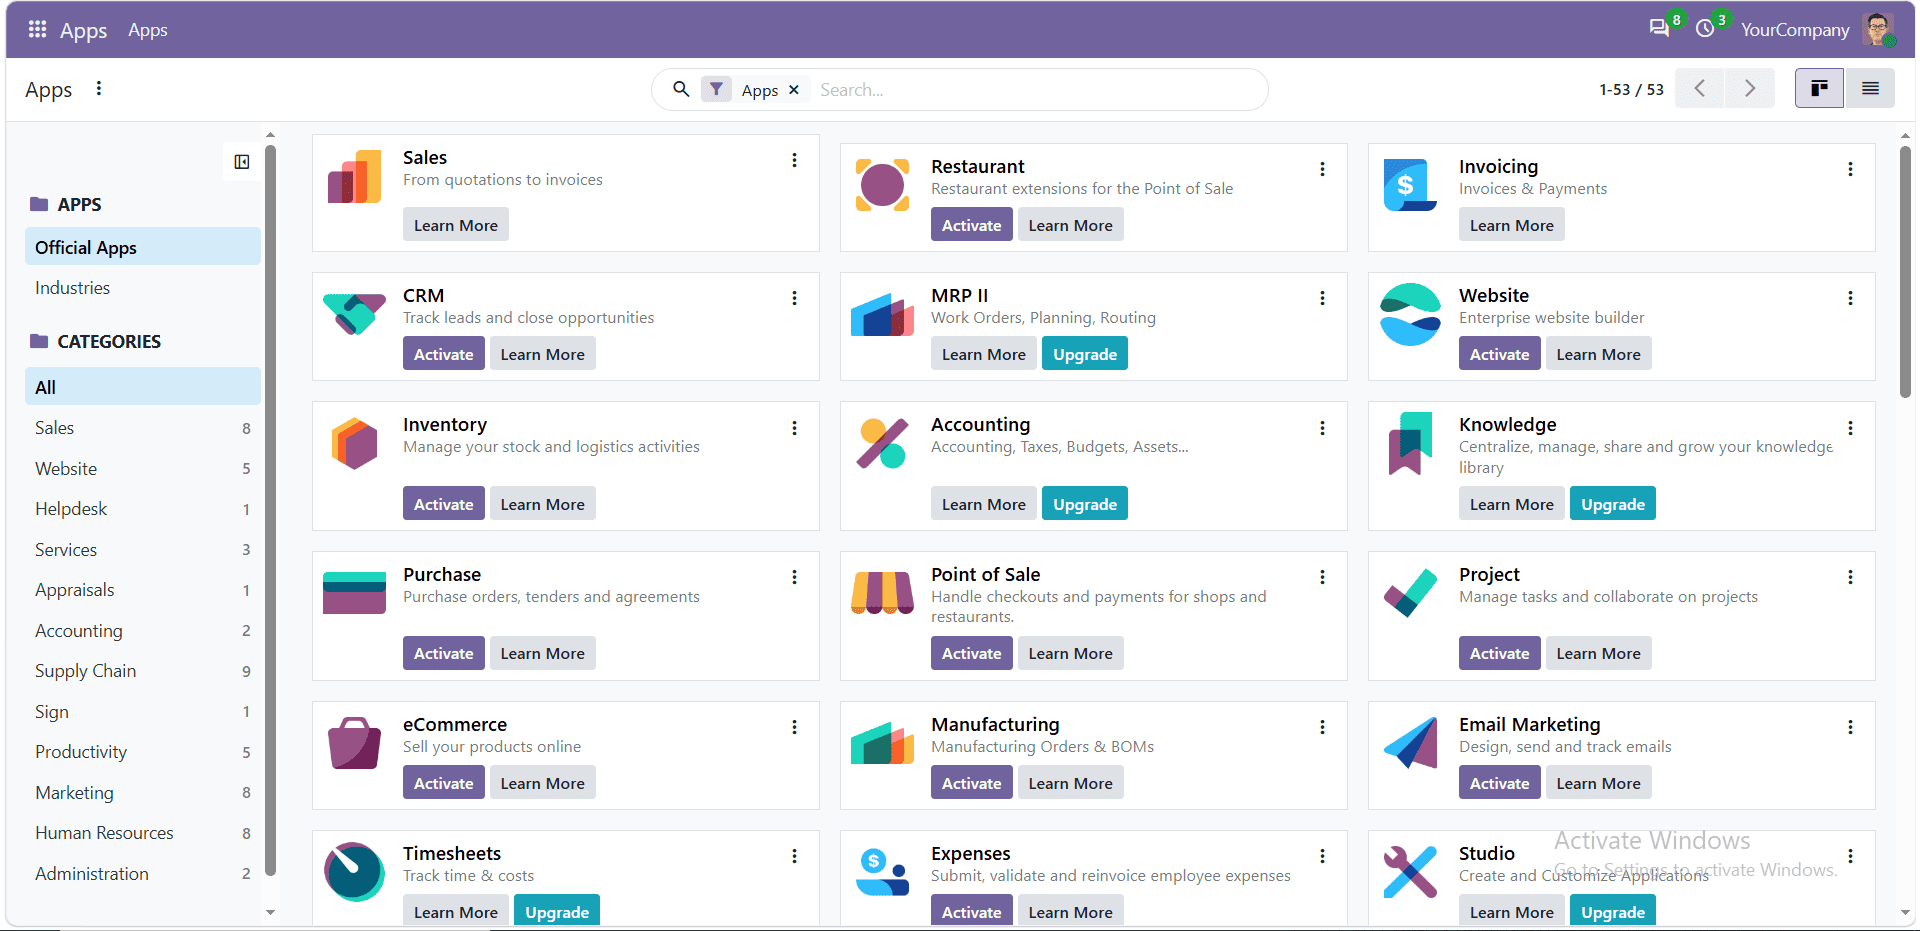
Now, the Odoo 20 development environment has been established in Windows with the help of PyCharm. Consequently, developers are capable of working with the Odoo source code, creating their own modules, debugging Python code, and testing modifications locally.
The availability of Python, PostgreSQL, a virtual environment, the Odoo 20 source code, and PyCharm creates a convenient development workflow for Windows users.
To read more about How to Setup Odoo 19 Development Environment Using Pycharm in Windows, refer to our blog How to Setup Odoo 19 Development Environment Using Pycharm in Windows.