It’s a day-to-day business; customers usually request a cost analysis prior to their payments. This is where pro-forma invoices become very handy, as you can provide a preview of the cost without sending a completed accounting document straight away. This way, your customer knows what they are going to pay for.
Sending out pro-forma invoices has become an easy task for Odoo 19 and is integrated perfectly into your selling process. It allows showing all the products/services, pricing, taxation, and payment terms professionally without accounting for it straight away. This feature is extremely helpful in case of advance payments, international transactions, or when your client needs to have internal authorization first.
In Odoo 19, pro-forma invoices will help you be clear, quicken your decisions, and minimize misunderstandings. This blog provides a step-by-step guide to generating and sending pro forma invoices in Odoo 19.
Now let’s learn how to send pro-forma invoices in Odoo 19. To do this, first access the Odoo 19 Sales module and select the Pro-Forma invoice option in the Configuration Settings.
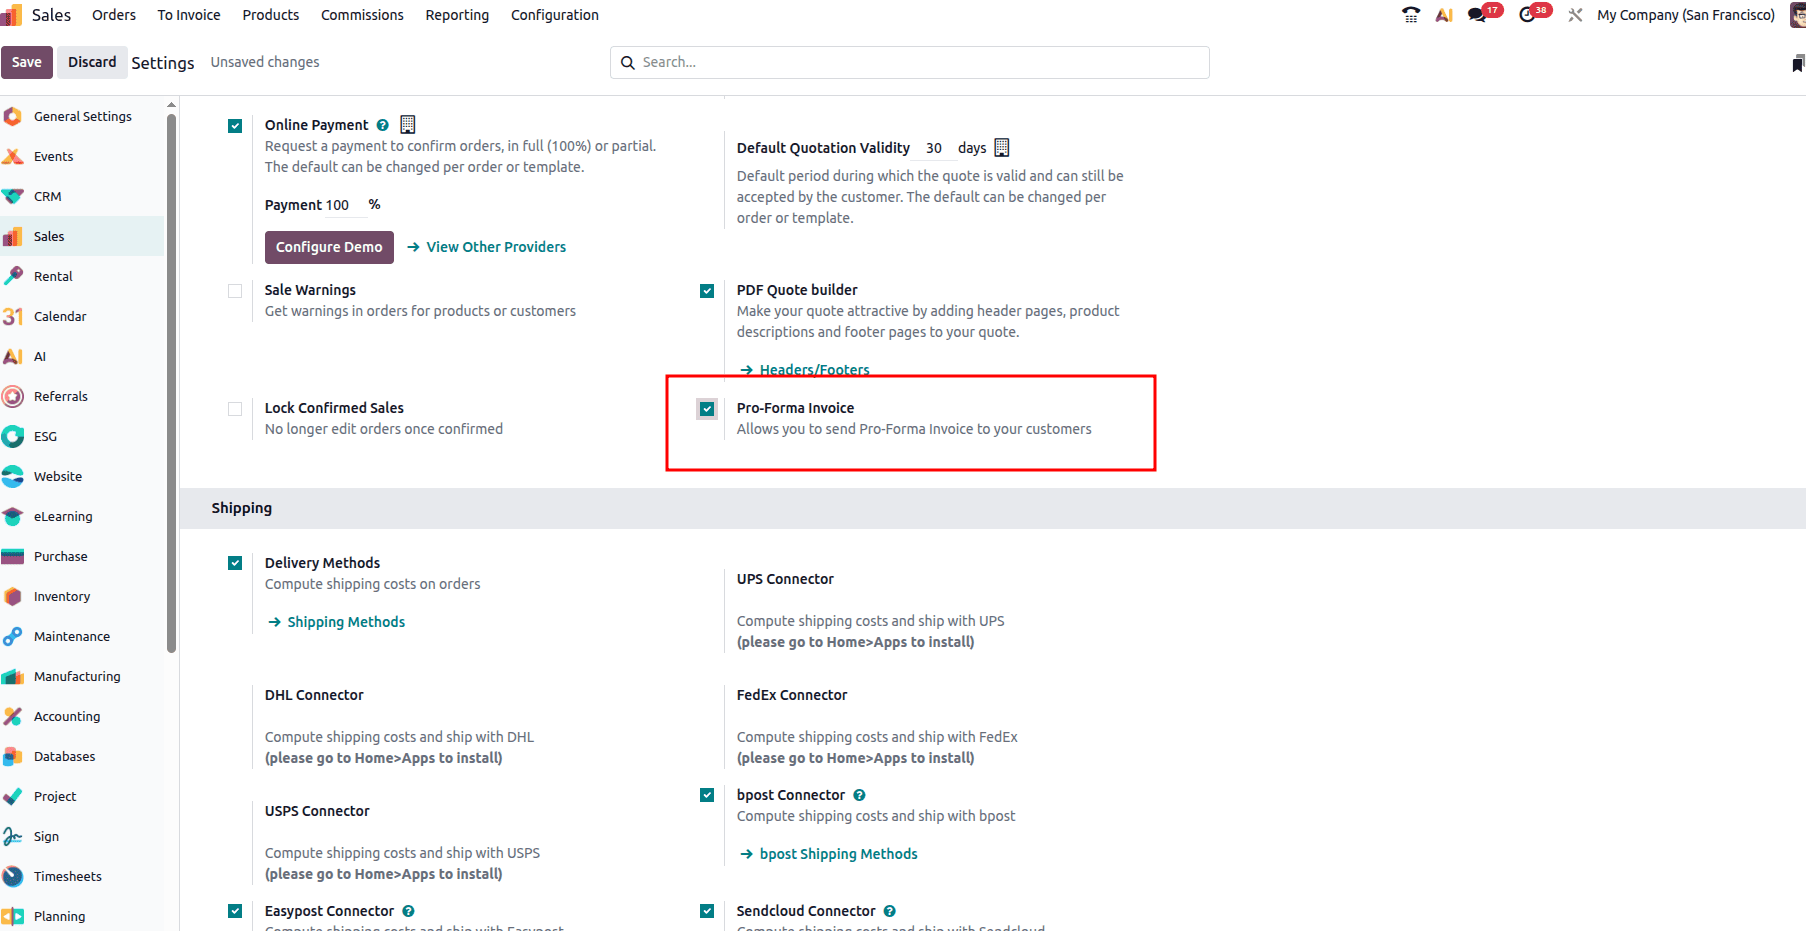
Once you enable the option, make sure to save the changes.
Quotation Creation and Sending Pro-Forma Invoice
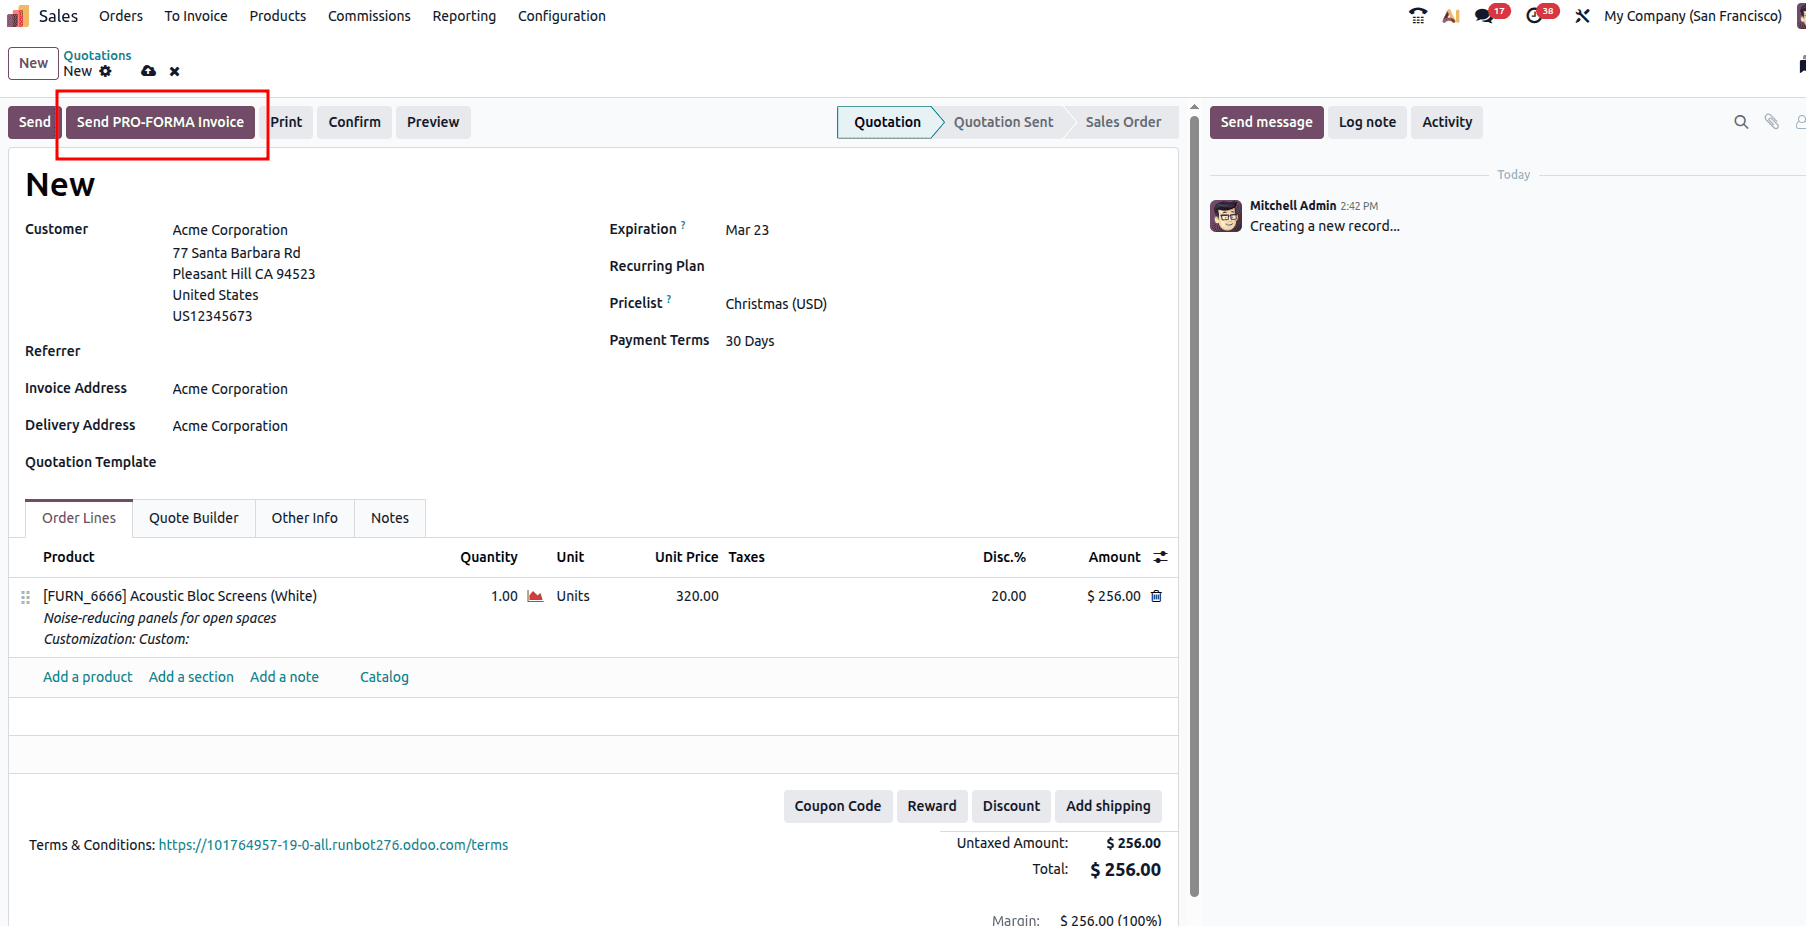
Now let’s see how a quotation is created from the Sales module and the pro-forma invoice is sent to the customer. For that navigate to the Orders tab in the Sales module and click on the ‘New’ button.

You can fill up the details of the quotation such as customer details, product details in the form which will be opened.
At the top of the form, you will be able to see a button called ‘Send Pro-Forma Invoice’. A pro-forma invoice can be sent either before or after the sales order is confirmed.
Prior to sending the invoice, verify that the Outgoing Mail Server is configured correctly and that the customer's email address is valid and available in the system.
Once you click on the ‘Send Pro-Forma Invoice’ button, the wizard below will appear.
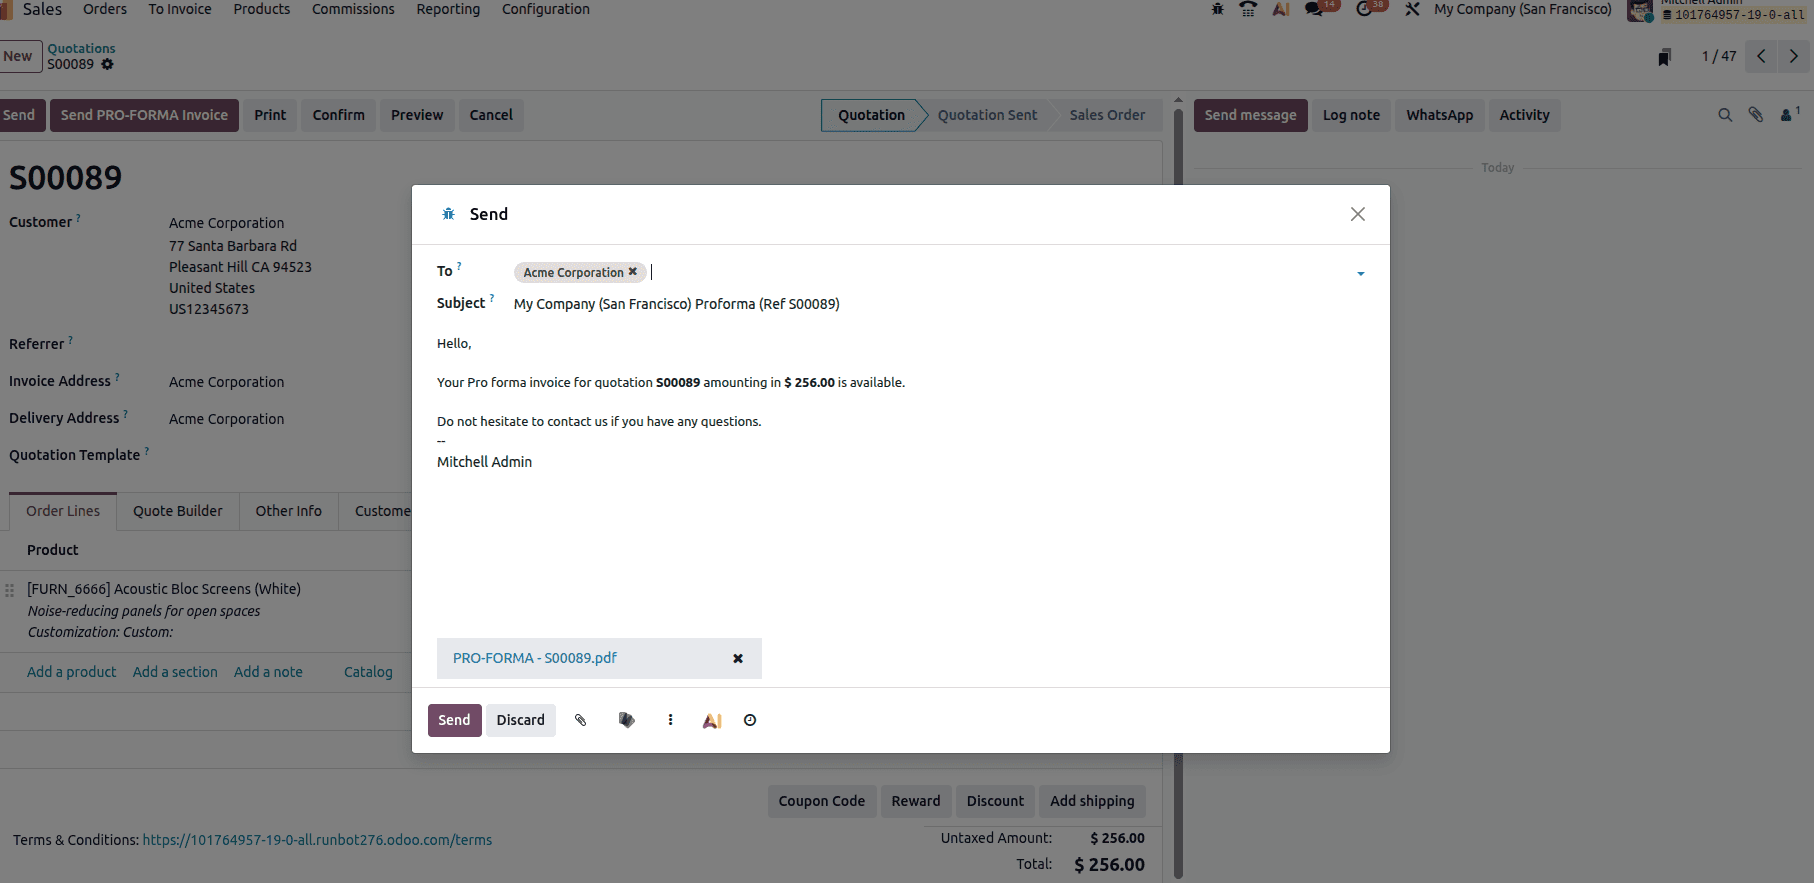
The wizard allows you to choose the recipient and personalize the email content as needed. The information concerning Pro-Forma invoice such as quotation reference and the total sum will be automatically generated in the email sample. The quotation will be attached as a PDF document, including all relevant customer quotation information.
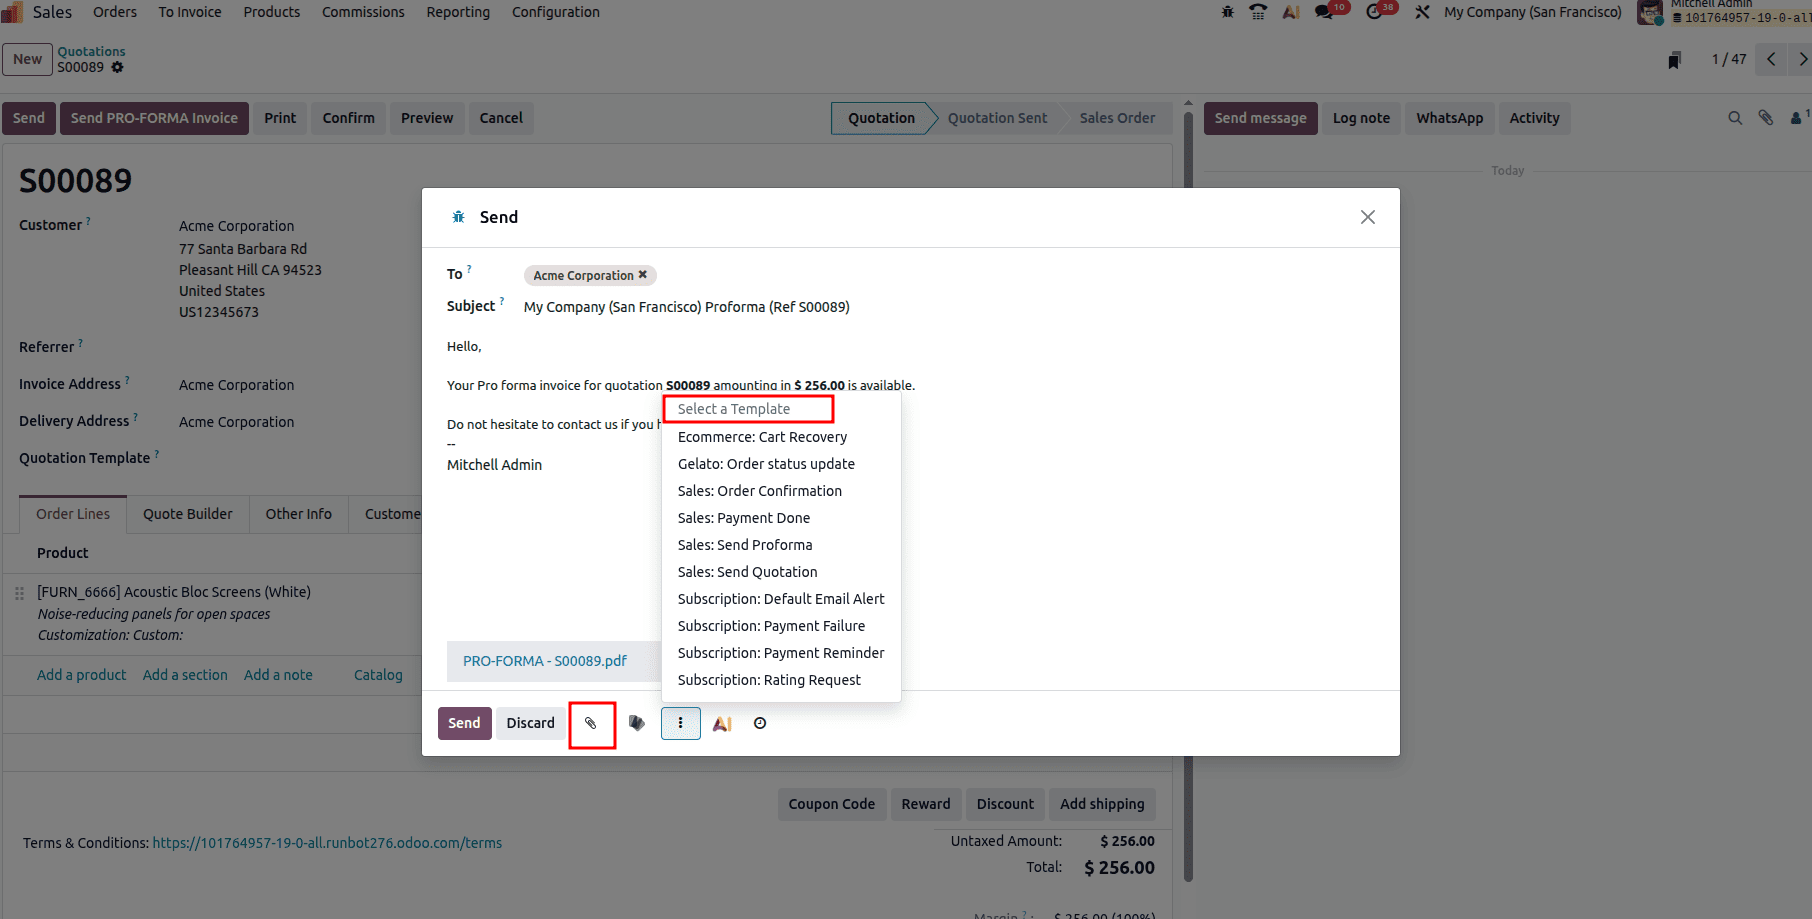
You can also use an existing email template to maintain consistency in the structure and professional tone of your communication. Templates help standardize important elements such as invoice details, formatting and messaging style. You can delete outdated templates to ensure your email remains clear, focused, and free of unnecessary content. You can also edit an existing template to change the wording or layout to better suit the customer.
Before sending the Pro-Forma invoice, you can attach any additional documents using the attachment icon. Once you have reviewed and finalized all the details, click Send to deliver the email to the customer.
Some of the other features provided are Schedule and Send later, Add from documents and Ask AI.
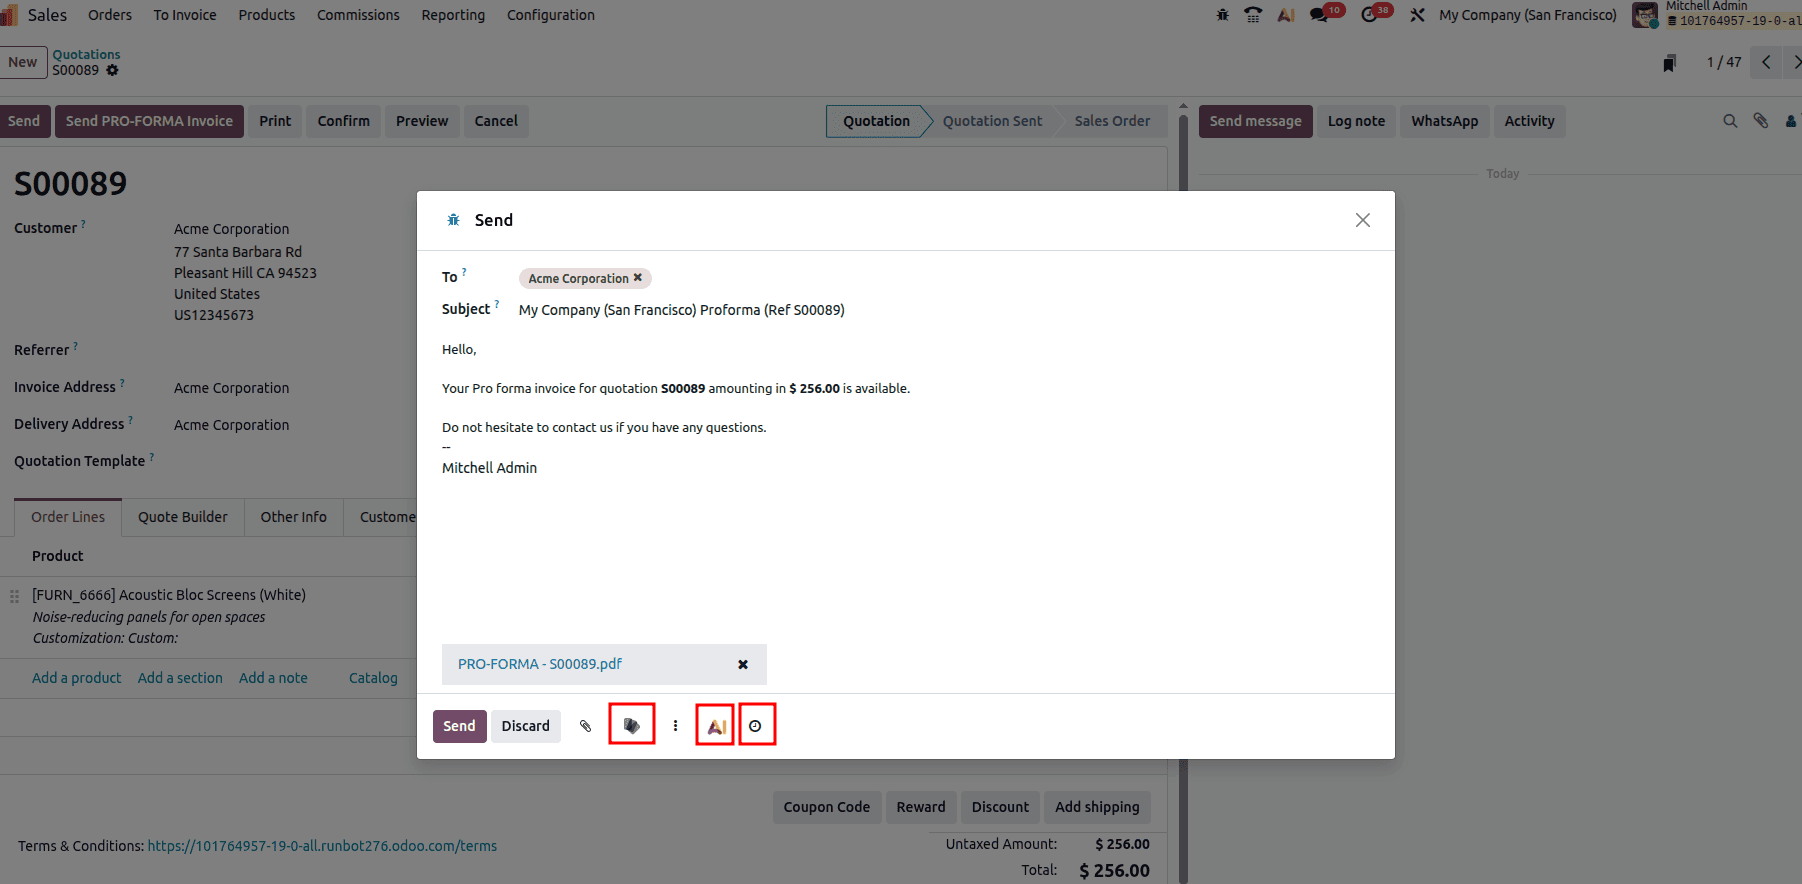
Right after the attachment icon you can add attachments directly from the documents module instead of our local files by clicking on the icon. Click the AI button within the email to generate content automatically, helping you draft messages more efficiently.
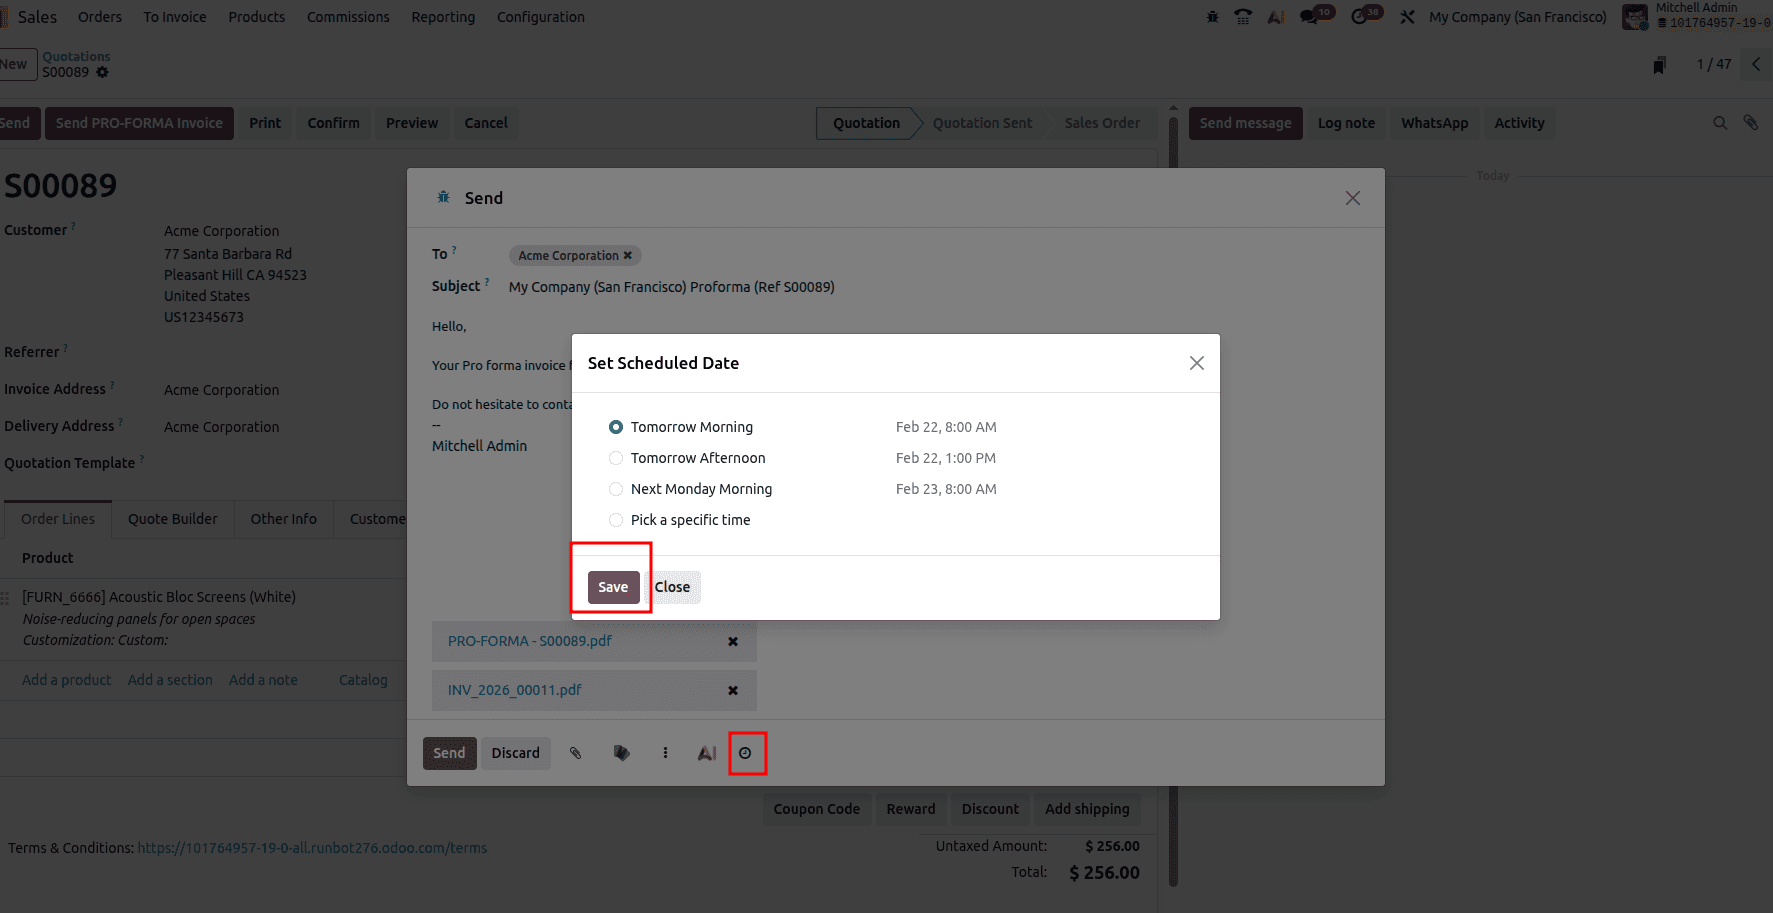
To schedule sending an invoice letter, you can click the icon in the image below. When you click it a wizard will open where you can select the time by which the invoice should be sent to the customer. Click on the ‘Schedule’ button when the time is saved.
Once it is scheduled, it will appear in the chatter under ‘Scheduled Messages’.
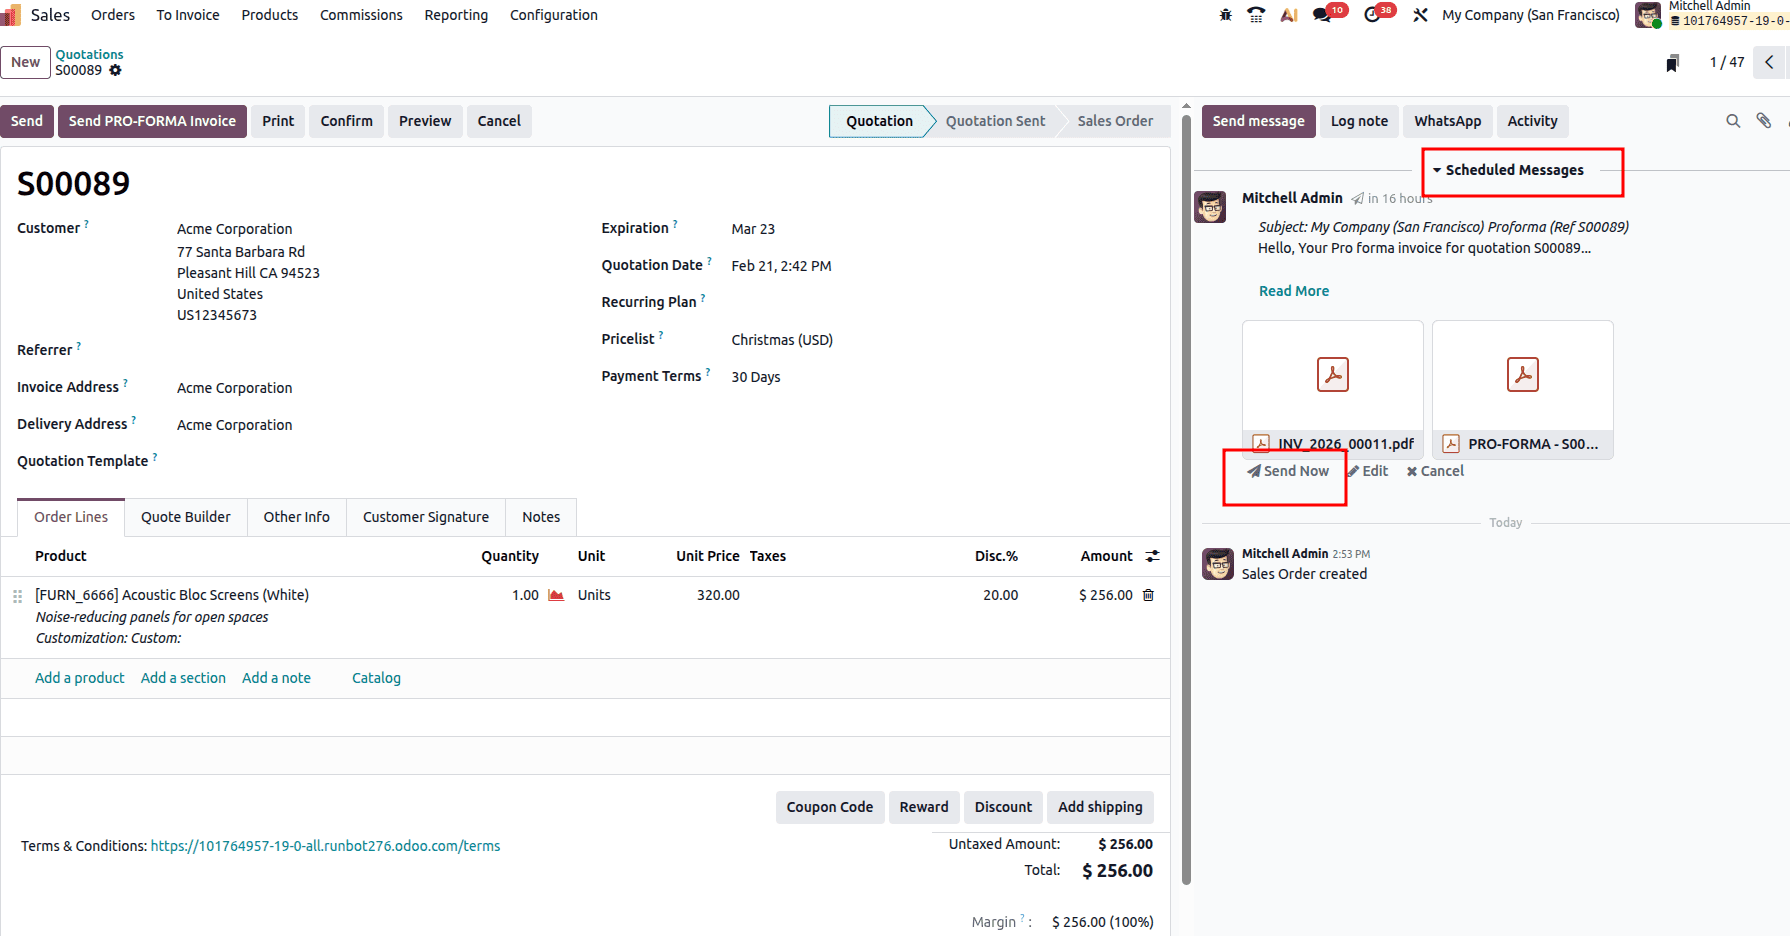
If you want to send the invoice immediately, just click on the ‘Send Now’ button so that it will be sent to the customer.
Once it is sent, the state will change to ‘Quotation Sent’ state and the corresponding message details can be seen in the chatter.
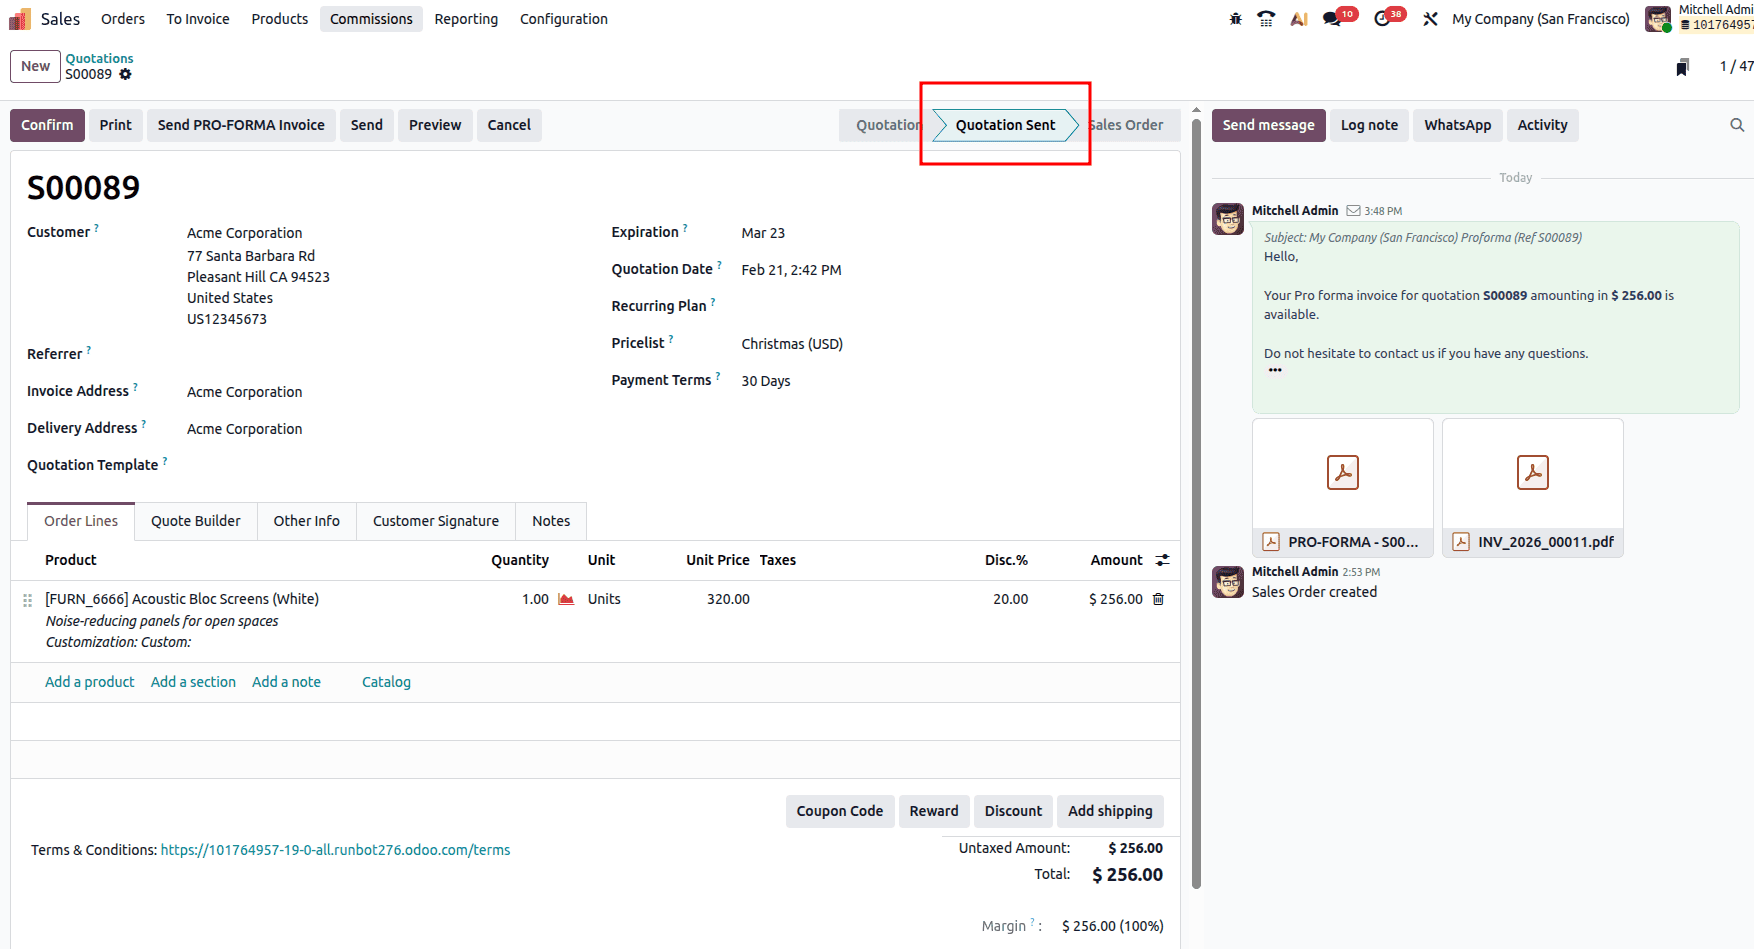
The customer can view their invoice from their mail. Once the customer is satisfied with the quotation, the sales team can move forward with the subsequent procedures.
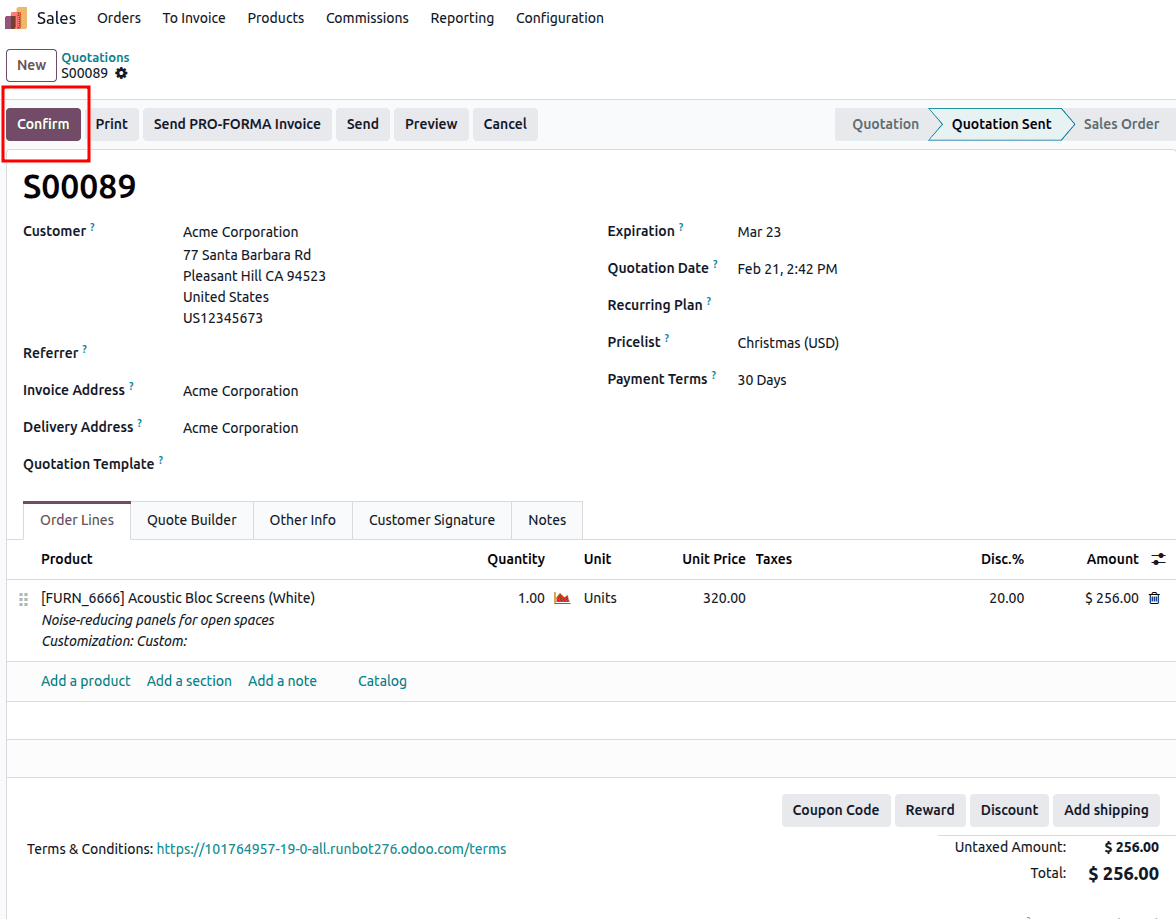
The sale order can be confirmed using the ‘Confirm’ button.
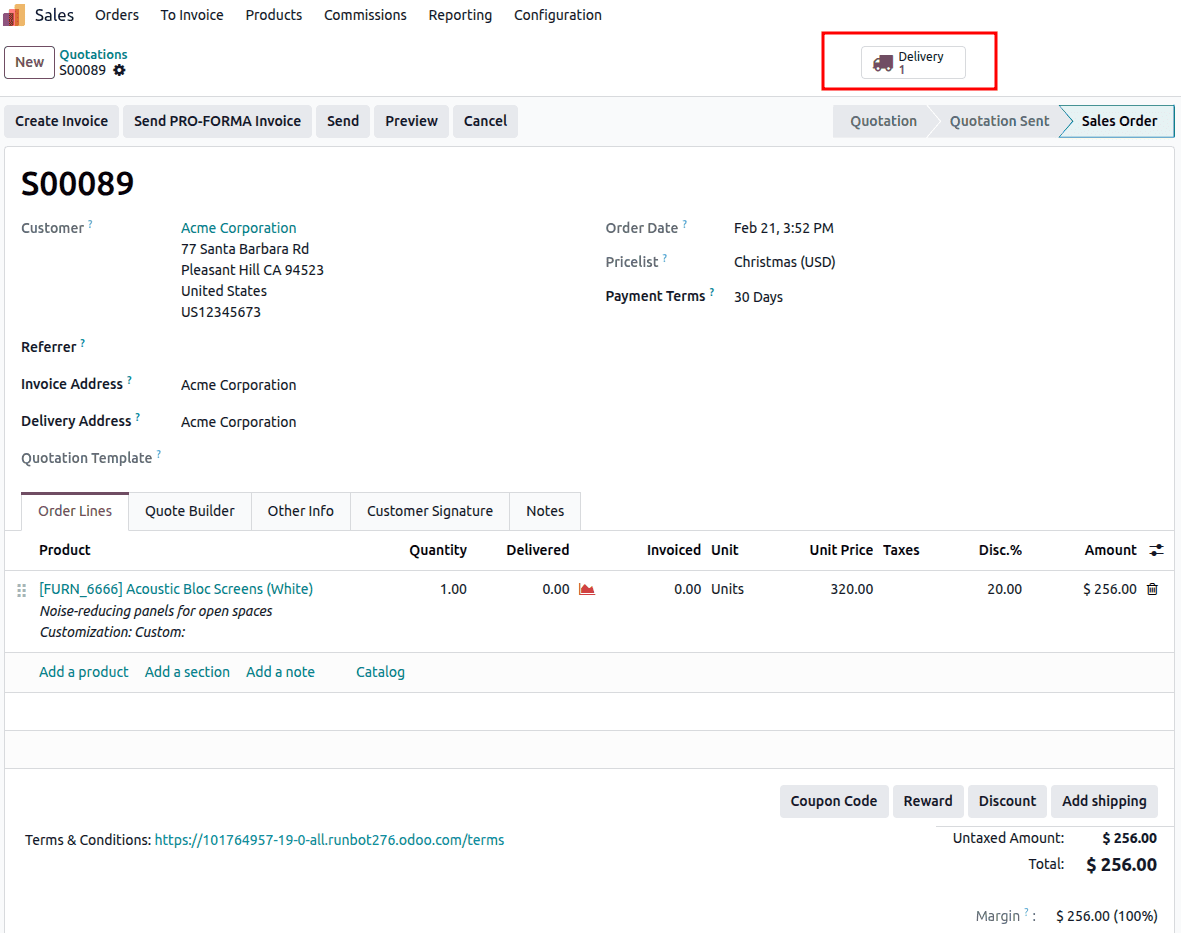
Once the quotation is confirmed, use the Delivery smart button to complete the transfer.
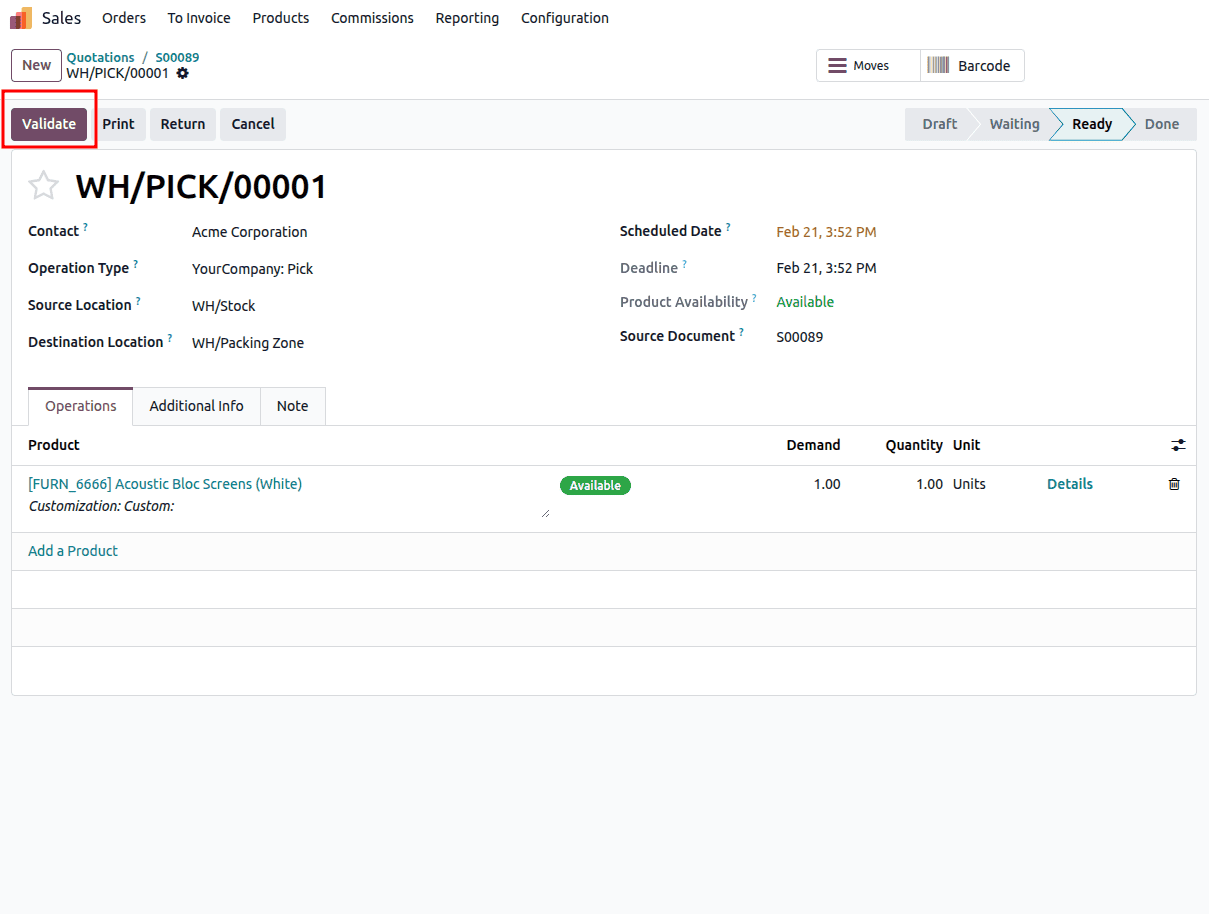
From there you can validate the delivery by clicking the ‘Validate’ button.
In conclusion, Odoo 19 Pro-Forma invoices will be very easy to send to facilitate a professional and clear sales process. This way, you will be able to offer your clients detailed cost information before you record the actual invoice in your accounting system. This feature helps streamline the approval process and minimizes the risk of misunderstandings.
Odoo 19 provides users with the ability to easily generate and send emails with Pro-Forma invoices. The software includes customized templates and PDF quotations to ensure effective communication and fast customer response. This feature can be effectively used to speed up approvals and reduce confusion.
To read more about How to Send Pro-Forma Invoices to Customers in Odoo 18, refer to our blog How to Send Pro-Forma Invoices to Customers in Odoo 18.