The PLM module in Odoo 19 includes strong versioning capabilities for Bills of Materials (BOMs) and commodities. Businesses can guarantee correct documentation and visibility by efficiently handling modifications and iterations throughout a product's lifespan. The PLM module's more straightforward version control can help businesses maintain clear visibility into product revisions, foster collaboration, and enhance product management.
Let's examine how the versioning process is aided by the PLM Module.
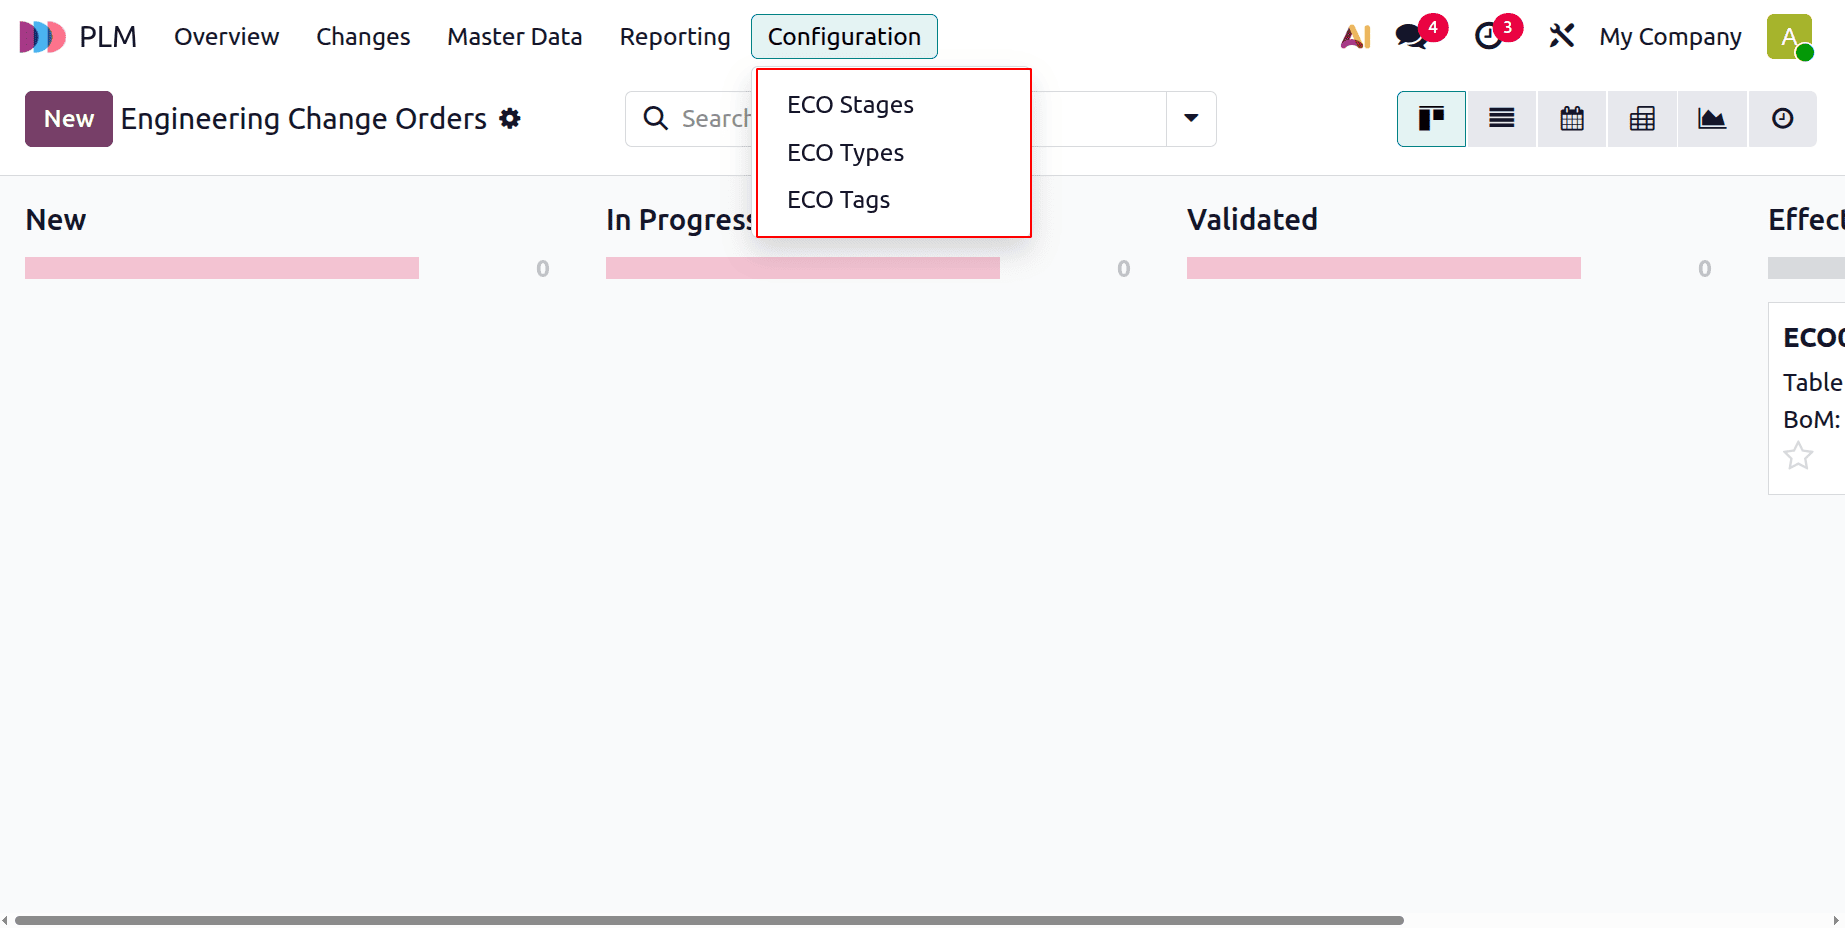
ECO Changes can be used for versioning within the PLM module. While the PLM module is active, the Configuration tab allows you to specify ECO Stages, ECO Types, and ECO Tags.
Let's now examine how to modify a product's version and the Bill of Material.
ECO on the Bill of Materials (BoM)
Let's start by updating the bill of materials. Make a fresh BoM for this procedure first. Select the Bill of Materials option from the Master Data menu. After that, users can pick the ‘New’ option to begin a new BoM or open an existing one.
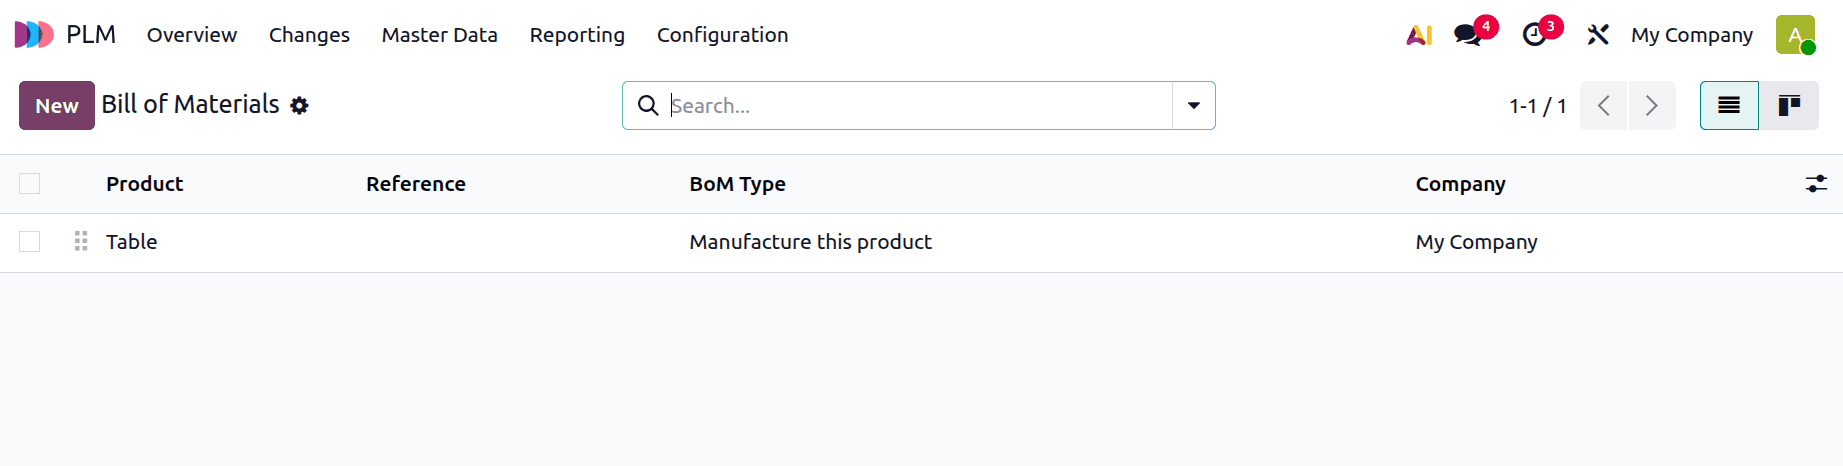
Open the BoM that was made for the TABLE product. There, the Reference, BoM Type, and Company are displayed. Get the Bill of Materials open.
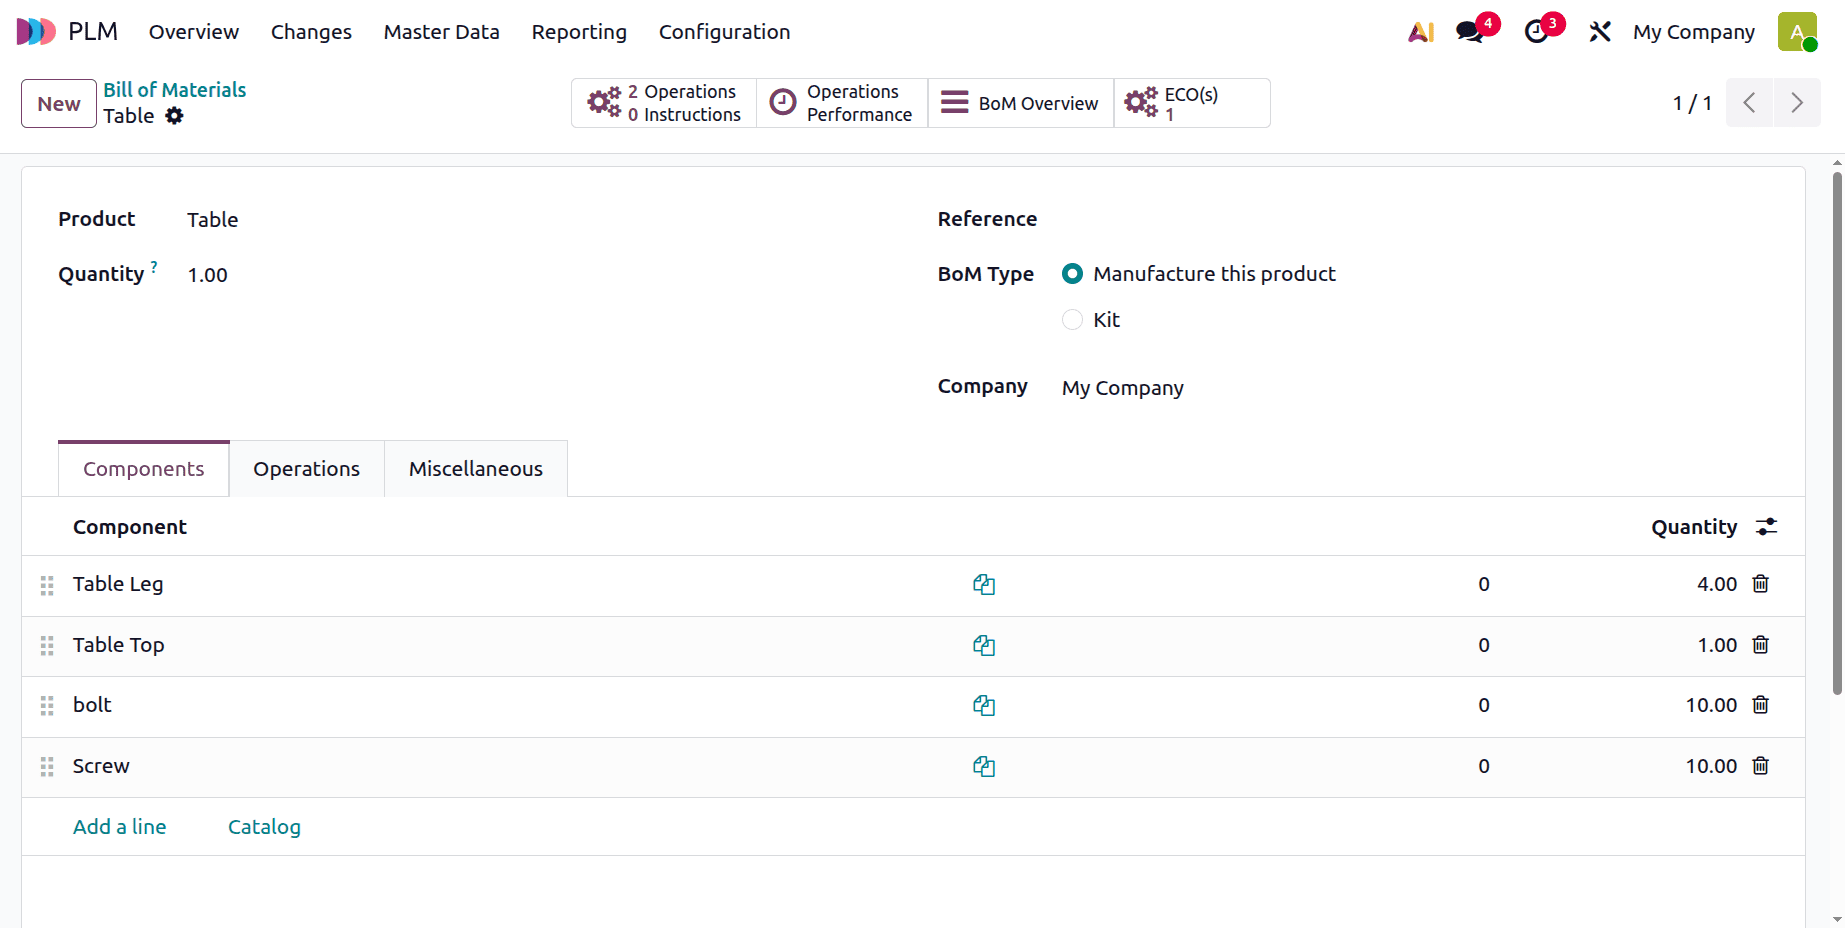
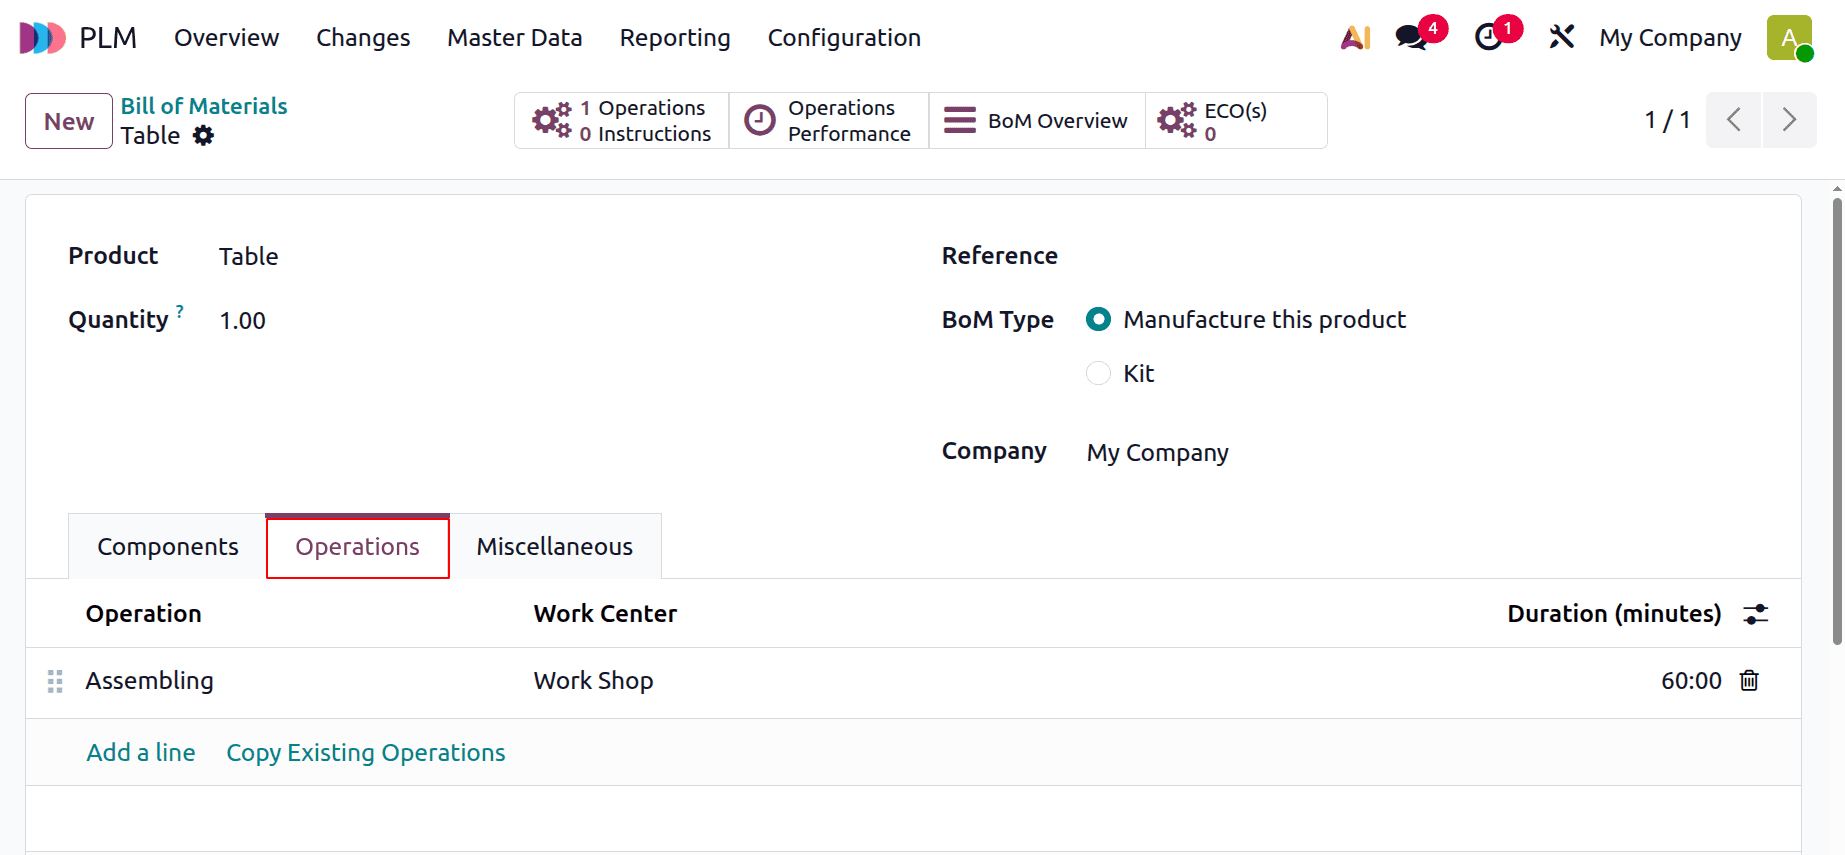
Select the manufactured product, a product variant, and a quantity. In this case, the product is a Table. Here, no reference was added. The Manufacturing BoM is created when the Manufacturing BoM Type is selected. Add components related to the product's manufacturing to the Components tab.
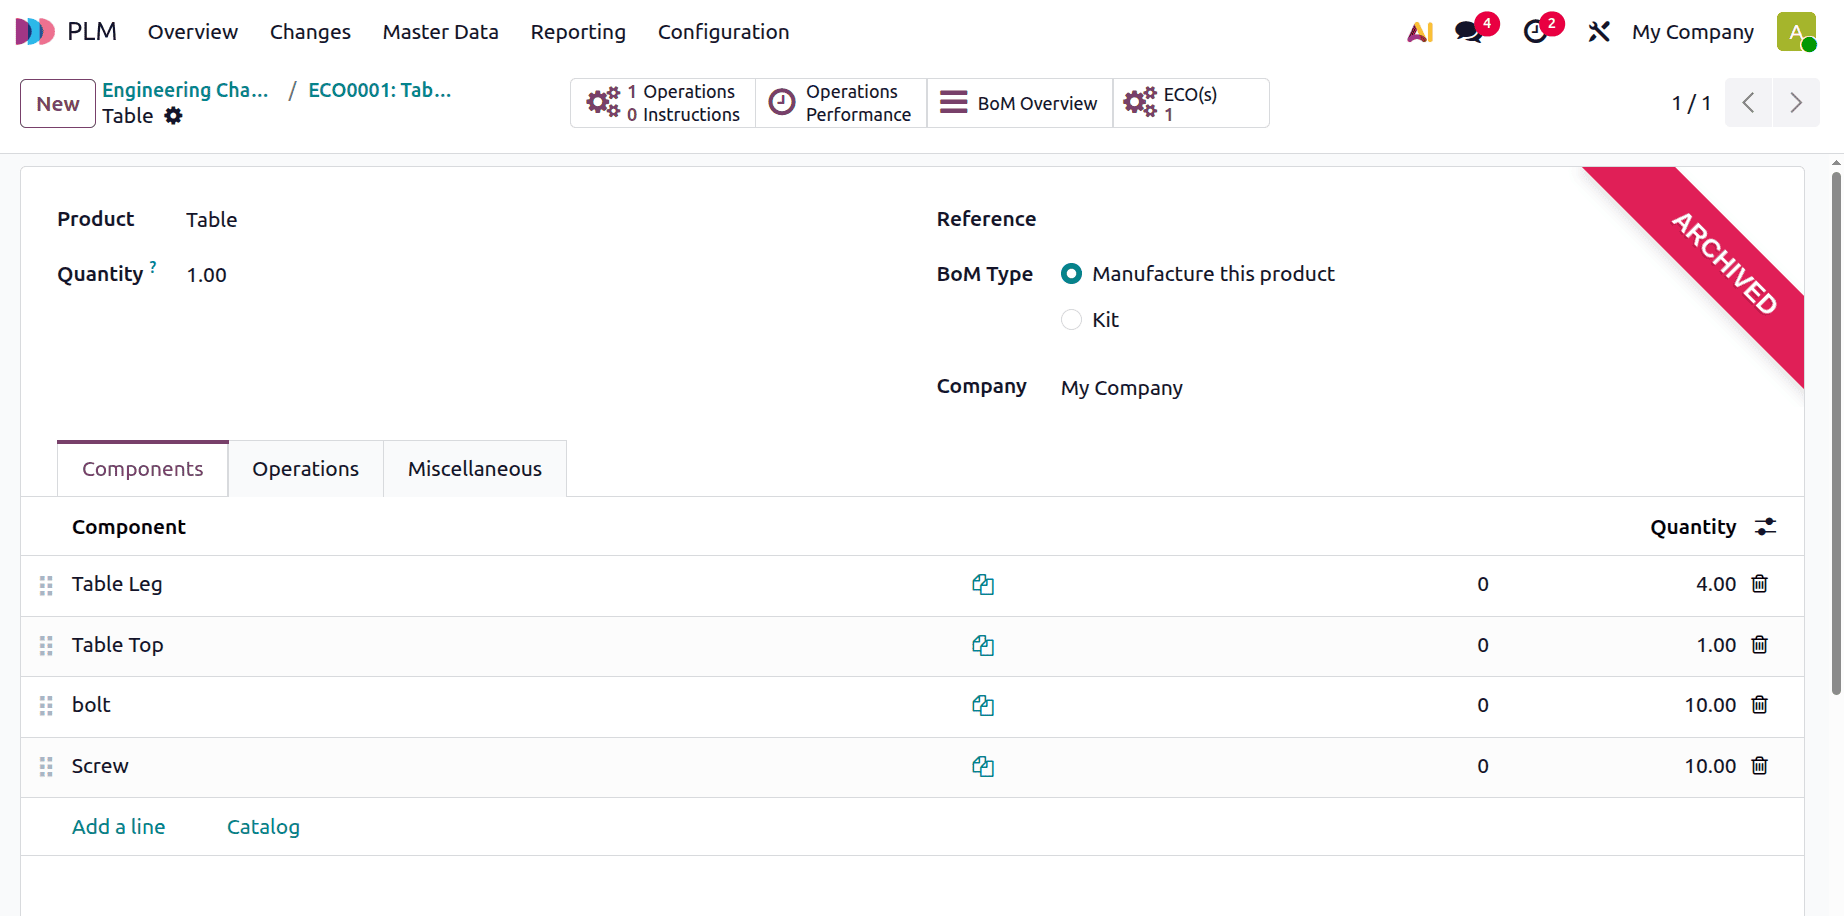
The raw materials required to produce TABLE are displayed on the components tab. In this case, the components added are Table Top, Table Leg, Bolts, and Screws.
The Operations page, which comes next, displays a list of the actions taken during the production process. As of right now, the BoM has only one additional operation.
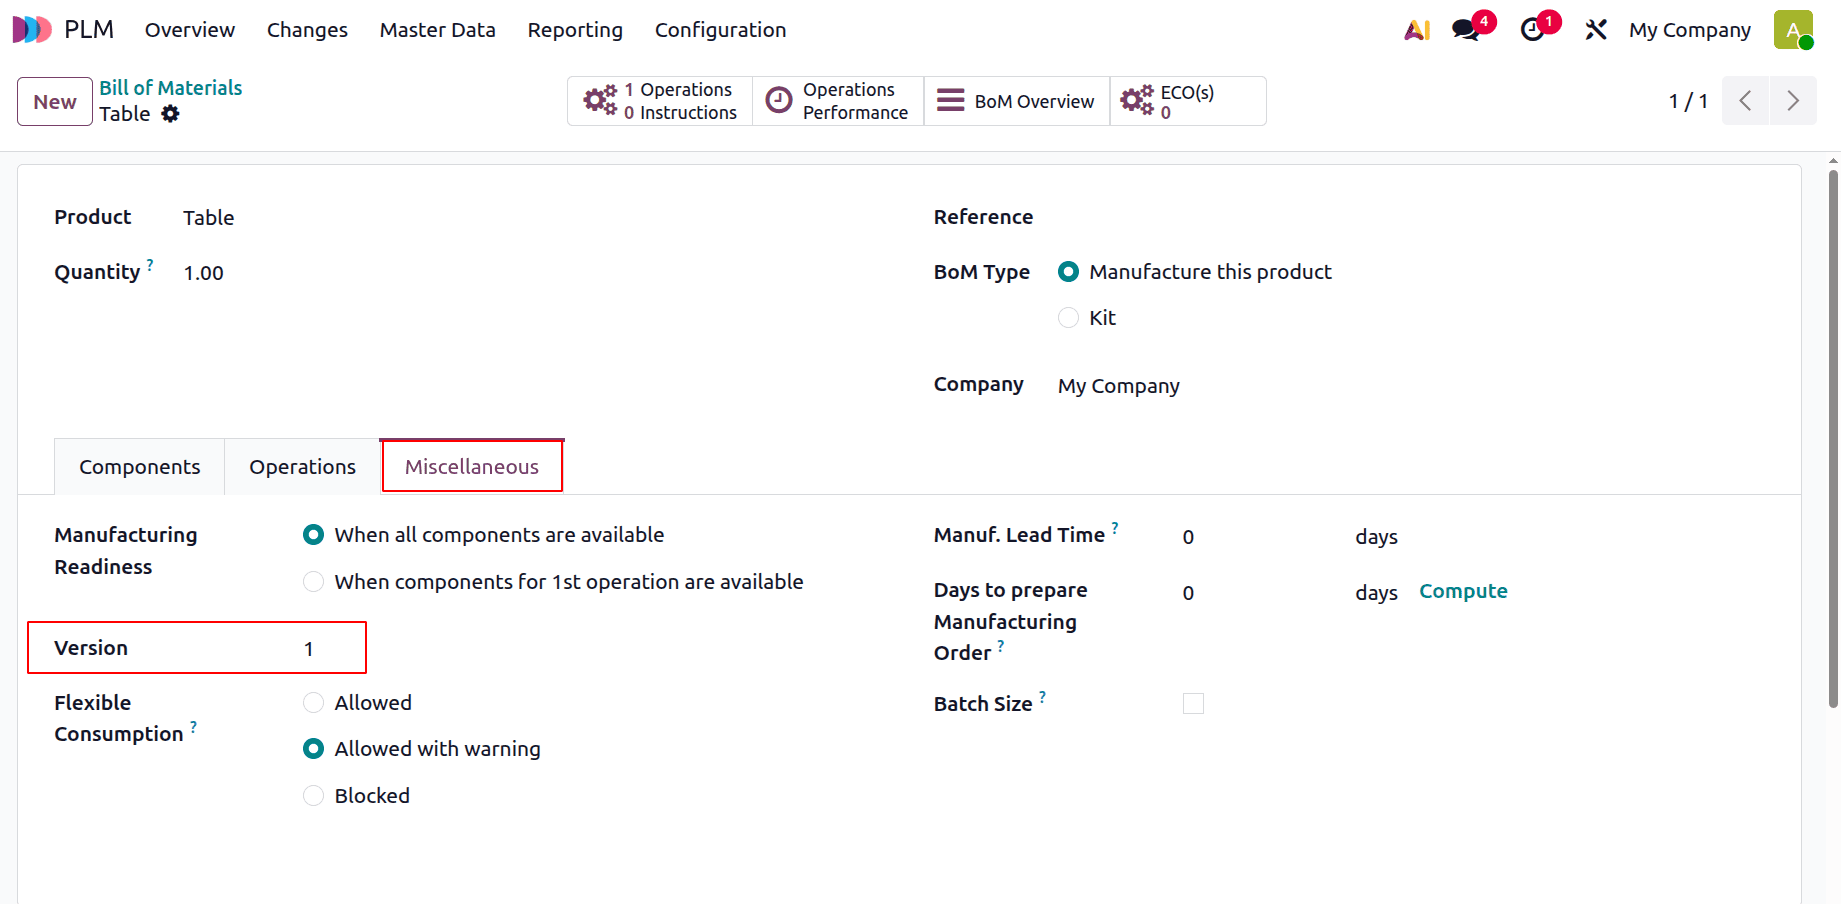
The produced bill of materials is displayed on the BoM's Miscellaneous tab. Here, the BoM is currently in Version 1.
To add ECO Changes to the freshly formed BoM, select the Changes tab.
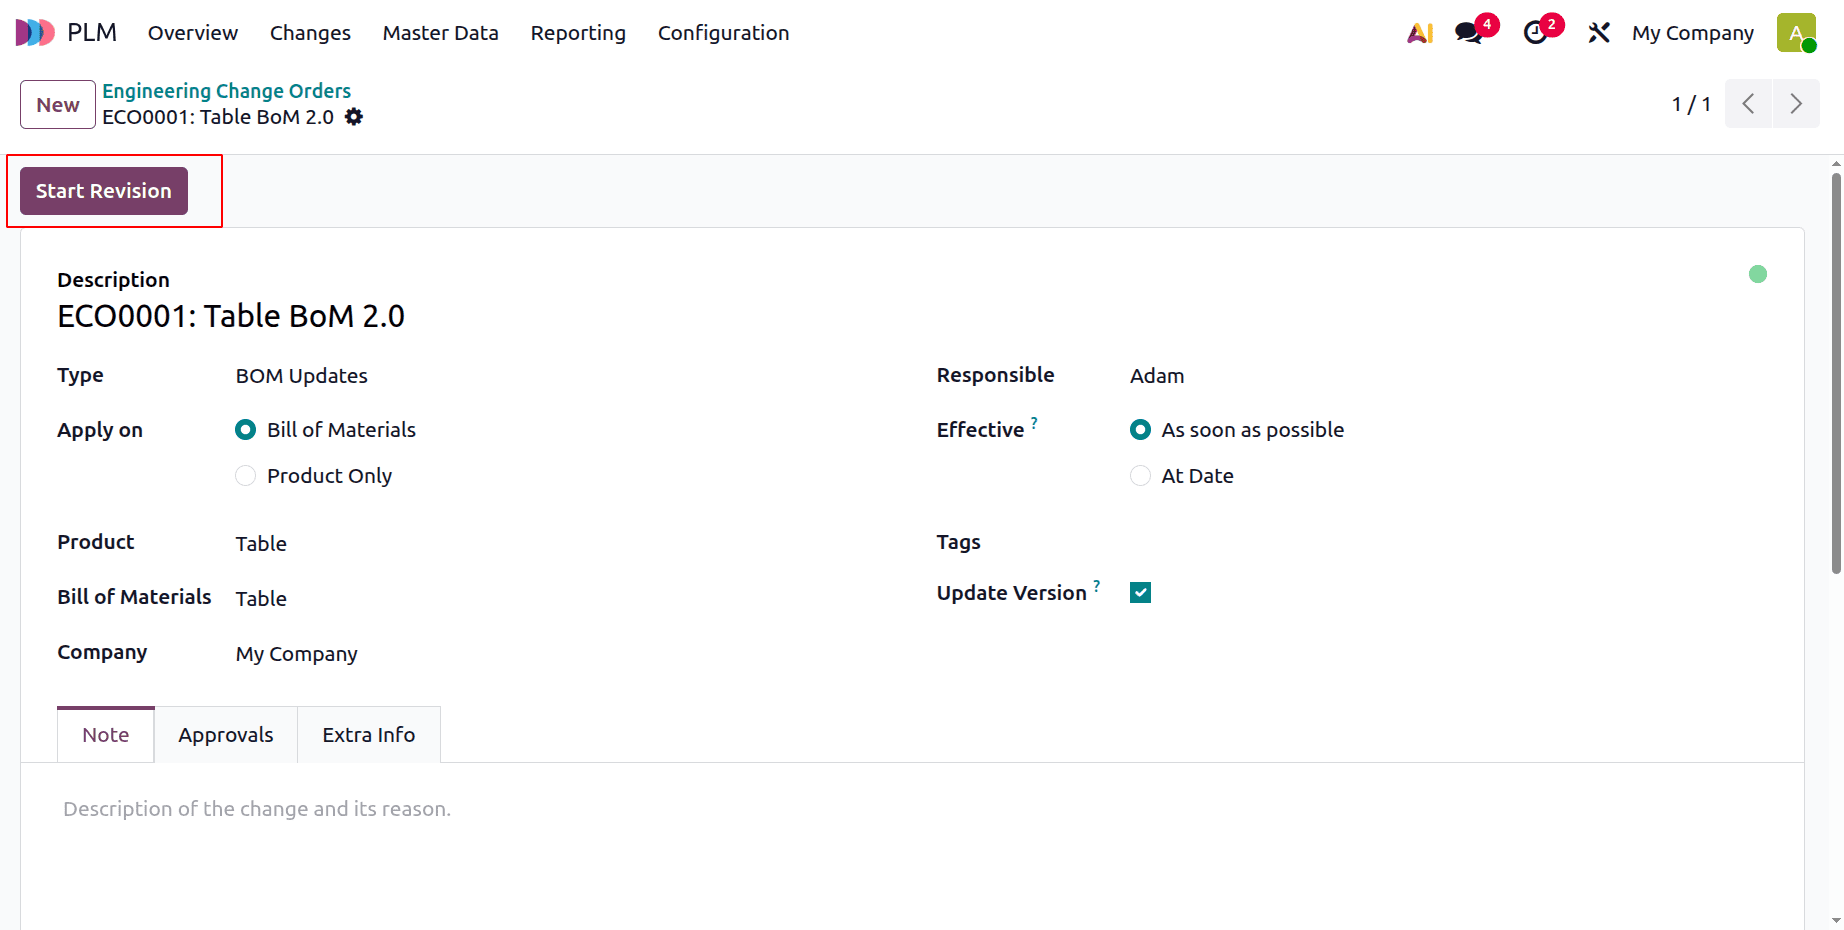
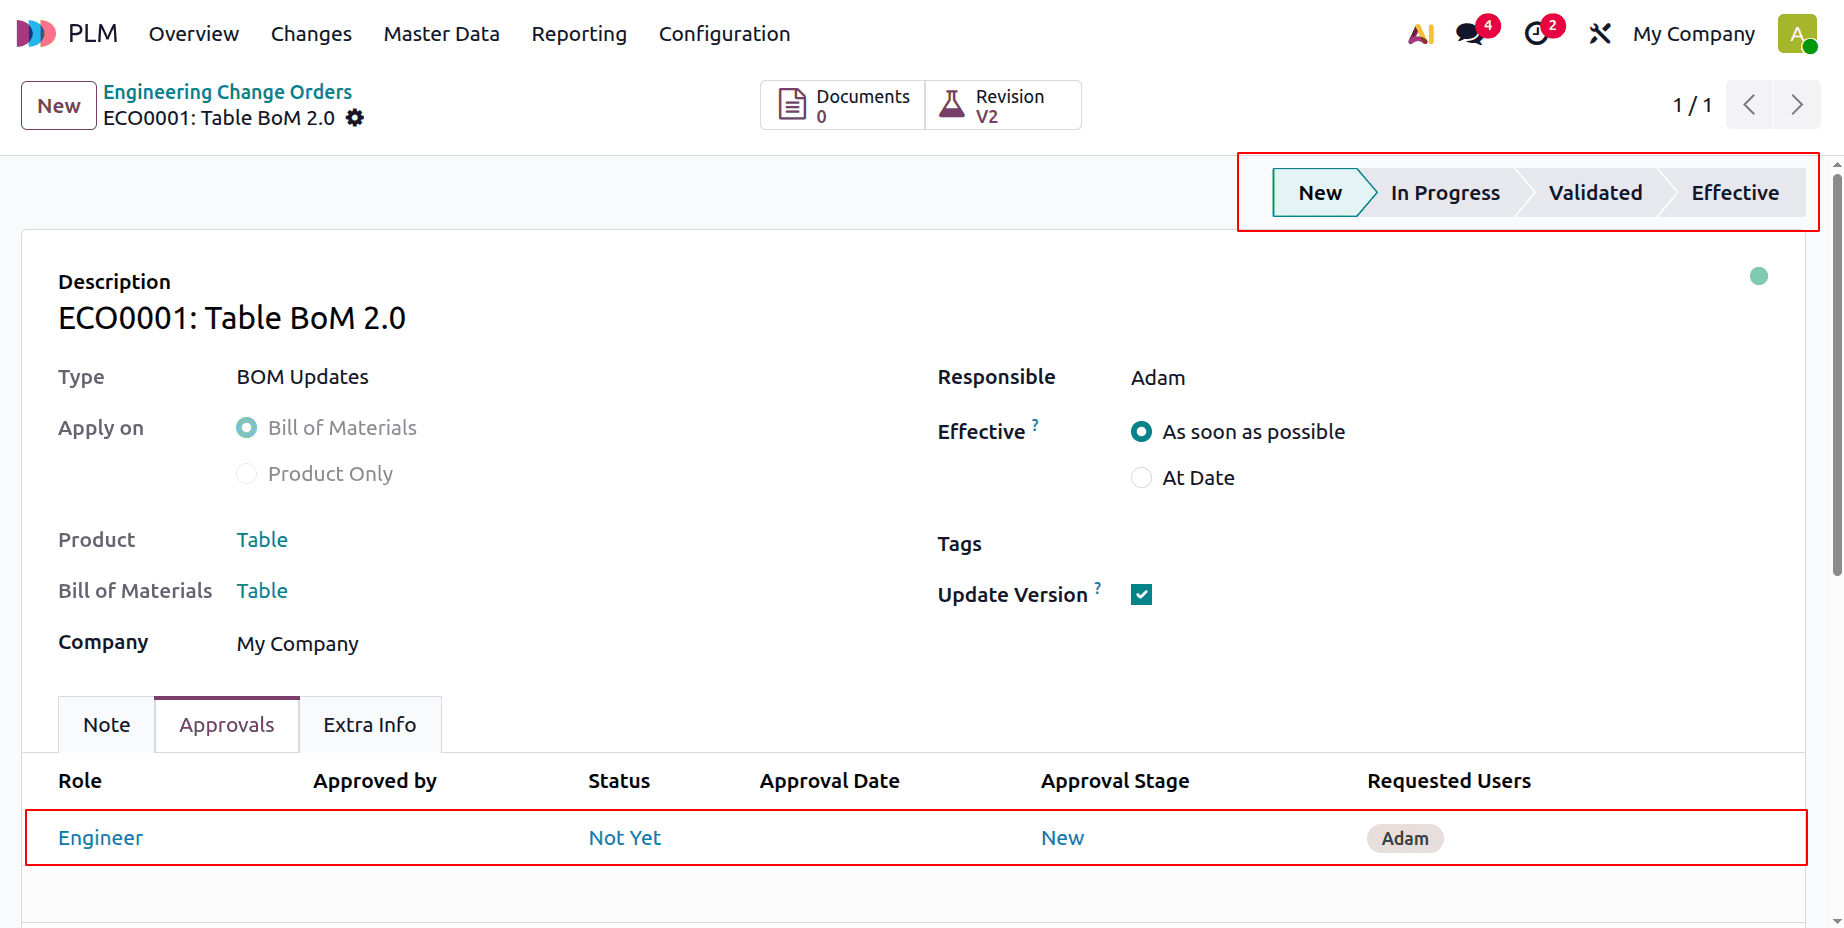
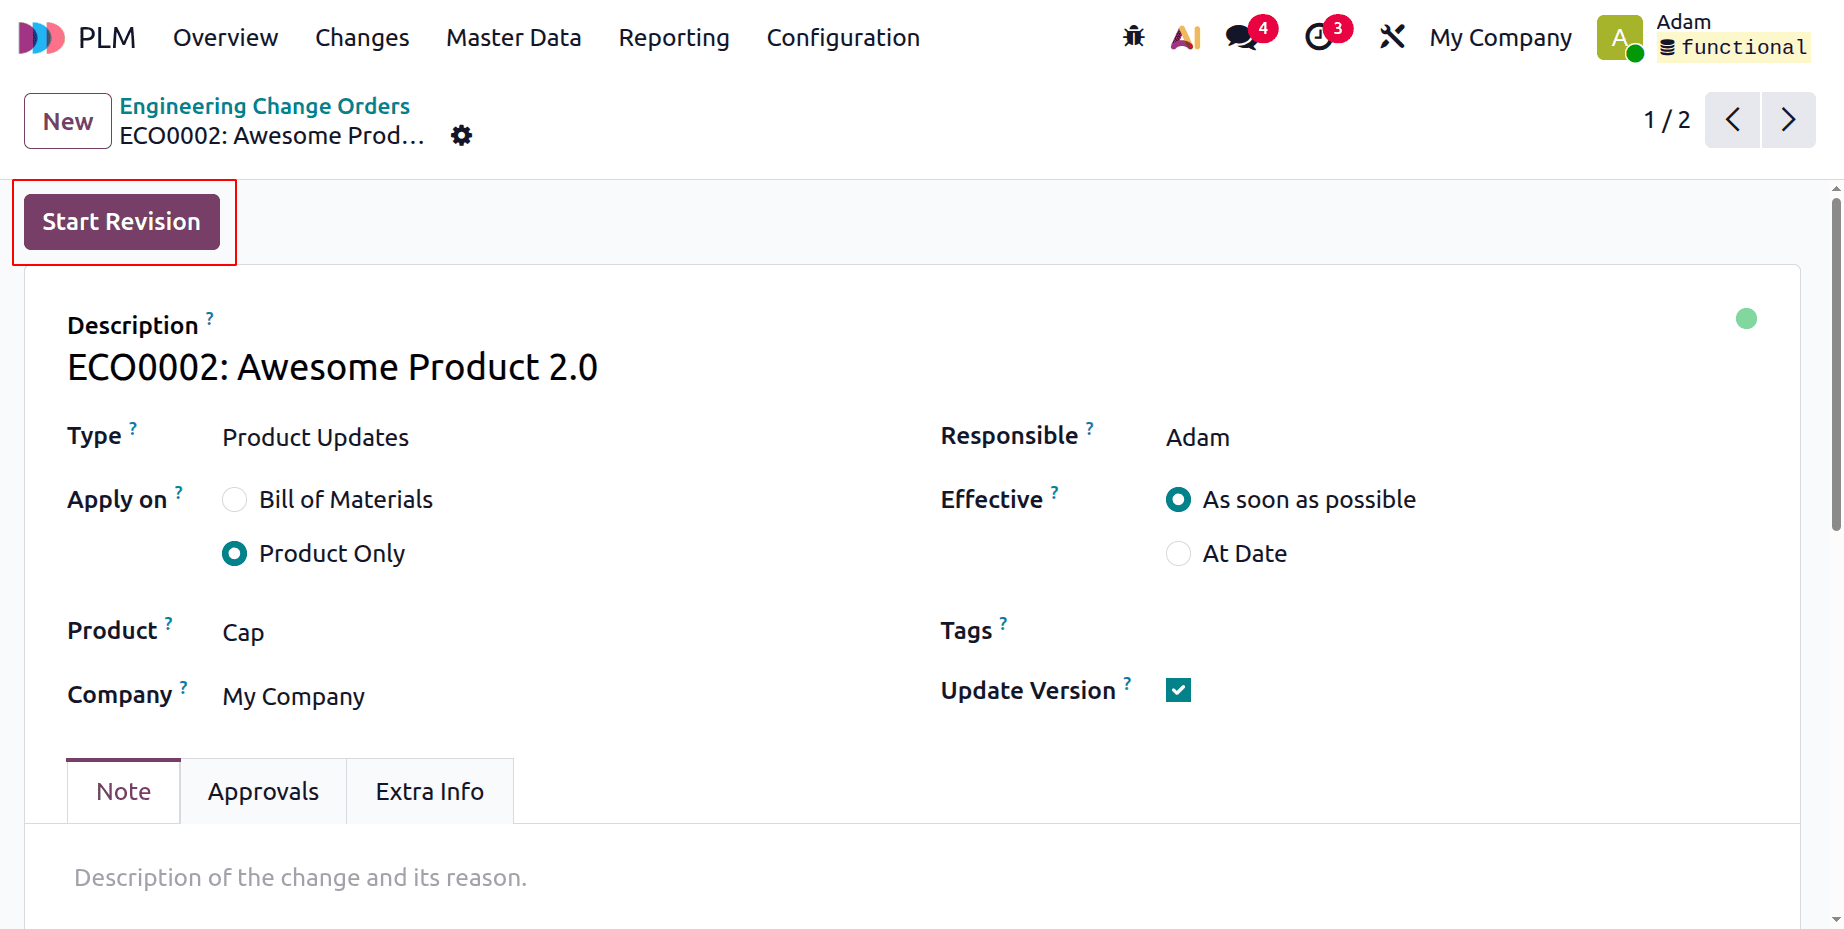
Describe it in the description field. Select the right choice, accountable person, and type. The Bill of Materials was selected as the "Apply on" option at this time. When the manufacturing product is chosen from the product tab, the pertinent bill of materials will be put in the BoM field right away. Click "start revision" after that.
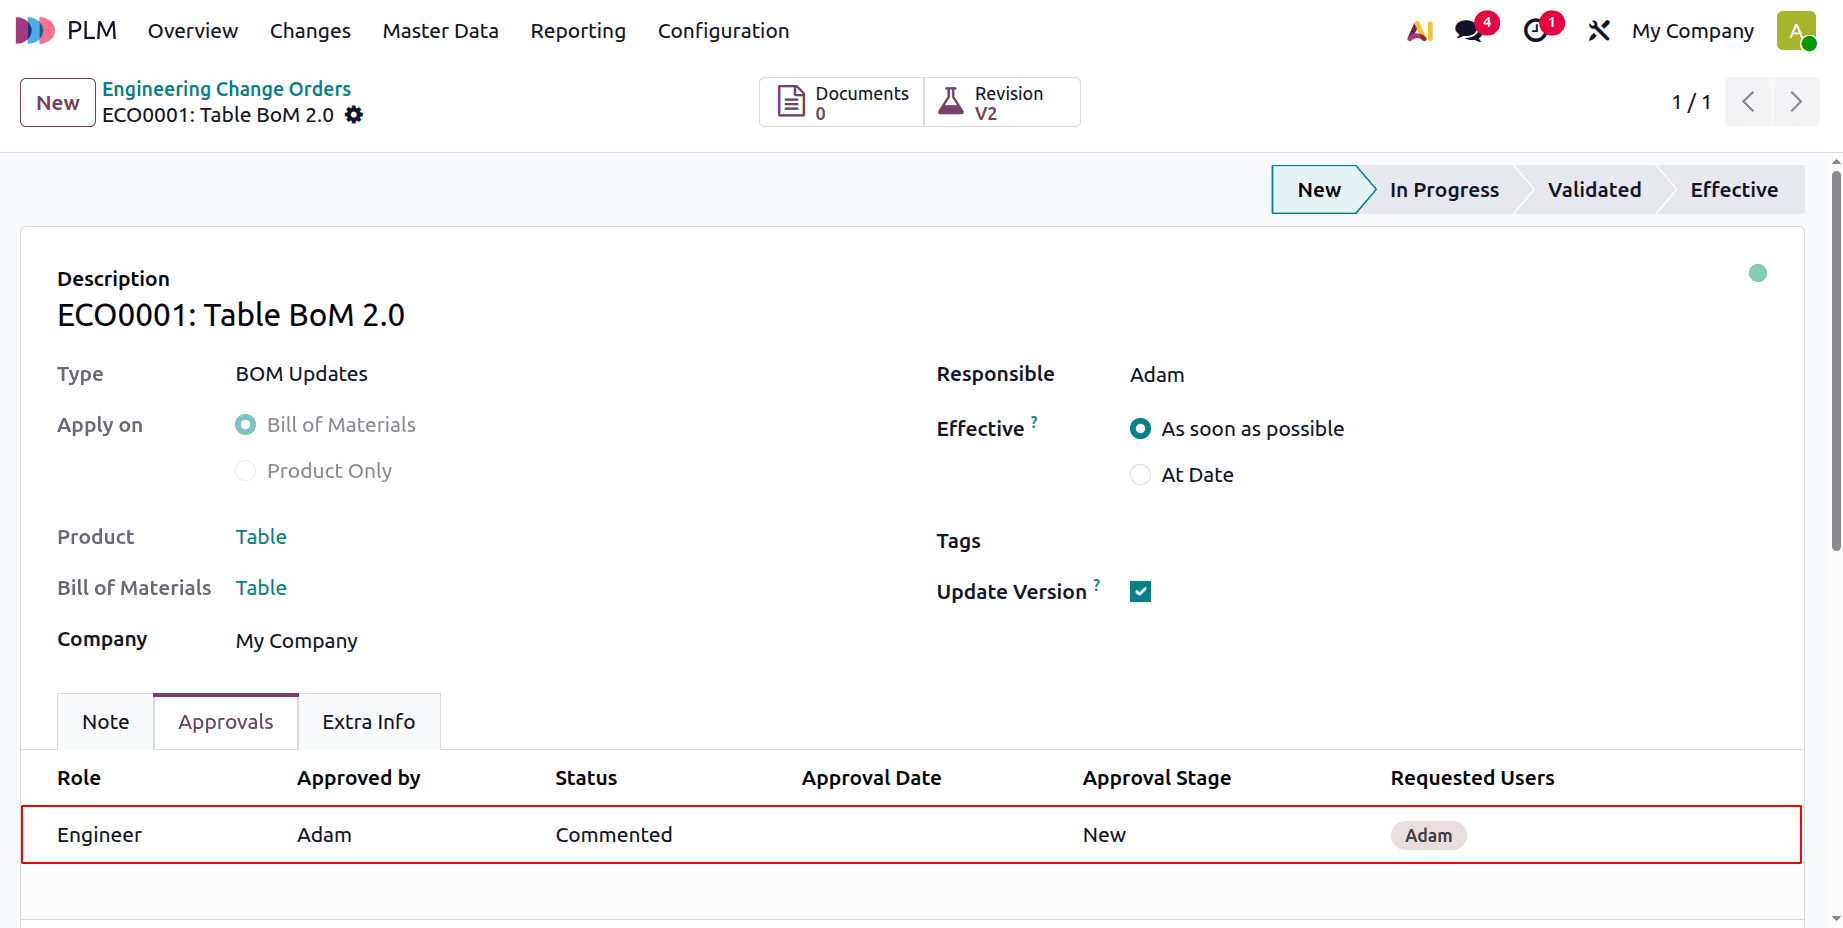
Right now, the ECO Change Order procedure is in its New Stage. The user Adam would want to comment at this time.
Add a log note, as seen in the screenshot above. To add a comment, click on it. Next, press the Log button.

The approval status is then displayed as Commented on the Approval tab.
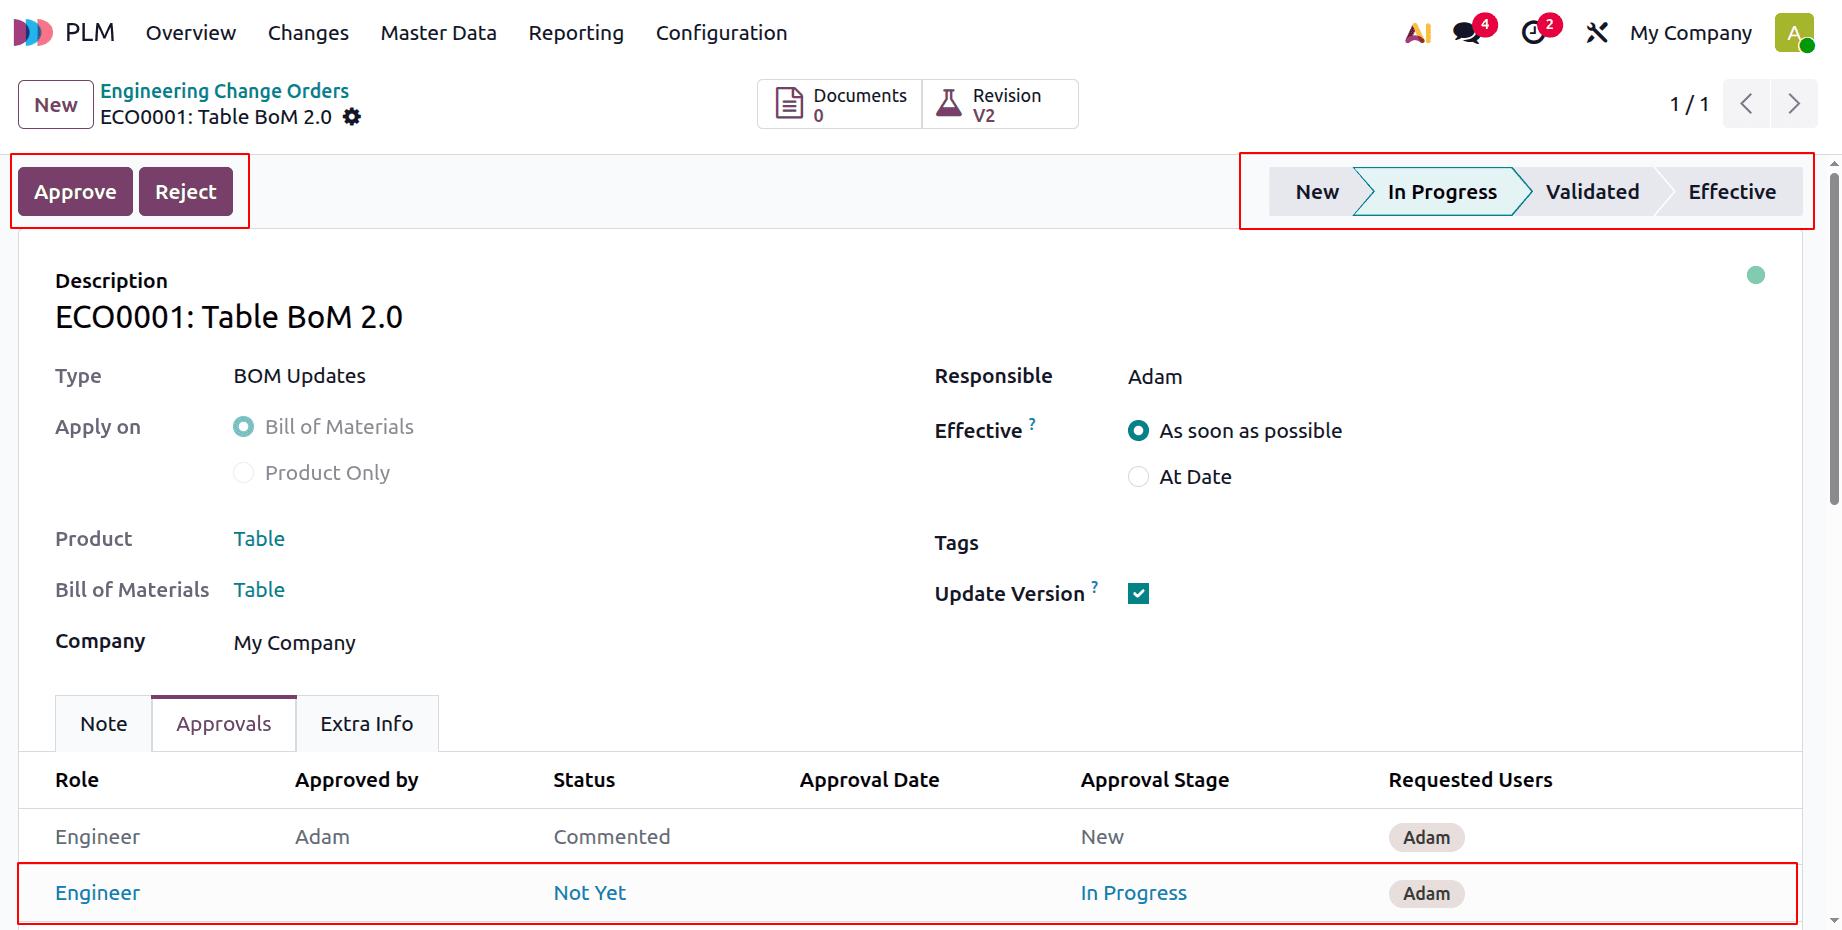
Next, switch to the "In Progress" stage. The user's approval is then required for the "In Progress" stage. Press the "Approve" button.
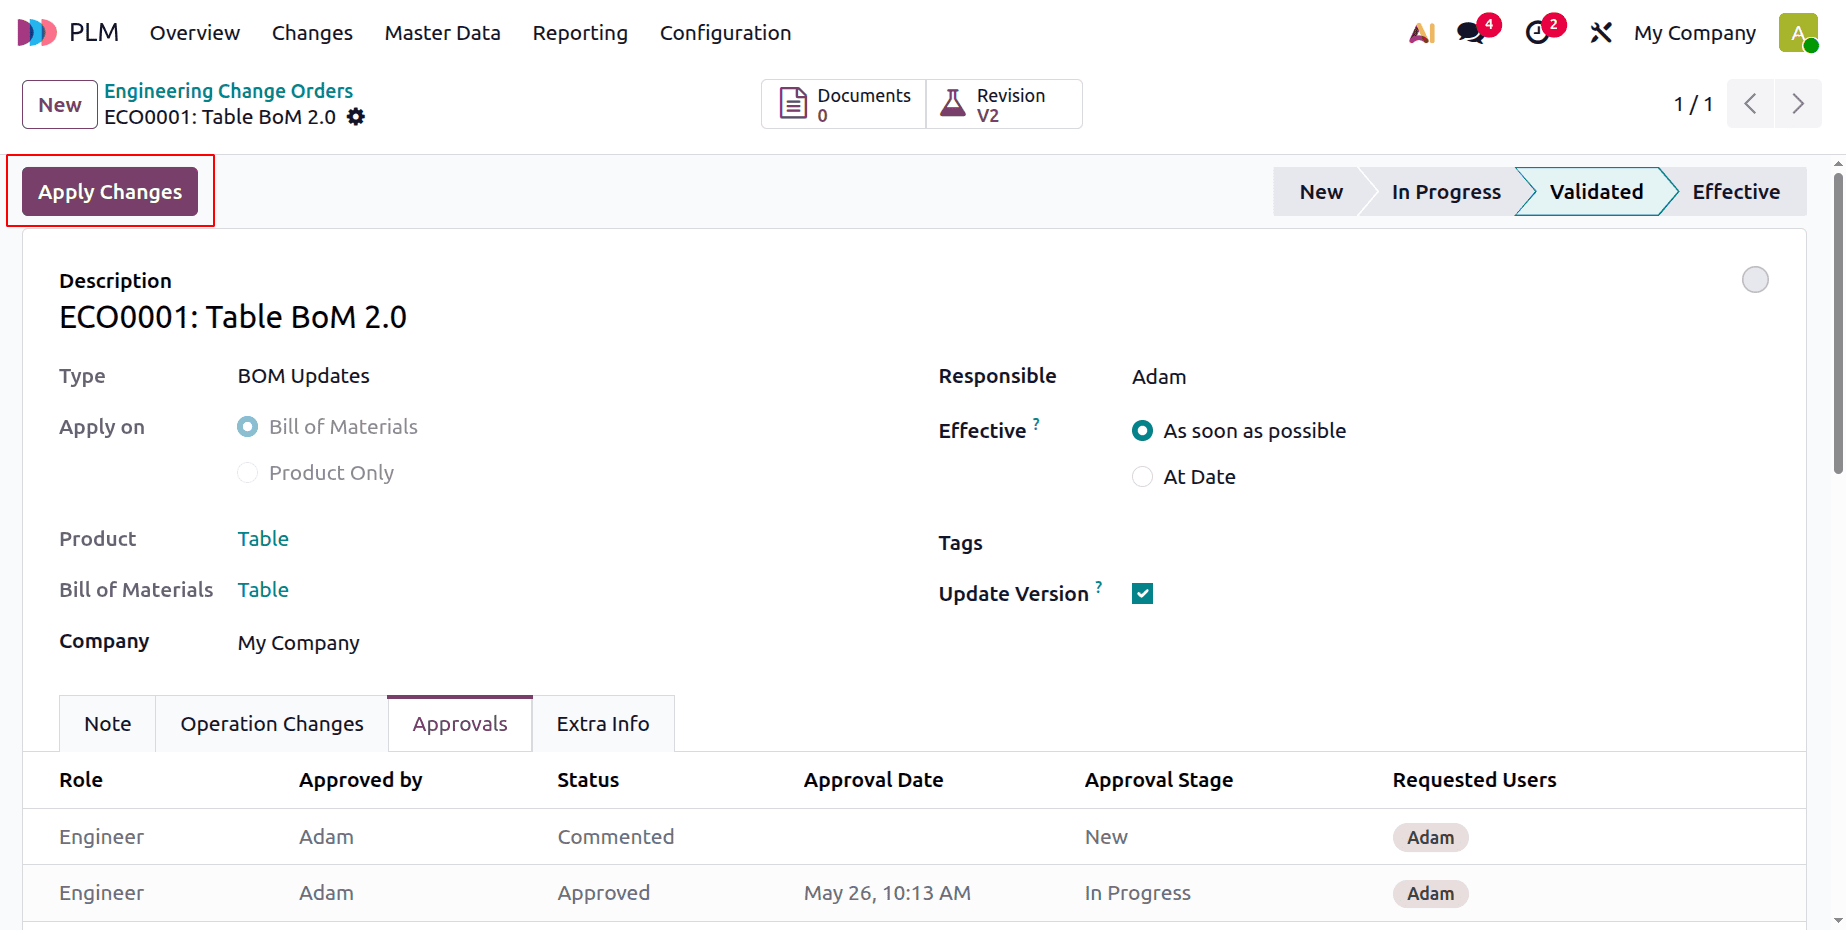
Next, switch to the Validated stage. Documents and Revision V2 are the two smart tabs. Users can select the Revision V2 tab or add any relevant documents.
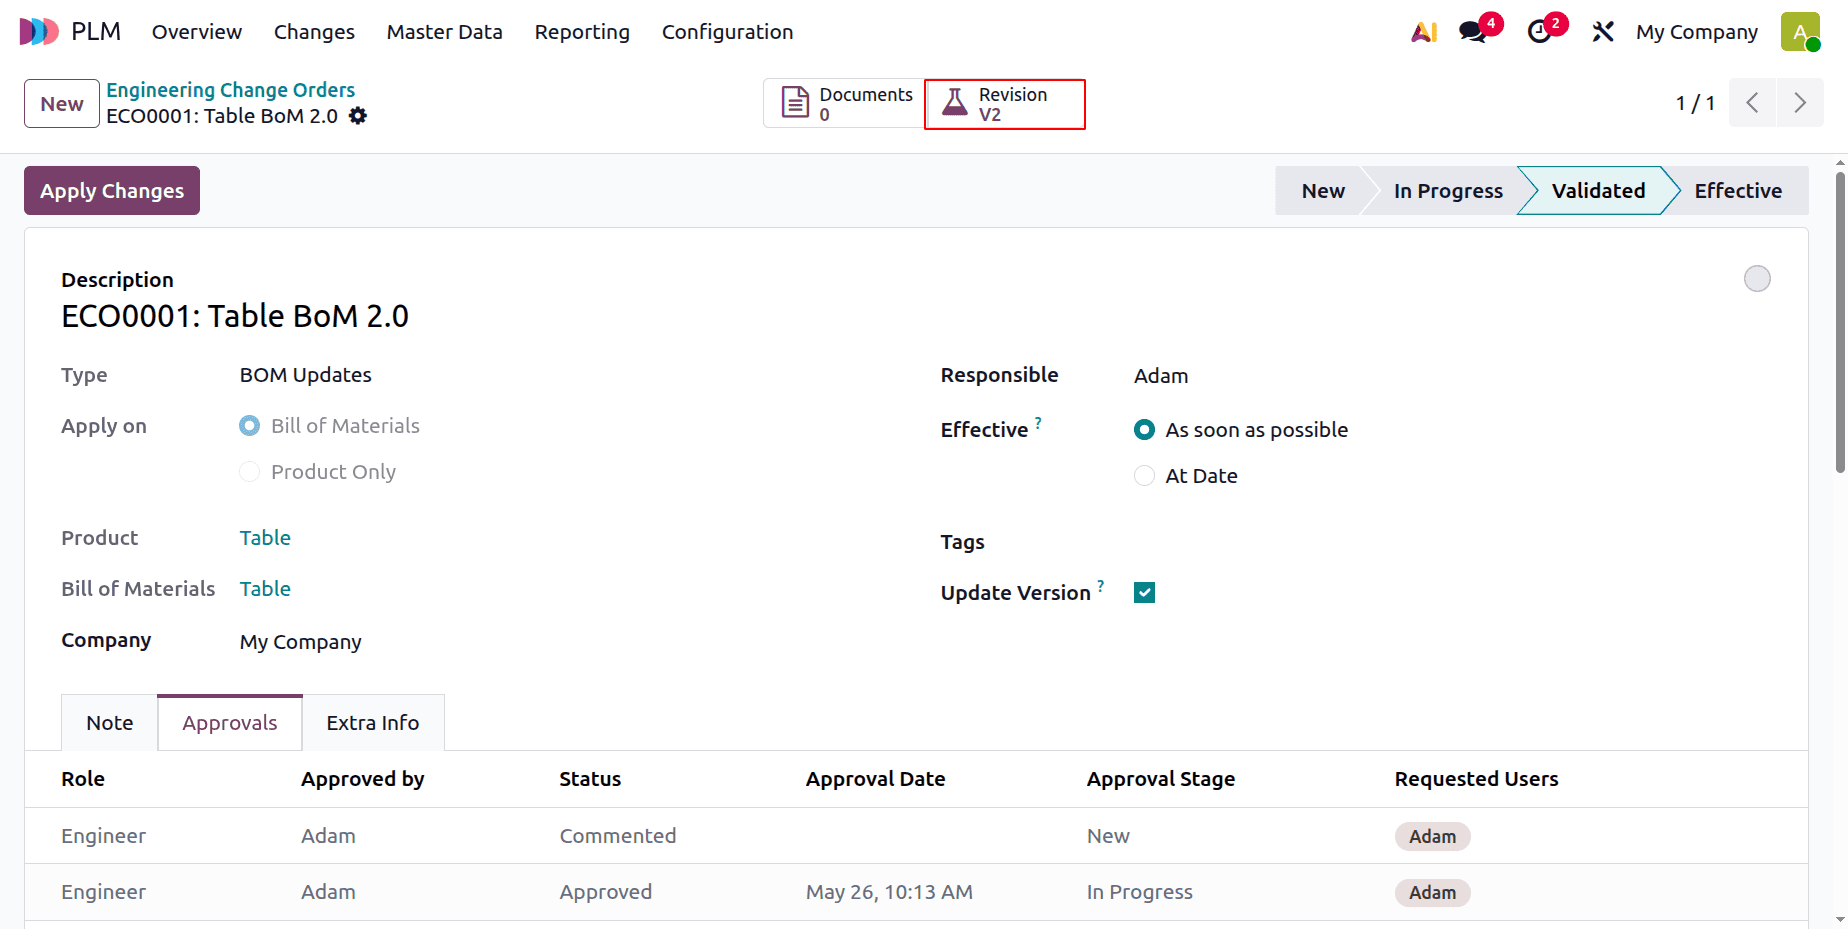
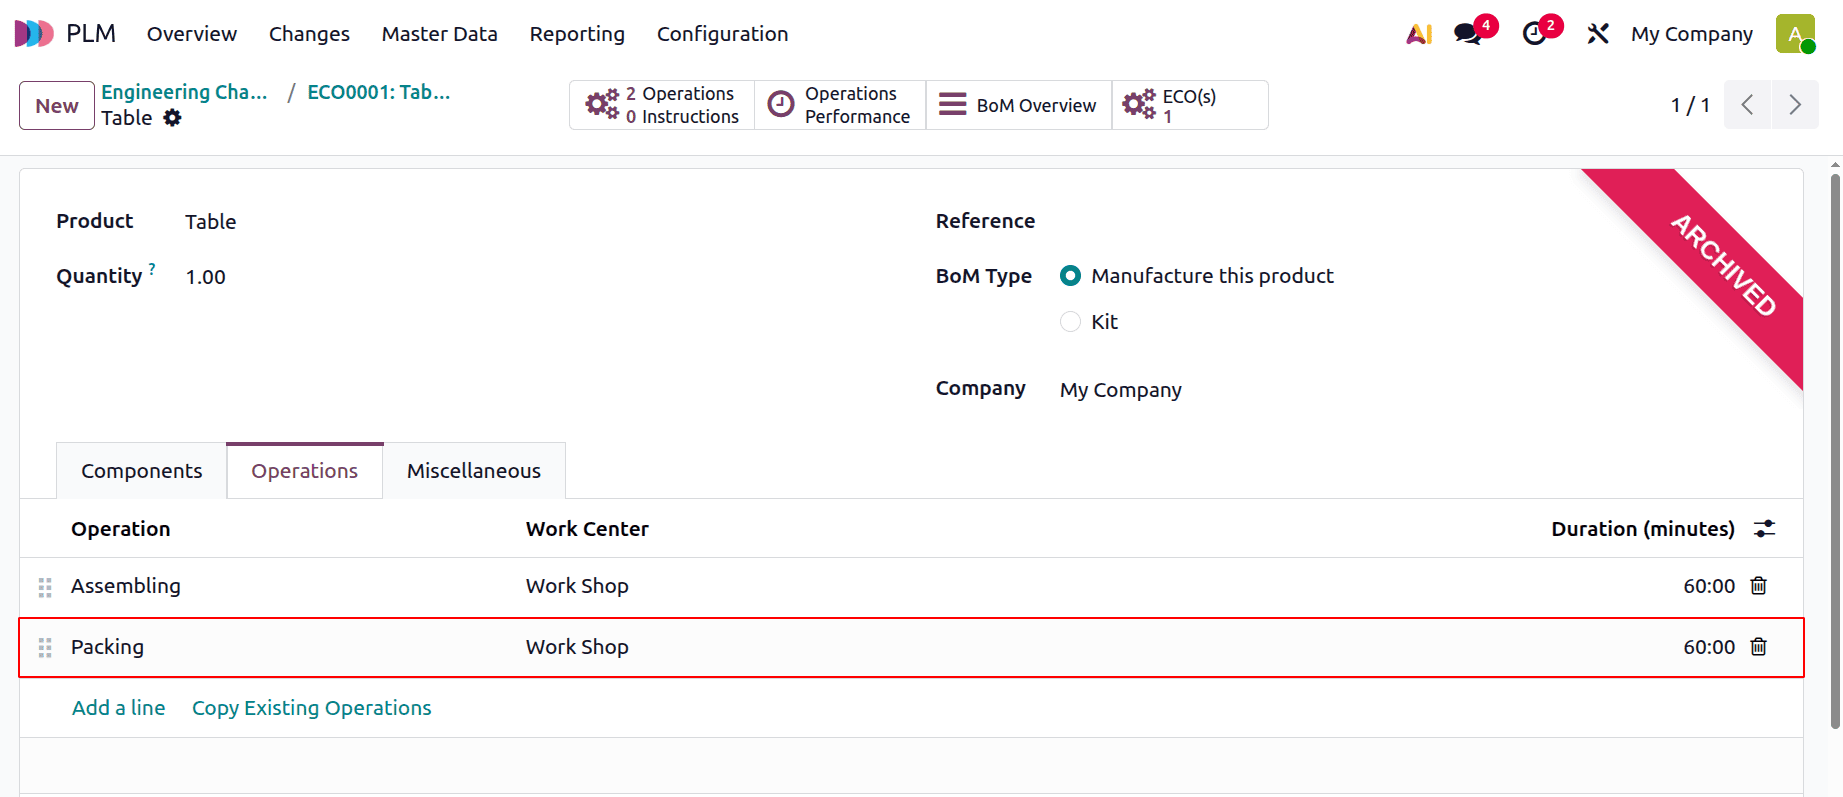
The bill of materials, which is currently in the Archived stage, will thereafter open there. Comments and operations can be added or removed by users.
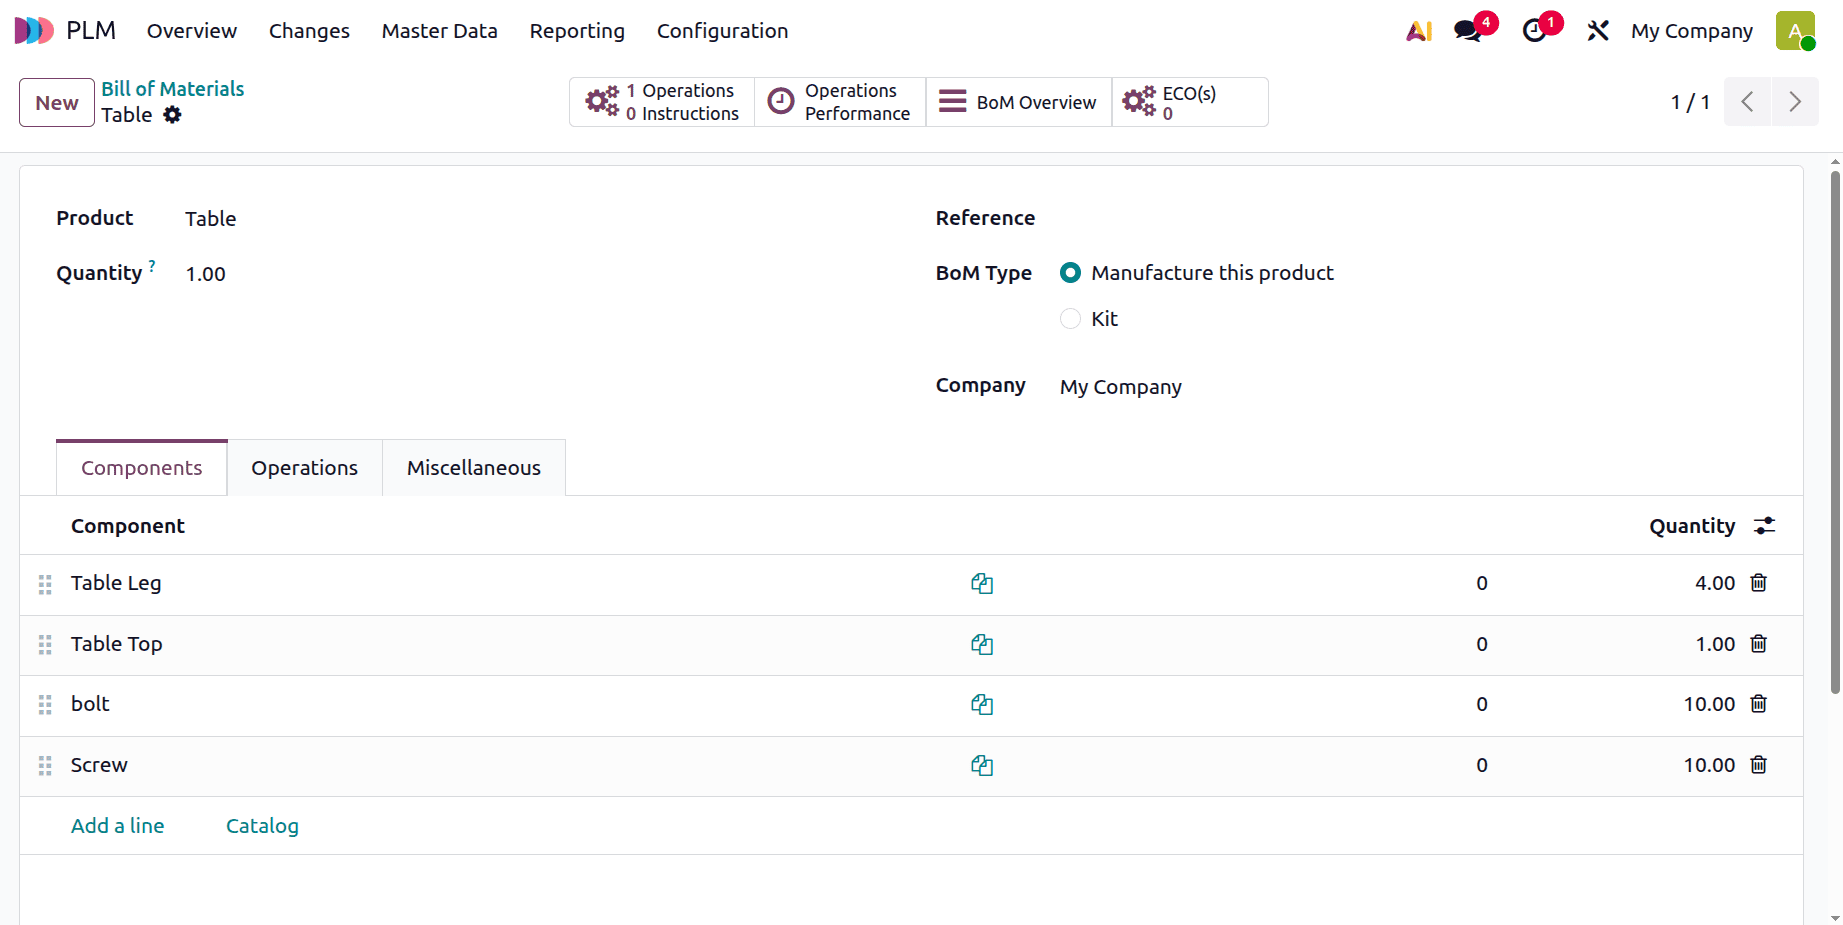
Let's add another process here, called Packing. Save it after adding it to the operation tab. Next, return to the engineering change order that was produced.
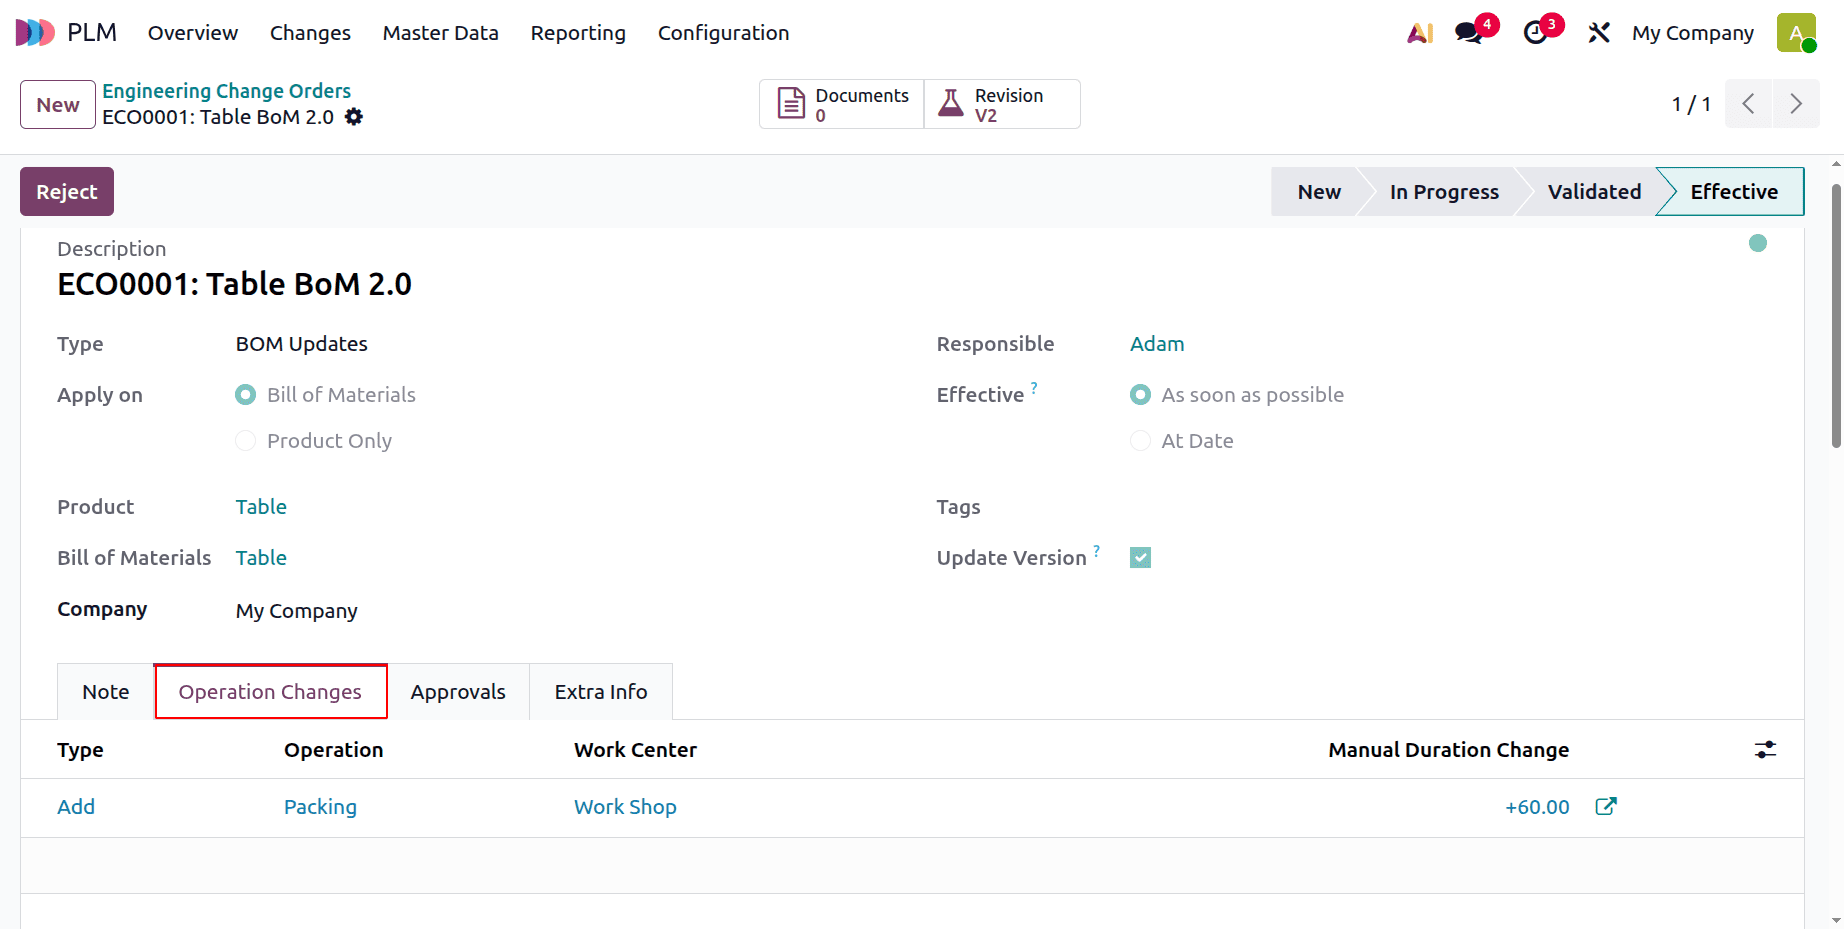
Click the Apply Changes button to implement the modifications you've made to the BoM. After that, the step will immediately become effective.
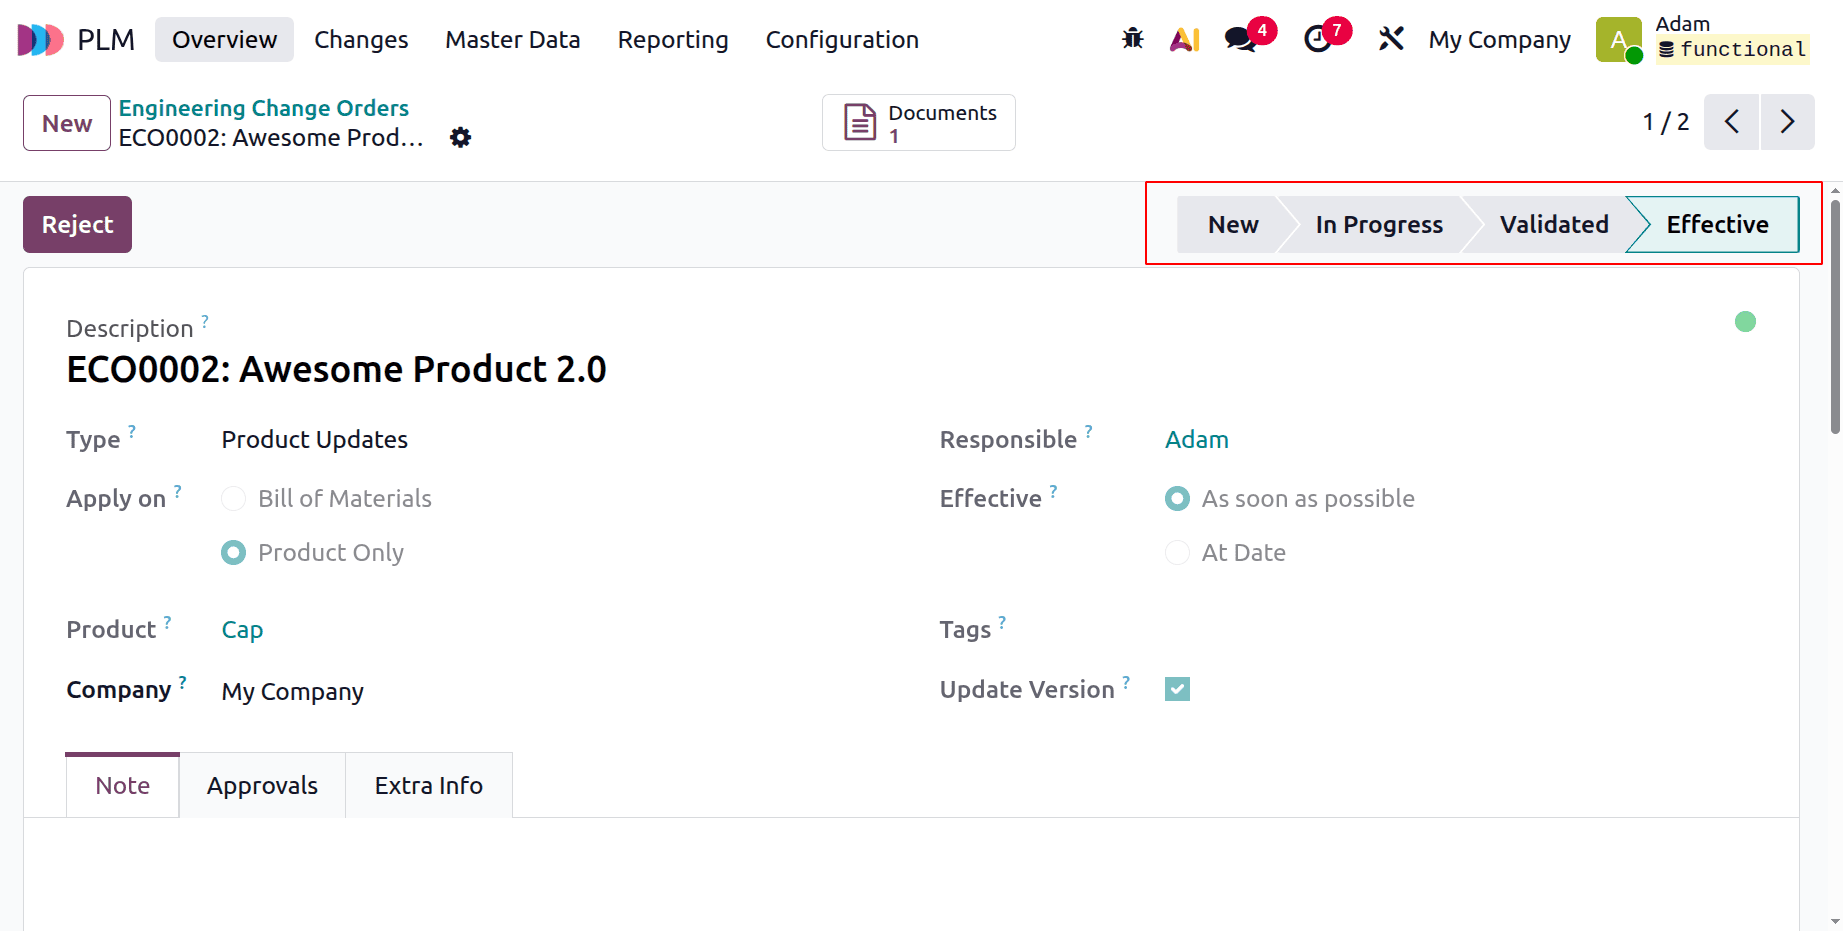
Effective is the last phase. At this point, obligatory approval is required. To finish the procedure, click the Approve button.
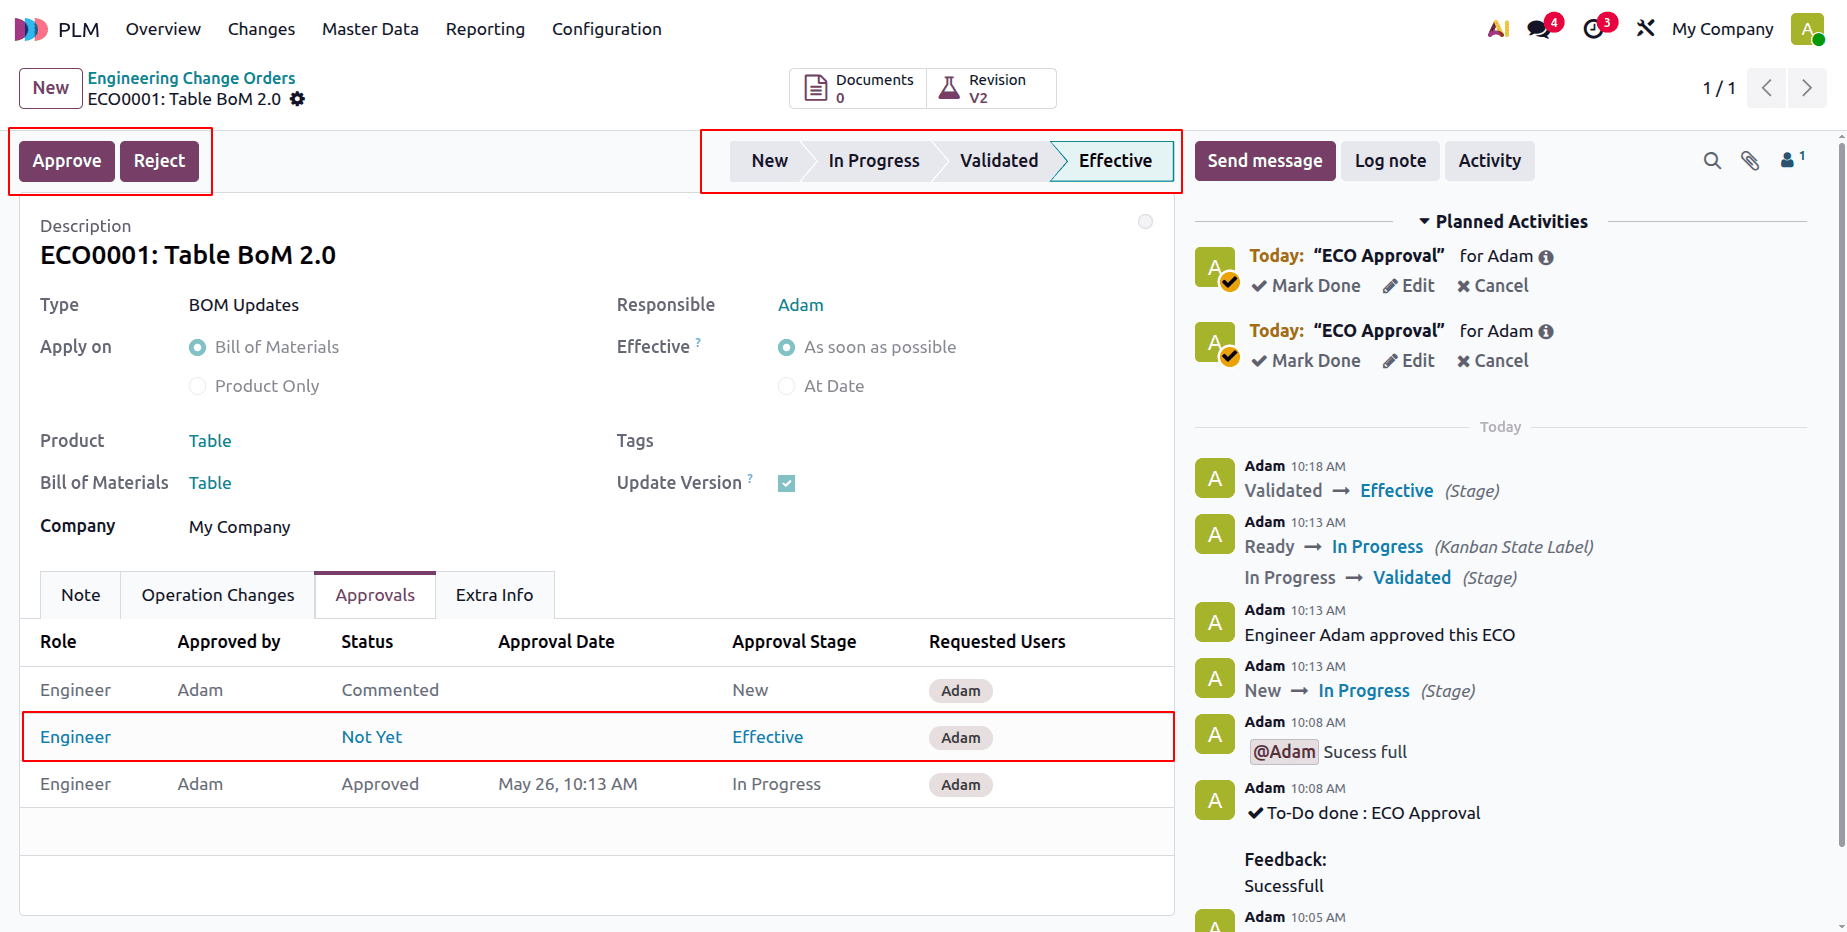
Next, a new tab called Operation Changes was introduced. As said, you can see the modifications made to the BoM operation there. Thus, a new Operation called Packing was created by the user and is visible there.
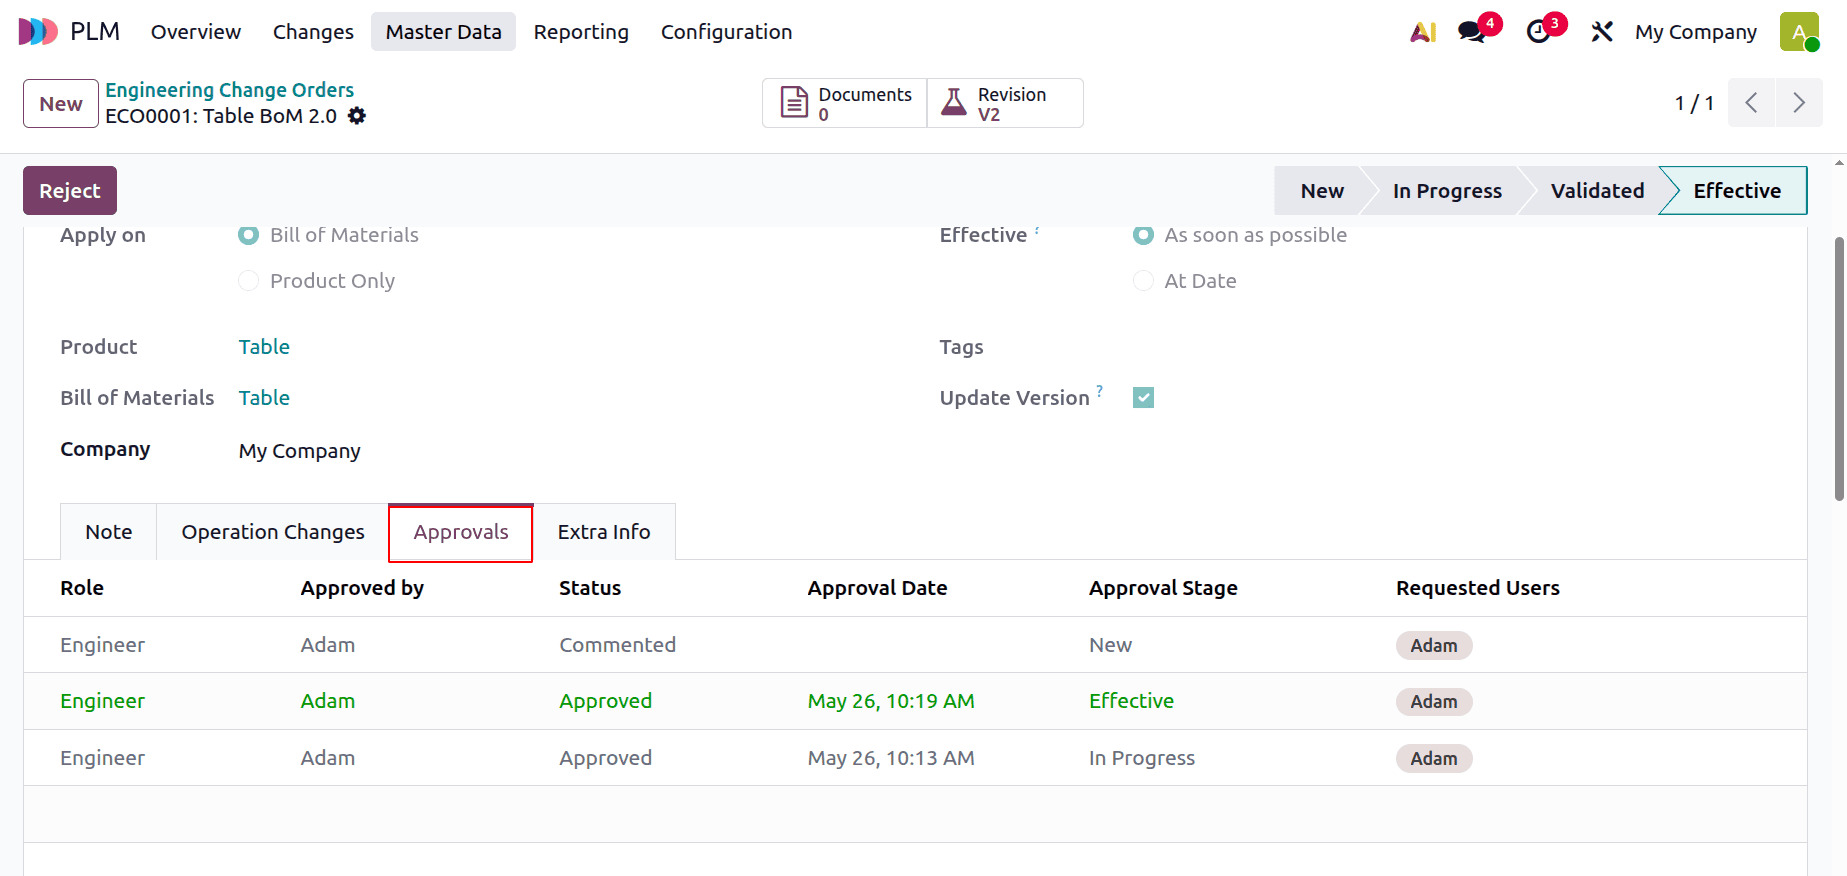
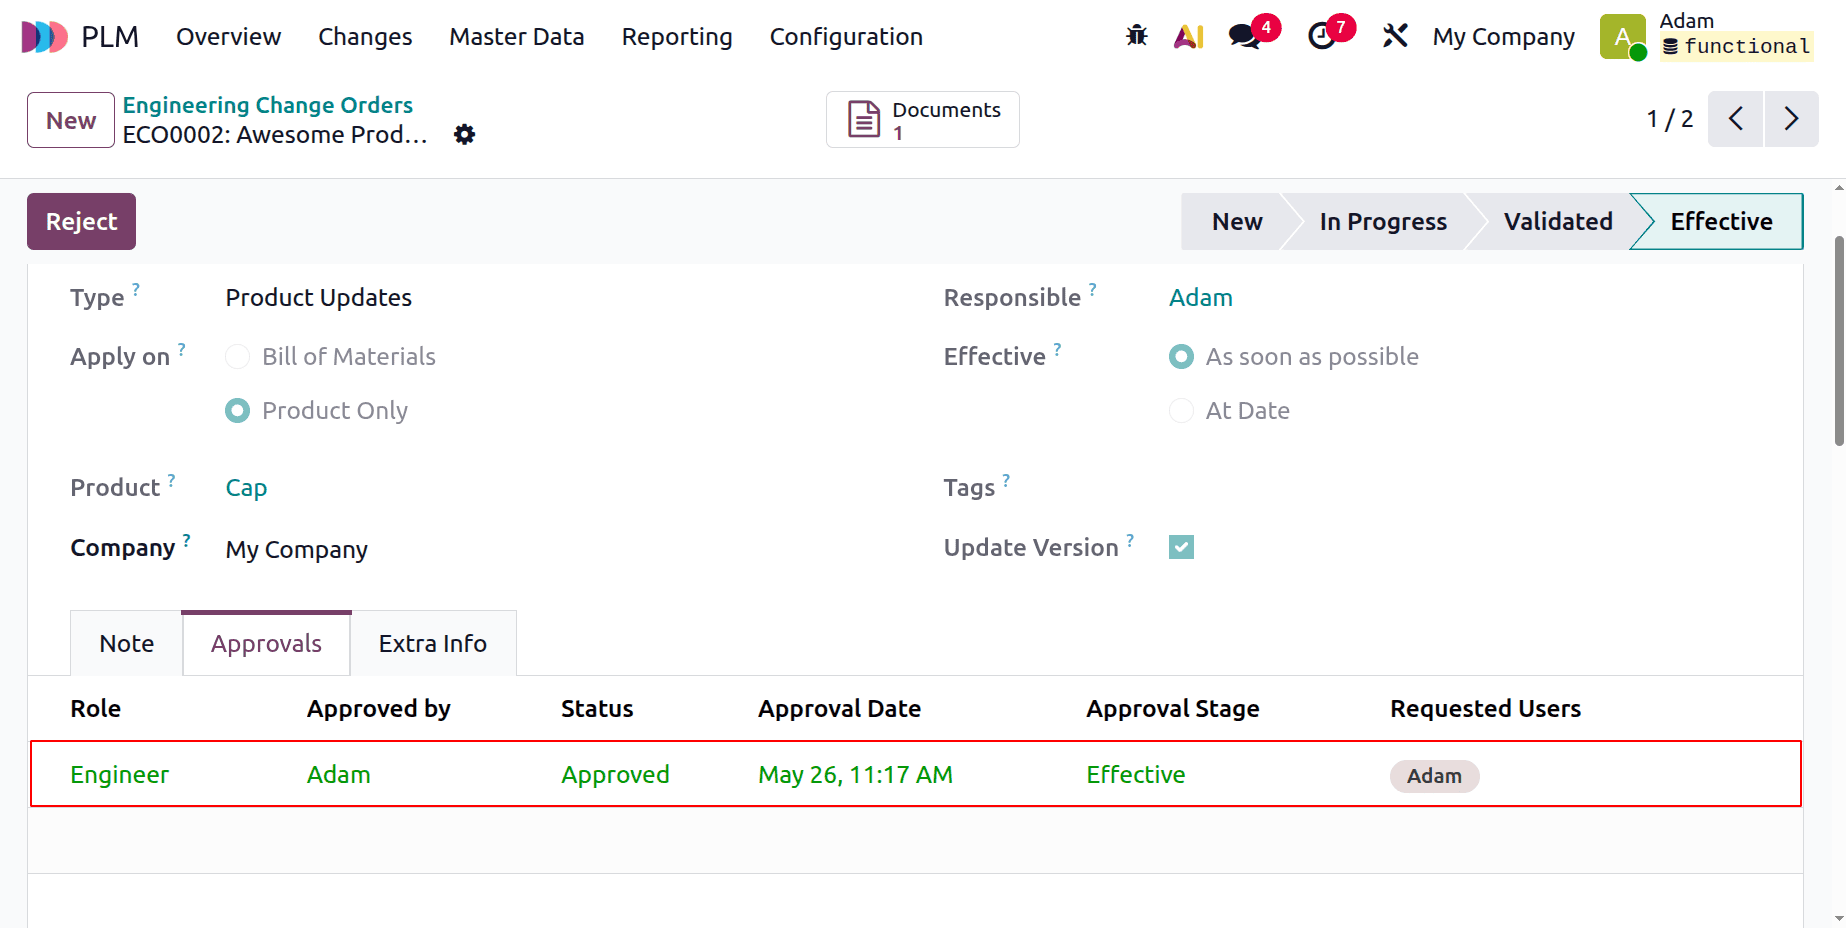
The added approvals are displayed on the Approval tab along with the Role, Approved By, Status, Approval Date, Approval Stage, and Requested Users.
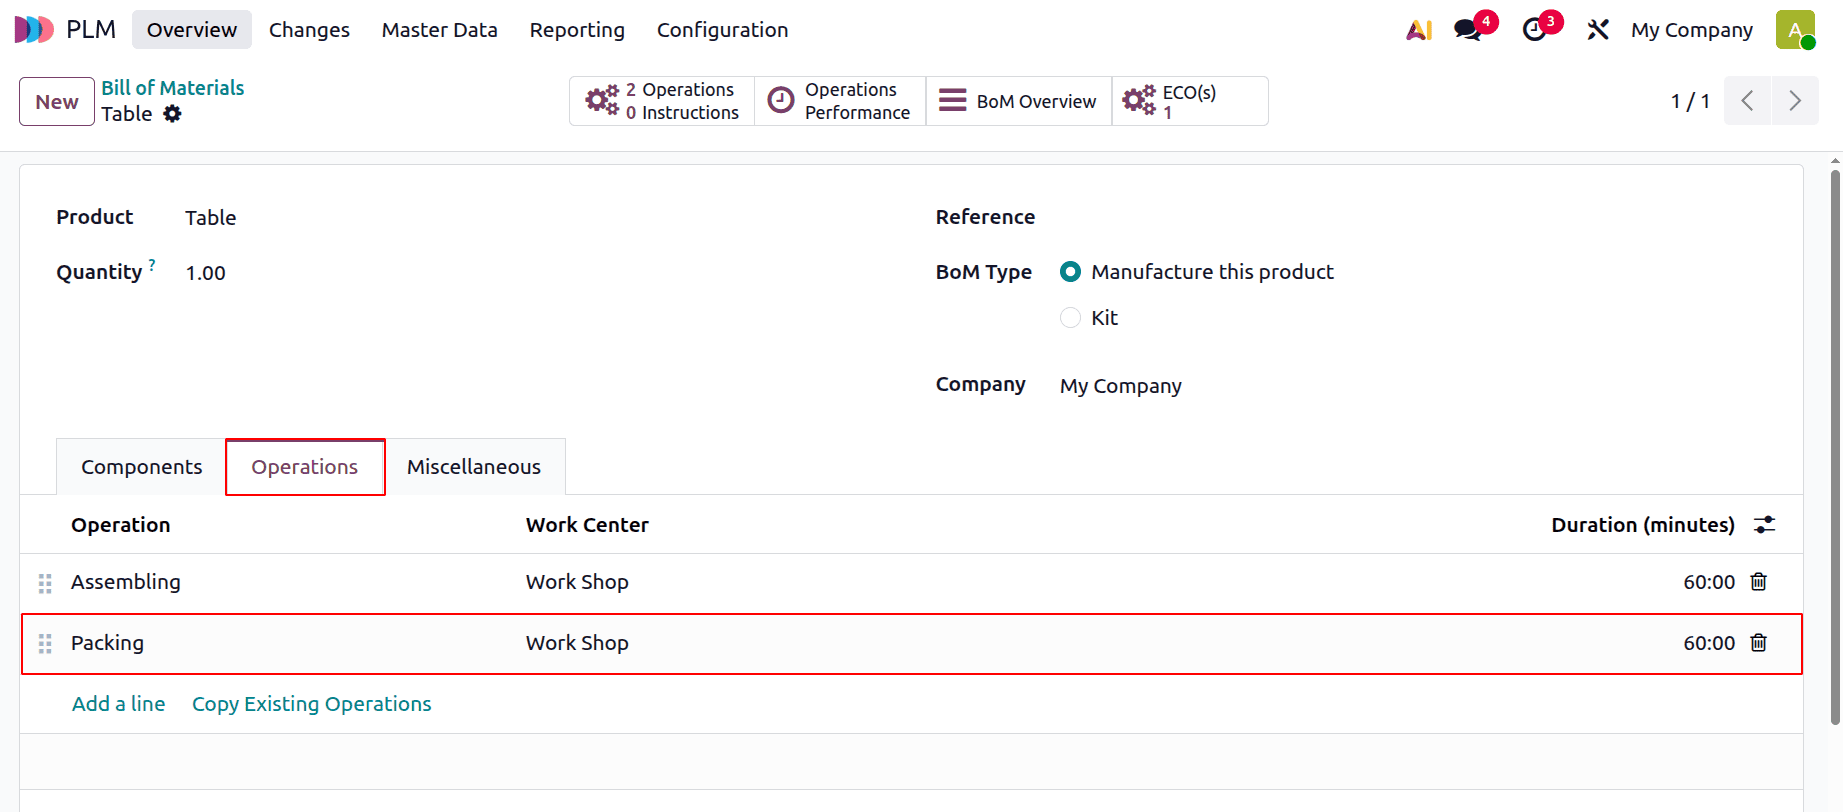
The recently added procedure may now be seen on the Operations tab while examining the BoM for the product TABLE.
Next, select the Miscellaneous option to view the most recent version of the Bill of Materials.
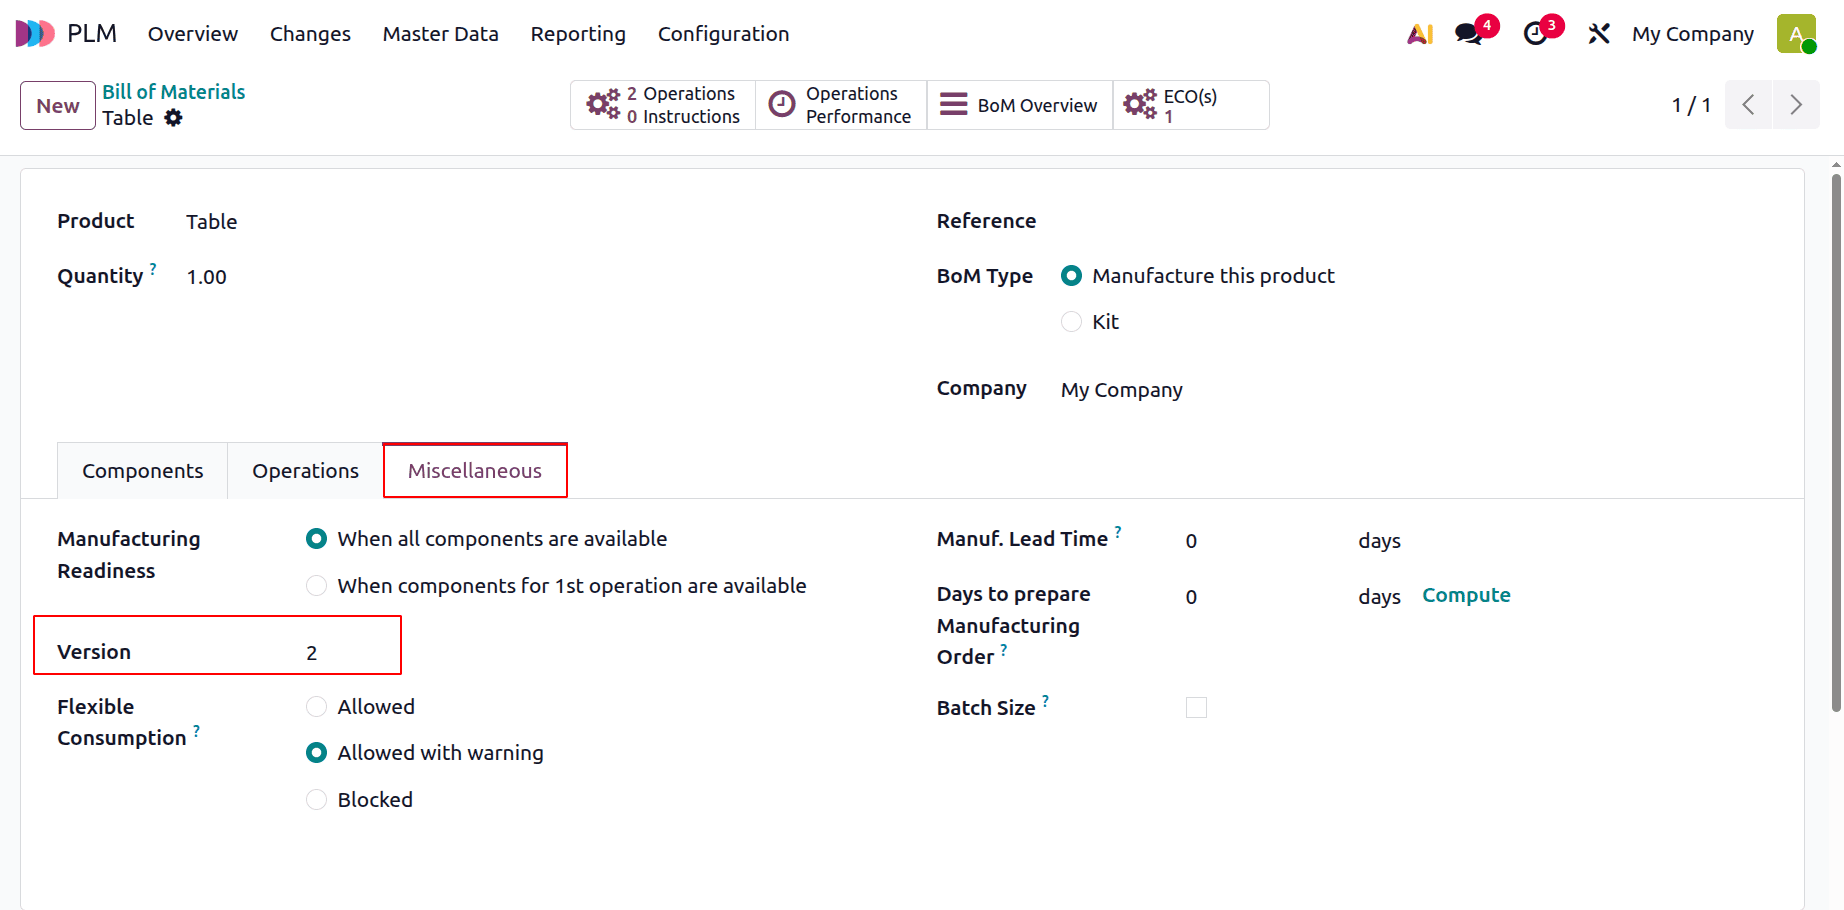
After the Engineering Change Order is completed, the version is changed to 2, as seen in the screenshot above.
ECO on the Products
Let's use a new product to address that. Select the product under the Master Data from the dropdown menu that displays.
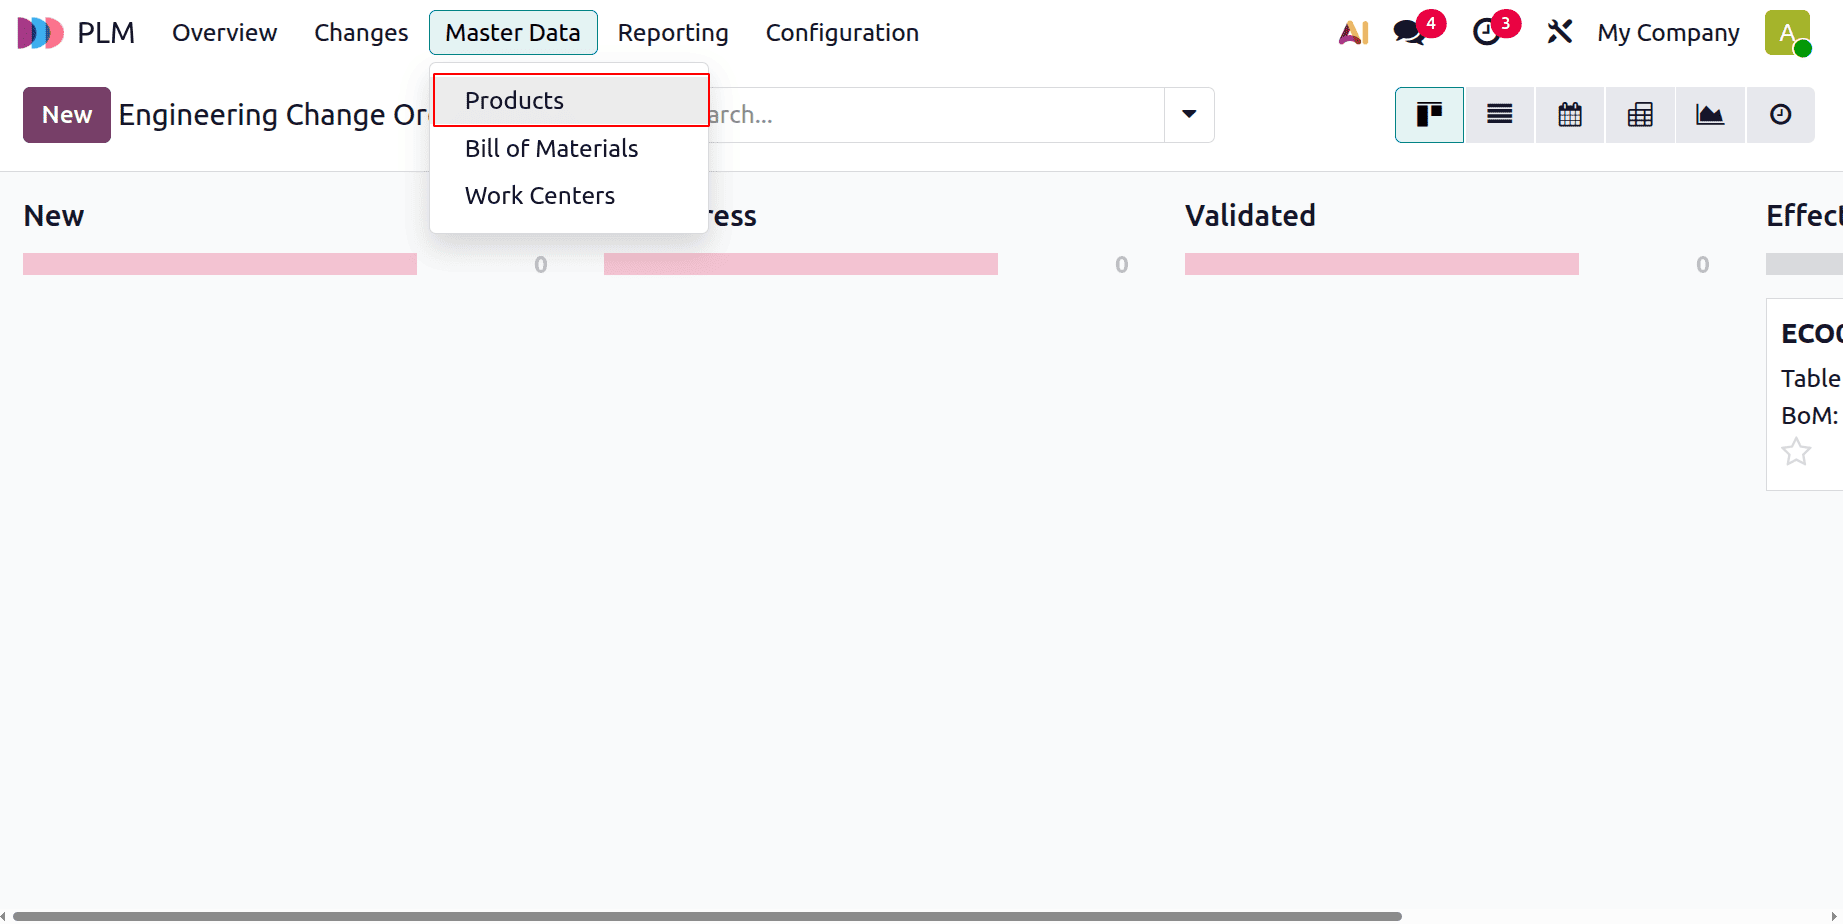
The products are displayed in the Kanban view when you click on the Products. The product's name, image, price, and available quantity are displayed. The priority will be shown next to the product name.
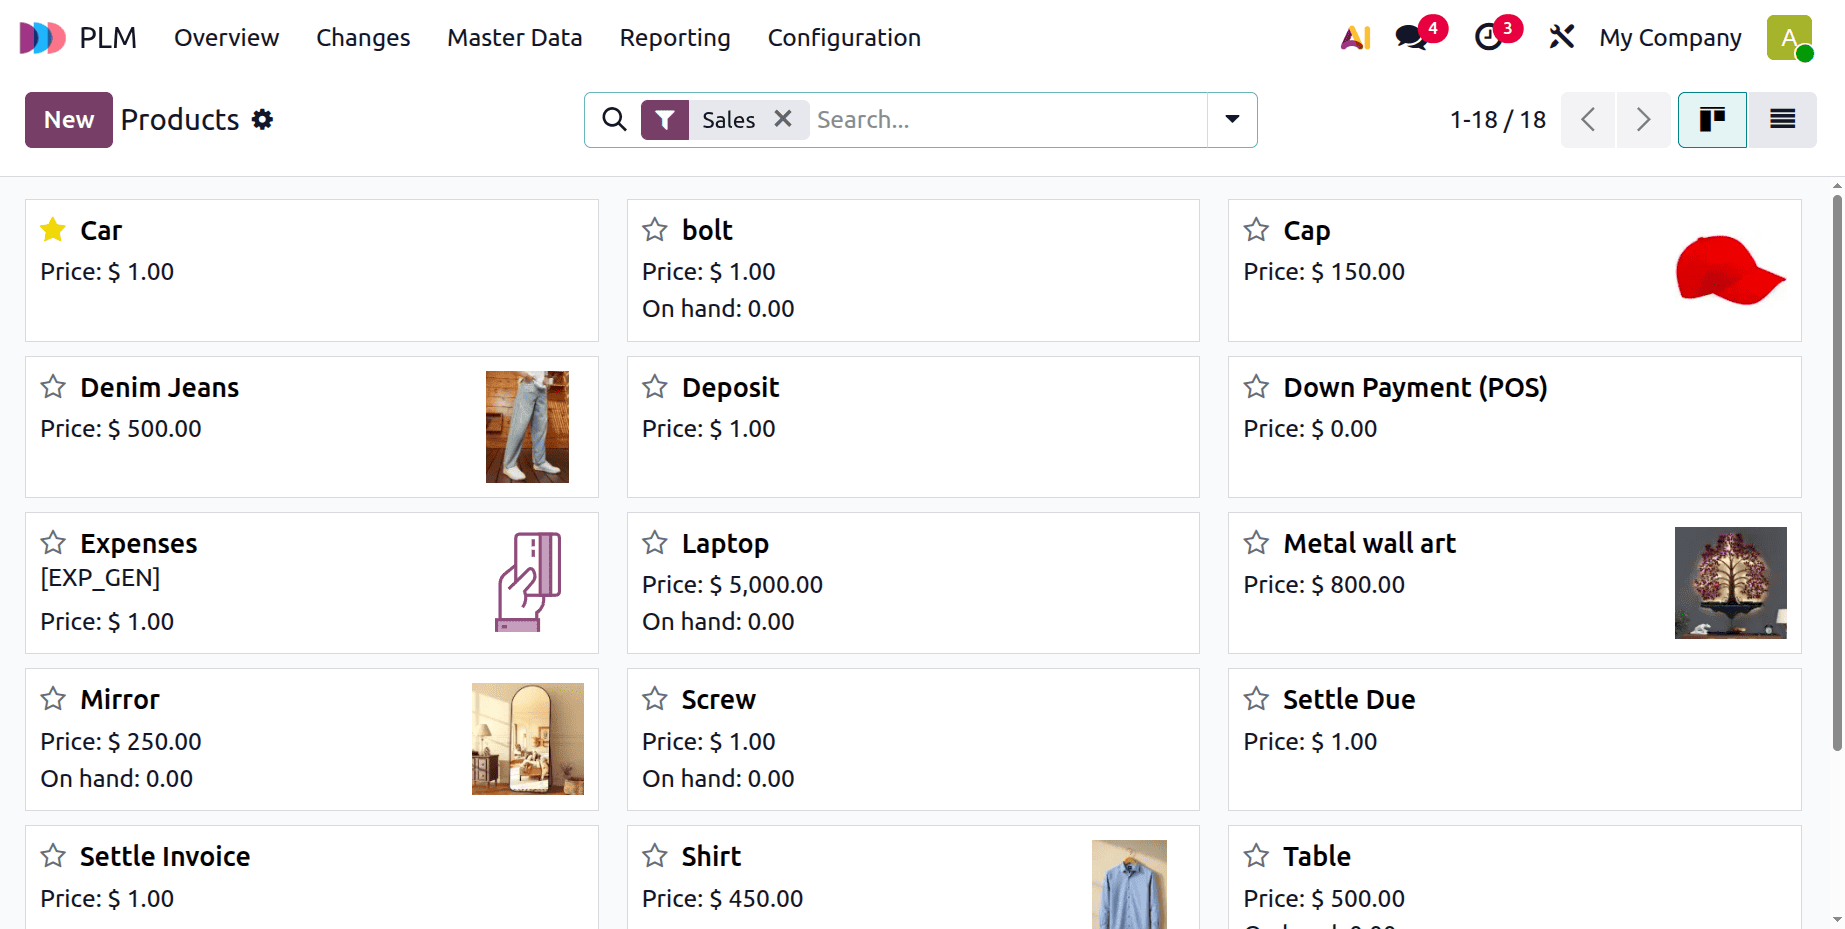
Launch a single product. Cap is the product name. There, all of the product's details are displayed. Within the product, select the Inventory tab. The Inventory tab displays the product version. The product is currently on Version 1.

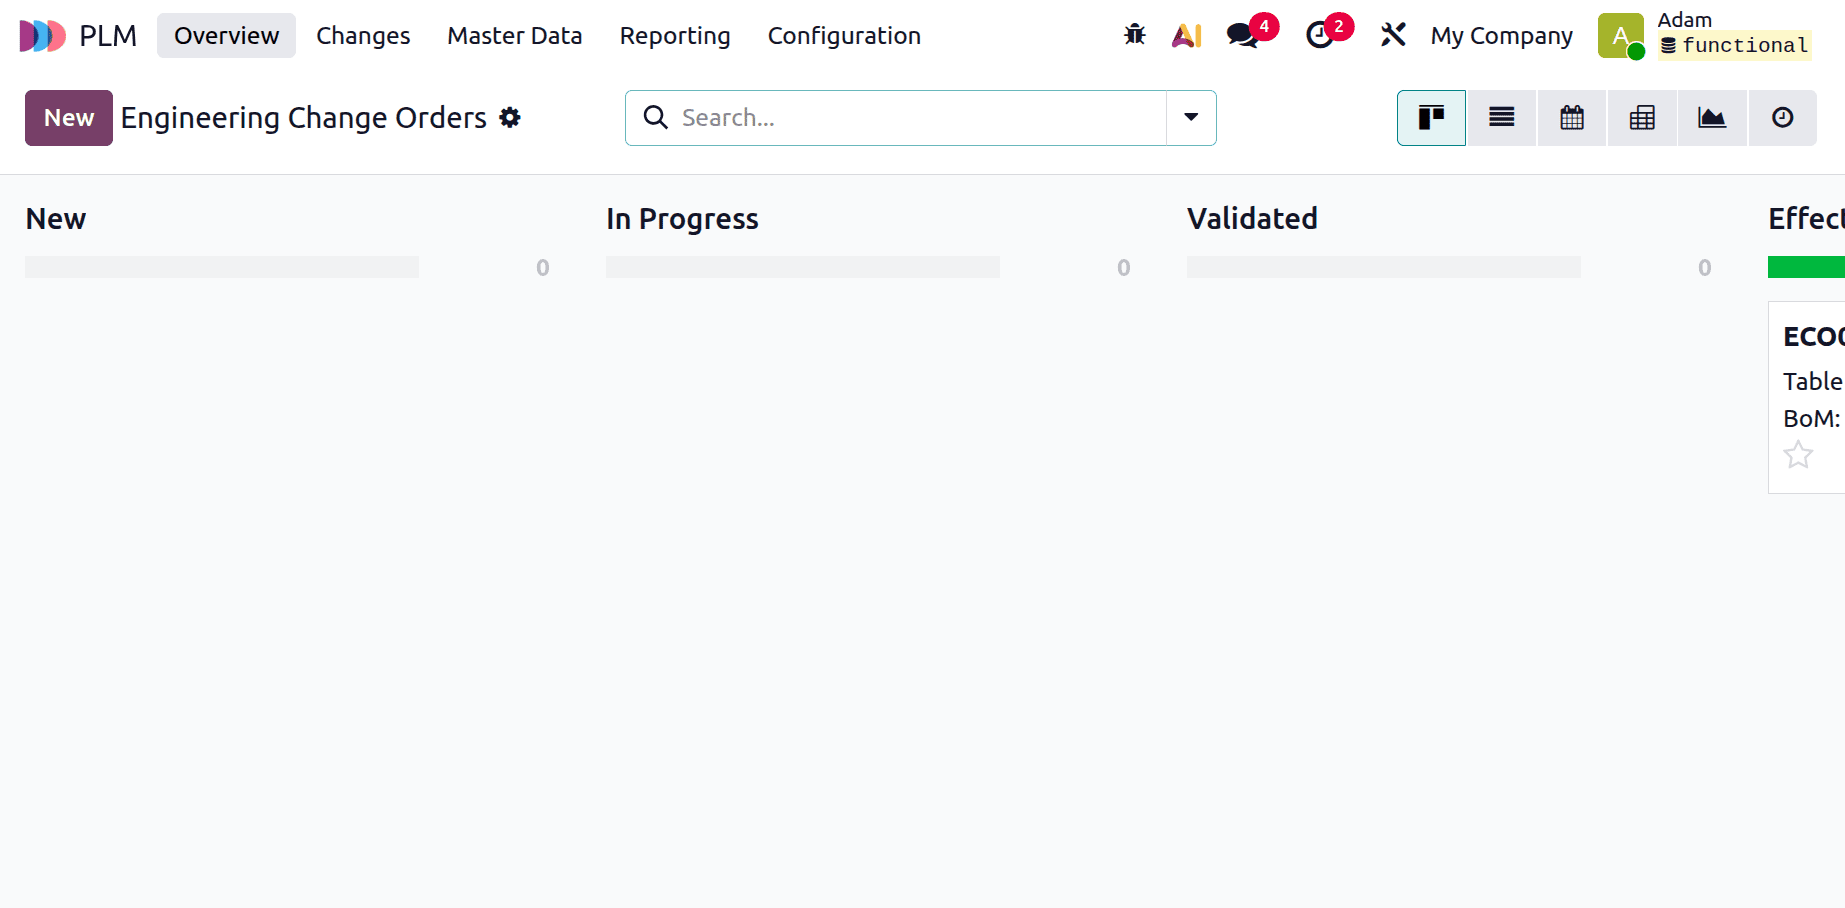
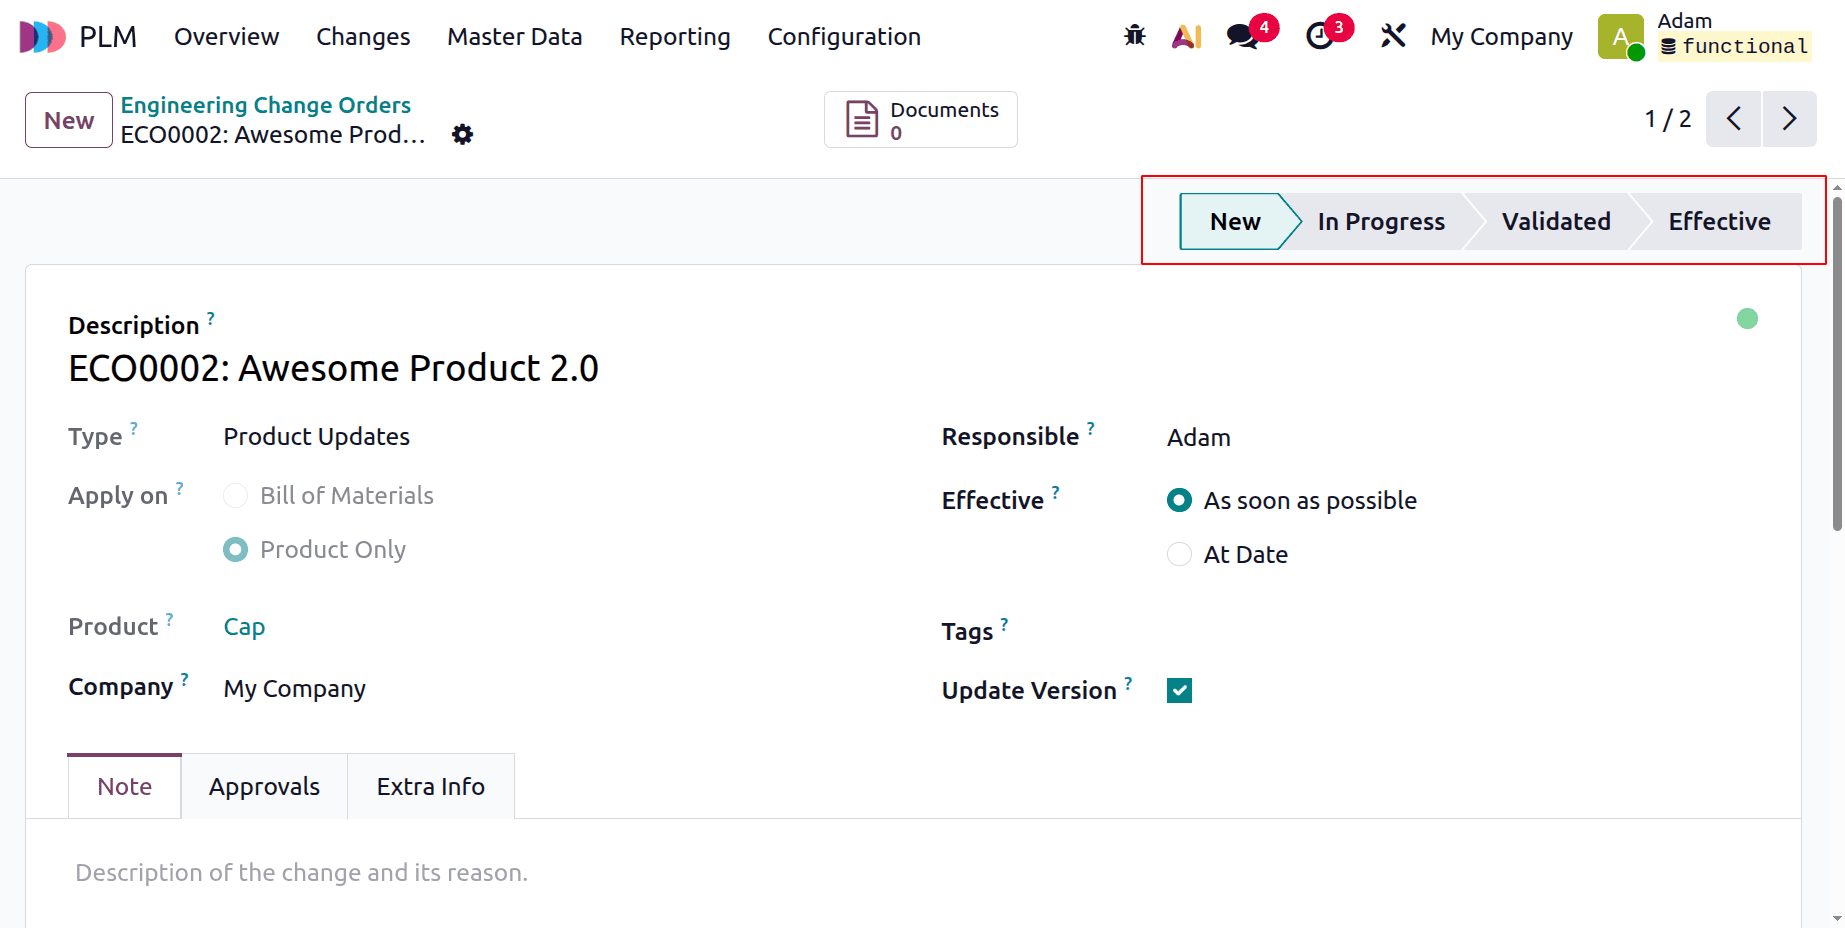
Let's now look at how product version updates were handled by the PLM Module. Click the Changes menu to accomplish this. There, the ECO's phases are displayed. Click the New button to add a new engineering change order.
A new window has opened. Select the ECO Type there, then provide a process description. Second, since there are two possibilities, both the Product and the BoM can be used. This is a product-specific application; therefore, choose "Product Only." Next, under the Product section, choose the newly created product BOX. Bring up the company and the responsible individual. After the eco-changes take place, there are two options. One is as soon as possible and on a specific date. In this case, the decision is taken as soon as it is practical. In addition to designating the tag "Product," click ‘Start Revision’ to begin the procedure after adding the necessary data.
Here, there are four pre-configured stages. This is currently in the New stage. The remaining three phases are Validated, Effective, and In Progress. The stages are easily adjustable by users.
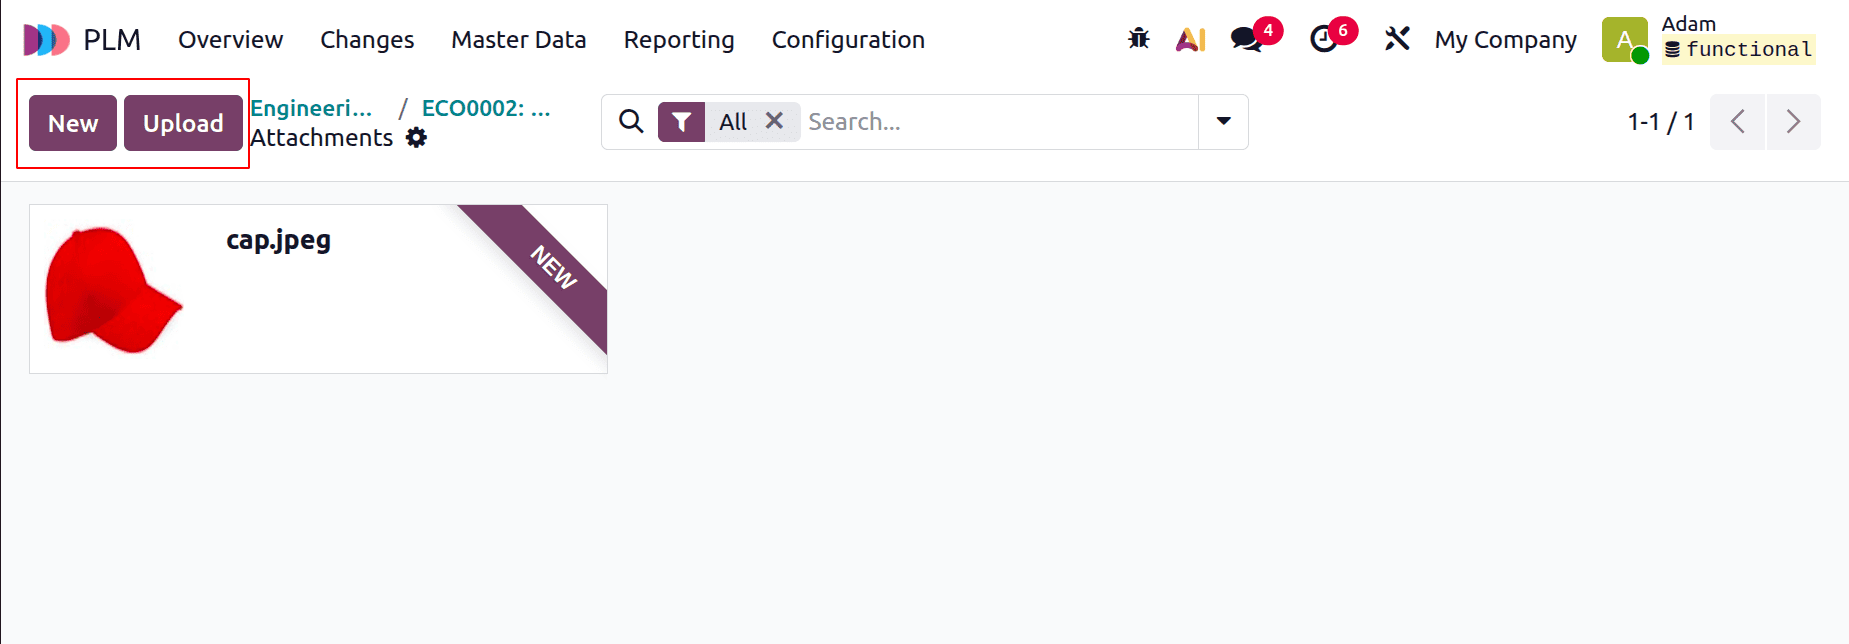
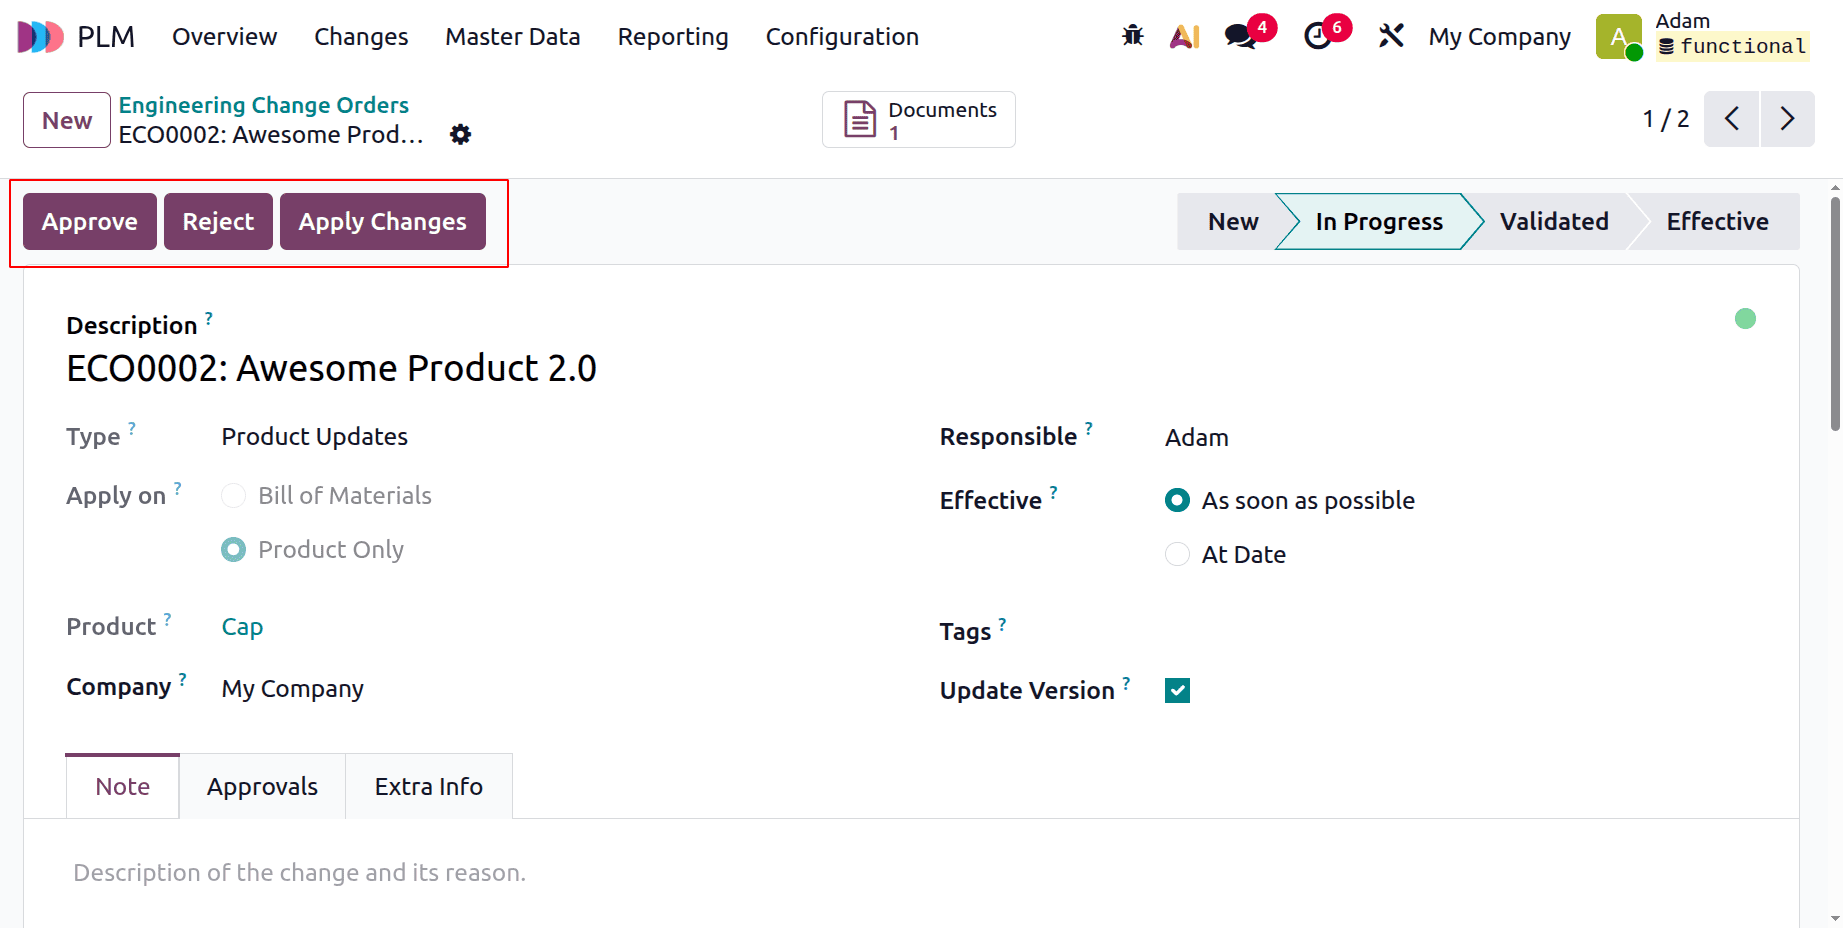
Users can make adjustments to the product while it is in the "In Progress" stage. New documents can be uploaded to the product using the Document smart tab.
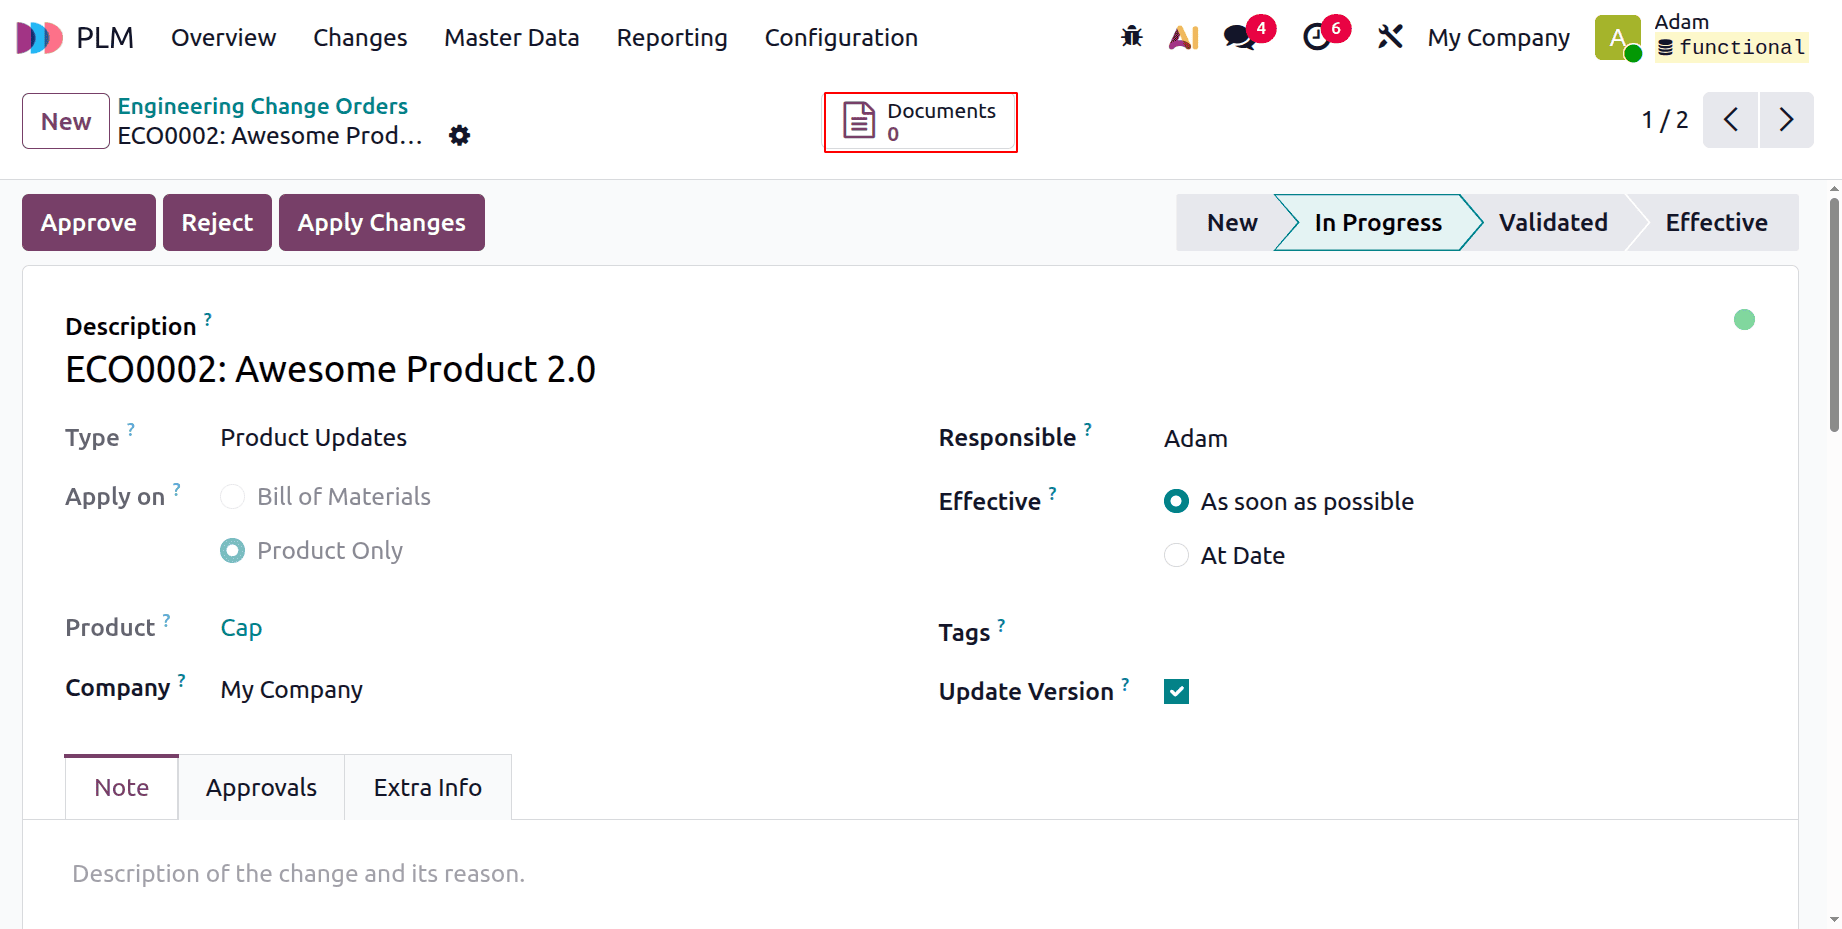
Select the Document smart tab. Documents can be added using the New and Upload buttons.
The modifications can then be added by clicking the Apply modifications button. To add the employee's approval, click the Approve button.
The stage will then be automatically changed to Effective. It is this ECO's final phase. The user then requires consent at this point.
The employee's approval is then displayed on the Approval tab, which has the status of Approved and has been approved by Mitchell Admin. The Approval tab displays additional information such as Role, Approved By, Status, Approval Date, Approval Stage, and Requested Users.
The ECO Change Order was obtained at the very end, the process is now complete.
Let's examine the final product version once the ECO Change Order is complete. Click the Master Data tab, choose Products from the list, and look for the item Laptop to achieve that. The Inventory tab revealed the second iteration of the product.

In conclusion, the PLM module will let customers update the Bill of Material and Product versions to improve their effectiveness. The main advantage is that the user can better comprehend and control the process.
To read more about How to Handle ECO of Bill of Materials & Products with Odoo 18 PLM, refer to our blog How to Handle ECO of Bill of Materials & Products with Odoo 18 PLM.