Point-of-Sale (POS) systems are the heartbeat of modern retail, crucial for optimizing operations and guaranteeing a stellar customer experience. Odoo, with its powerful suite of business applications, offers a highly capable POS module designed for speed and accuracy in handling sales.
However, as your business grows and workflows become more specialized, standard functionality often hits its limits. That's where customization becomes essential. One of the most effective ways to tailor Odoo 19 is by adding custom buttons to the POS interface, ensuring the system perfectly aligns with your unique business requirements.
How do we introduce these specialized features into Odoo? Through modules.
A module is the fundamental unit of Odoo development—a self-contained package that bundles all the necessary code, data files, and resources required to implement a specific functionality, keeping your customizations clean and organized.
Once your custom module is set up, the next step is to define the custom button's appearance and placement. The Odoo POS interface relies on XML templates to render all UI components, including buttons, toolbars, and interactive elements.
Inside your new module, navigate to the static/src/xml directory. Here, you will create a new XML file to hold the template definition for your custom button.
Below is a foundational example of how a custom button can be defined within an XML template structure, ready to be rendered by the Odoo POS system:
<?xml version="1.0" encoding="UTF-8"?>
<templates id="template" xml:space="preserve">
<t t-name="your_module.ControlButtons" t-inherit="point_of_sale.ControlButtons" t-inherit-mode="extension">
<xpath expr="//t[@t-if='props.showRemainingButtons']/div/button[hasclass('o_pricelist_button')]"
position="after">
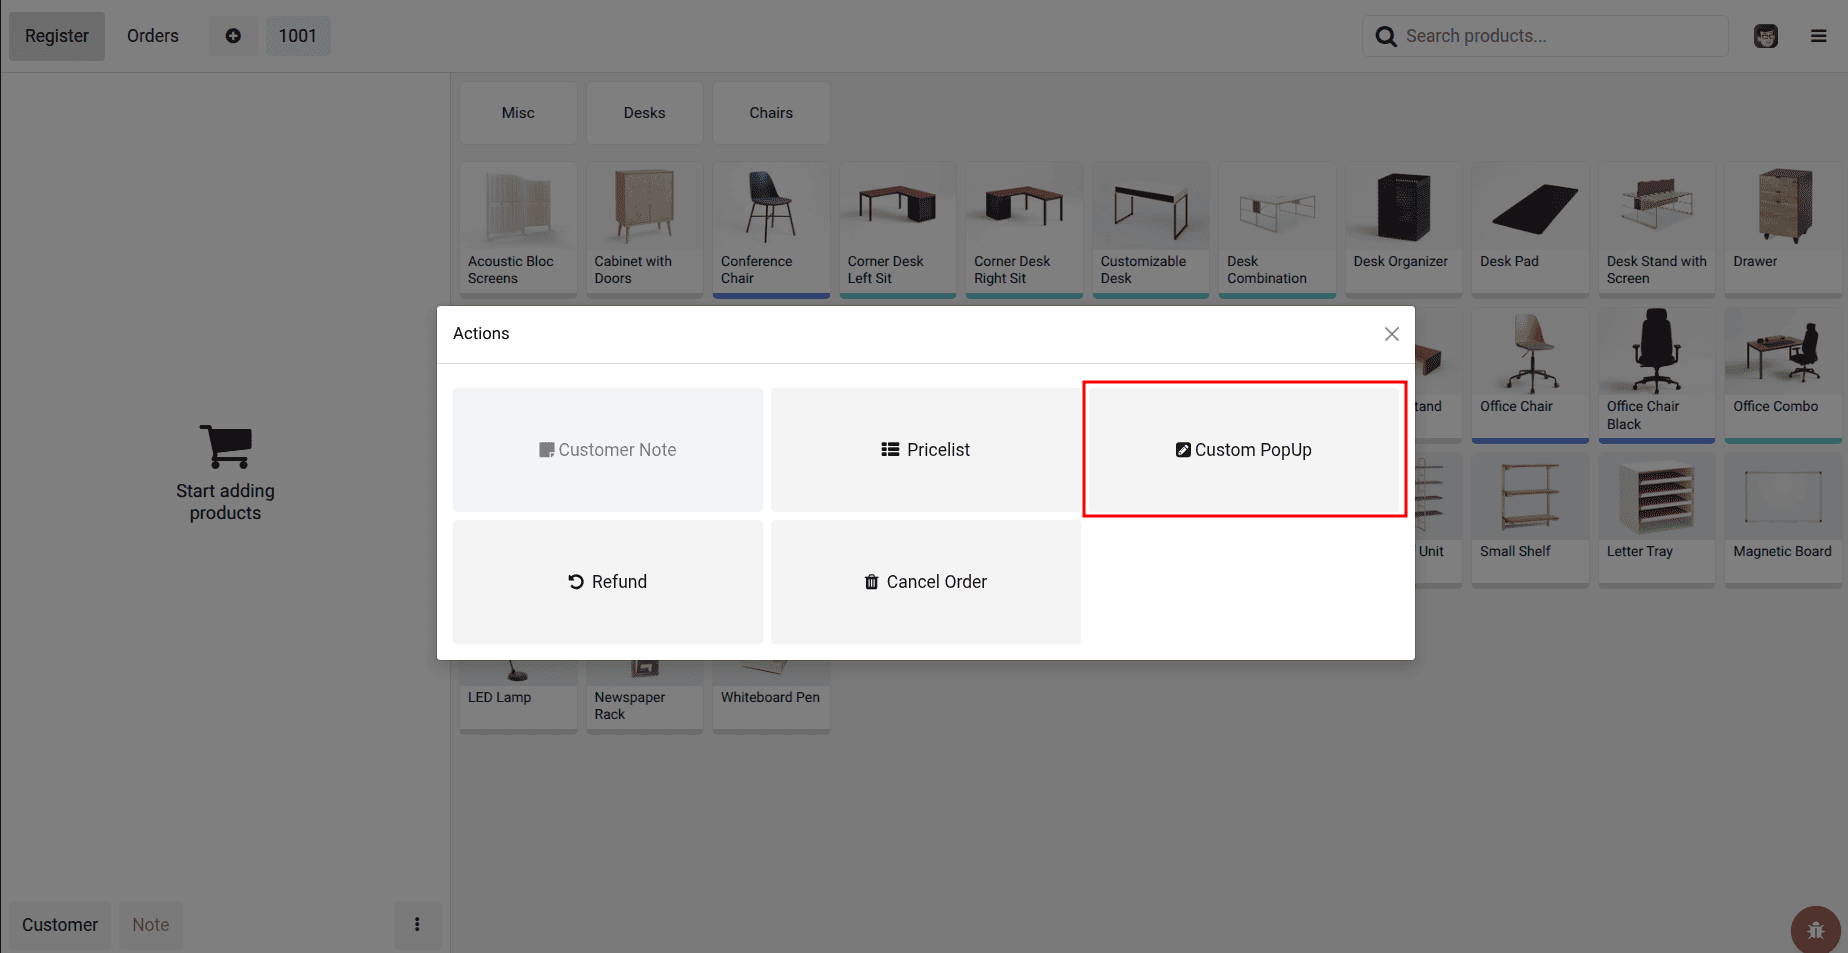
<button class="btn btn-secondary btn-lg py-5" t-on-click="() => this.onClickPopup()">
<i class="fa fa-pencil-square me-1" role="img" aria-label="Custom Alert" title="Custom Alert"/>Custom PopUp
</button>
</xpath>
</t>
</templates>
In this example, a custom button is added with a star icon, the label “Custom PopUp,” and a click handler onClickPopup(). The button is styled using Bootstrap classes to maintain a consistent look and feel with the standard Odoo POS interface.
The XML template is responsible only for the structure and visual layout of the button, while the actual behavior is handled in JavaScript. Since the Odoo 19 POS is built on the Odoo Web Library (OWL)—a modern framework used for creating interactive and responsive interfaces—you will implement the functionality using OWL components.
To do this, create a new JavaScript file inside your module’s static/src/js directory. In this file, define the logic for your custom button by either creating a new component or extending an existing one, and implement the required functionality within the component’s methods.
Below is an example of how you can implement the onClickPopup() method for the custom button:
/**@odoo-module **/
import { AlertDialog } from "@web/core/confirmation_dialog/confirmation_dialog";
import { _t } from "@web/core/l10n/translation";
import { ControlButtons } from "@point_of_sale/app/screens/product_screen/control_buttons/control_buttons";
import { patch } from "@web/core/utils/patch";
patch(ControlButtons.prototype, {
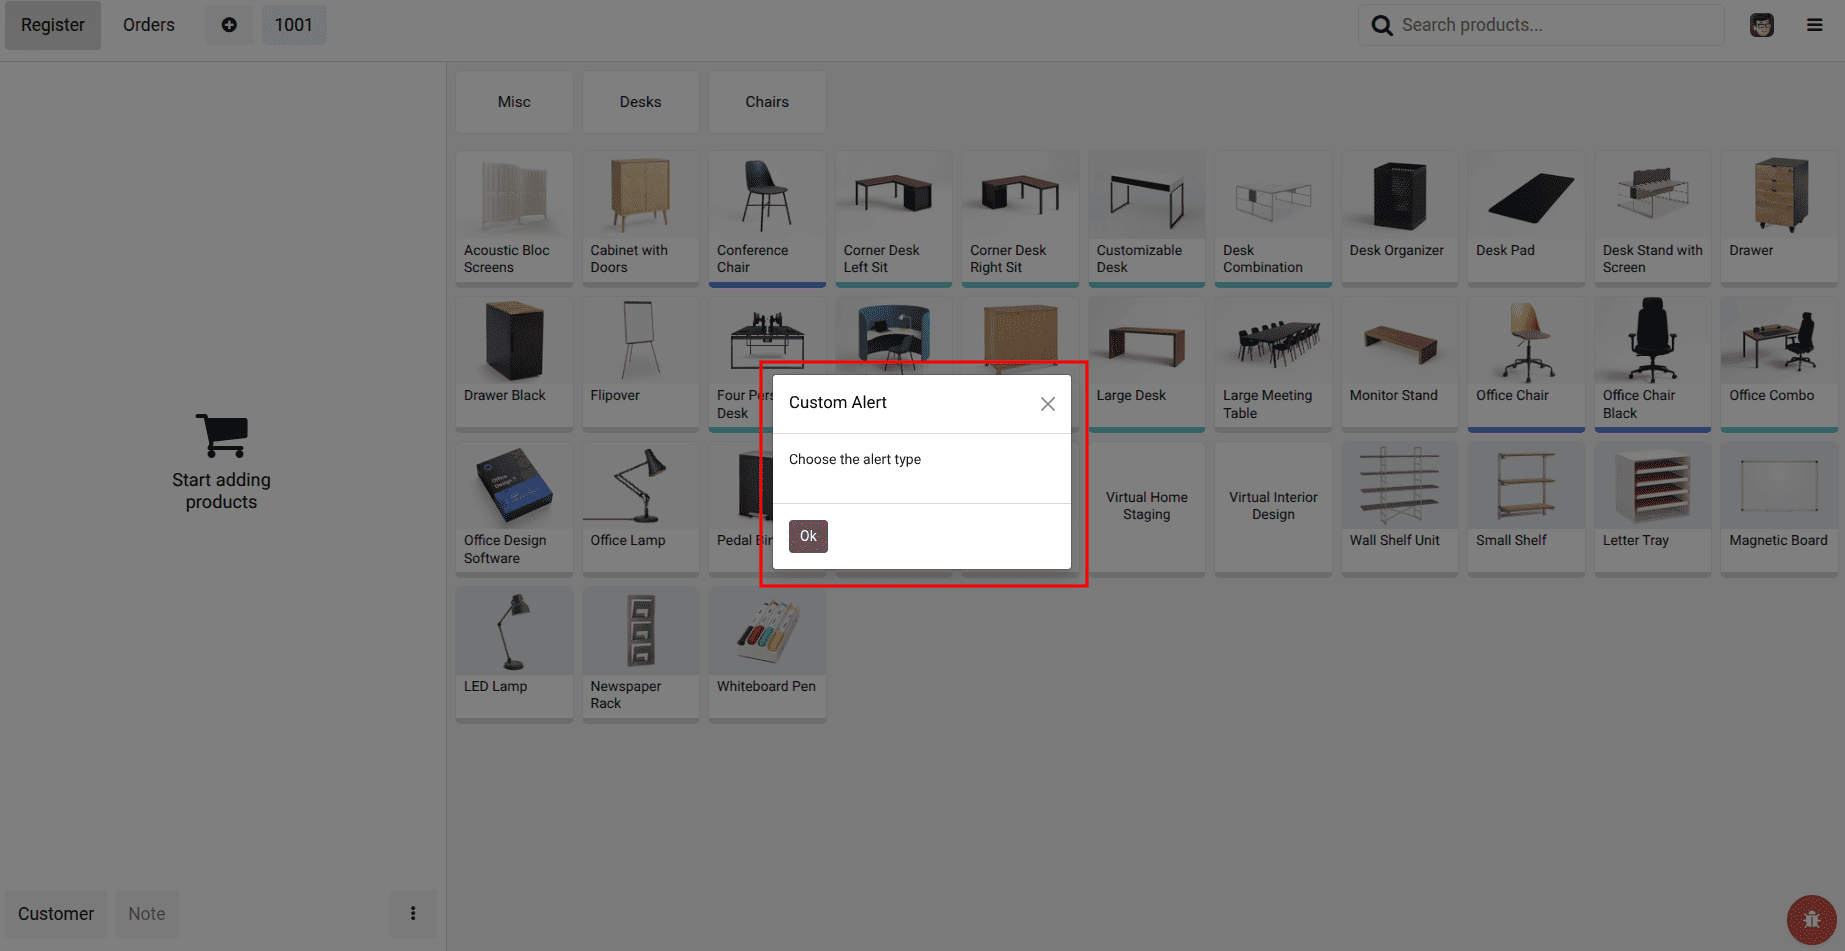
async onClickPopup() {
this.dialog.add(AlertDialog, {
title: _t("Custom Alert"),
body: _t("Choose the alert type"),
});
},
});
While the provided examples clearly demonstrate the fundamental steps for adding a custom button to the Odoo POS interface using XML for structure and JavaScript for logic, the customization potential goes much further; businesses can and should enhance and tailor the button based on specific operational needs, which might involve sophisticated adjustments to its styling, significantly extending its core functionality, or integrating it seamlessly with other Odoo modules or external third-party services to create a more powerful and unified user experience.
To read more about How to Add a Custom Button in Odoo 18 POS Screen, refer to our blog How to Add a Custom Button in Odoo 18 POS Screen.