Creating a custom button inside the chatter in Odoo 19 enables teams to operationalize key workflows directly from the communication panel, eliminating navigation overhead and accelerating user actions. With Odoo 19’s OWL-driven frontend, the chatter can be extended cleanly by introducing custom components that interact seamlessly with the record context, services, and backend logic. This approach provides a scalable, production-ready extension point that aligns with Odoo’s modern UI architecture while allowing organizations to trigger approvals, automated processes, or other actions directly from the chatter’s action bar.
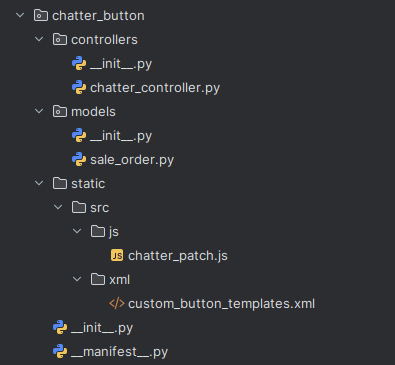
A well-organized module structure is essential when extending Odoo, especially for features that involve both backend logic and frontend UI customizations. Keeping controllers, models, JavaScript files, and templates properly structured ensures that each layer loads correctly and works together without conflicts. This section outlines the core module setup required to add a custom button to the chatter, laying the groundwork for the implementation steps that follow.
STEP 1: CREATE A CONTROLLER
This controller serves as the backend bridge between the chatter button and the server-side business logic. When a user clicks the custom button in the chatter, the frontend sends a JSON request to the /chatter_custom/action route. The controller receives the model name and record ID, retrieves the corresponding record securely using sudo(), and executes the designated business logic method. Once the operation is complete, the controller returns a simple success response. In short, it enables the frontend UI to safely trigger Python logic inside Odoo.
# -*- coding: utf-8 -*-
from odoo import http
from odoo.http import request
class ChatterActionController(http.Controller):
  @http.route('/chatter_custom/action', type='jsonrpc', auth='user')
  def chatter_custom_action(self, model, res_id):
     """Function to post message on chatter"""
     record = request.env[model].sudo().browse(int(res_id))
     if record:
        record.message_post(body="This record has been reviewed by %s." % (request.env.user.name,))
     return {"success": True}
STEP 2: CREATE THE XML TEMPLATE (Button UI)
This template extends the existing chatter layout to inject a new action button directly into the UI. By inheriting from mail.Chatter, it uses xpath to locate the built-in Activity button and inserts the custom Review Order button immediately after it. The button uses standard Bootstrap styling for a consistent appearance and calls the JavaScript handler onCustomAction when clicked. This enables the frontend to display the custom button without modifying any core Odoo templates.
<?xml version="1.0" encoding="UTF-8"?>
<templates id="template" xml:space="preserve">
   <t t-name="mail.Chatter" t-inherit="mail.Chatter" t-inherit-mode="extension">
       <xpath expr="//button[hasclass('o-mail-Chatter-activity')]" position="after">
           <button type="button"
                   class="btn btn-secondary text-nowrap o_custom_chatter_btn ms-1"
                   t-att-class="{ 'my-2': !props.compactHeight }"
                   t-on-click="onCustomAction">
               <span>Review Order</span>
           </button>
       </xpath>
   </t>
</templates>
STEP 3: CREATE THE JAVASCRIPT LOGIC
This JavaScript file enriches the chatter functionality by defining the client-side behavior for the custom button. It patches the Chatter component and adds the onCustomAction method, which sends an RPC request to the backend controller with the current record’s model and ID. After the backend processes the request, the script refreshes the chatter thread to display the newly posted message. Error handling is included to provide user feedback if something goes wrong. This file links the frontend button to backend logic and ensures the chatter stays up to date without reloading the entire view.
/** @odoo-module **/
import { patch } from "@web/core/utils/patch";
import { Chatter } from "@mail/chatter/web_portal/chatter";
import { _t } from "@web/core/l10n/translation";
import { rpc } from "@web/core/network/rpc";
patch(Chatter.prototype, {
   async onCustomAction() {
       try {
           await rpc("/chatter_custom/action", {
               model: this.props.threadModel,
               res_id: this.props.threadId,
           });
           // Reload chatter messages in real-time
           if (this.props.threadId) {
               const thread = this.store.Thread.insert({
                   model: this.props.threadModel,
                   id: this.props.threadId,
               });
               // Fetch messages for the thread
               await thread.fetchNewMessages();
           }
       } catch (error) {
           this.env.services.notification.add(
               _t("Error executing action"),
               { type: "danger" }
           );
           console.error("Custom action error:", error);
       }
   },
});
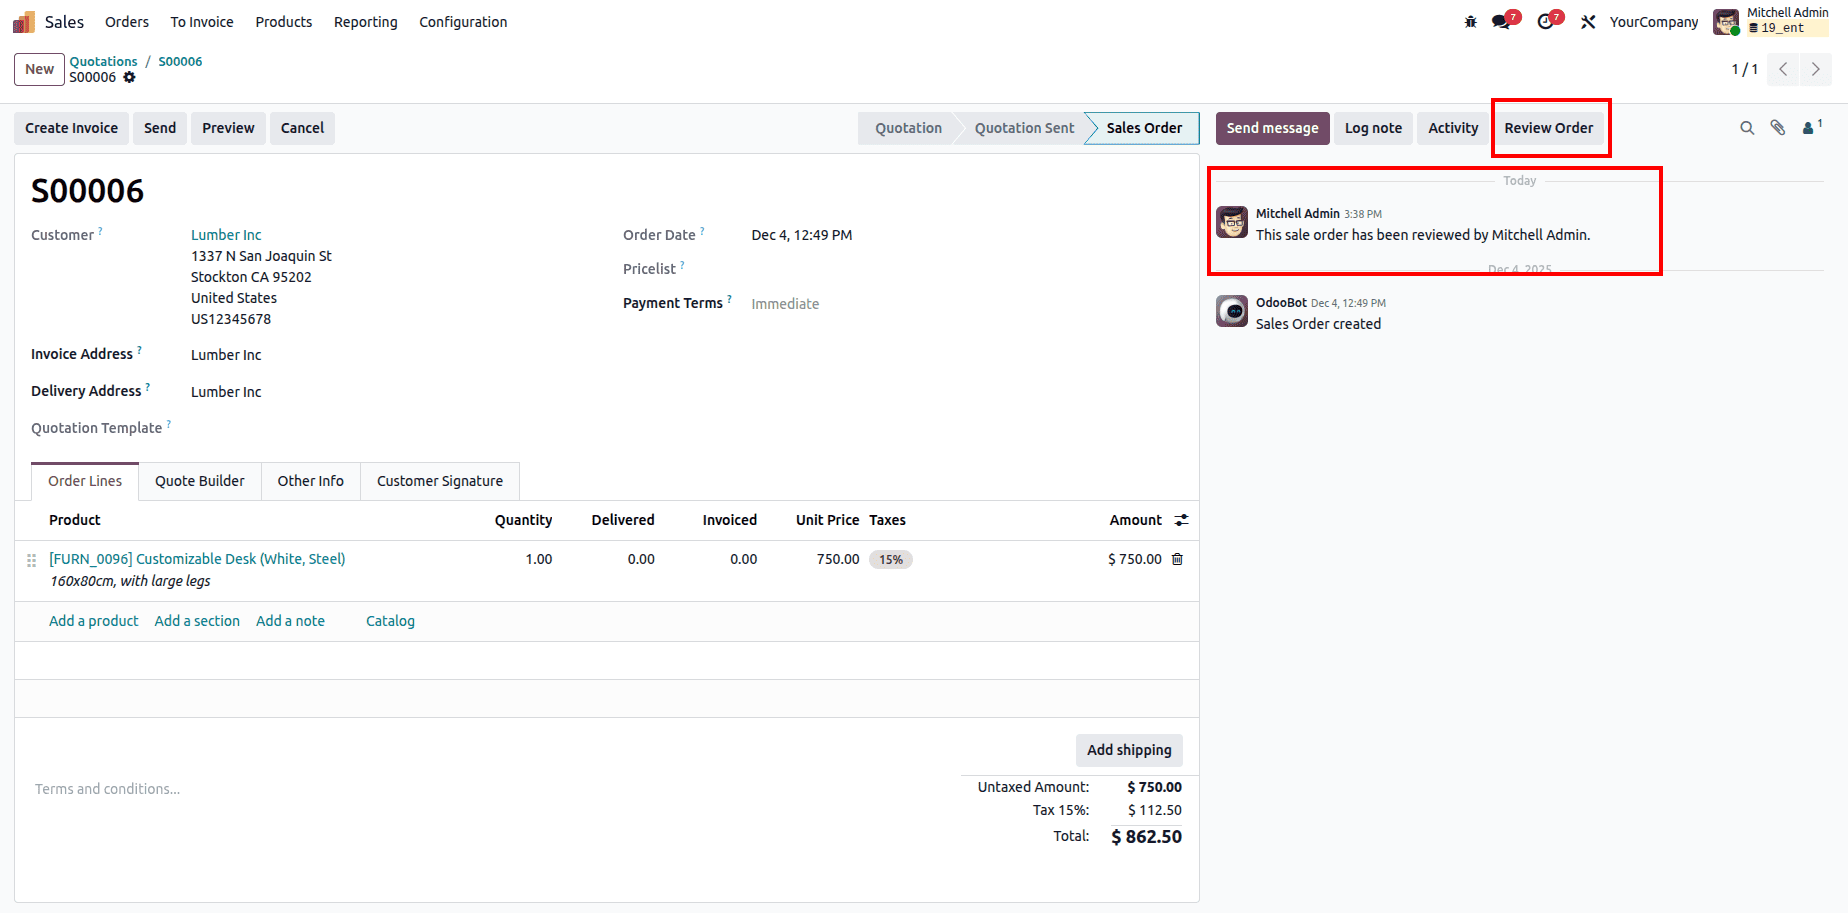
With this complete setup in place, the system will now display a “Review Order” button directly inside the chatter of every Sale Order. When a user clicks the button, the backend logic is triggered, and a new message is automatically posted in the chatter confirming that the order has been reviewed by the current user. This gives teams a quick, consistent way to acknowledge or log reviews without navigating away from the record, streamlining communication and improving traceability within the sales workflow.
By following this structured approach, you establish a clean, extensible framework for embedding custom actions directly into the Odoo 19 chatter. Each layer—the controller, model, XML template, and JavaScript logic—works together to deliver a seamless user experience that connects frontend interaction with backend business processes. This design not only streamlines user workflows by placing key actions where collaboration happens but also provides a scalable foundation for more advanced automations in the future. With this pattern in place, teams can continue to enrich the chatter with additional capabilities that support operational speed and process efficiency across the platform.
To read more about How to Add a Custom Button to the Chatter in Odoo 18, refer to our blog How to Add a Custom Button to the Chatter in Odoo 18.