In Odoo 19, qcontext continues to play a central role in determining how data prepared in backend controllers reaches frontend QWeb templates. Every website controller in Odoo returns an HTTP response object that contains a qcontext dictionary. This dictionary holds all the values required by the template during rendering, such as products, categories, pagination data, and layout options. By extending this dictionary, developers can introduce custom variables without altering the core logic, keeping implementations clean, upgrade-safe, and maintainable.
To demonstrate how qcontext works in Odoo 19, let us consider a complete working example where we add a custom promotional message to the default Shop page. This is achieved by creating a custom module that inherits the existing WebsiteSale controller and injects a new value into qcontext. The injected value is then accessed and displayed in the QWeb template through template inheritance.
Module Structure
A clean module structure ensures clarity and maintainability. Below is the folder structure required to implement this customization:
website_shop_qcontext/
+-- __init__.py
+-- __manifest__.py
+-- controllers/
¦   +-- __init__.py
¦   +-- main.py
+-- views/
    +-- website_sale_templates.xml
Each folder serves a specific purpose: the controllers folder handles backend request logic, while the views folder contains the QWeb template overrides used for frontend display.
Module Manifest (__manifest__.py)
The manifest file defines the module metadata and dependencies. Since we are extending the Shop page, the website_sale module is required.
{
   'name': 'Website Shop Offer Message',
   'version': '19.0.1.0.0',
   'summary': 'Display custom offer message on shop page using qcontext',
   'description': """
Injects a custom alert message into the Shop page using qcontext
by extending the default WebsiteSale shop controller.
""",
   'category': 'Website',
   'author': 'Your Company',
   'website': 'https://www.yourcompany.com',
   'depends': ['website_sale'],
   'data': [
       'views/website_sale_templates.xml',
   ],
   'installable': True,
   'application': False,
}
Python Initialization Files
The root __init__.py file loads the controllers folder:
from . import controllers
Inside the controllers directory, the following __init__.py ensures the controller logic is loaded:
from . import main
Extending the Shop Controller (controllers/main.py)
This is the core of the implementation. Here, we inherit the existing WebsiteSale controller, override the shop method, and inject a custom value into qcontext. The original controller logic remains intact by calling super() before modifying the response.
from odoo import http
from odoo.addons.website_sale.controllers.main import WebsiteSale

from odoo import http
from odoo.addons.website_sale.controllers.main import WebsiteSale

class WebsiteSaleInherit(WebsiteSale):
   @http.route()
   def shop(self, page=0, category=None, search='', min_price=0.0,
            max_price=0.0, ppg=False, **post):
       # Call original controller
       response = super().shop(
           page=page,
           category=category,
           search=search,
           min_price=min_price,
           max_price=max_price,
           ppg=ppg,
           **post
       )
       # Inject custom data using qcontext
       if hasattr(response, 'qcontext'):
           response.qcontext['offer_message'] = (
               " Limited Time Offer: Get 25% off on all items!"
           )
       return response
In this implementation, the offer_message key becomes part of the rendering context and is automatically accessible within the Shop QWeb template.
Website Template Override (views/website_sale_templates.xml)
To display the injected message, we inherit the website_sale.products template and insert the message at the top of the product listing section. The template simply checks for the presence of the offer_message variable in qcontext and displays it accordingly.
<?xml version="1.0" encoding="utf-8"?>
<odoo>
   <template id="custom_shop_message" inherit_id="website_sale.products">
       <xpath expr="//div[hasclass('o_wsale_products_main_row')]" position="before">
           <t t-if="offer_message">
               <div class="alert alert-info text-center my-3">
                   <strong>
                       <t t-esc="offer_message"/>
                   </strong>
               </div>
           </t>
       </xpath>
   </template>
</odoo>
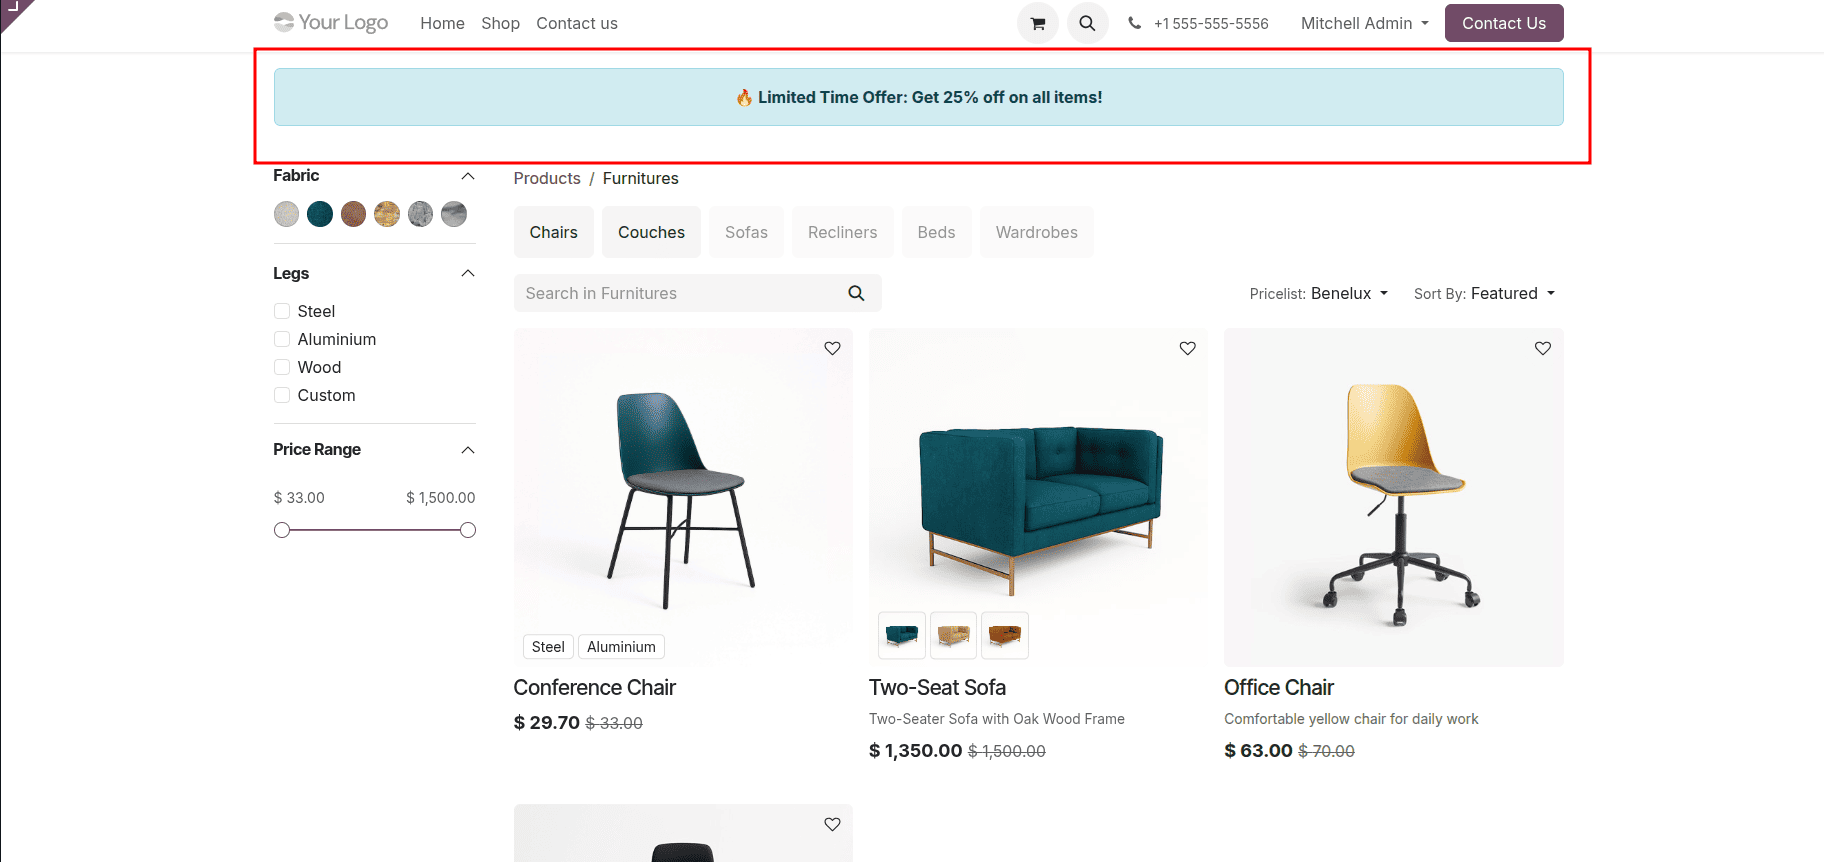
After installing the module and updating the Apps list, navigate to the Shop page (/shop) on the website. You will notice a custom informational alert displayed above the product listings. This message is rendered dynamically using the value injected into qcontext from the controller.
Conclusion
This complete example clearly shows how qcontext works in Odoo 19 by connecting backend controller logic with frontend QWeb rendering. By extending the existing Shop controller, injecting a custom variable into qcontext, and reading that variable in a template, developers can introduce dynamic, context-aware content without altering core files. This approach keeps customizations modular, readable, and future-proof, making qcontext one of the most effective tools for website customization in Odoo.
To read more about How Q Context Works in Odoo 18, refer to our blog How Q Context Works in Odoo 18