Businesses must maintain product quality in order to satisfy customers, adhere to regulations, and preserve their reputation as a brand. Odoo 19's improved Quality module gives businesses access to a full suite of quality control solutions that are intended to optimize quality assurance throughout the supply chain, manufacturing, and inventory processes.
The advantages and salient characteristics of quality checks in Odoo 19 will be discussed in this blog, along with how these tools support constant product quality across the whole production process.
Advantages of Using Quality Checks in Odoo 19
The Quality module in Odoo 19 provides a centralized, easy-to-use platform for defining, automating, carrying out, and monitoring quality checks across your operations. Quality control becomes a fully integrated element of your workflow, whether it's for manufacturing operations, internal transfers, or incoming shipments.
Businesses can improve overall product quality by detecting problems early, reducing defects, and ensuring products match specified specifications through the use of standardised inspection techniques, automatic quality control points (QCPs), and clearly defined checkpoints.
By providing rule-based inspections that can be applied consistently throughout operations, Odoo 19 assists companies in meeting internal standards and regulatory requirements. The Quality module guarantees that your inspections are always in line with expectations, from ISO conformance to customer-specific standards.
Odoo 19's integrated dashboard and reporting capabilities enable real-time quality control data monitoring. By identifying bottlenecks, analysing patterns, and proactively implementing improvements, managers can increase operational efficiency and decrease rework.
The quality checks can be set inside the Quality Control points. Navigate to Quality Control, then choose the Quality Control point from there. A list of the existing quality control points will be displayed. To create a new quality control point, click the New button.
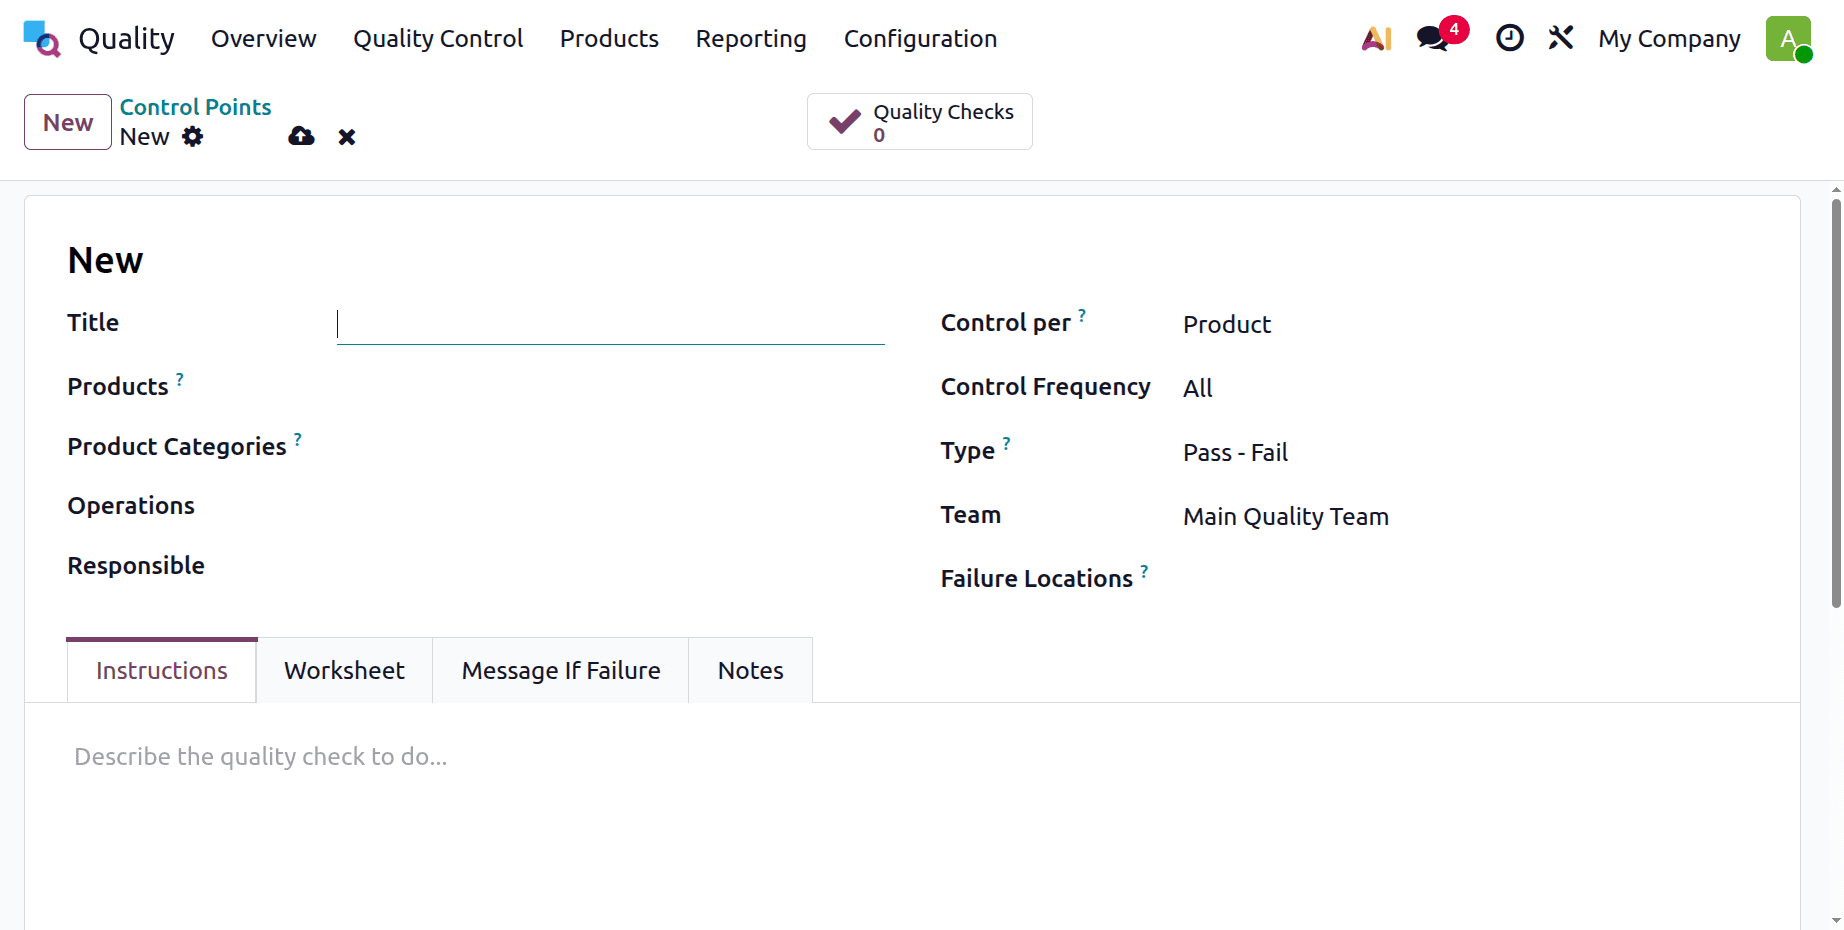
While creating a new one, the user needs to set a Title first. Then, users need to mention the Product, Product Category, and Operations to check the quality. There are options to check Quality control per Product or Operation. Control frequency can be set as All, Randomly, periodically, or On demand.
There are different types of quality checking available in Odoo. Let's check each one separately.
Type: Instructions
Businesses can guarantee consistent, accurate, and compliant procedures across manufacturing and inventory operations using Odoo 19's variety of quality checks. The Instructions Quality Check is one of the most popular and successful.
Odoo 19's instruction quality checks are used to direct and enforce particular protocols that operators must adhere to when handling inventories, producing goods, or making internal transfers. These checks are intended to lower mistakes, standardise operations, and guarantee that procedures are followed in accordance with established protocols.
By including unambiguous instructions in the process, companies can:
- Boost the uniformity of operations
- Reduce the number of human mistakes
- Verify adherence to safety regulations or manufacturing procedures.
- Continue to produce high-quality goods throughout the process.
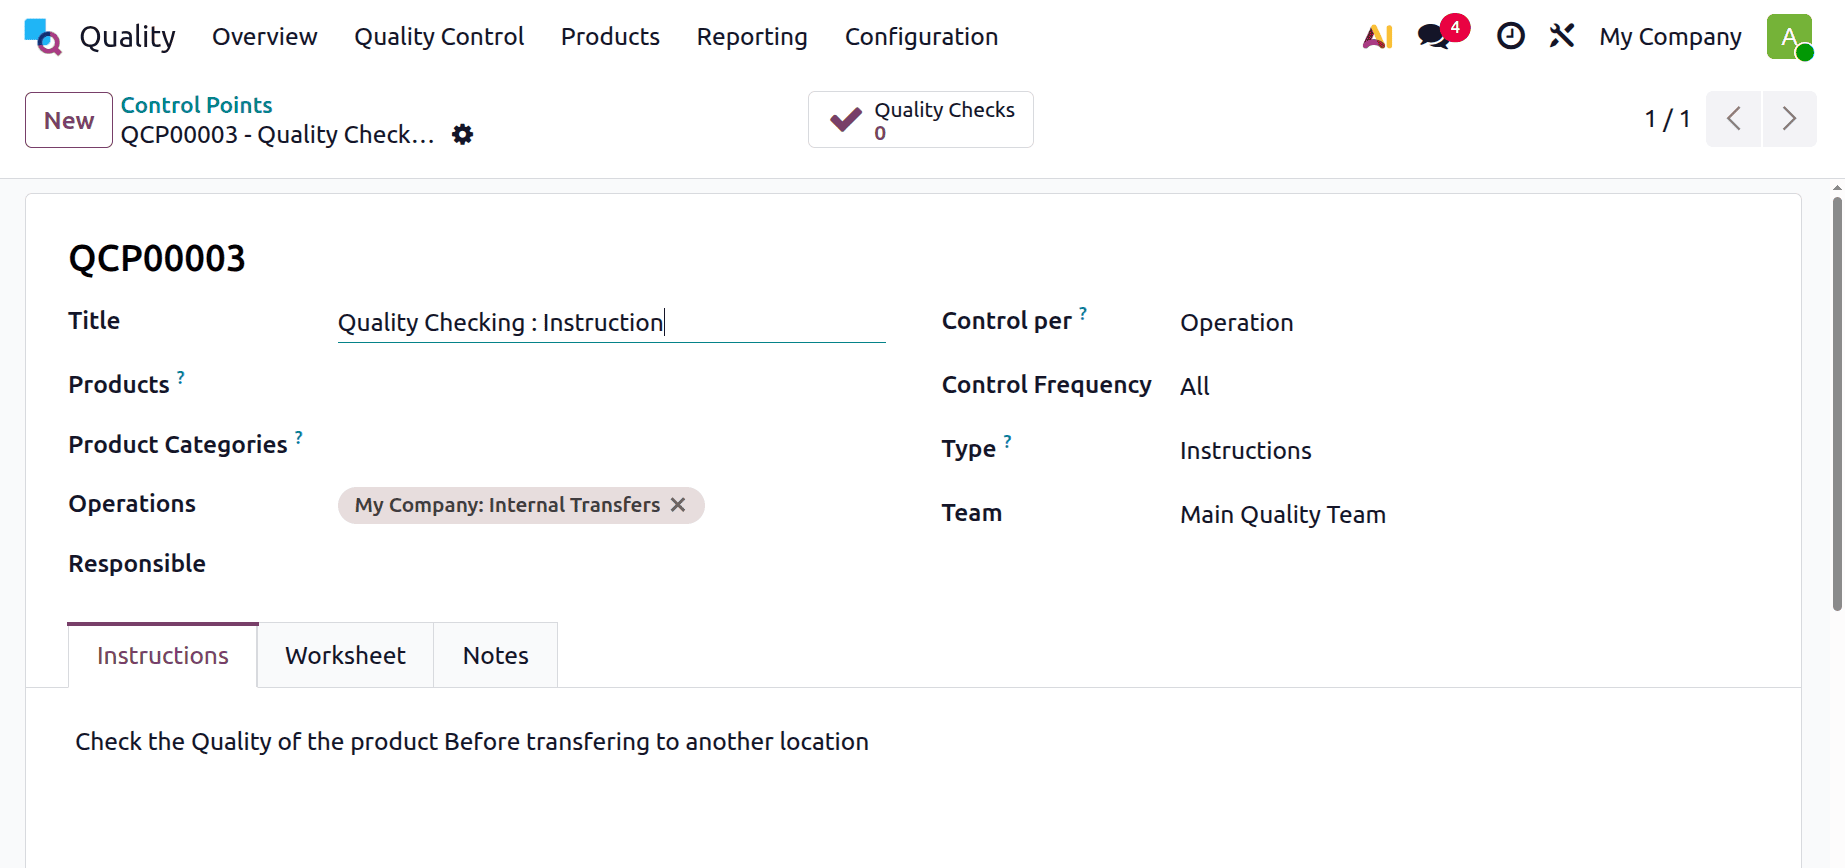
Let's create a new Quality control point to check the quality of the type Instruction. Here, the quality check occurs during the Internal Transfer. The Type is set as Instructions. Inside the Instruction tab, mention the Instruction for the quality checking.
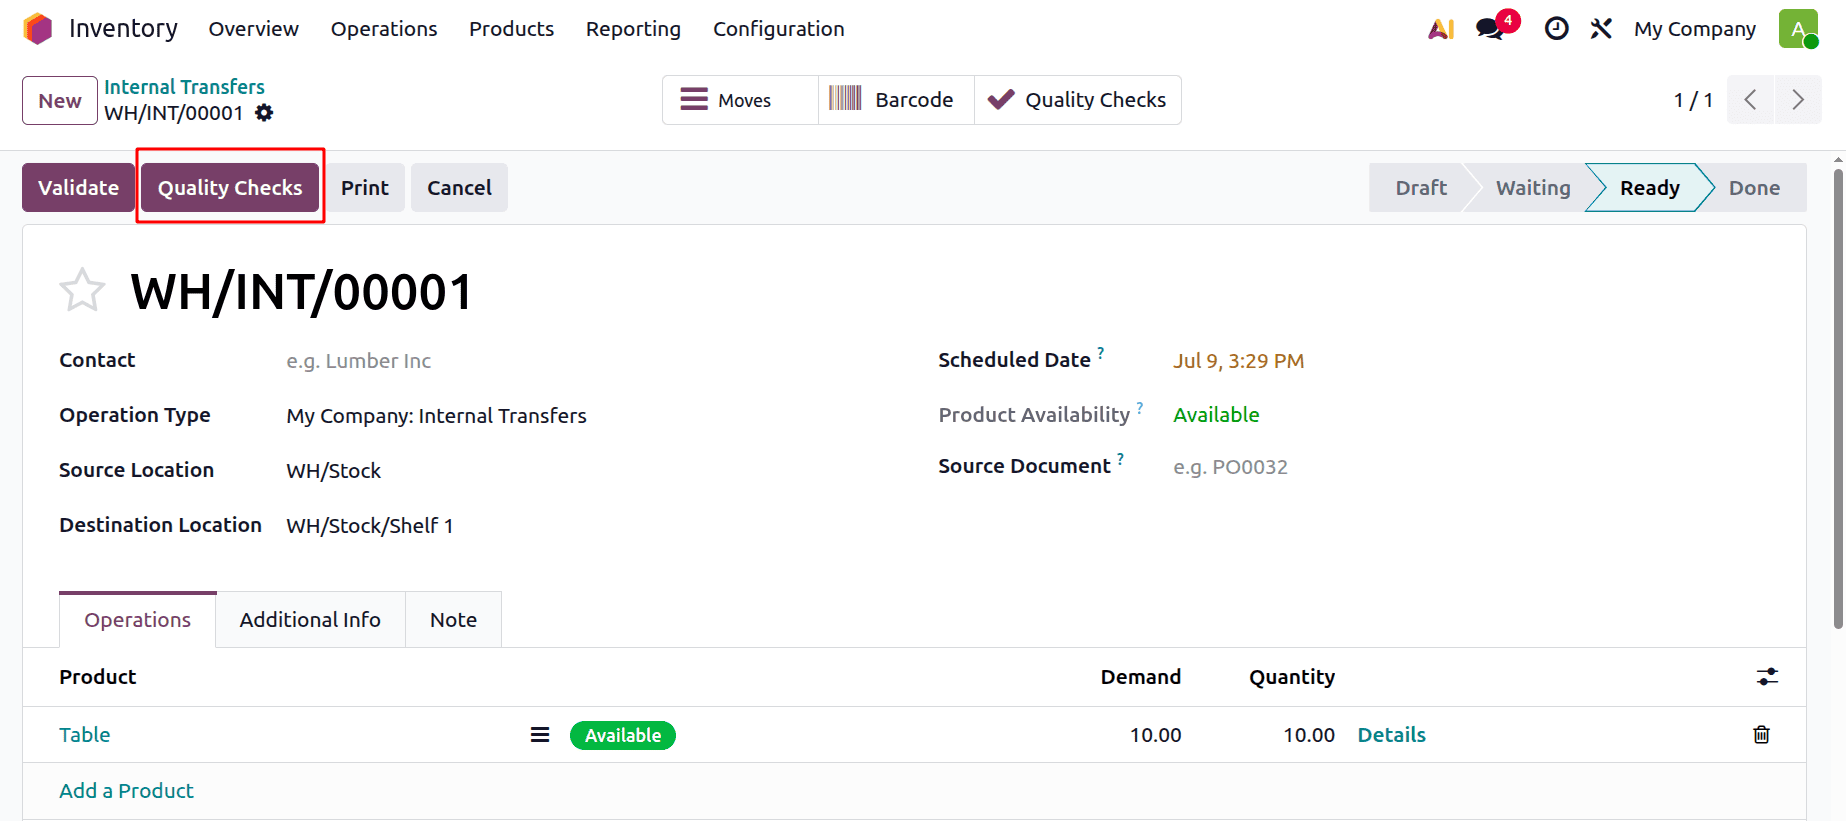
Let's create a new Internal transfer from the Inventory. From the Operations menu, click on the Internal transfer and create a new one.
Here, one product is being transferred from the stock location to the shelf. There is a button named Quality Checks. Click on it.
Here, the quality type is Instructions. The given note can be seen there, and users can also add some Notes there. Then click on the Validate button.
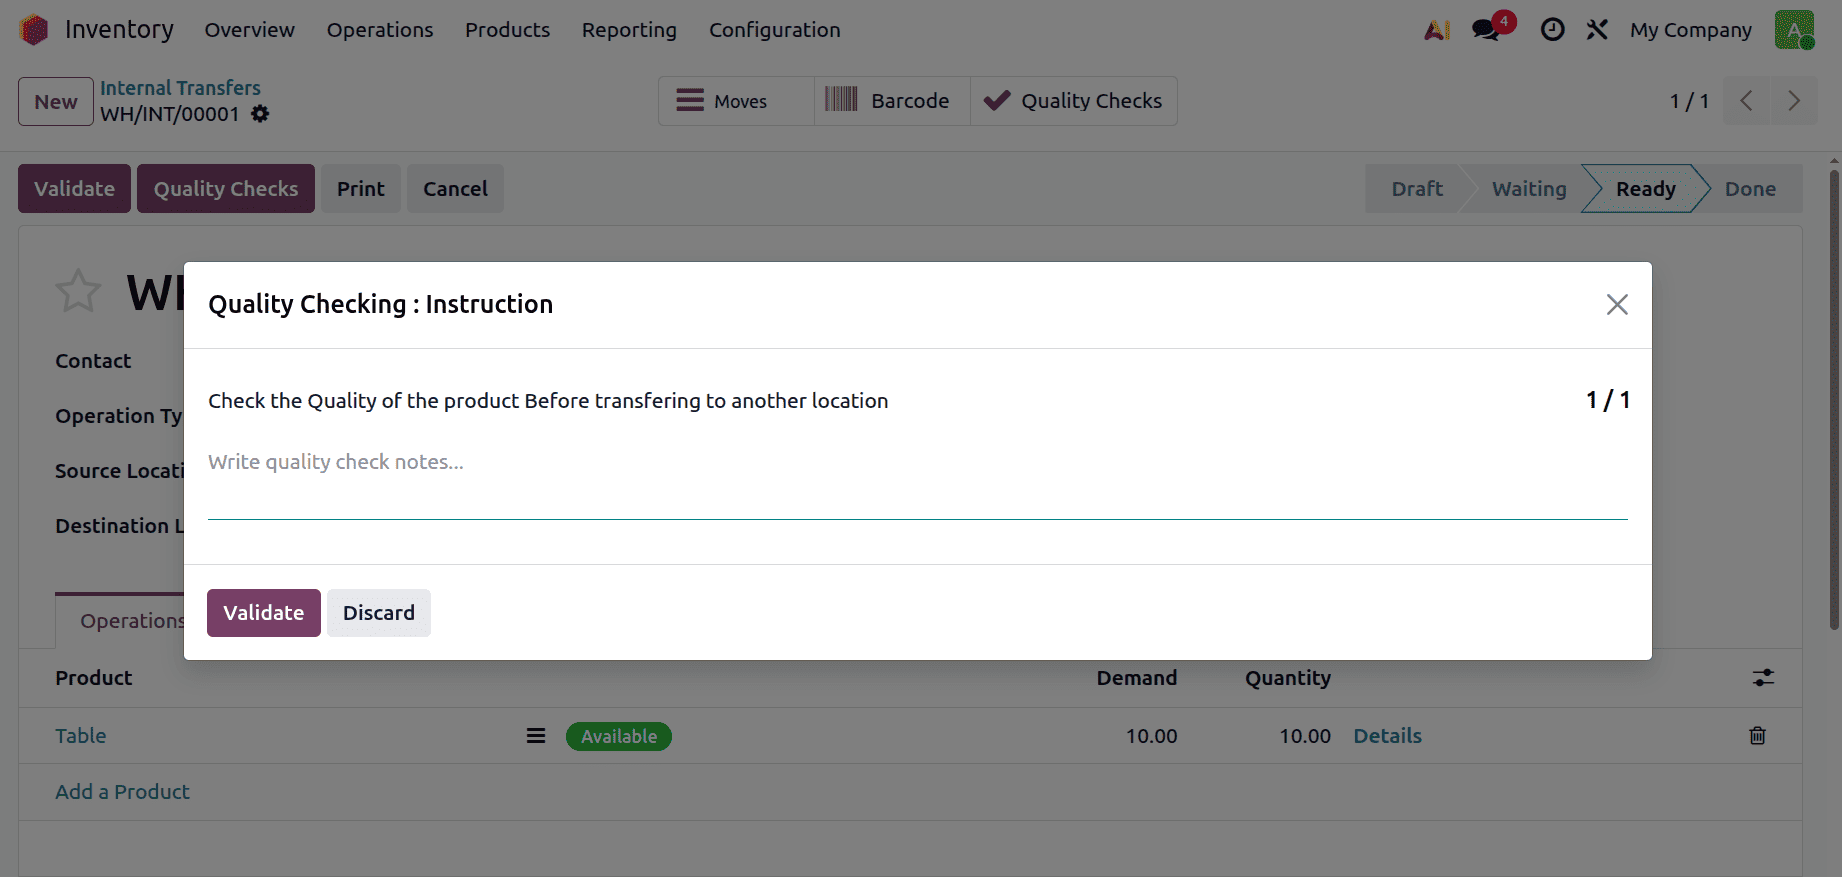
This is how the quality type Instruction works.
Type: Pass / Fail
In Odoo 19, pass-fail quality checks are used to confirm if a product satisfies predetermined requirements. Items are assessed in accordance with predetermined criteria, and the results are simply labelled as "Pass" or "Fail." This method provides a rapid and effective technique to evaluate product quality, assisting companies in identifying non-conformities and promptly putting corrective measures in place.
You can specify the precise requirements a product must fulfil in order to pass the inspection in a text field seen in Pass-Fail checks.
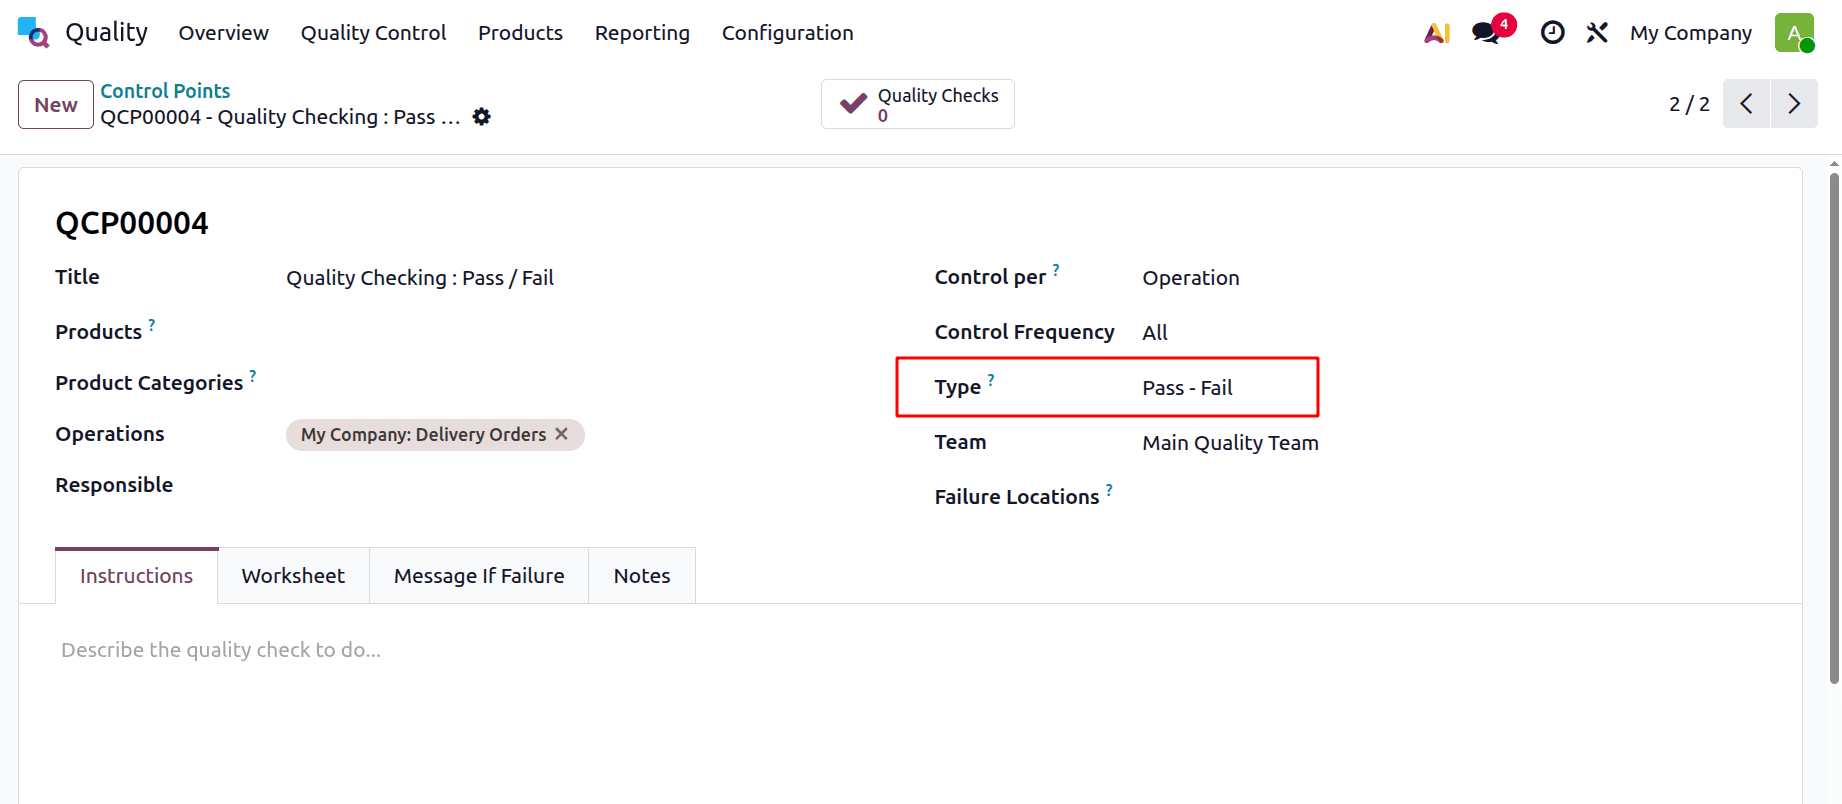
The screenshot below shows a quality control point created for the operation, Delivery. Here, the quality checking type is set as Pass / Fail.
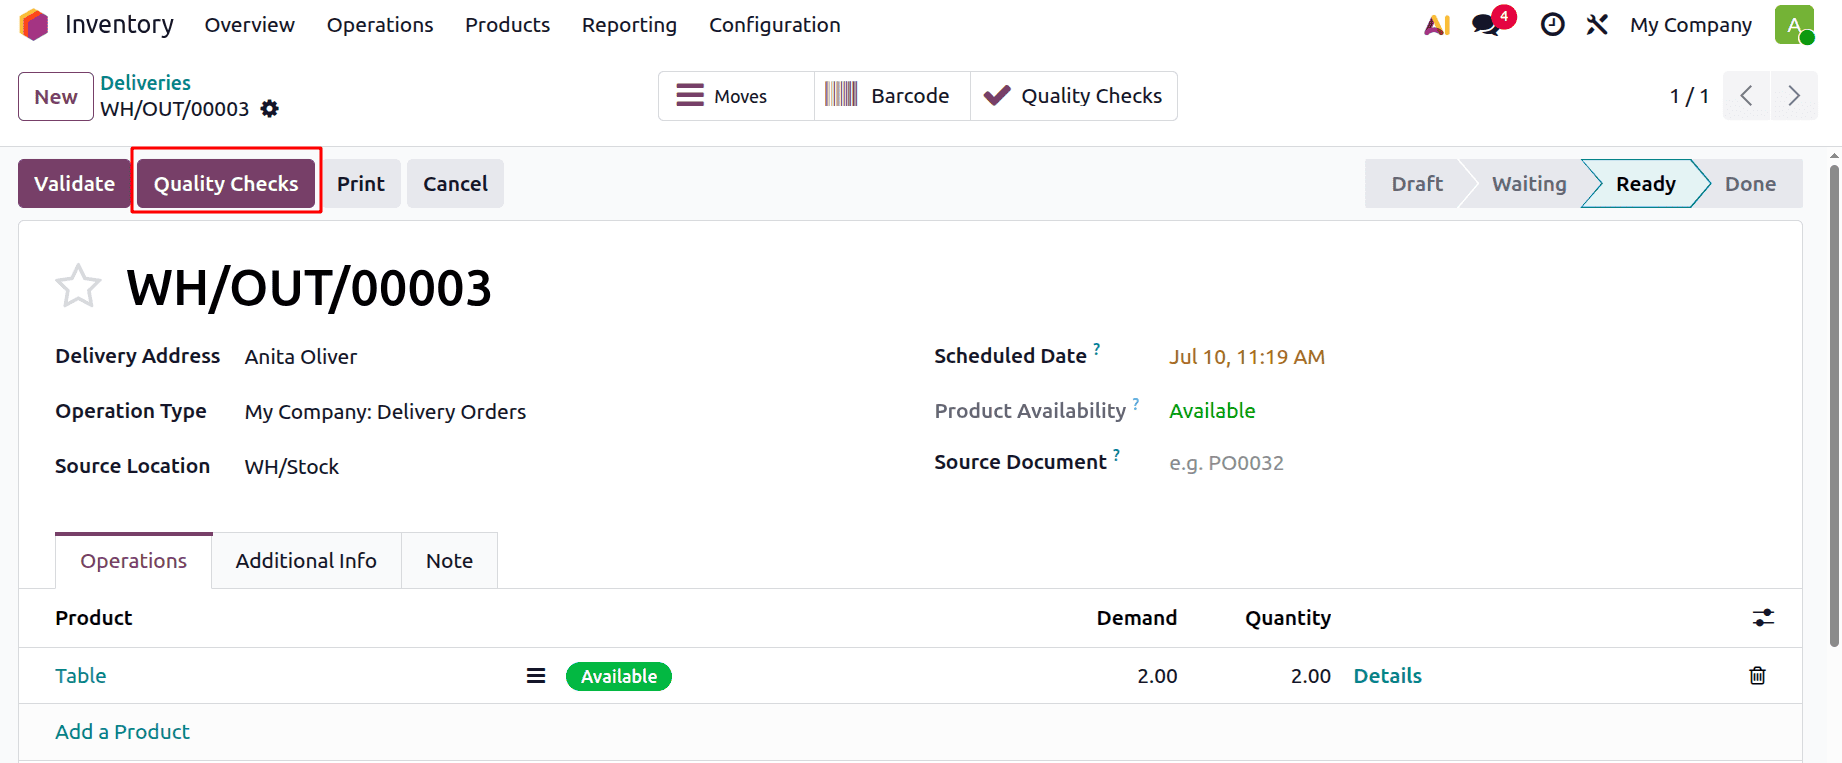
From the inventory, create a delivery order. Enter the required details, such as the customer, product, quantity, and other relevant information. Then, click the Quality Checks button to perform the quality check.
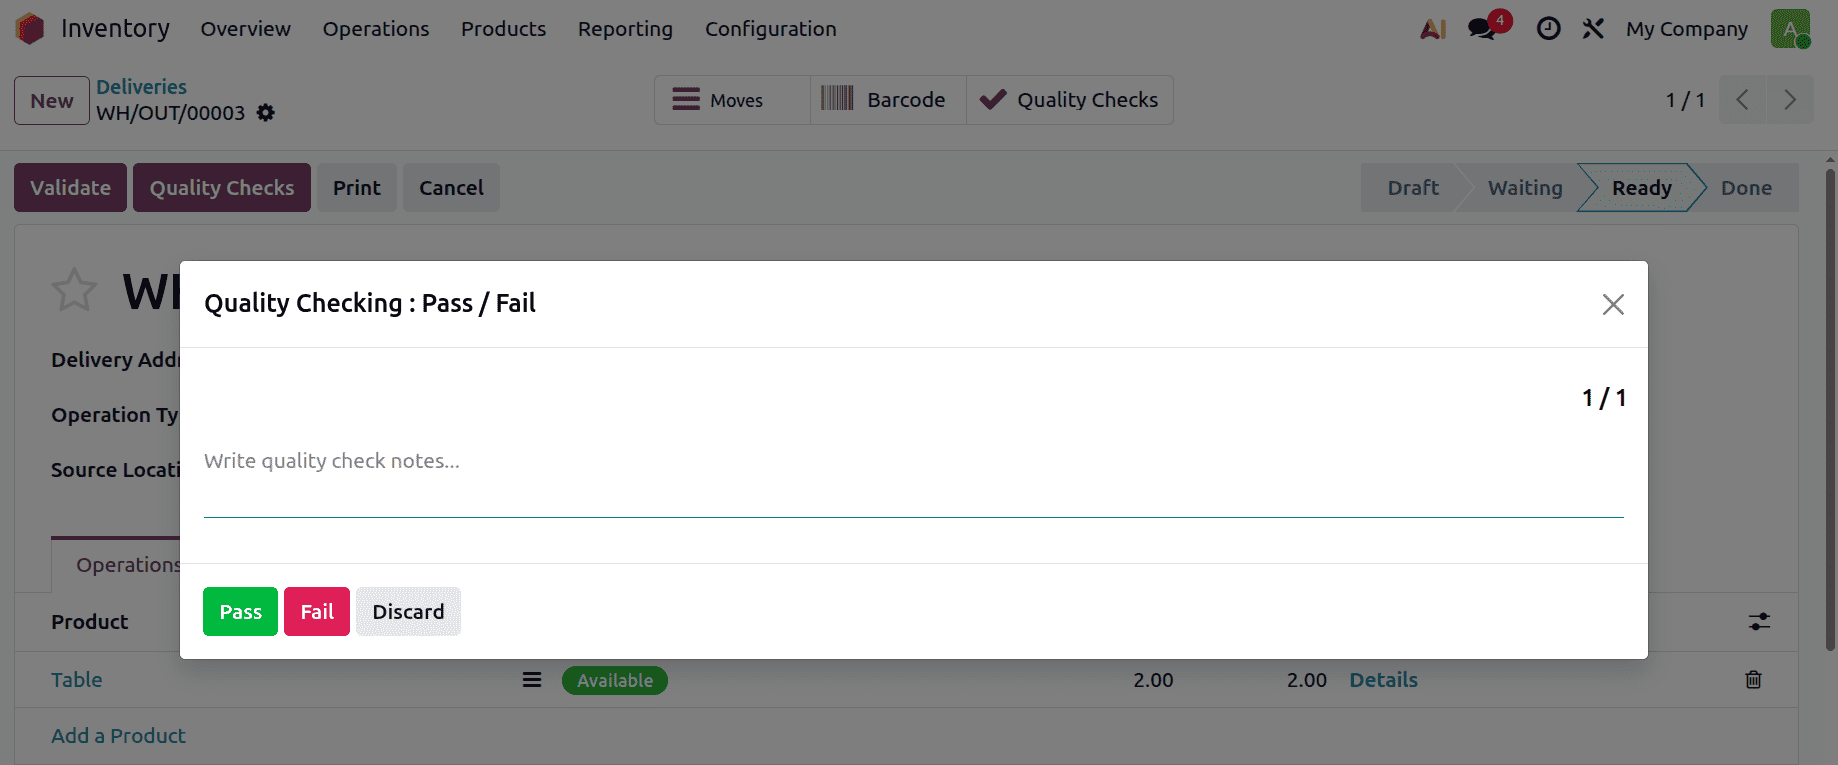
As shown below, a pop-up will appear. There is a space to add any notes about the quality checking. Two options are available to record the quality check result. If the quality check is successful, click the Pass button. If the quality check is unsuccessful, click the Fail button.
Type: Take a Photo
Odoo 19's "Take a Picture" quality checks are used to take pictures of goods or procedures while they are being inspected. The quality team can evaluate the product's condition and spot surface flaws, inconsistencies, or departures from expected standards with the aid of this visual method. By offering visual documentation and facilitating more in-depth inspections, incorporating image capture into quality checks improves quality assurance.
In order for the relevant team to examine and verify the product visually, these checks necessitate attaching a photo to the quality check.
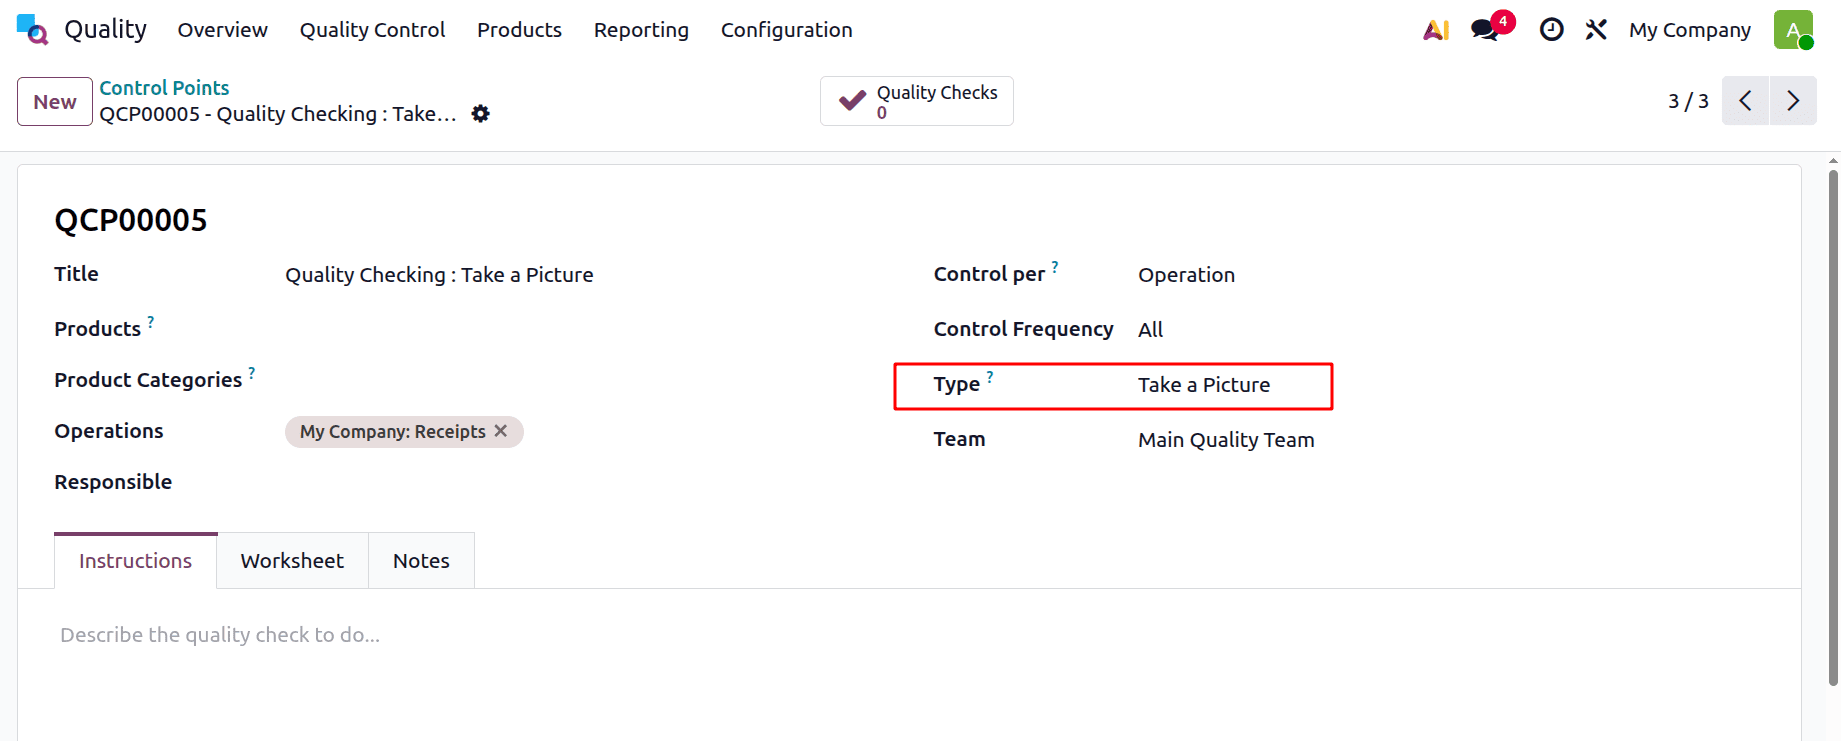
The screenshot below illustrates a Quality Control Point configured for the Receipt operation, with the Quality Check Type set to Take a Picture.
To perform the quality check, create a new Receipt from the Inventory module. Enter the required details, including the vendor, product, and quantity, and then click the Mark as To Do button. Next, click the Quality Checks button before validating the receipt.
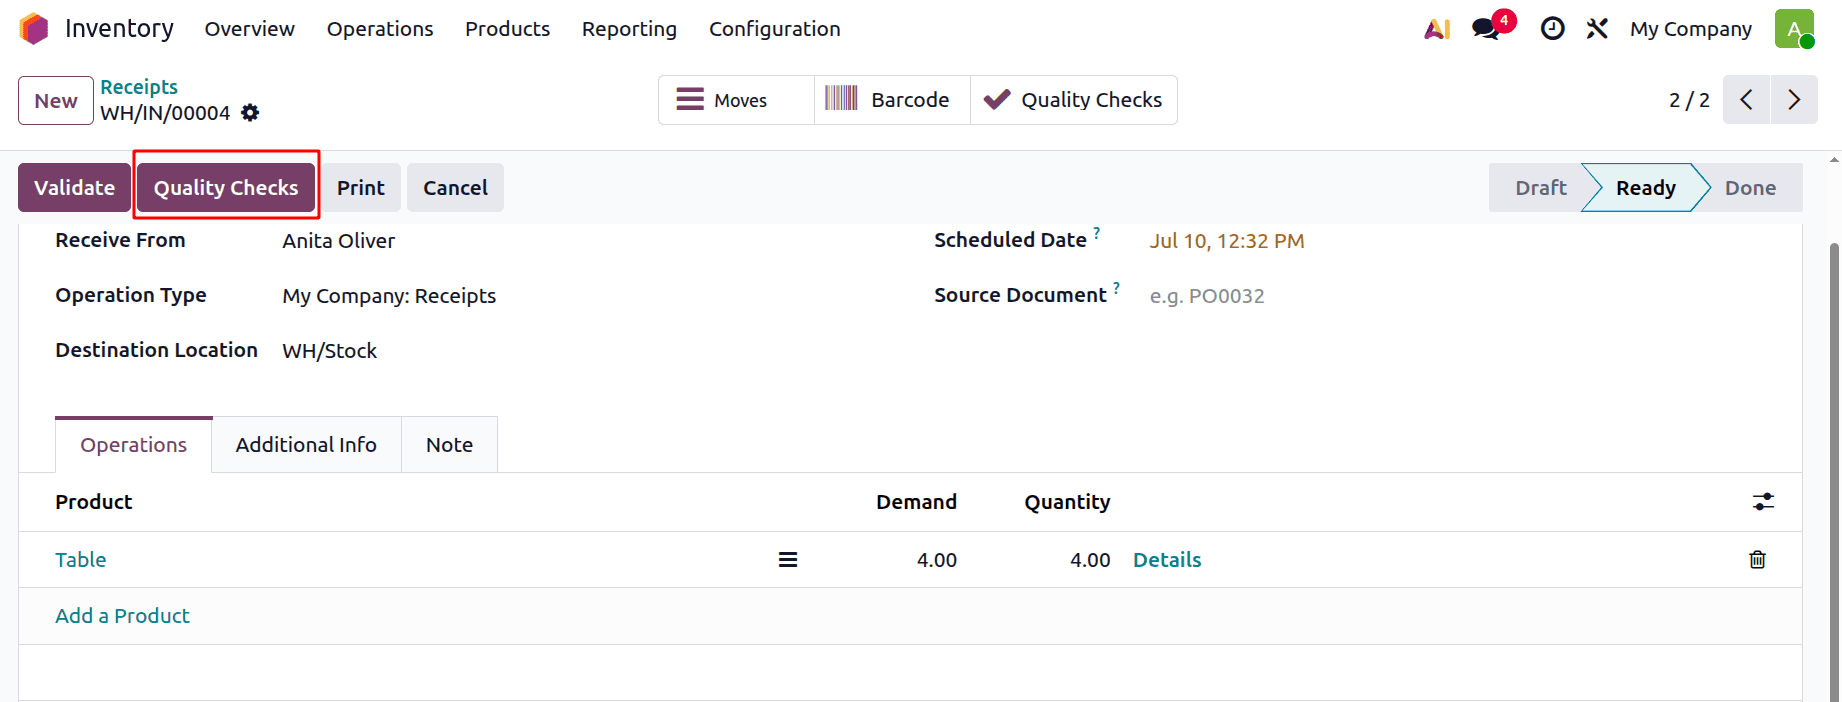
To complete the quality check, upload the required image when prompted.
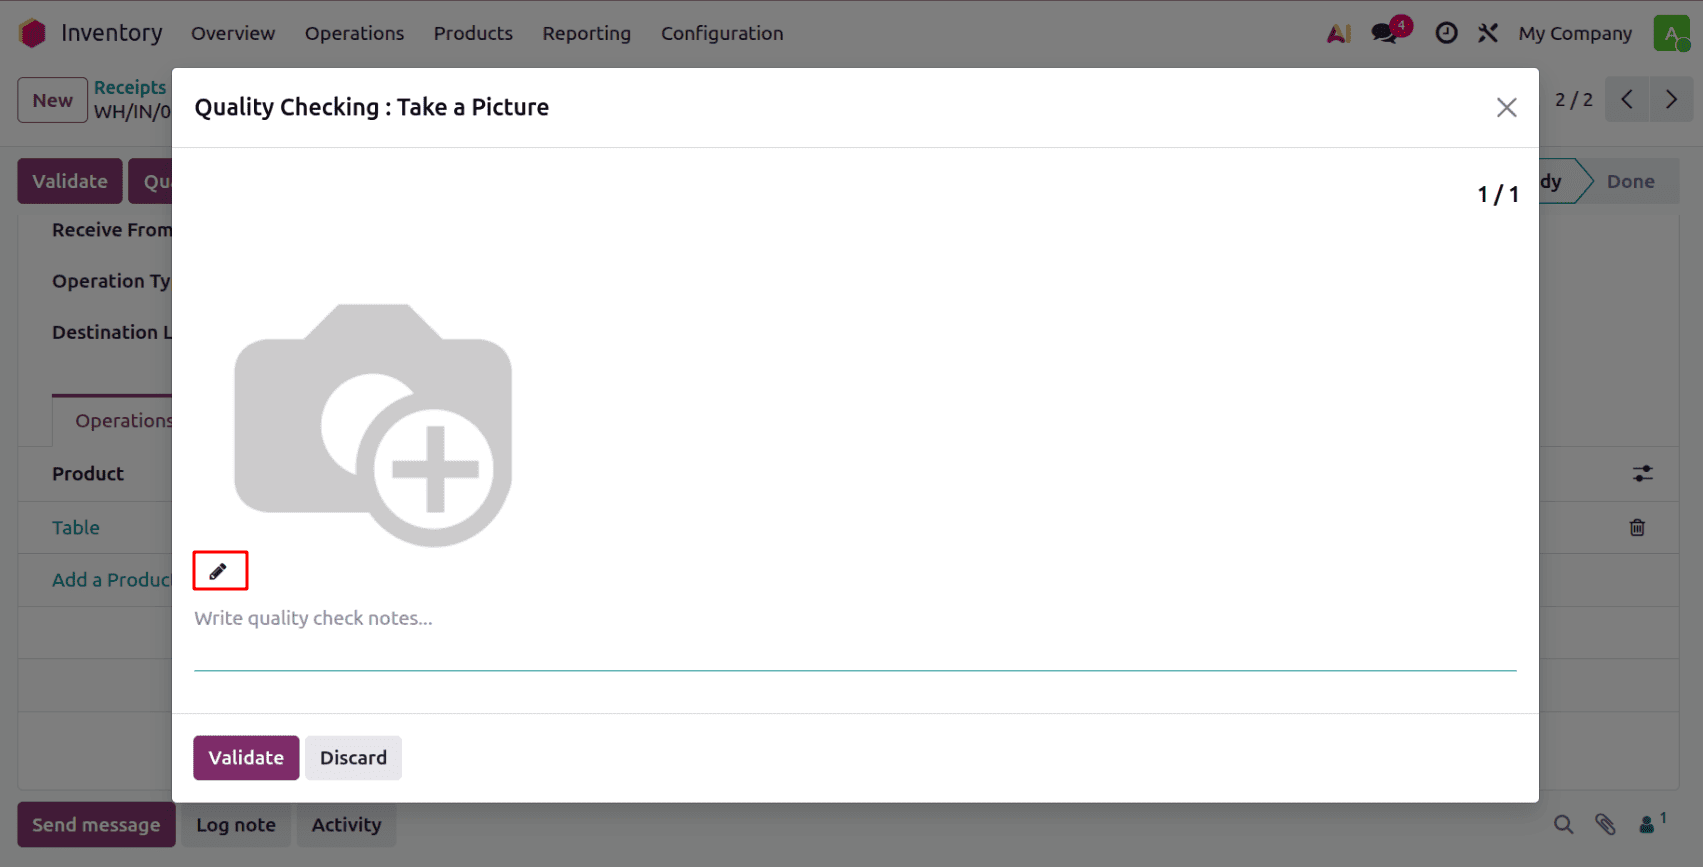
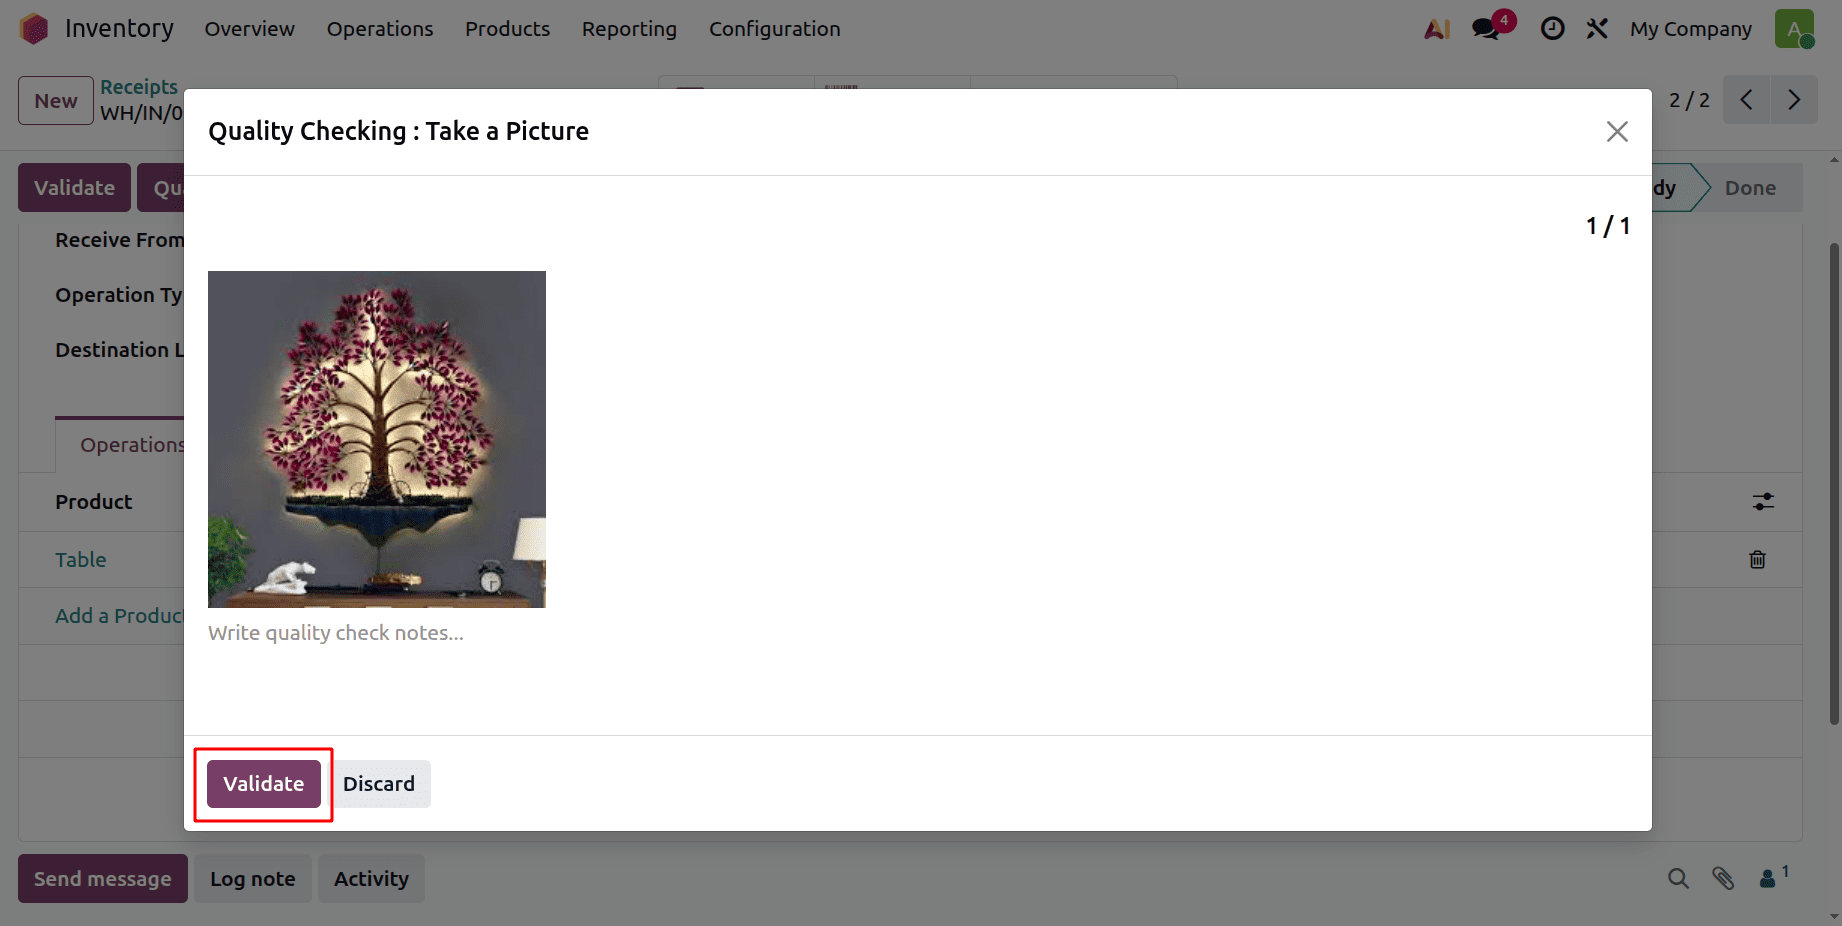
After the image has been uploaded, click the Validate button to finalize the quality check.
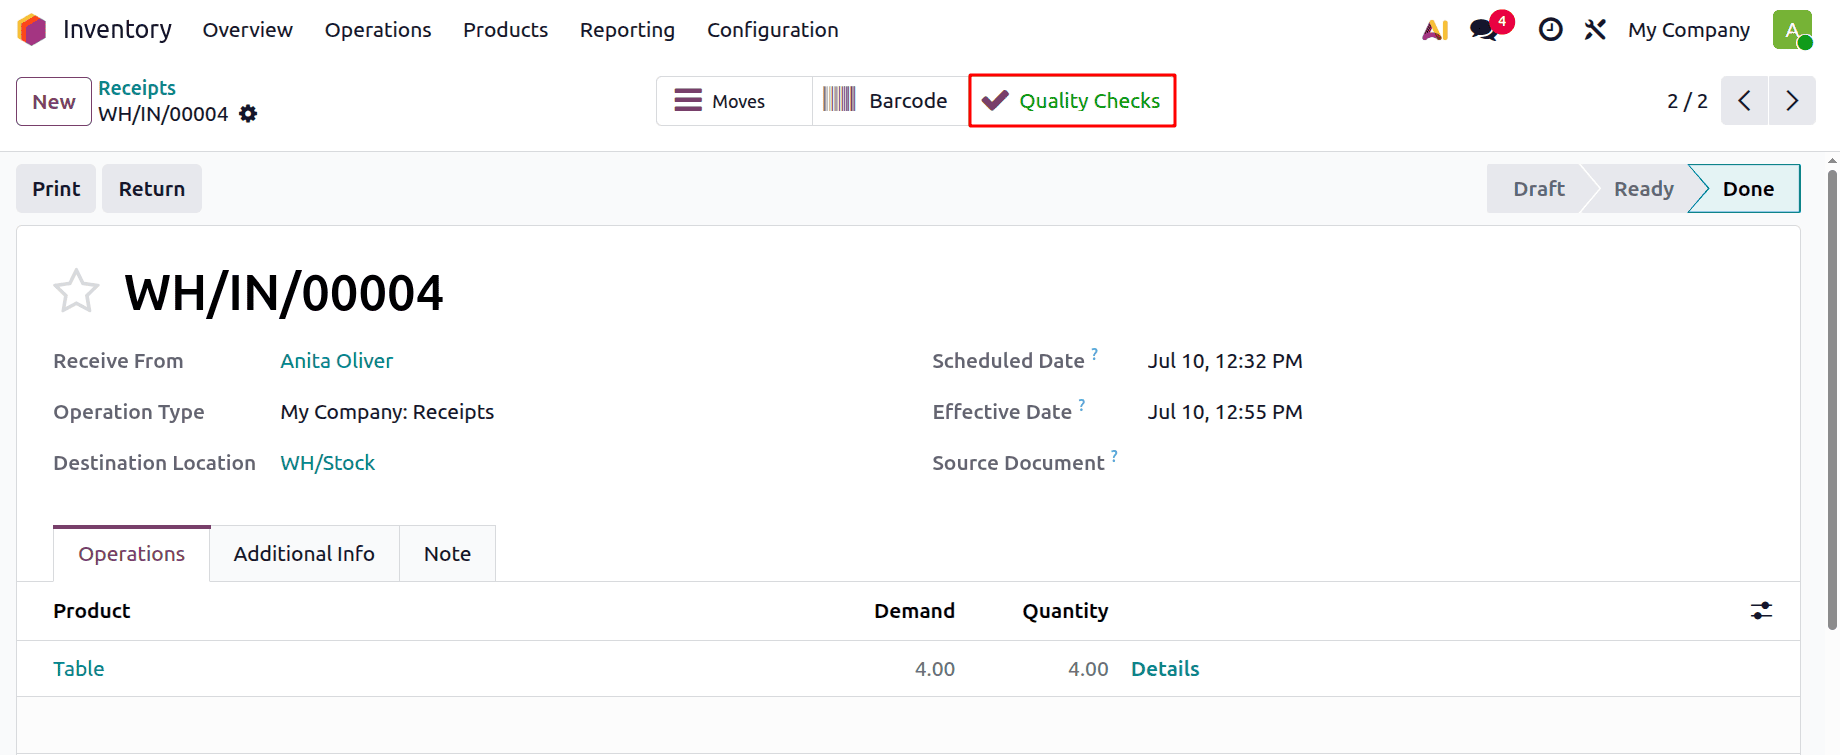
Once the validation is complete, the quality check is marked as Successfully Completed.
Type: Measure
Quantifiable assessments of particular product features, such as size, weight, volume, or other measurable factors, are carried out through measure quality checks. To make sure that products meet quality standards, you can specify acceptable tolerance ranges and norm values for each property in Odoo 19.
Actual measurements are taken during production or inspection and compared to these predetermined standards. Only when the measurement is within the allowable tolerance limits is the quality check designated as "Pass".
Measure quality checks enable firms to achieve customer or regulatory expectations and maintain consistency by accurately validating product compliance.
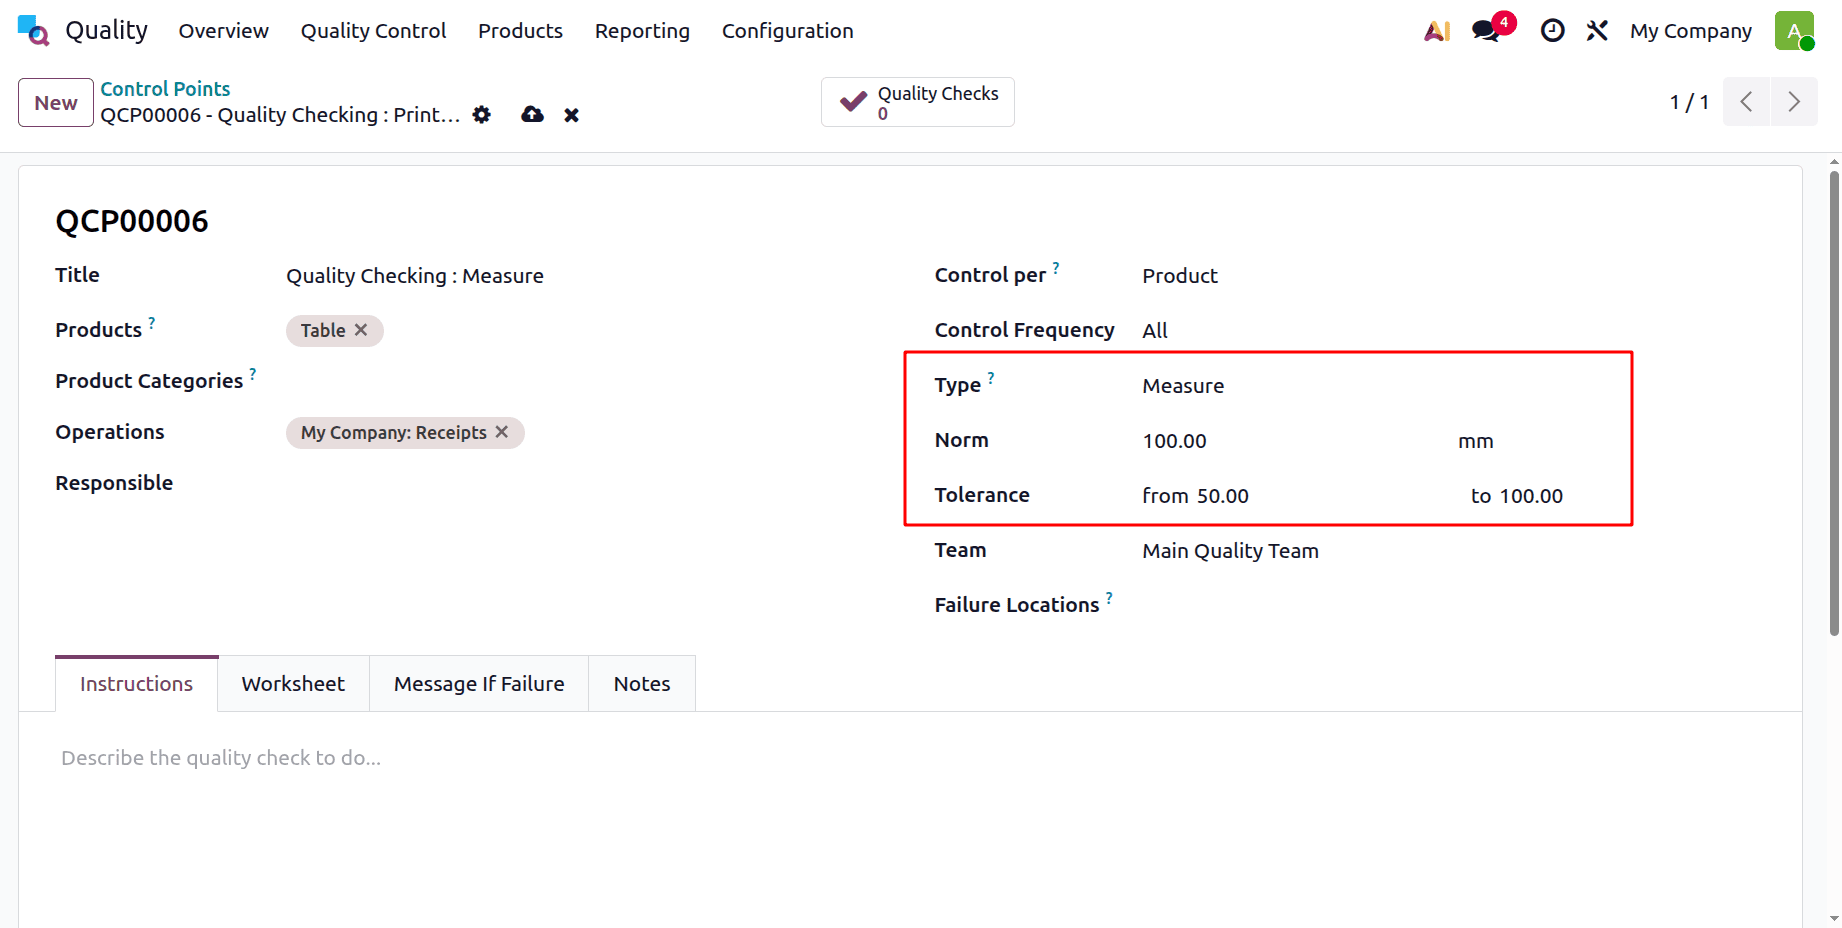
A new Quality Control Point is created for the Product table, with the Quality Check Type configured as Measure. While choosing the Type as Measure, the user should specify the Norm and Tolerance range.
Choose Measure as the quality check type from the Type drop-down box. Two more fields, Norm and Tolerance, will be shown as a result.
In the first text box of the Norm field, specify the target measurement value that the product is expected to achieve. To provide the proper unit of measurement, use the second text box.
In the Tolerance field, enter the acceptable measurement limits by specifying the minimum value in the From subfield and the maximum value in the To subfield.
Choose the quality team in charge of overseeing the checks produced by the QCP from the Team drop-down menu.
Give thorough instructions on how the measurement should be carried out in the Instructions field.
From the Inventory module, create a new Receipt and enter the necessary information, such as the vendor, product, and required quantity. Then, click on the Mark as ToDo button also.
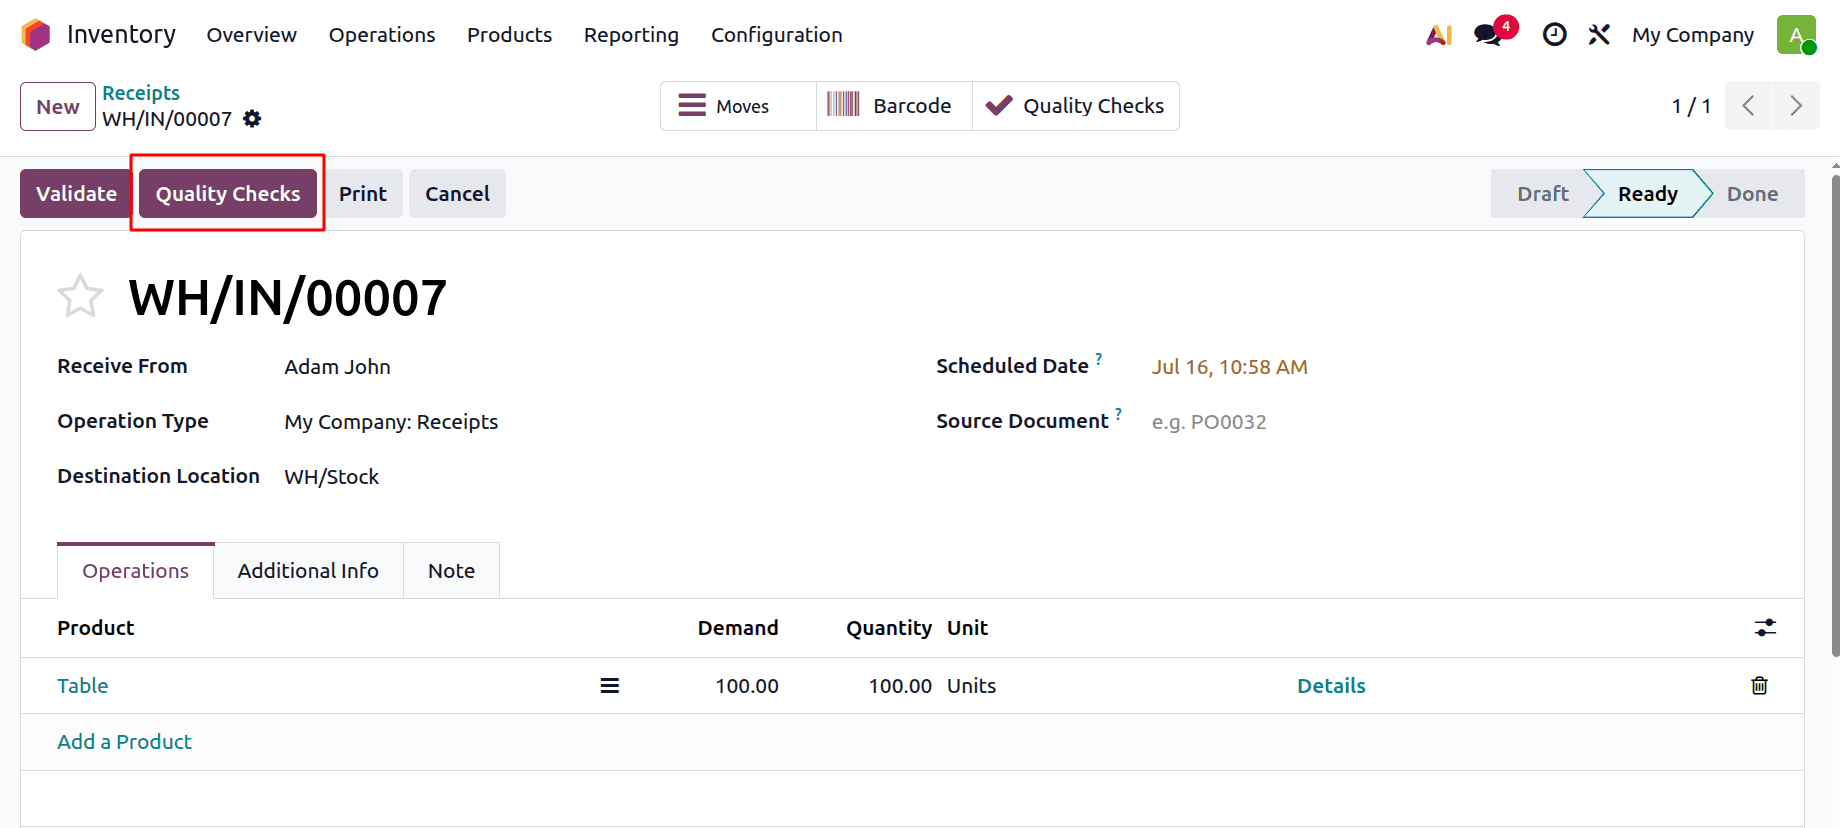
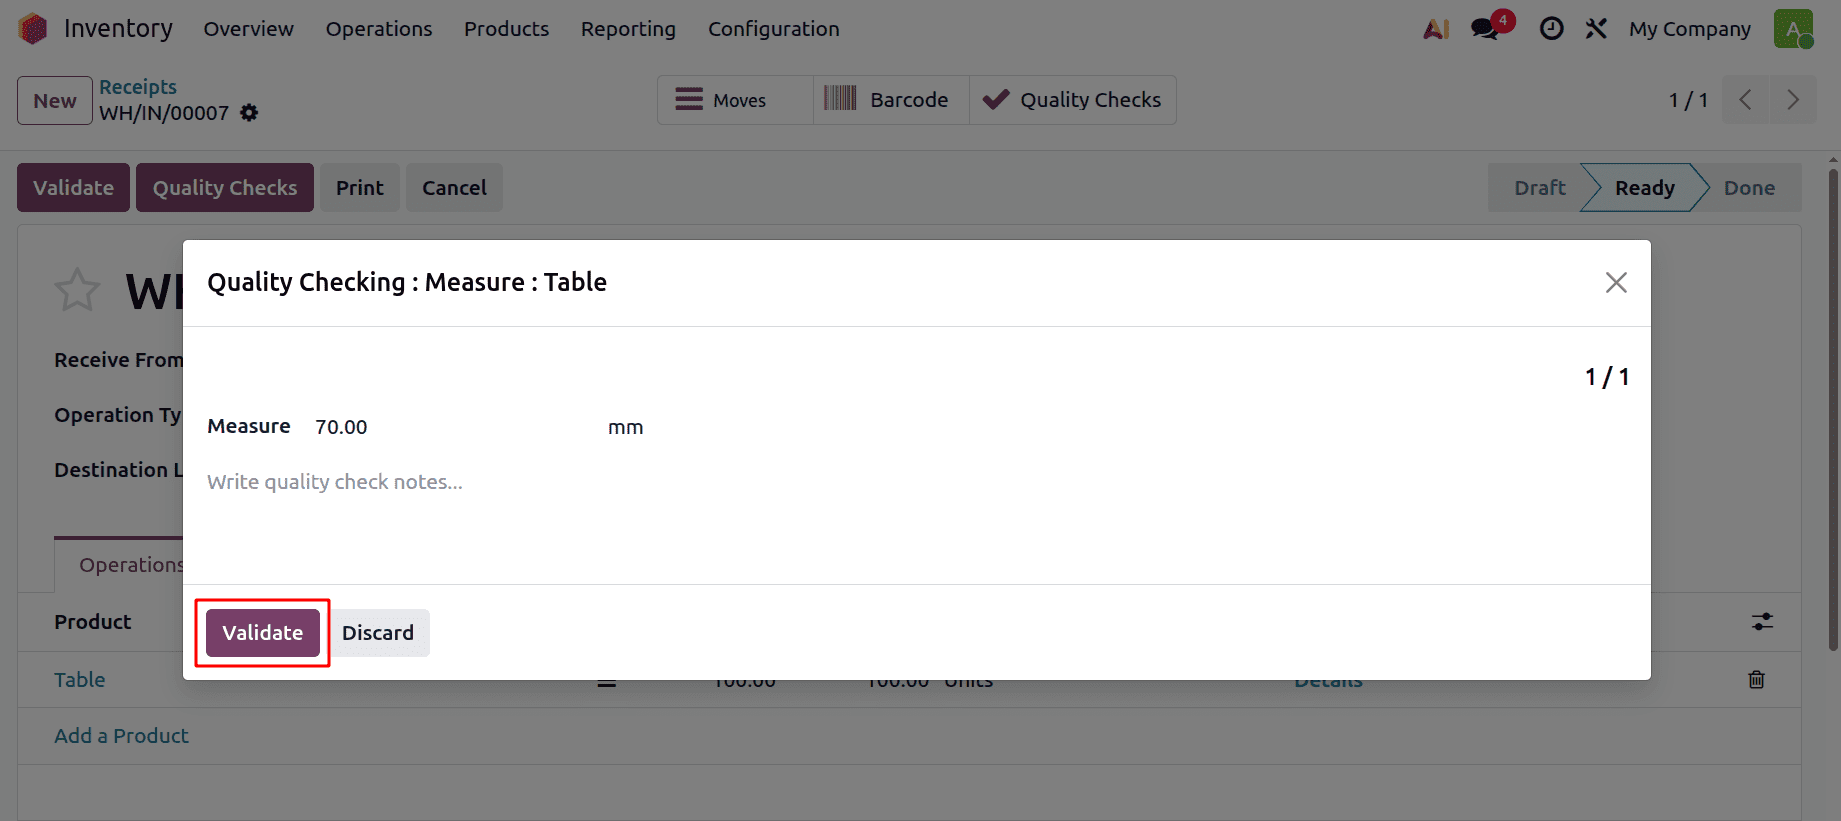
Click on the Quality Checks button. The pop-up window allows the user to enter the required measurement value for the quality check. The measurement should be between the value added and the tolerance.
At the bottom of the pop-up window, two options are available: Correct Measure and Confirm Measure.
If the value was entered incorrectly, choose "Correct Measure". This will cause the quality check window to reopen, enabling you to enter the accurate measurement and select "Validate" once more.
Click "Confirm Measure" to continue if the measurement supplied is correct but outside of the permitted range. This will formally indicate that the quality check was unsuccessful.
Then Validate.
Odoo 19's Quality module provides a variety of quality control options that assist companies in upholding uniform standards for their processes and products throughout their operations. Organisations can minimise costly errors and identify problems early by implementing the proper quality checks at various stages of manufacturing, inventory, and logistics. These options for quality control boost customer happiness, guarantee adherence to internal and industry standards, and increase operational efficiency. Businesses may create a dependable quality management strategy that promotes long-term success and continual improvement by utilising the several quality categories in Odoo 19.
To read more about Overview of Quality Types in Odoo 18, refer to our blog Overview of Quality Types in Odoo 18.