Managing a company’s finances requires accuracy, organization, and efficient processes, especially when dealing with vendor payments and financial records. The Accounting module in Odoo 19 provides a comprehensive set of tools designed to simplify financial management for businesses of all sizes. With its integrated features, the module helps companies manage invoices, track expenses, reconcile bank transactions, and maintain reliable accounting records. By automating many routine accounting tasks, Odoo allows finance teams to reduce manual work, minimize errors, and focus more on strategic financial planning and business growth.
One of the useful capabilities available in Odoo 19 Accounting is the Check Payment feature, which enables businesses to process vendor payments using checks. While many organizations rely on digital payment methods, checks are still widely used in certain industries and regions for supplier settlements. Odoo supports this traditional payment method by allowing users to register payments through checks and print them directly from the system. When a vendor bill is confirmed, the payment can be registered by selecting Check as the payment method. The system then records the transaction and generates the appropriate accounting entries automatically. This integrated workflow helps businesses manage check payments more efficiently while ensuring that all financial transactions are accurately documented in the accounting records.
In addition to facilitating payment processing, Odoo also supports seamless bank reconciliation. Once a check is issued and later appears in the company’s bank statement, the transaction can be matched with the corresponding payment recorded in the system. This ensures that the company’s financial records remain consistent with bank data, helping accountants maintain transparency and accuracy in financial reporting.
This blog explores the complete workflow of processing vendor check payments in Odoo 19 Accounting, including the necessary configuration steps, payment registration, check printing, and reconciliation. By understanding this process, businesses can effectively manage vendor payments while maintaining clear and accurate financial records.
To begin using check payments in Odoo 19, the feature must first be enabled in the Accounting settings. Navigate to the Accounting module, open the Configuration menu, and select Settings. Within the vendor payment configuration section, you will find the option to enable Check Payments. Activating this option allows Odoo to support check-based vendor payments within the accounting workflow. Once enabled, additional configuration options become available that allow users to define how checks will be printed and processed.
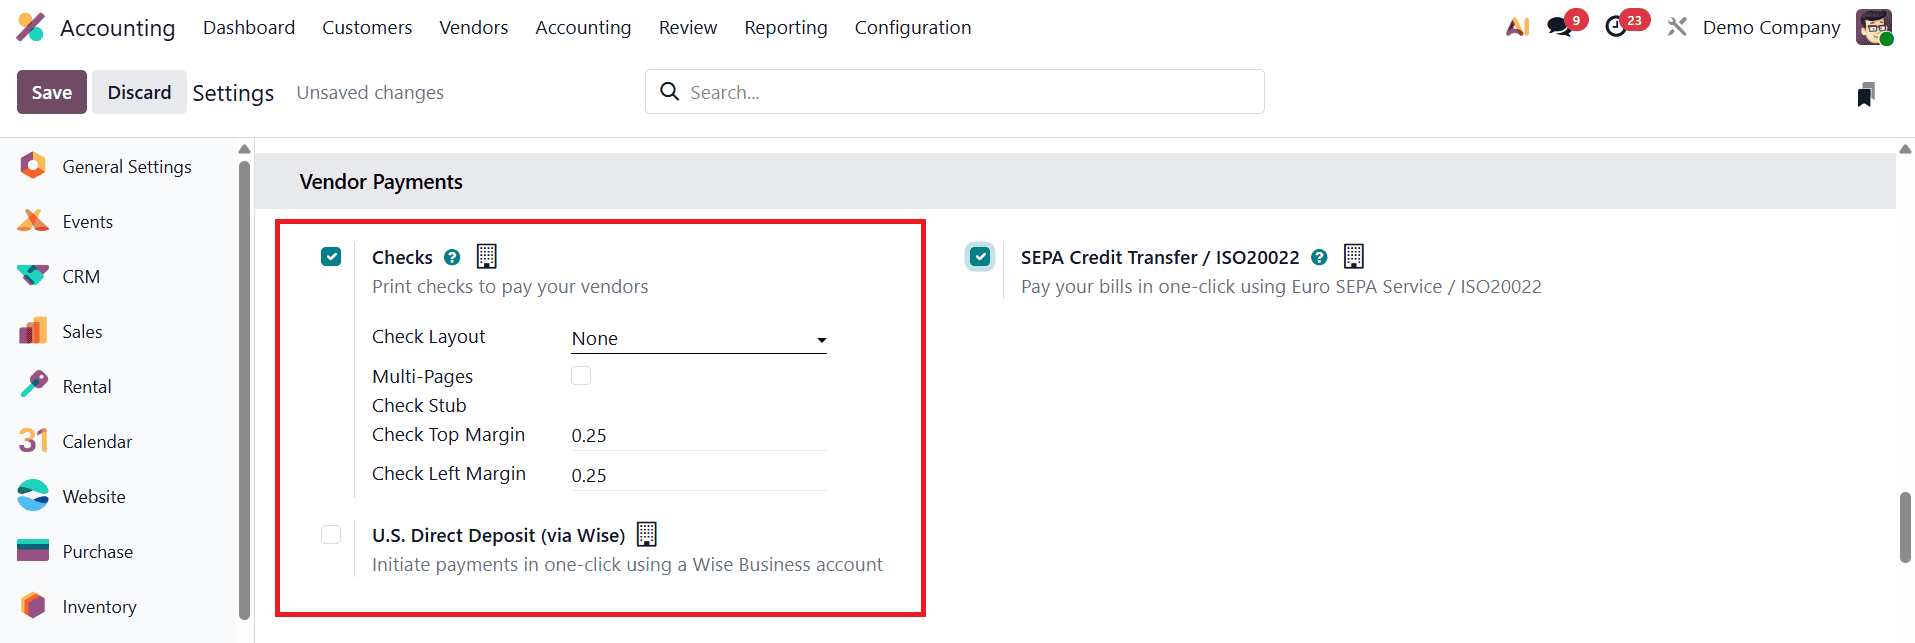
After activating the check payment feature, users can configure the check layout to match their company’s check printing format. Odoo provides several predefined layouts, including Print Check (Top) – US, Print Check (Middle) – US, and Print Check (Bottom) – US. These layouts are designed to align with standard check paper formats commonly used in the United States. Selecting the appropriate layout ensures that the printed information such as the payee name, amount, and date appears correctly on the physical check. For businesses that do not require a predefined format, the None option can be selected, allowing greater flexibility in how check printing is handled.
Odoo also provides customization options for check margins, such as the Check Top Margin and Check Left Margin fields. These settings allow users to adjust the alignment of printed checks according to their printer configuration and the specific design of their check paper. Fine-tuning these margin settings helps ensure that the printed details appear in the correct position on the check, preventing misalignment during printing. Once the configuration is complete, businesses can start paying vendor bills using checks through a simple workflow.
After enabling the required feature, the next step is to configure the Bank Journal to support check payments. To do this, open the Bank Journal directly from the Accounting Dashboard, where all configured journals are displayed for quick access and management. Selecting the bank journal will open its configuration window, which contains multiple sections that control how payments are processed through that journal.
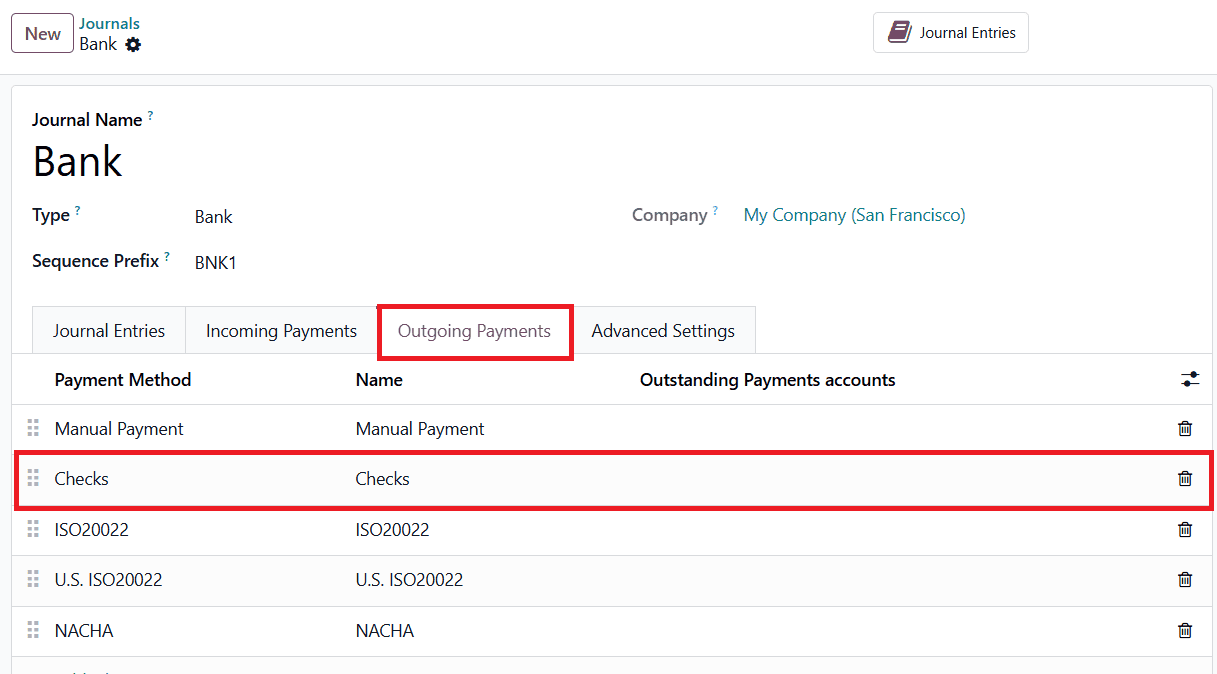
Within the journal configuration page, navigate to the Outgoing Payments tab. This section defines the different payment methods that can be used when making payments from the selected bank journal. To enable check payments, add Checks as one of the available payment methods in this section. By adding this option, Odoo allows users to process vendor or supplier payments using checks directly from the system. Once the Checks payment method is added, the system will include it as a selectable option whenever an outgoing payment is created from that bank journal.
In the Check Printing section of the Outgoing Payment tab in the journal configuration window in Odoo 19, users can control how check numbers are assigned and how checks are formatted when printed. The Manual Numbering option allows users to enter check numbers manually instead of relying on Odoo to generate them automatically. This can be useful for businesses that need to match check numbers with pre-printed checks or follow a specific numbering system.
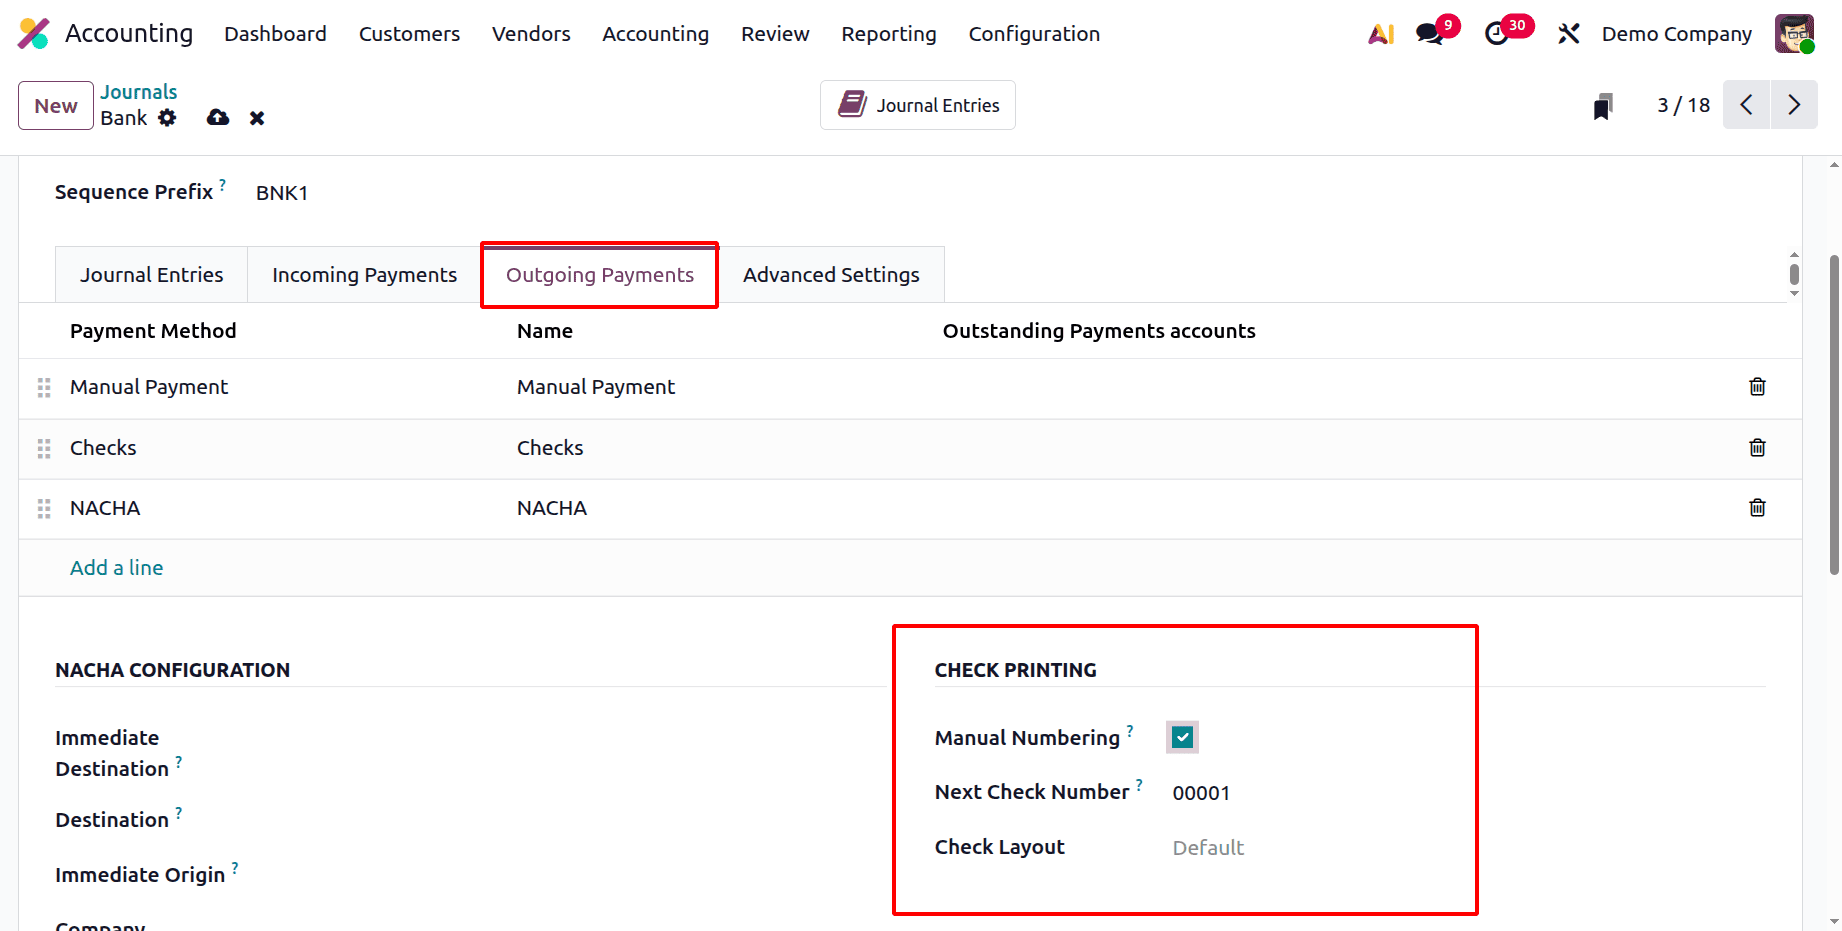
If Manual Numbering is enabled, Odoo automatically generates check numbers based on the value entered in the Next Check Number field. The system uses this number as the starting point and assigns subsequent numbers sequentially each time a check is printed. Additionally, the Check Layout option allows users to select the format or template used when printing checks. These layouts are designed to match commonly used check formats, ensuring that the printed information aligns correctly with the physical check template being used.
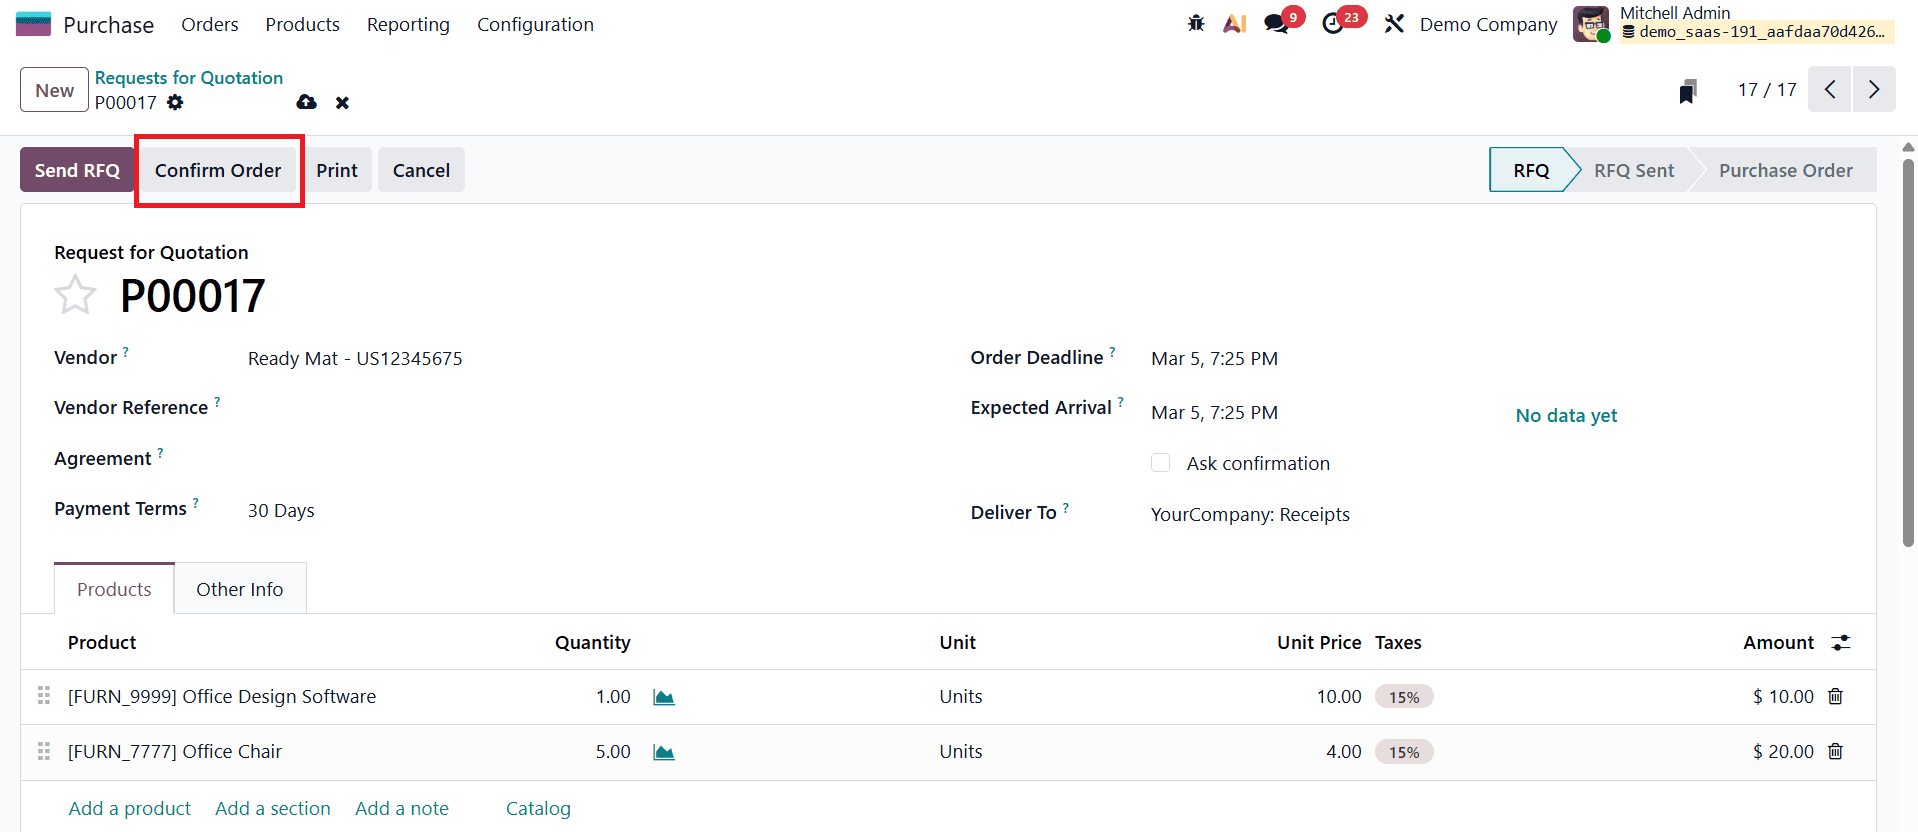
The vendor payment process in Odoo 19 usually begins after a vendor bill has been created and confirmed. To start, create a Purchase Order and confirm it.
Once the purchase order is confirmed, validate the receipt of the products to record that the purchased items have been received.
Next, navigate to the Accounting module to create the bill. From the Vendor menu, select Bills to open the vendor bill window and click the New button. First, add the Vendor. The form provides an Auto-Complete option that allows you to select the related Purchase Order, which will automatically populate the Invoice Lines.
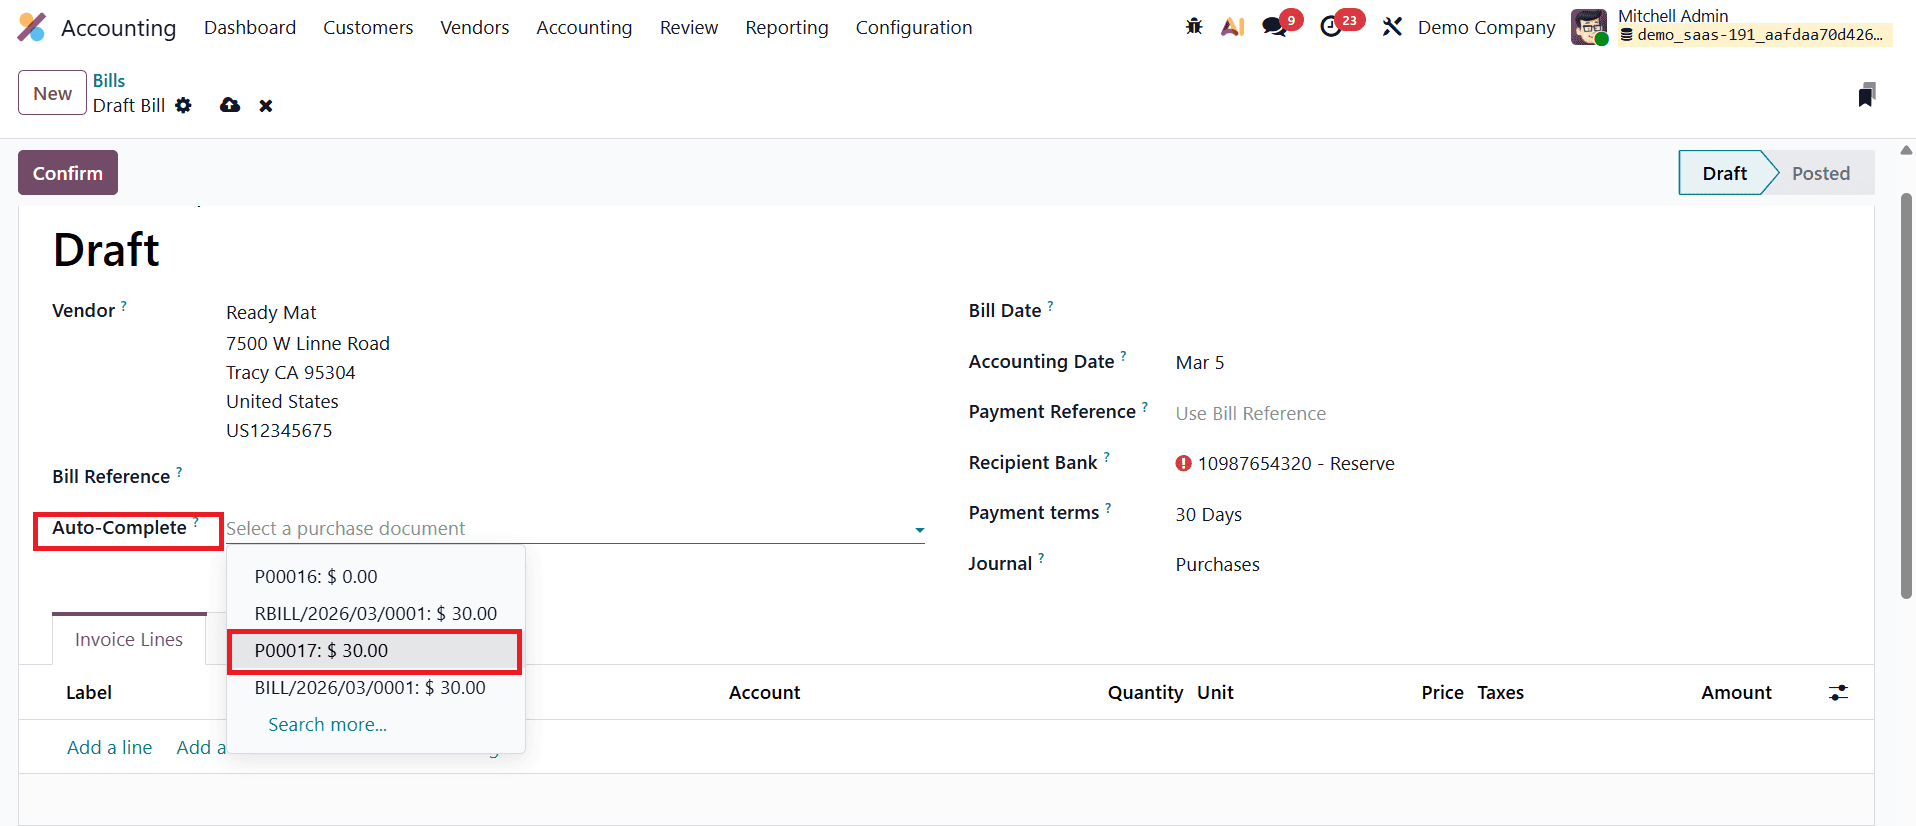
You can either select the purchase order to automatically fill in the invoice details or manually enter the required information in the Invoice Lines section.
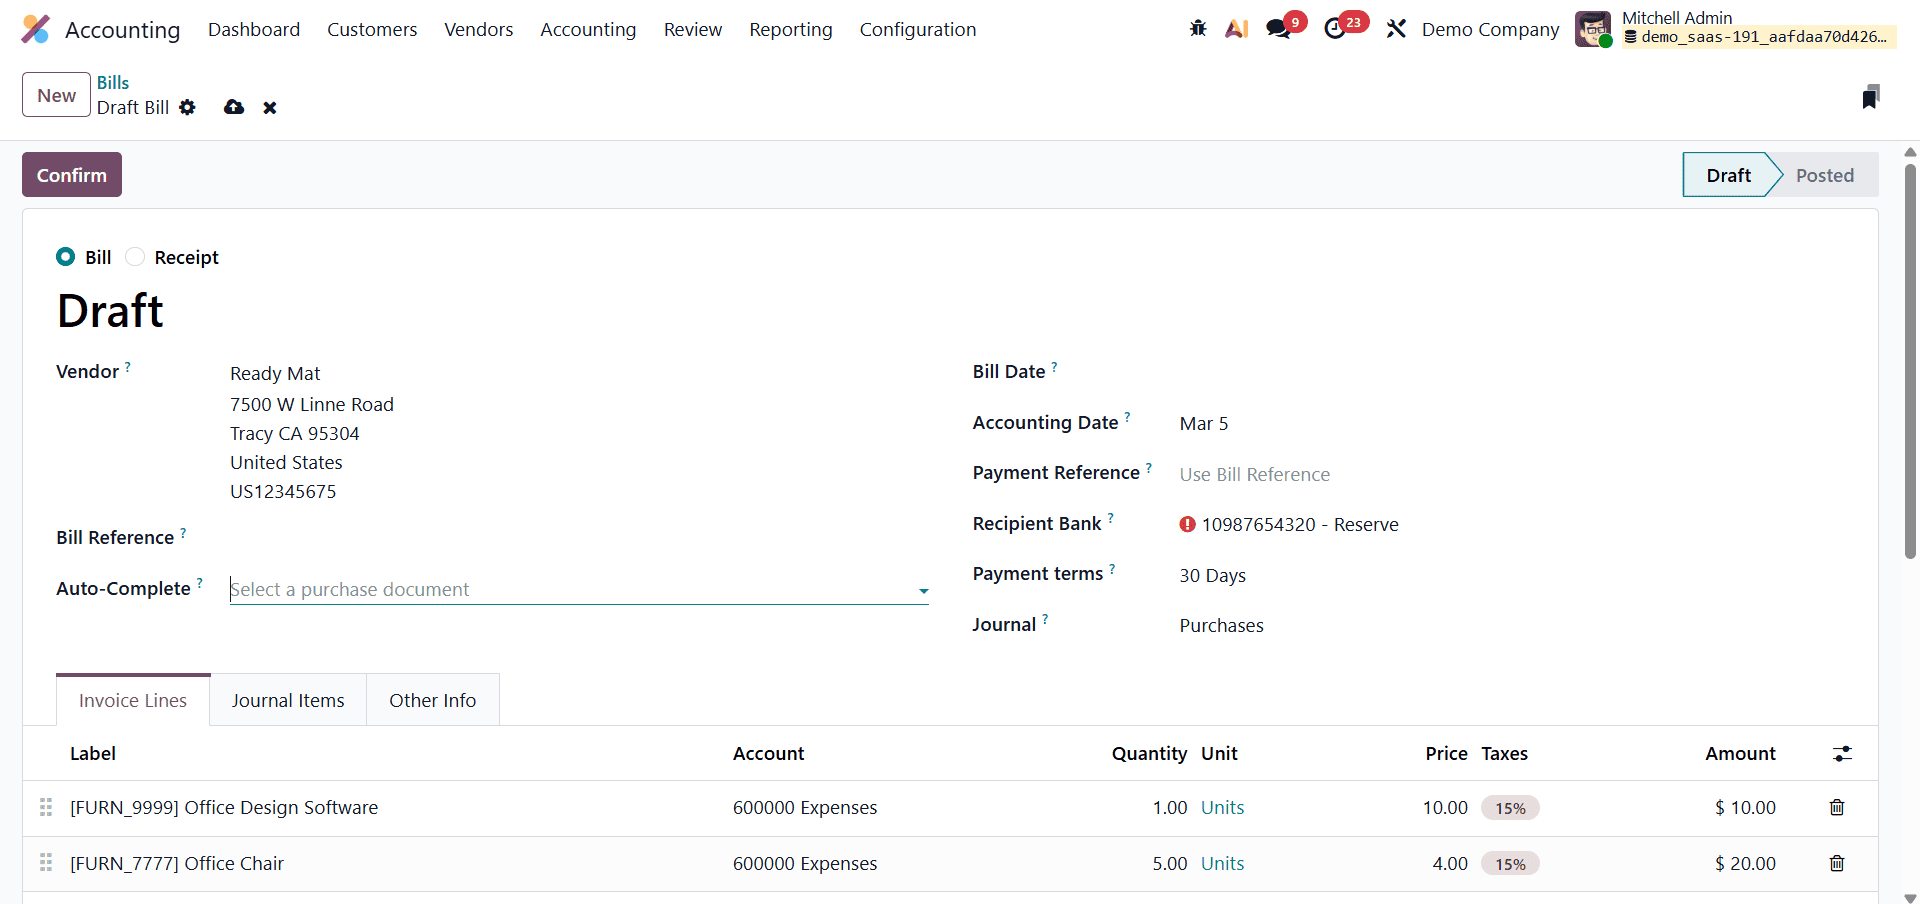
After verifying that the products, quantities, and amounts are correct, click the Confirm button to validate the bill. Once the bill details, such as vendor information, invoice lines, taxes, and payment terms, are reviewed and confirmed, the bill is posted and becomes ready for payment. At this stage, the user can proceed to register the payment directly from the vendor bill form.
To register a vendor payment by check in Odoo 19 Accounting, begin by selecting the vendor bill that you want to pay. Vendor bills can be accessed by navigating to the Vendors menu in the Accounting module and selecting the Bills option.
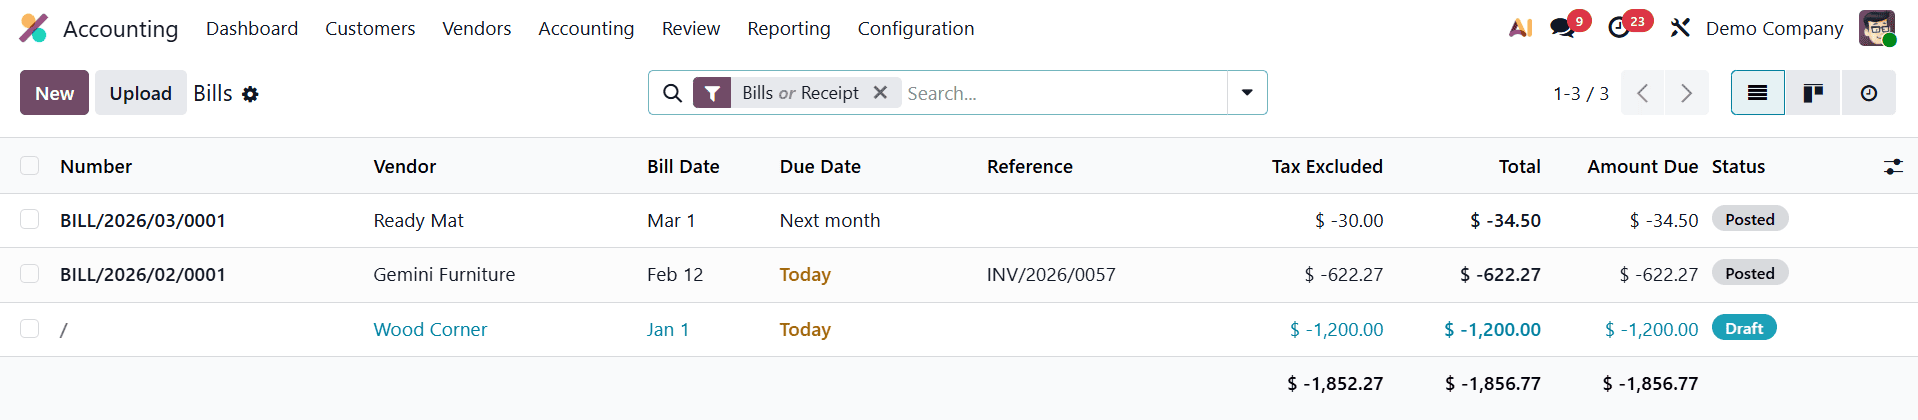
This section displays all supplier bills recorded in the system.
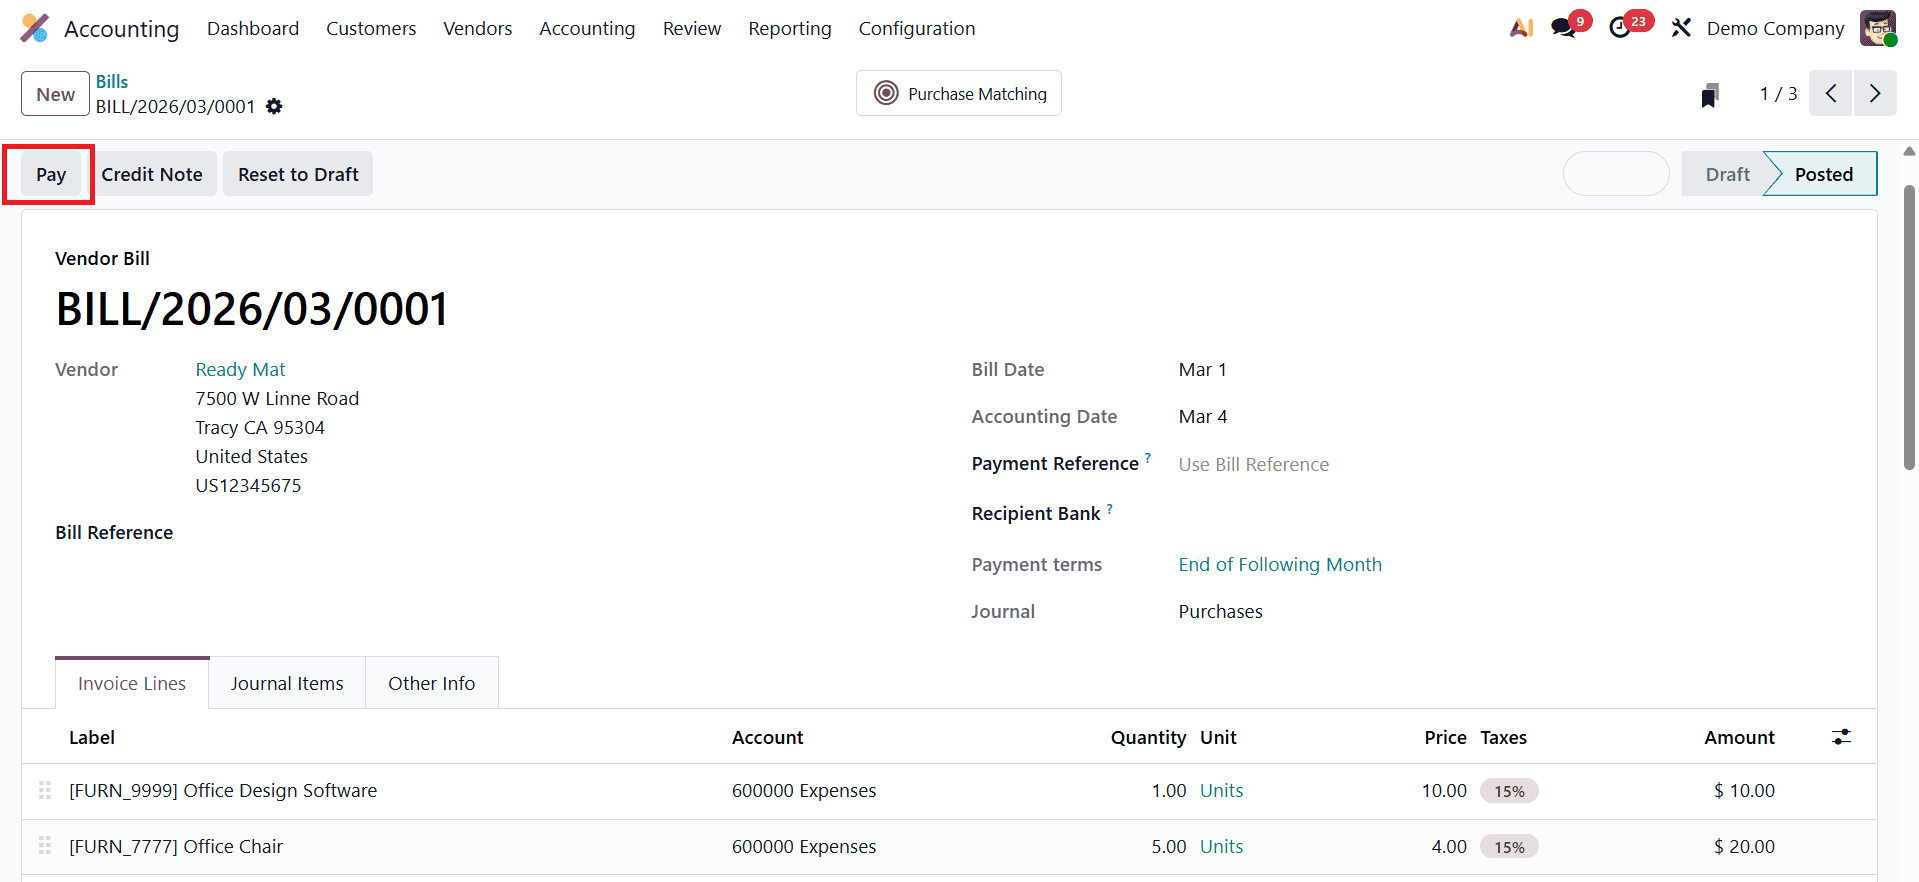
After selecting the relevant vendor bill from the list, ensure that the bill has been validated or posted. Once validated, you can proceed with the payment by clicking the Pay button available on the bill form. This action opens a payment registration window where you can specify the details of the payment transaction.
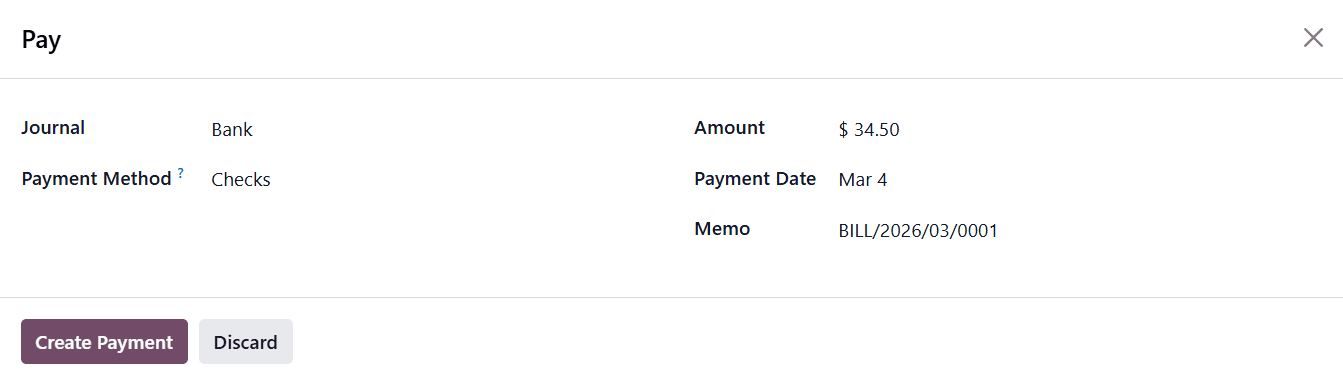
In this window, select Check as the Payment Method, indicating that the payment will be made using a check rather than another method such as bank transfer or manual payment.
The payment window also provides several fields where you can enter additional payment information. These include the Payment Amount, which reflects the amount being paid toward the bill, the Payment Date, which records the date the check is issued, and an optional Memo field that can be used to add notes or references related to the payment. After verifying that all the payment details are accurate, click the Create Payment button to confirm the transaction.
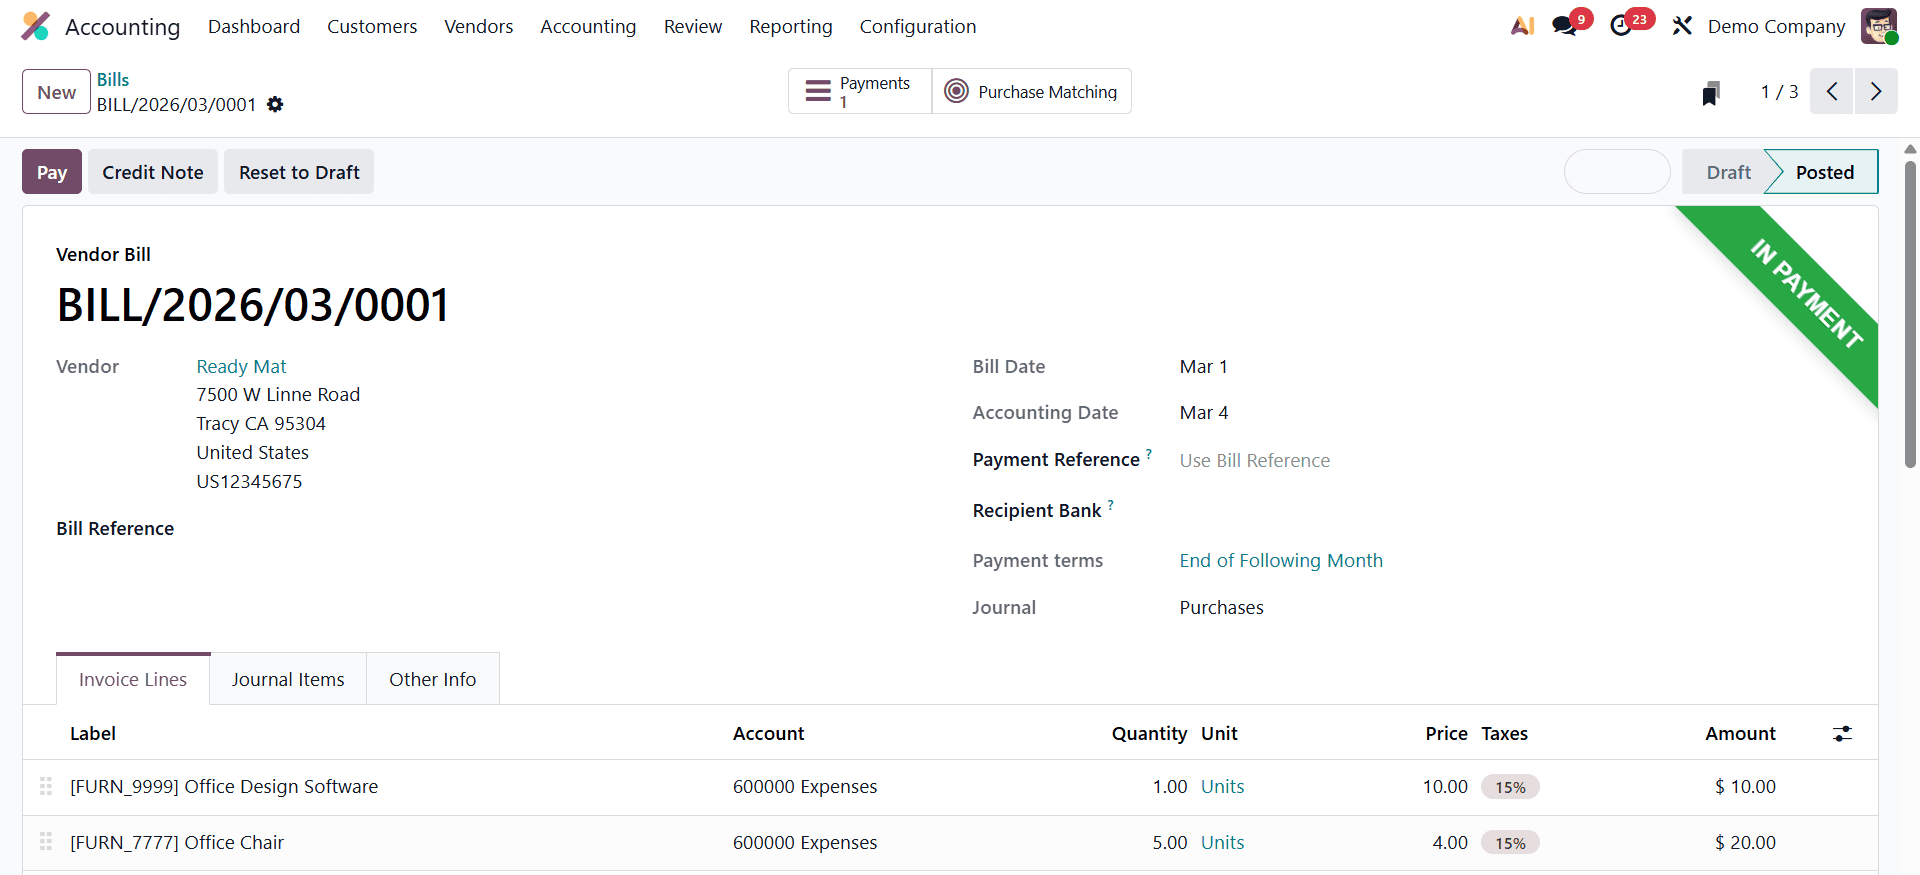
Once the payment is created, Odoo records the payment in the accounting system and links it directly to the corresponding vendor bill. The status of the bill will then change to In Payment, indicating that the payment process has been initiated and that the check has been issued but may still need to be cleared through bank reconciliation.
Printing Checks for the Registered Payment
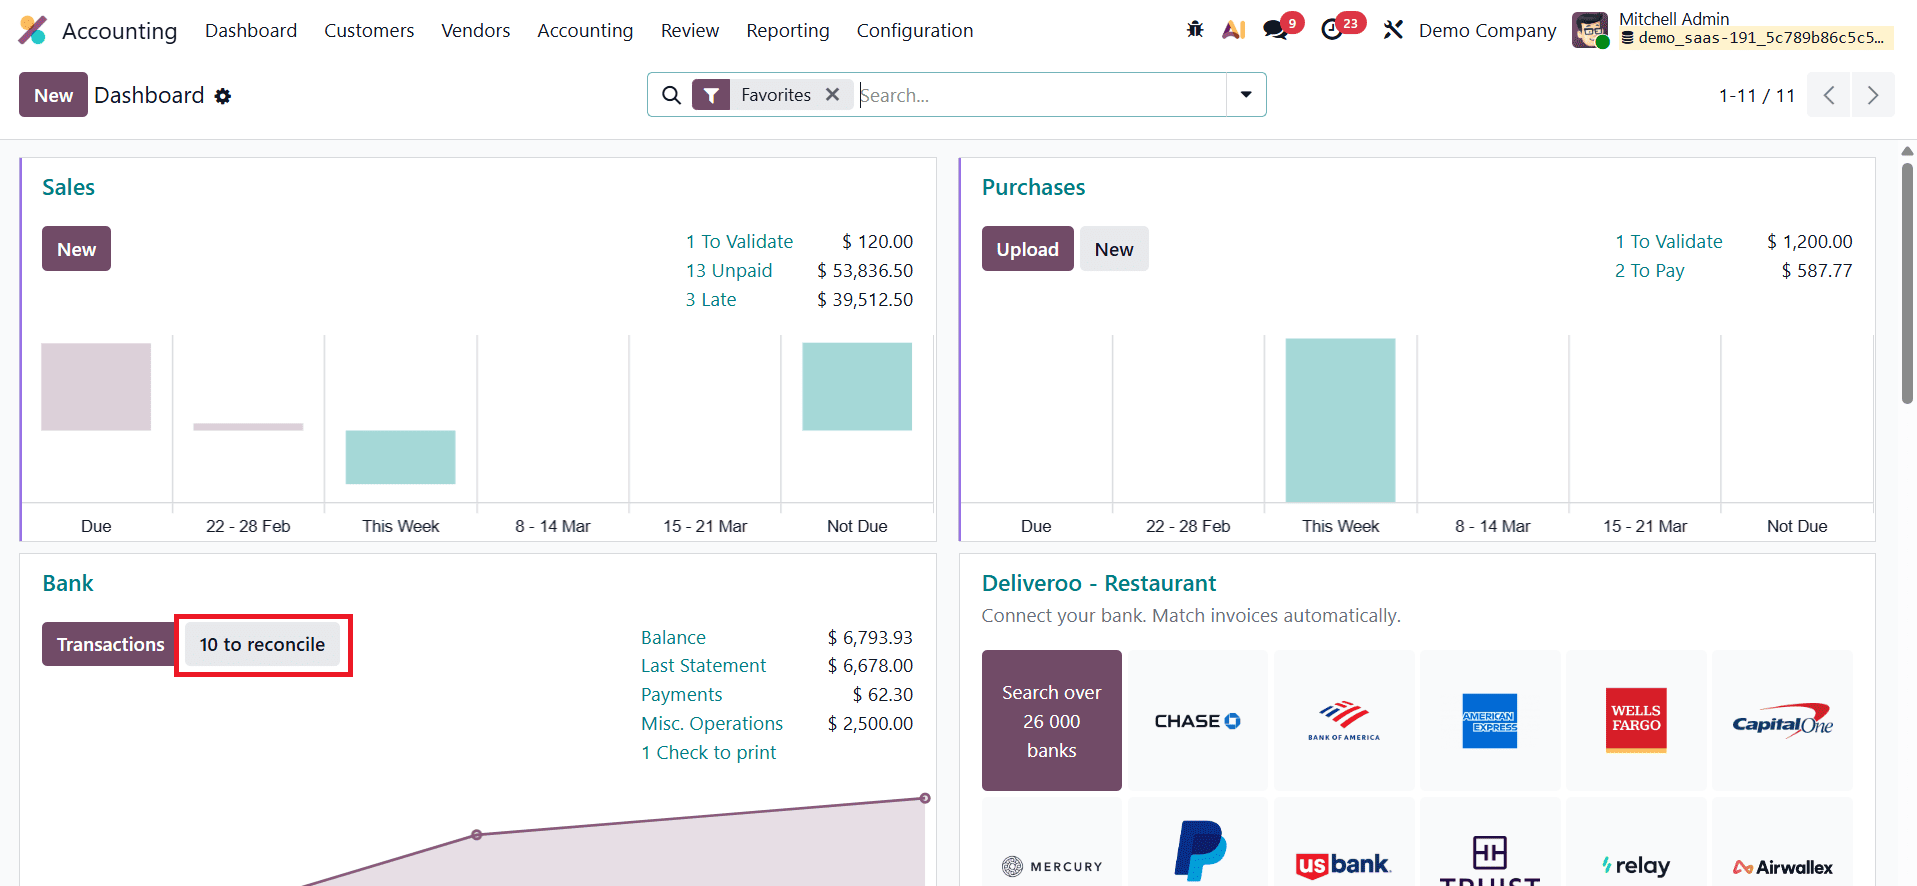
After registering a payment using the Check payment method in Odoo 19 Accounting, the next step is to print the check. Once the payment is recorded, you can navigate to the Accounting Dashboard, where the system provides an overview of all accounting journals. In the Bank Journal section, Odoo displays the number of checks that have been registered and are awaiting printing.
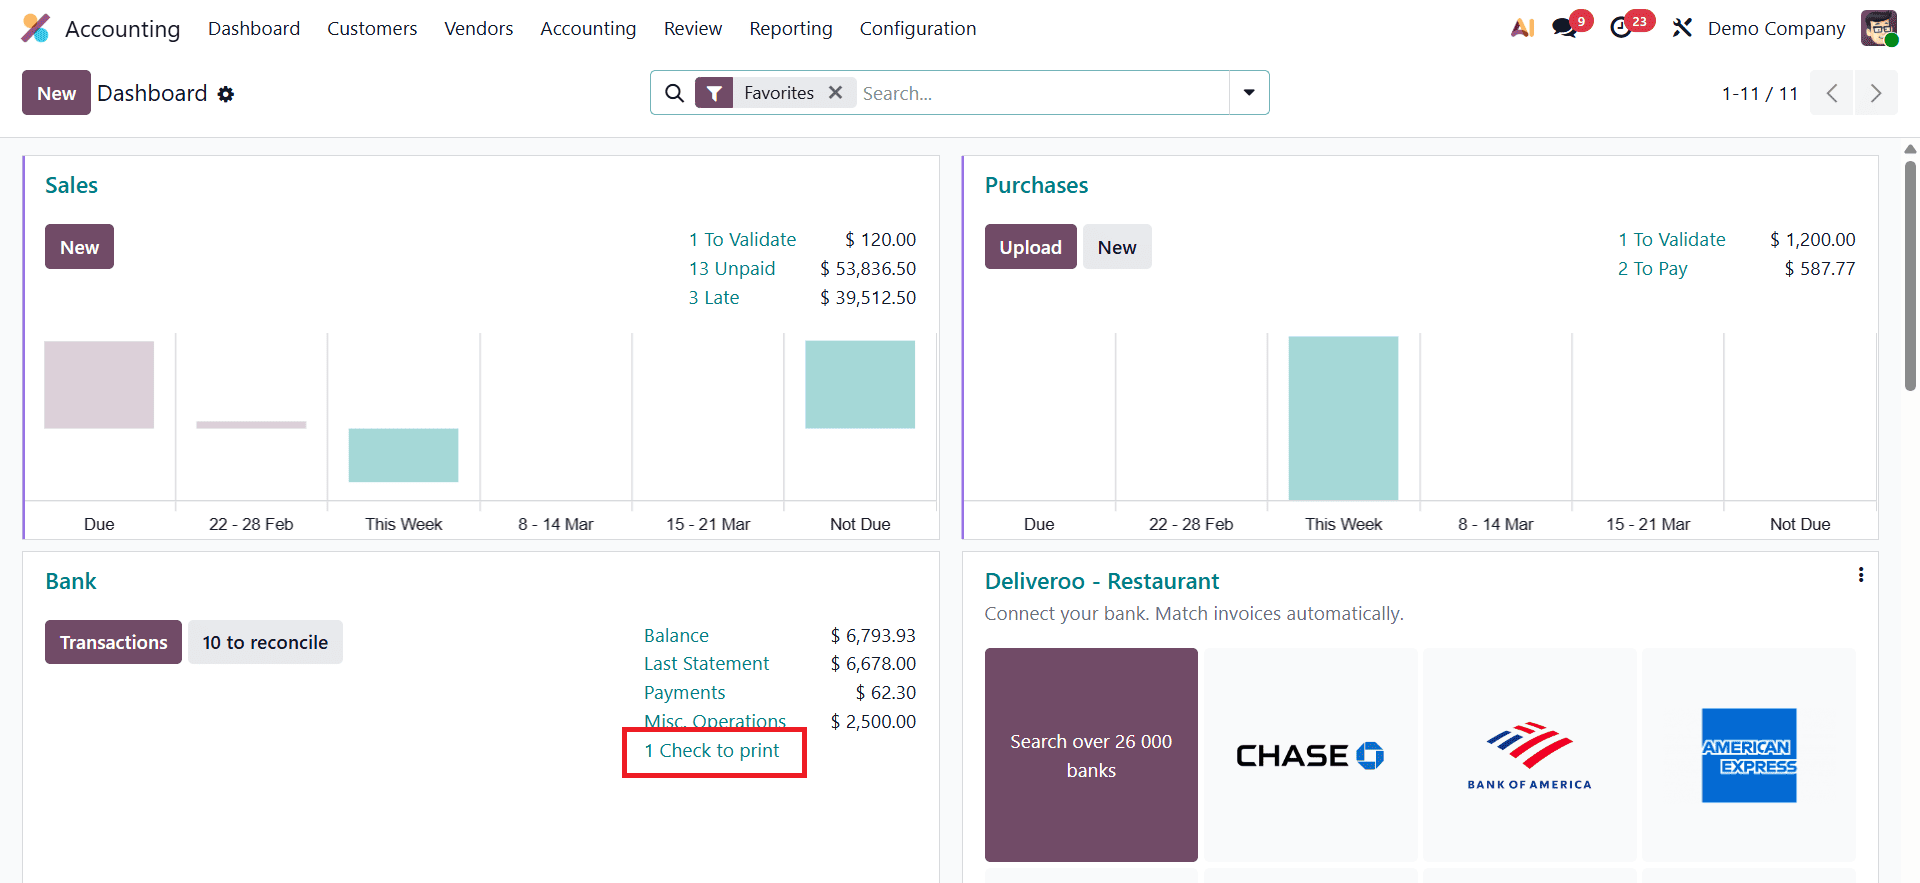
To proceed with printing, click the Checks to Print button available in the Bank Journal. This action opens a new window that lists all the registered check payments that are ready to be printed. The list allows users to review and select the specific check they wish to print, ensuring accuracy before generating the physical document.
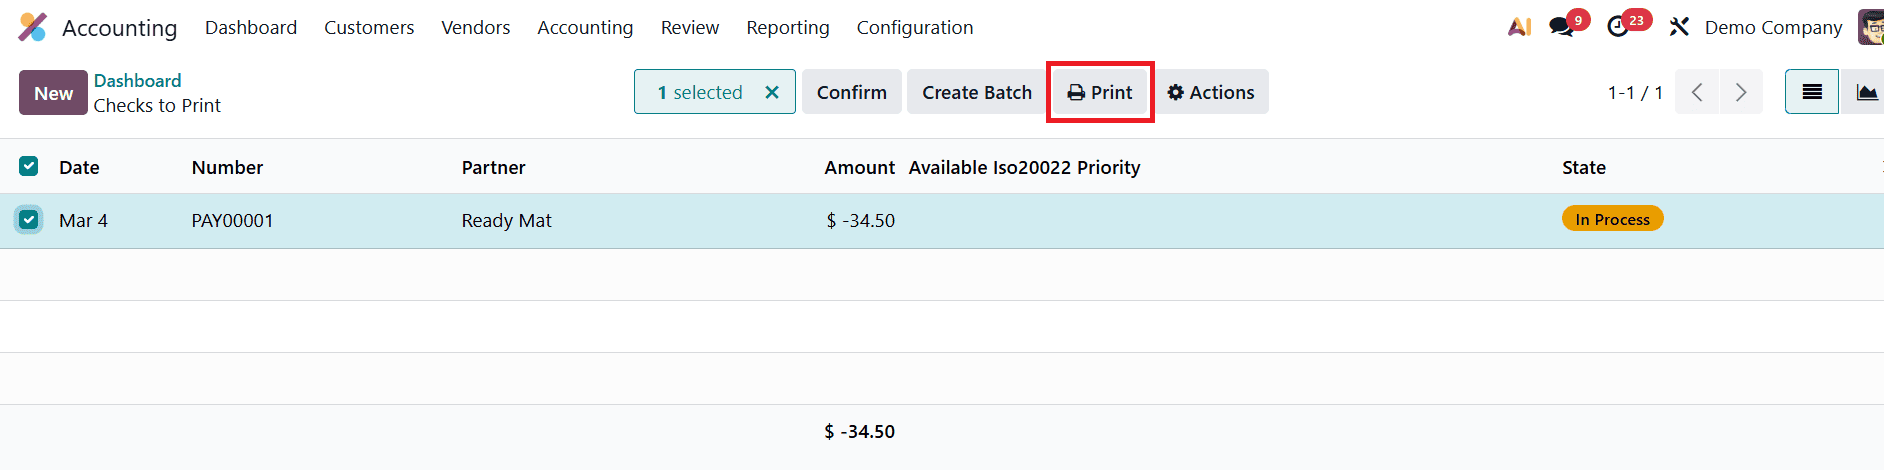
After selecting the appropriate check from the list, click the Print button. Odoo will then generate the check according to the configured check layout and formatting settings. The system prepares the check in a printable format that aligns with the selected check template, allowing it to be printed directly from the Accounting module.
Reconciliation of Check Payments
To complete the check payment process for a vendor bill in Odoo 19 Accounting, the payment must be reconciled with the corresponding bank transaction. Reconciliation ensures that the check issued to the vendor matches the transaction recorded in the company’s bank statement, helping maintain accurate financial records. This step confirms that the payment has been processed by the bank and properly reflected in the accounting system.
You can begin the reconciliation process by navigating to the Accounting Dashboard and selecting the appropriate Bank Journal. Within the bank journal interface, users can manage bank statements and match them with recorded accounting transactions.
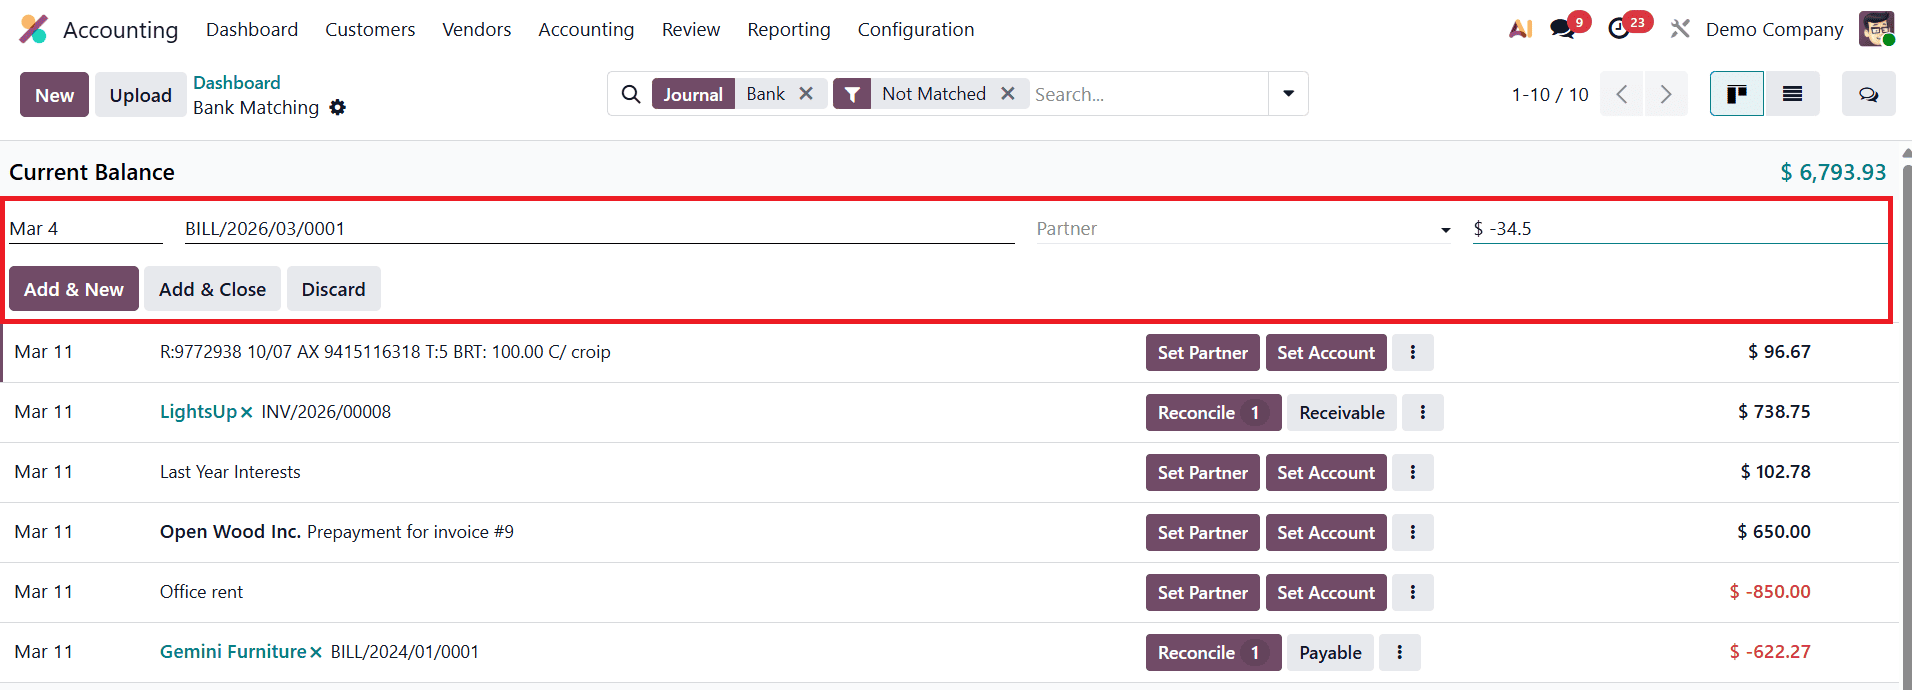
To start a new reconciliation, click the New button, which opens a new line where the details of the bank transaction can be entered.
In this line, provide the necessary information such as the transaction date, description, vendor name, amount, and currency. These details help the system identify and match the bank transaction with the previously registered check payment. After entering the required information, click Add & Close to record the statement line. Once the bank statement is created, Odoo automatically matches entries based on the recorded payments. The system will display the bank statement alongside the corresponding vendor payment, allowing you to verify that the amounts and details are correct.
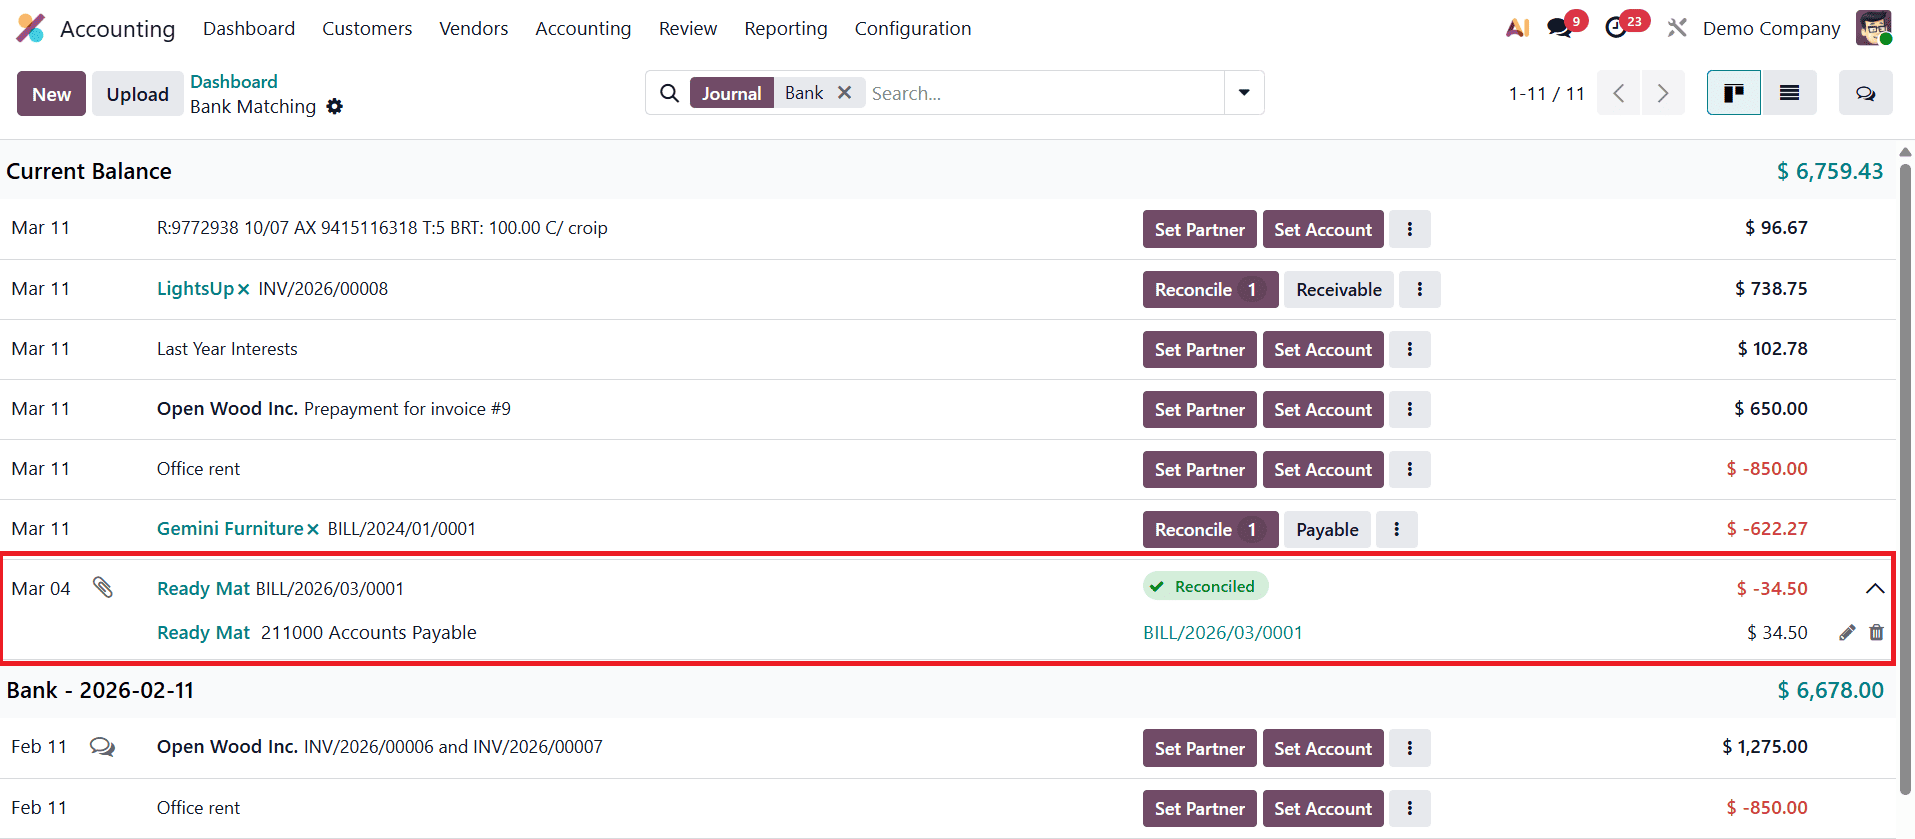
After validation, the statement line will be marked as Reconciled, indicating that the bank transaction and the accounting record have been successfully reconciled.
With the reconciliation completed, the status of the related vendor bill will automatically update to Paid, confirming that the check payment has been fully processed and cleared through the bank.
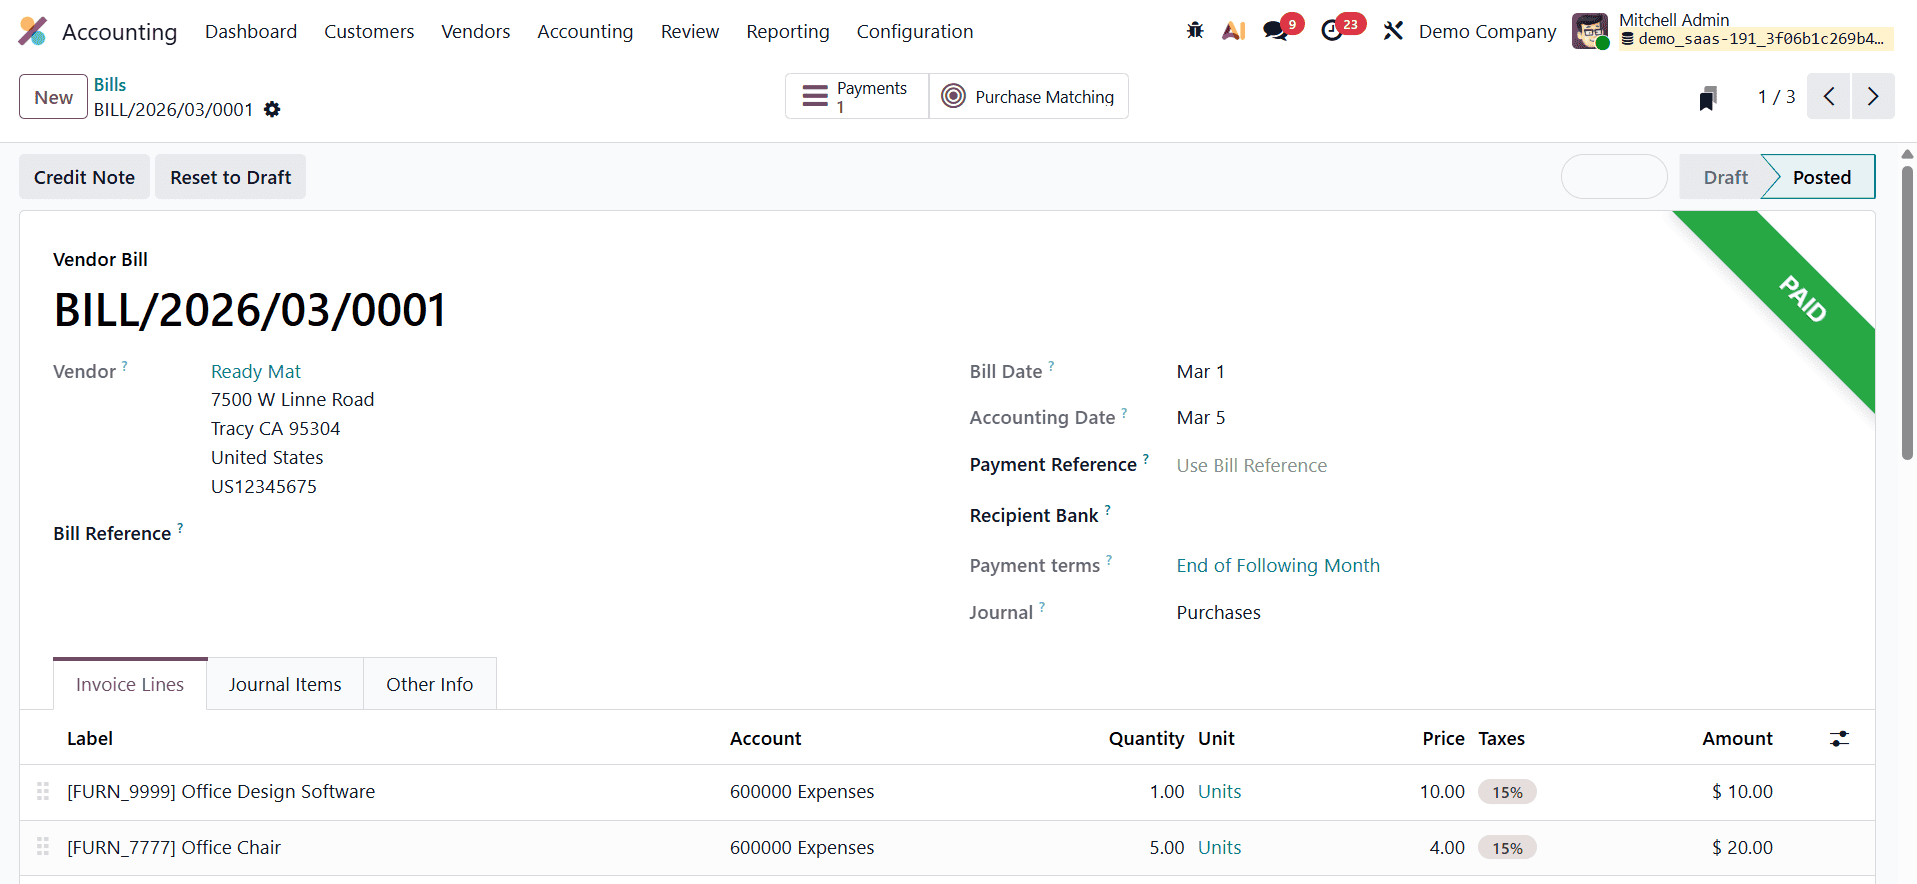
This final step ensures that both the accounting records and bank statements remain consistent and accurate.
Odoo 19 Accounting provides a structured and efficient way to manage vendor payments through multiple methods such as checks and SEPA credit transfers. From configuring payment methods and registering vendor payments to printing checks and completing bank reconciliation, Odoo integrates the entire payment workflow within a single system. This streamlined process helps businesses maintain accurate financial records, reduce manual errors, and ensure that all vendor transactions are properly tracked. By automating payment processing and reconciliation, Odoo enables organizations to manage supplier payments more effectively while maintaining transparency and control over their accounting operations.
To read more about How Vendor Check Payments Can Be Handled in Odoo 18 Accounting, refer to our blog How Vendor Check Payments Can Be Handled in Odoo 18 Accounting.