Reception reports, a crucial part of Odoo 19, are meant to speed up the product's receipt process and enhance inventory management. These reports provide a comprehensive record of the things received, reducing errors and ensuring accuracy in both number and quality assessments. Reception reports can be integrated with Odoo's more extensive inventory and procurement modules to help businesses manage their supply chain more effectively.
In this article, we will discuss the benefits, setup, and uses of reception reports in Odoo 19. Regardless of your level of Odoo knowledge, this article will help you get the most out of this powerful technology.
To get the report, first enable the "Reception report" option. To achieve this, go to the Inventory module's setup tab. Choose Settings from the configuration menu. There will be a Reception Report option. Activate it. After making the required adjustments, save the page.

Let's now look at the operation of the Reception Report. Let's navigate to the products section and select the New button to create a new product. Here, the product is a storable device called a Large Cabinet. The product is currently out of stock because the amount on hand is zero.

Since the product is not yet available, there is no stock at the moment. Keep in mind that this product has been the subject of some inquiry. Ordering for the sale of this item.
Go back to the Inventory section and create a new Delivery transfer to do this. Simply select Delivery from the Transfers menu. To add a new one, click the New button.

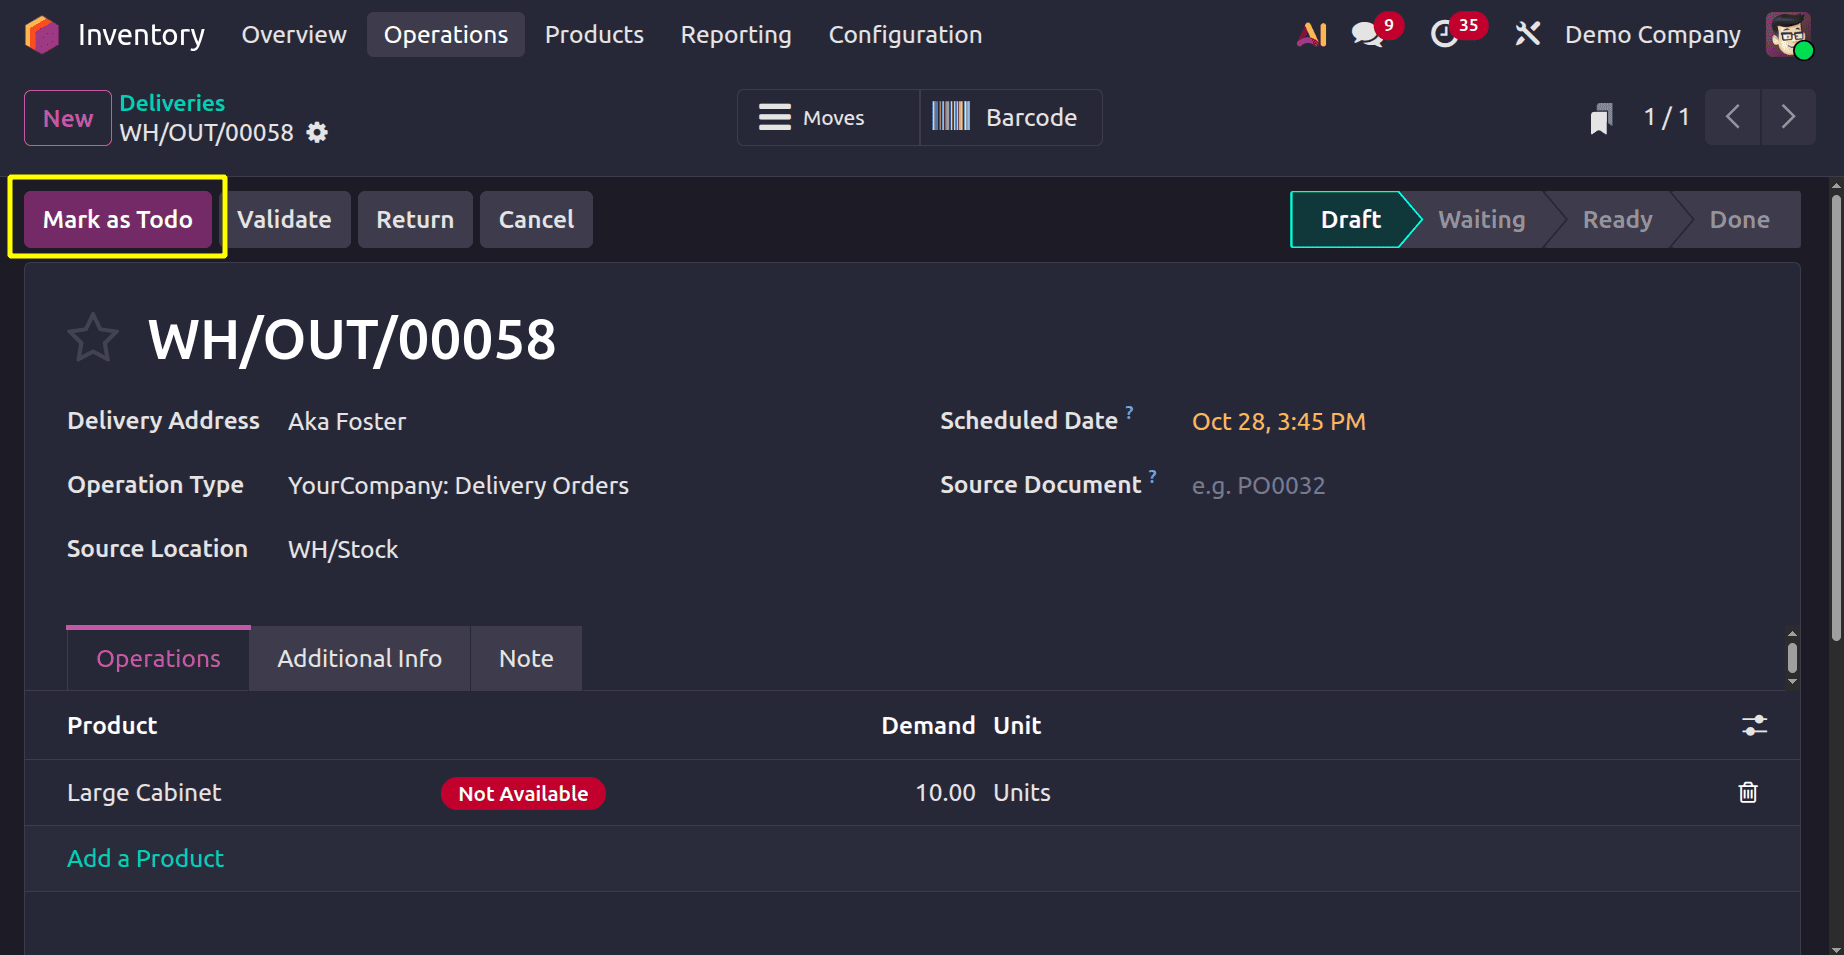
Aka Foster was the customer for whom the first delivery transfer was made. Ten large cabinets were needed by the customer. The Mark as Todo button should be clicked. Then the delivery is in the Waiting Stage.
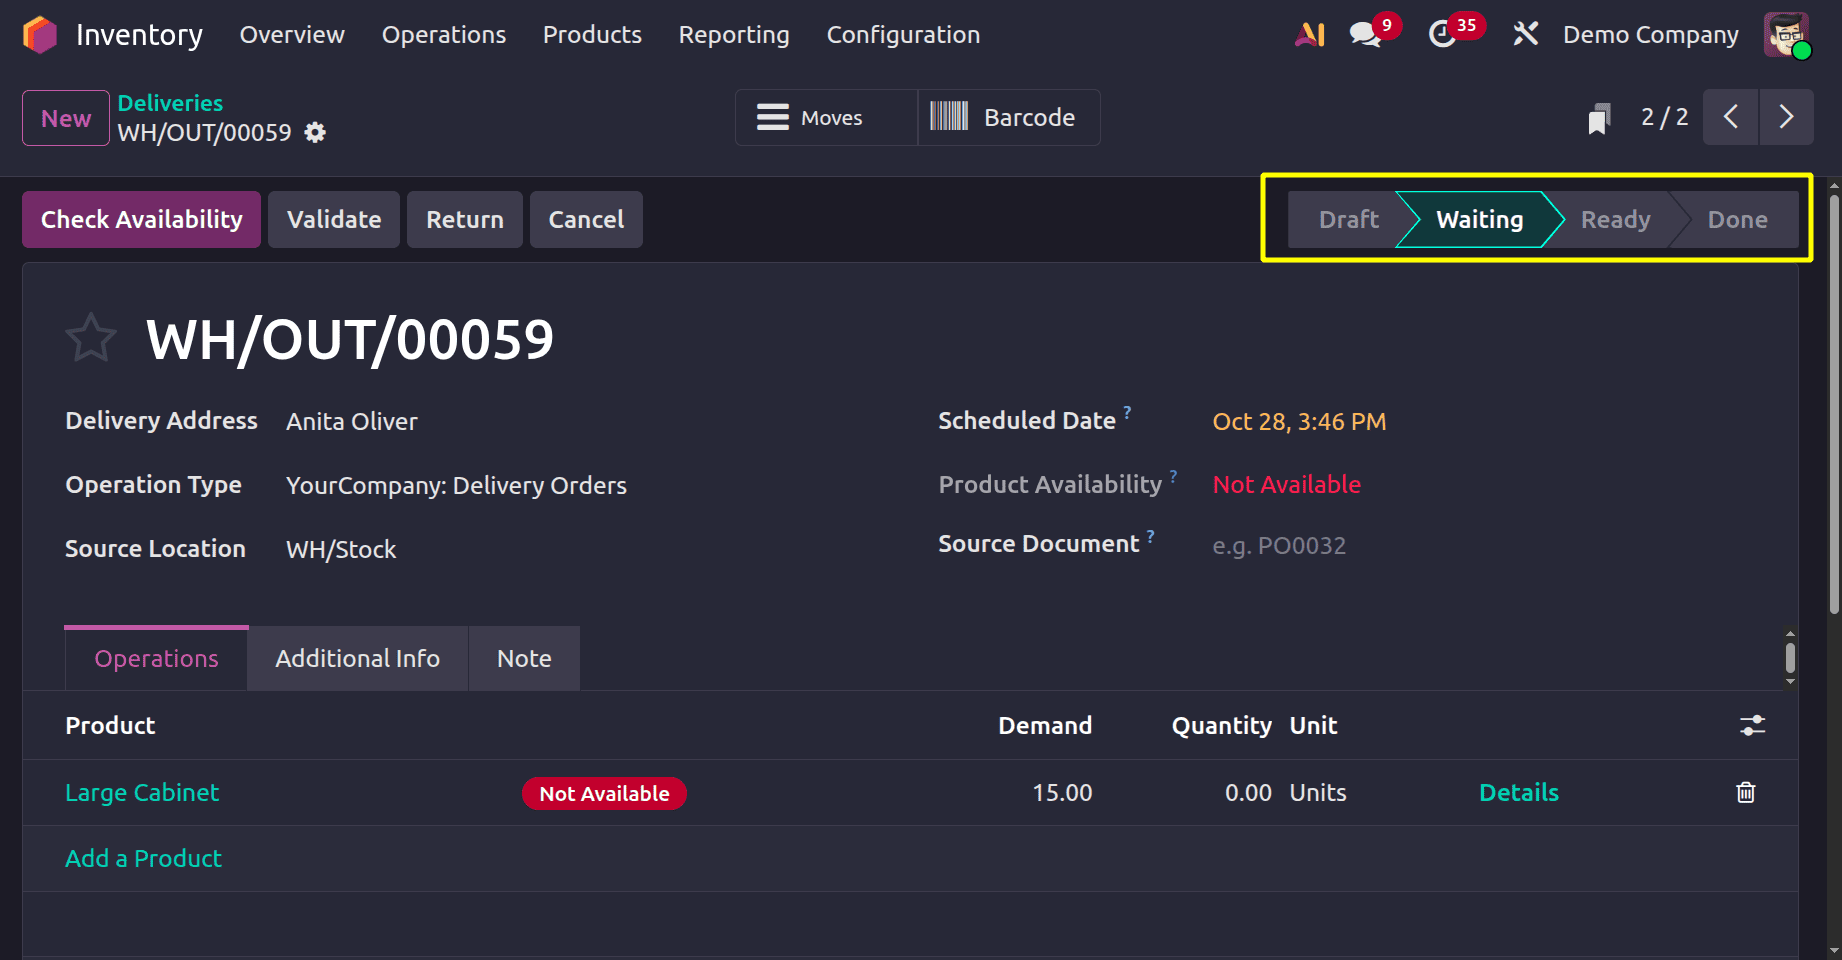
Anita Oliver, a different consumer, asked for fifteen quantities of the product. The Mark as Todo button should be clicked. Users can then observe from the delivery that the product is not in stock.
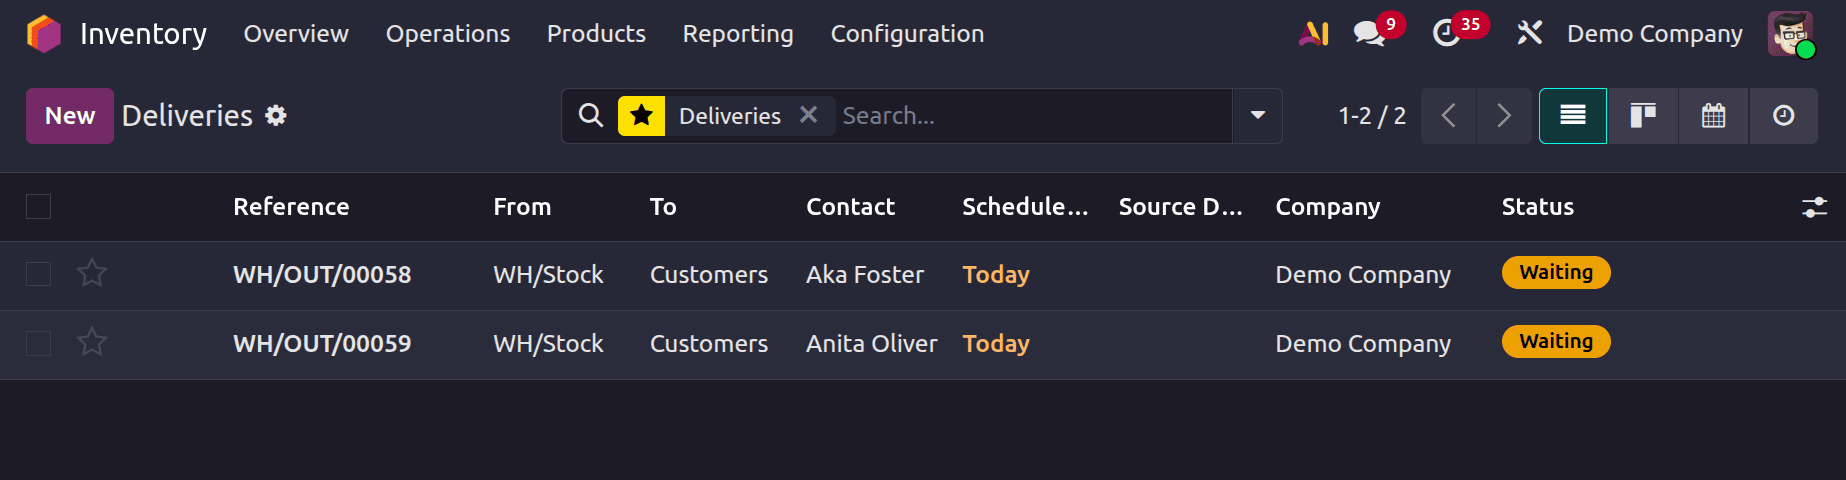
For two distinct clients, two delivery orders are made. The identical product is being requested for each of them. However, the company does not have the goods in stock. Delivery transfers are now in the waiting phase.
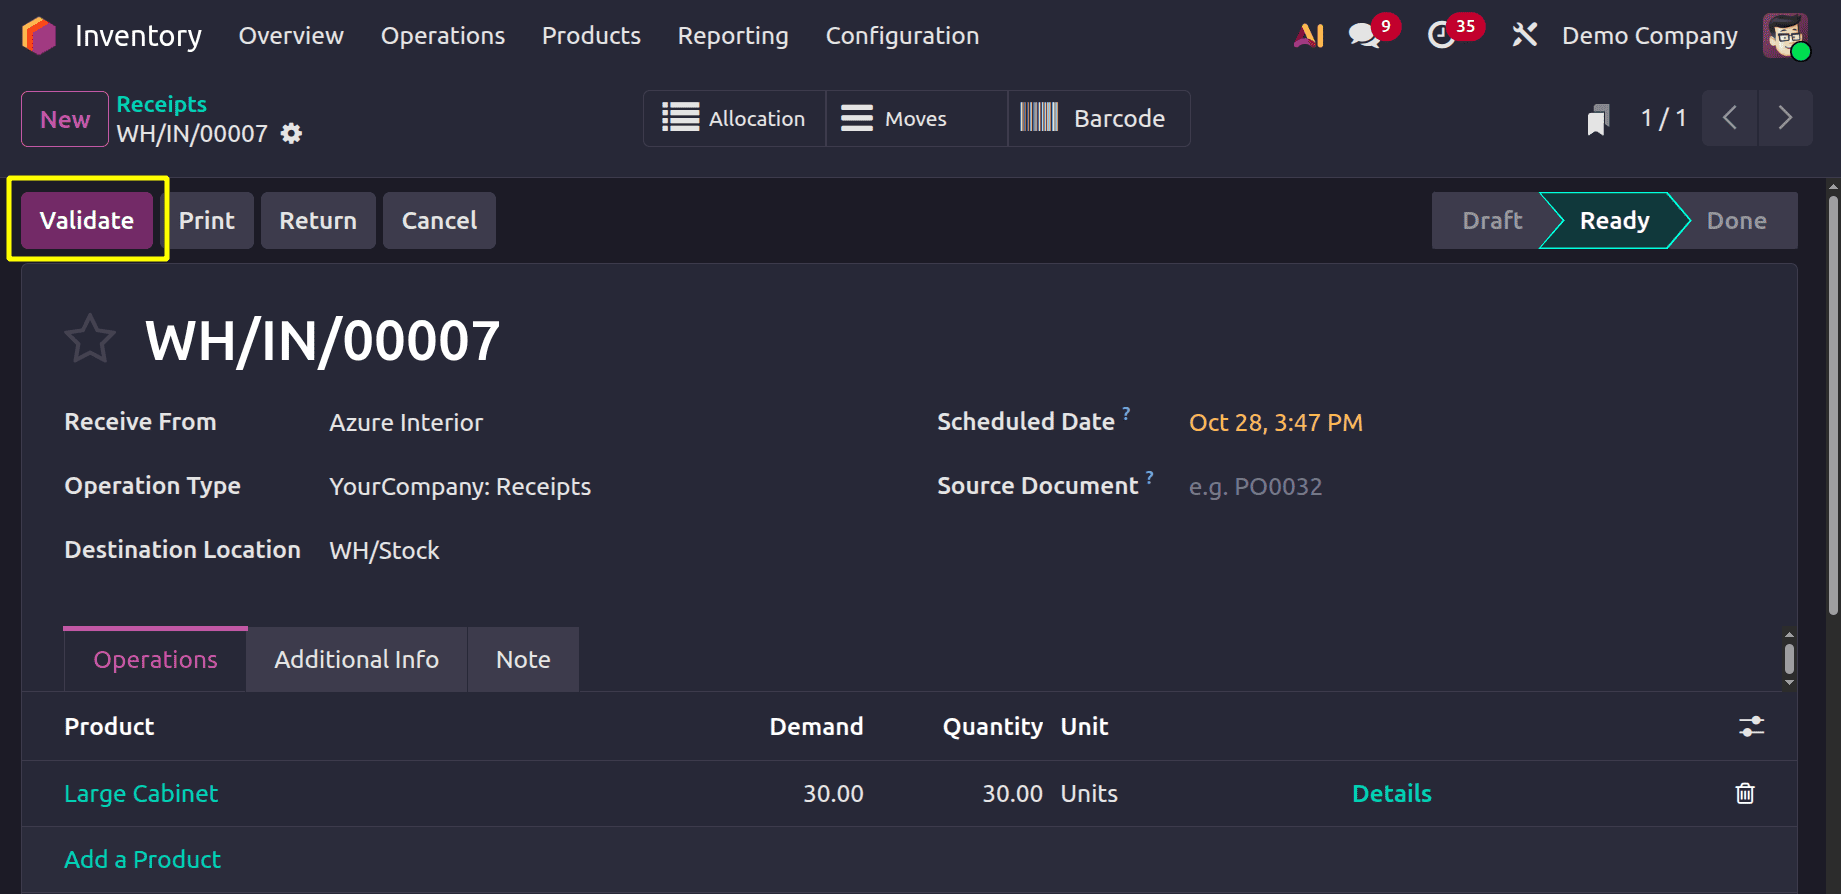
Let's make the product a new receipt. Users can generate new receipts from the Transfer themselves. To add a new receipt, click the New button. Azure Interior, the vendor, is the source of this product. The product and quantity can be added by the user inside the Operations line.
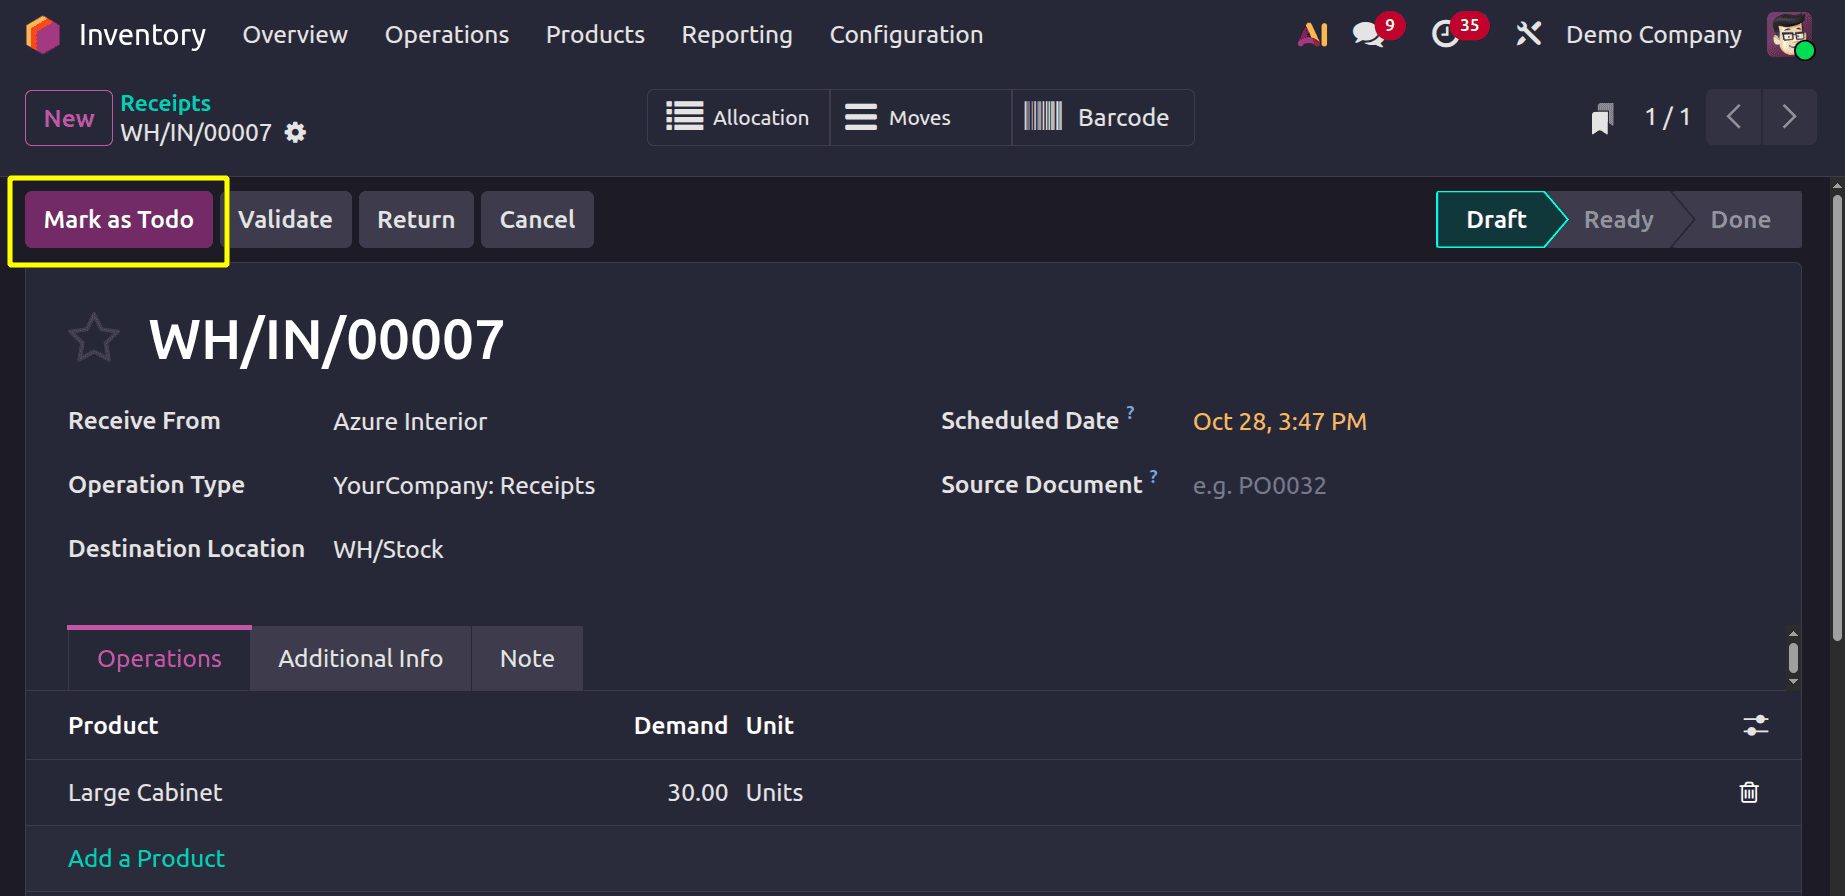
The customer requested 30 units of the Large Cabinet product. The destination address on the receipt is listed as WH/Stock, which stands for company stock. The Mark as Todo button should be clicked. To finish the transfer, click the Validate button when the receipt has moved to the Ready stage.
Done will replace the receipt stage. The merchandise then arrives at the stock location when the transfer is finished. There will be a smart tab called Allocation, as seen in the screenshot below.
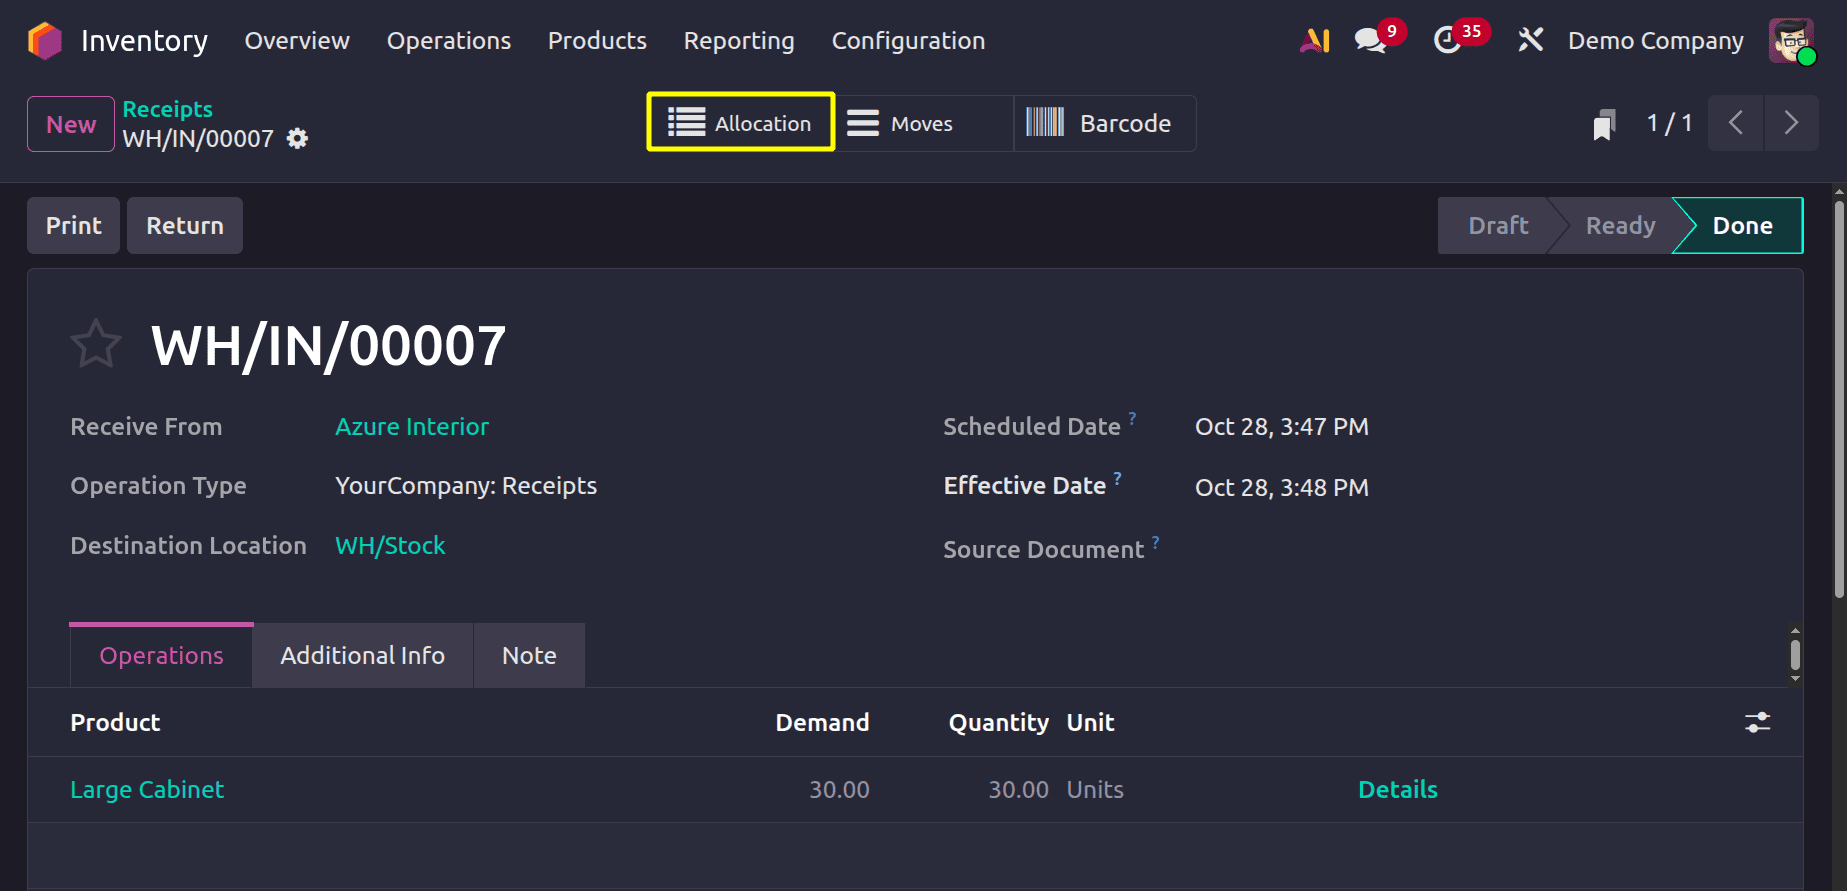
Users can read the reception report when they access the smart tab Allocation. A list of deliveries made for the received goods is included in this reception report. Details such as the customer's name, delivery sequence number, anticipated delivery date, and quantity required are displayed in the reception report.
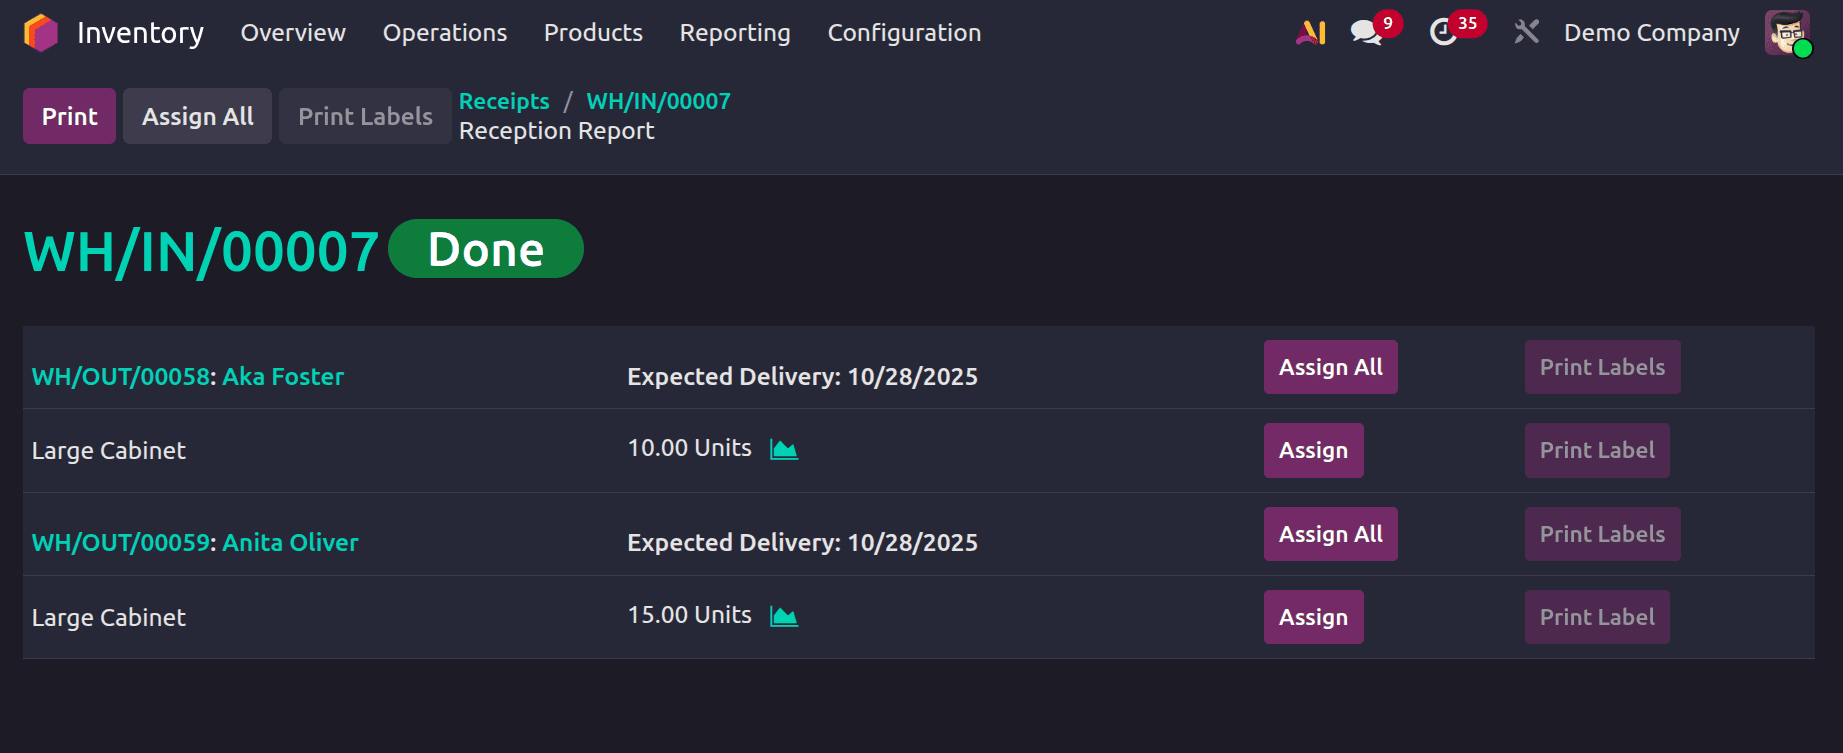
As a result, the two delivery orders in the screenshot above are for Anita Oliver and Aka Foster, respectively. There is a button labelled Assign and Assign All on the right side. Users can quickly assign the received products to delivery orders by using those buttons.
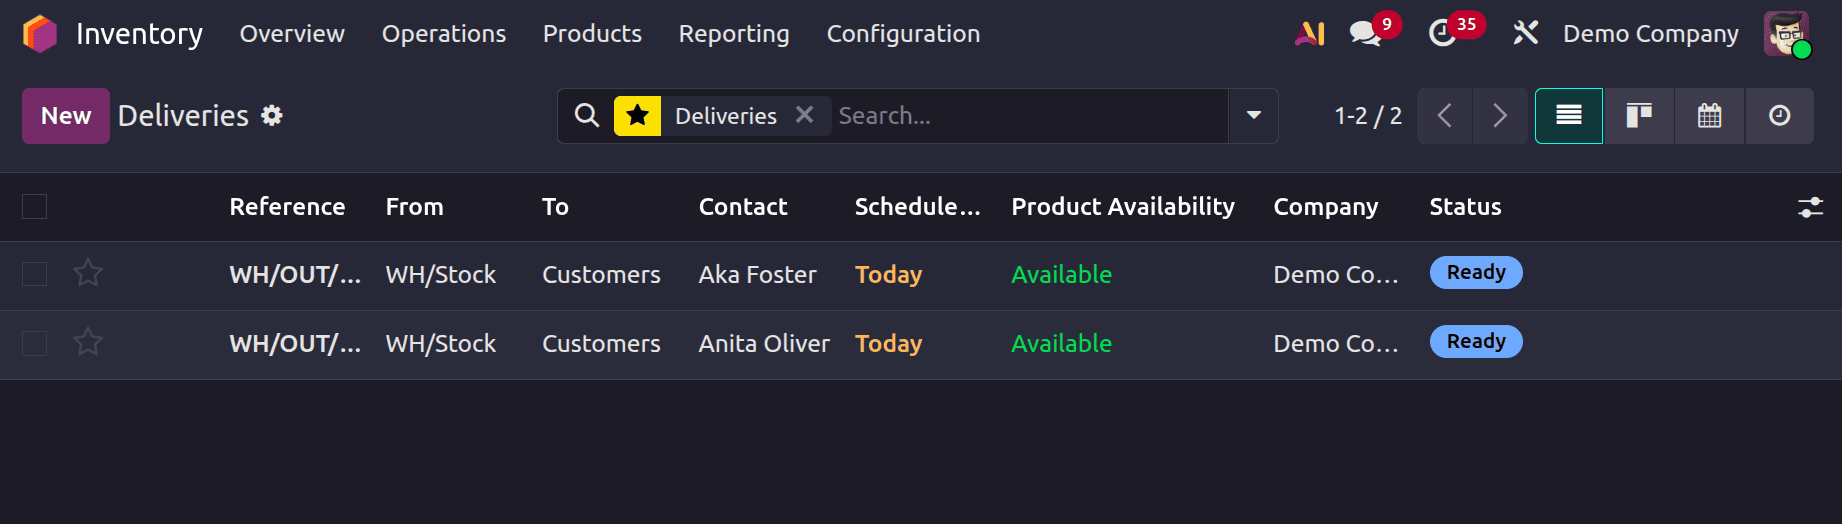
Verify the delivery after the product has been assigned. The product's availability is then displayed as Available. The order can be validated by users.
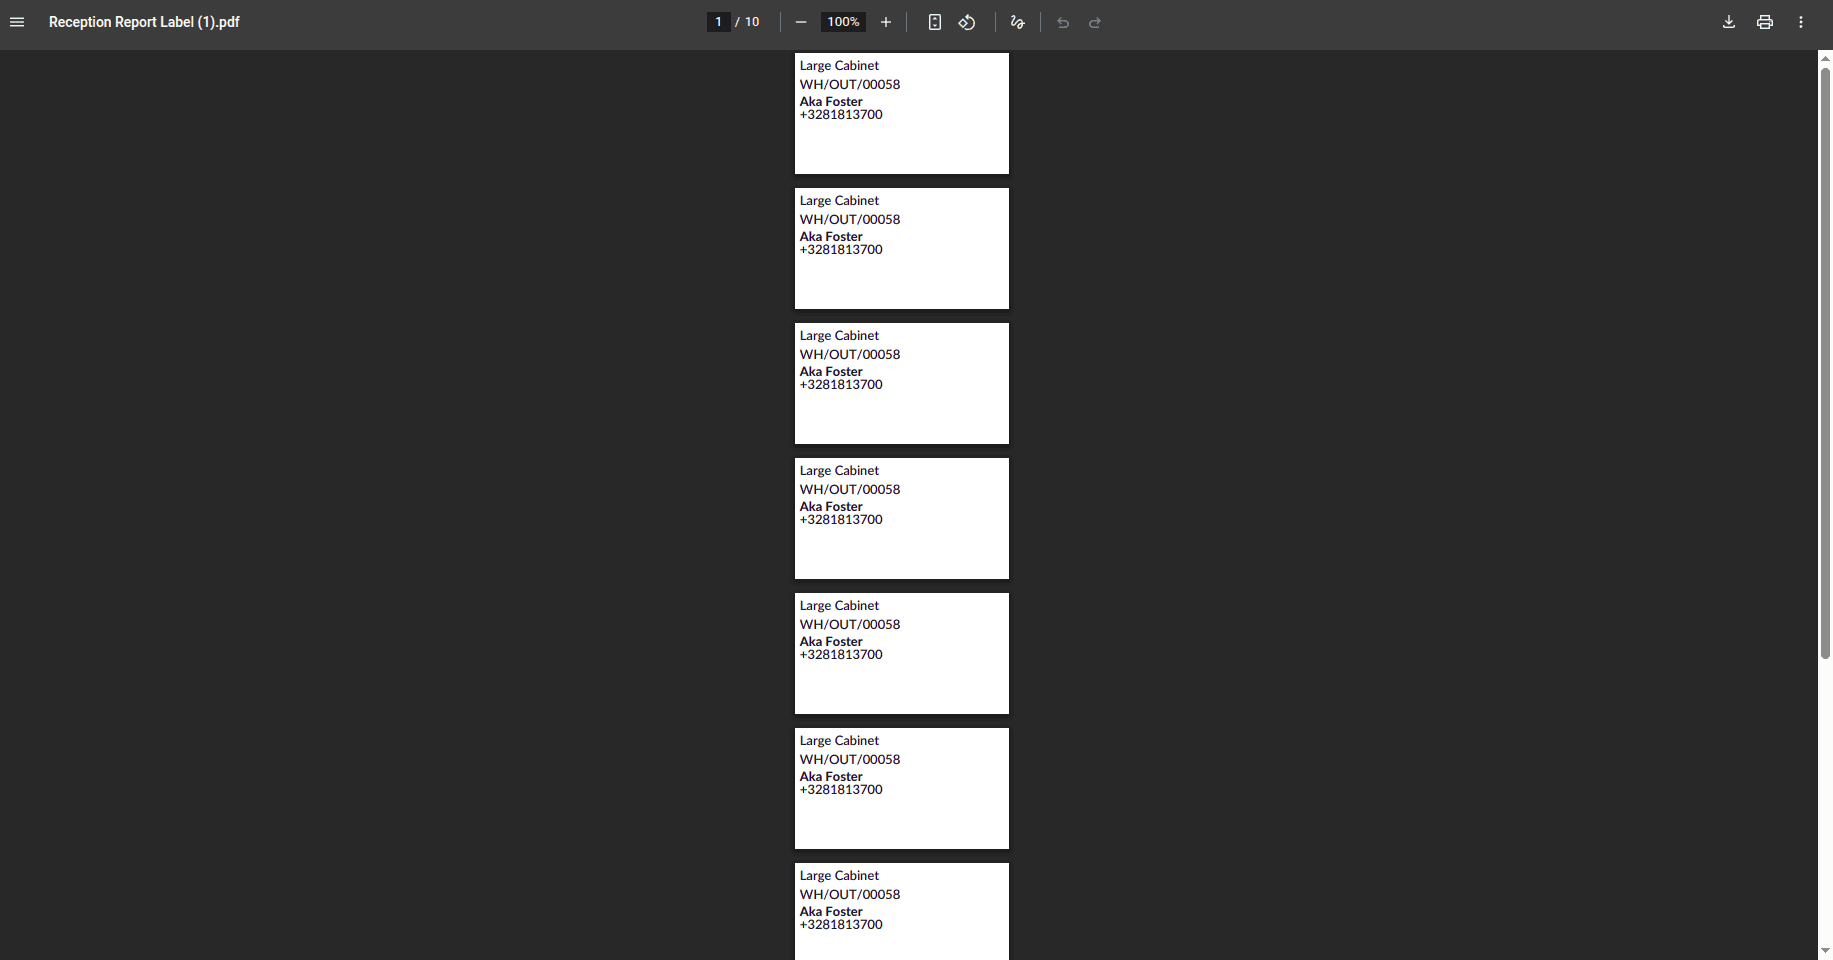
The reception report will then provide an additional button called Print Label.

From there, you can easily print the order labels, which are identical to the ones below.
Using Replenish on Order MTO
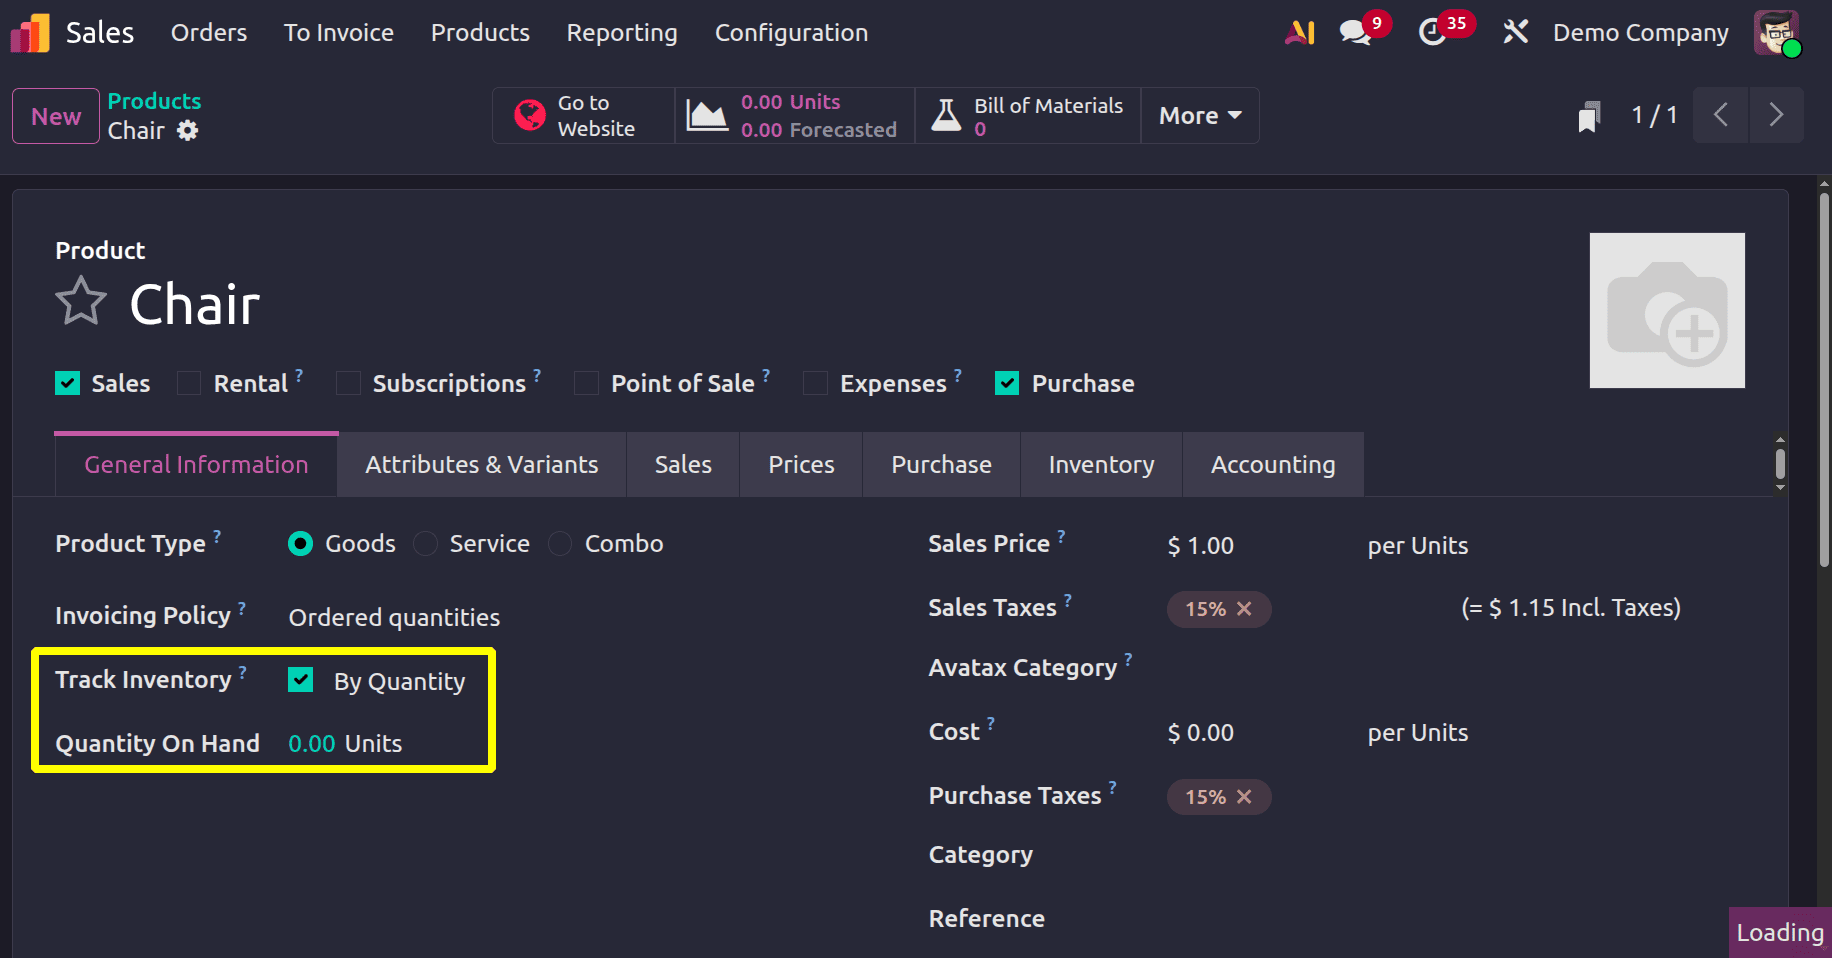
Let's configure a new product, which is called "Chair" in this case. Every detail is included, including the cost, sales price, and taxes. When the product's on-hand amount is checked, it is zero. This indicates that there is no stock of the product.
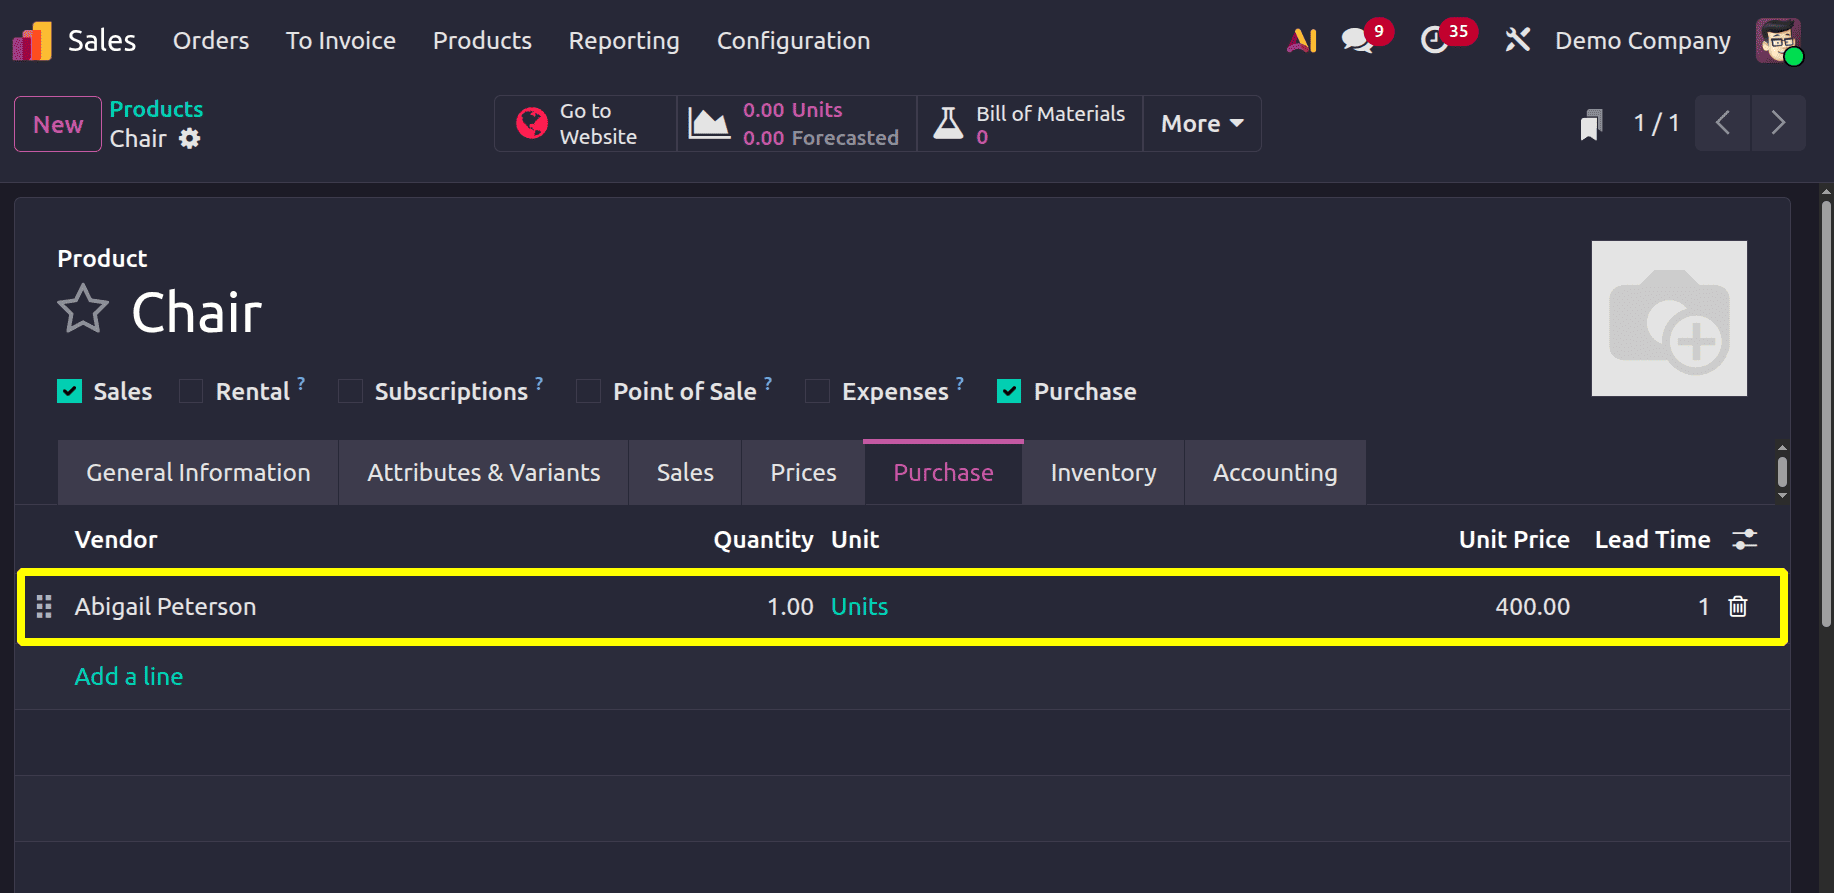
The vendor name from whom the product will be purchased can be specified by the user under the purchasing tab. Abigail Peterson is the seller in question. There, you can also see the vendor's price and delivery lead time.
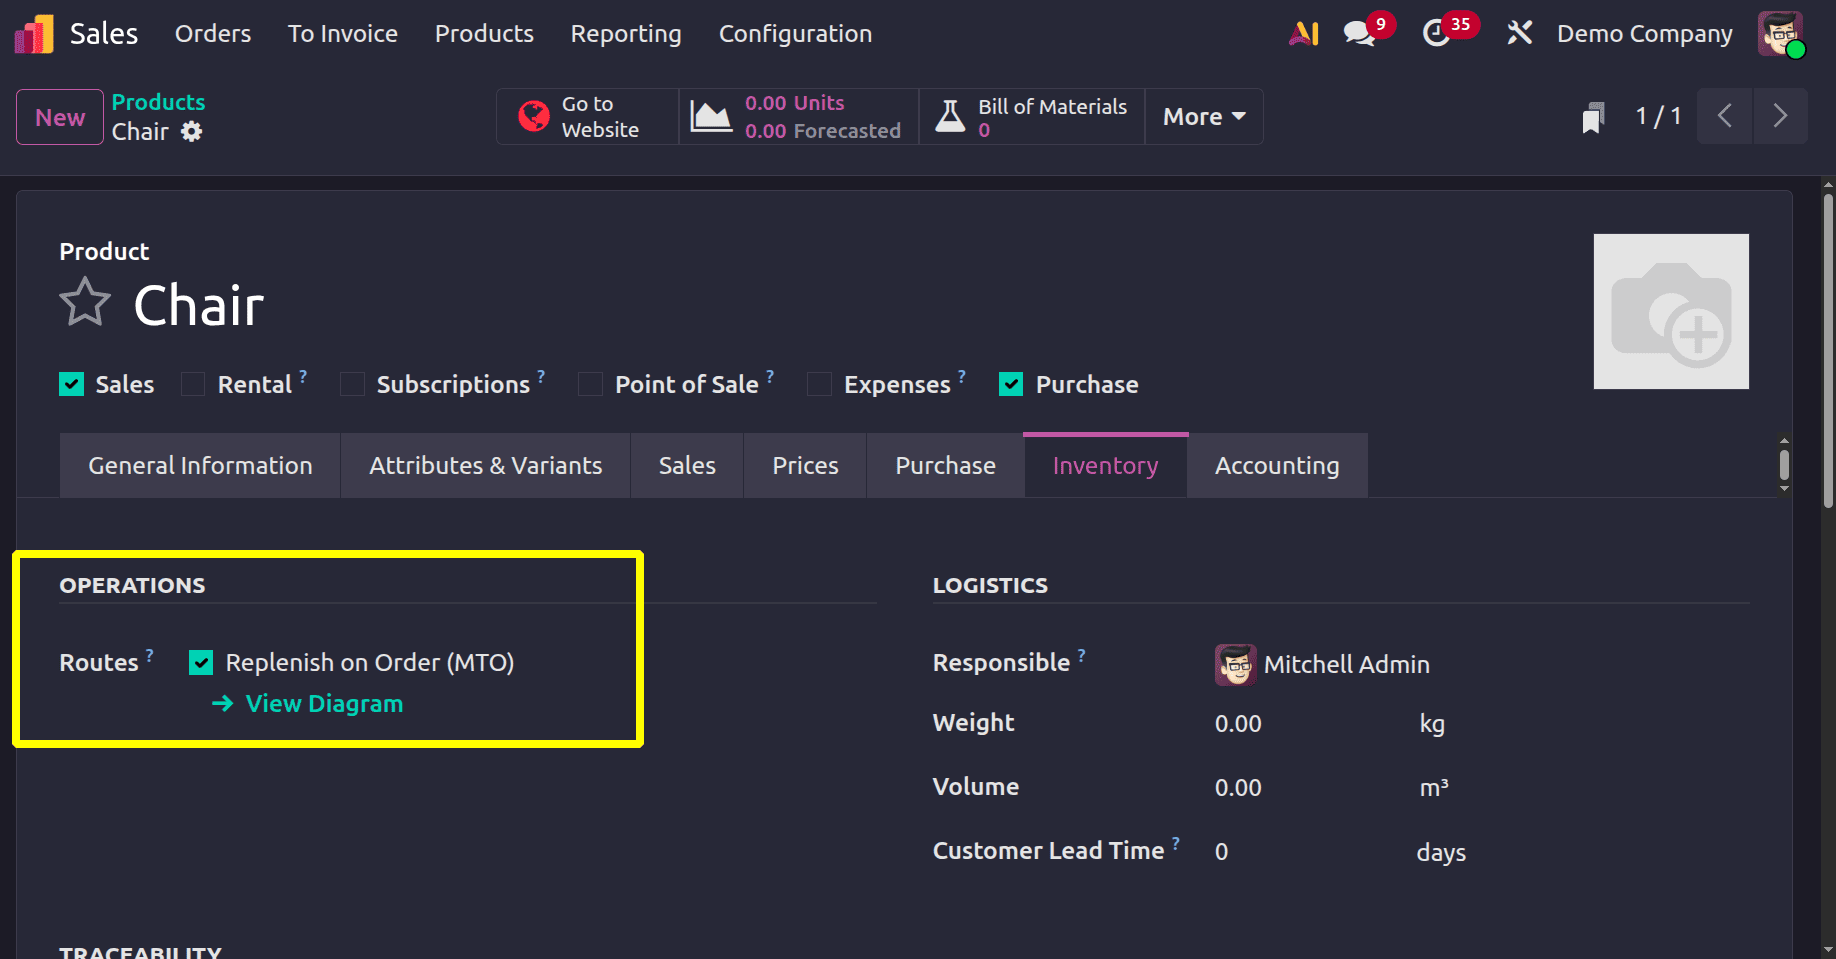
Users can add the product's routes from the Inventory tab. Replenish on Order (MTO) the recommended routes in this case. No bill of materials is created, so the Purchase order will trigger to restock the quantity.
Thus, the configuration of the product is finished. Let's proceed to include a fresh sale order.
Deco Addicts is the selected client in this case, and they ordered five quantities. Verify the quote.
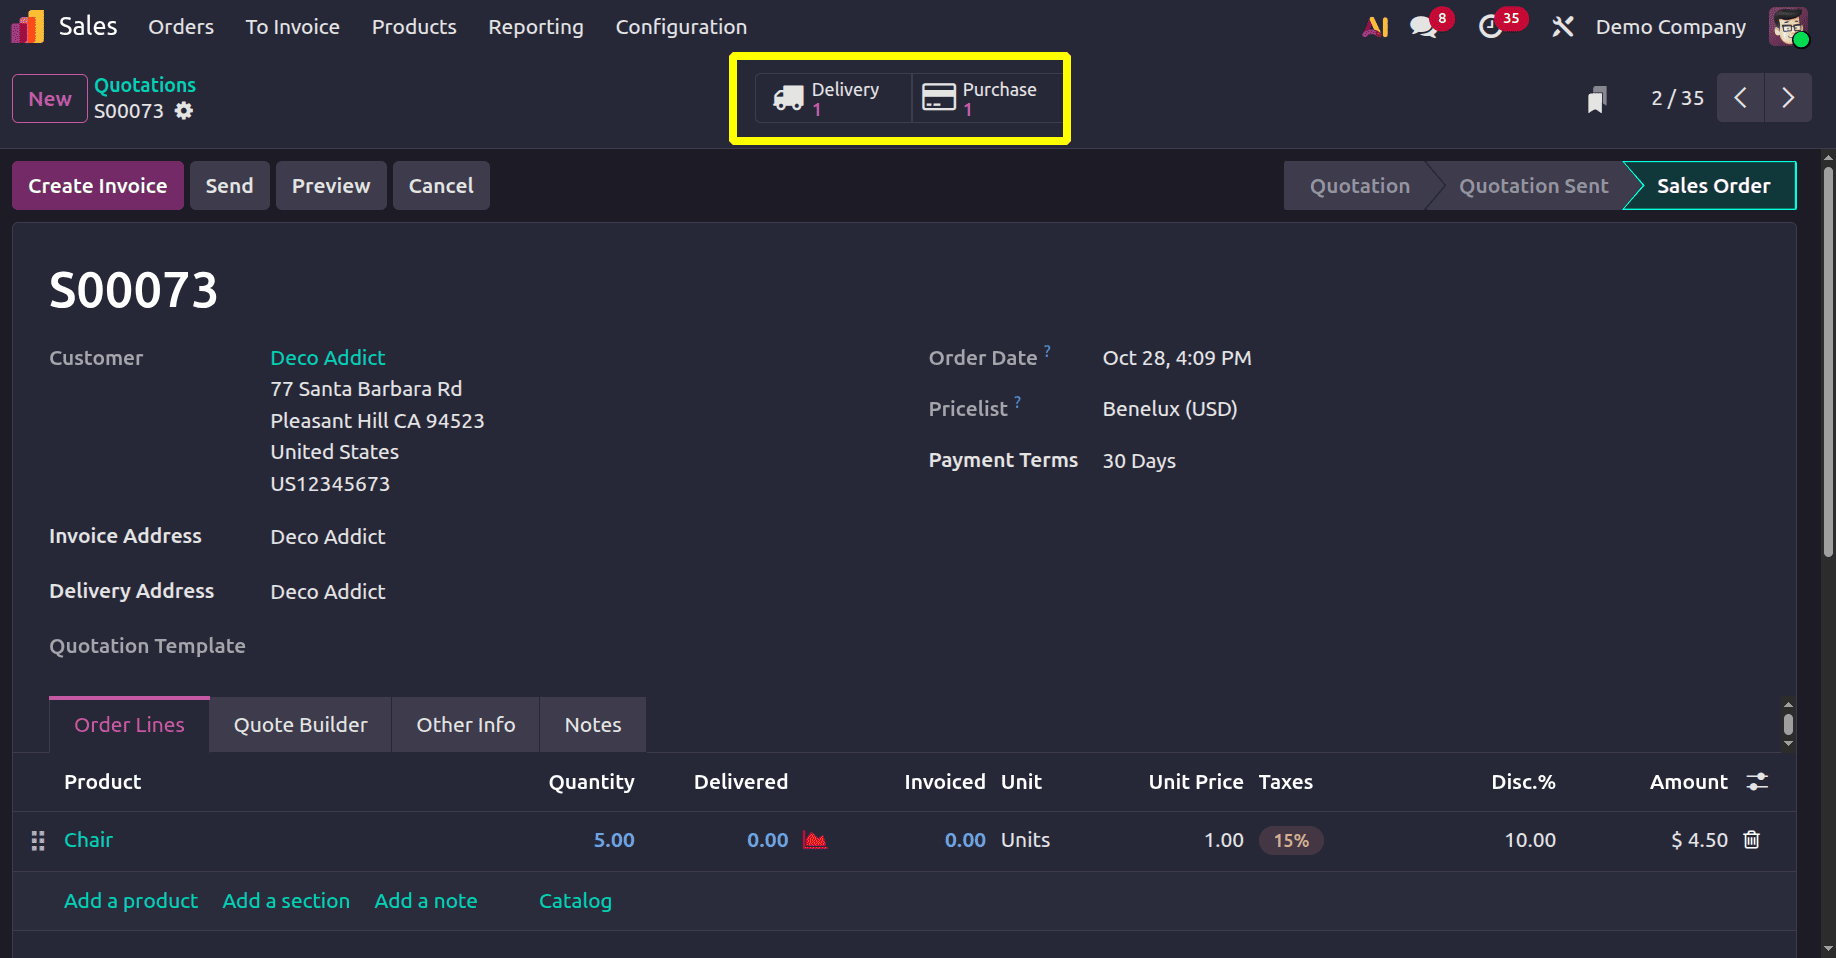
One delivery and one purchase order are initiated upon quotation confirmation. It is evident from inspecting the delivery that the product is out of stock.
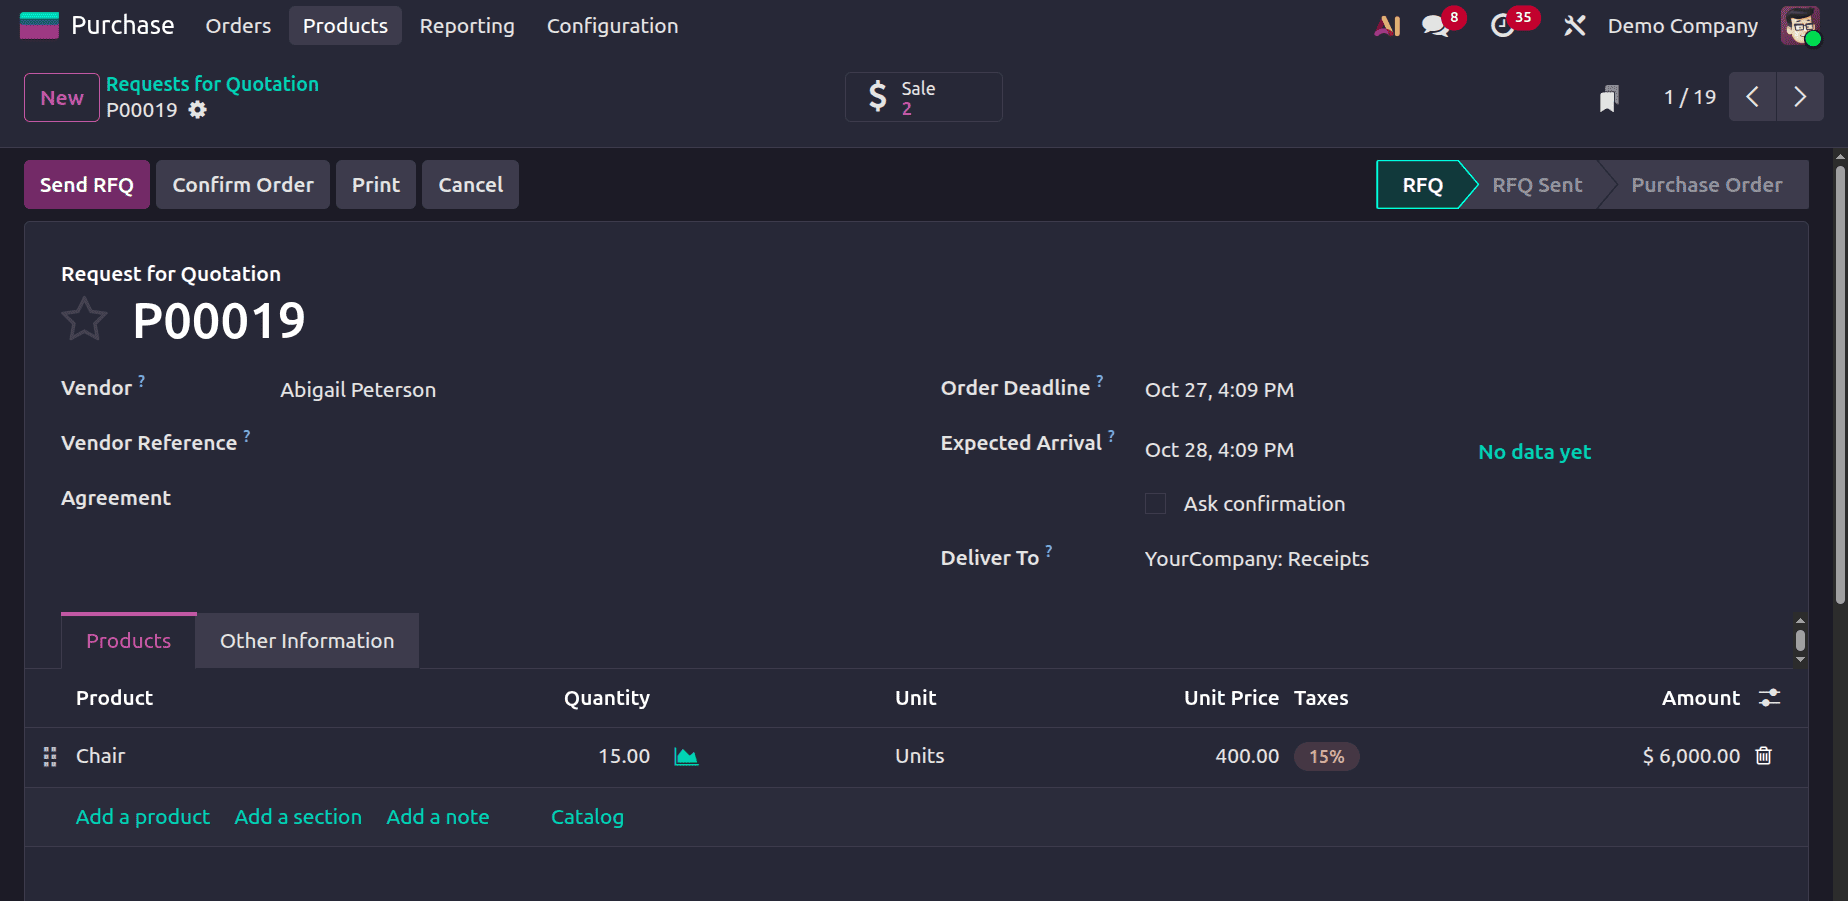
To verify, open the purchase order. Abigail Peterson, who was mentioned in the product, is the vendor.

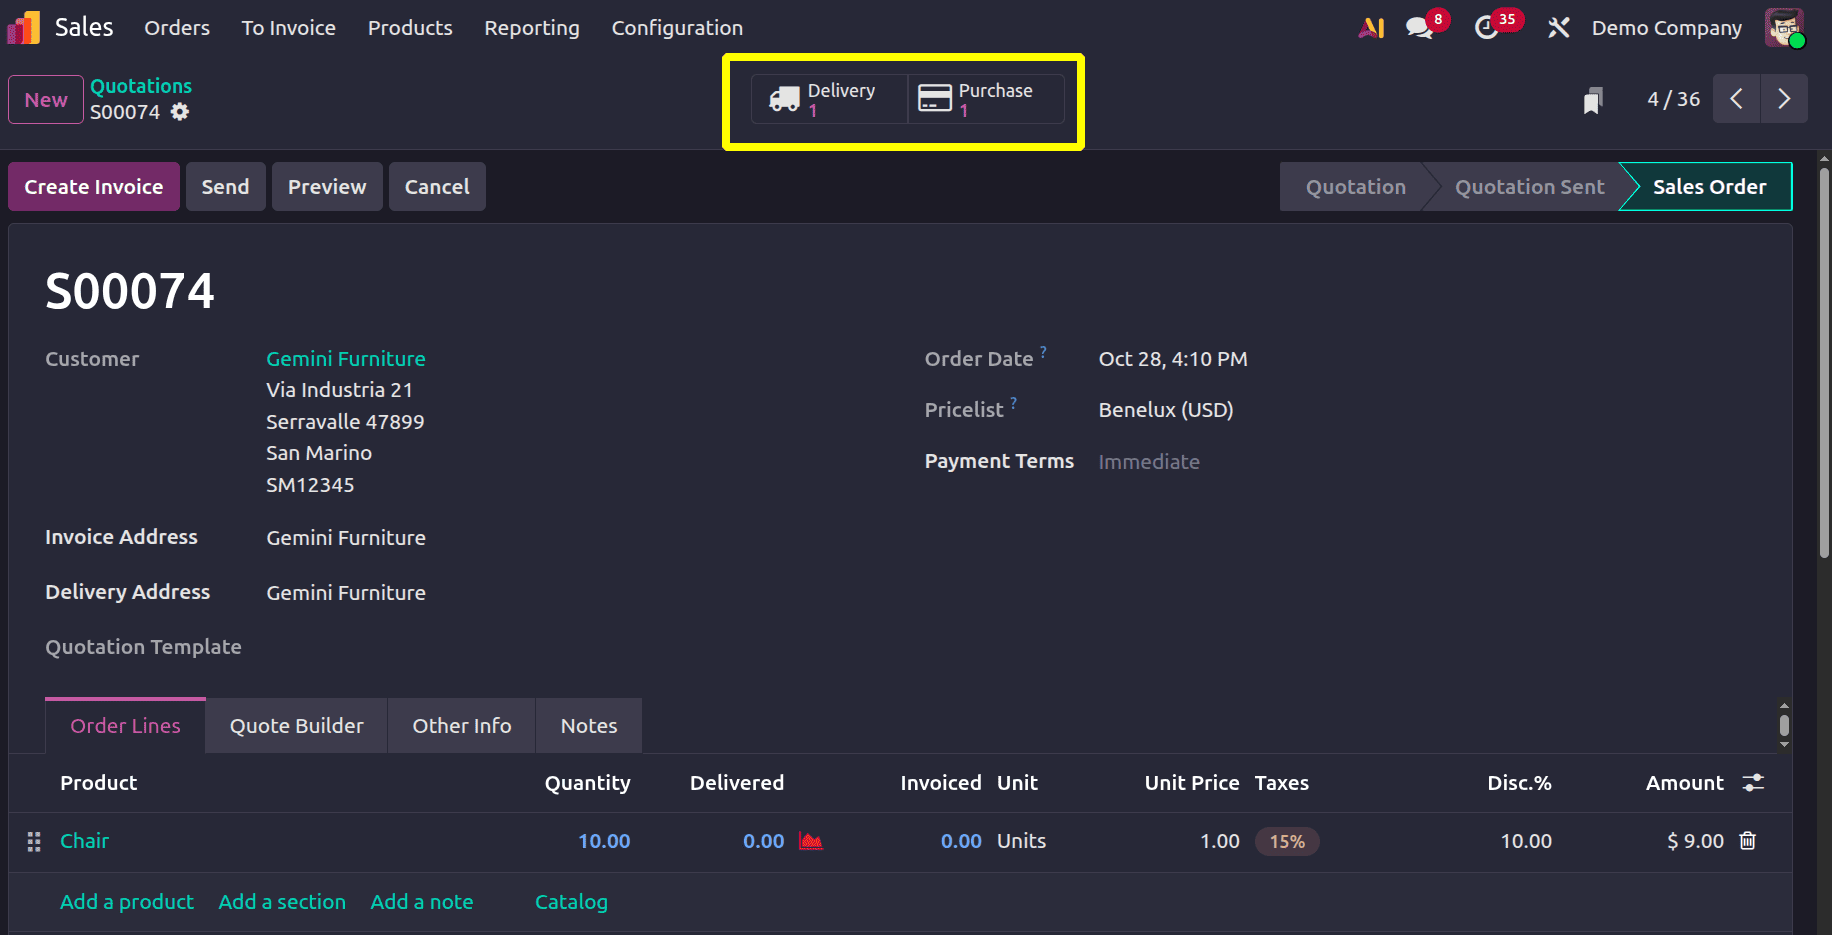
Make another sale order for a different buyer before confirming the transaction. Gemini Furniture is the client this time. Ten units of the same product, the Chair, were needed by the customers. Verify the order.
Let's now review the prior purchase order. This can be accessed using the Odoo 19 Purchase module or from the prior sale order.
In this case, the buy order quantity is 15. This indicates that Deco Addicts, the first customer, placed an order for 5 quantities, while Gemini Furniture, the second customer, placed an order for 10.
In this instance, the first RFQ has the second demand attached to it. This implies that any RFQs that are currently open and that are automatically generated for the same product and from the same vendor will be appended to the open RFQ.
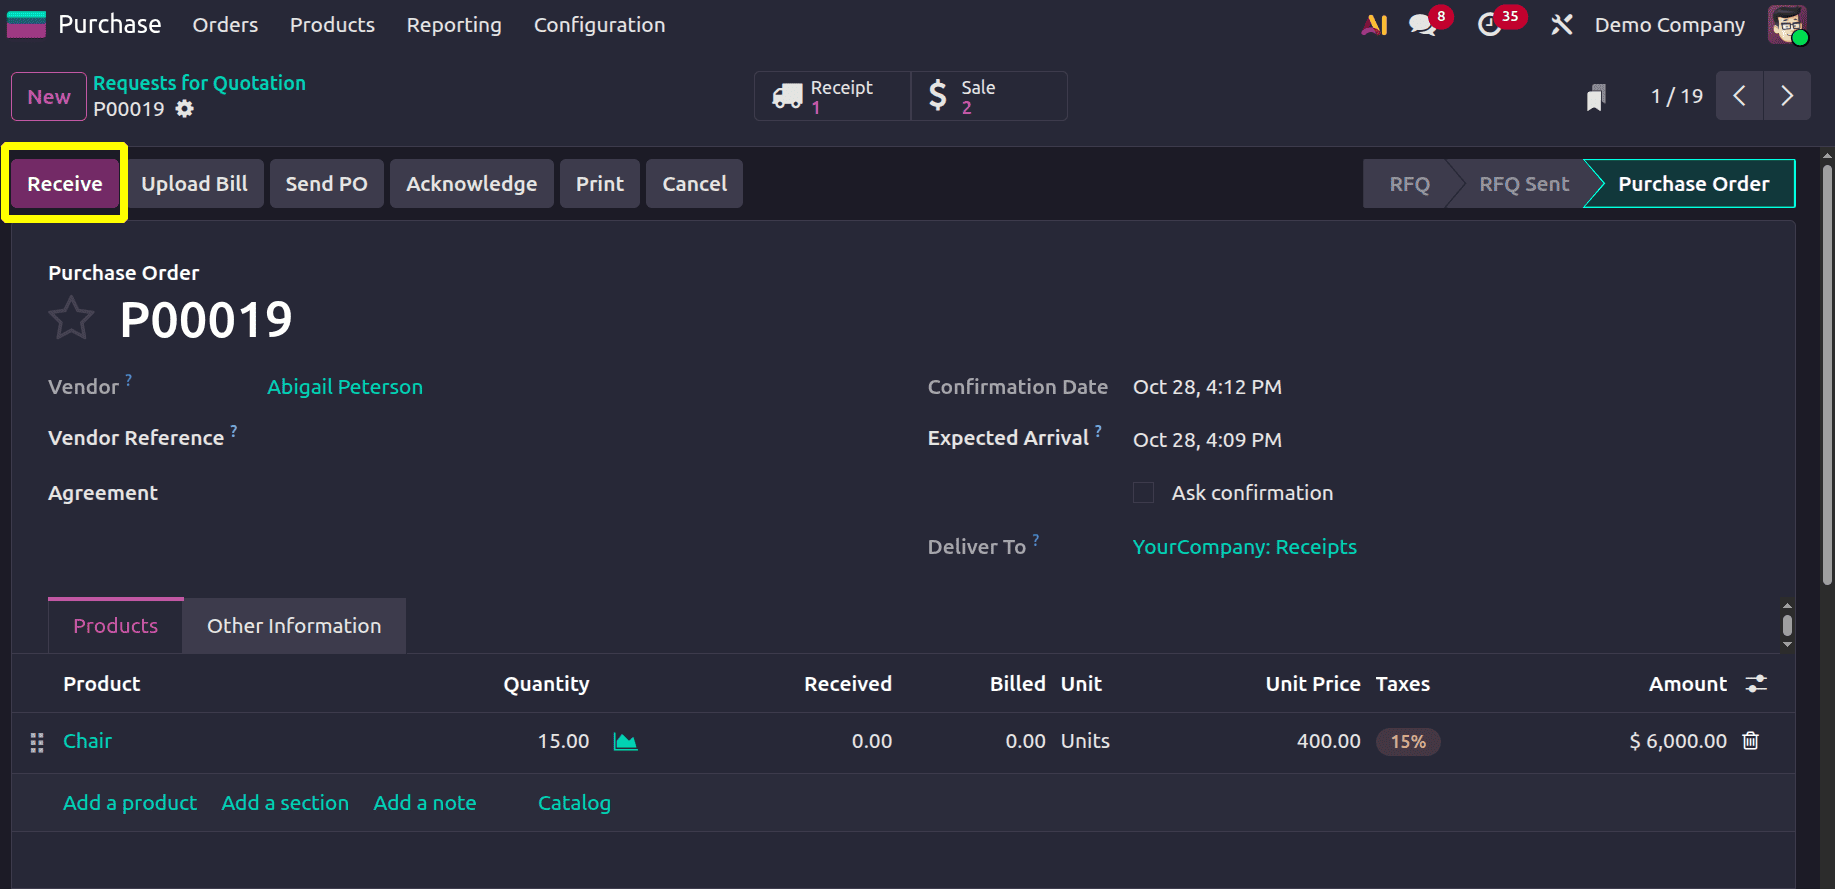
Verify the purchase order. After that, get the merchandise. On the receipt, click the Validate button.
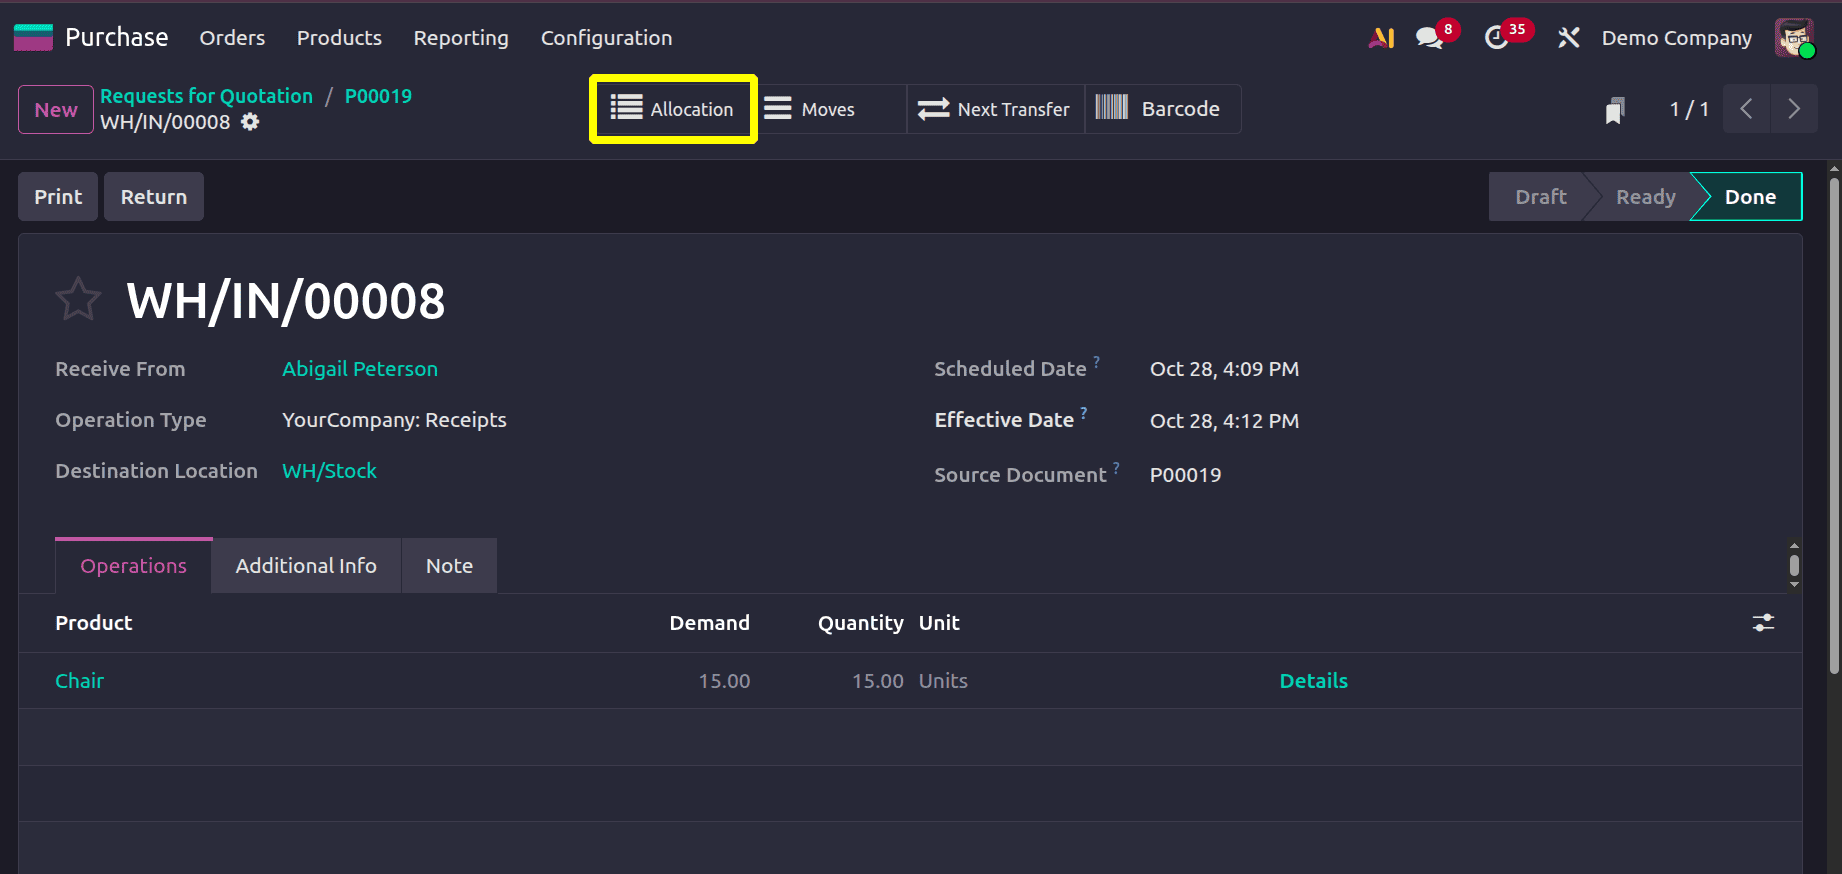
As previously stated, the Allocation is displayed following validation. To view the Reception Report, click on it. But here the products are already assigned to the orders.
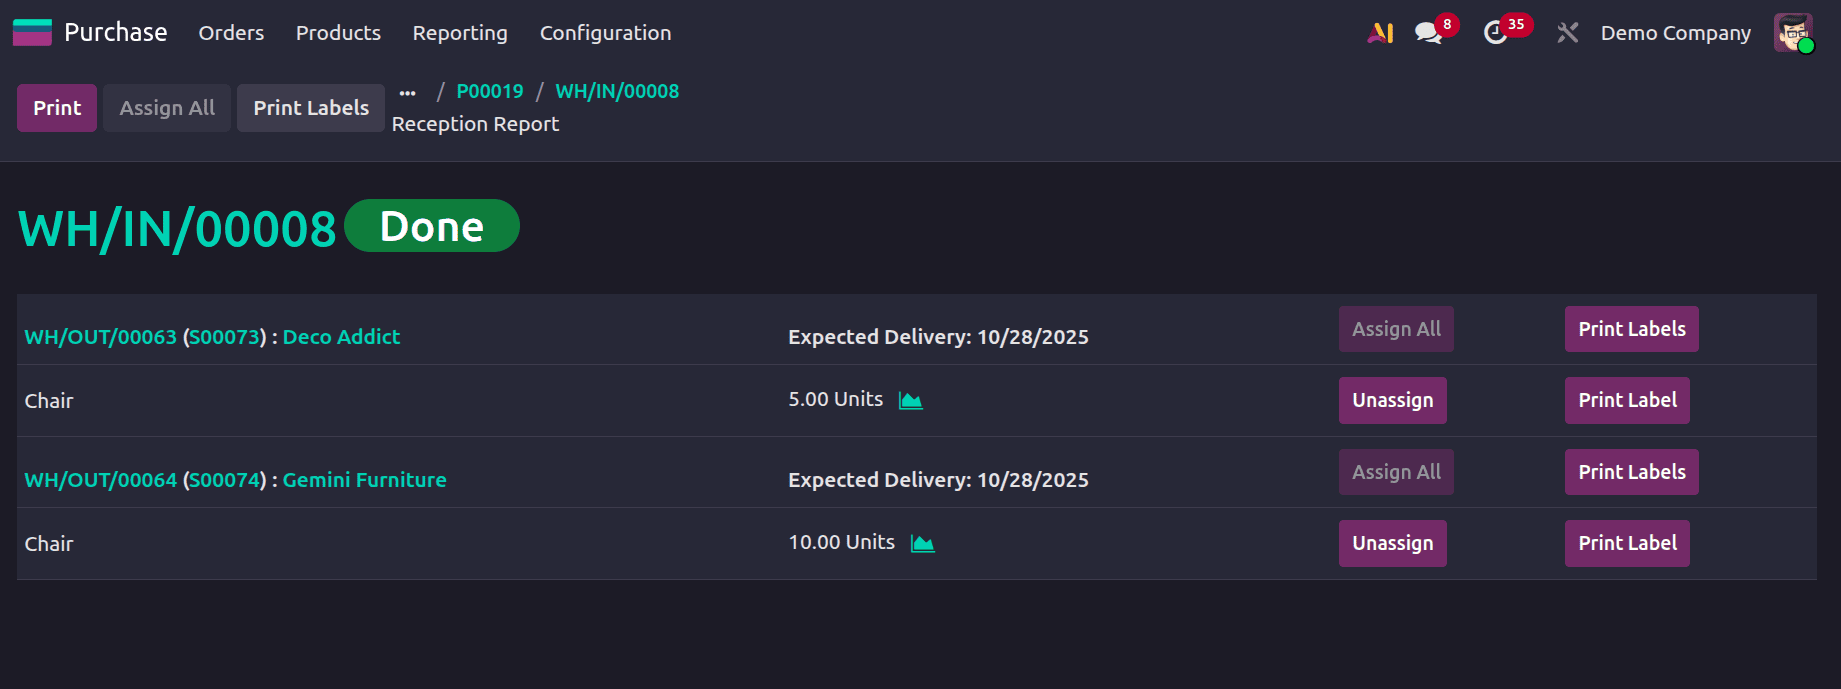
Users can Unassign the reserved products from the Allocation report itself.
In conclusion, handling Reception Reports in Odoo 19 streamlines the purchasing procedure by providing a quick and easy way to compare received goods with purchase orders. This feature ensures accurate inventory updates, enhances supplier communication, and lessens discrepancies. By using Odoo 19's capabilities, businesses may improve operational efficiency, expedite their purchase process, and maintain correct records.
To read more about How to Handle Reception Reports in Odoo 18 for Purchase, refer to our blog How to Handle Reception Reports in Odoo 18 for Purchase.