RabbitMQ is an open-source message broker. At its core, it does one job: it accepts messages from one application (the producer) and delivers them to another (the consumer). That might sound simple, but the elegance lies in how it decouples those two systems.
RabbitMQ was initially developed by Rabbit Technologies Ltd and was later acquired by VMware (and more recently, the project is stewarded under Broadcom). It uses the Advanced Message Queuing Protocol (AMQP) as its core standard, which means it's not proprietary - any AMQP-compatible system can communicate with it.
The classic analogy is a post office. You drop a letter in the mailbox. You don't need to know when the recipient will open it or whether they're home right now. The postal system handles that. RabbitMQ is your postal system for software. Without a message broker, Application A has to wait for Application B to respond before it can move on. That creates tight dependencies and, more often than not, performance bottlenecks. With RabbitMQ sitting in the middle, Application A fires off a message and gets on with its life. RabbitMQ holds that message in a queue until Application B is ready to pick it up. RabbitMQ is a reliable messaging and streaming broker that offers easy deployment on cloud platforms, on-premises systems, and local environments. It is currently used by millions worldwide.
Features of RabbitMQ
There are various features of RabbitMQ which make it one of the most popular messaging brokers.
- Reliable Messaging
RabbitMQ makes sure that messages are delivered successfully between two applications. The messages are persisted so they don’t get lost if there is a restart in the broker.
- Asynchronous Processing
Long processes can be done asynchronously by the system and do not block the main application.
- Message Queues
Messages remain in the queue until a consumer is ready to retrieve and process them. The producer and consumer do not have to run simultaneously.
- Routing & Exchanges
RabbitMQ allows users to use different kinds of exchanges to route the messages to either a single or multiple queues according to the defined rules.
- Scalability
Several consumers can read messages from the same queue, making it simple to distribute processing between many consumers.
- High Availability
RabbitMQ provides clustering and mirrored queues to ensure that applications remain available in case of any node failures.
- Security
Authentication, authorization, TLS, and virtual hosts ensure security.
- Cross-Platform Support
RabbitMQ runs on Linux, Windows, macOS, Docker, Kubernetes, cloud environments, and on-premises infrastructure.
- AMQP Support
RabbitMQ is built on the Advanced Message Queuing Protocol (AMQP), making it compatible with many programming languages and frameworks.
- Management Dashboard
RabbitMQ includes a web-based management interface that allows administrators to monitor queues, exchanges, connections, channels, and system health in real time.
Install RabbitMQ on Ubuntu 20.04
The following instructions help you install the latest release of RabbitMQ on Ubuntu 20.04 using the official RabbitMQ package repositories.
Step 1: Update Package Index
sudo apt update
sudo apt upgrade -y
Step 2: Installing Dependency Packages
sudo apt-get install curl gnupg apt-transport-https -y
Step 3: Importing the RabbitMQ Signing Key
curl -1sLf "https://keys.openpgp.org/vks/v1/by-fingerprint/0A9AF2115F4687BD29803A206B73A36E6026DFCA" | sudo gpg --dearmor | sudo tee /usr/share/keyrings/com.rabbitmq.team.gpg > /dev/null
Step 4: Adding apt repositories of Team RabbitMQ
sudo tee /etc/apt/sources.list.d/rabbitmq.list <<EOF
## Modern Erlang/OTP releases
##
deb [arch=amd64 signed-by=/usr/share/keyrings/com.rabbitmq.team.gpg] https://deb1.rabbitmq.com/rabbitmq-erlang/ubuntu/jammy jammy main
deb [arch=amd64 signed-by=/usr/share/keyrings/com.rabbitmq.team.gpg] https://deb2.rabbitmq.com/rabbitmq-erlang/ubuntu/jammy jammy main
## Latest RabbitMQ releases
##
deb [arch=amd64 signed-by=/usr/share/keyrings/com.rabbitmq.team.gpg] https://deb1.rabbitmq.com/rabbitmq-server/ubuntu/jammy jammy main
deb [arch=amd64 signed-by=/usr/share/keyrings/com.rabbitmq.team.gpg] https://deb2.rabbitmq.com/rabbitmq-server/ubuntu/jammy jammy main
EOF
Step 5: Update Package Indices
sudo apt-get update -y
Step 6: Install Erlang packages
sudo apt-get install -y erlang-base \
                       erlang-asn1 erlang-crypto erlang-eldap erlang-ftp erlang-inets \
                       erlang-mnesia erlang-os-mon erlang-parsetools erlang-public-key \
                       erlang-runtime-tools erlang-snmp erlang-ssl \
                       erlang-syntax-tools erlang-tftp erlang-tools erlang-xmerl
r
Step 7: Install rabbitmq-server and its dependencies
sudo apt-get install rabbitmq-server -y --fix-missing
Step 8: Activate the RabbitMQ Management Dashboard
sudo rabbitmq-plugins enable rabbitmq_management
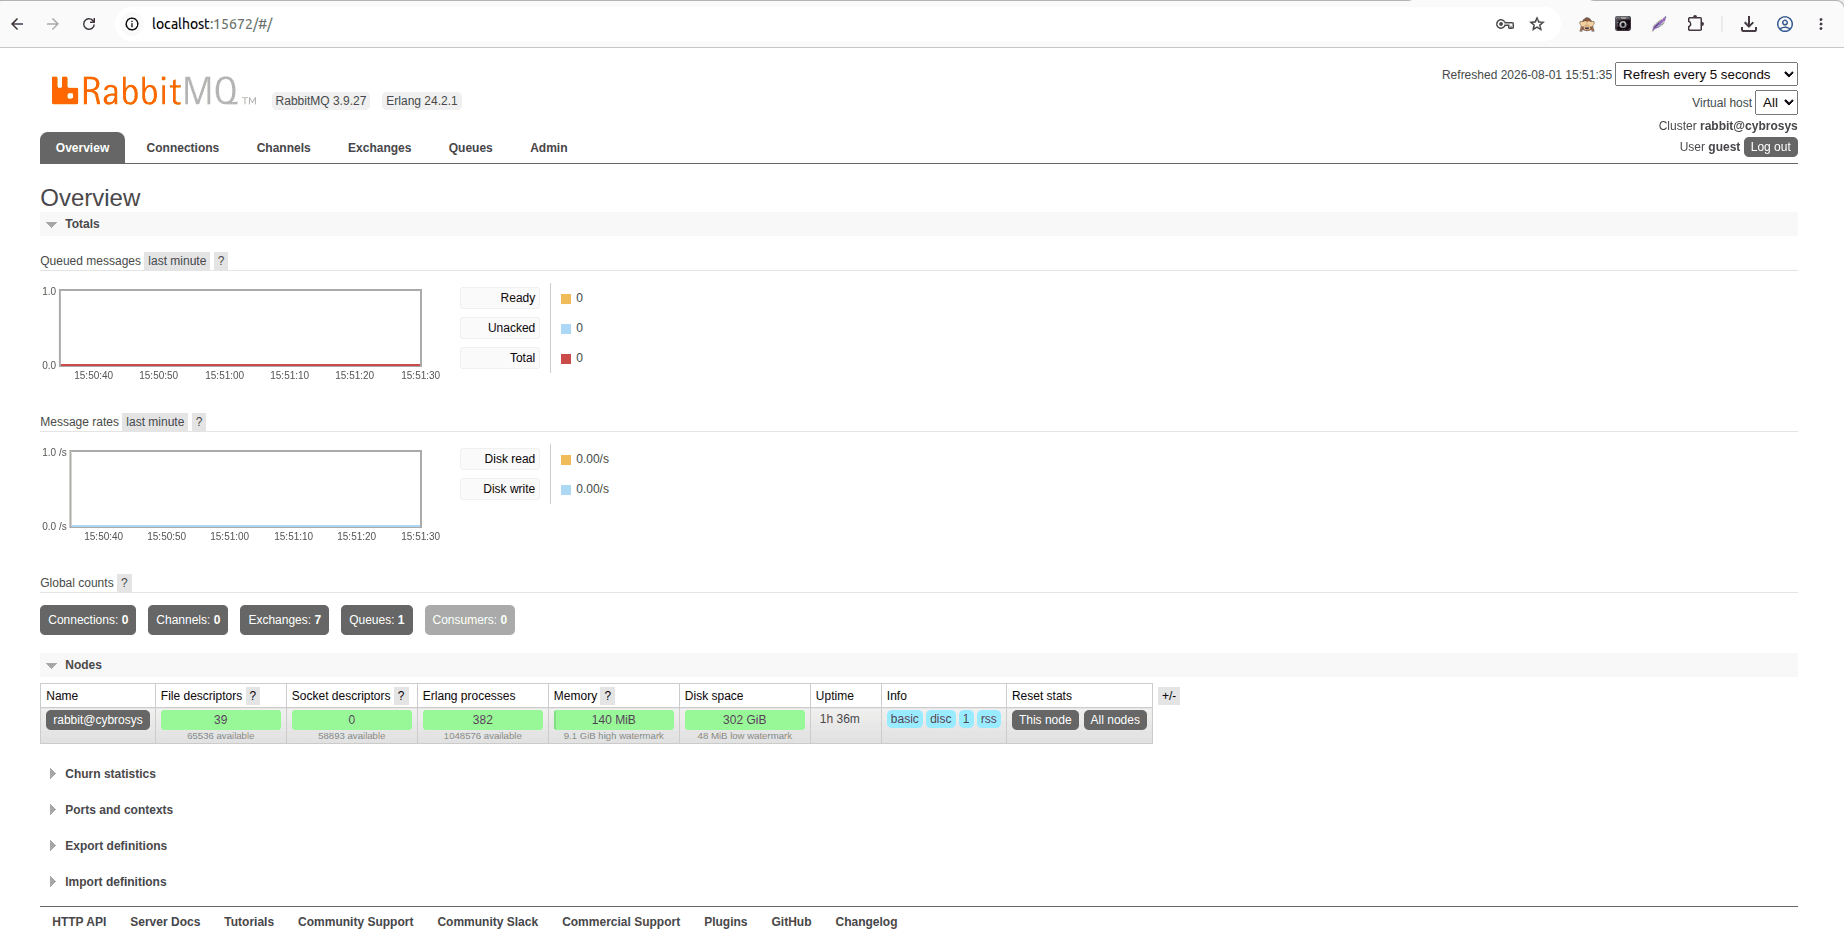
Step 9: Access the RabbitMQ Dashboard
Launch your web browser and visit:
http://localhost:15672
A login page for the RabbitMQ dashboard will appear on your screen.
The default username and password are:
- Username: guest
- Password: guest
Upon successful authentication, you will see the RabbitMQ Management Dashboard.
However, the default guest user can be accessed only from localhost. In case you want to use RabbitMQ for production purposes, you need to create an additional administrator user.
It is one of the RabbitMQ features that people often face, and its inclusion makes the manual more comprehensive.
Connecting RabbitMQ with Odoo 19
After installation and proper configuration of RabbitMQ, the next thing to do would be establishing a connection from Odoo. The connection is done through the use of the Pika Python client in order to implement the AMQP protocol. The process would involve the following steps:
- Creation of connection with RabbitMQ.
- Creation of an exchange and queue.
- Publication of messages to the exchange.
- Consumption of messages from the queue.
Before proceeding, ensure that the Pika library is installed in your Odoo virtual environment.
pip install pika
Step 1: Creating Connection
The first thing to do is create a connection with RabbitMQ. This will require the following things: the host address, port number, virtual host, and user credentials.
import pika
credentials = pika.PlainCredentials("guest", "guest")
connection = pika.BlockingConnection(
    pika.ConnectionParameters(
        host="localhost",
        port=5672,
        virtual_host="/",
        credentials=credentials,
    )
)
channel = connection.channel()
Step 2: Making an Exchange
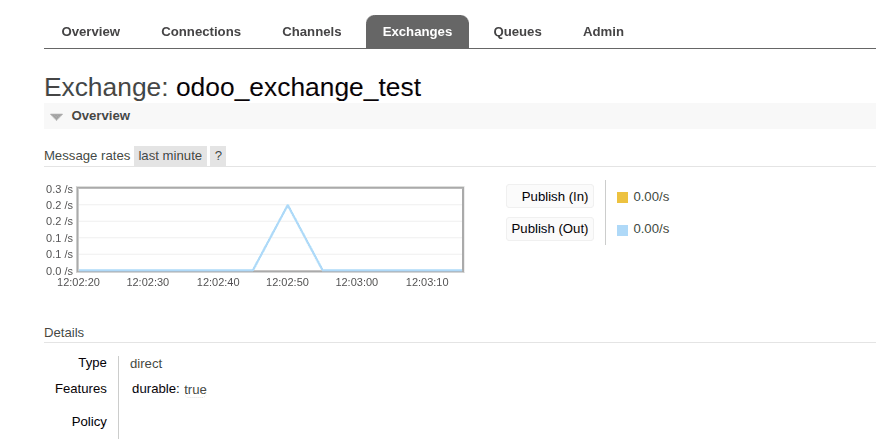
Exchange is the place where all messages will be sent when published to RabbitMQ. Rather than publishing messages straight to the queue, producers publish messages to exchanges, which will route them to one or more queues based on the routing rule configurations.
Make a Direct Exchange via the following code:
channel.exchange_declare(
    exchange="odoo_exchange",
    exchange_type="direct",
    durable=True,
)
- odoo_exchange is the exchange name.
- direct refers to the type of the exchange that routes the message based on the exact match of the routing key.
- durable=True guarantees the availability of the exchange even after a RabbitMQ restart.
When RabbitMQ finds an exchange with the same configuration, RabbitMQ doesn't create a new one; instead, it will reuse the existing one.
Step 3: Making a Queue
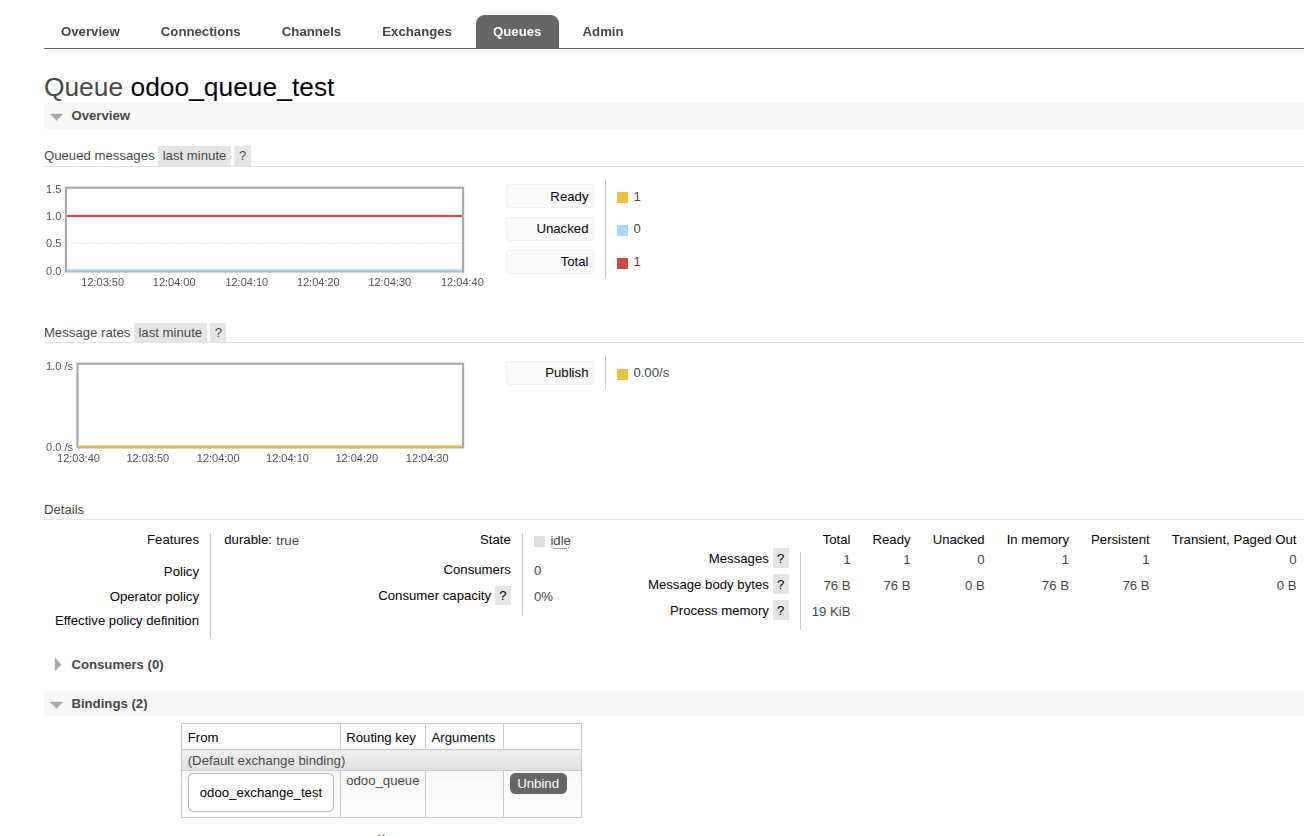
A queue is a temporary storage for messages until the consumer processes them. When the designated queue does not exist in RabbitMQ, RabbitMQ automatically creates it.
The queue can be created via the following code:
channel.queue_declare(
    queue="odoo_queue",
    durable=True,
)
- odoo_queue refers to the queue name.
- durable=True ensures that RabbitMQ queue will survive after the server reboot.
When the queue is already available, RabbitMQ reuses the existing queue.
Step 4: Binding the Queue to the Exchange
After creating the exchange and queue, the next step is to bind them together. A binding determines how messages sent to an exchange are delivered to a specific queue.
channel.queue_bind(
    queue="odoo_queue",
    exchange="odoo_exchange",
    routing_key="odoo_queue",
)
- queue specifies the destination queue.
- exchange specifies the exchange that receives published messages.
- routing_key determines which messages are delivered to the queue.
With this binding in place, any message published to odoo_exchange using the routing key odoo_queue will be routed to the odoo_queue queue, where it remains until a consumer retrieves and processes it.
Step 5: Message Publishing
After creating the exchange and queue, Odoo will start publishing messages to RabbitMQ. This will be done through an exchange where the routing key will decide the appropriate queue for each message.
import json
message = {
    "sale_order": "SO001",
    "customer": "Azure Interior",
    "status": "Confirmed"
}
channel.basic_publish(
    exchange="odoo_exchange",
    routing_key="odoo_queue",
    body=json.dumps(message),
    properties=pika.BasicProperties(
        delivery_mode=2,
        content_type="application/json",
    ),
)
Setting delivery_mode=2 makes the message persistent in case the RabbitMQ server restarts while the queue is durable.
Step 6: Message Consumption
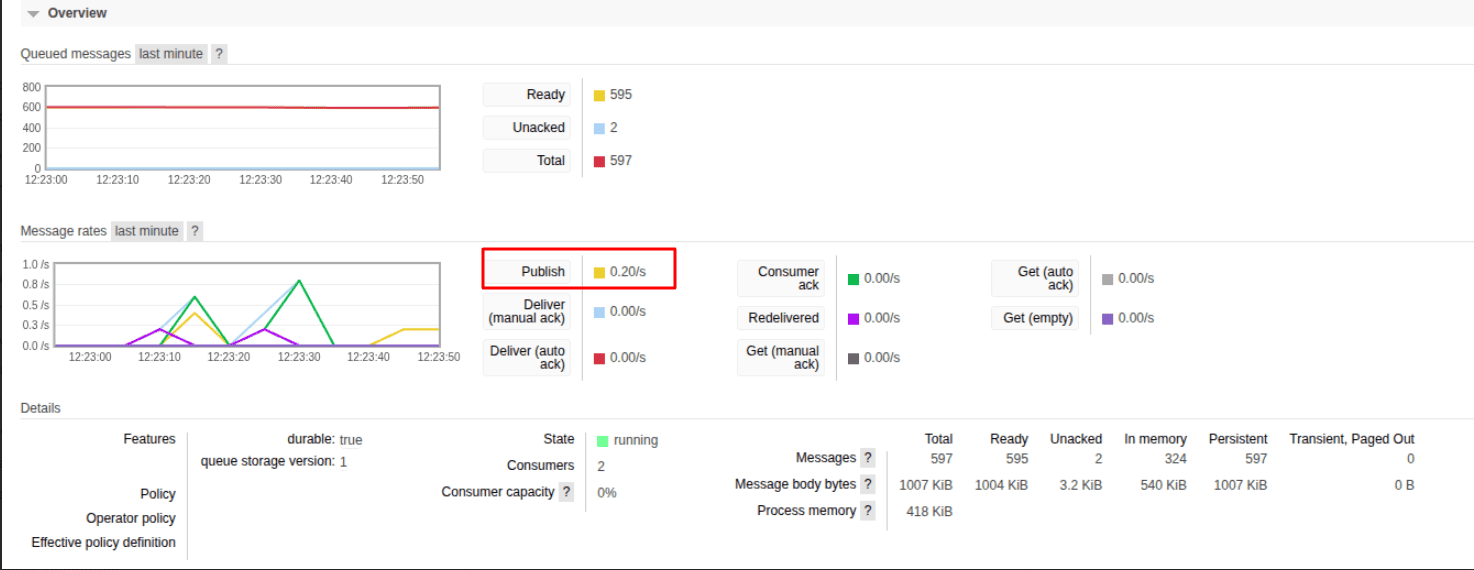
Messages are continuously listened to by a consumer in the queue. Once there is a message available in the queue, it is delivered to the consumer.
def callback(ch, method, properties, body):
    print("Received:", body.decode())
    # Process the message here
    ch.basic_ack(delivery_tag=method.delivery_tag)

channel.basic_qos(prefetch_count=1)
channel.basic_consume(
    queue="odoo_queue",
    on_message_callback=callback,
    auto_ack=False,
)
channel.start_consuming()
With the help of basic_ack(), it is indicated that the message has been processed successfully. In case the consumer crashes before acknowledging the message, RabbitMQ can deliver the message once again.
By setting basic_qos(prefetch_count=1), only one unacknowledged message allowed to the consumer.
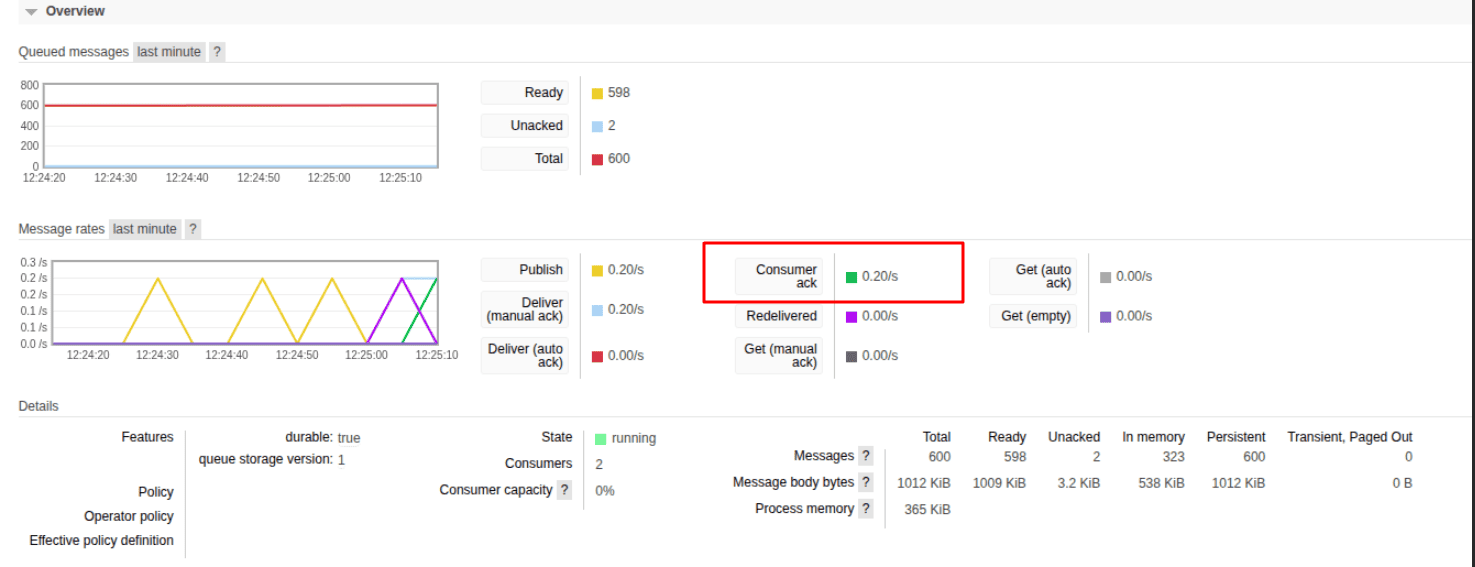
Step 7: Close the connection
Once everything is done with the publishing process, the connection needs to be closed in order to release the resources.
connection.close()
As far as consumers are concerned, the connection will be open because they constantly listen for incoming messages.
In such a way, we provide a simple solution for integration of RabbitMQ with Odoo through declaring exchanges and queues, sending persistent messages and receiving the consumed ones.
In conclusion, RabbitMQ allows one to design an efficient asynchronous communication protocol between Odoo and other software. As a result, exchanges, queues, routing keys, and consumers allow the background processes of Odoo to be performed without blocking the user request. In this blog, we talked about the basics of RabbitMQ, discussed its features, installed it on Ubuntu 20.04, started the management interface and showed how to connect Odoo to it by using Pika. Furthermore, we learned how to create exchanges and queues and how to bind them, publish and consume messages. Using the above components, one can efficiently integrate Odoo with any other software.
To read more about How to Integrate DocuSign in Odoo 19, refer to our blog How to Integrate DocuSign in Odoo 19.