Odoo 20 Map Views provides an interactive way to visualize geographical data, including customer addresses, vendor locations, delivery points, warehouses, events, and service areas. In this blog, we’ll walk through the steps to configure and implement Map Views in Odoo 20 Enterprise Edition.
If your model has a relation with model res.partner or address fields like city, country, longitude, and latitude, the model records can be easily shown in map view.
Map view simplifies visualization of location based records and helps users to make better business decisions through appropriate geographical insights. It also creates interactive navigation and routing and provides a user-friendly interface.
Enabling Map View in Odoo 20
Step 1: Add Map View to Window Action
To enable Map View for a model in Odoo, add map to the view_mode field of the corresponding window action. This allows users to access the map alongside other views, such as list and form views, directly from the user interface.
<record id="action_crm_lead_enterprise" model="ir.actions.act_window">
   <field name="name">Leads</field>
   <field name="res_model">crm.lead</field>
   <field name="view_mode">list,form,map</field>
</record>
A user can also include a map view in an already existing window action by mentioning the window action ID.
<record id="action_crm_lead_map" model="ir.actions.act_window.view">
   <field name="act_window_id" ref="sale.action_crm_lead"/>
   <field name="view_mode">map</field>
   <field name="view_id" ref="crm.crm_lead_view_map"/>
</record>
Step 2: Define a Map View
Create a new record in the Views model as an xml file. Enclose the field name that is required to be displayed in the map view within the <map> tag.
<record id="crm_lead_view_map" model="ir.ui.view">
   <field name="name">crm.lead.view.map</field>
   <field name="model">crm.lead</field>
   <field name="arch" type="xml">
       <map js_class="crm_map" res_partner="partner_id" routing="true">
           <field name="partner_id" string="Customer"/>
       </map>
   </field>
</record>
The <map> tag controls how the records are displayed on the map.
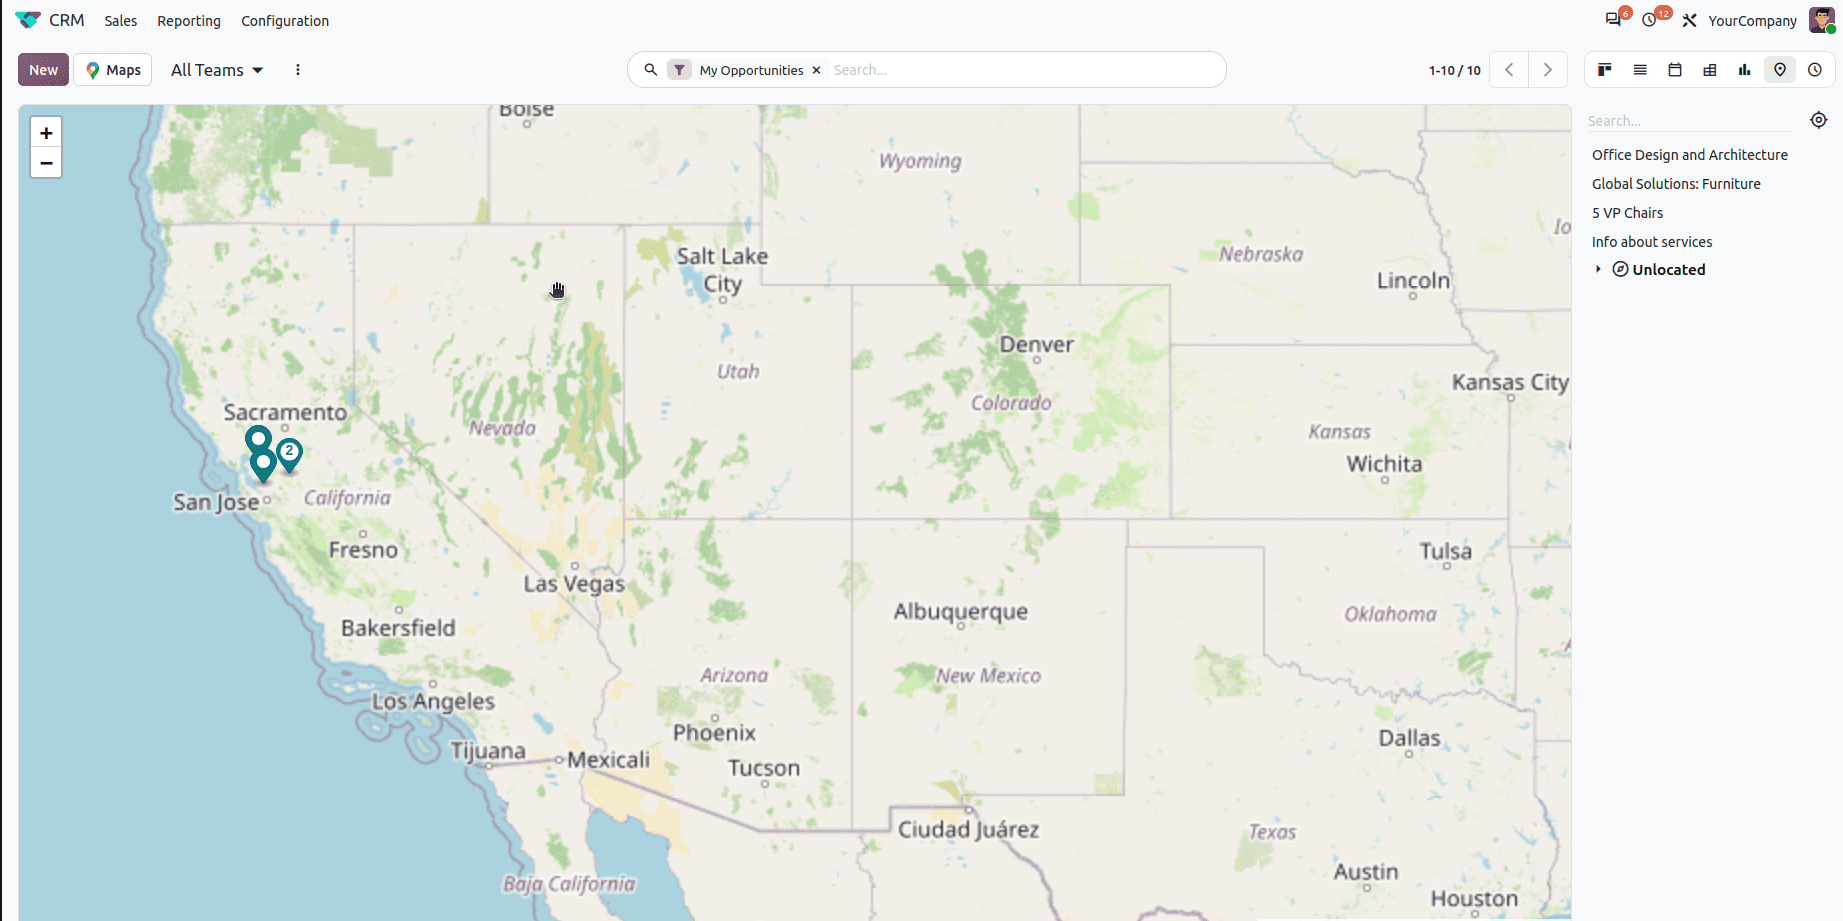
Properties of Map View
- res_partner - a Many2One relation with res.partner, Odoo displays map markers based on the address information associated with the related partner records. Suppose our model has a relation with res.partner via the field partner_id, mention the field name under res_partner.
<map res_partner='partner_id'>
- routing - when routing is set to true, the map view will show the route between two locations.
- default_order - sets how the records are sorted in the map view panel.
- hide_name - if set to true, it hides the record names in the map view.
- hide_title - hides the map title from the view.
- hide_address - hides the address details in the pop-up.
- panel_title - let users set a custom title in the map’s panel.
Odoo 20's Map Views provide a useful method to see geographic data. You may turn simple records into an interactive map experience by creating a Views model record with XML.
Map Views are definitely worthwhile if your application uses addresses, routes, or locations. Map Views enhance usability by making geographical data easier to visualize and understand. With the right configuration, you can integrate Map Views into your custom modules in Odoo 20 and present location-based records in a more interactive and meaningful way.
To read more about How to Create Map Views in Odoo 19, refer to our blog How to Create Map Views in Odoo 19.