Odoo’s Barcode app streamlines warehouse operations by integrating barcode scanning with inventory management. In this blog, we’ll learn how to add a custom icon to the Barcode screen with the help of the bus service.
For example, let's add a button to display pending orders, unassigned sales orders, and other specific information directly from the Barcode Interface.
Step 1: Extend the Barcode Template
Initially, we can inherit the main component of the Barcode application.
<?xml version="1.0" encoding="UTF-8"?>
<templates xml:space="preserve">
   <t t-name="sales_counter.ControlPanel"
      t-inherit="web.ControlPanel"
      t-inherit-mode="extension">
       <xpath expr="//div[contains(@class,'o_cp_pager')]"
              position="before">
           <t t-if="env.config.viewType === 'kanban'">
               <div style="display: inline-flex;
                       align-items: center;
                       justify-content: center;
                       min-width: 36px;
                       height: 30px;
                       padding: 0 12px;
                       background: #e74c3c;
                       color: white;
                       border-radius: 999px;
                       font-weight: 700;
                       font-size: 14px;
                       line-height: 30px;">
               <span t-esc="salesCounter.count"/>
           </div>
           </t>
       </xpath>
   </t>
</templates>
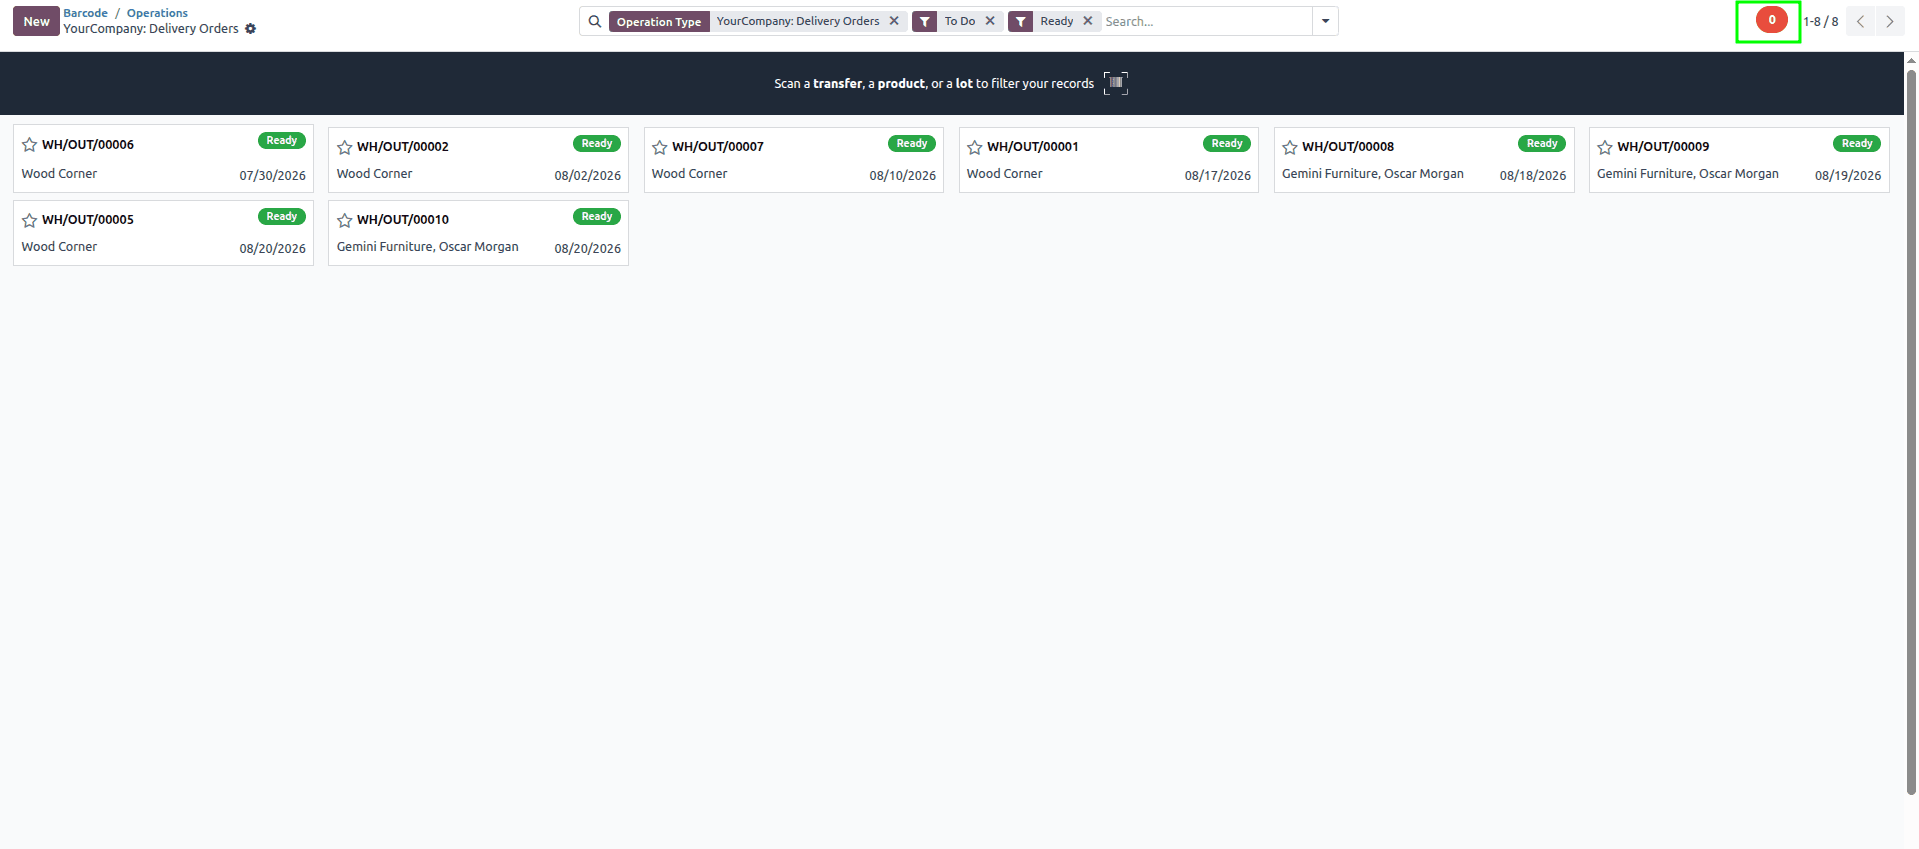
The code extends the existing Barcode interface by adding a custom icon with a counter badge to the screen.
The above code extends the barcode interface by adding an icon on the barcode screen.
The screenshot below shows the newly added icon in the Barcode interface.
Step 2: Add the JavaScript Logic
The code below shows the JS file to change the counter value.
/** @odoo-module **/
import { ControlPanel } from "@web/search/control_panel/control_panel";
import { patch } from "@web/core/utils/patch";
import { useService } from "@web/core/utils/hooks";
import { useState, onWillStart } from "@odoo/owl";
patch(ControlPanel.prototype, {
   setup() {
       super.setup();
       this.orm = useService("orm");
       this.busService = this.env.services.bus_service;
       this.salesCounter = useState({ count: 0 });
       this.busService.addChannel("sales_counter");
       this.busService.subscribe("update_counter", ({ count }) => {
           this.salesCounter.count = count;
       });
       onWillStart(async () => {
           this.salesCounter.count = await this.orm.call(
               "sale.order",
               "broadcast_counter",
               []
           );
       });
   },
});
The code extends the Barcode application by patching its main OWL component. When the Barcode screen opens, it retrieves the latest counter value, stores it, and updates the displayed count automatically without requiring a page refresh.
You can add the python code as below.
@api.model
def broadcast_counter(self,flag=False):

   count = self.env['sale.order'].search_count([
       ('user_id', '=', False),
       ('state', '=', 'sale'),
   ])
   _logger.info("SALES COUNTER broadcasting count=%s", count)
   if flag :
       self.env['bus.bus']._sendone(
           'sales_counter',          # channel
           'update_counter',         # event
           {'count': count}          # payload
       )
       return
   return count
Step 3: Add Assets to the Manifest
Include the XML and JavaScript files in your module assets.
'assets': {
    'web.assets_backend': [
        'your_module/static/src/js/barcode_counter.js',
        'your_module/static/src/xml/barcode_counter.xml',
    ],
},
Refresh your models to see the changes.
We can easily customize the barcode interface by inheriting the components and template. We can see real-time information directly from the Barcode’s screen. It improves the overall user experience.
To read more about How to Add an Icon in the Barcode Interface in Odoo 18, refer to our blog How to Add an Icon in the Barcode Interface in Odoo 18.