Odoo is already a powerful, all-in-one platform for managing day-to-day business operations from sales and accounting to inventory and HR. One of its most underrated strengths is Discuss, the built-in chat module that lets teams communicate in real time, share updates, and collaborate directly inside the ERP instead of bouncing between external tools.
However, there’s a clear limitation.
With Odoo 19 Enterprise, AI features are now baked into the platform bringing smart assistance, automation, and contextual help directly into workflows. But if you’re running Odoo Community, those AI capabilities don’t come included. You get the solid foundation, but not the intelligence layer on top.
That’s where this blog series comes in.
In this guide, we’ll walk step by step through building an AI-powered chatbot inside the standard Odoo Discuss module, specifically for Odoo Community Edition. We’ll use n8n as the automation and orchestration layer to connect Odoo with modern AI services and business logic.
The goal isn’t to bolt on a clunky external chat widget. Instead, we’ll create something that feels native to Odoo:
- The bot lives inside Discuss
- Users interact with it like they would with a teammate
- Conversations happen in real time, right where work already happens
By the end, you’ll have a practical blueprint for bringing AI into Odoo Community.
N8N Chatbot Module
In this part we will create an odoo module to chat with the AI agent we create inside n8n. We can start by creating an odoo module structure shown below.
n8n_chatbot
+-- data
¦   +-- ir_action_server.xml
+-- __init__.py
+-- __manifest__.py
+-- models
¦   +-- chatbot_script.py
¦   +-- __init__.py
¦   +-- mail_channel.py
+-- views
    +-- chatbot_script_views.xml
__manifest__.py
# -*- coding: utf-8 -*-
{
    "name": "N8N Chatbot",
    "version": "19.0.1.0.0",
    "category": "Tools",
    "summary": "N8N Chatbot.",
    "description": "N8N Chatbot.",
    "depends": ["base", "mail", "contacts", "im_livechat"],
    "data": [
        "data/ir_action_server.xml",
        "views/chatbot_script_views.xml"
    ],
    "license": "LGPL-3",
    "installable": True,
}
data/ir_action_server.xml
This file defines a server action in Odoo that appears on the Chatbot Script model.
When triggered from the UI, it runs a Python method that generates an AI agent user linked to the chatbot.
<?xml version="1.0"?>
<odoo>
    <data>
        <record id="generate_agent_user" model="ir.actions.server">
            <field name="name">Generate AI Agent</field>
            <field name="model_id" ref="im_livechat.model_chatbot_script"/>
            <field name="binding_model_id"    ref="im_livechat.model_chatbot_script"/>
            <field name="state">code</field>
            <field name="code">action = record.action_generate_agent_user()</field>
        </record>
    </data>
</odoo>
chatbot_script.py
# -*- coding: utf-8 -*-
from odoo import fields, models

class ChatbotScript(models.Model):
    """
    This model extension marks a chatbot as an AI agent and
    creates a linked Odoo user for the chatbot operator
    if one does not already exist.
    """
    _inherit = "chatbot.script"
    is_agent = fields.Boolean("AI Agent", help="Is AI Agent ?")
    def action_generate_agent_user(self):
        """
        Generates an Odoo user for the chatbot's operator partner
        and flags the chatbot as an AI agent.
        """
        if not self.operator_partner_id.user_ids:
            self.sudo().write({
                'is_agent': True
            })
            self.env['res.users'].sudo().create([{
                "name": self.operator_partner_id.name,
                "partner_id": self.operator_partner_id.id,
                "login": self.operator_partner_id.name.lower()
            }])
mail_channel.py
# -*- coding: utf-8 -*-
from odoo import api, models
from markupsafe import Markup
import requests
import logging

_logger = logging.getLogger(__name__)
n8n_endpoint = "http://localhost:5678/webhook/ollama"

class MailChannel(models.Model):
    """
    This override listens to messages posted in Discuss channels,
    sends user messages to an n8n webhook when an AI agent is present,
    and posts the AI-generated reply back into the same channel
    as the agent user.
    """
    _inherit = "discuss.channel"
    @api.model
    def message_post(self, **kwargs):
        """
        Intercepts message posting to trigger an AI response
        while preserving the original Odoo behavior.
        """
        res = super().message_post(**kwargs)
        self.env.cr.commit()
        # Find AI agent partners in the channel
        agents = self.channel_partner_ids.filtered(
            lambda x: any(bot.is_agent for bot in x.chatbot_script_ids)
        )
        # Prevent the AI from replying to itself
        if agents and not any(
                bot.is_agent for bot in res.author_id.chatbot_script_ids
        ):
            try:
                # Send the user message to n8n
                response = requests.post(
                    n8n_endpoint,
                    json={
                        "chatInput": kwargs.get('body'),
                        "sessionId": self.uuid
                    }
                )
                data = response.json()
                # Post AI response back into the channel
                self.sudo().message_post(
                    body=Markup(data[0].get('output')),
                    message_type="comment",
                    subtype_xmlid="mail.mt_comment",
                    author_id=agents[0].id,
                )
            except Exception as e:
                _logger.warning(f"AI Agent Error: {e}")
                # Fallback message if AI fails
                self.sudo().message_post(
                    body=Markup("Something went wrong."),
                    message_type="comment",
                    subtype_xmlid="mail.mt_comment",
                    author_id=agents[0].id,
                )
        return res
views/chatbot_script_views.xml
This view extension adds a visual ribbon to the chatbot form to clearly indicate when a chatbot is marked as an AI agent.
<?xml version="1.0"?>
<odoo>
    <record id="chatbot_script_view_form" model="ir.ui.view">
        <field name="name">chatbot.script.form.inherit.n8n.chatbot</field>
        <field name="model">chatbot.script</field>
        <field name="inherit_id" ref="im_livechat.chatbot_script_view_form"/>
        <field name="arch" type="xml">
            <xpath expr="//widget[@name='web_ribbon']" position="after">
                <widget name="web_ribbon" title="AI Agent" bg_color="text-bg-info" invisible="not is_agent"/>
            </xpath>
        </field>
    </record>
</odoo>
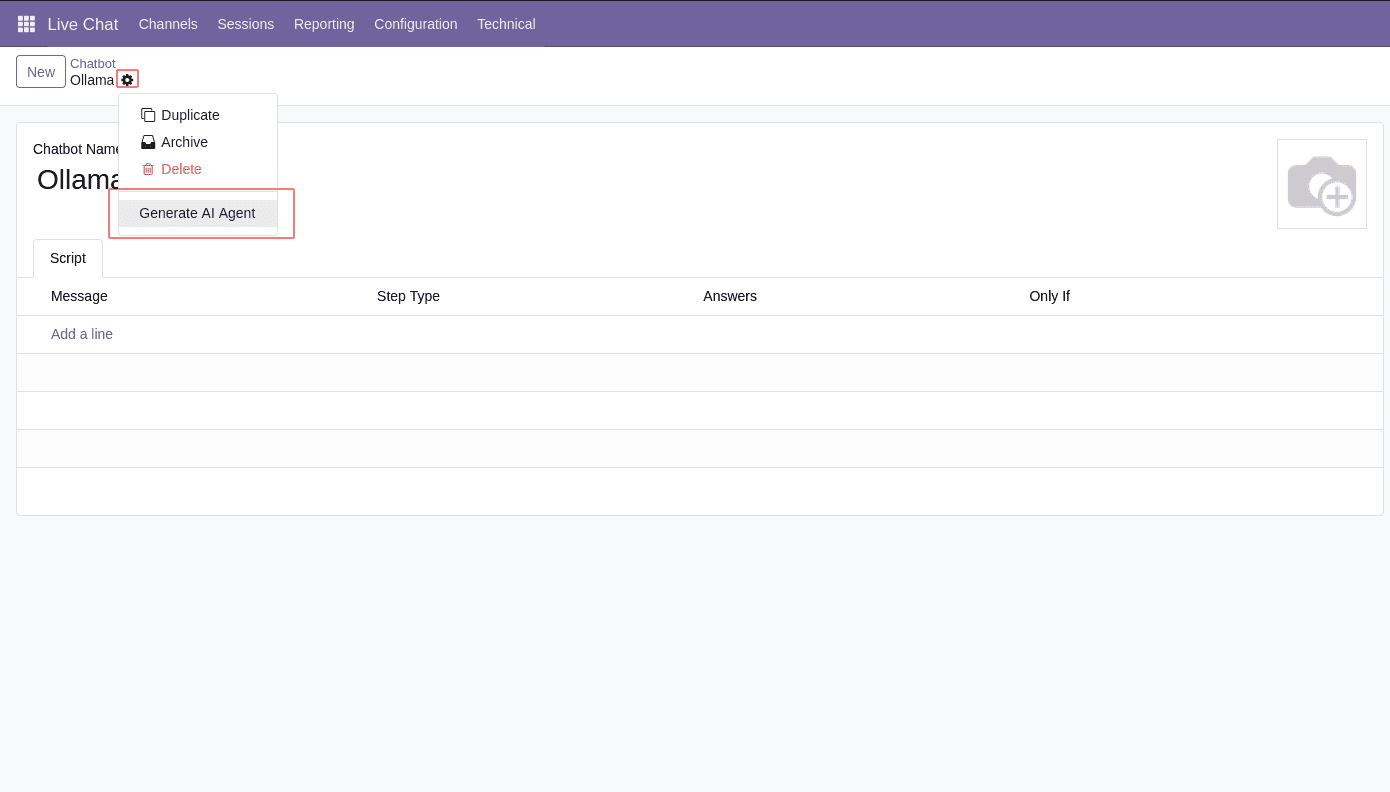
Now we can install the module and create a new chatbot from the Live Chat module. And by clicking the button below, we can make it an AI agent.
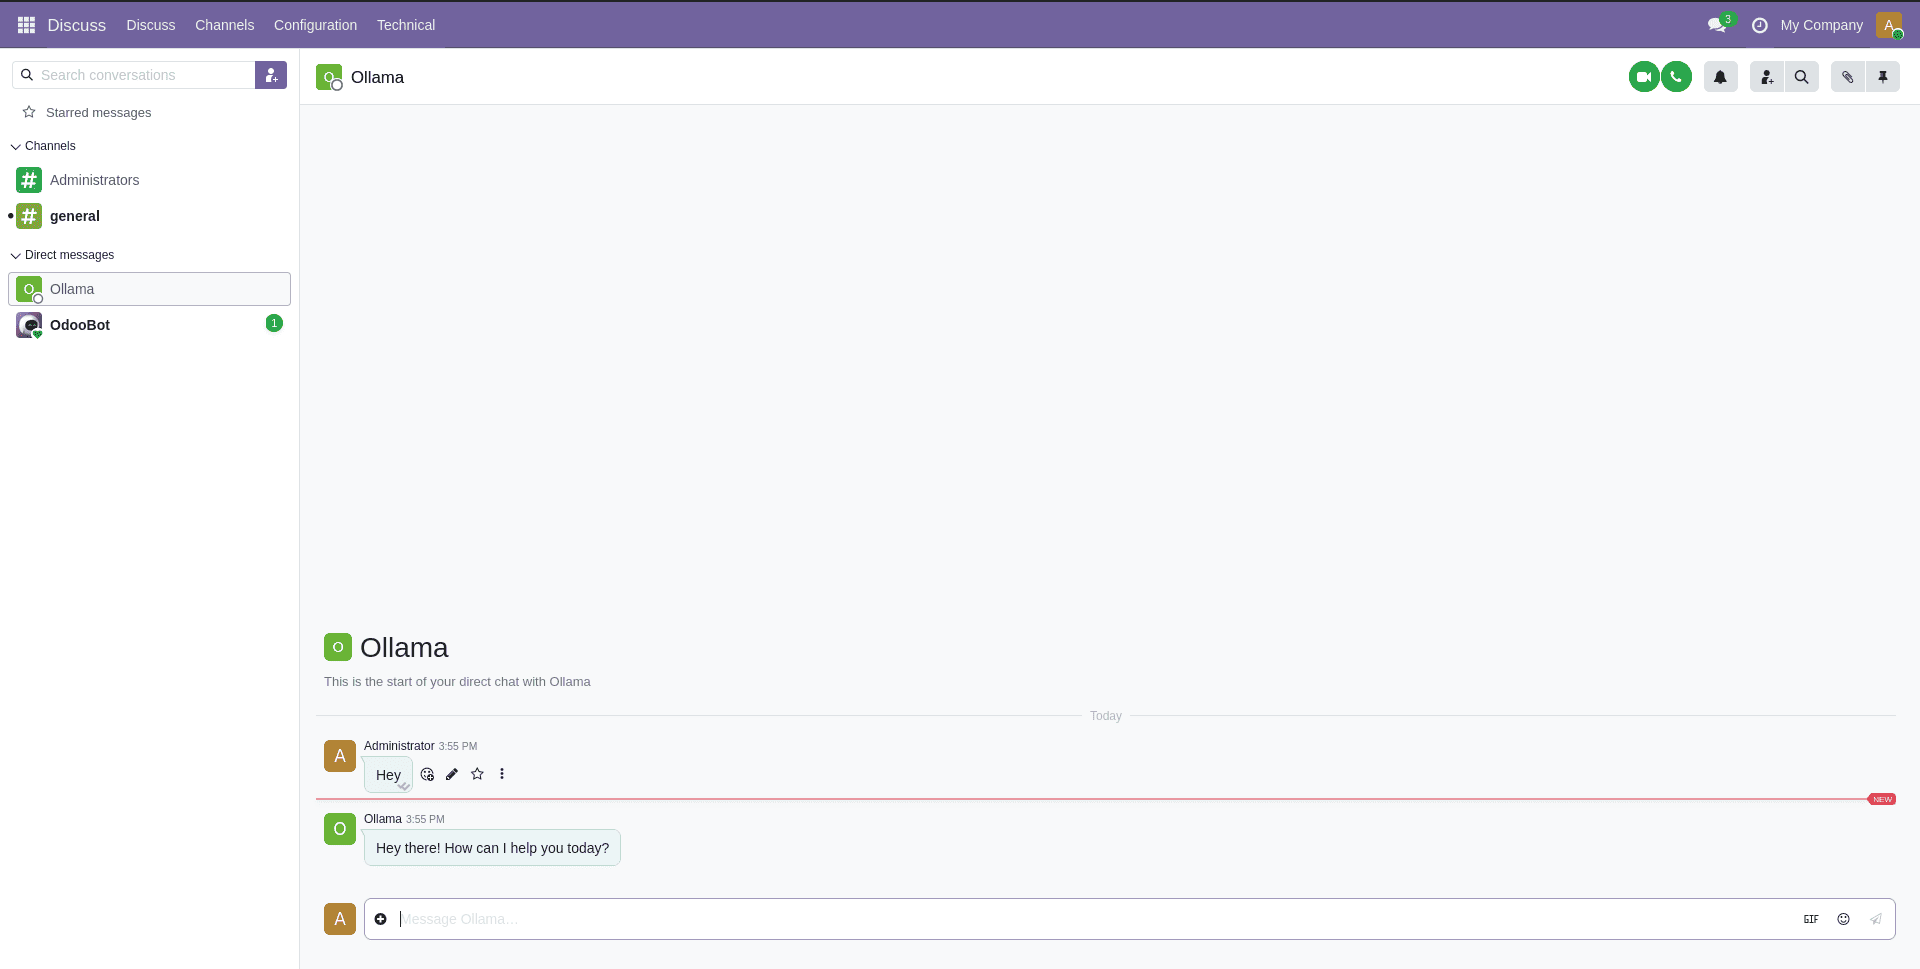
Now we can go to the Discuss module and search for the AI agent we just created which is ‘ollama’ and start chatting.
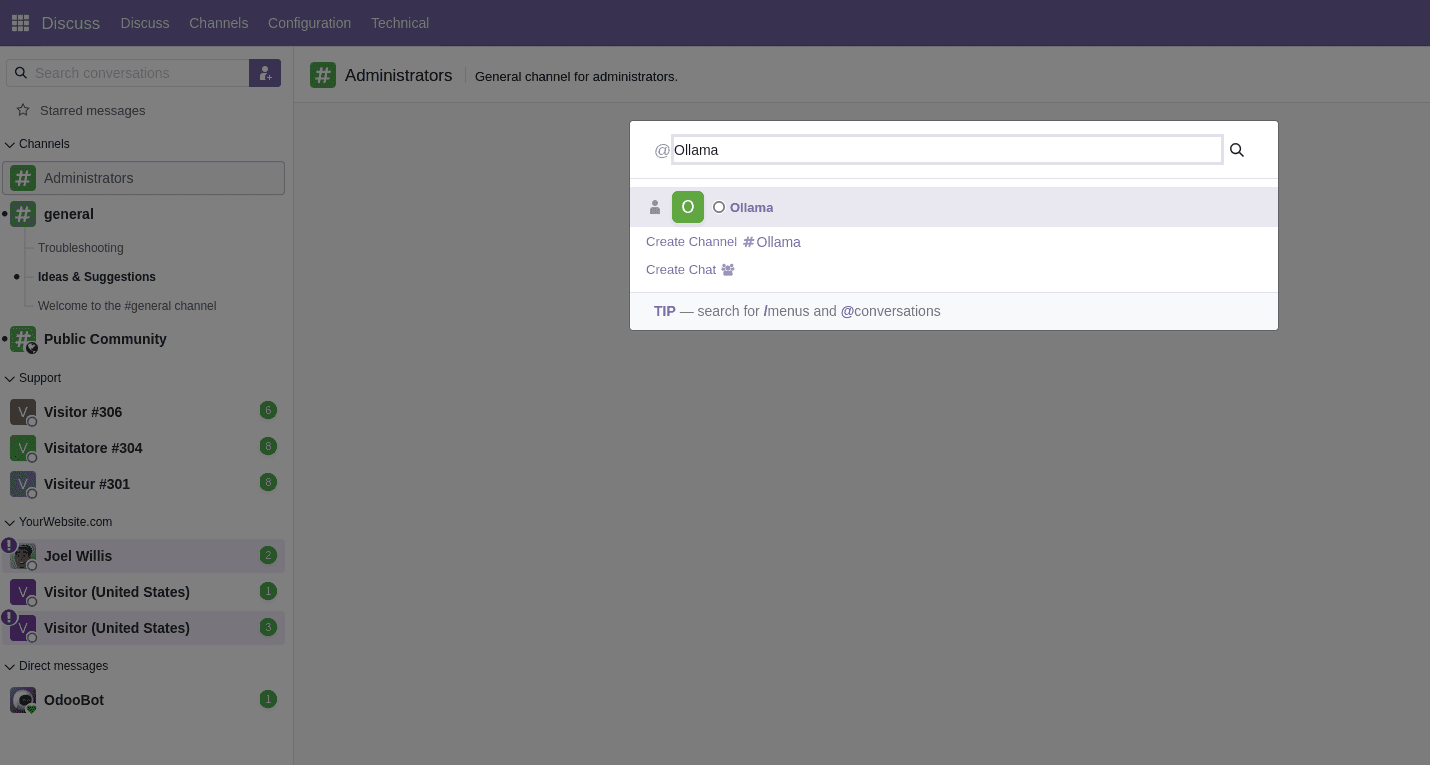
But to get an AI response back, we need to set up the N8N AI agent and endpoint first.
Setting up N8N AI Agent
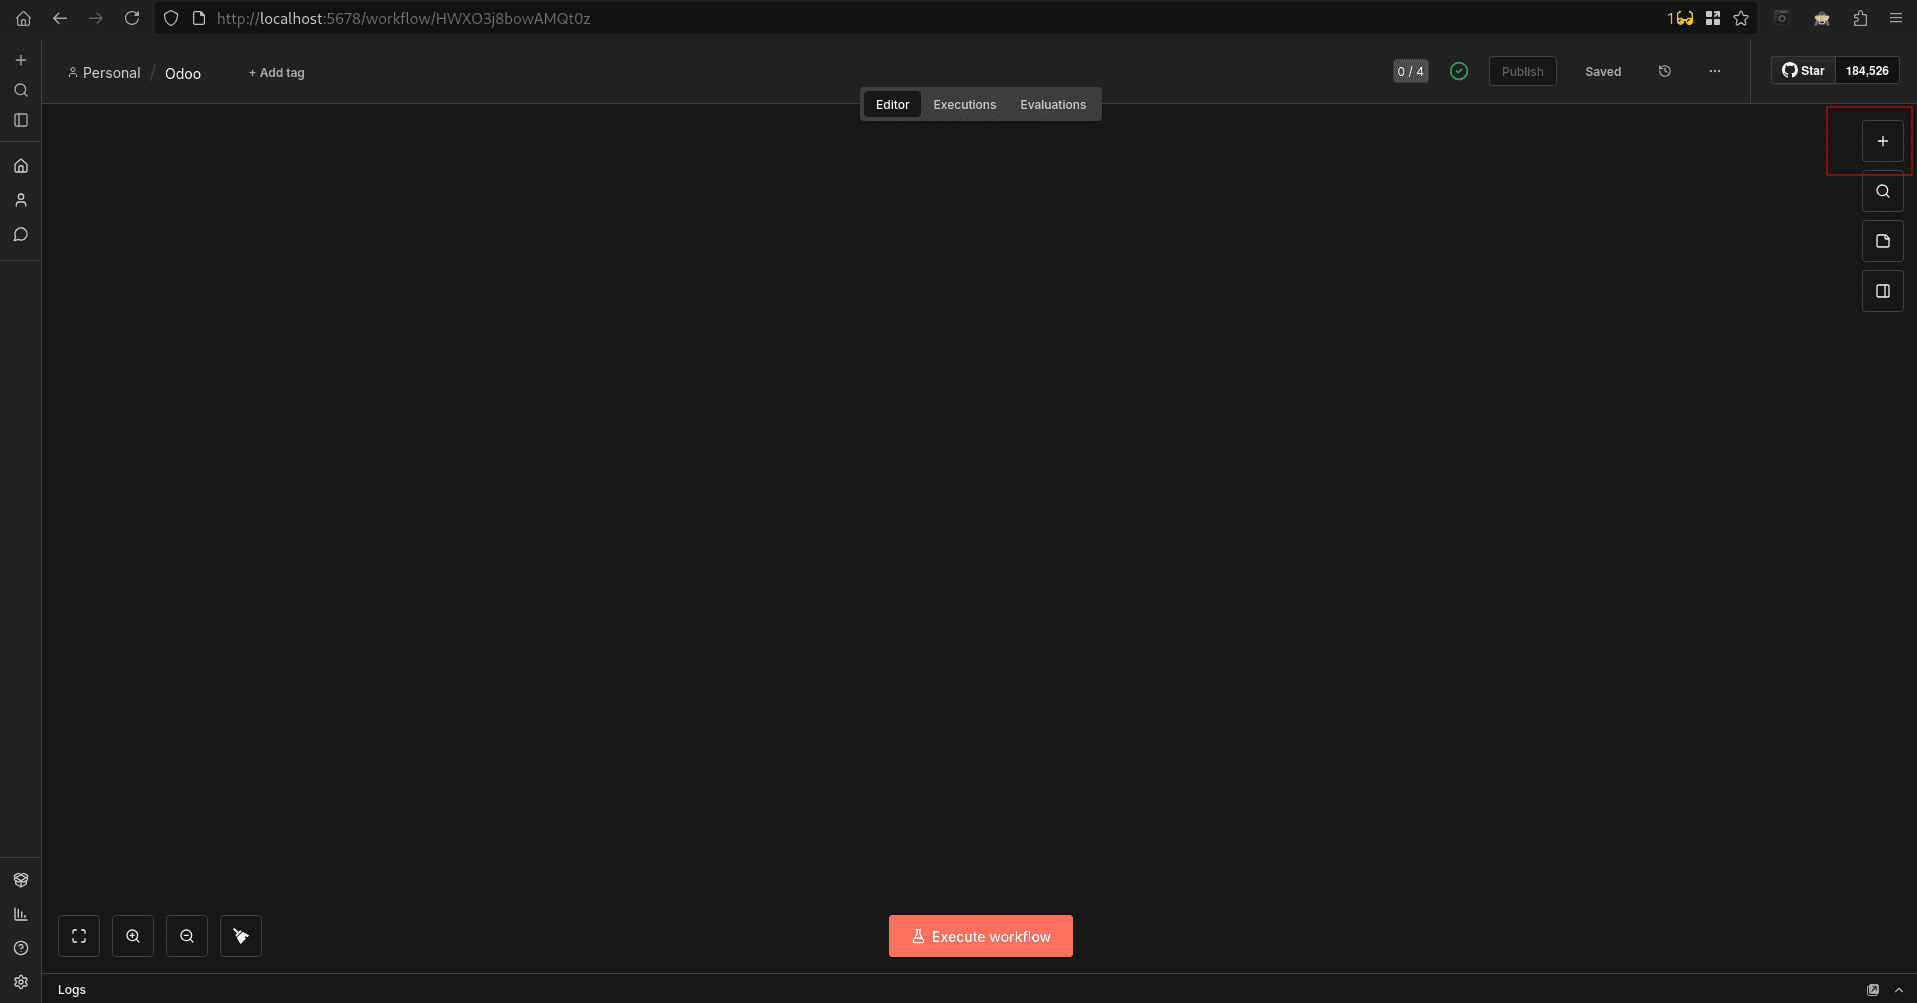
In this part, we’ll build the workflow that acts as the brain of the AI agent receiving messages from Odoo, passing them to an AI model, maintaining conversation context, and returning a response that feels natural and continuous. You can add n8n nodes, as shown below.
You can add the nodes shown below by clicking the ‘+’ button on the right side
Now you can search for the nodes shown below, drag and drop, and make a structure like the one shown below.
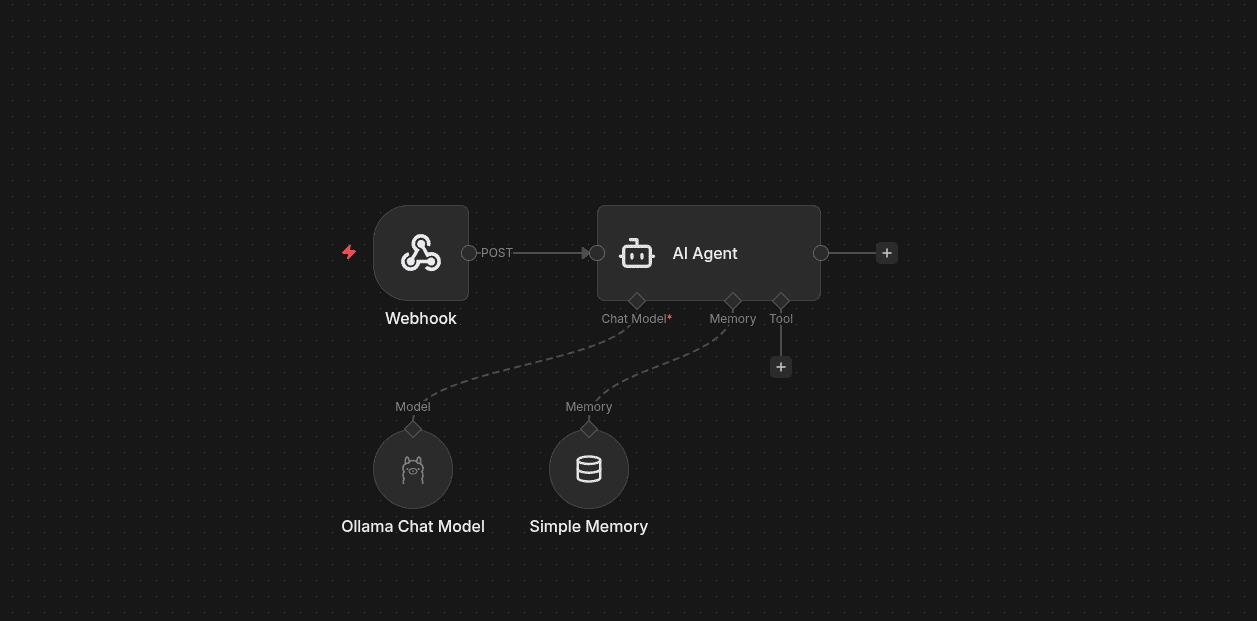
- A Webhook receives messages from Odoo Discuss
- An AI Agent node orchestrates the conversation
- A Chat Model (via Ollama) generates responses
- A Memory node keeps track of the conversation history
All of this happens synchronously, so replies feel instant inside Odoo. Next we can check each node separately. Now let’s check the configurations of each node in the workflow.
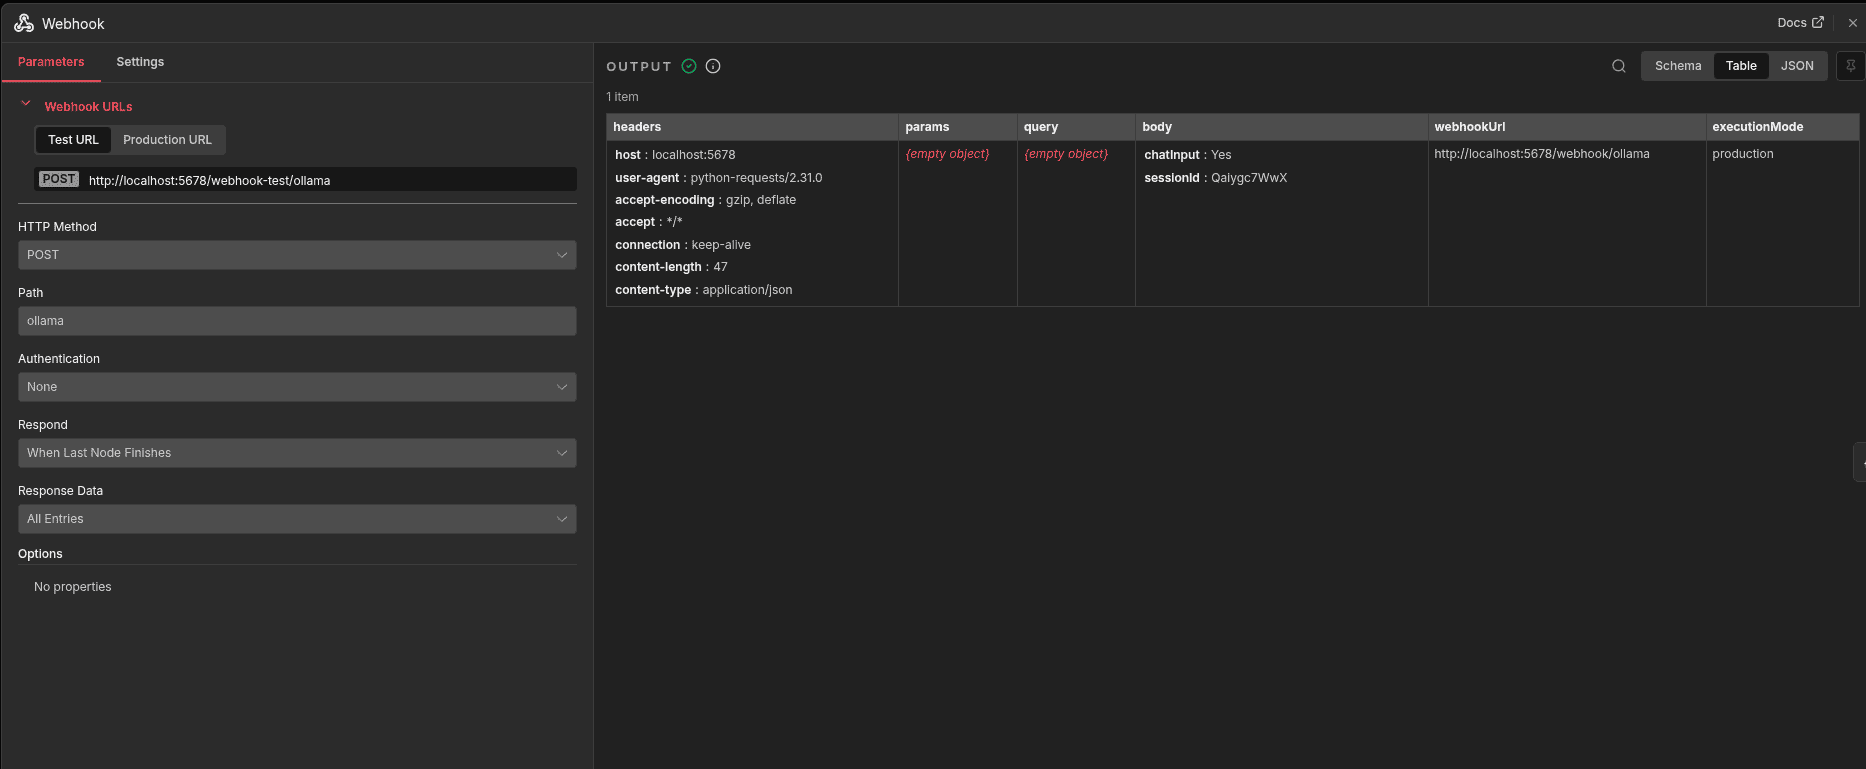
The Webhook node starts the workflow by receiving messages from Odoo Discuss. Each message, sent with a session ID, triggers the workflow so the AI agent can process the request and respond in real time.
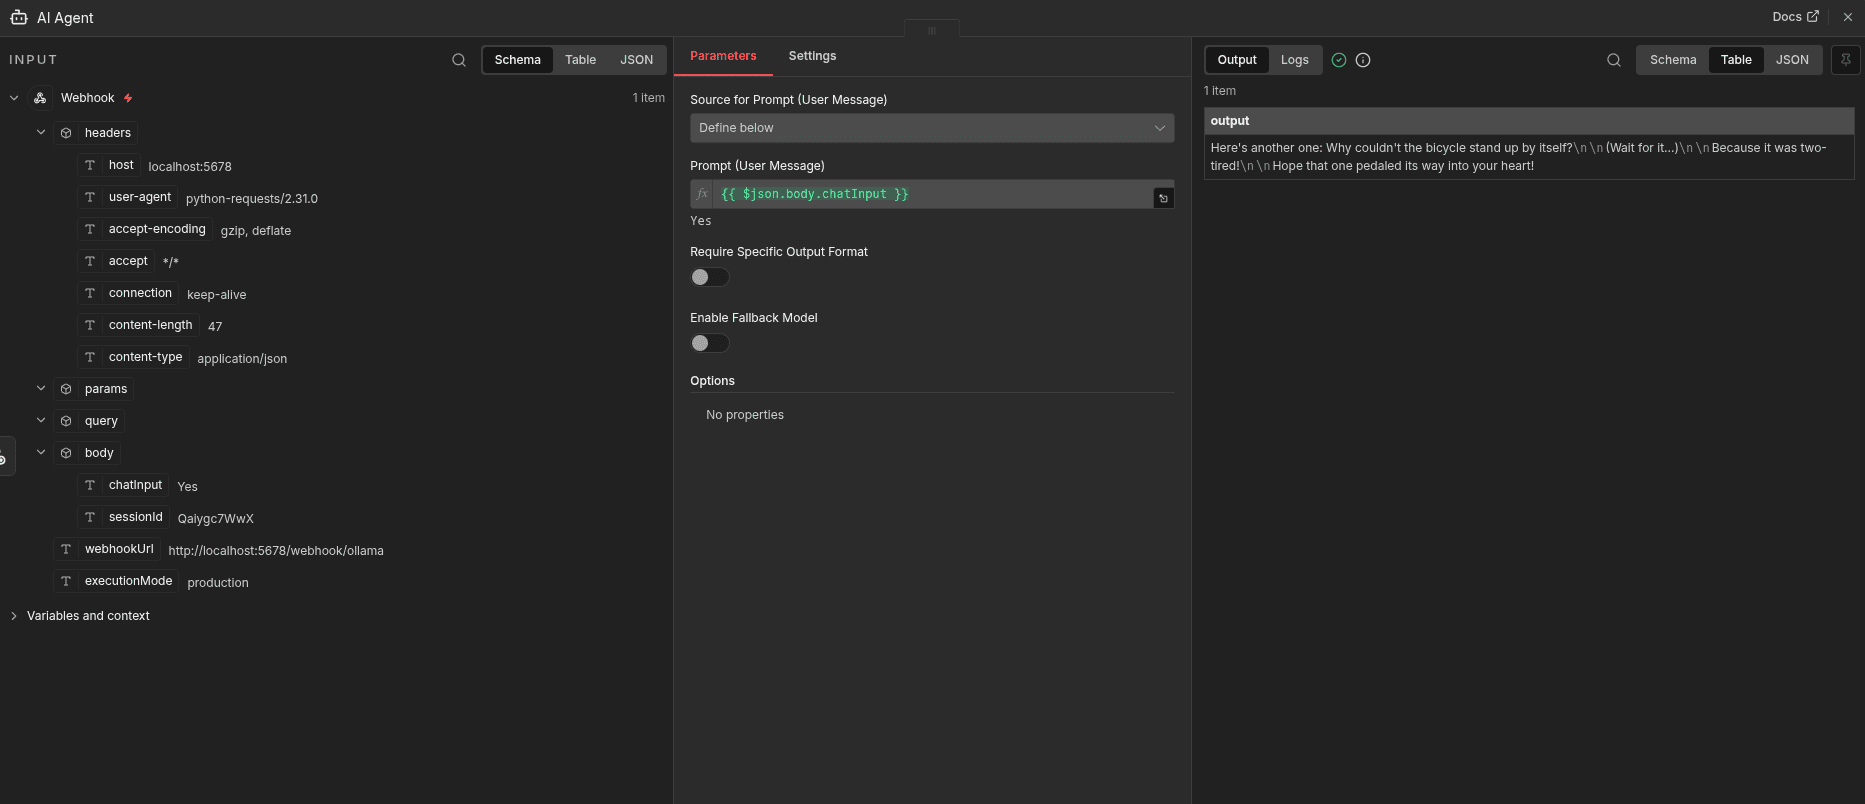
The AI Agent node is the brain of the workflow. It processes the user’s message, applies context and instructions, and generates an intelligent reply before sending it back to Odoo.
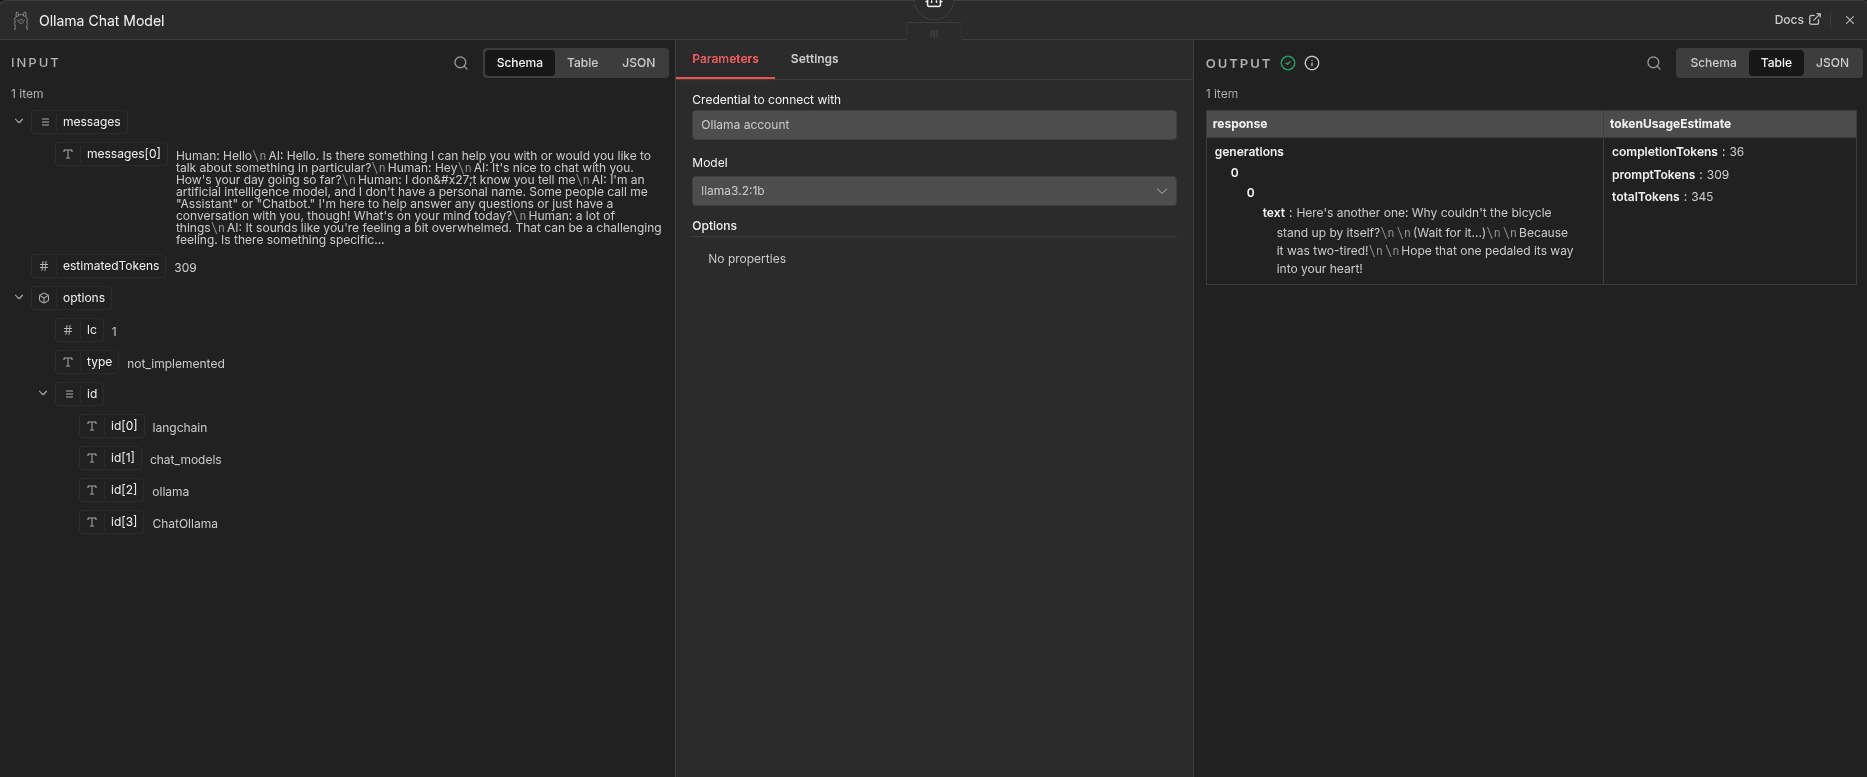
The Ollama Chat Model node generates the AI reply. It sends the conversation to a local Ollama model, which produces a natural language response and returns it to the workflow, keeping everything self-hosted.
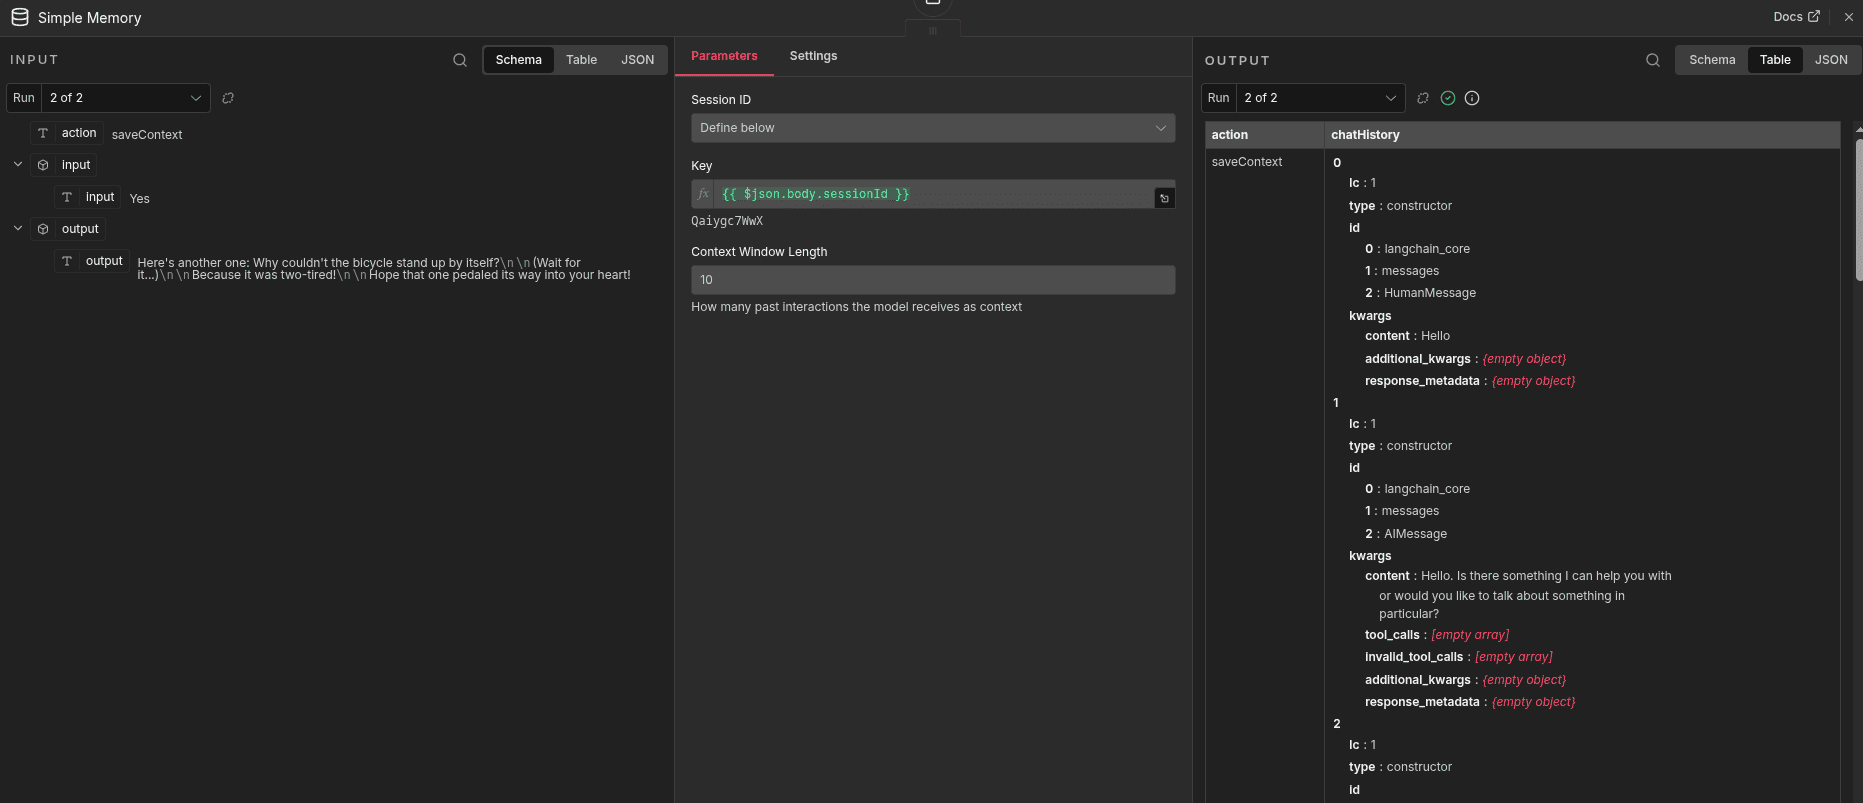
The Simple Memory node stores chat history using the session ID, allowing the chatbot to remember past messages and respond with proper context in ongoing conversations.
Now you can create a new chat with the newly created chatbot Ollama in the discuss module, and the model connected will message you there directly.
This guide demonstrated how to bring AI capabilities into Odoo Community Edition by building a native chatbot inside the Discuss module using n8n as the orchestration layer.
To read more about How to Integrate Odoo with n8n for Smart Business Automation, refer to our blog How to Integrate Odoo with n8n for Smart Business Automation.