Managing clients, whether they are individuals or businesses, is made simple by Odoo 19's Point of Sale (PoS). The PoS page allows you to add new clients immediately, and all of the data is automatically saved and synchronized with the backend.
Customer Configuration
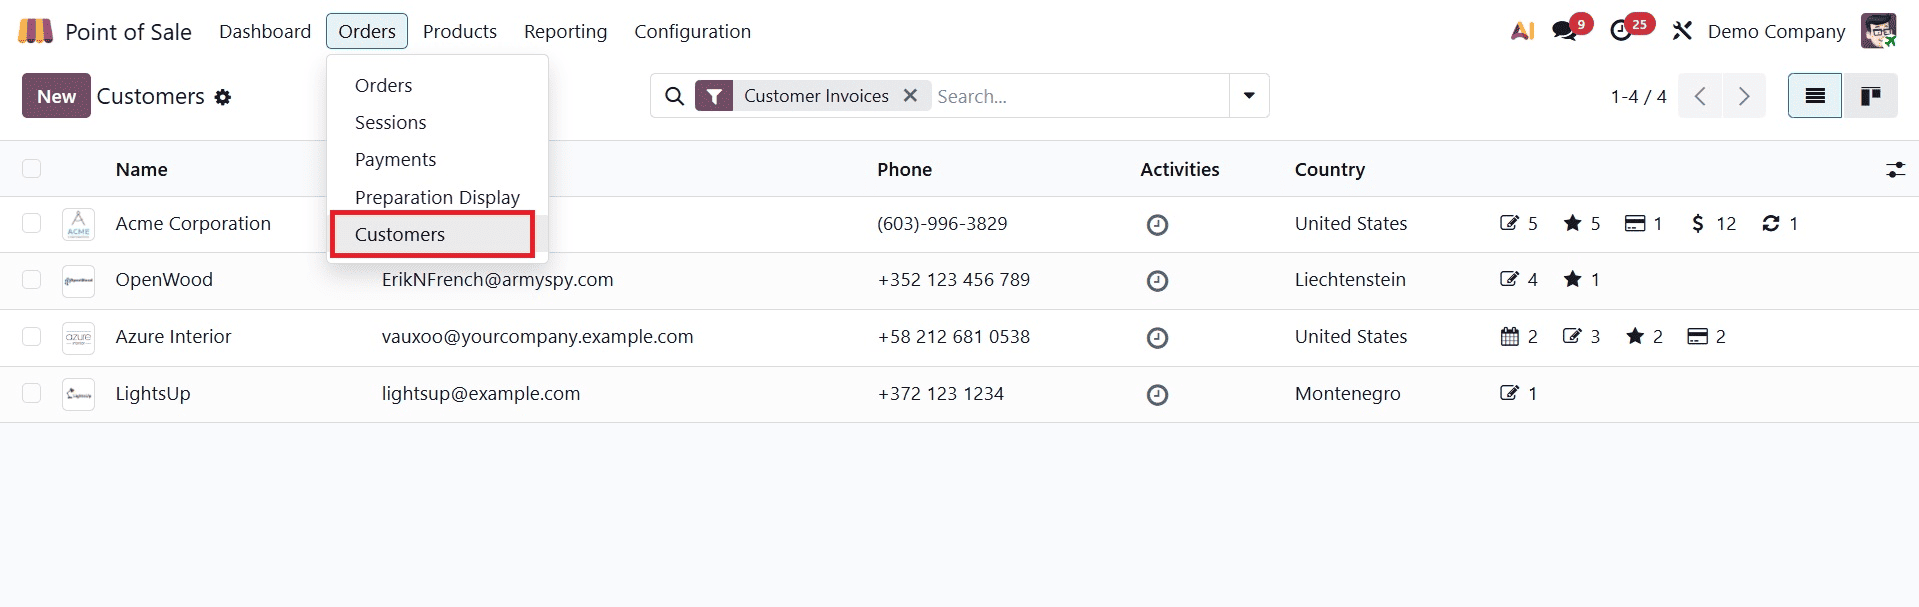
In order to create a new customer or view the existing customer’s details, you have got the customers option under the Orders menu, as shown below.
Select the New option to create a new customer, and on the page, you can provide the details like pertinent customer information, including Name, Company Name, Contact Information, Job Position, Email Address, Website, and any applicable Tags, after first choosing whether the customer is a Person or a Company. For convenience, the address information of an existing customer will appear automatically.

After entering the basic data, proceed to complete the remaining fields on each of the accessible tabs.
Contacts and Addresses
A customer may occasionally need more than one address, such as different locations for home and office use or for billing and delivery. You can link several addresses to a single customer profile according to their particular requirements by adding these extra addresses in the "Contacts & Addresses" section of the customer form.

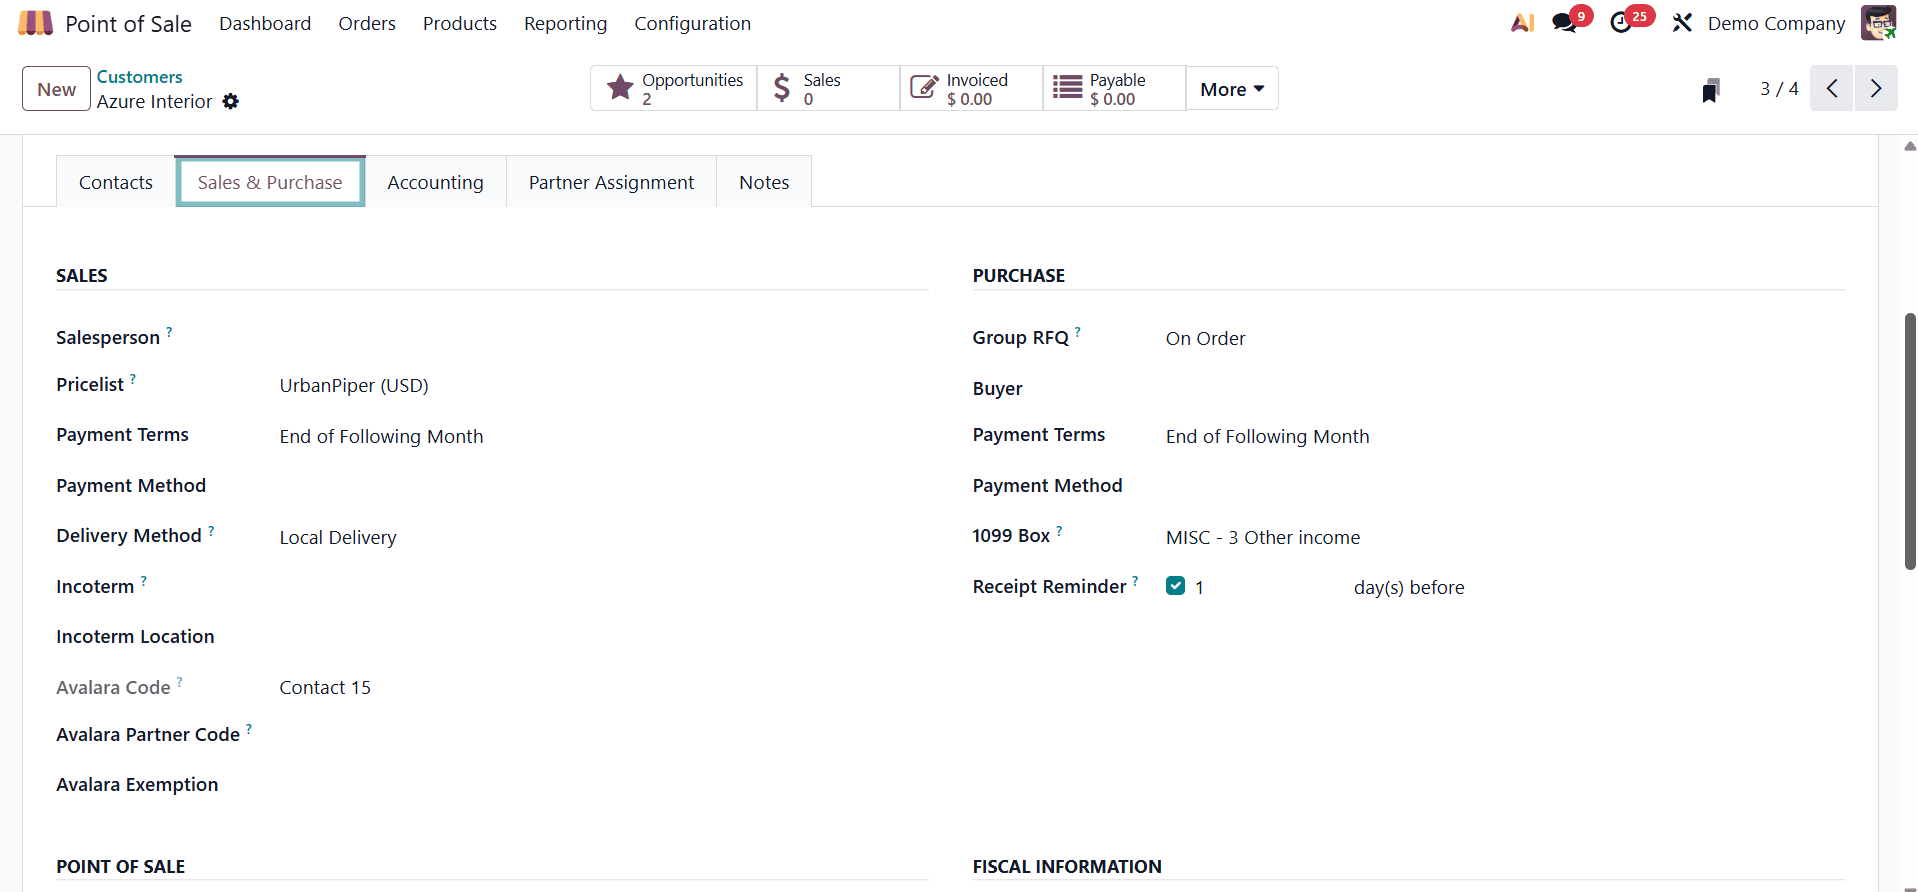
Sales and Purchase
Key transactional and logistical preferences for a client, such as payment options, delivery methods, PoS identifiers, and tax setups, can be entered on this tab. The tab is separated into multiple sections:
- Sales: You can set up the customer's sales-related parameters here. For sales orders, designate a salesperson, establish payment terms, choose an appropriate price list, specify the Avalara tax code, and select the preferred delivery method.
- Purchase: This area makes it possible to configure customer purchases, especially in a business-to-business setting. Choose a buyer, specify the payment method, select the terms of payment, and activate receipt reminders.
- Point of Sale: To expedite identification in point-of-sale transactions, you can link a barcode to the consumer.
- Fiscal Information: Determine the customer's fiscal position, which aids in applying the appropriate tax mapping guidelines according to their tax structure or location.
- Miscellaneous: Additional company identifiers and references, such as Company ID, Citizen ID, Reference, Website, or any other helpful internal or external data points, can be entered in this section.
- Inventory: When delivering or receiving items to the contact, utilize this area to add stock locations that are used as source and destination locations.
Accounting Tab
You can set up a customer's or vendor's unique financial and invoicing parameters on the Accounting tab of the Odoo 19 contact form. The system's handling of transactions, accounting entries, and invoice follow-ups for the chosen contact is influenced by these variables.
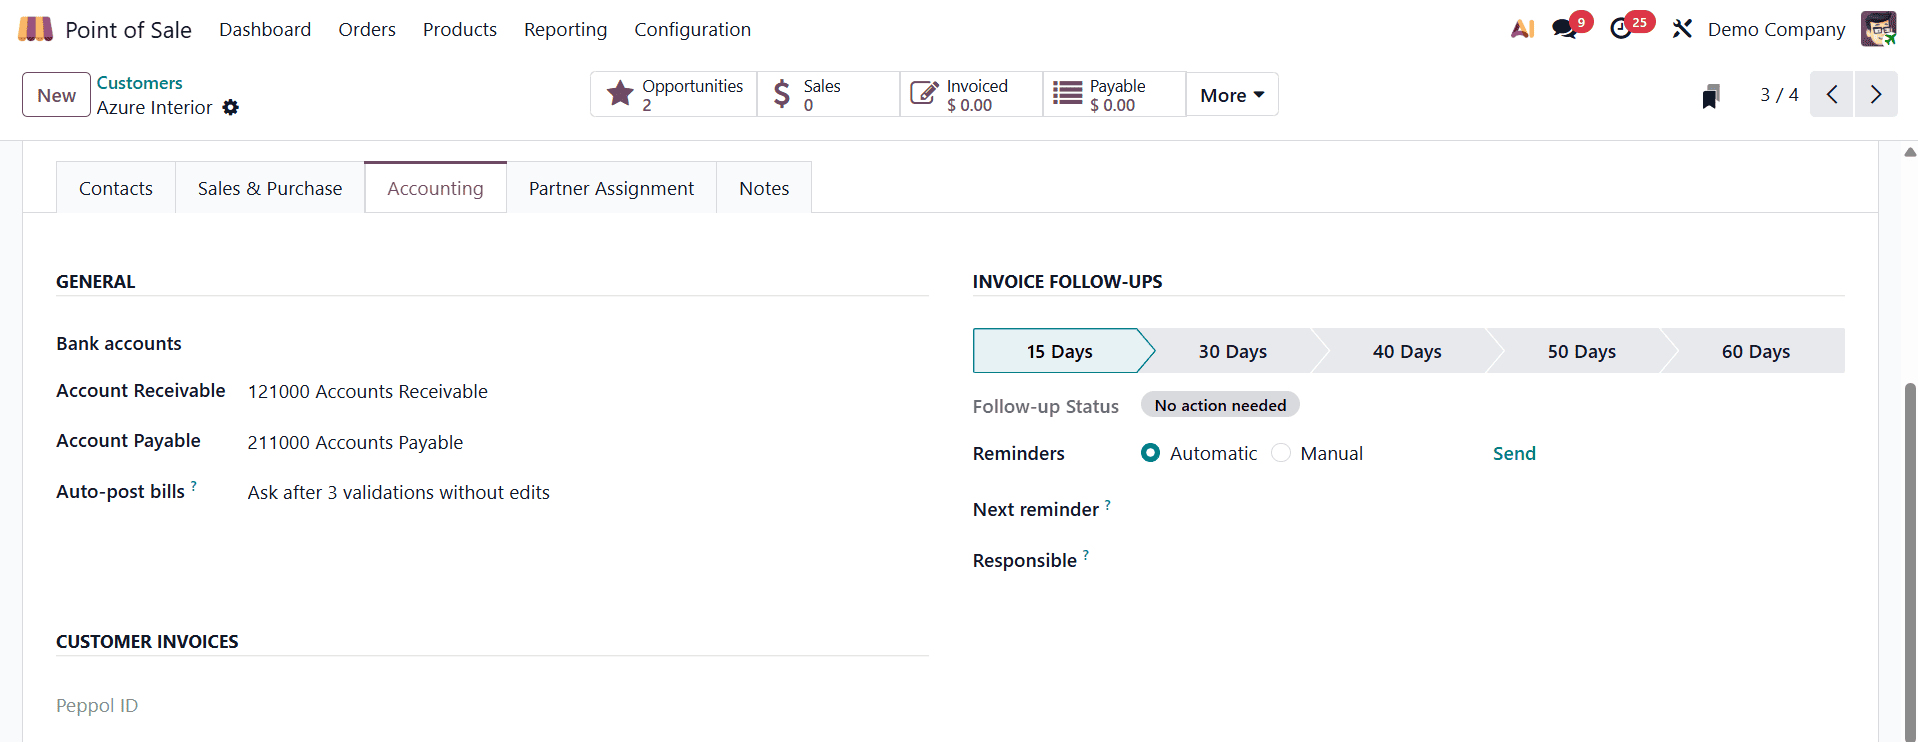
- Banks: Enables you to connect a customer to one or more bank accounts for wire transfers or payment processing.
- Account Receivable: Indicates the account that is used to monitor receivables, or money that a customer owes.
- Account Payable: Indicates the account used for payables (money you owe them) if this contact is also a supplier.
- Auto-post bills: Vendor bill validation can be automated with the Auto-post bills option. There are three primary ways to set up this feature:
- Always: When a vendor bill is created, the system will automatically post (verify) it right away.
- Ask after three validations without edits: Odoo will automatically post the bill for the first three consecutive bills after three validations without modifications. The system will request consent after three successful automatic postings without manual adjustments, allowing you to modify the behavior.
- Never: The bills will be generated in "Draft" status, necessitating user authentication and publication. Ignore Abnormal Invoice Amount: This selection allows you to disregard automated checks for invoice amounts that greatly differ from what is expected.
- Ignore Abnormal Invoice Date: Ignores alerts for invoices (such as backdated invoices) whose dates deviate from anticipated deadlines.
Customer Invoices Section
This section, which is particularly pertinent to businesses that employ electronic invoicing systems, focuses on how the client receives bills.
- Peppol ID: This parameter contains the customer's endpoint identifier and is used for issuing invoices via the PEPPOL network. This guarantees adherence to e-invoicing laws in numerous nations.
Section for Invoice Follow-Ups
Maintaining the health of your receivables and handling past-due payments depend on this area.
- Follow-up Status: Displays the customer's current payment status of invoice
- Reminders: This feature lets you select between manual and automatic reminders for delinquent bills. Odoo will adhere to a pre-established reminder schedule when it is set to automatic.
- Send: If needed, a button to email the consumer a follow-up reminder right away.
- Next Reminder: Depending on the payment follow-up guidelines, it shows the date that the next reminder will be delivered.
- Responsible: Assigns the task of monitoring and handling this customer's past-due invoices to an internal user (such as a sales representative or accountant).
Creation of Order from POS
Clicking the "Customer" button allows you to choose the right customer when starting an order from the POS terminal. This causes a popup to appear with a list of current clients. You can then choose a customer from the list or click the "Create" option to create a new one.
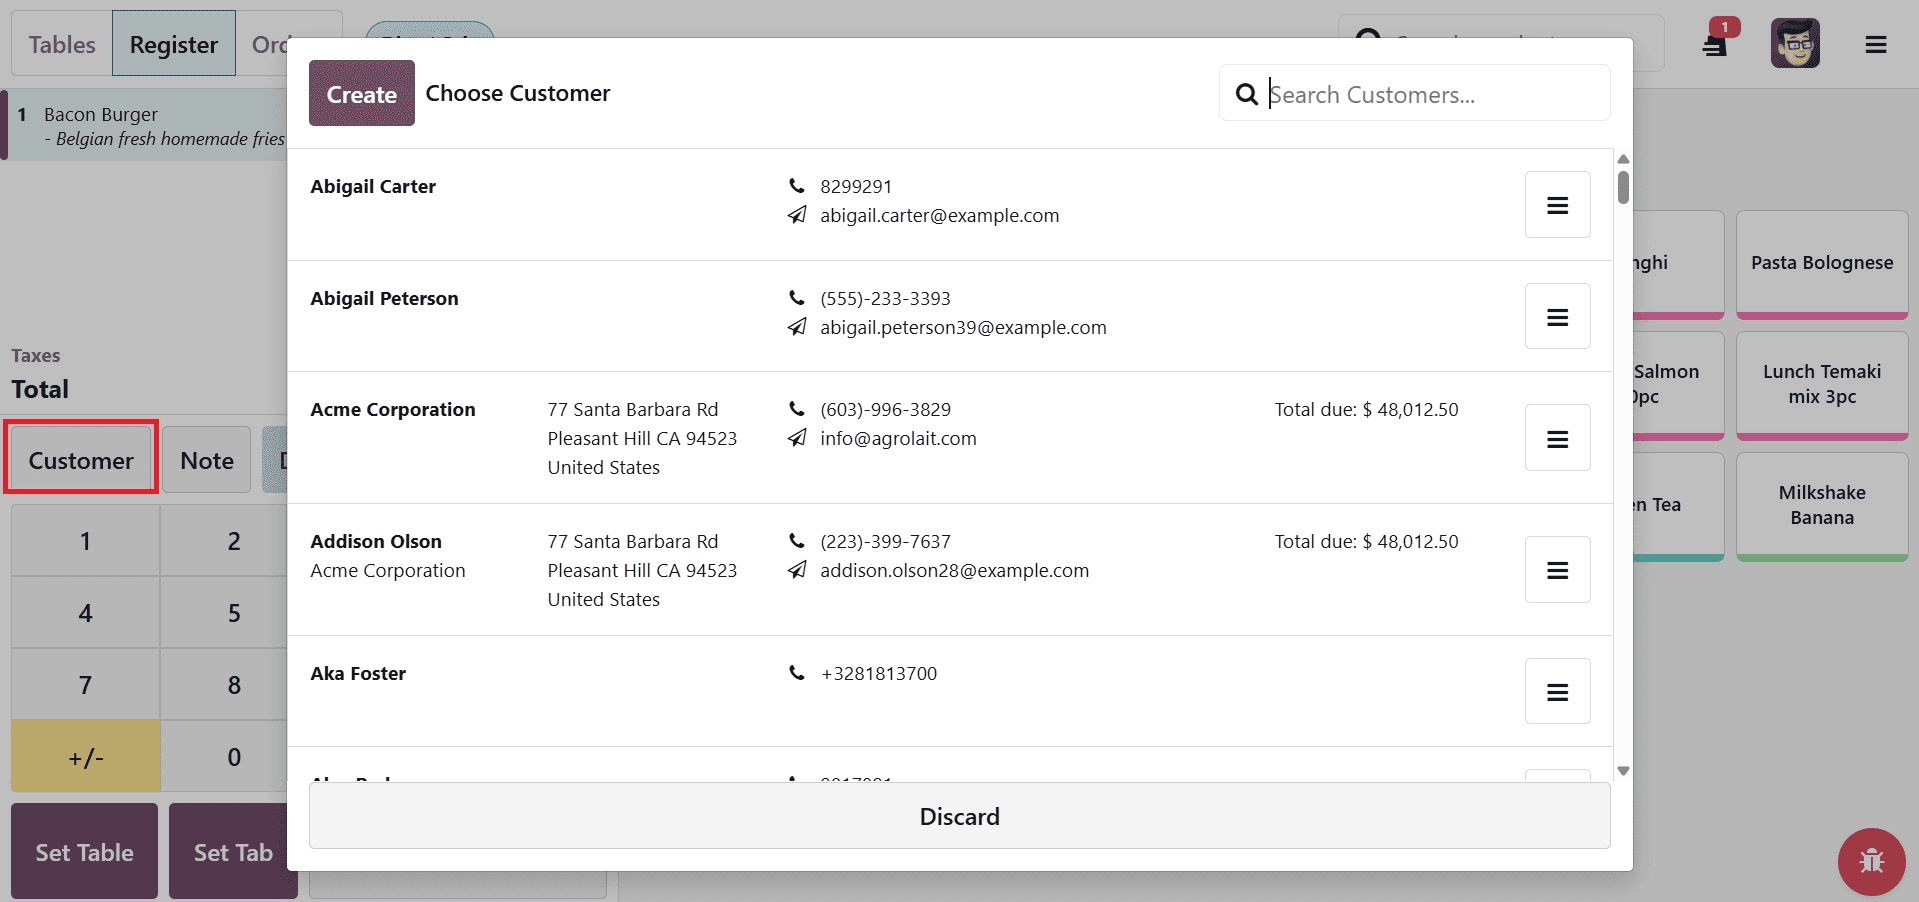
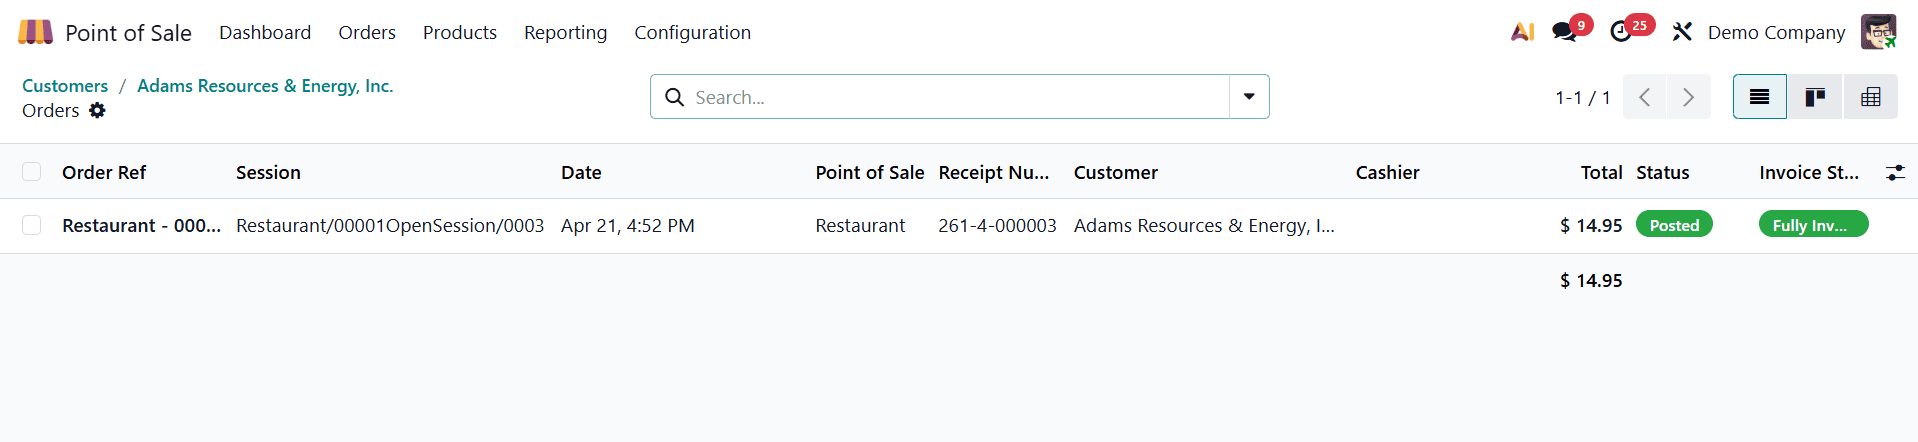
The customer will be connected to the POS order after being chosen. Afterwards, you can simply keep track of every order linked to that customer by going to their contact profile. There is a smart tab called "POS Orders" will show you their whole transaction history.
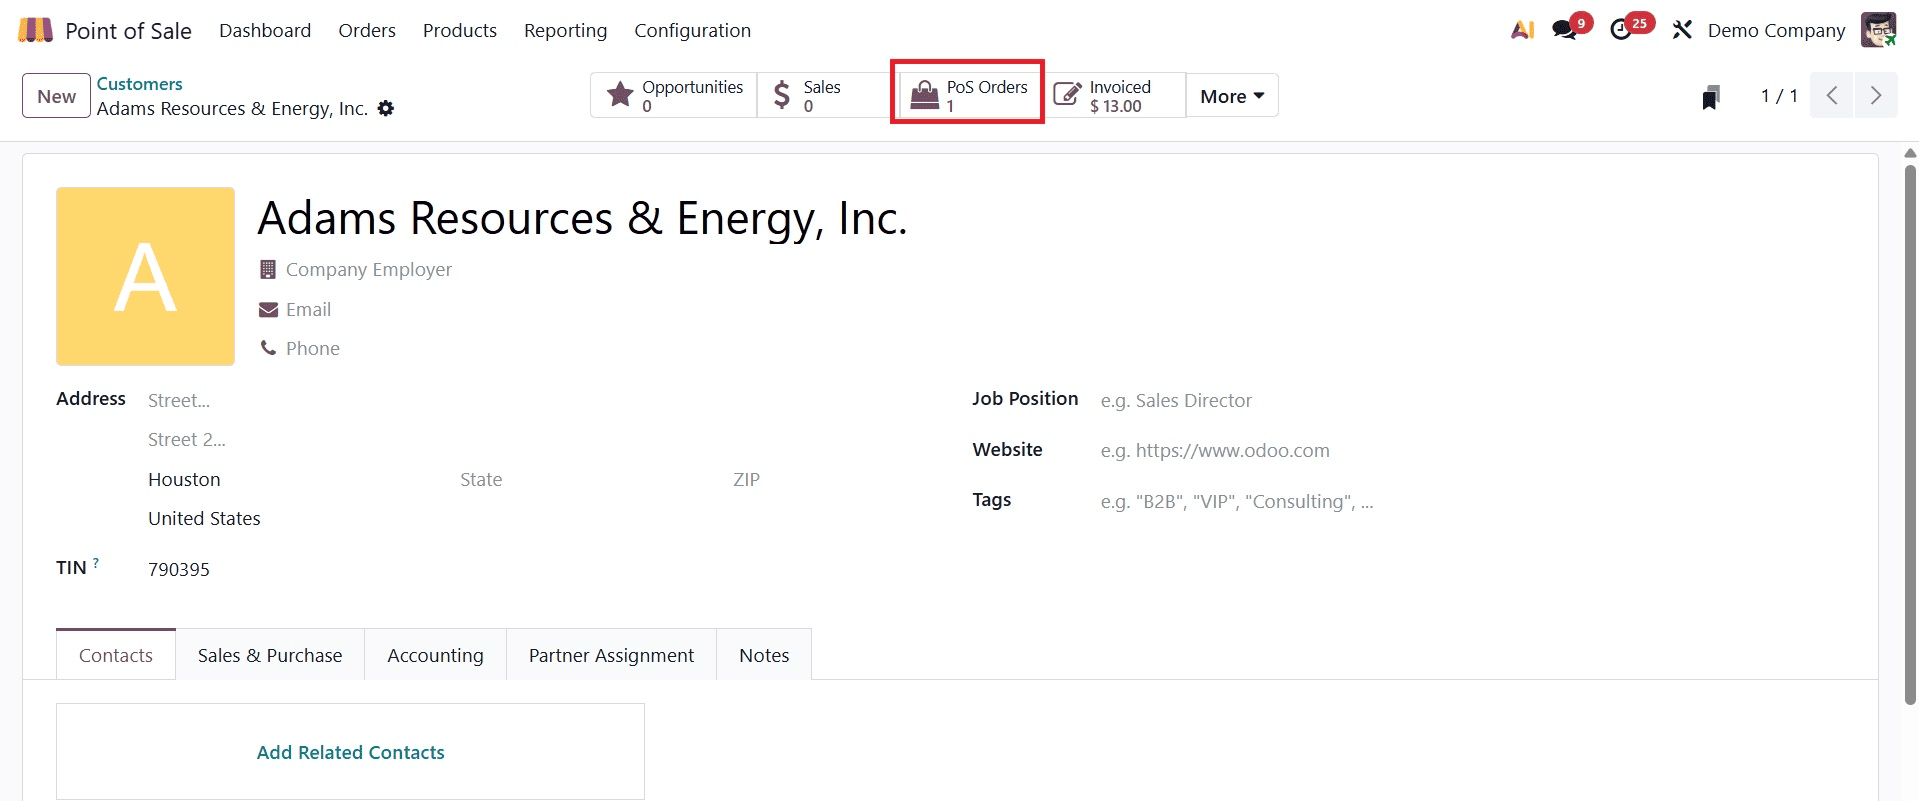
On selecting the POS smart button, you will get the detailed view of the page, as shown in the screenshot below.
To put it briefly, Odoo 19's Point of Sale simplifies client management by centralizing all of their information, including contact details, sales, payment, and invoicing choices. The POS allows you to add new clients immediately, link them to orders, create numerous addresses, and monitor their complete transaction history. Businesses may operate more quickly, maintain organization, and offer their clients better, more individualized service thanks to this smooth connection between the POS and backend.
To read more about How to Manage and Create Odoo 18 Point of Sale Customers, refer to our blog How to Manage and Create Odoo 18 Point of Sale Customers.