Modern business operations rely on efficiency, often achieved by automating repetitive, time-based tasks. In Odoo 19, this automation is powered by Scheduled Actions (also known as Cron Jobs), which execute predefined operations in the background without any manual intervention. This functionality is indispensable for maintaining data consistency, generating periodic reports, sending notifications, and much more.
This guide will walk you through the concepts and implementation of scheduled actions in Odoo 19, providing a clear path to automating your business processes.
The Scheduled Actions Menu
Odoo provides a centralized interface to manage all automated tasks. You can access this from:
Settings > Technical > Scheduled Actions
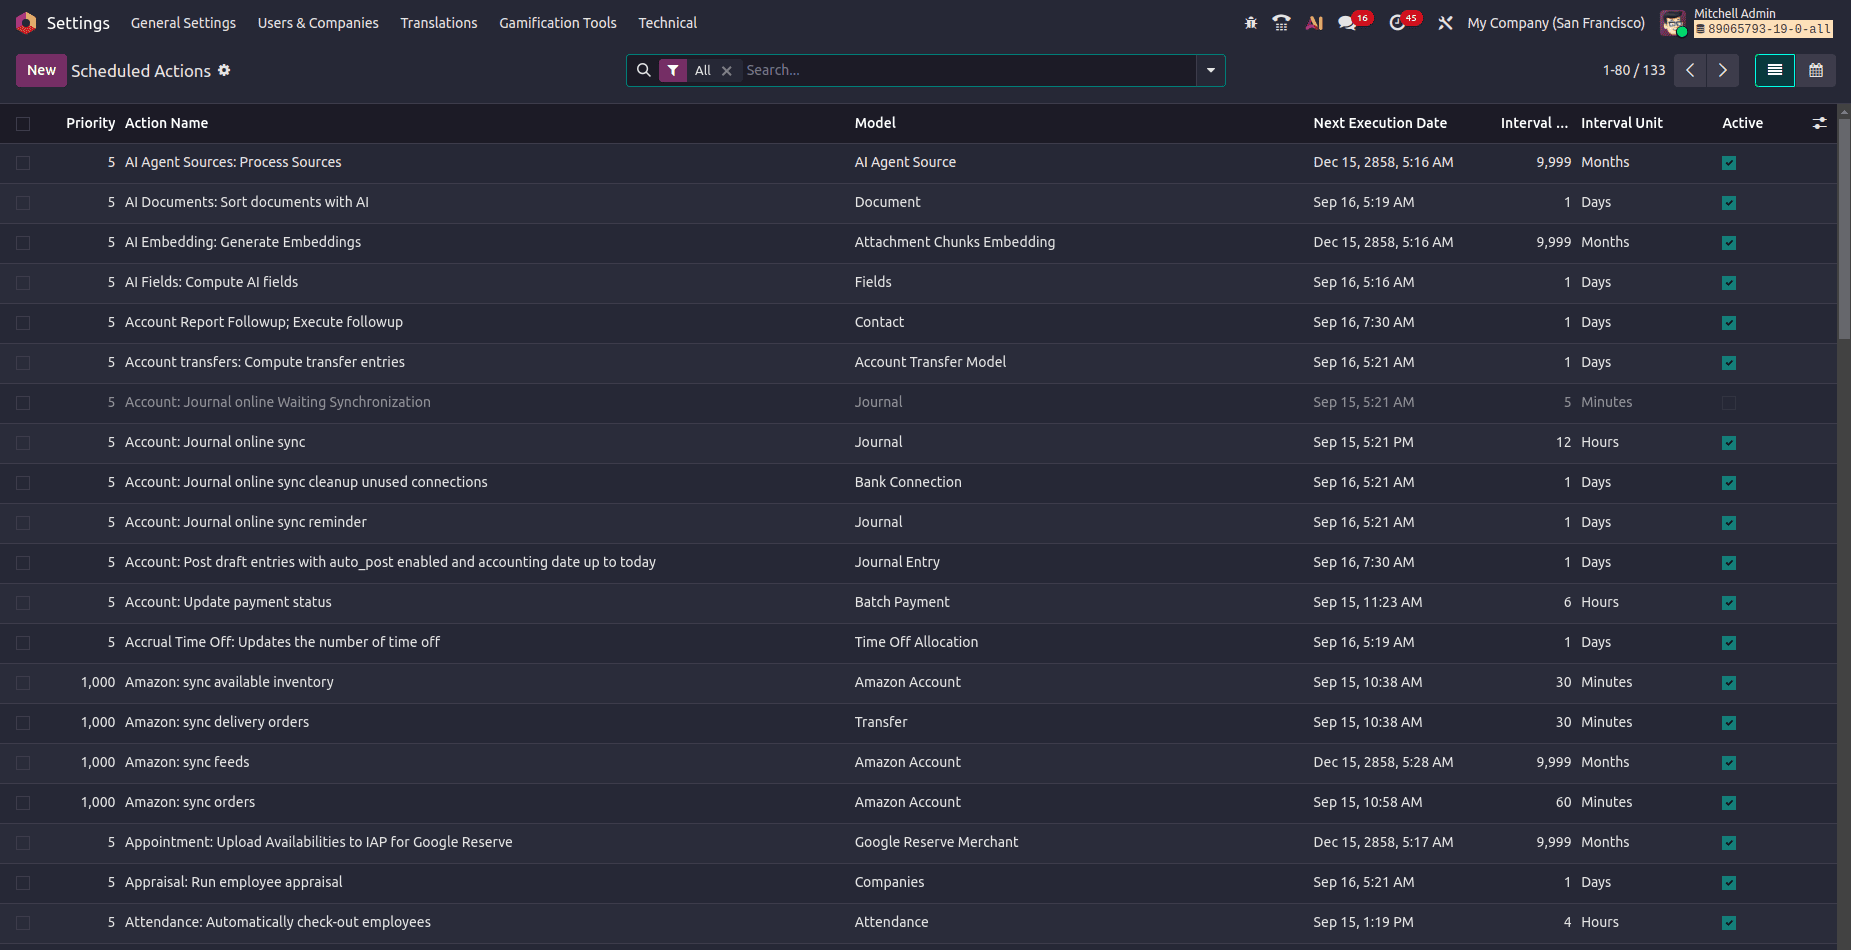
This menu presents a list view of all existing cron jobs, detailing crucial information such as:
- Action Name: The descriptive label for the task.
- Model: The Odoo model on which the action operates.
- Next Run: The scheduled date and time for the next execution.
- Interval: The frequency of the task (e.g., every 5 minutes, 1 day).
- Active: A toggle to enable or disable the task.
From here, you can create new actions manually using the New button, which opens a form to configure all necessary details, including the Python code to be executed.
Defining Cron Jobs via XML
While the UI is user-friendly, the most powerful and maintainable method for developers is to define scheduled actions within a module's code. This ensures the automation is deployed and version-controlled alongside your custom features.
To do this, you create an XML file (commonly named data/ir_cron_data.xml) in your module. Here’s a breakdown of a typical cron job definition:
<?xml version="1.0" encoding="UTF-8"?>
<odoo>
    <data noupdate="1">
        <record id="cron_send_daily_reminder" model="ir.cron">
            <field name="name">Daily Customer Follow-up</field>
            <field name="model_id" ref="model_res_partner"/>
            <field name="state">code</field>
            <field name="code">model._send_daily_followup()</field>
            <field name="user_id" ref="base.user_root"/>
            <field name="interval_number">1</field>
            <field name="interval_type">days</field>
            <field name="nextcall" eval="(DateTime.now() + timedelta(days=1)).strftime('%Y-%m-%d 09:00:00')" />
            <field name="priority">5</field>
            <field name="active">True</field>
        </record>
    </data>
</odoo>
Let's deconstruct the key attributes:
<data noupdate="1">: This crucial tag ensures the record is created only upon module installation. Subsequent module updates will not overwrite any modifications made to this cron job in the database, preserving its state.
id & model: The id provides a unique identifier for the record, while model="ir.cron" specifies that we are creating a Scheduled Action.
name: A clear, human-readable label for the action, displayed in the technical menu.
model_id: References the Odoo model the action will act upon. The ref attribute uses the model's technical ID (e.g., model_res_partner for the Partner model).
state & code: These work in tandem. state="code" tells Odoo to execute a Python method. The code attribute contains the actual method call: model._send_daily_followup(). Here, model represents the target model, and _send_daily_followup() is the custom method to run.
user_id: Specifies the user context under which the code executes. base.user_root (the superuser) is typically used to avoid permission issues.
interval_number & interval_type: These define the execution frequency. interval_number is a digit (e.g., 1), and interval_type can be minutes, hours, days, weeks, or months.
nextcall: Determines the precise timestamp for the first execution. The eval attribute allows for dynamic calculation using Python. The example schedules the first run for 9:00 AM the next day.
priority: A number that dictates the execution order in the queue when multiple jobs are scheduled simultaneously. Lower numbers have higher priority.
Implementing the Business Logic: The Python Method
The XML definition points to a method that must be implemented in the Python model file. This method contains the core logic of the automated task.
from odoo import models, fields, api
class ResPartner(models.Model):
    _inherit = 'res.partner'
    def _send_daily_followup(self):
        """
        Automated method to send a follow-up email to partners.
        """
        # Example: Fetch all partners who are customers
        customer_records = self.search([('customer_rank', '>', 0)])

        # Get an email template from the system
        mail_template = self.env.ref('my_module.email_template_daily_followup')

        # Send the template to each customer
        for partner in customer_records:
            mail_template.send_mail(partner.id, force_send=False)  # force_send=False queues the email
These results,
Scheduled Actions are a cornerstone of automation in Odoo 19, transforming repetitive manual tasks into reliable, background processes. By leveraging the ir.cron model through either the intuitive interface or precise code-based definitions, developers can build sophisticated automation for tasks like:
- Sending scheduled emails and notifications
- Performing nightly data clean-up or archiving
- Generating and distributing daily/weekly reports
- Updating calculated fields or statuses based on time elapsed
Mastering this feature allows businesses to create a more streamlined, efficient, and error-free operational workflow, ensuring critical tasks are never missed and employees can focus on higher-value work.
To read more about How to Configure Scheduled Actions in Odoo 18, refer to our blog How to Configure Scheduled Actions in Odoo 18