In any business environment, invoicing plays a vital role in maintaining smooth financial operations and ensuring accurate transaction tracking. It serves as a formal document that communicates the product details, quantity, price, taxes, and total amount payable to the customer. Traditionally, generating invoices after each transaction can be time-consuming and prone to manual errors, especially in high-volume or online sales scenarios where customers often complete purchases instantly through digital payment gateways.
Odoo 19 simplifies this process by introducing enhanced automatic invoicing features that allow businesses to automatically generate invoices as soon as a customer’s payment is confirmed. This automation not only accelerates the sales-to-invoice cycle but also minimizes human intervention, ensuring precision and consistency across all transactions.
With the Odoo 19 Sales module, users can easily configure automated invoicing policies to fit their business model. Once the payment is validated, whether through an online payment platform, manual confirmation, or a connected accounting system, Odoo automatically creates and validates the corresponding customer invoice. This feature is particularly useful for eCommerce businesses, subscription-based services, and companies dealing with large customer volumes, where speed and accuracy are crucial.
In this blog, we’ll explore how Odoo 19 enables users to set up and manage auto-generated invoices upon payment confirmation, ensuring efficient, transparent, and error-free billing within your ERP workflow.
Enabling Automatic Invoice Generation in Odoo 19 Sales
To streamline your invoicing workflow in Odoo 19, the first step is to enable the Automatic Invoice feature within the Sales module’s settings. This configuration ensures that an invoice is automatically generated once a customer’s online payment has been confirmed, reducing the need for manual intervention and improving efficiency across your sales operations.
Navigate to the Settings menu of the Sales application.
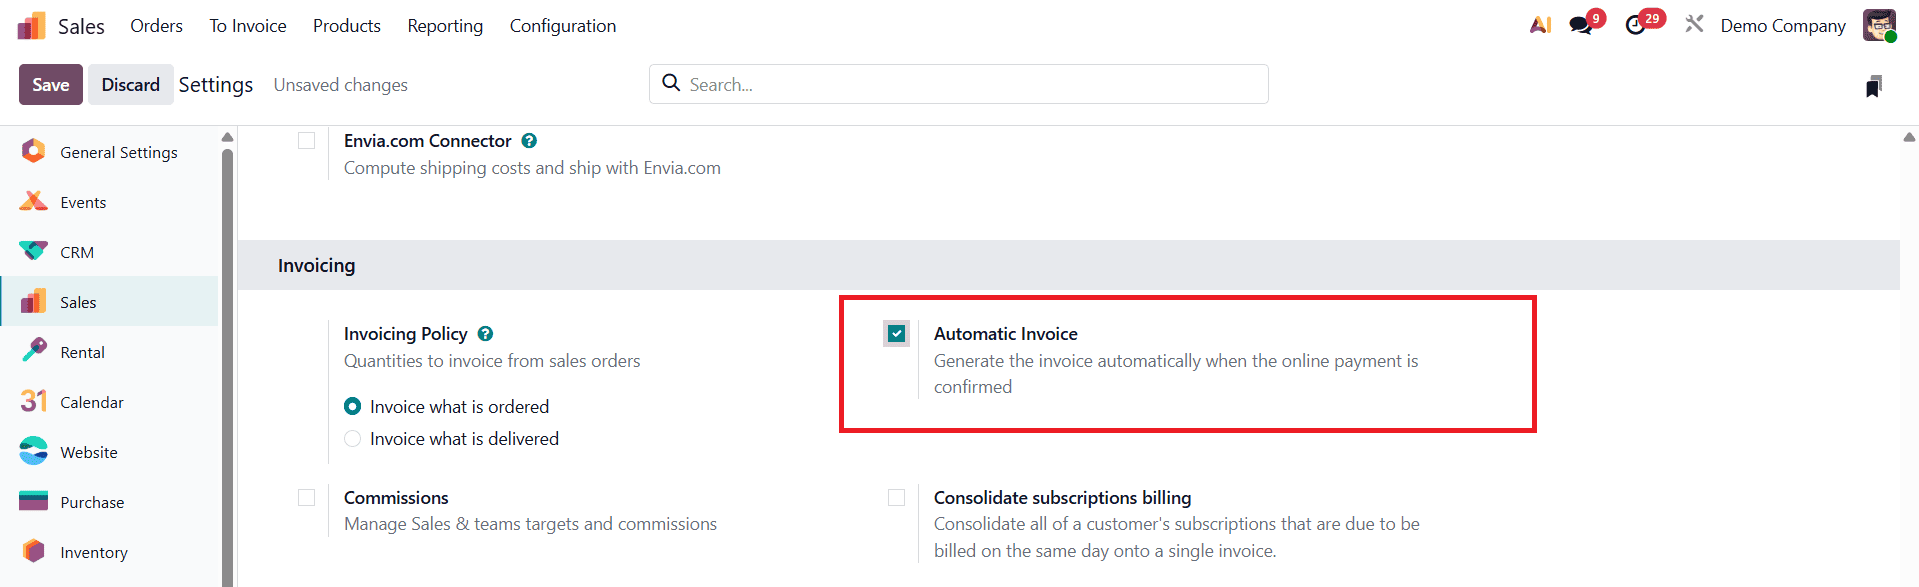
Under the Invoicing section, you will find the option labeled Automatic Invoice. Activate this feature to allow Odoo to handle invoice creation automatically upon successful payment confirmation. In addition to this, make sure that the Invoice what is ordered option is also enabled under the Invoice Policy section. This ensures that invoices are created based on the quantities ordered rather than the quantities delivered, making the process faster and more consistent for prepaid orders. Once these settings are configured, click Save to apply the changes.
Developing Automatic Invoices for a Sales Order in Odoo 19
After enabling the automatic invoicing feature in the Sales settings, the next step is to configure your products so that Odoo can generate invoices automatically based on confirmed payments. To begin, navigate to the Products menu under the Sales module. This section provides a complete overview of all existing products configured in your database. If you wish to create a new product, click the New button to open a product creation form.
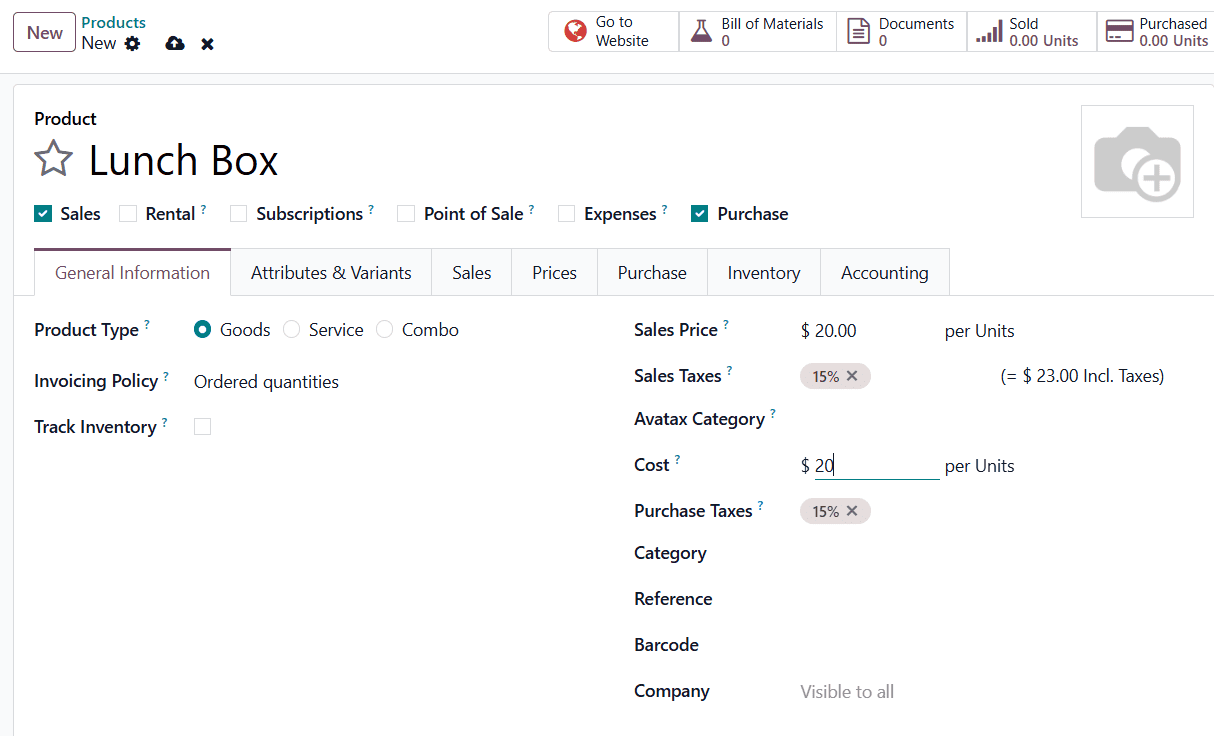
In the Product Name field, enter the appropriate title for your item. Then, under the General Information tab, you’ll find the Invoicing Policy option. Select Ordered Quantities to ensure that invoices are generated according to the quantities ordered by the customer, rather than based on delivered quantities. This policy is essential for enabling automatic invoicing after online payment confirmation. Once the product details such as price, category, and sales information have been entered, click Save to store your changes.
After setting up the product, you can also provide customers with access to the Customer Portal, allowing them to conveniently view their orders, invoices, and payment statuses online. In Odoo 19, portal users refer to external users such as customers or clients who are granted limited access to specific business information through the Customer Portal. These users can view essential details like quotations, sales orders, invoices, and payment statuses, but they cannot modify or edit any data. This controlled access ensures both transparency and data security while allowing customers to stay informed about their transactions.
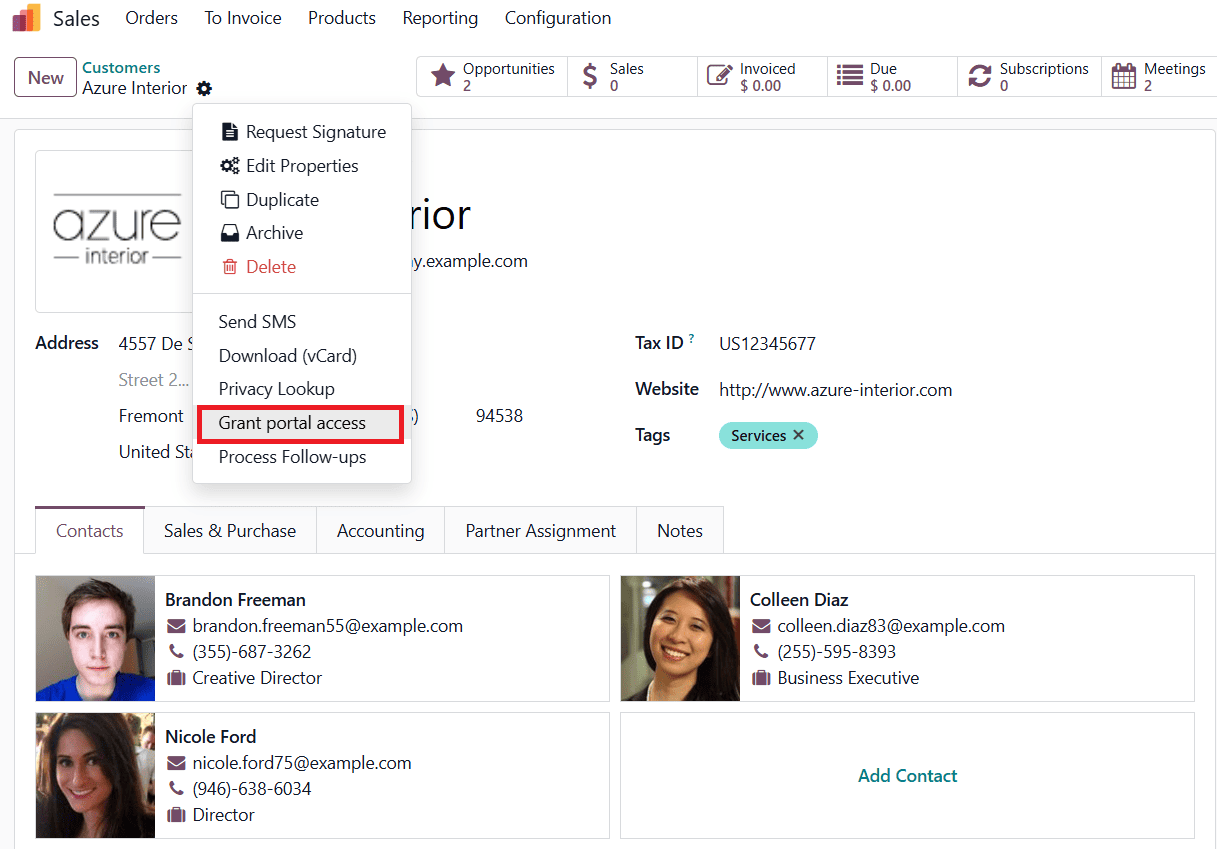
To provide portal access, open the Sales module and navigate to the Customers menu. Choose the customer record for whom you wish to grant access. From the Action menu at the top of the customer form, select Grant Portal Access.
Once selected, a pop-up wizard will appear, prompting you to enter the customer’s email address and confirm the Grant Access option.
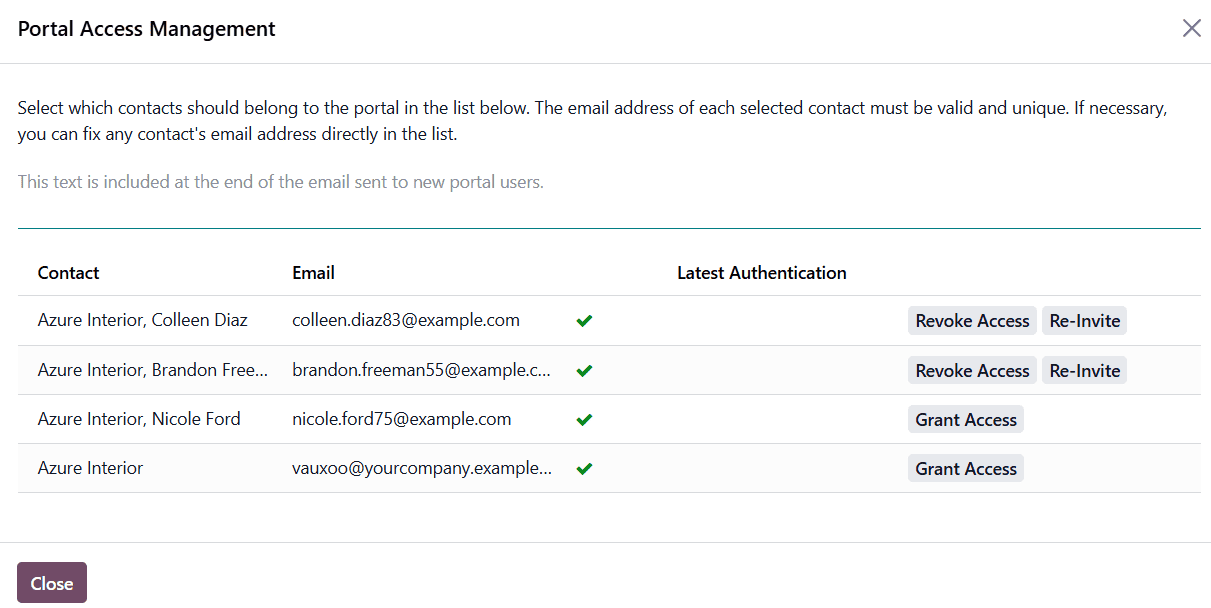
It’s important to ensure that the email entered is valid, as the system will send a login link to this address. The customer will use this link to access their portal account securely.
With portal access in place, you can now proceed to create a Quotation for the product. To do this, click the New button within the Sales Orders menu of the Sales module. This action opens a new quotation form where you can select your customer and add the desired product under the Order Lines tab. Enter the quantity of products to be sold and click Save to record the order details.
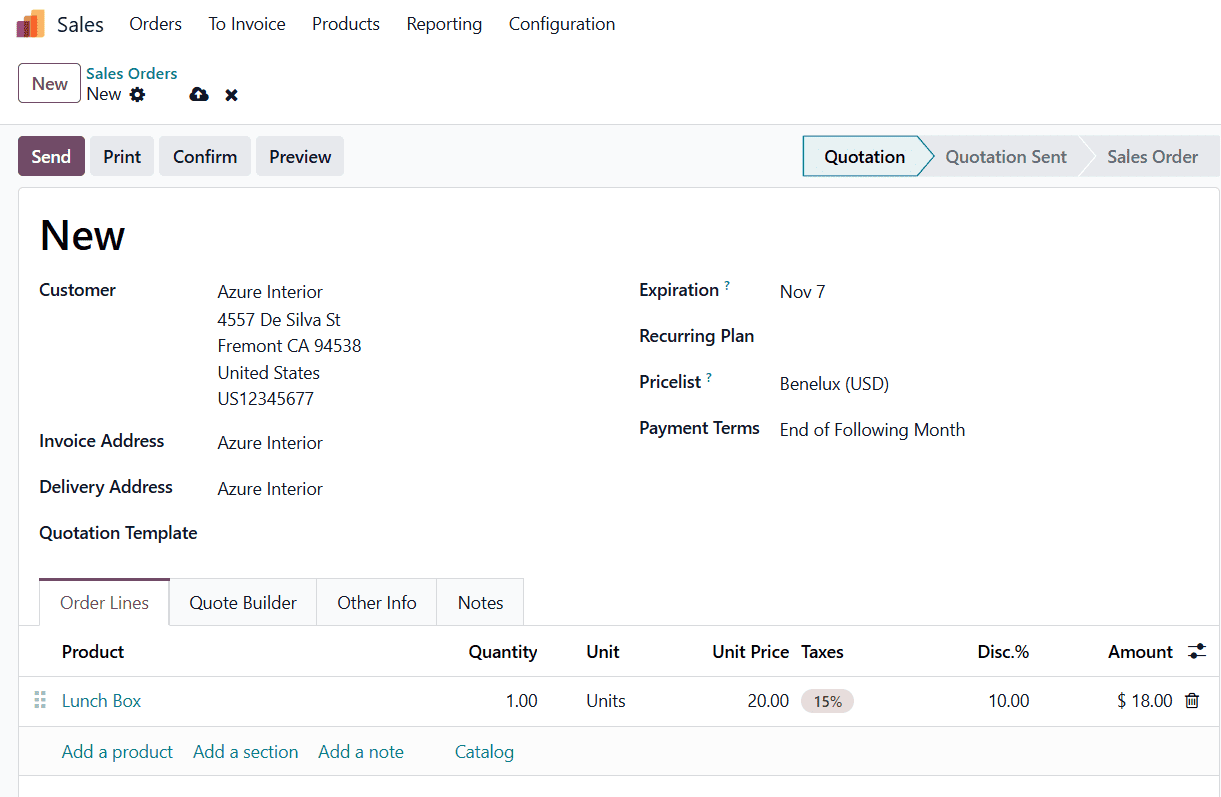
Odoo 19 allows you to share the quotation or order details directly with the customer via email. To do this, simply click the Send button from the Sales Order form. A new window will appear displaying the customer’s email address in the Recipients field.
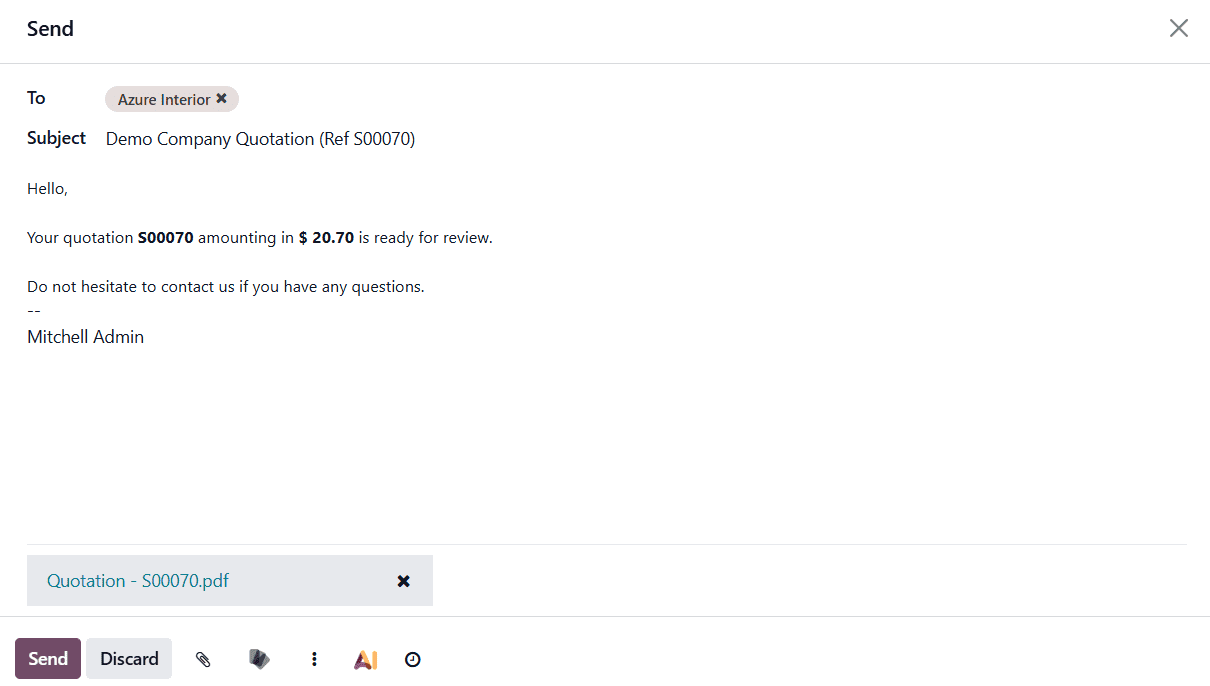
You can review and modify the Subject line and the Email Body before sending it. Odoo also lets you attach additional files, such as product brochures or terms of service, using the attachment icon. Once all details are finalized, click Send to dispatch the email.
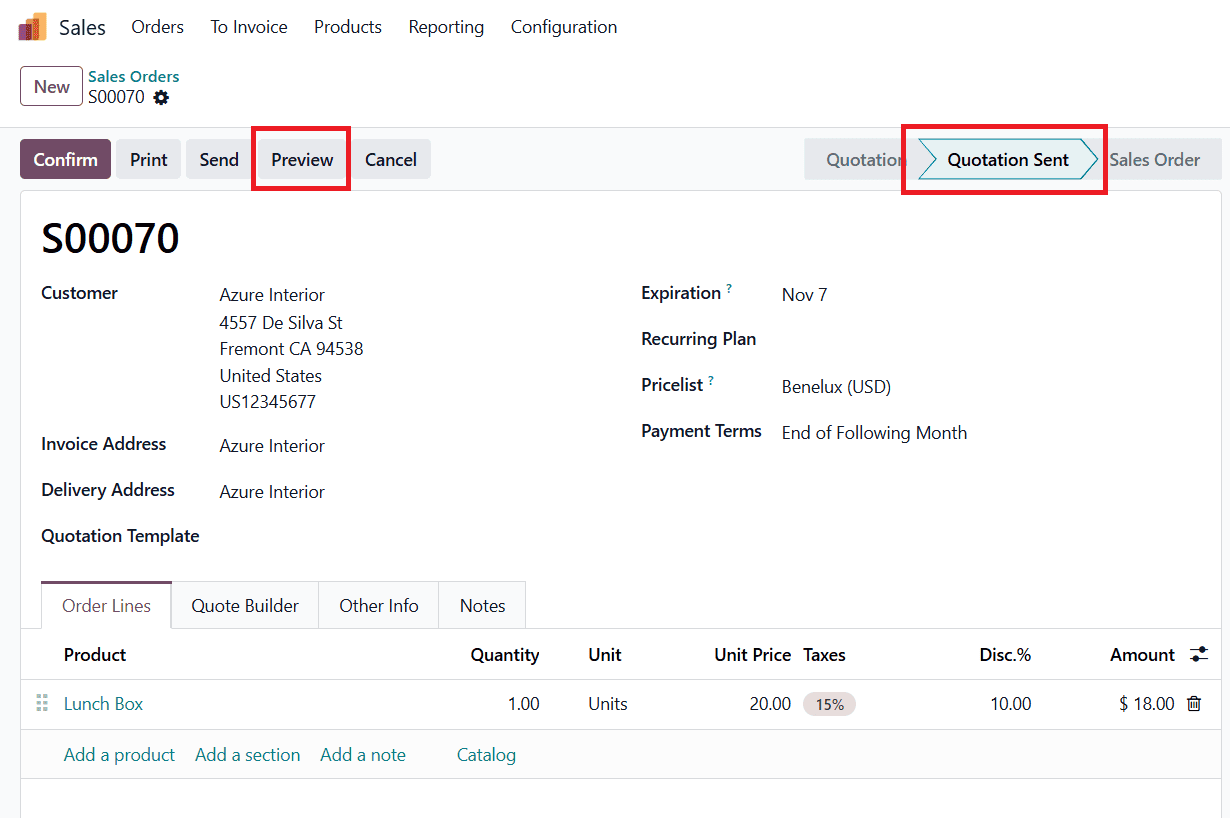
After the email is sent, the quotation stage automatically updates from Quotation to Quotation Sent, and you can preview the customer’s portal view by clicking the Preview smart button in the Sales Order window.
Before customers can complete their purchase, ensure that Online Payment and Online Signature are enabled in your configuration settings.
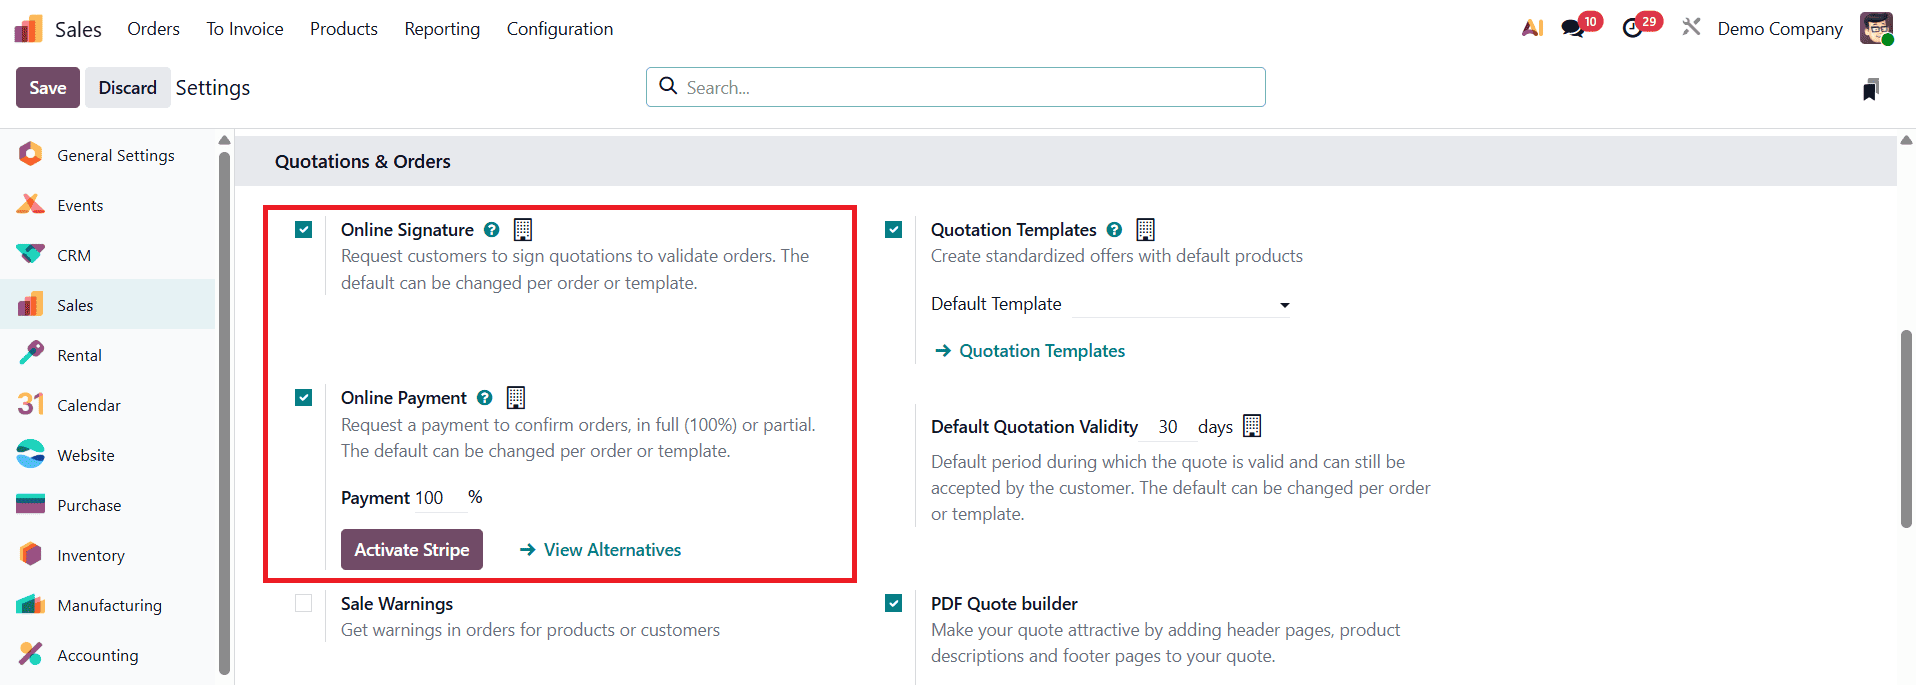
These features make it easier for customers to review, approve, and pay for quotations directly through the Customer Portal.
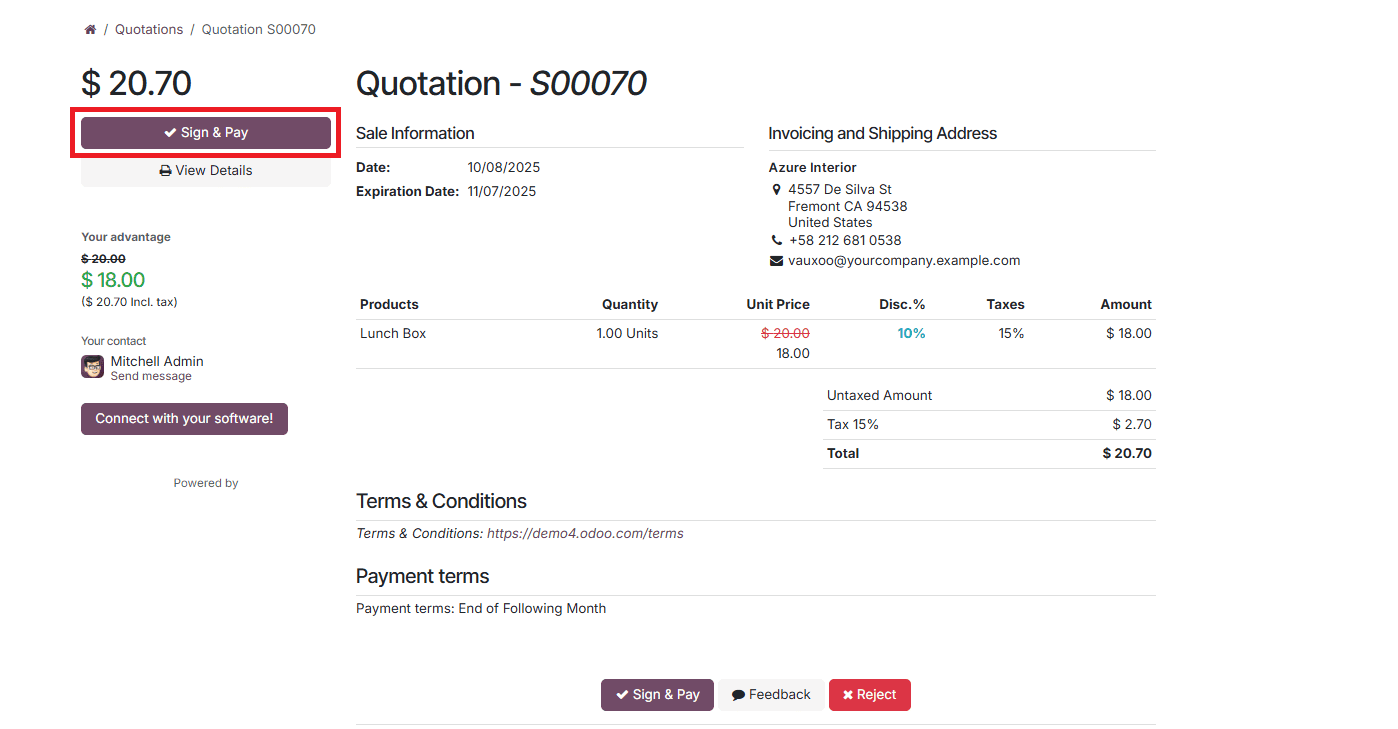
When the customer logs into their portal account, they can view all relevant quotation details, including expiration and quotation dates, invoicing, and shipping addresses. To confirm the order, they simply click the Sign & Pay button.
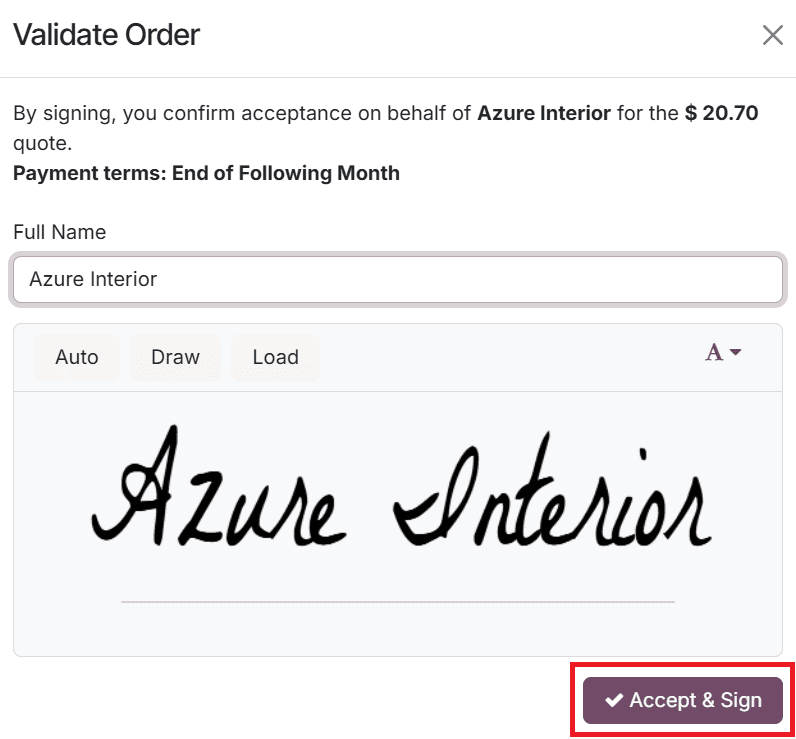
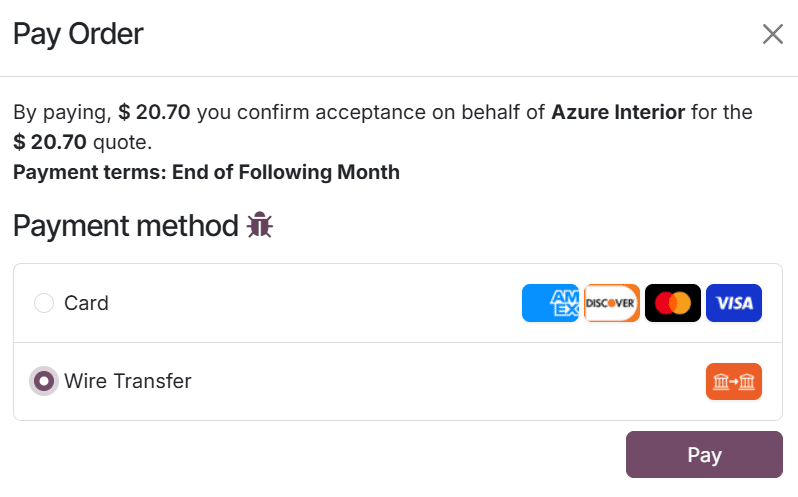
A validation window will appear, prompting the customer to sign the quotation using one of three available options: Auto, Draw, or Load. After signing, the customer clicks Accept & Sign, followed by selecting the preferred Payment Method.
Finally, clicking Pay completes the transaction.
Once the payment is successfully processed, the customer portal displays a confirmation message, and the order status in the backend automatically updates to Sales Order.

You will also notice two new smart tabs, Delivery and Invoice, appearing in the Sales Order form.
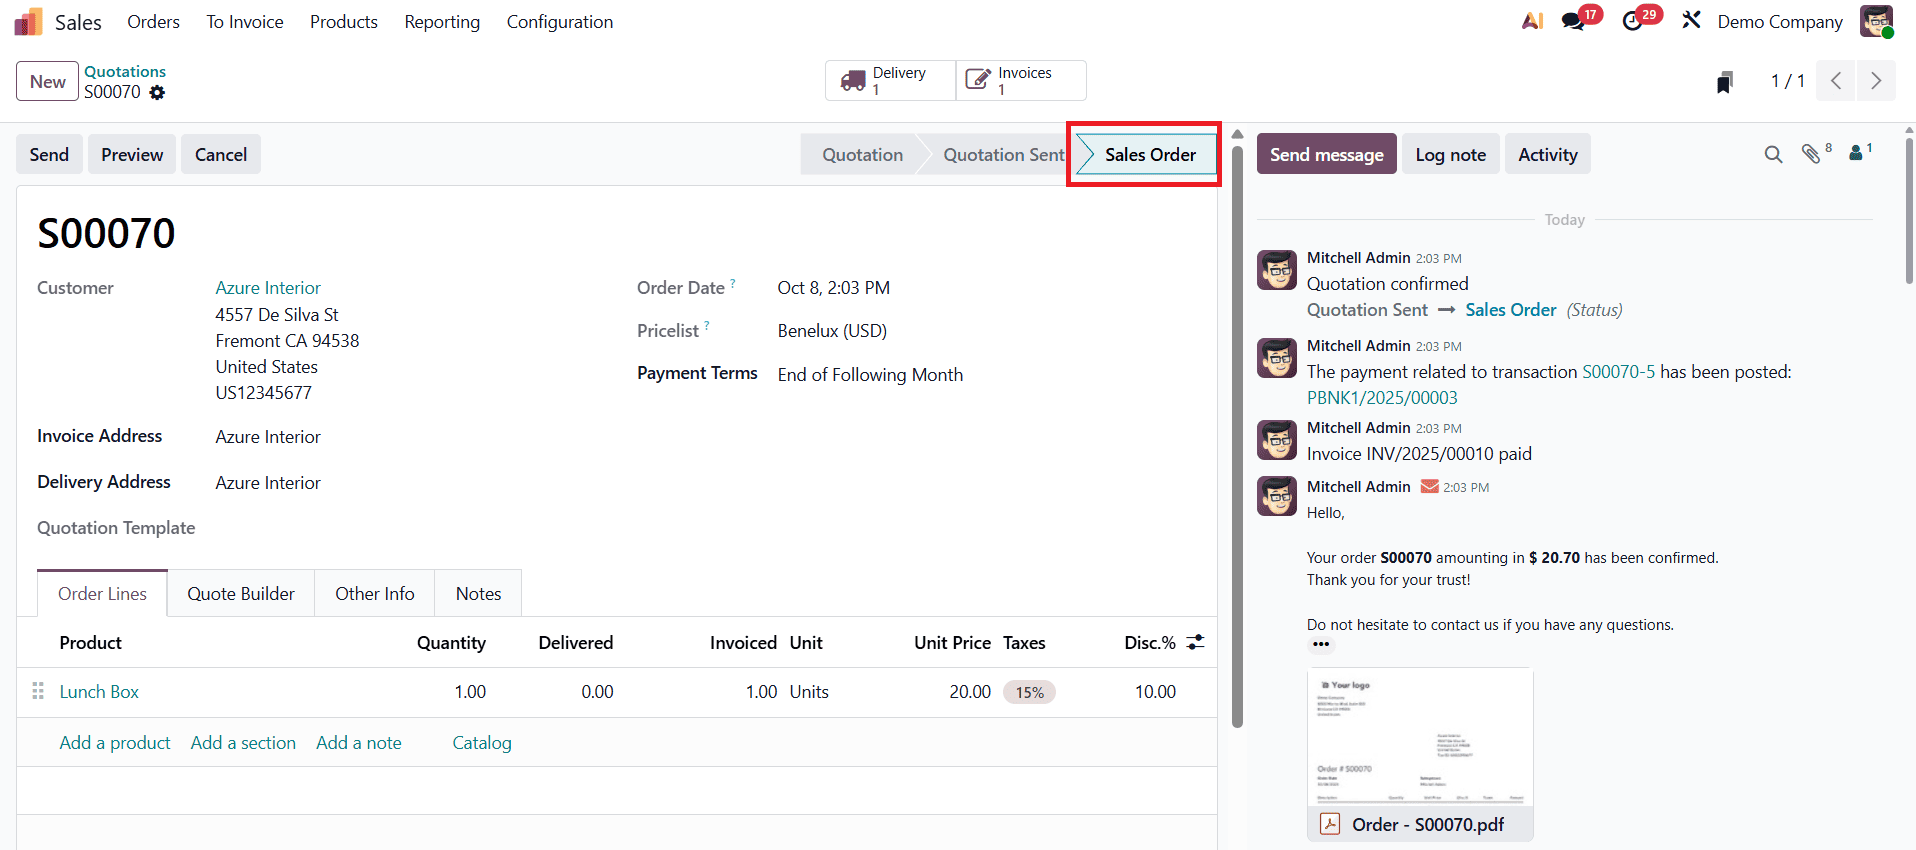
Under the Invoice tab, Odoo 19 automatically generates the corresponding invoice immediately after payment confirmation.
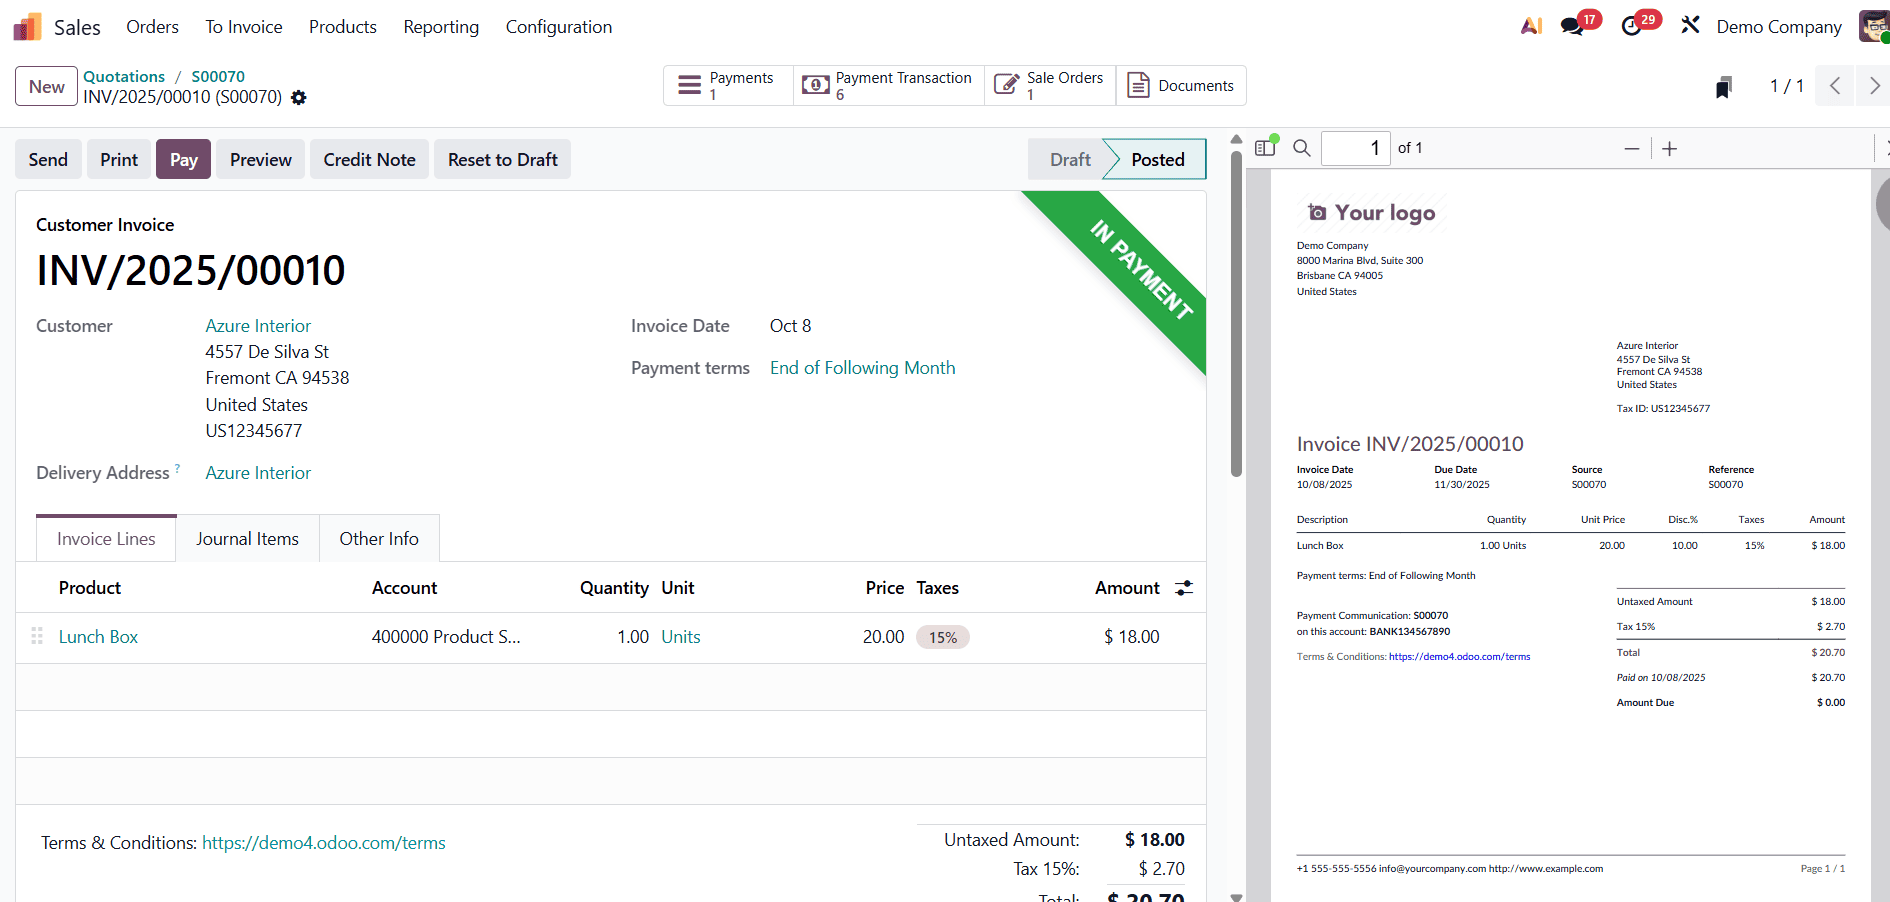
The invoice status will display as In Payment, reflecting the real-time synchronization between the Sales and Accounting modules.
By automating invoice generation upon payment confirmation, Odoo 19 enables businesses to simplify their billing processes, minimize administrative workload, and ensure accurate financial tracking. This seamless integration of sales and accounting workflows not only saves time but also enhances customer satisfaction and promotes efficient business growth.
To read more about How to Generate an Automatic Invoice for a Sales Order in Odoo 18, refer to our blog How to Generate an Automatic Invoice for a Sales Order in Odoo 18.