Creating customer invoices is a core part of managing any business, as it records the products or services sold to customers and tracks the amount they owe. A customer invoice acts as an official document that details the transaction, payment terms, taxes, and total amount due. In Odoo 19, customer invoicing becomes even more streamlined with an improved Accounting module, intuitive form views, and smarter automation. Odoo 19 allows businesses to easily create, manage, and validate invoices, ensuring accuracy in financial records and faster payment tracking. Whether you are new to Odoo or upgrading to the latest version, understanding how customer invoices work is essential for smooth accounting operations.
This step-by-step guide will help you create customer invoices in Odoo 19 with ease.
In Odoo 19, invoices are generated based on your business workflow and the modules you use. For example, in the Sales module, once a sales order is confirmed, Odoo can automatically create a draft customer invoice, reducing the need for manual entry. This draft can be reviewed, adjusted if needed, and then validated before sending it to the customer. Whether invoices are created automatically or entered manually, they are all synchronized and displayed in one place, the Invoices dashboard under the Customer menu in the Accounting module.
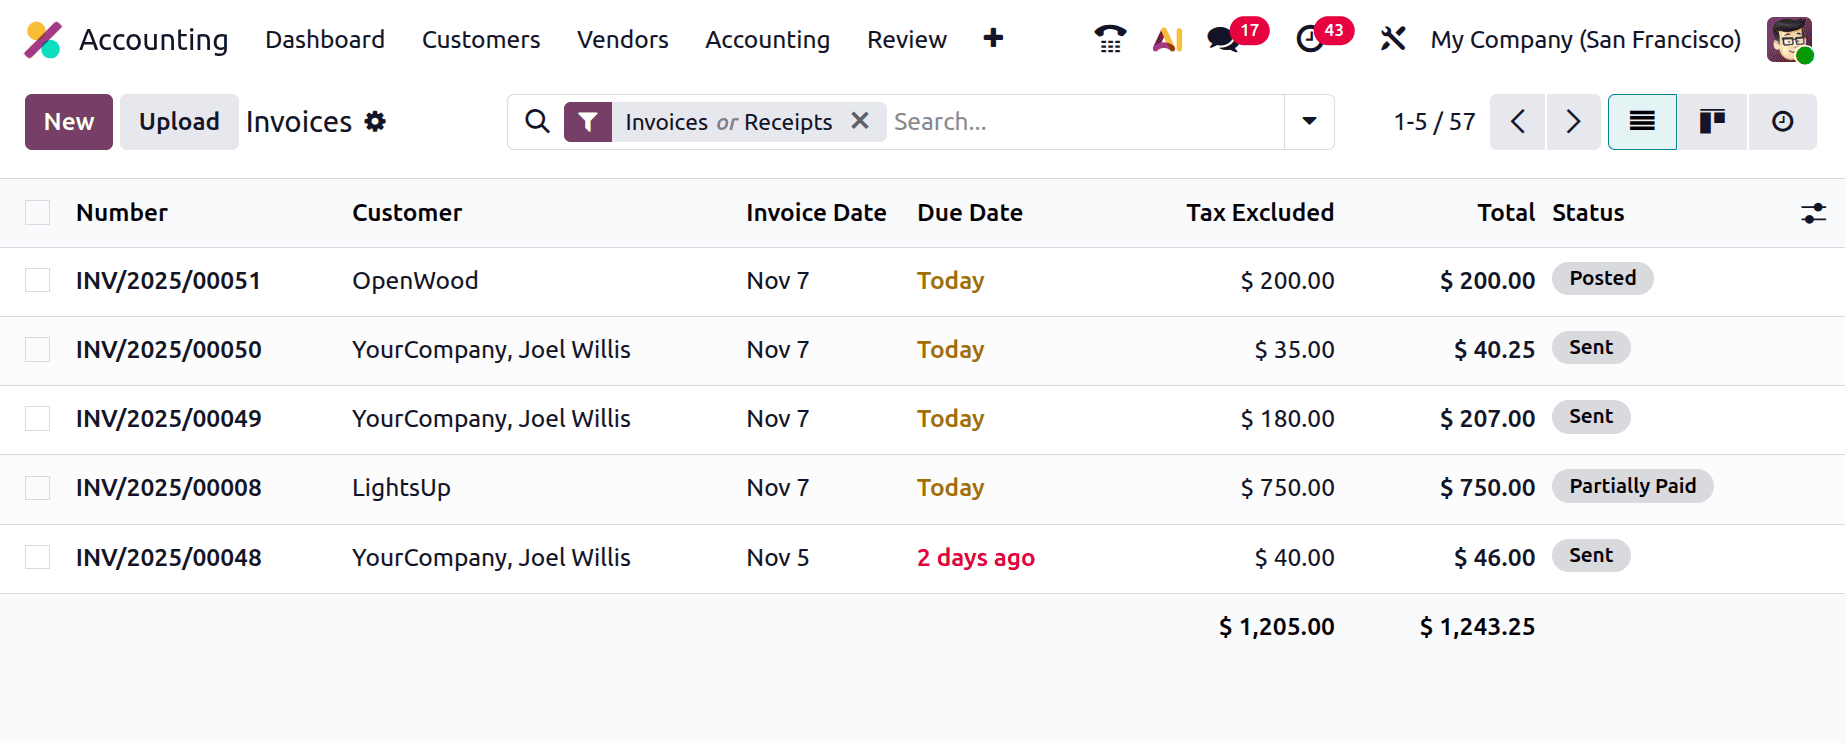
The Invoices dashboard in Odoo 19 offers a clean and organized overview of all customer invoices in a single place. The list view displays key details such as Invoice Number, Customer Name, Invoice Date, Due Date, Tax Excluded Amount, and Invoice Status. Its streamlined layout allows finance teams to easily track invoice progress and identify pending actions at a glance. Users can also customize the view by adjusting column visibility to match their workflow needs.
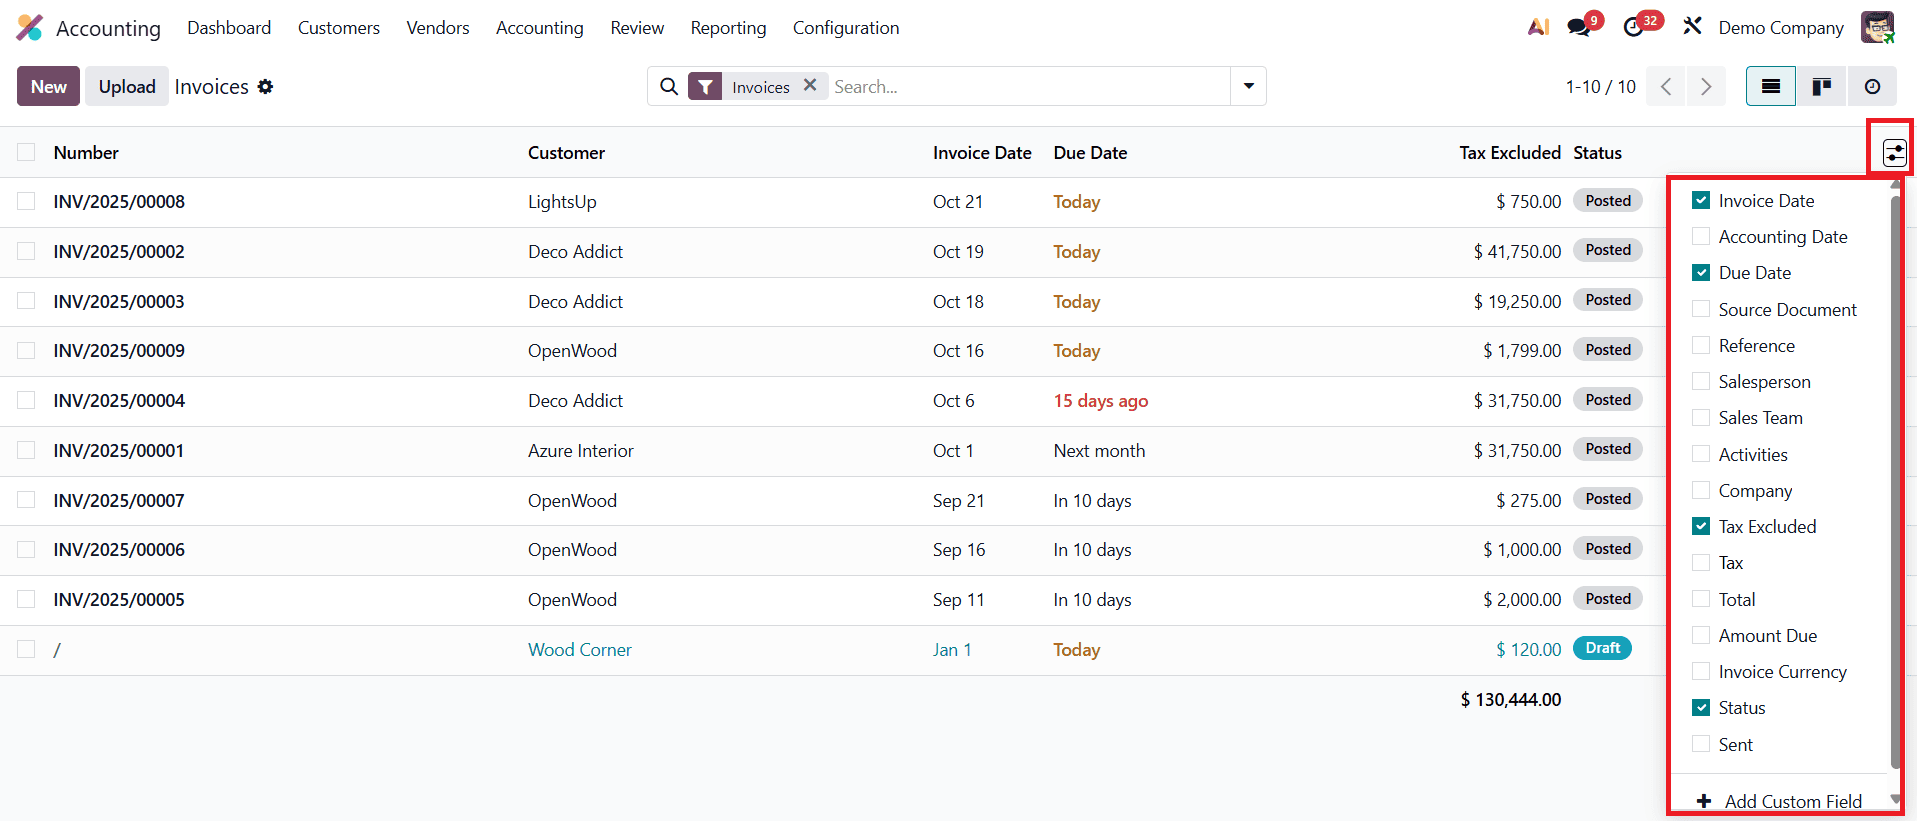
By clicking the small gear icon next to the Status field, users can customize their invoice list by adding or removing fields such as Accounting Date, Source Document, Activities, Salesperson, Sales Team, Reference, Company, Tax, Total, Amount Due, Currency, and Sent. This flexibility allows each user to tailor the interface to fit their workflow and operational requirements.
To help manage large volumes of invoices more efficiently, Odoo 19 offers improved sorting, filtering, and grouping options. The system provides a set of default filters, such as My Invoices, Draft, Posted, Canceled, Not Sent, Invoices, Receipts, Credit Notes, To Review, To Pay, In Payment, and Overdue, making it easy for users to quickly find the documents they need.

For more precise searches, the Add Custom Filter option lets users define their own conditions, giving them full control over how invoice data is displayed. The Group By feature adds another level of convenience by enabling users to categorize invoices based on criteria such as Salesperson, Customer, Status, Sales Team, Payment Method, Invoice Date, Company, or Journal. Users can also create custom groups for deeper segmentation, ensuring clearer insights and easier management of large or complex invoice sets.
To further improve usability, Odoo 19 provides multiple viewing modes. The List View offers a structured, data-focused layout ideal for detailed analysis, while the Kanban View presents invoices in a more visual and interactive format, making it easier to track workflow stages at a glance.

The Kanban layout displays invoices as movable cards grouped by status, allowing teams to track workflow progress in a clear and intuitive way. From this view, users can upload existing invoices using the Upload button or create new ones by clicking New. Choosing New opens the invoice creation form, where users can enter customer information, add products or services, define payment terms, and confirm tax and accounting details before finalizing the invoice.
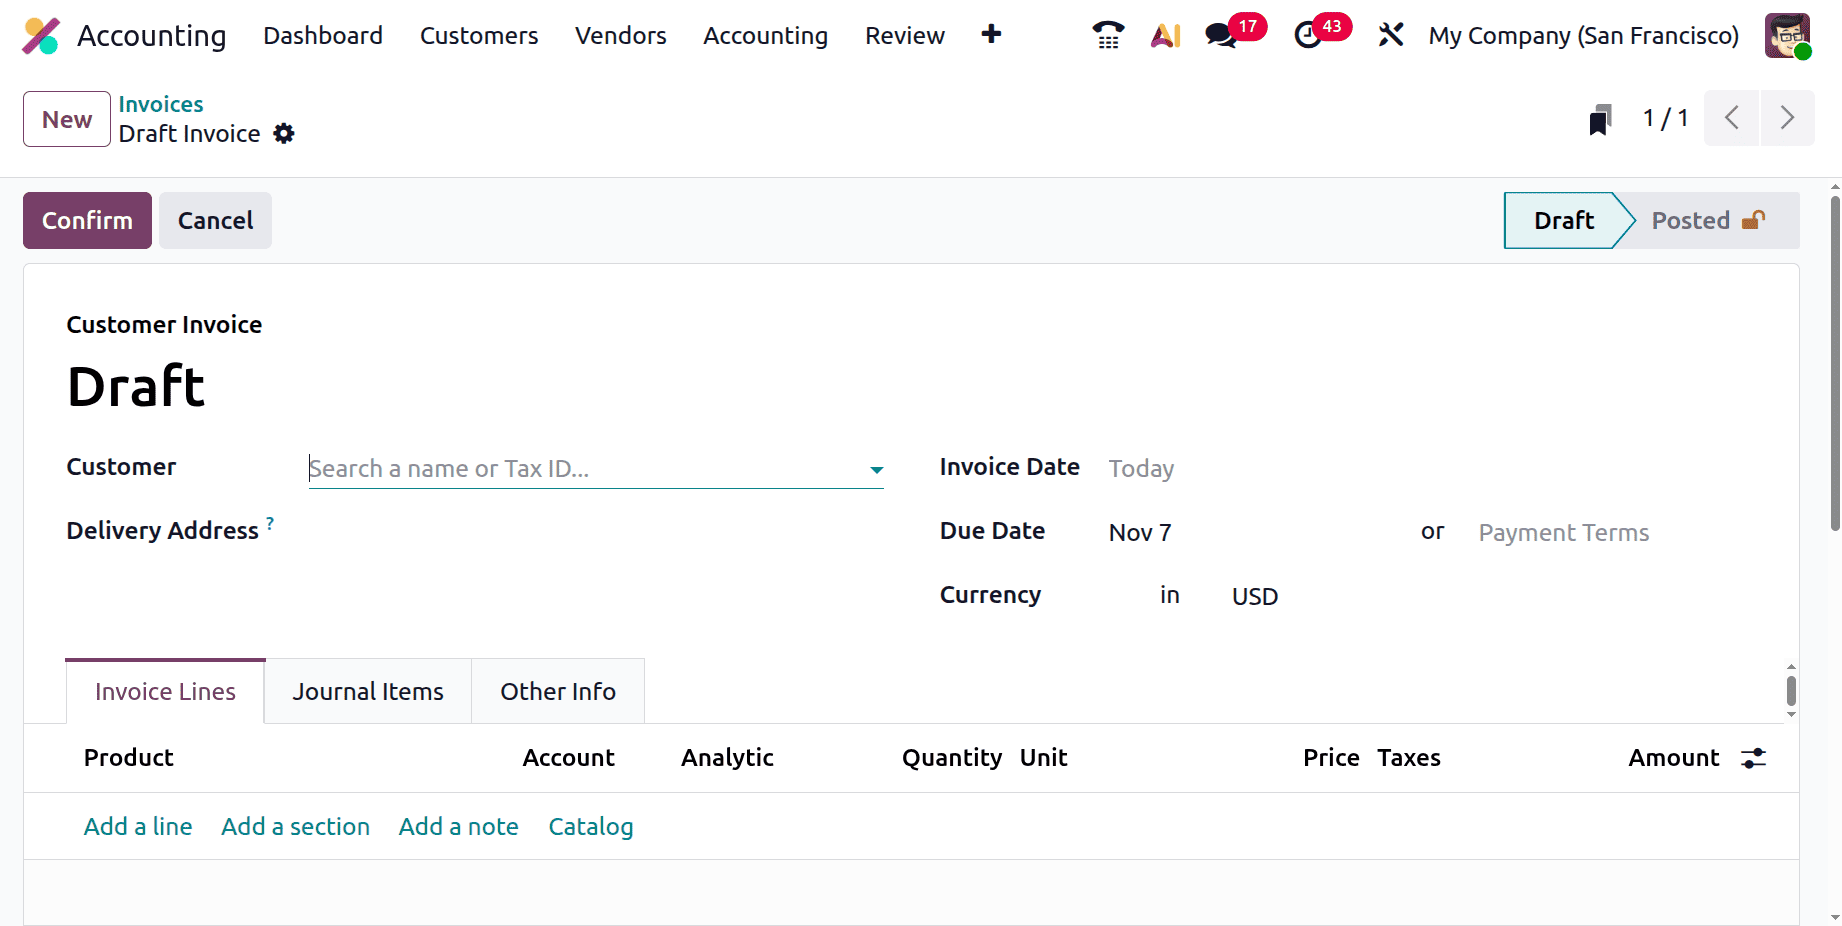
When creating a new invoice, users start by selecting the Customer Name and Delivery Address, ensuring the invoice is accurately linked to the correct client. The Invoice Date must then be entered, as it plays an important role in tracking payments and reconciling accounts. Depending on the customer’s configuration, Payment Terms, such as 30 Days, Immediate Payment, or End of Month, may be automatically populated. If needed, users can also manually set a specific Due Date for the transaction.
The invoice form in Odoo 19 is structured into three main tabs, Invoice Lines, Journal Items, and Other Info, each designed to manage a different part of the invoicing workflow.
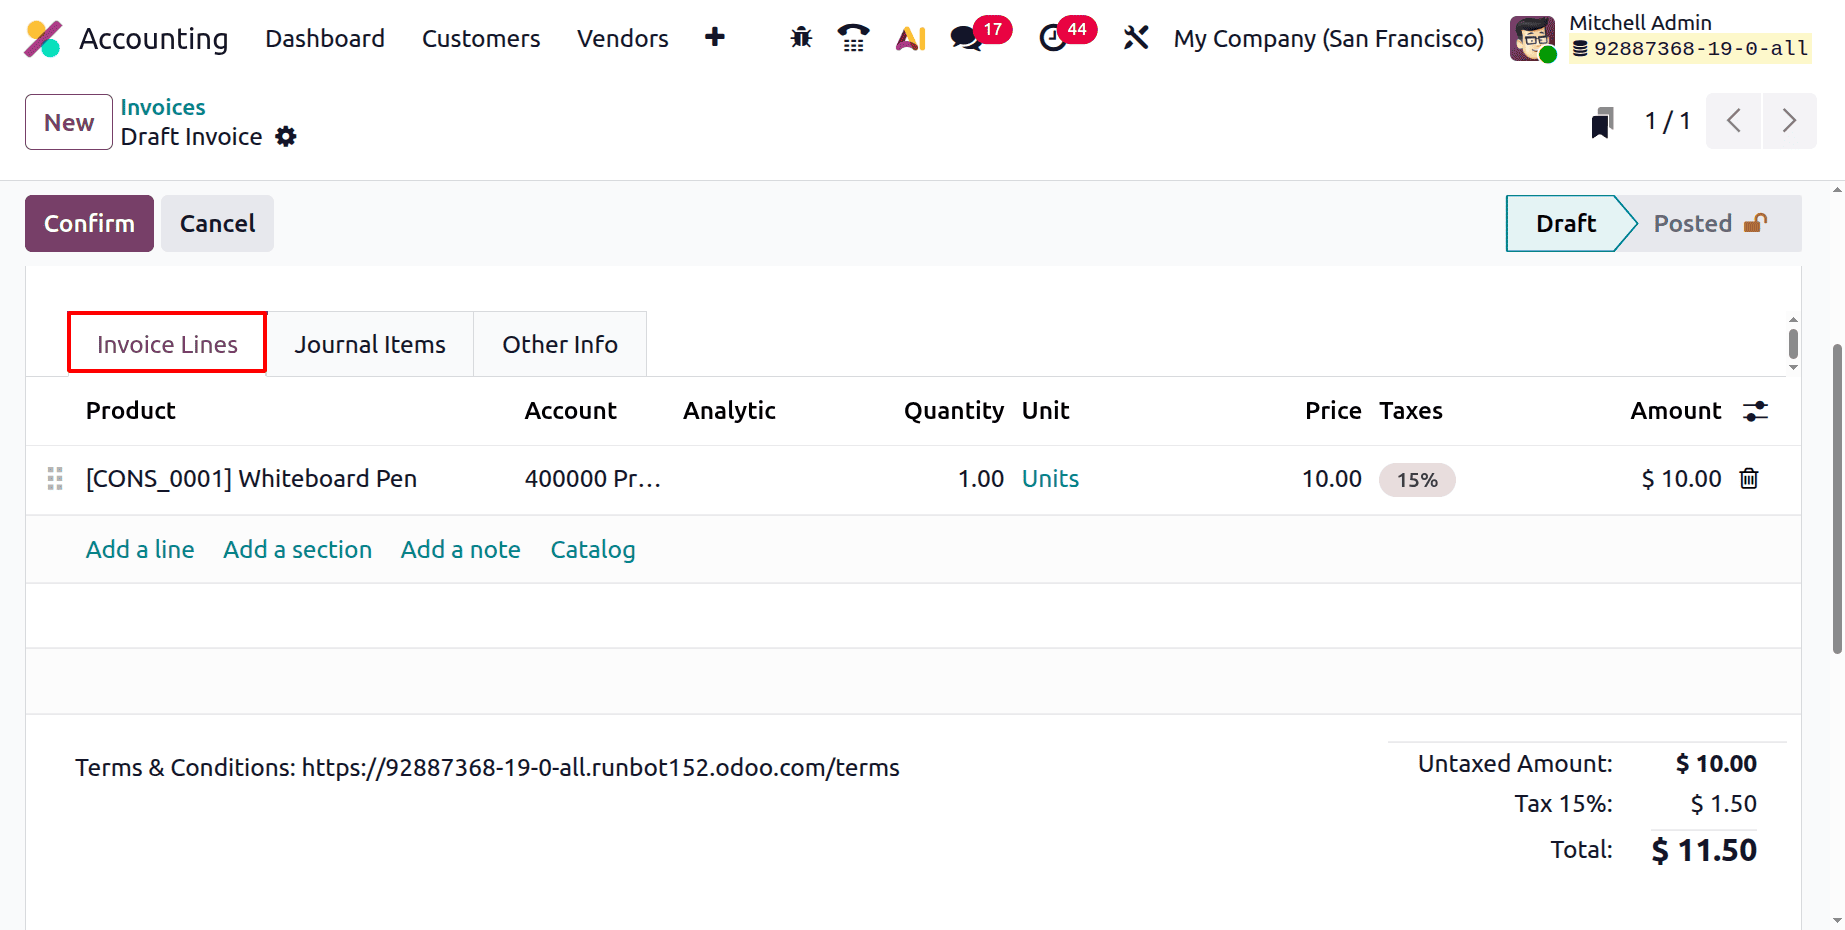
In the Invoice Lines tab, users can add products or services by clicking Add a Line. Each line includes key details such as Product, Account, Quantity, Unit of Measure (UoM), Price, Taxes, and Amount. When an invoice is generated automatically from a Sales Order, these fields are pre-filled according to the order lines, minimizing manual entry and ensuring accuracy. For better structure, users can insert headings using Add a Section or include additional notes and clarifications using Add a Note. The Catalog button in the Invoice Lines area serves as a convenient shortcut, allowing users to browse and select items directly from the product catalog while creating or editing an invoice.
At the bottom of the tab, the system automatically calculates and displays the Untaxed Amount, Taxes, Total, and Amount Due, giving users a clear, real-time summary of the final payable amount.
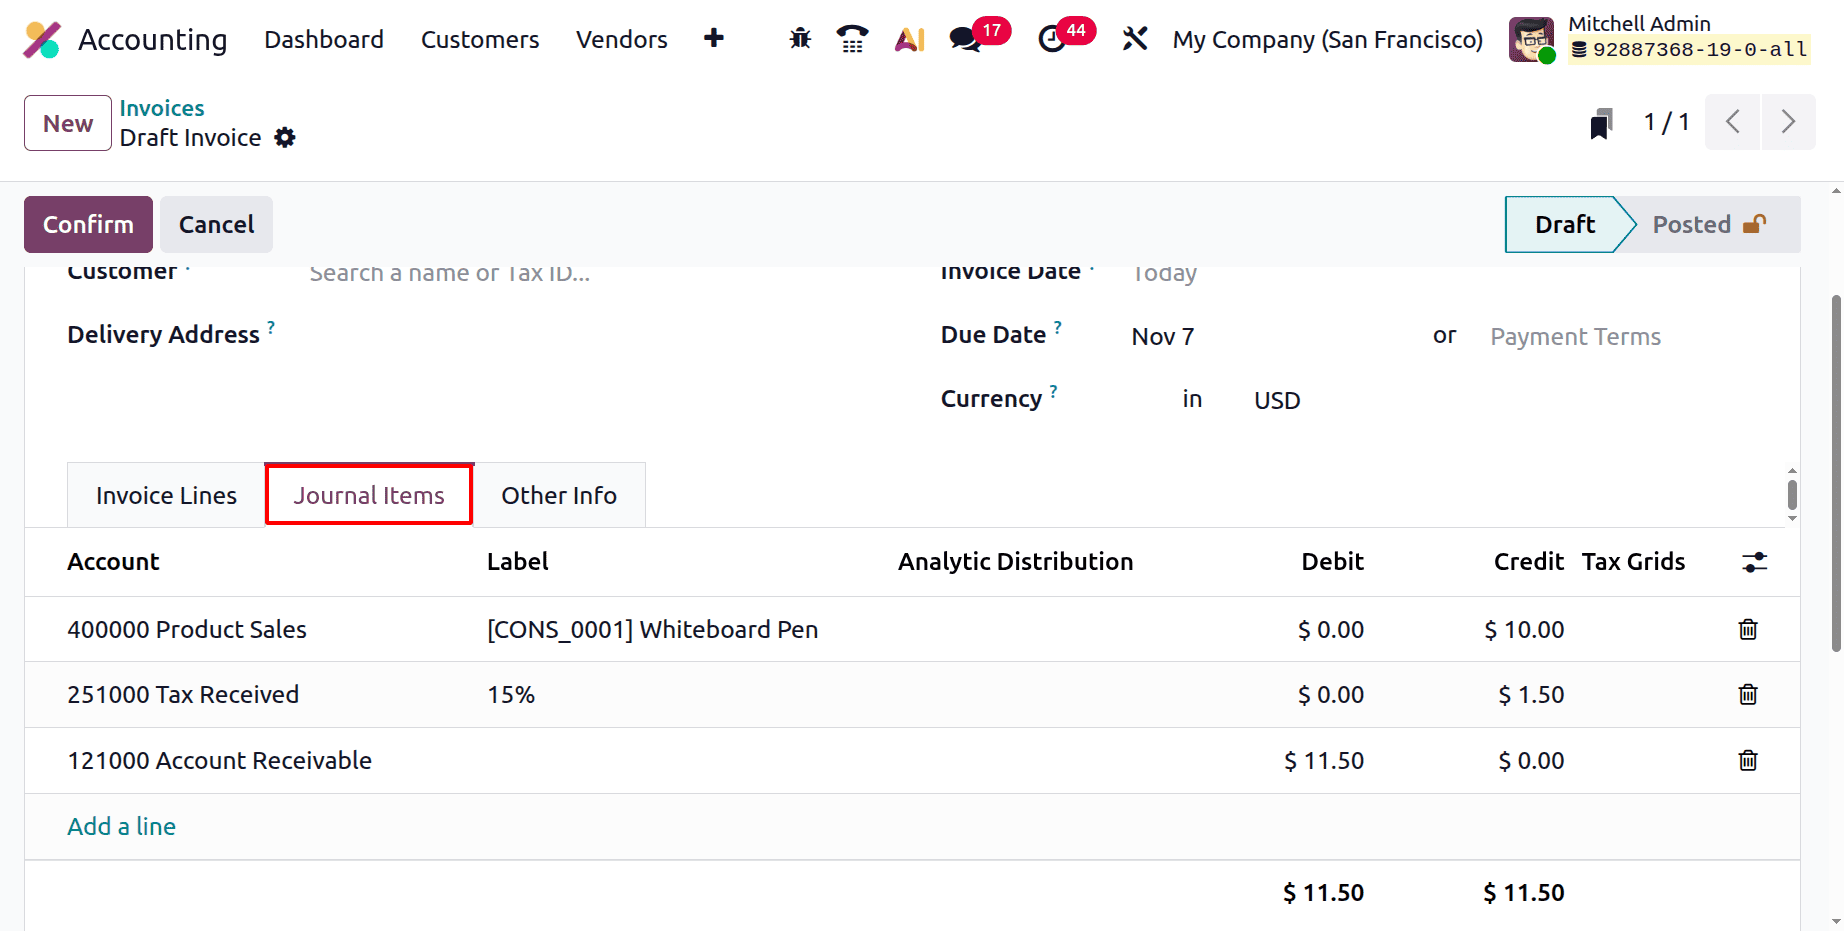
The Journal Items tab displays the underlying accounting entries generated from the invoice. It includes essential details such as the Account, Label, Debit and Credit amounts, and Tax Grids, reflecting how the transaction impacts the company’s financial records. Users can add new lines or remove existing ones using the available action buttons, giving them control over the accounting structure of the invoice when adjustments are needed.

The Other Info tab consolidates all supplementary details related to the invoice. In this section, users can assign a Salesperson and Sales Team to identify who managed the transaction. It also includes fields for Customer Reference and Recipient Bank Account, ensuring that payments are routed correctly. The Payment Reference field lets users specify a unique identifier that helps customers easily recognize the invoice during payment. Additionally, the Delivery Date records when the products or services were delivered to the customer.
Under the Accounting section of this tab, users can further refine invoice settings by selecting the Company, Fiscal Position, Incoterms, Incoterm Location, and Payment Method. These configurations support compliance with international trade standards, tax requirements, and internal company policies.
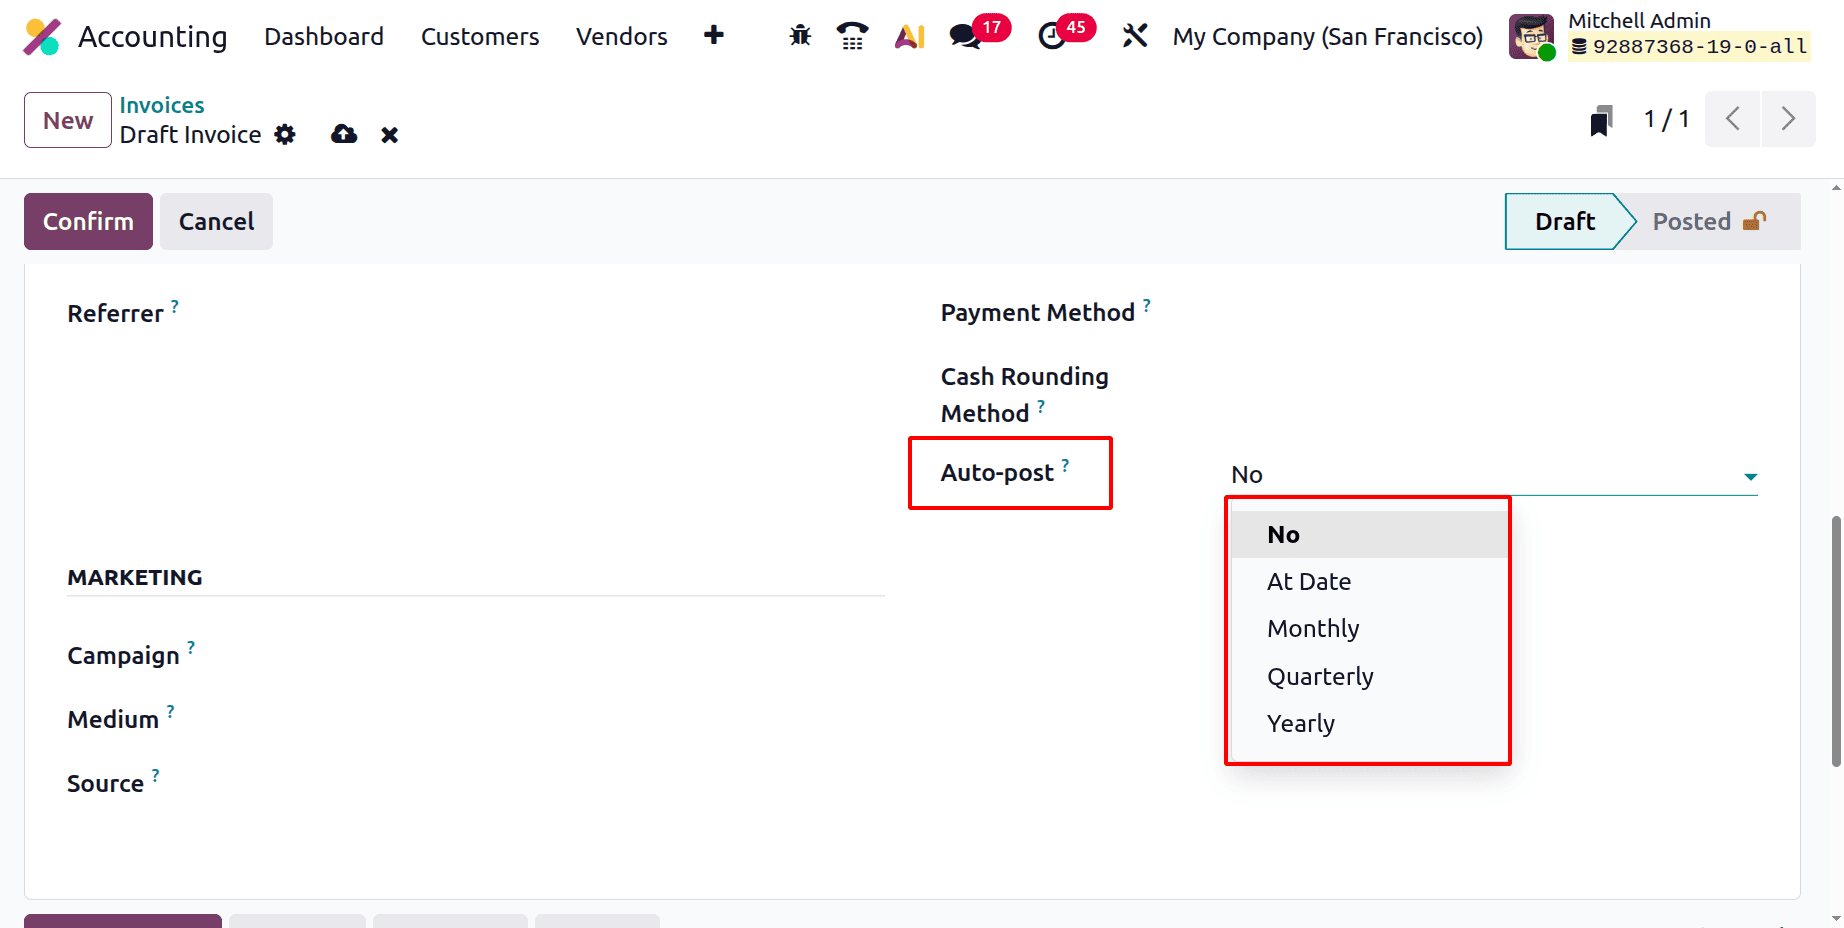
The enhanced Auto Post feature in Odoo 19 allows invoices to be posted automatically according to a defined schedule. Users can choose to auto-post invoices Monthly, Quarterly, or Yearly, depending on their billing cycle. For businesses that prefer manual control, the Auto Post option can simply be set to “No.” The Auto Post Until field lets users specify an end date for this automation, making it especially useful for recurring or time-limited invoicing scenarios.
The Marketing section enables users to record campaign-related details such as Campaign, Medium, and Source, helping businesses track and analyze the impact of marketing initiatives associated with their sales activities.
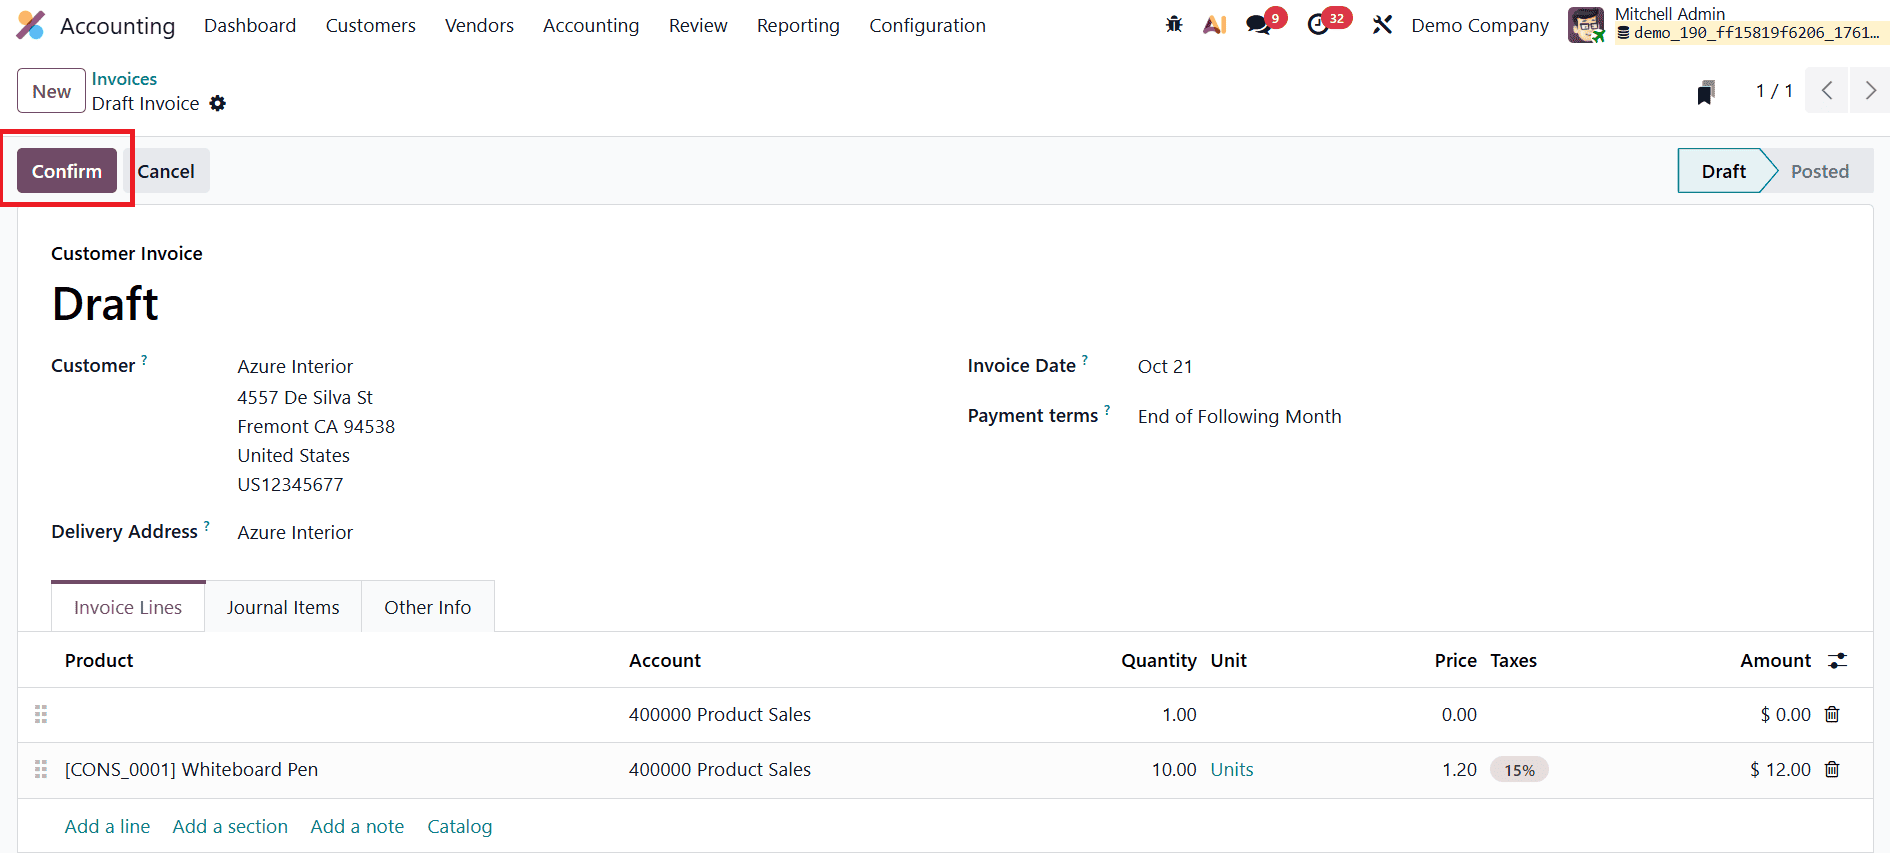
Once all required details have been entered, users can finalize the invoice by clicking the Confirm button. This action changes the invoice status from Draft to Posted, officially recording it in the system and making it part of the company’s financial records.

From this point, users can move forward with sending the invoice to the customer, registering payments, or initiating follow-up actions for overdue invoices. If needed, a posted invoice in Odoo 19 can be reverted back to the draft stage using the Reset to Draft option. This is especially helpful when corrections or adjustments are required after an invoice has already been posted.
The Preview button gives users a customer-side view of the invoice, allowing them to see exactly how the document will appear before it is sent.

This client preview page offers multiple options for the customer: they can view, download, print, or even pay the invoice directly using their preferred payment method. Additionally, the built-in chat or messaging interface allows customers to communicate instantly with the assigned salesperson, enabling smooth and efficient correspondence without the need to switch platforms.
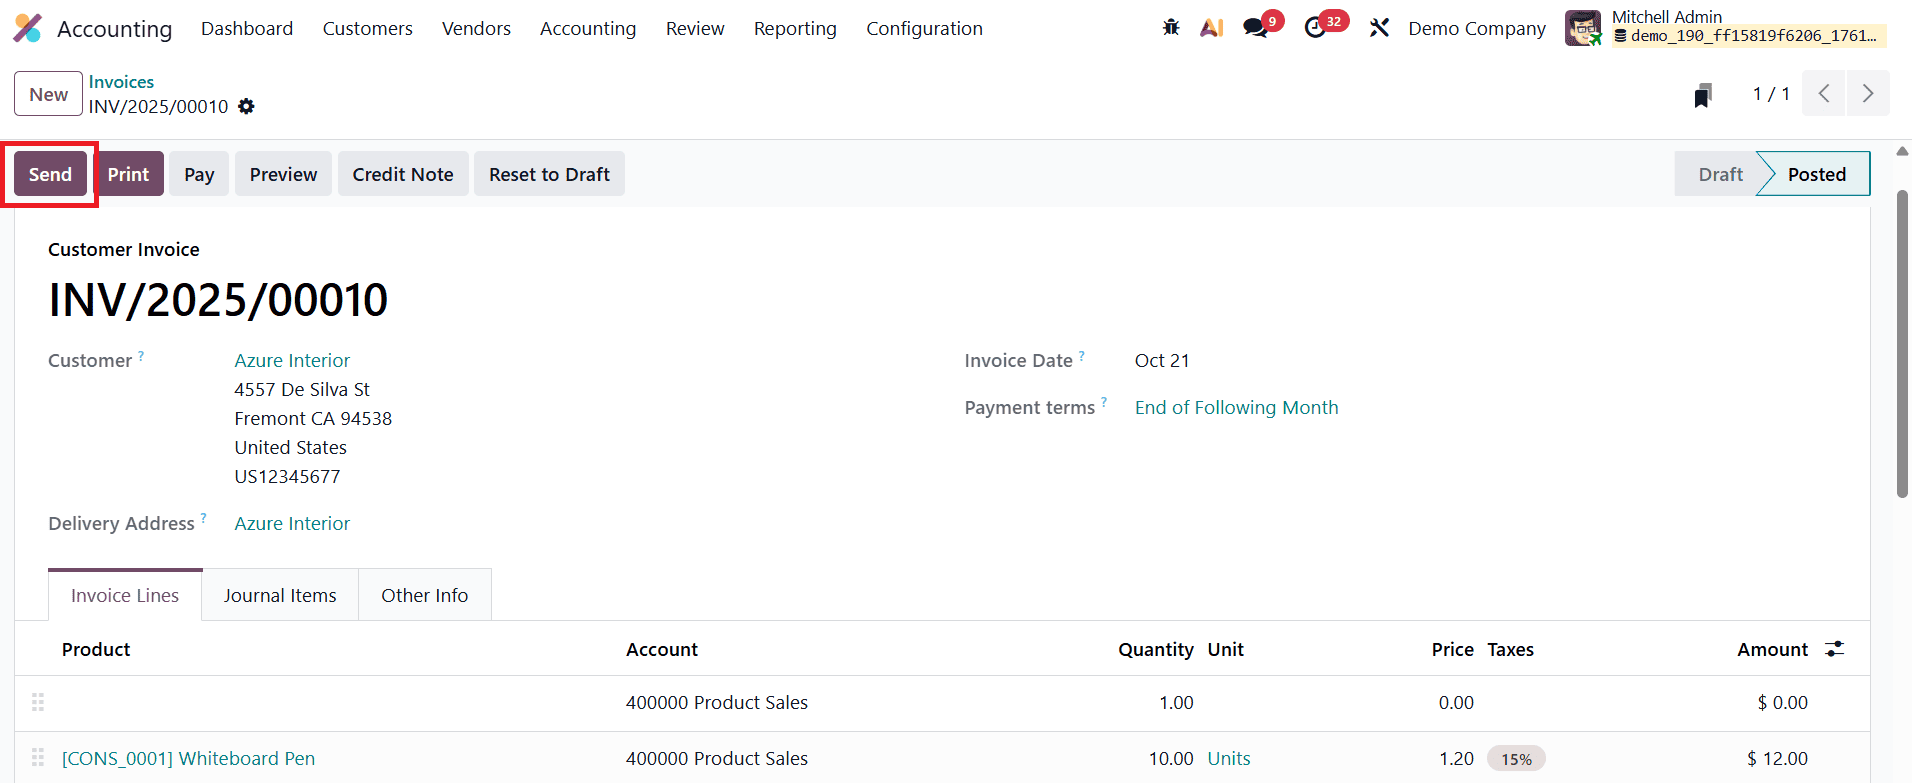
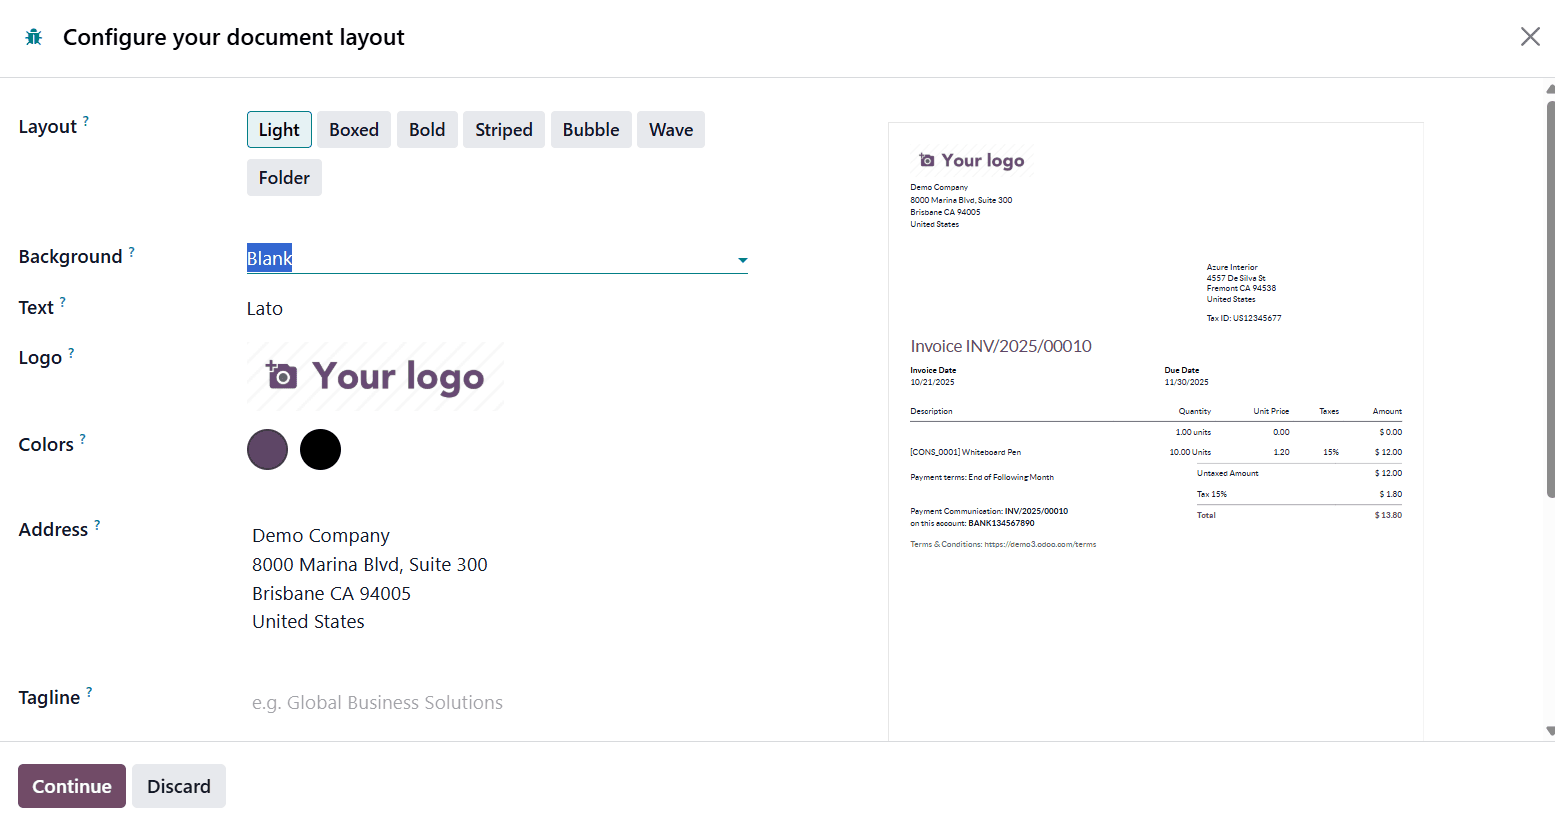
When you're ready to share the invoice with the customer, clicking the Send option opens an auto-generated email template. From the Configure your document layout window, you can personalize this template by adjusting the layout, background, text style, logo, colors, address, and tagline. This ensures that the invoice and accompanying email reflect your company’s branding before being sent to the customer.
This email can be fully customized; users can edit the recipients, subject line, and body content before sending.
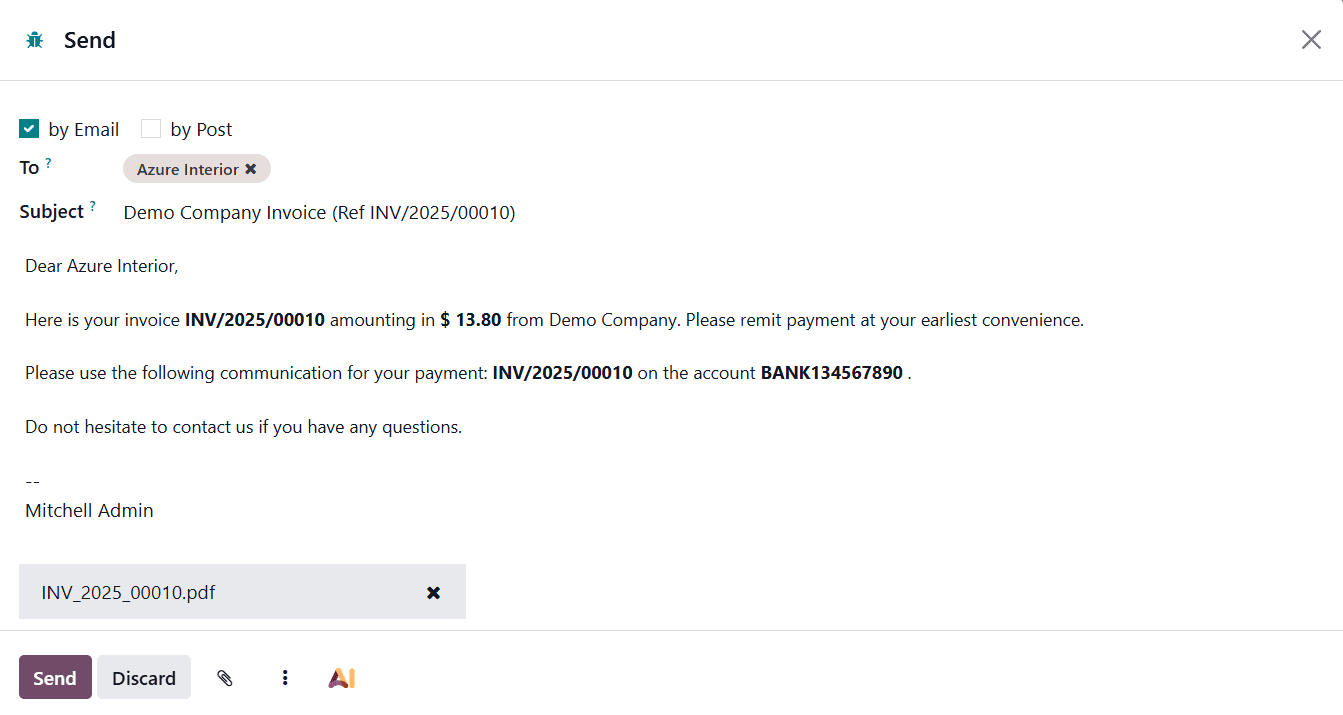
Once everything is finalized, attaching the invoice and clicking Send will deliver the email directly to the customer’s inbox. By selecting the AI option, a pop-up window appears, allowing users to generate or refine the email content using artificial intelligence. This ensures that every message sent to clients is polished, clear, and personalized with minimal effort.
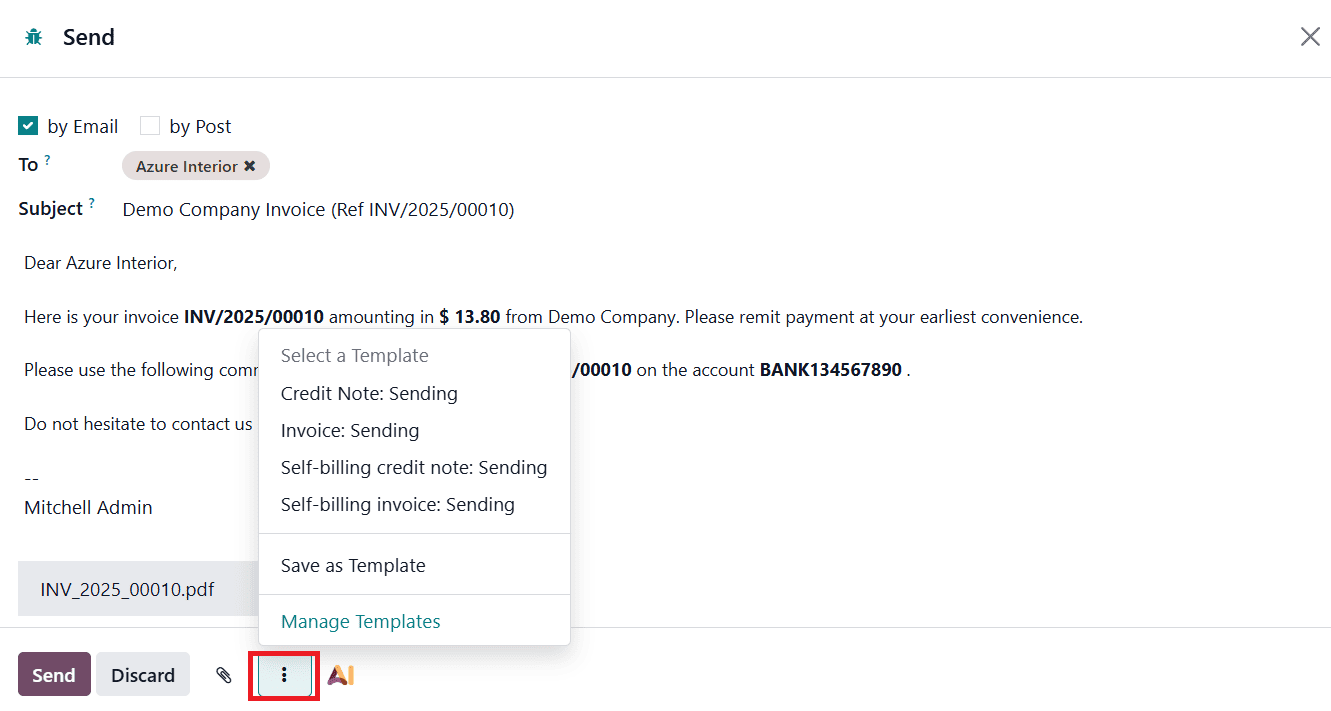
The three-dots menu(?) in the email composer offers additional control and customization options. Users can select from existing email templates to maintain consistent communication across all invoices. If you create a new message that you’d like to use again, the Save as Template option allows you to store it for future use. All saved templates can be viewed, edited, or organized through the Manage Templates option.
Selecting Manage Templates opens a dedicated window that displays all email templates available in the system, making it easy to update or standardize messaging across your organization.
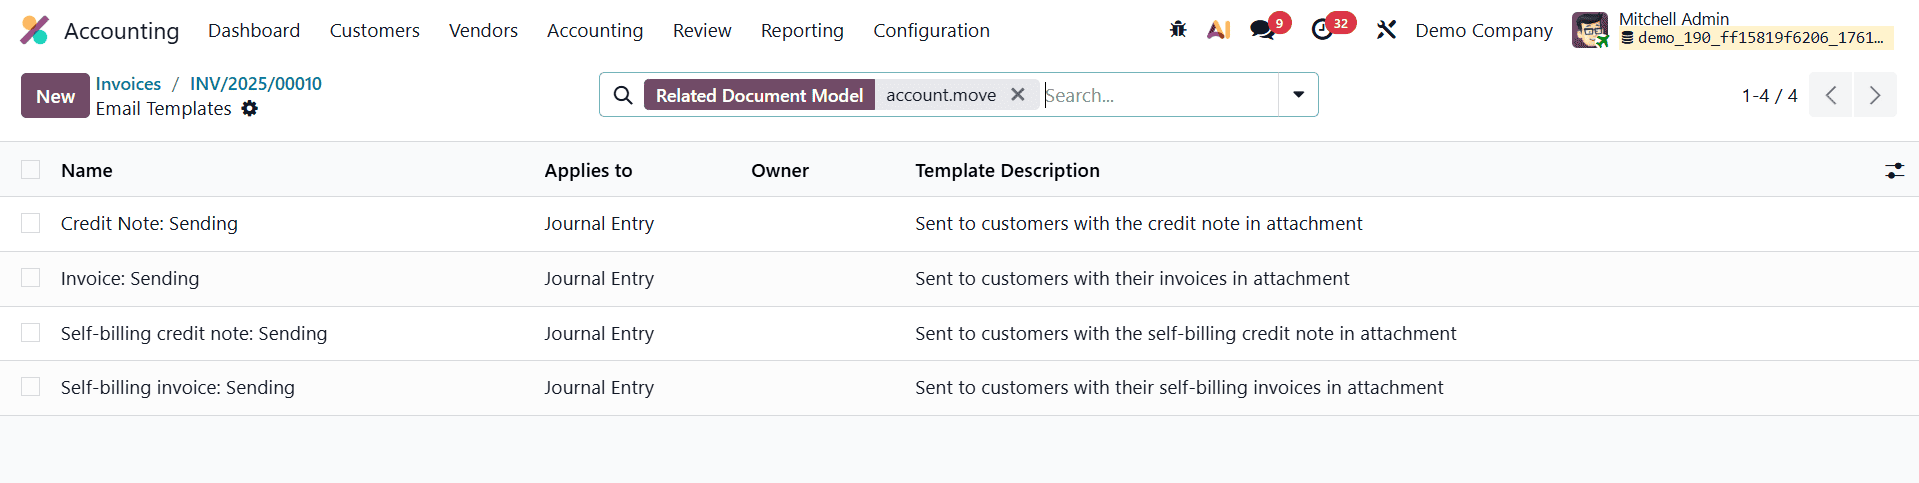
From this window, you can click the New button to create a fresh email template. While setting up a new template, you can assign a Name and define the Applies To field, which determines the document type or model the template will be associated with, such as invoices, sales orders, or quotations.
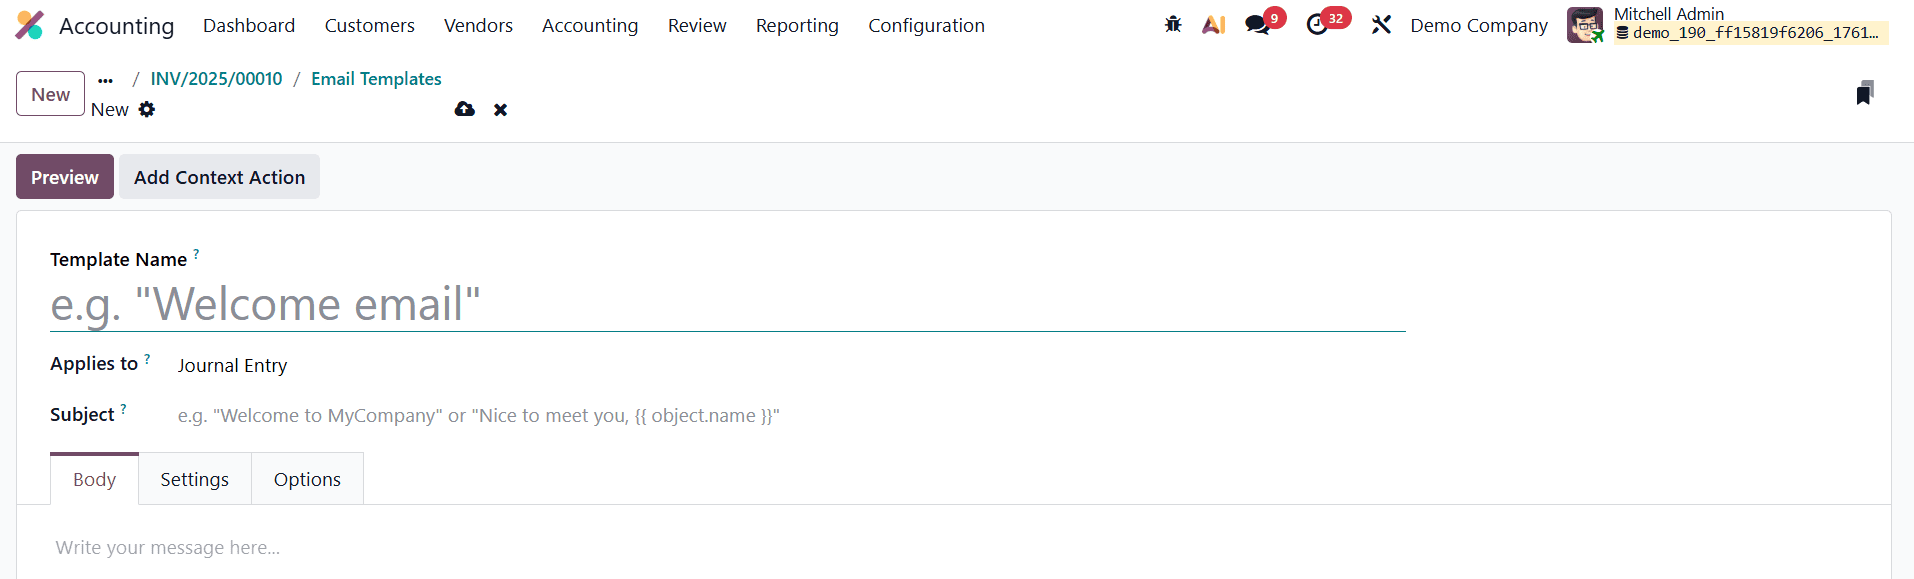
Under the Subject field, you can define the email subject line that will appear in the customer’s inbox. The main email content can then be created in the Body tab, where you can use customizable HTML or plain text fields to design a clear and professional message.
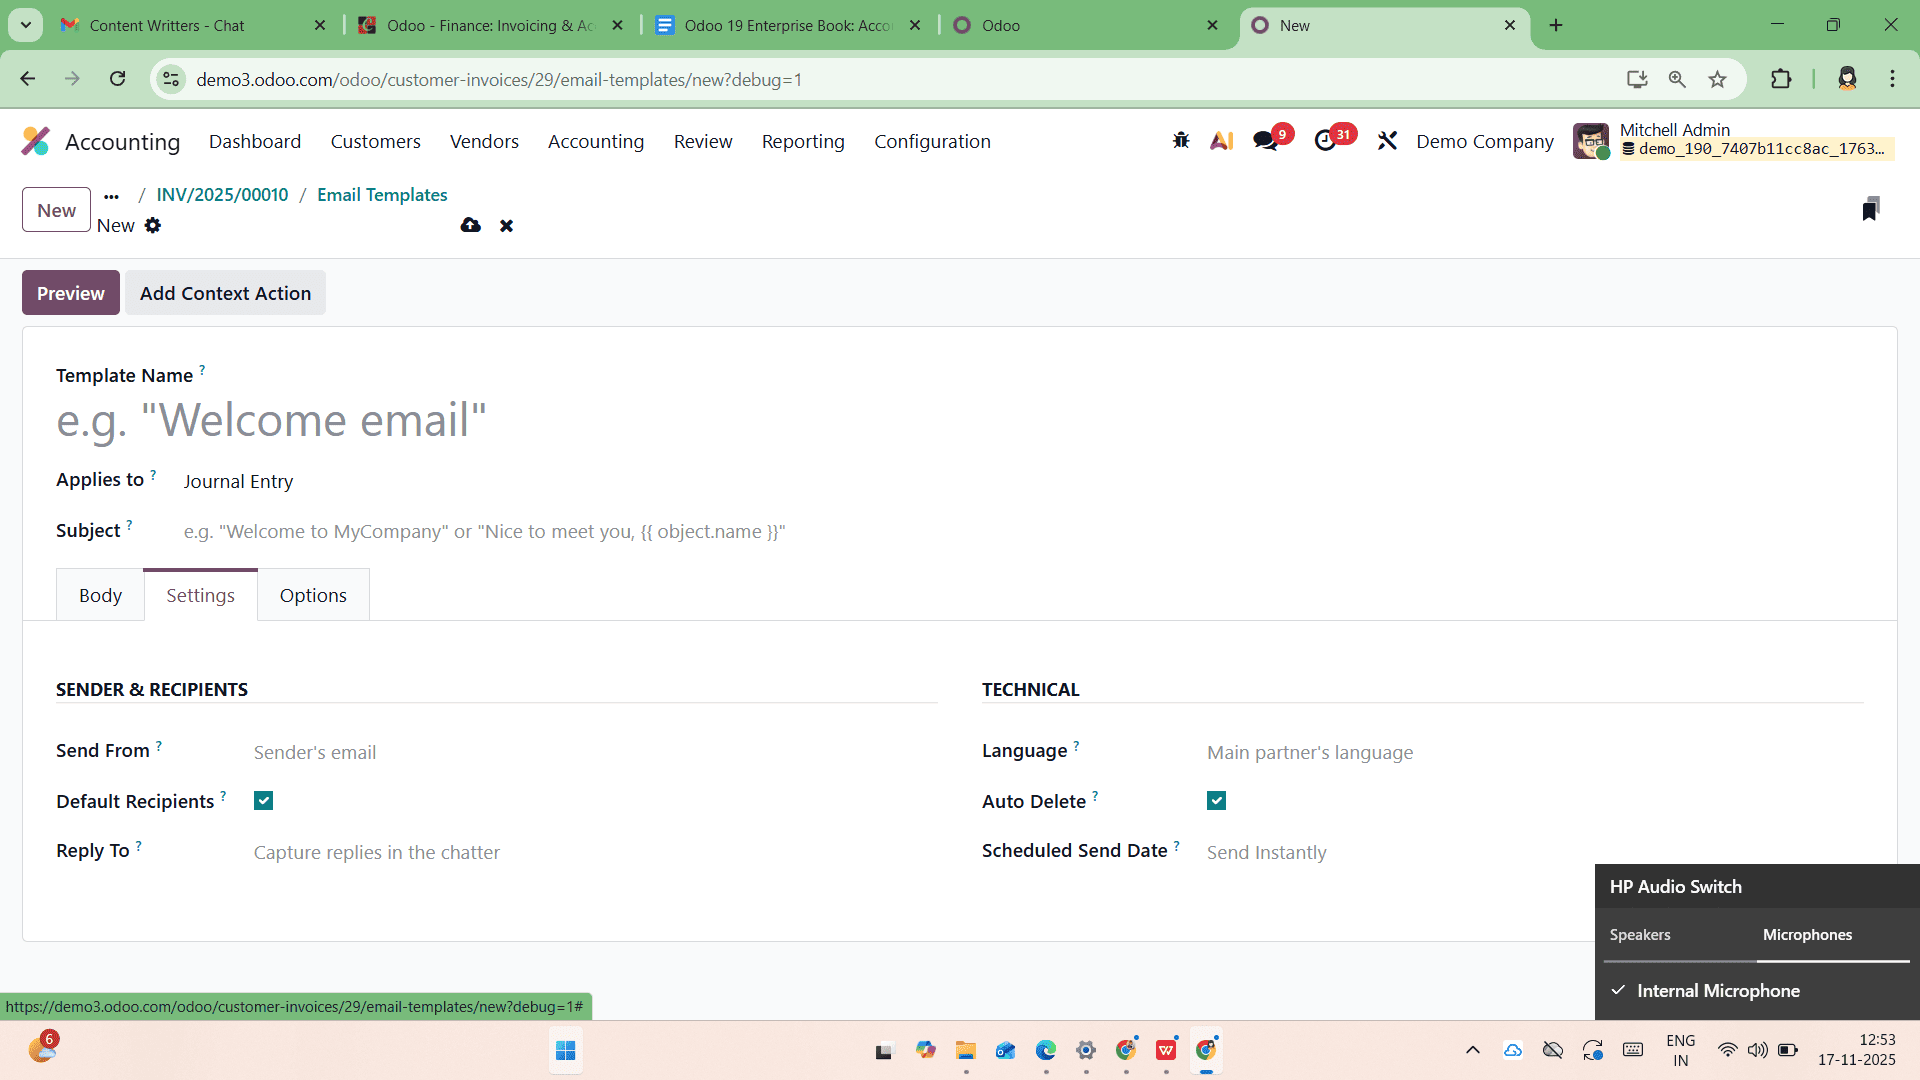
Within the Settings tab, users can configure important parameters such as the From address, Default Recipients, Reply-To address, Language, and Scheduled Send Date, offering full flexibility for automated or delayed email delivery. The Auto Delete option lets you decide whether emails generated from this template should be automatically removed after they are sent.

The Options tab offers advanced options such as choosing the Attachments, Dynamic Report (to attach dynamic documents like invoices or receipts), Owner, and Template Description.
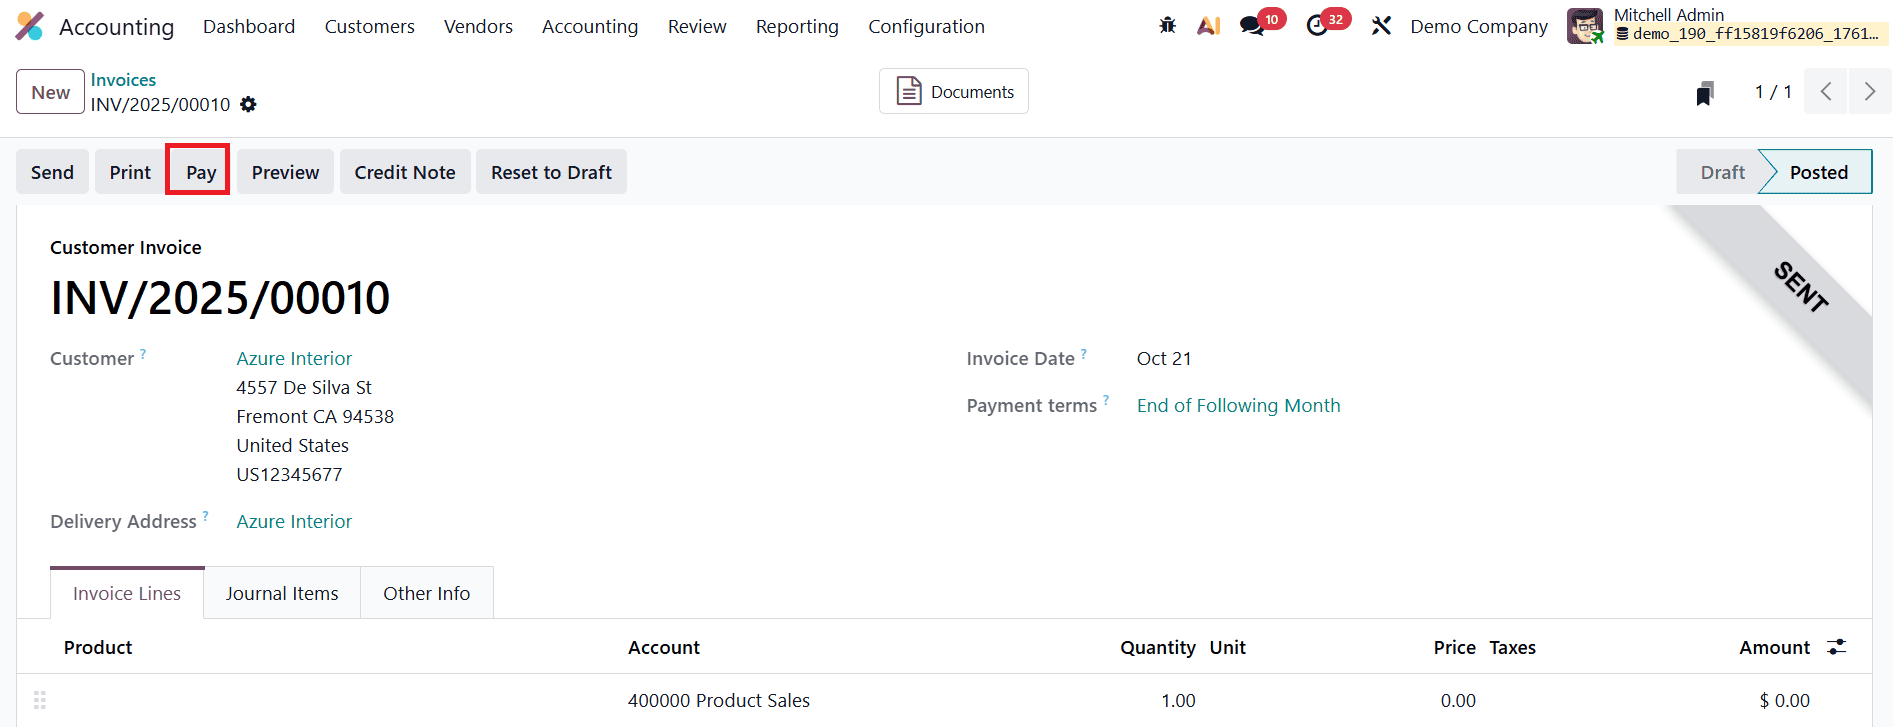
Once the customer completes the payment, the Pay option is used to record the transaction in the system. When selected, Odoo opens a payment registration pop-up that includes fields such as Journal, Payment Method, Recipient Bank Account, Amount, Payment Date, and Memo. These details ensure the payment is accurately logged and properly linked to the corresponding invoice.
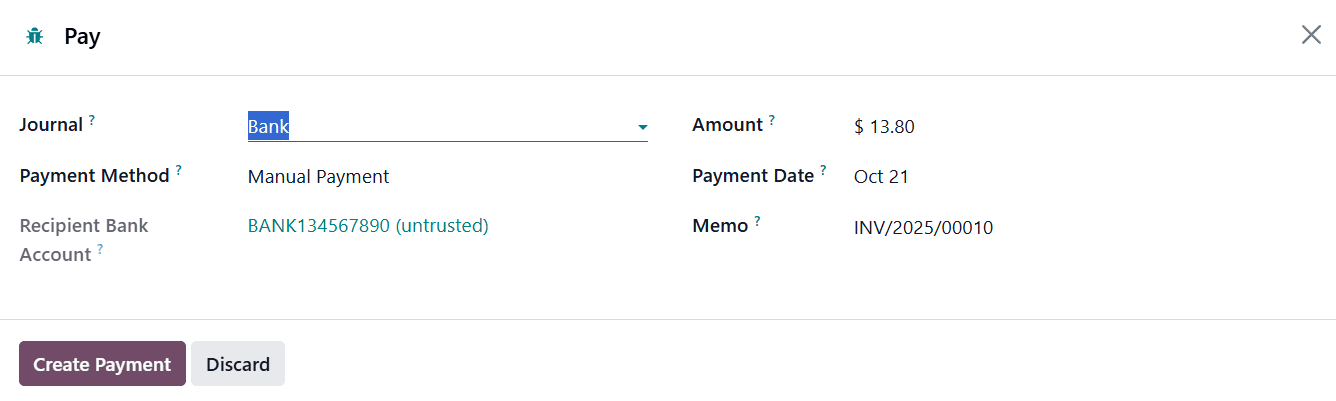
Each field can be reviewed or adjusted as needed to ensure the payment details are accurate. Clicking Create Payment validates the transaction, and the invoice status automatically updates to In Payment, indicating that the payment has been initiated or successfully processed.
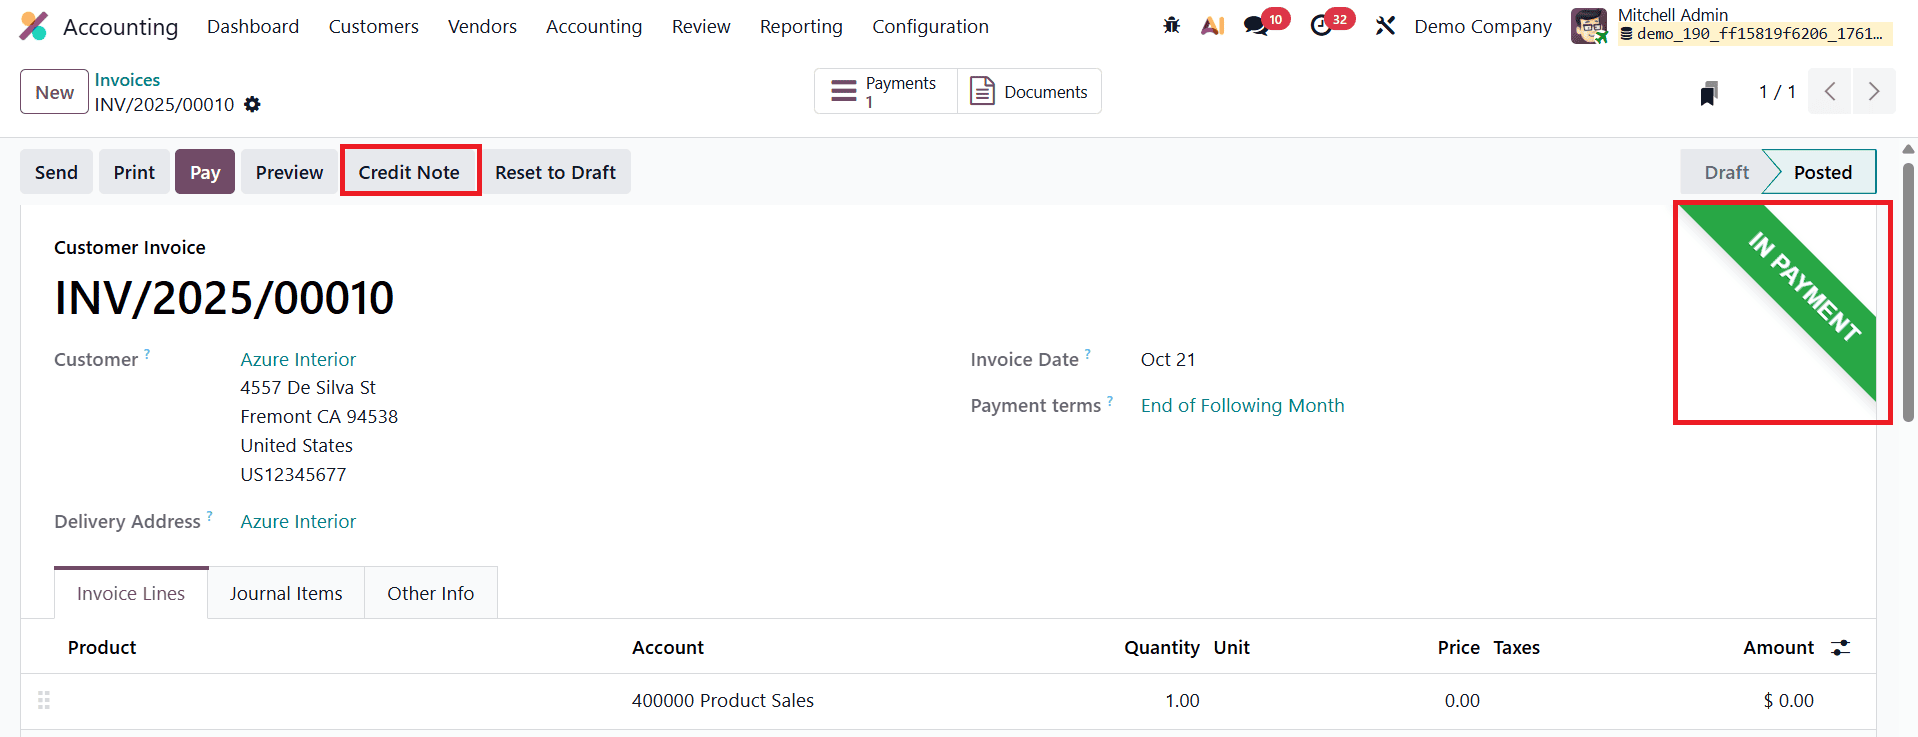
In cases where customers return products, receive damaged goods, or disagree with the services provided, businesses may need to issue a Credit Note to adjust the original invoice. This process can be started by clicking the Credit Note button.
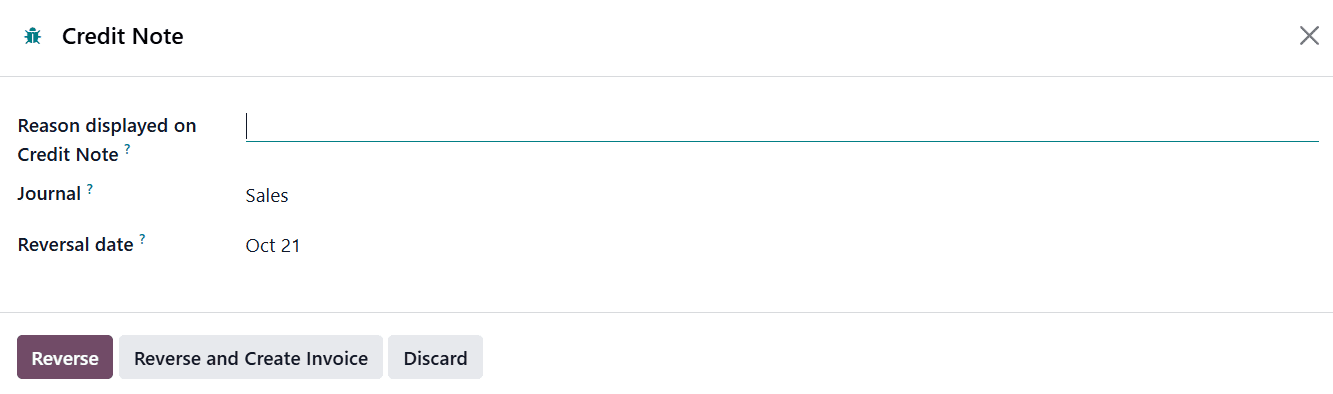
When clicked, a wizard window opens, allowing the user to specify details such as the Reason for issuing the credit note, the Reversal Date (which can match the original journal entry date or be set to a custom date), and the Journal in which the reversal will be recorded.
After entering the relevant information and clicking Reverse, the system automatically generates a draft credit note linked to the original invoice. The system then redirects the user to a new window displaying this draft credit note for further review and validation.
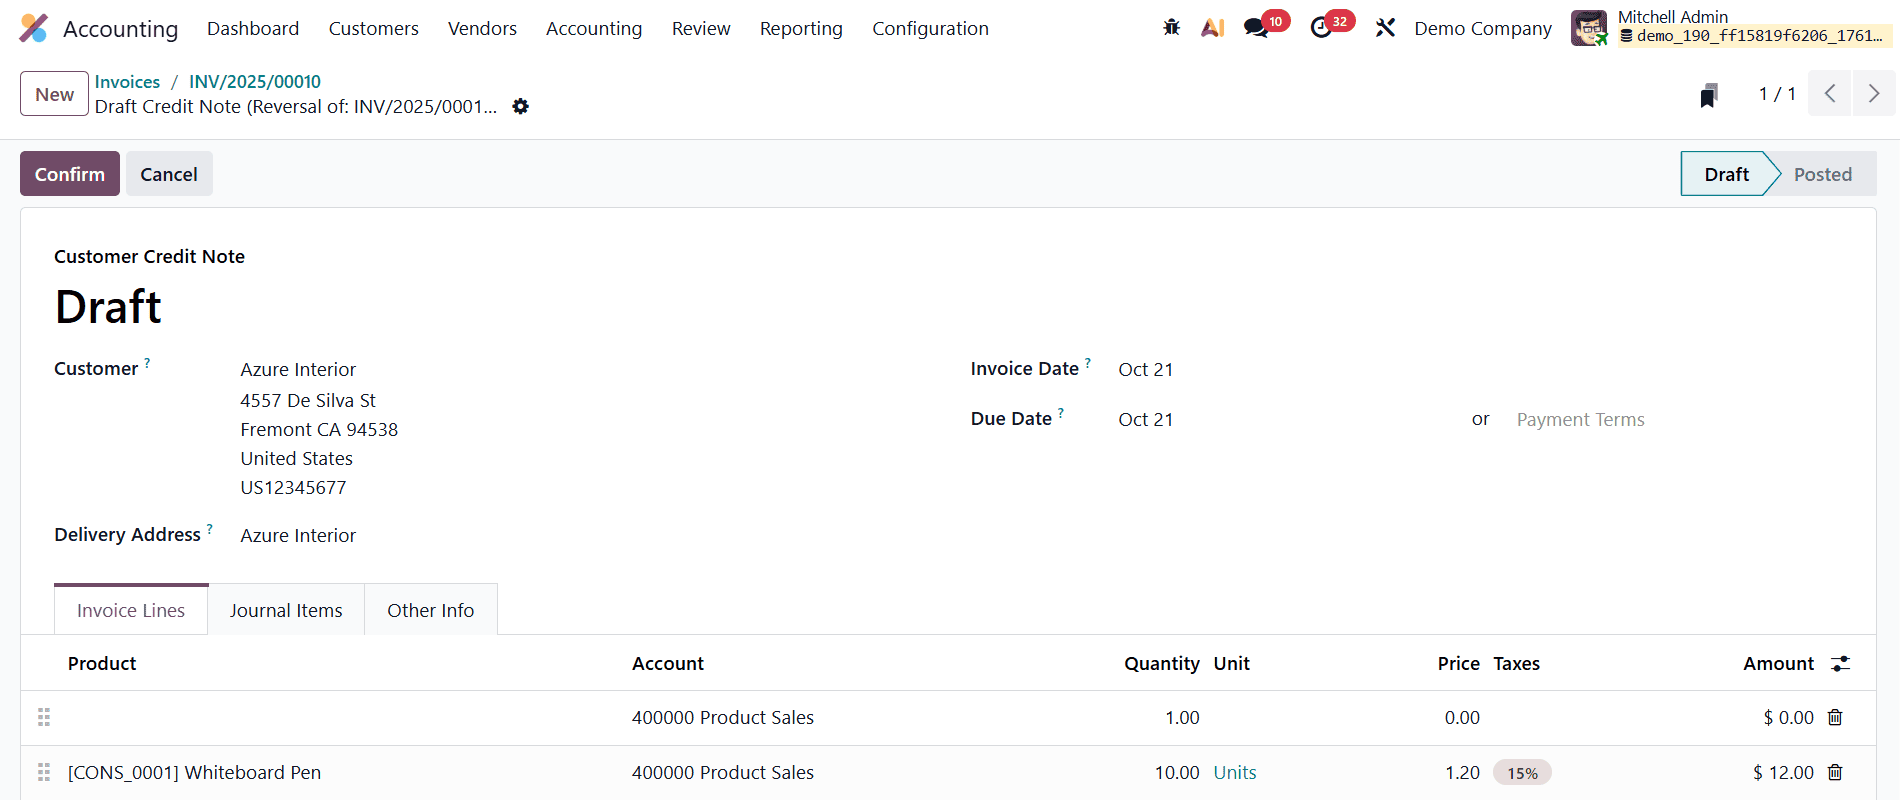
Once the draft credit note is reviewed, clicking Confirm validates the document and officially records it in the system. If a refund or payment needs to be processed, the Pay option can later be used to register the corresponding transaction. This ensures that all financial records remain accurate, transparent, and fully aligned with the adjustments made to the original invoice.
Overall, Odoo 19 makes the process of creating and managing customer invoices much easier. Every step, from creating an invoice to sending it, receiving payments, or issuing credit notes, has been designed to save time and reduce mistakes. The system also connects smoothly with other modules like Sales and CRM, so all your data stays updated automatically. Whether your business is small or large, Odoo 19 gives you helpful tools to manage your billing in a quick and organized way. By learning how to use these invoicing features, you can improve your daily work, get payments faster, and keep your financial records clear and accurate.
To read more about How to Create a Customer Invoice in Odoo 18 Accounting, refer to our blog How to Create a Customer Invoice in Odoo 18 Accounting.