The term "Access Rights" in Odoo describes the privileges granted to different users or groups within the system. These rights determine what a user may do in Odoo, including adding, changing, deleting, or viewing specific data or modules.
Access Rights in Odoo 19 Accounting
- No
- Read-only
- Invoicing
- Invoicing and Bank
- Bookkeeper
- Administrator
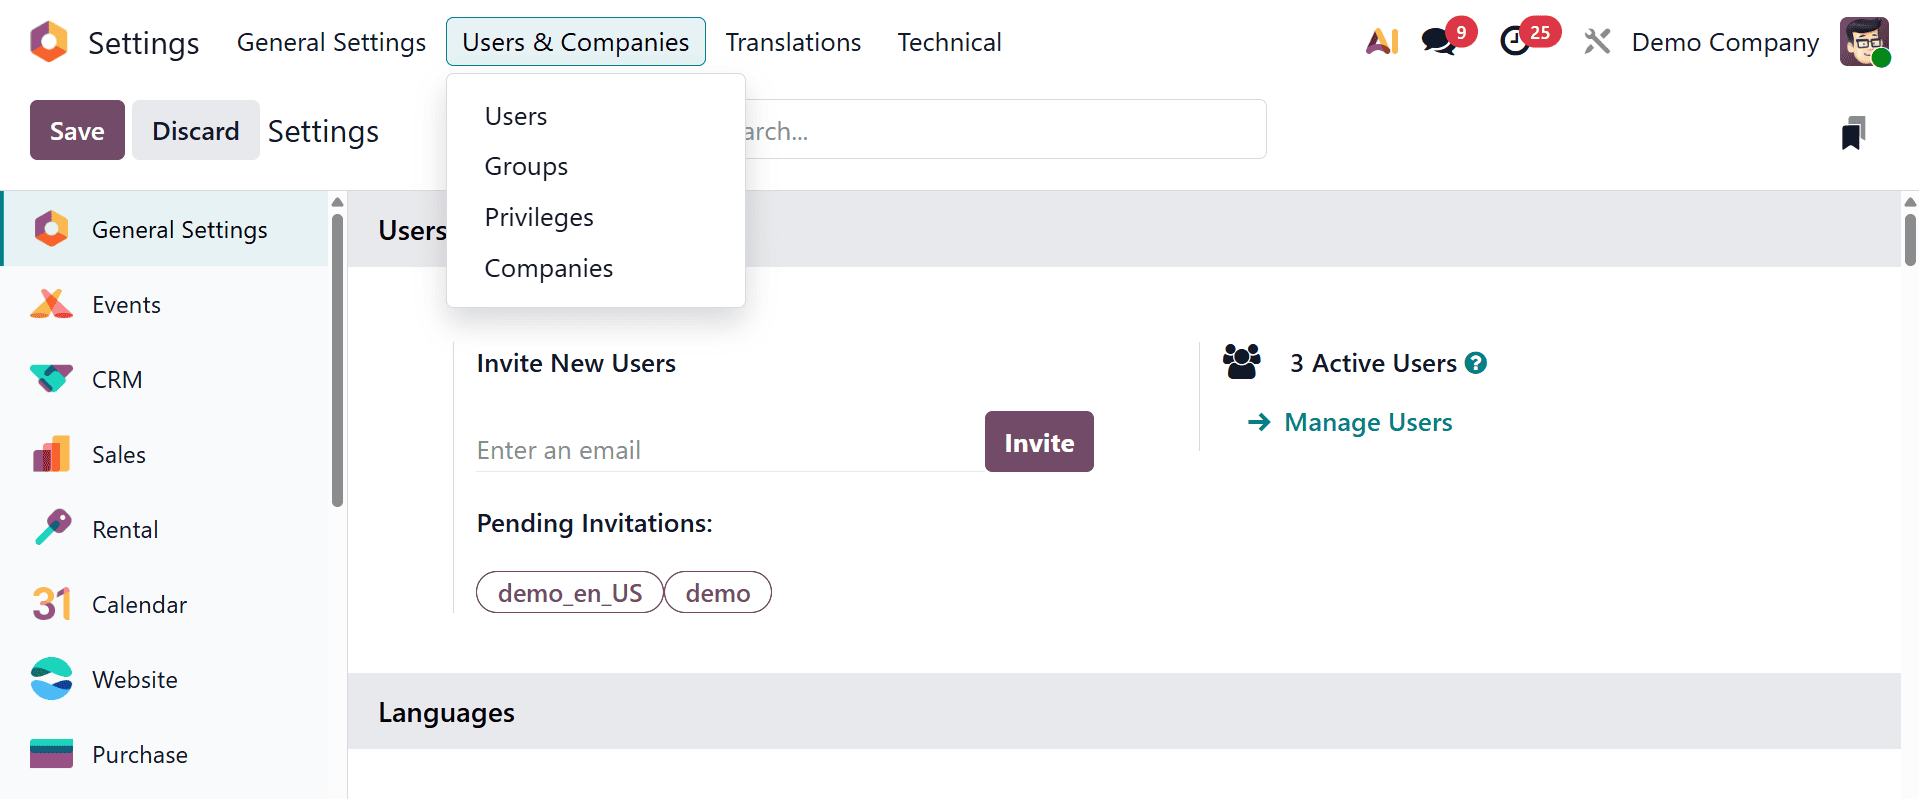
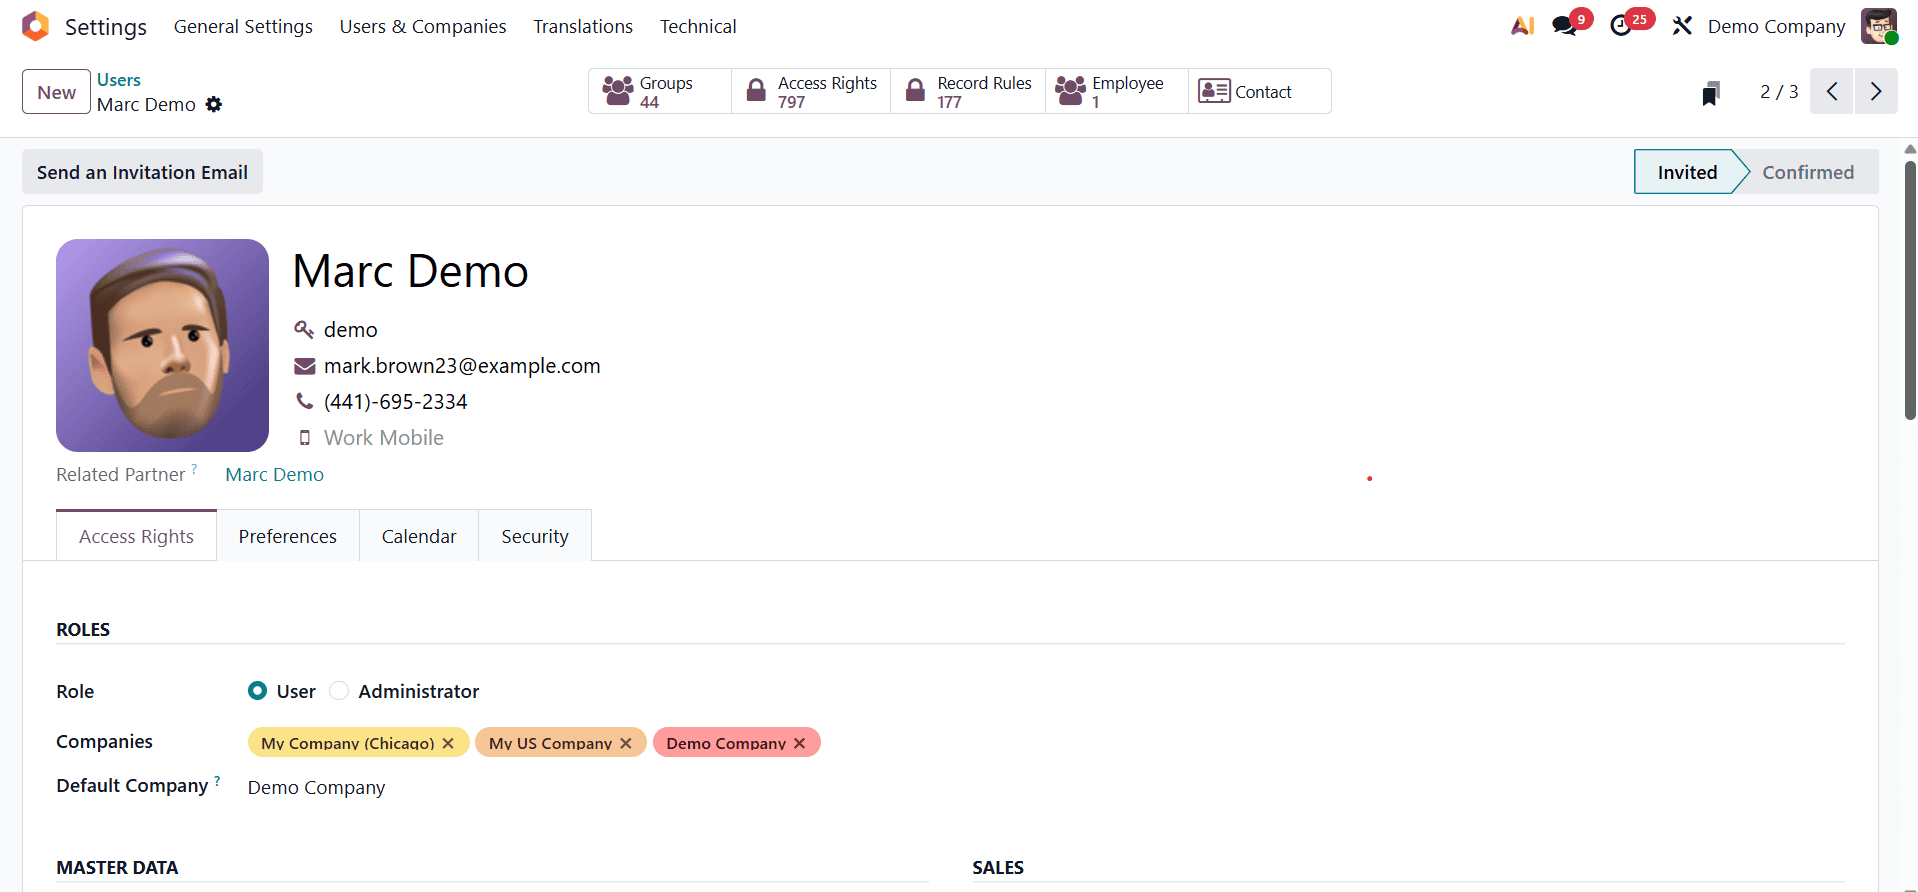
The Users & Companies menu appears when you navigate to the Odoo General settings. There are sub-menus under the Users & Companies menu under "Users," "Groups," "Companies," and "Privileges."
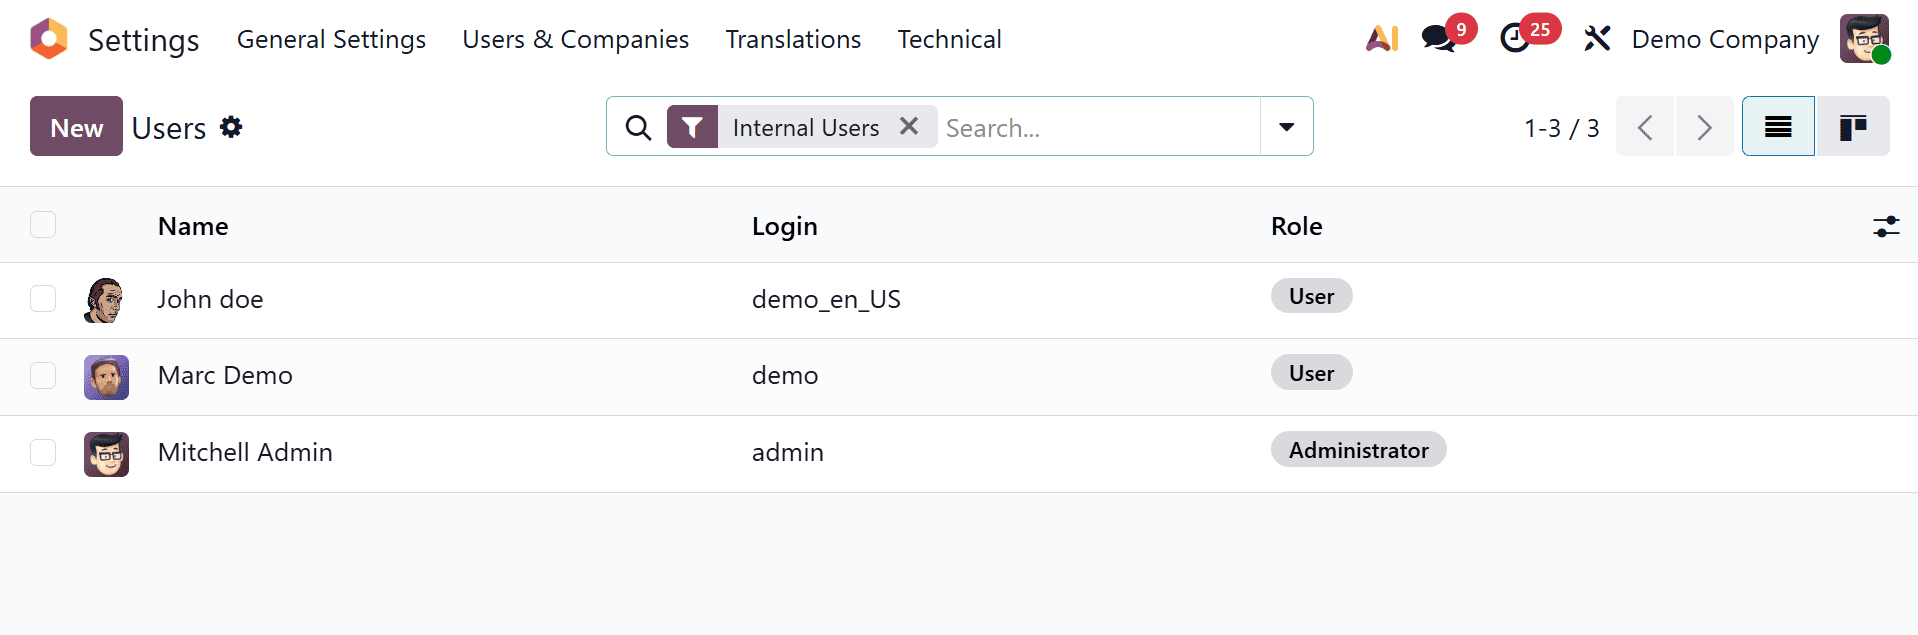
You can view a list of all Internal Users by choosing the Users sub-menu. All users—internal, portal, and public—are listed below when the "Internal User" filter is removed.
Each user's access privileges to every Odoo module, such as the Sales, Accounting, Inventory, and so on, will be displayed when they are selected.
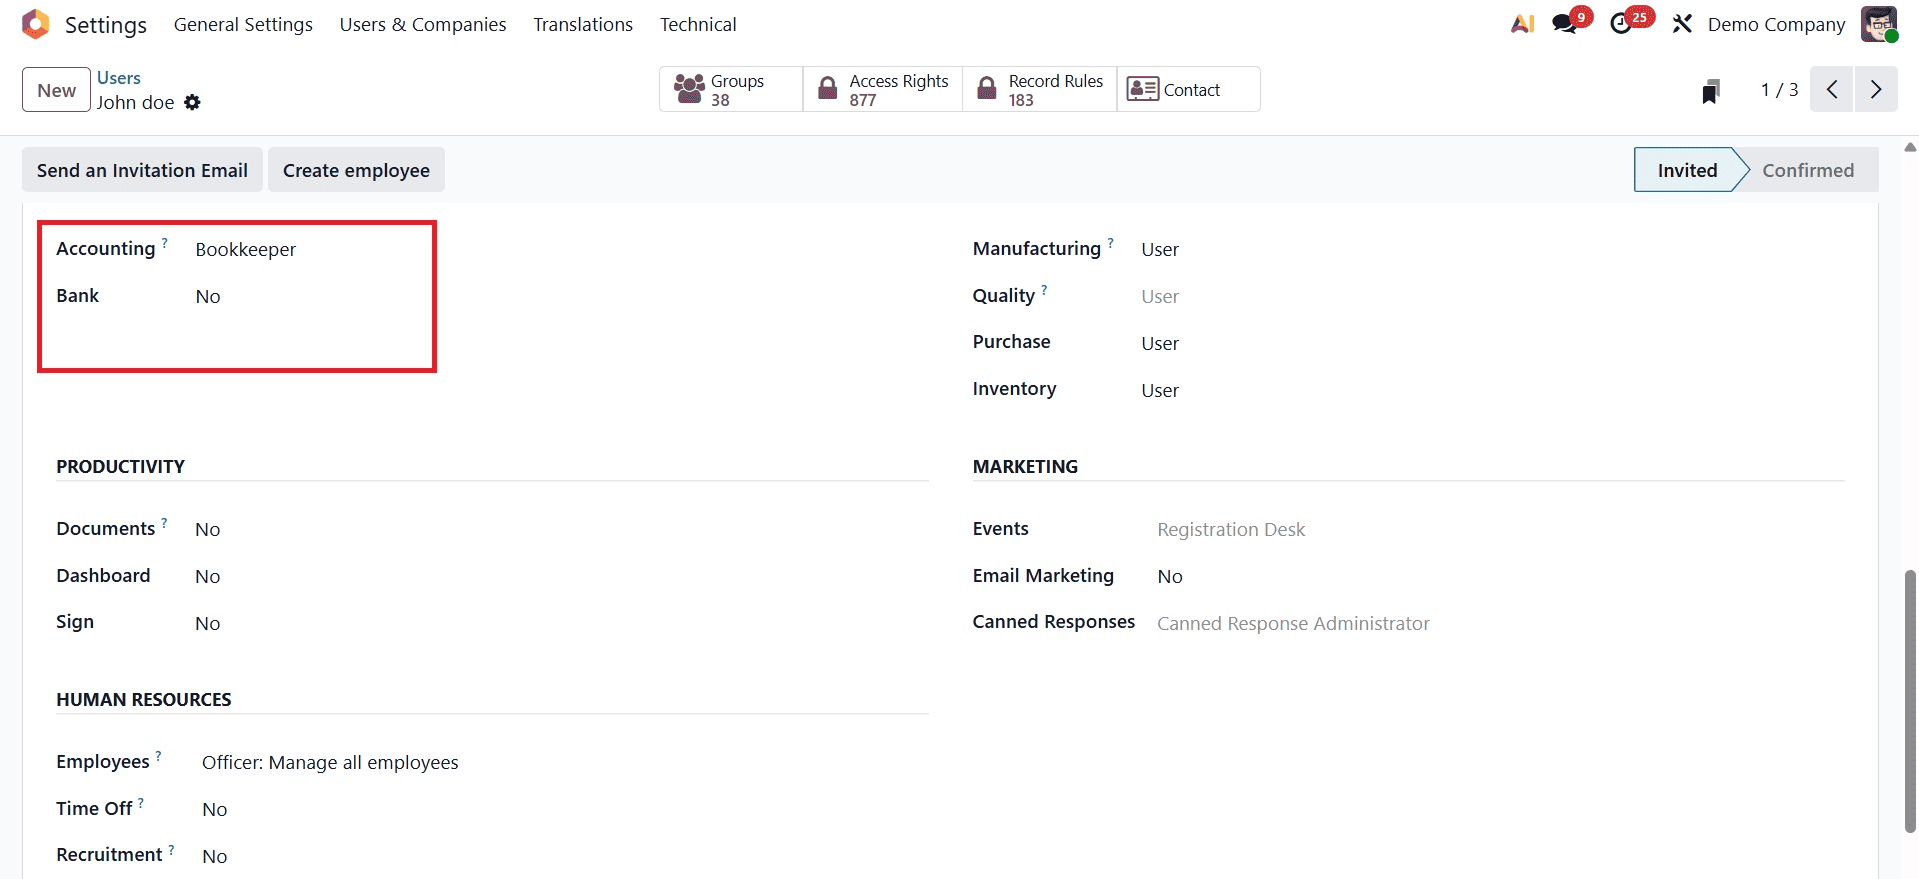
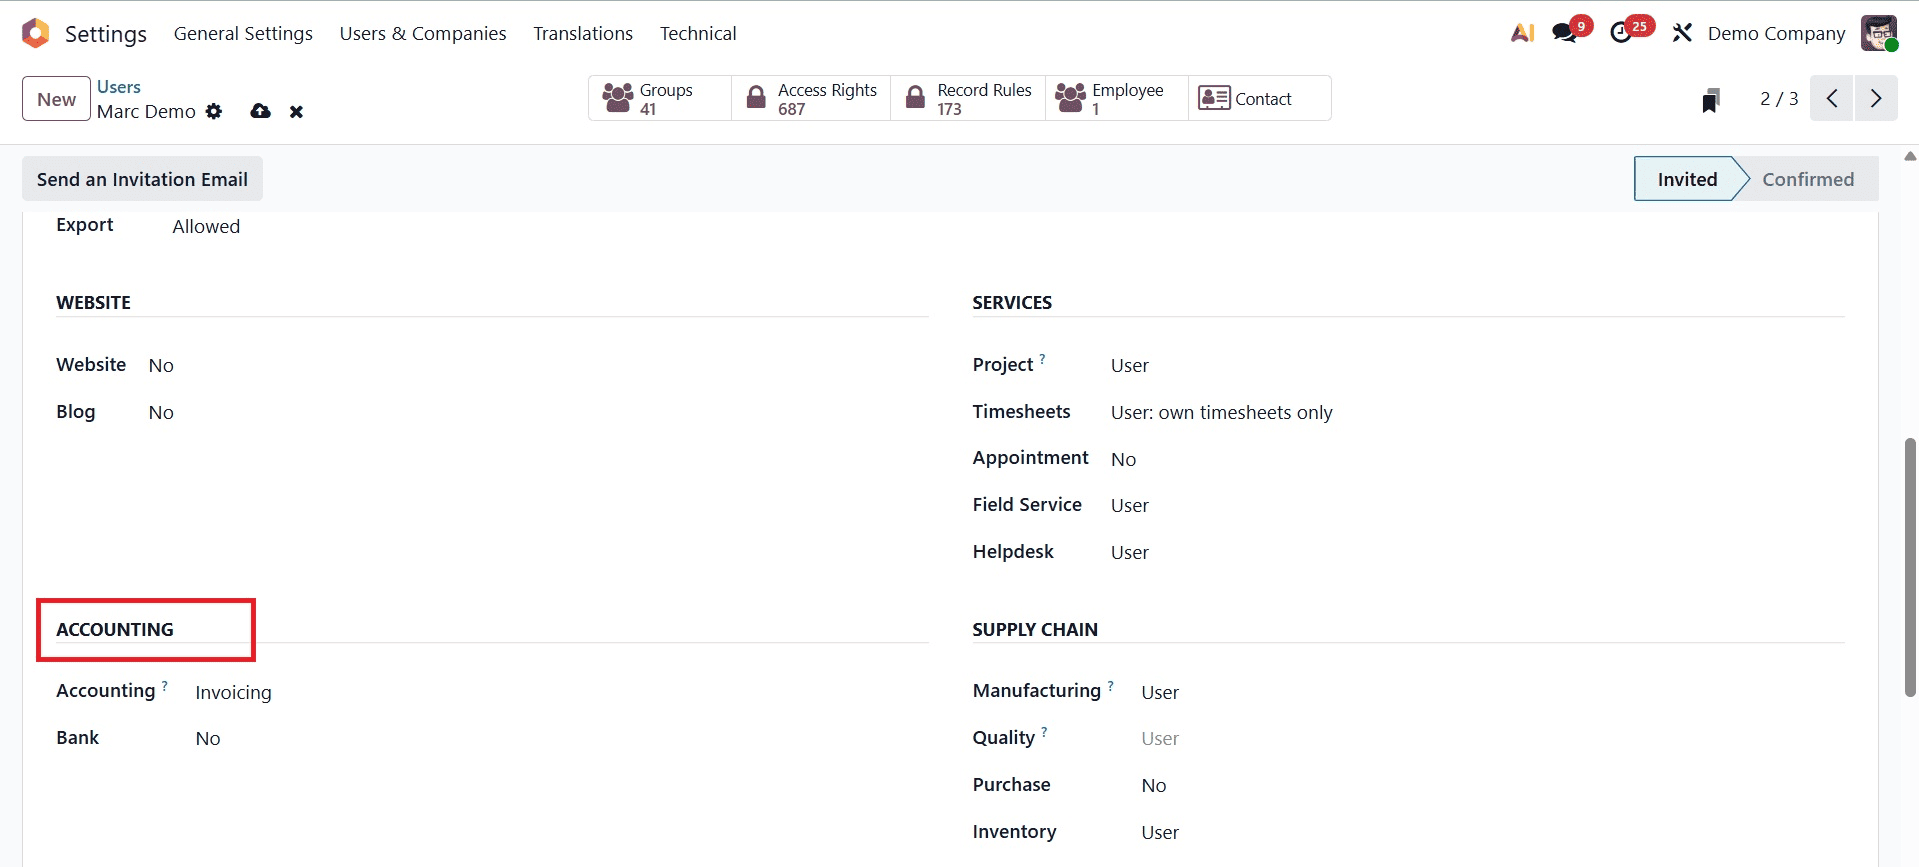
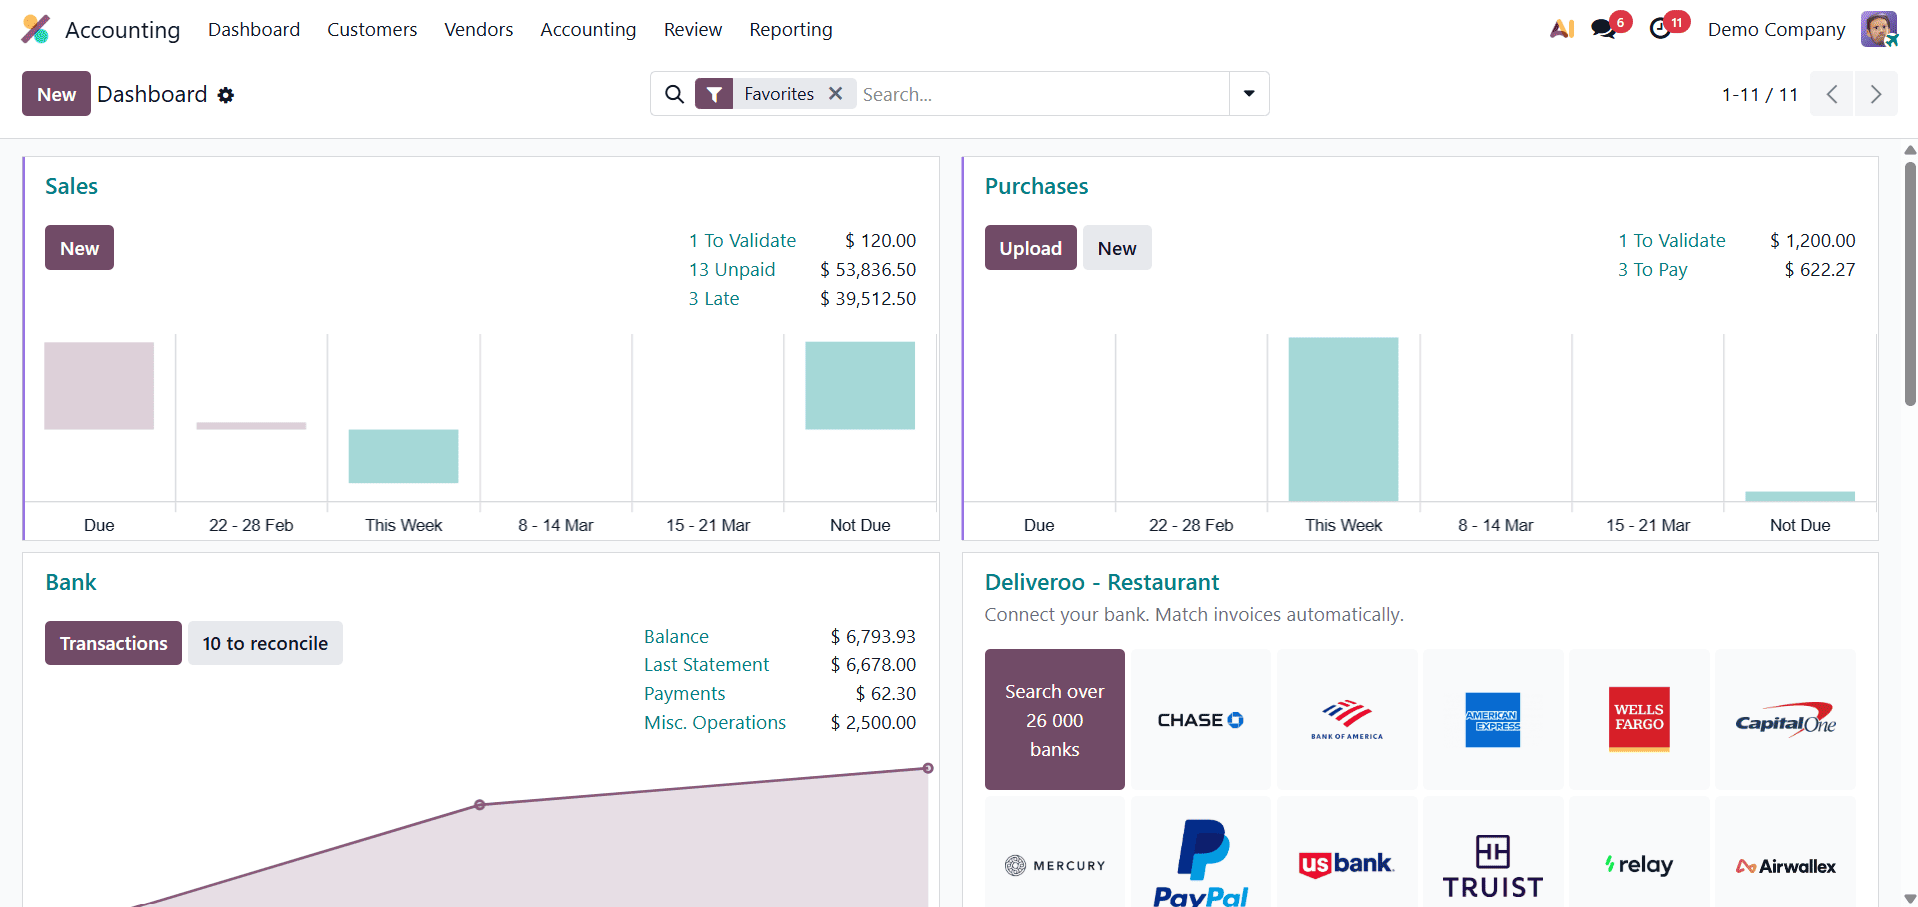
The accounting module's access rights are listed in the Accounting section. All of the Odoo 19 accounting module's access rights will be displayed in a dropdown list.
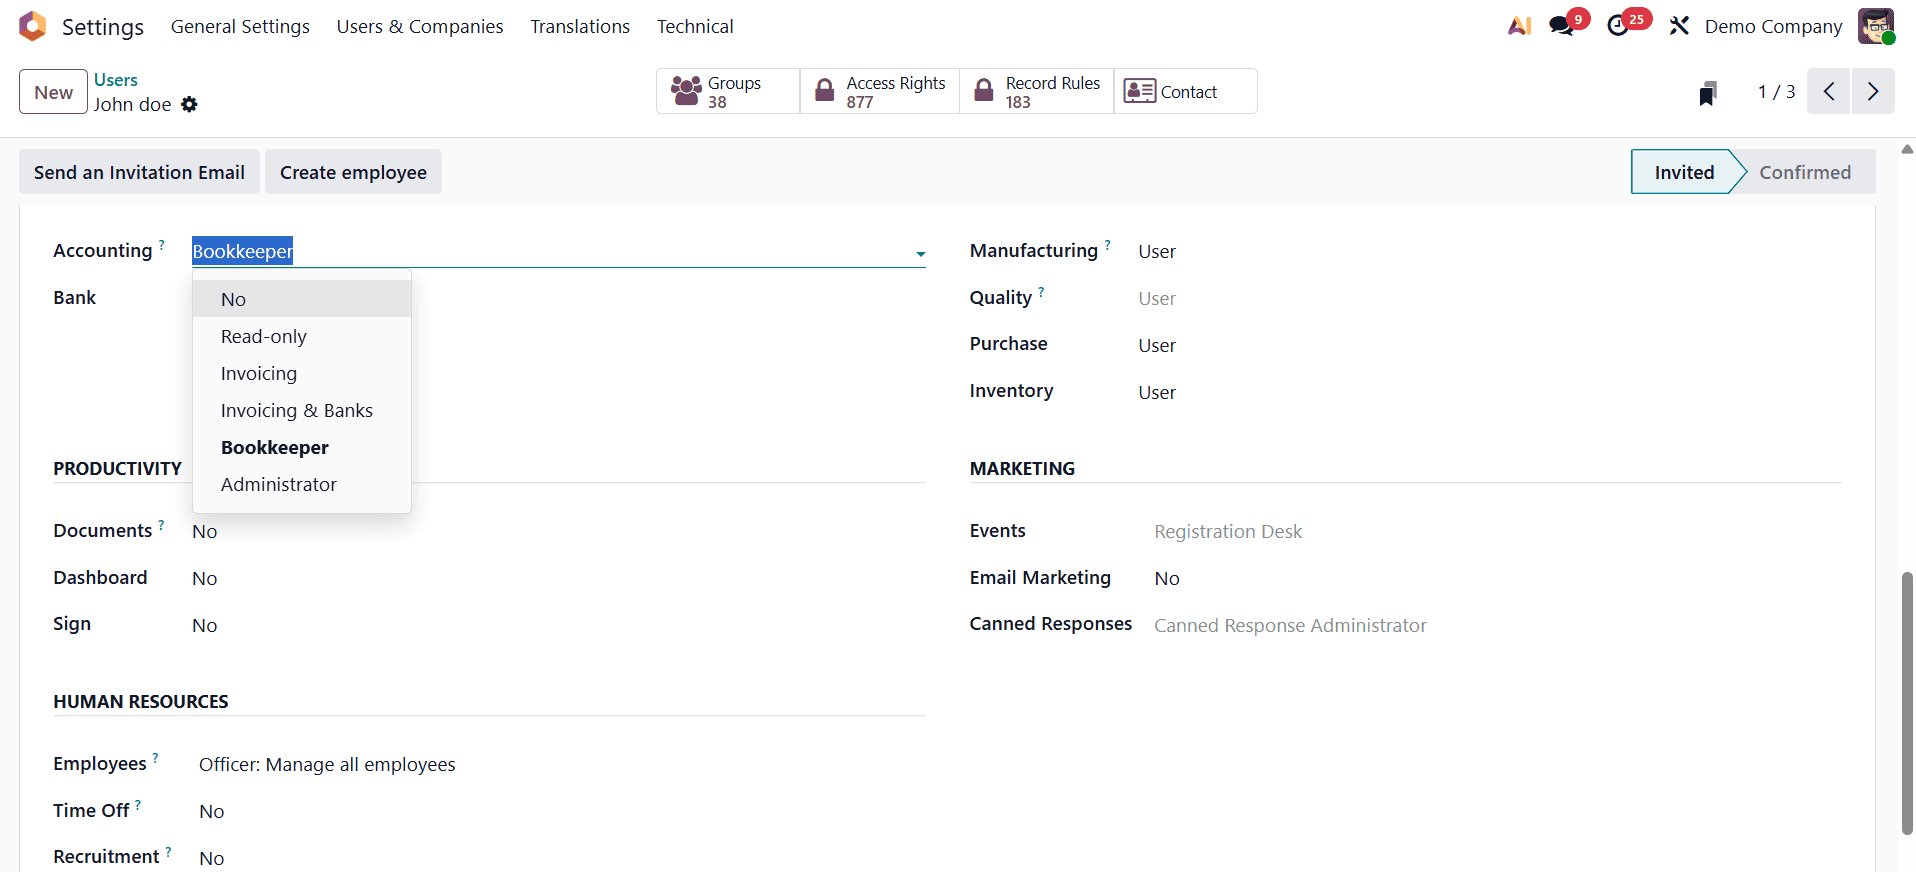
From the list, choose any of the access rights that should be assigned to the chosen user. When managing your invoicing and accounting procedures, these access rights are useful. Simply examine all of the features of each access directly after assigning it to a user.
- Invoicing: The features that give the user access privileges to invoices are invoices, payments, and basic invoice reporting.
- Read-Only: Users with read-only access privileges can view all the
Accounting information, but only in Read-only format. With these access rights, no actions are permitted.
- Invoicing and Banks: Provides access privileges to the "Invoicing" feature as well as the accounting dashboard, bank administration, and follow-up reports.
- Bookkeeper: All accounting functions, such as asset management, reporting, and analytical accounting, are accessible without configuration rights.
- Administrator: The administrator has complete access permissions, which include the ability to manage accounting data and configure systems.
In order to determine all of the features and functions that a user can access with each access right, it is necessary to first create an internal user and grant them various access privileges.
Invoicing
To verify each access right in the Odoo19 accounting module, go to users and either create a new internal user or use an existing user. To grant this person access rights, navigate to the Accounting section. The user types, email address, and name are listed on this page.
From the general settings, configure the user Mitchell Admin's access rights. First, select "Invoicing" as the access right and make sure this user is permitted to utilize certain features and functions. The user can only produce invoices for clients and process payments for those invoices when the access rights are set to Invoicing.
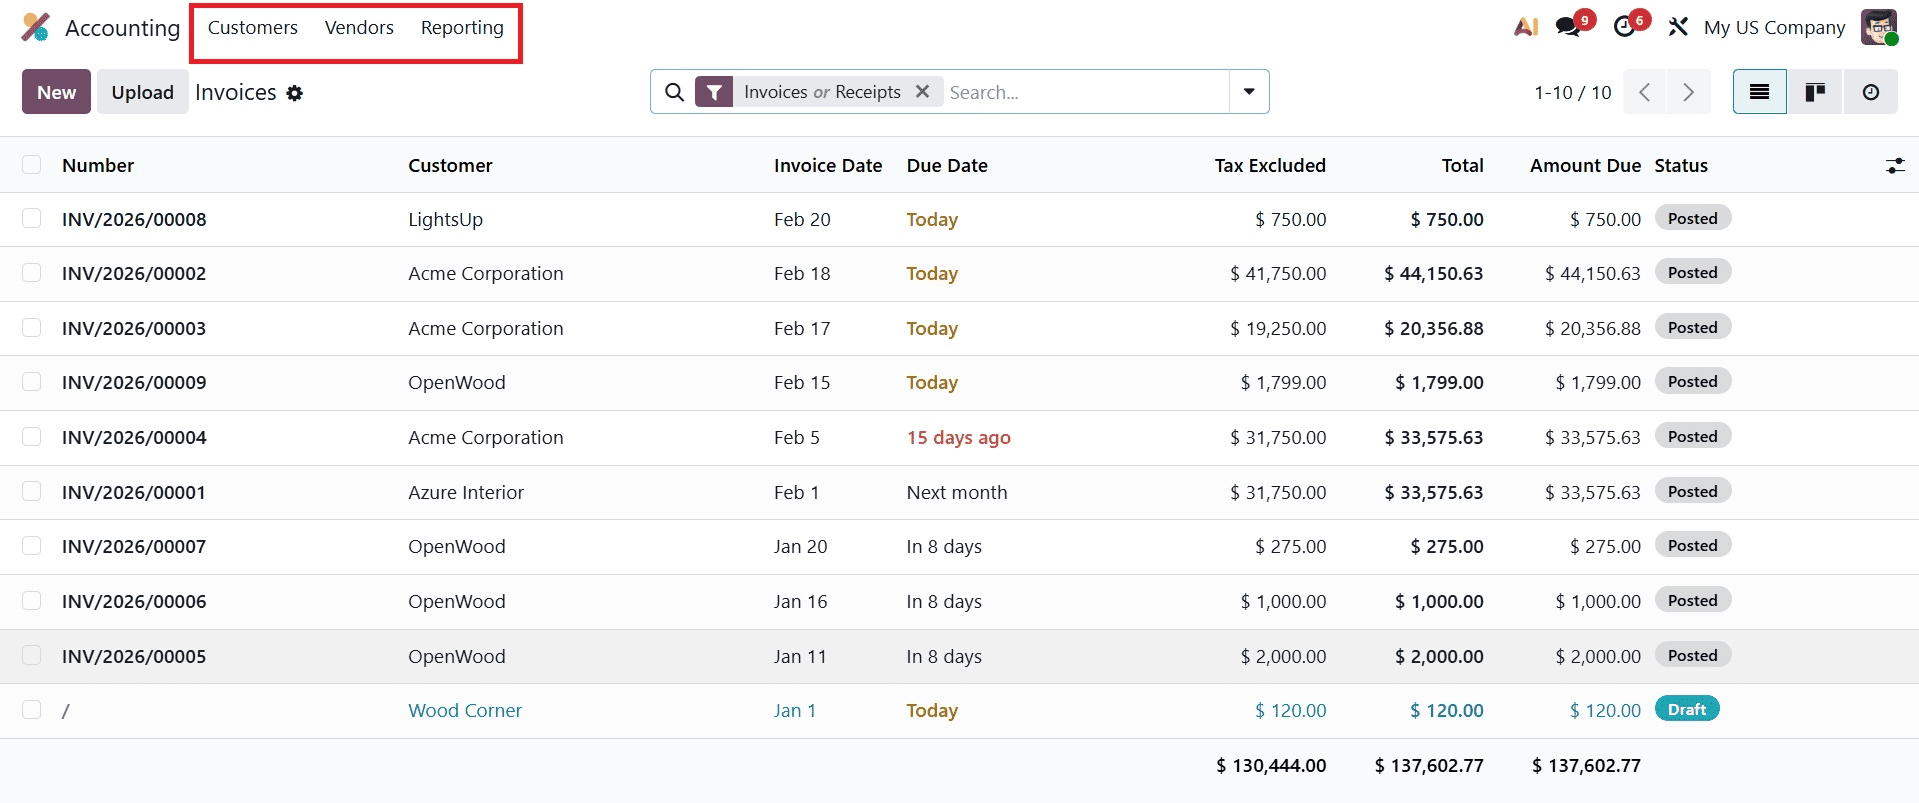
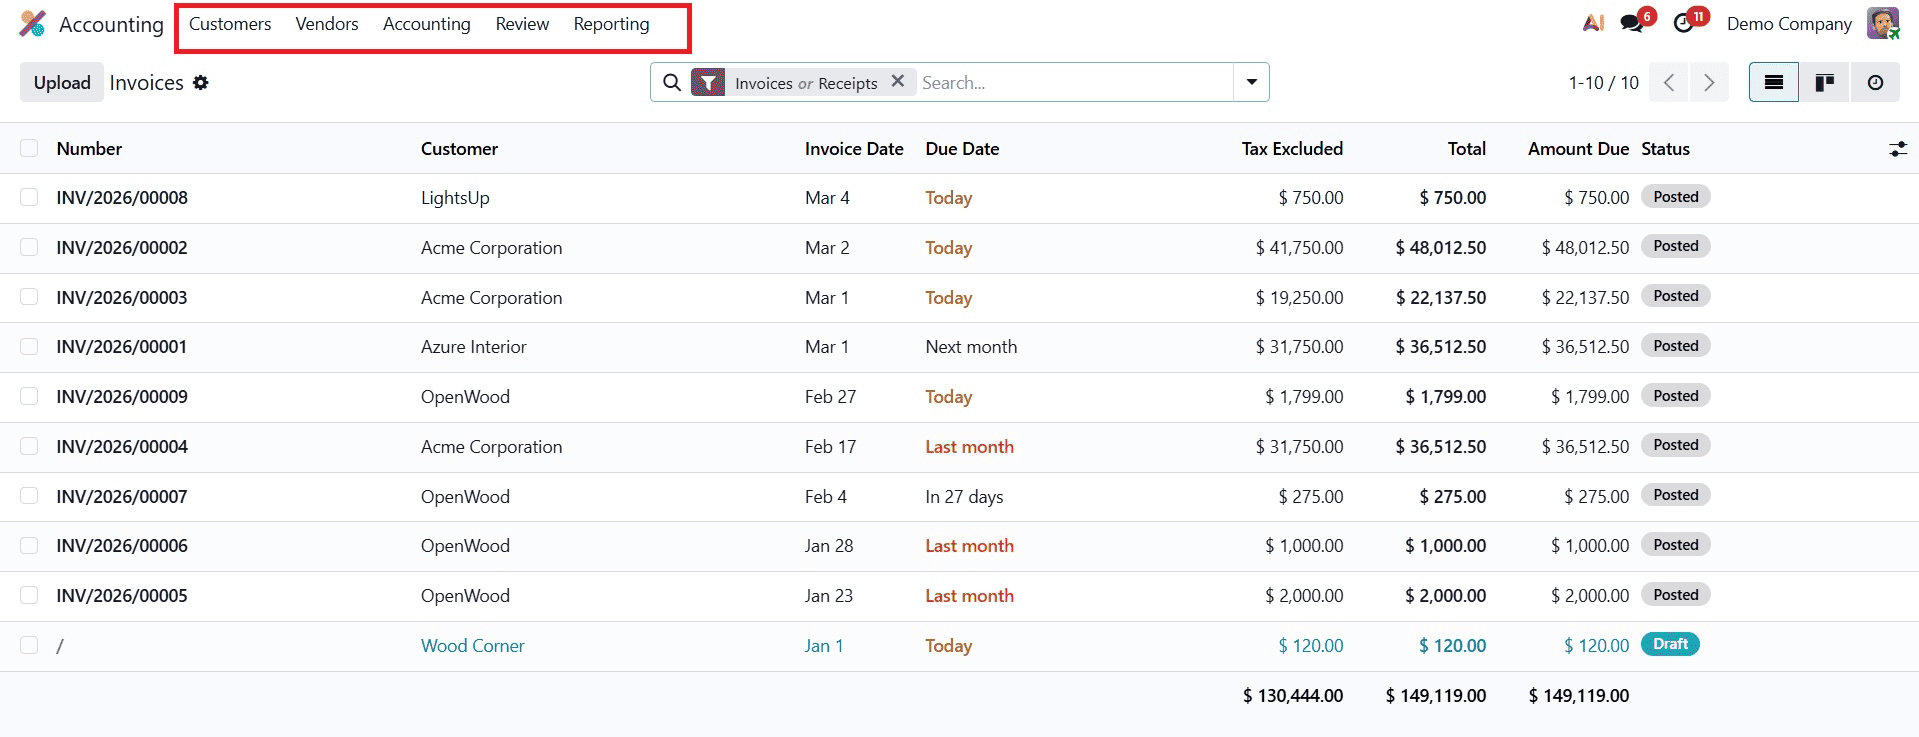
Proceed to the Accounting application after logging in as "Marc demo." The invoice page will open first when the accounting program is launched. When the user's access rights are set to "Invoicing," they are not able to see the dashboard. The accounting application has just three menus: Vendor, Customer and Reporting.
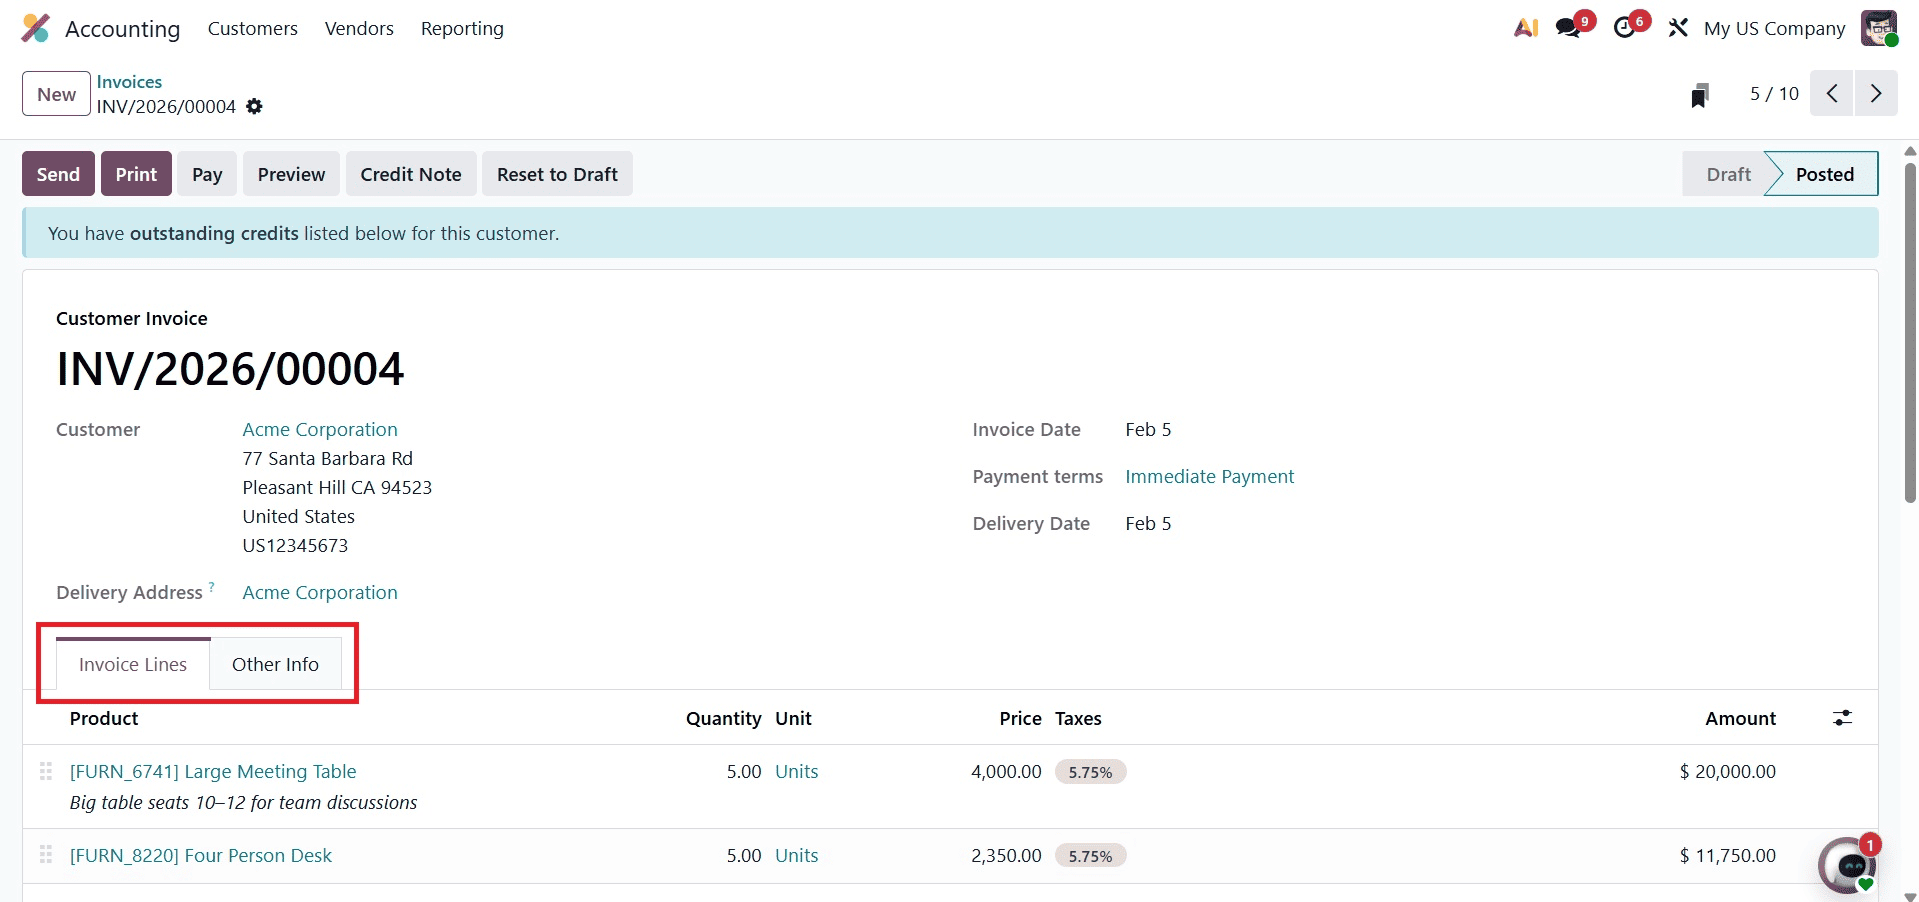
The information of the journal item created when the invoice is created will not be visible to the user if their access right is set to "invoicing." In other words, Marc Demo will not receive the specifics of the journal items that correspond to the invoice if he makes one.
Simply use the credit note option to handle any refunds after the invoice has been produced. Journal entries will typically be generated automatically as well. However, the journal item created in relation to the credit note is not visible to the user with access permissions invoicing. When you select the credit note option, a popup will show up. Add the justification that should appear on the credit note there, click "Reverse and Create Invoice," and then click "Confirm" to validate the credit note.
Additionally, since the user only has access permissions to invoices, the journal item tab is absent. Even after the credit note has been verified, only the Invoice Lines and Other Info tabs remain. Only creating invoices for sale orders is possible for the person with invoicing access capabilities; they do not have access to the sale order's journal items.
After that, confirm that this user can access the journal items when the purchase order's debit notes are generated. The business wishes to pay extra for the quotation when a purchase order is made and more products are delivered than were ordered.
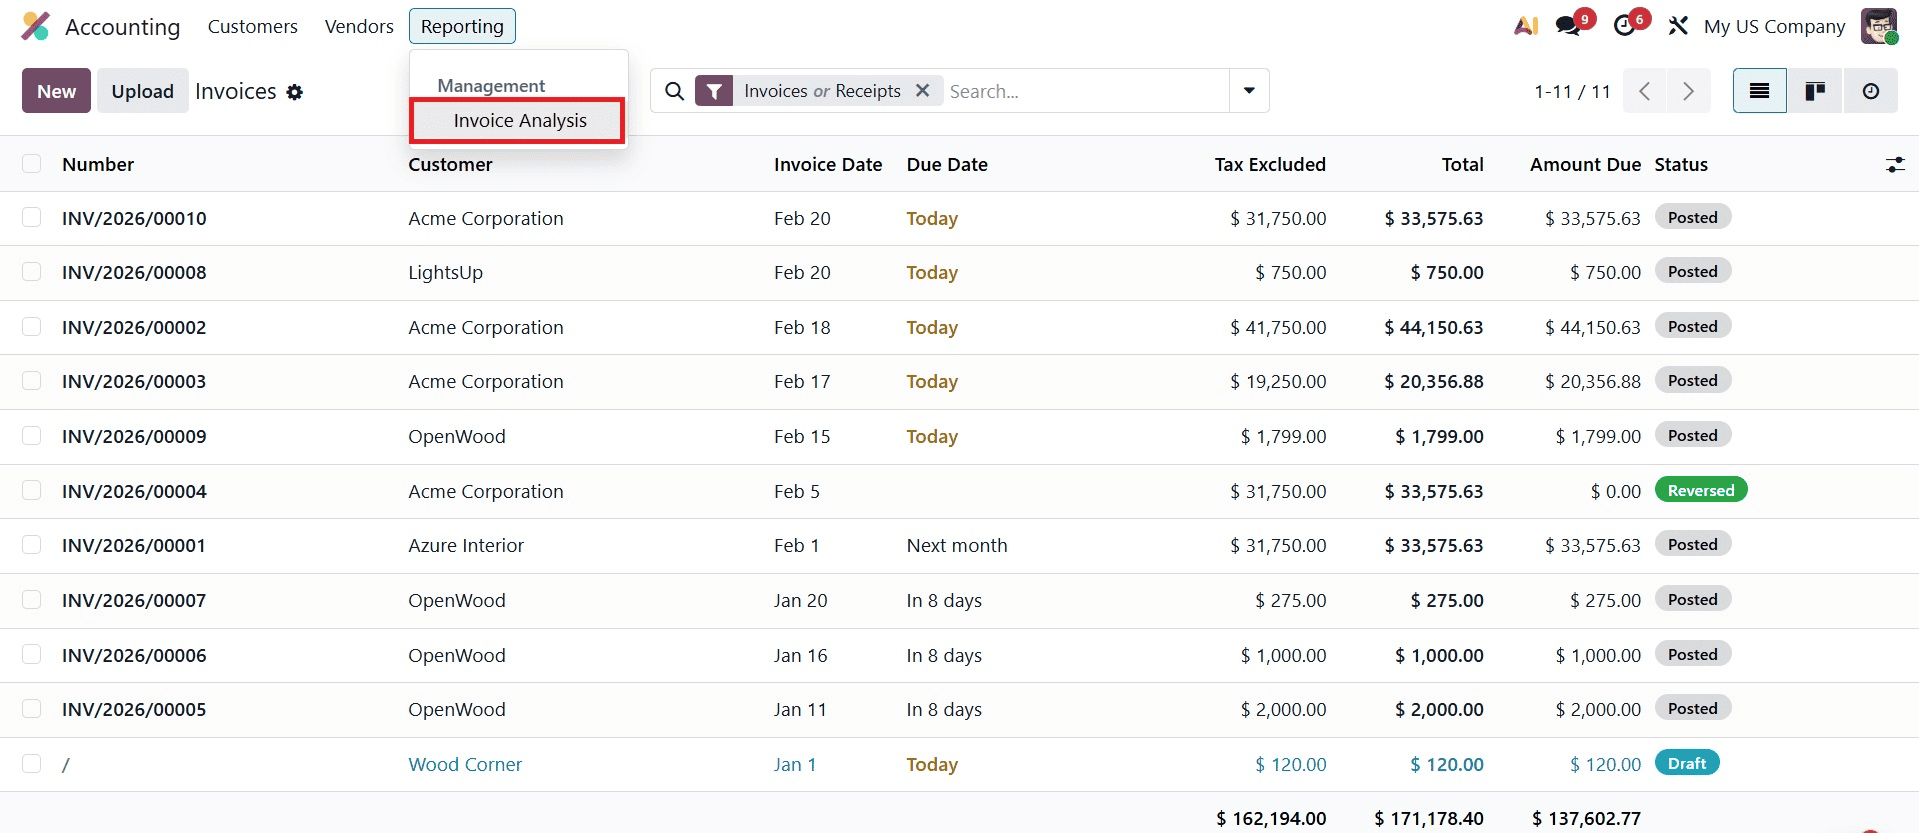
The reporting menu only has one sub-menu, "Invoice Analysis," which provides the most basic invoicing reports. The generated invoices will then be accessible in many forms, including the pivot view and the graphical view.
The user can therefore create invoices, vendor bills, customer payments, and more when the access privilege is set to "Invoicing." However, it is not permitted to alter the accounting application's configurations.
Read Only
To modify the user Marc demo's access privileges to read-only, log out of the user Marc demo, then log in as Mitchell admin, and then go back to the General settings.
With read-only access, users of Odoo's accounting module can view and examine financial data without requiring any modifications. It is typically provided to users who simply require access to financial data for reference or analysis and do not require the capacity to make changes or perform transactions.
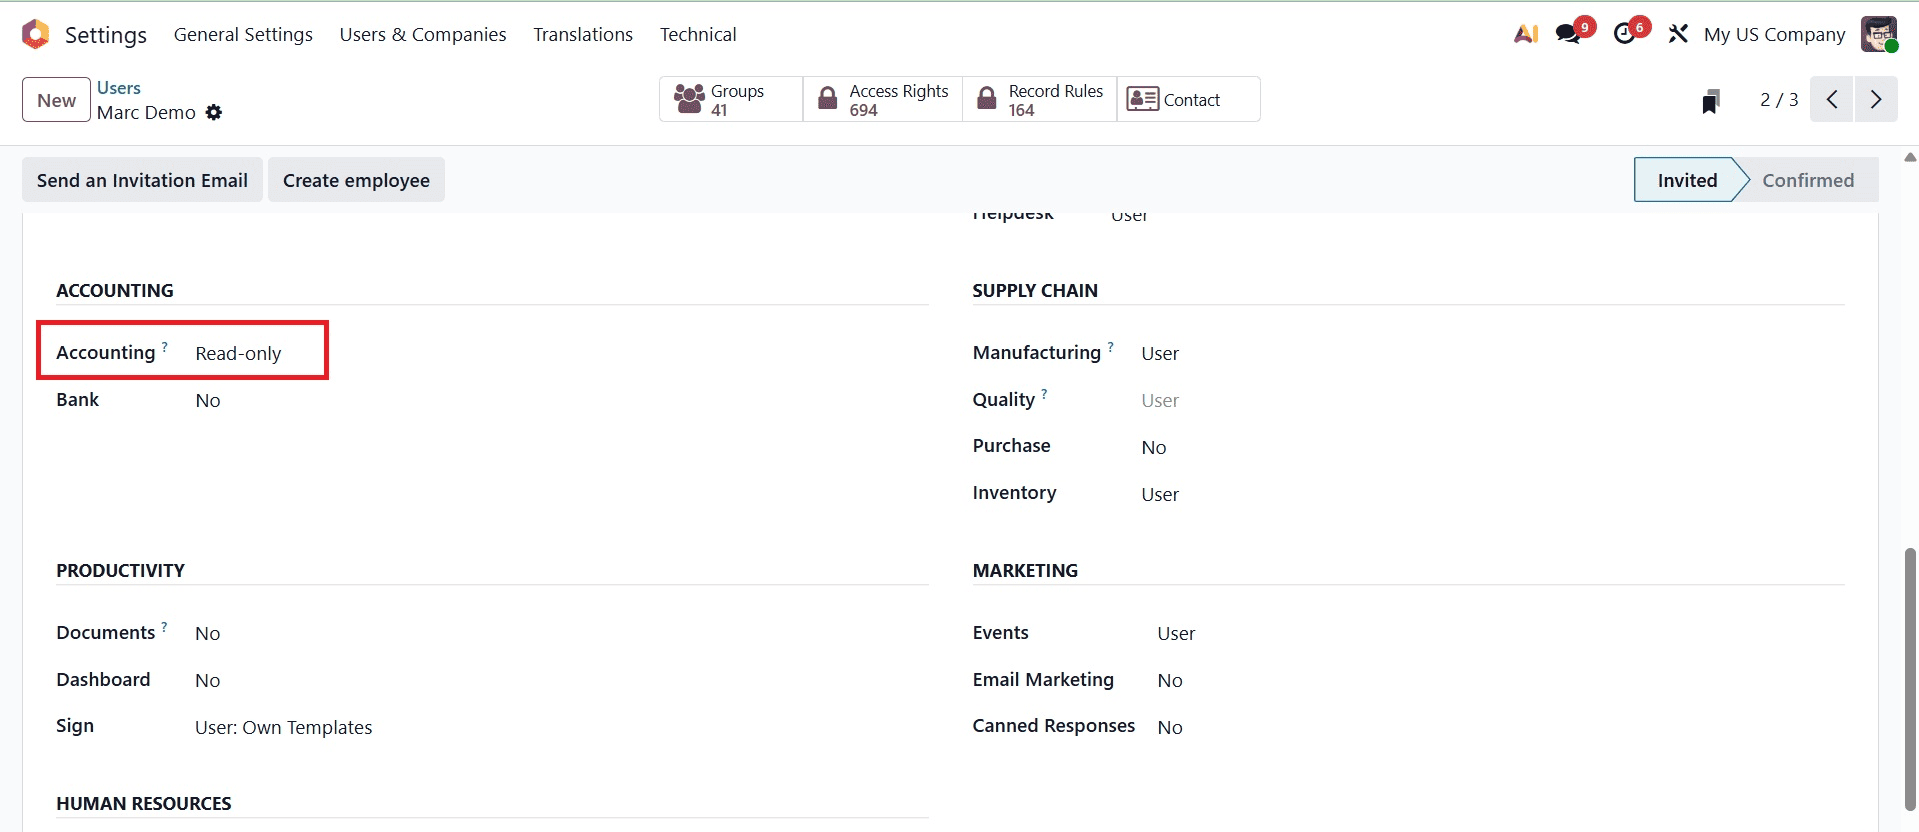
To save the modifications made to the user's profile, click the "Save" icon. After that, we'll observe the modifications brought about by read-only access privileges, log-in as Marc demo, and go to the accounting module.
When the read-only access permission is enabled, there is no dashboard view. Users with read-only access can see the customer, vendor, accounting, review and reporting menus.
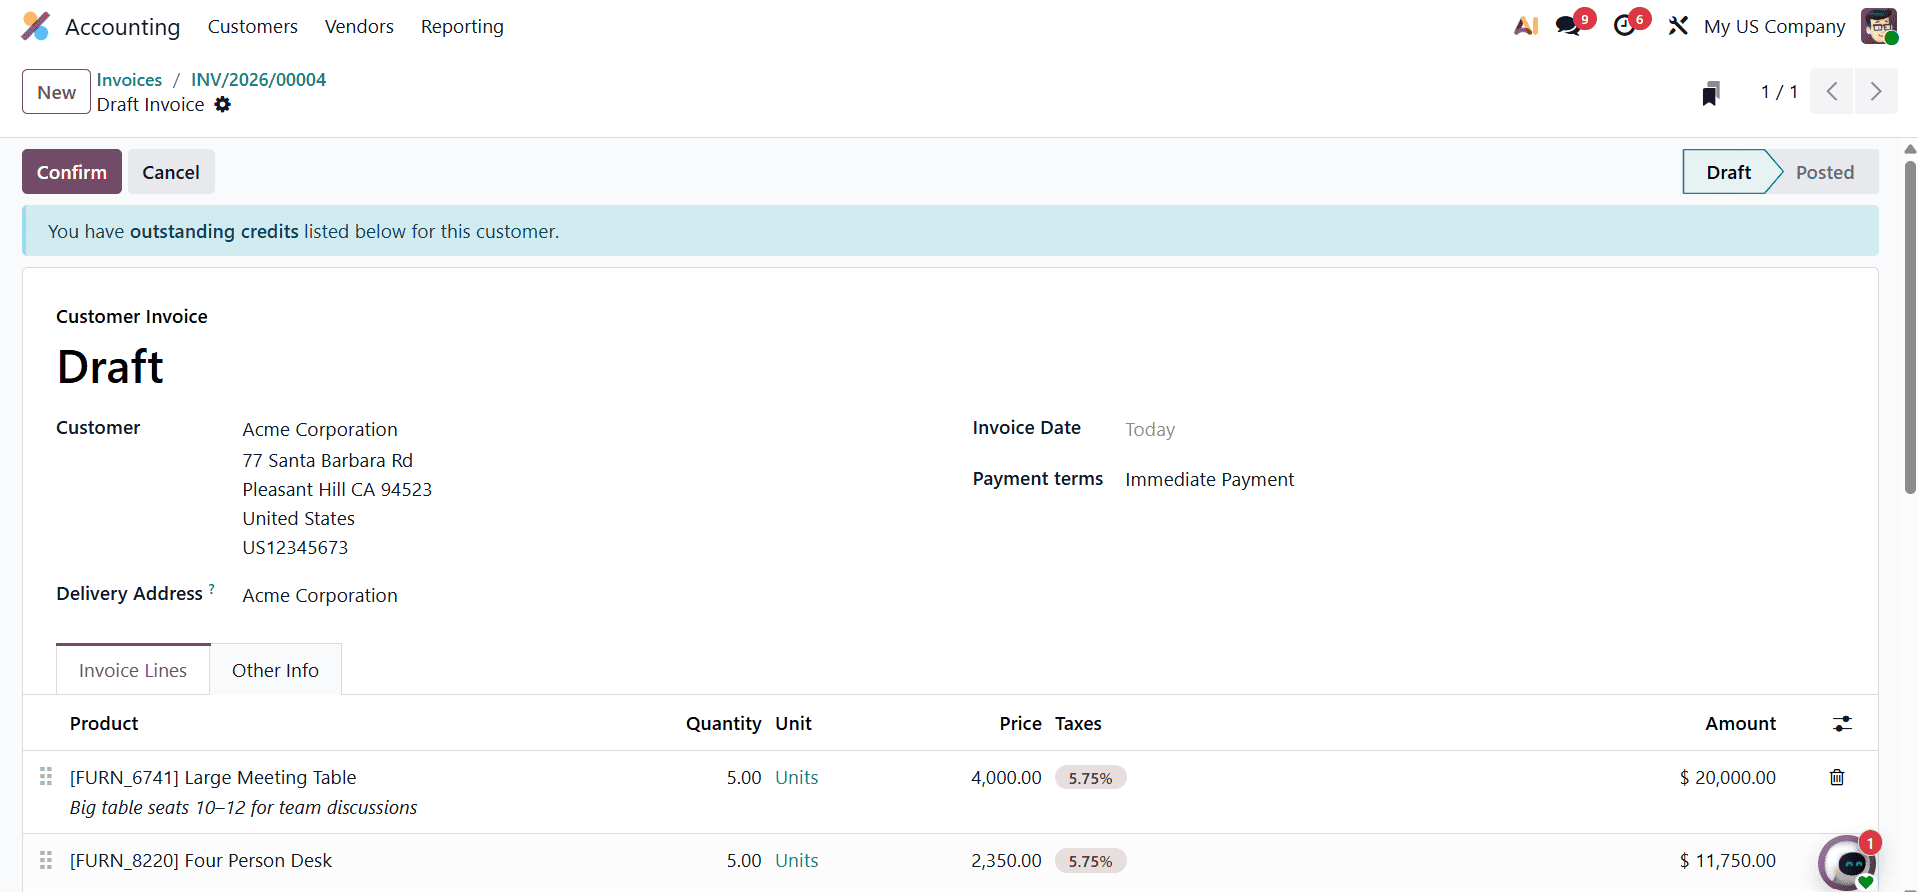
Although the user can create a new invoice for a customer, they are unable to create payments or verify the invoices or vendor bills. The draft version of this invoice will be available. No other modifications may be made to the invoice by the user.
The user with read-only access can see the accounting menu. This user can see assets, loans, analytical items, journal entries, and journal items. This user has access to all of the reporting's menus, but any modifications they make to journal entries, journal items, or analytical items won't have an impact on or be recorded as data for the reports.
Invoicing and Bank
Navigate to Mitchell admin's profile and select "Invoicing & Banks" as the "Marc Demo" access right. Next, sign in using the Marc demo user name.
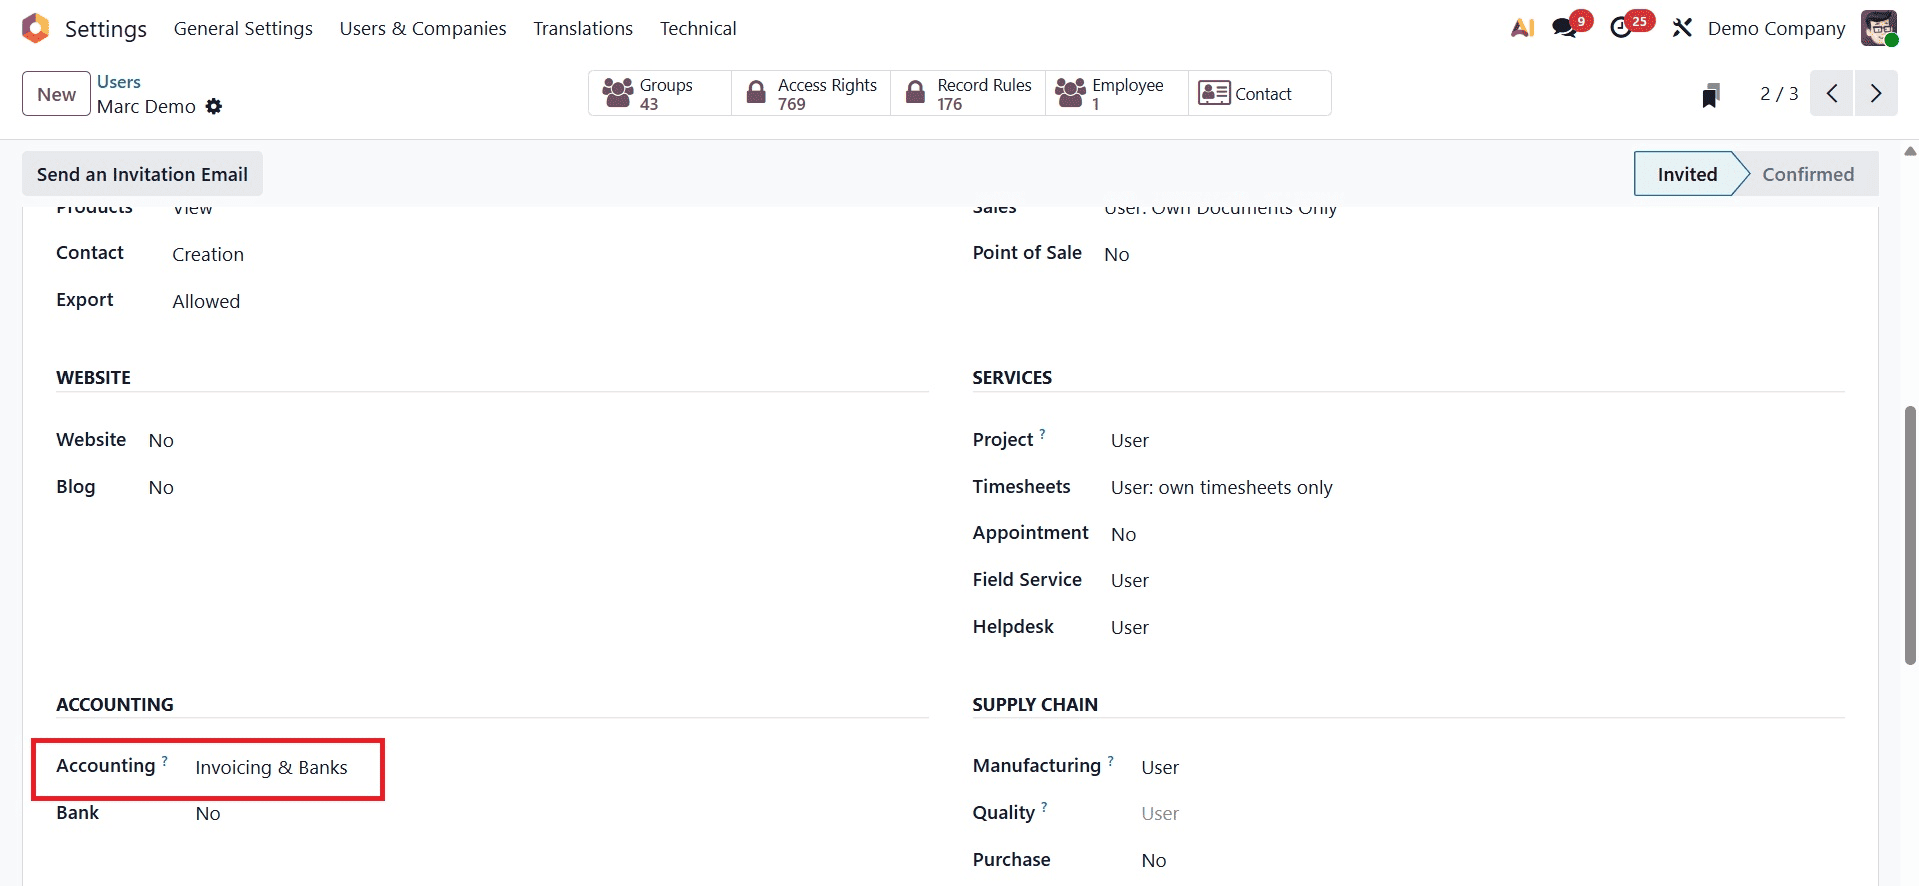
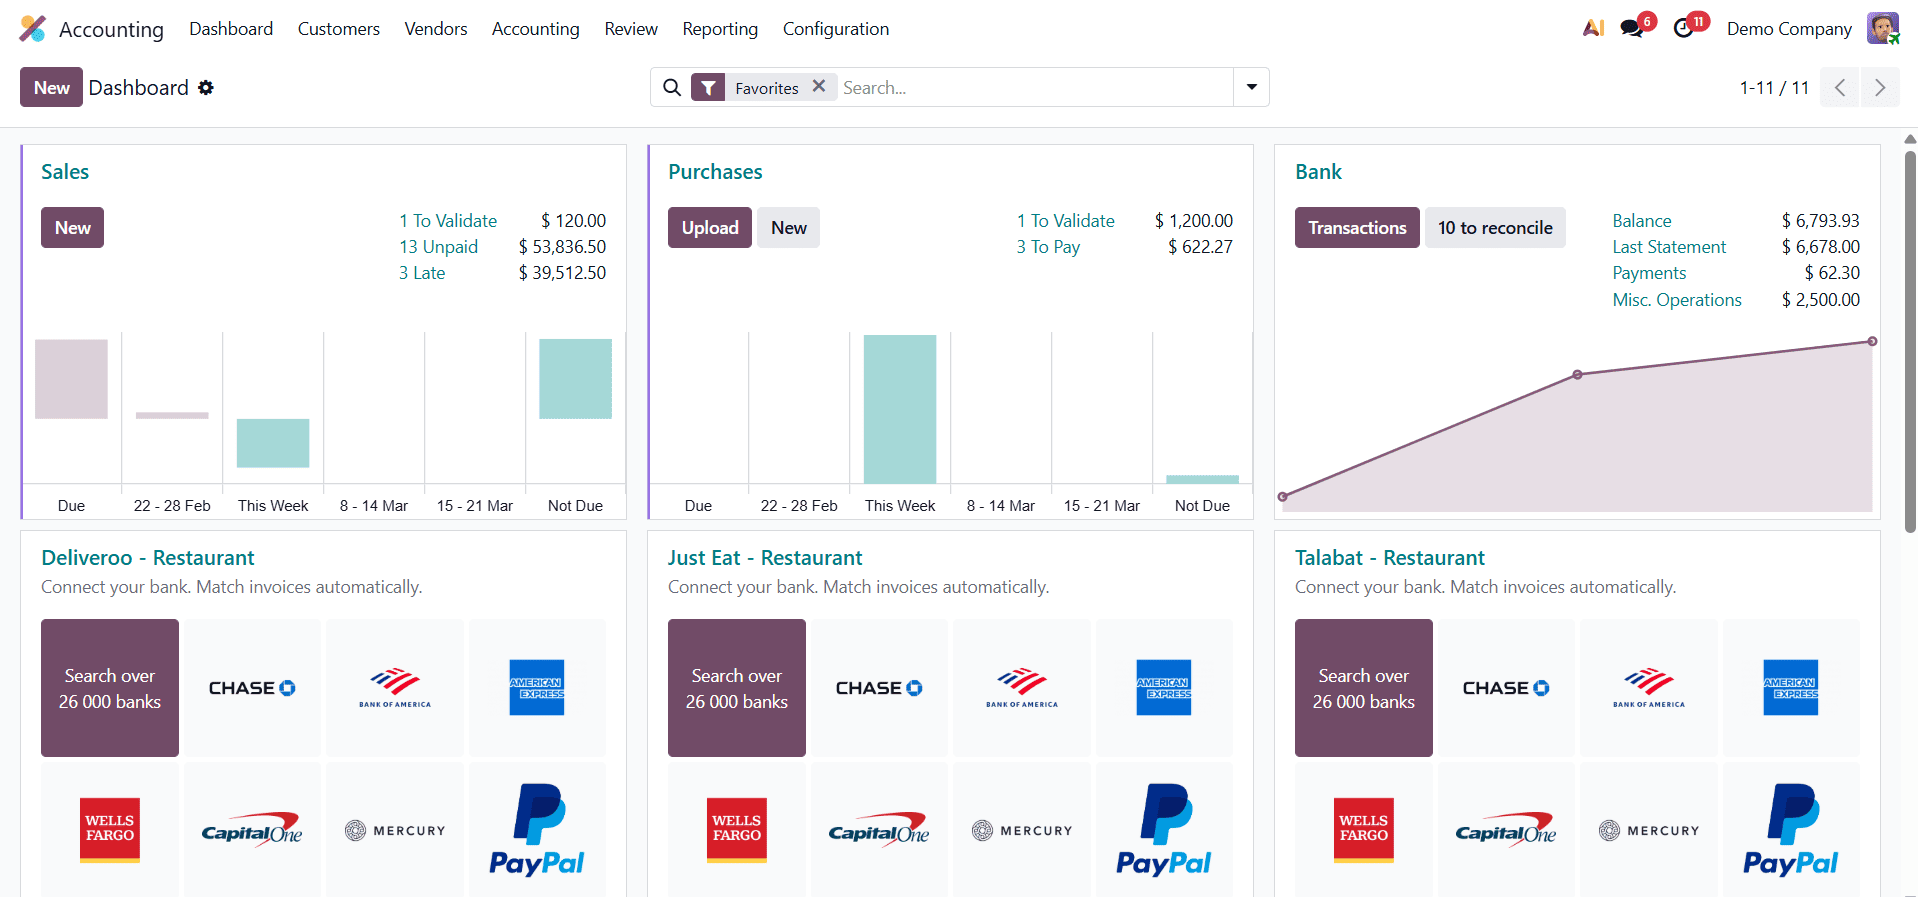
This user has access to the accounting dashboard, bank management, and follow-up reports in addition to access rights like invoicing.
Here, the dashboard view is accessible to users who have access permissions to "Invoicing & Banks." Users who have access rights to "Invoicing & Banks" can see the customer, vendor, accounting, and reporting menus. The user has the ability to generate an invoice, pay for it, and reconcile the payments. However, the setup menu won't be accessible. Only the graphical and pivot views of the invoice analysis are displayed. Only authorized people are able to handle financial transactions thanks to this access right.
Bookkeeper
From Mitchell admin's profile, set the user Marc Demo's access privileges to Bookkeeper, then log in to Marc Demo's profile.
An individual with the "Bookkeeper" access privileges can create and oversee invoices, vendor bills, customer payments, general ledger entries, bank reconciliation, and transactions. For these jobs, accurate financial data recording and a firm understanding of bookkeeping principles and procedures are necessary.
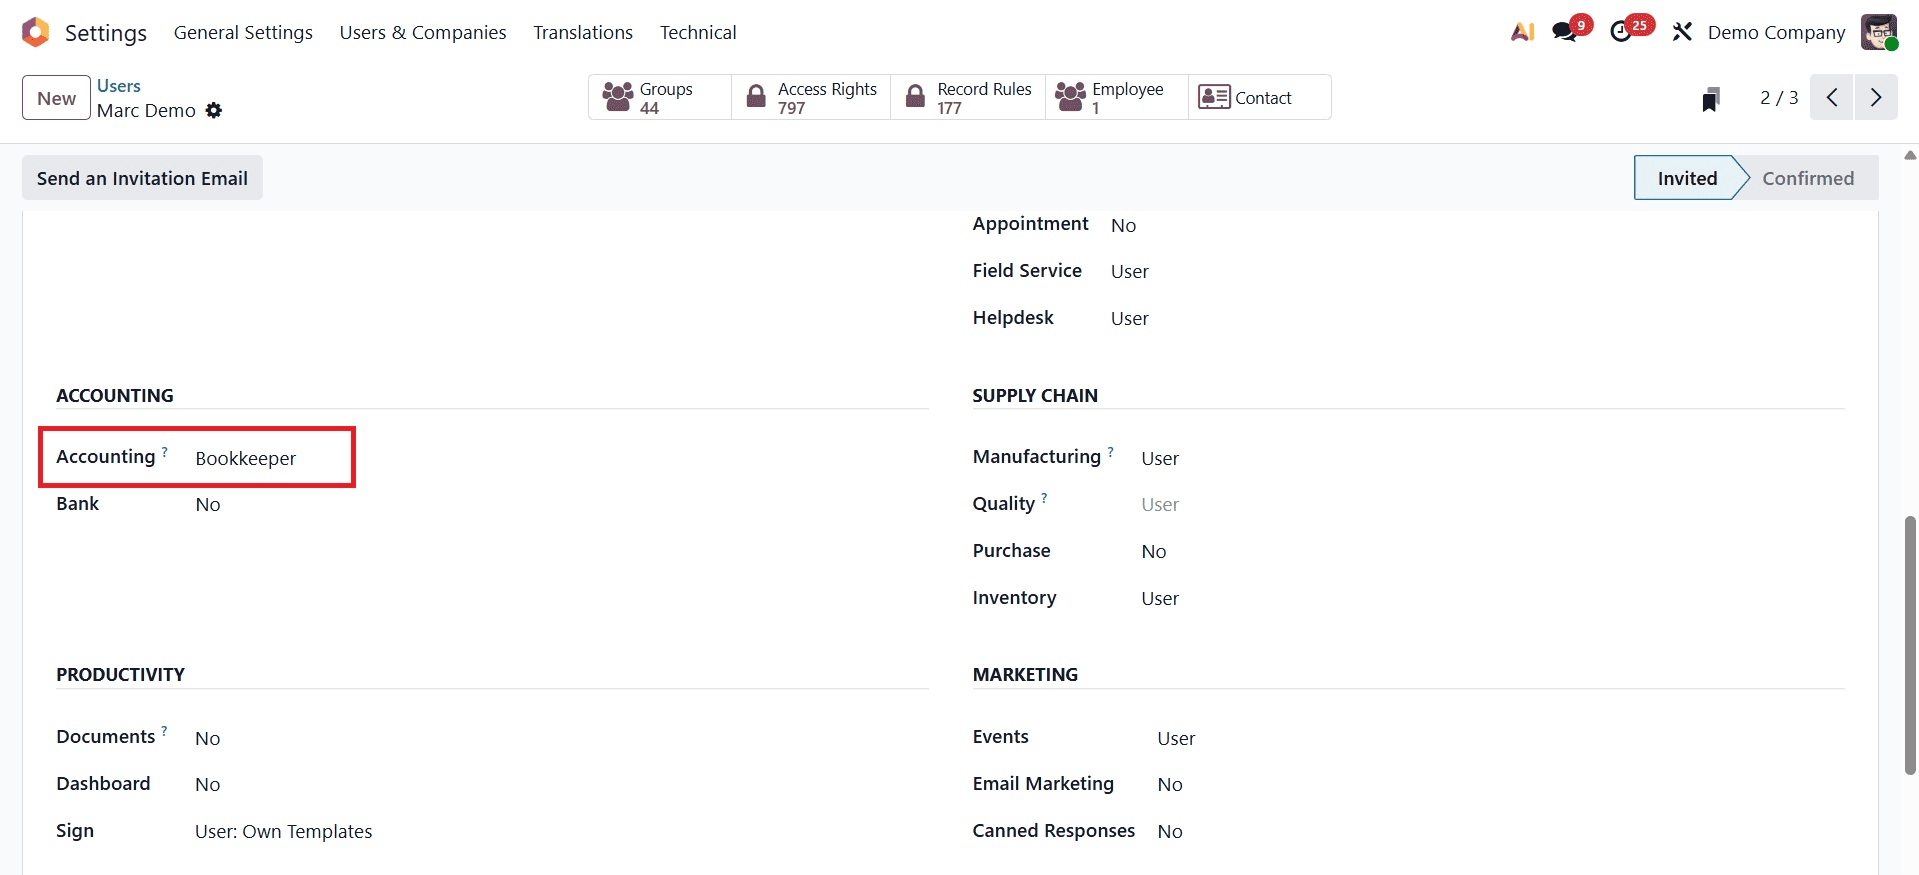
The user will see the dashboard page when logged in as Marc demo; he can make invoices and reconcile bills and invoices. Additionally, we can create data here and access journal entries, journal items, transfers, analytical items, assets, loans, reconcile, and secure entries.
Administrator
Administrators may typically manage the entire accounting system and perform a variety of tasks with the highest level of access in Odoo 19 accounting.
To preserve this, choose the "Mitchell admins" profile, grant Marc demo administrator access, and then click the "Save" button. Next, select the Accounting application after logging in as Marc's demo.
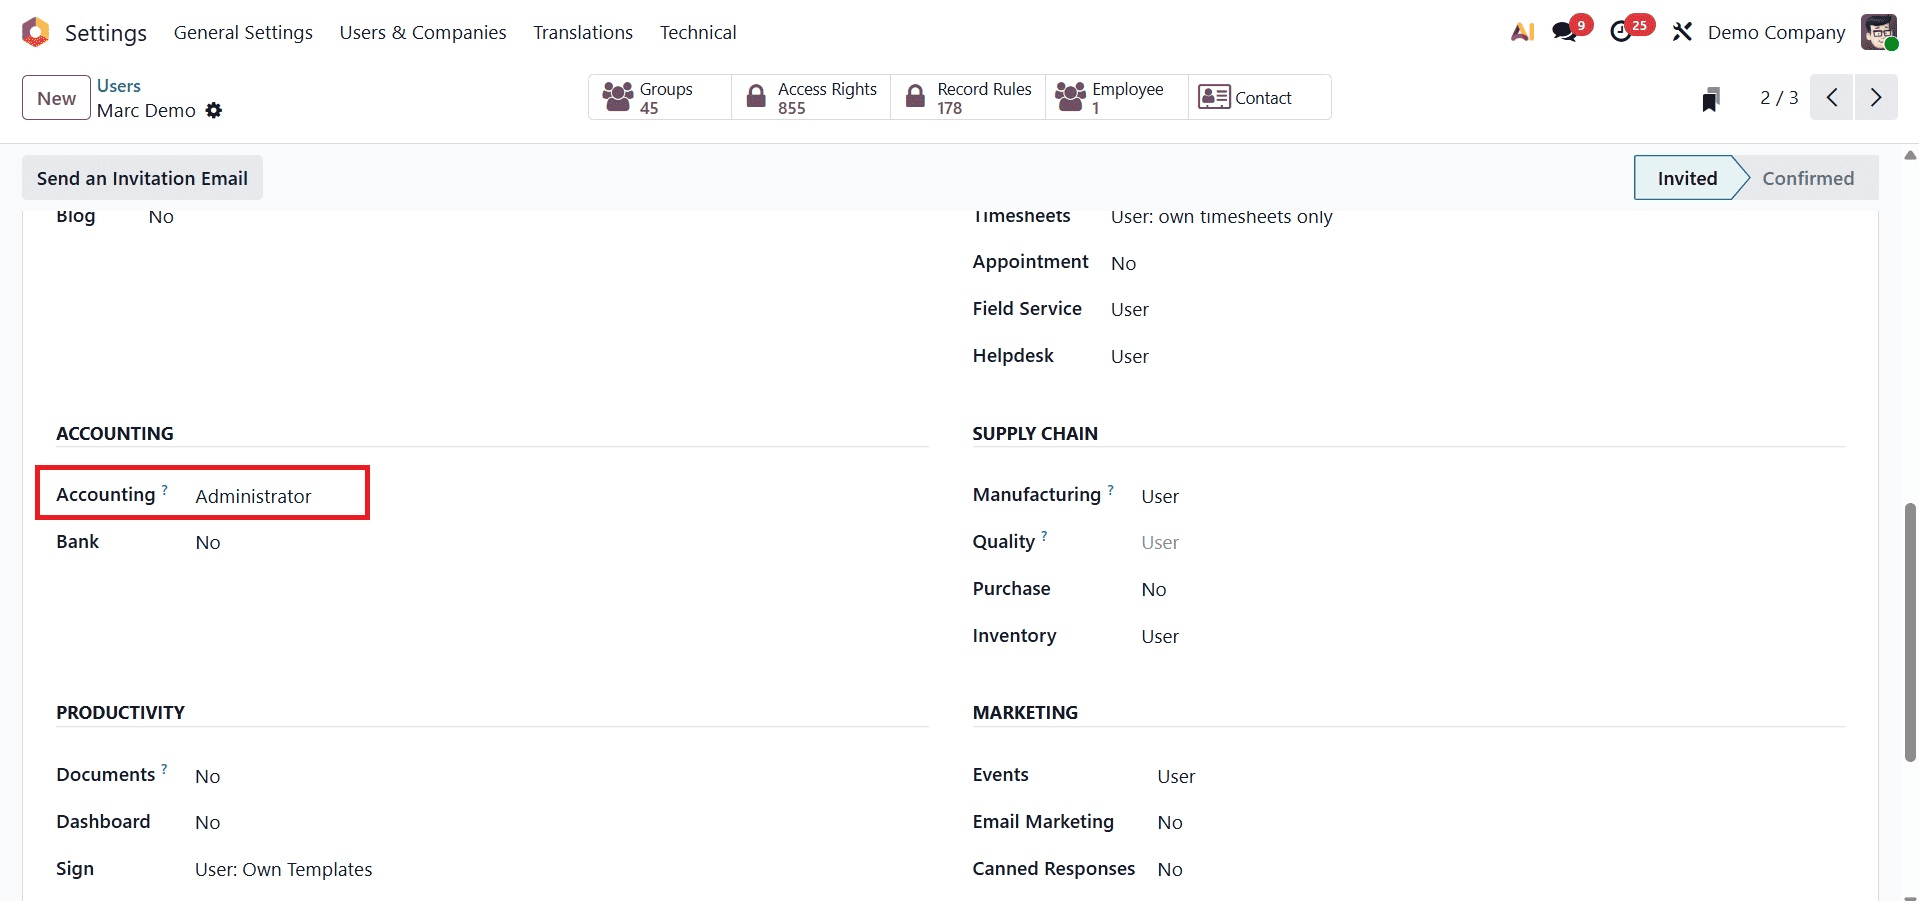
The Odoo Accounting application is fully accessible to the Administrator. He has the authority to configure the accounting program. Reconciliation models, company charts of accounts, and other information are only accessible to the administrator. The administrator has access to all of the company's reports and the ability to modify the accounting system.
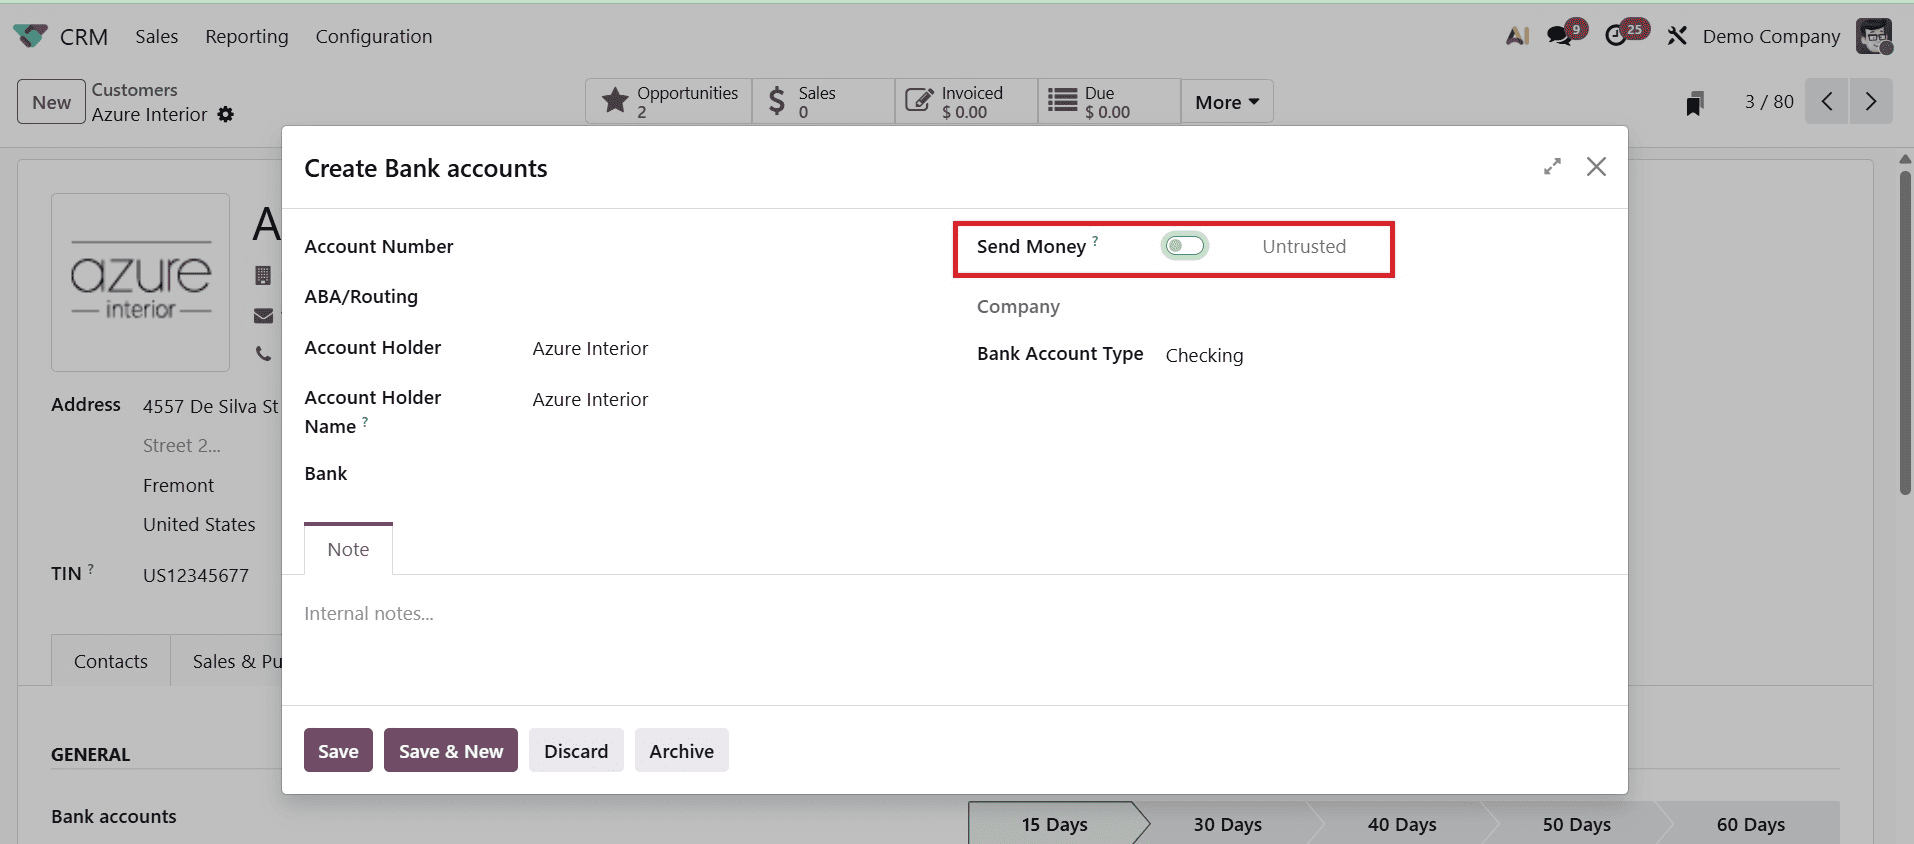
After setting up the Accounting access privileges, a user template's Accounting section has an additional option called Bank. There are two ways to complete the field: either select "Validate bank account" or leave it blank.
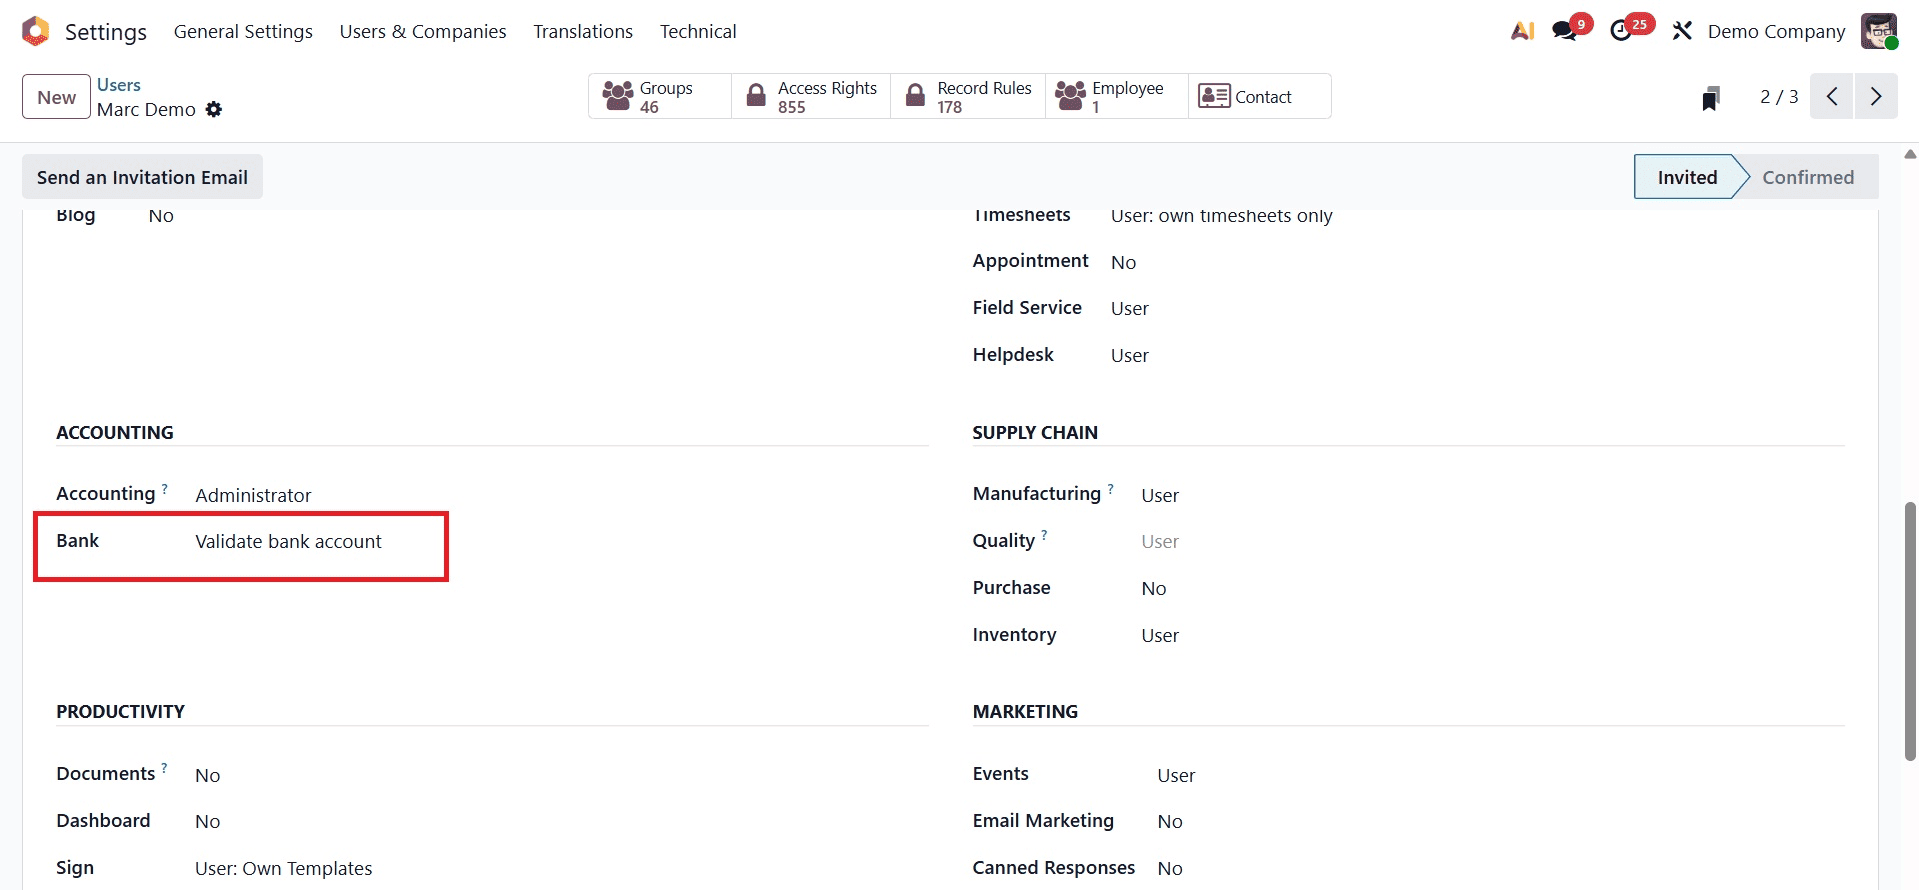
First, save it for one of the users by setting the Bank field to "Validate bank account," as shown in the screenshot above. A customer can then choose to provide their bank account information. Thus, switch from the sales or accounting module to the client template. Next, choose a client to whom the bank account information should be added. You can add the customer's account information after selecting one of the customers and going to the Accounting tab.
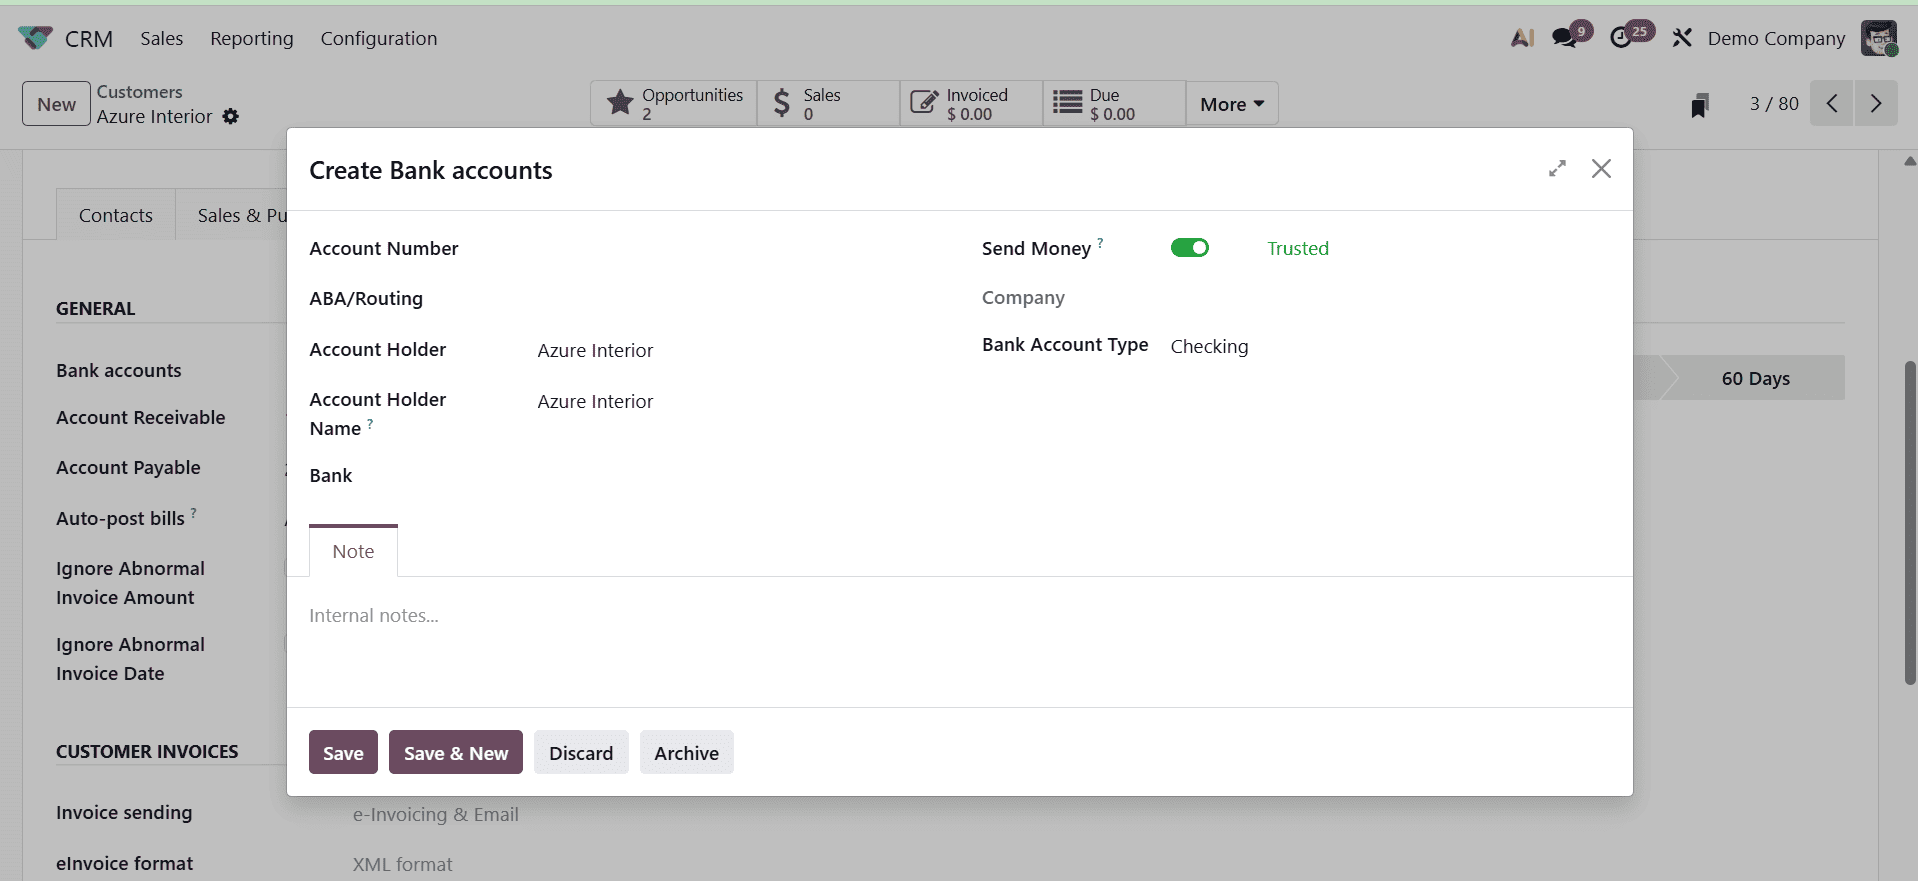
Enter the information in the popup box, including the Account Number, Bank, ABA/Routing, Account Holder, and Send Money.
- Account Number: Enter the account number of the client.
- Bank: Decide which bank the accounts are associated with.
- ABA/Routing: routing number of the American Bankers Association.
- Account Holder: The person who owns the account.
- Send Money: It's a frequent punishment to send phony bills using a fictitious account number. Verify new bank account details at all times for your own protection, ideally by calling the vendor, as penalties typically occur when their emails are compromised. You can turn on the ability to transmit money after verification.
This ‘send money’ enabling and disabling option is only available for the user with access rights of Bank “Validate bank account”. The account will be marked as a Trusted account if the Send Money boolean is enabled.
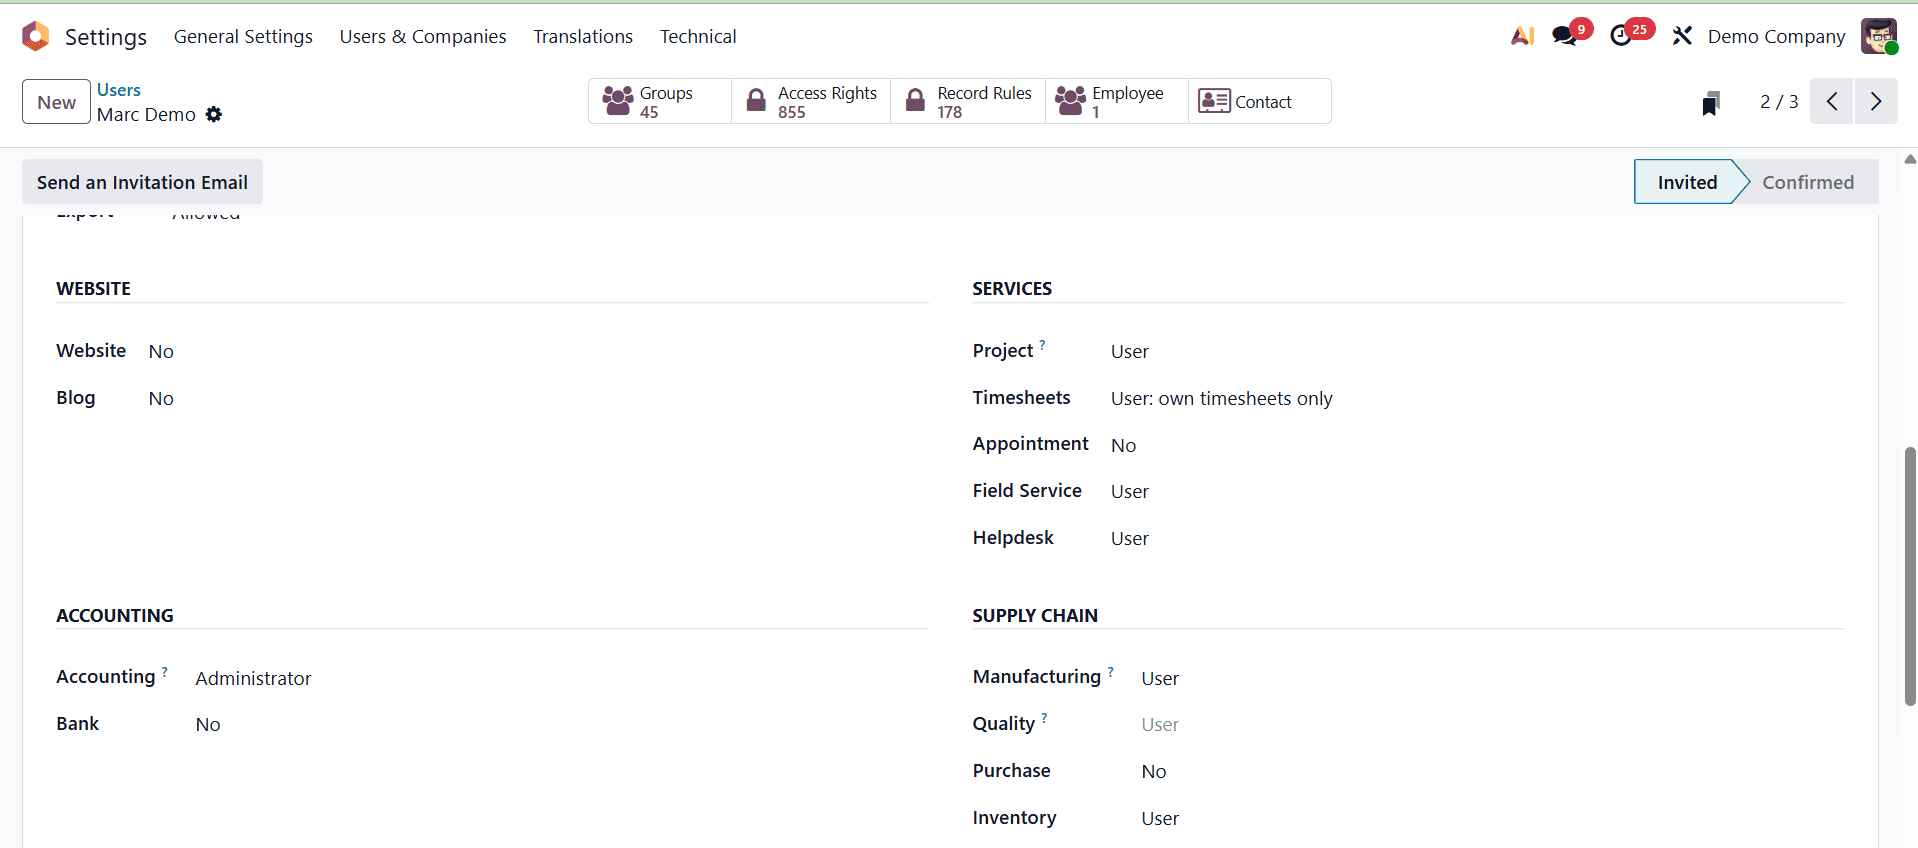
Move to the same user's template view and put the access rights ‘Bank’ as blank.
After that, proceed to the customer template from the accounting or sales module and follow the same steps as when adding a client's bank account information.
The Send Money field in the popup to enter account information is not active. The Send Money area should not be edited by the user. due to the fact that this user is unable to edit the field.
The blog discusses an additional bank validation in the Odoo 19 Accounting module with many purposes and functions. The five different forms of access privileges are invoicing, read-only, invoice & banks, bookkeeper, and administrator.
To read more about What Are the Different Types of Access Rights in Odoo 18 Accounting, refer to our blog What Are the Different Types of Access Rights in Odoo 18 Accounting.