The Point of Sale module in Odoo 19 is designed with a modern OWL-based frontend architecture that enables real-time synchronization between the browser session and backend order processing. This architecture gives developers the flexibility to extend PoS workflows and transfer custom frontend data directly into backend PoS orders.
In many business scenarios, developers need to pass additional information from the active PoS session to the pos.order model. These custom values may include customer notes, shift references, cashier remarks, delivery instructions, loyalty metadata, approval details, or any session-based information required for reporting and operational workflows. Since PoS orders are processed through frontend JSON synchronization, Odoo provides dedicated extension points that allow developers to safely inject custom data into the order lifecycle without breaking offline synchronization or session recovery mechanisms.
In this article, we will discuss how to load custom PoS session data into PoS Orders in Odoo 19 by extending the frontend PoS Order model, exporting custom JSON data, and storing the values in the backend pos.order model using the recommended Odoo 19 development approach.
Understanding the PoS Order Data Flow in Odoo 19
Before implementing the customization, it is important to understand how Odoo 19 processes PoS orders internally.
In Odoo 19:
Frontend Order
?
Reactive Store State
?
Automatic Synchronization
?
Backend _order_fields()
?
pos.order
Unlike traditional backend forms, PoS orders are first created inside the browser session. The order remains in the front-end reactive state until the cashier validates the payment.
Once validated:
- The frontend synchronizes the order
- Order data is converted internally into transferable payloads
- Backend processing methods create the final pos.order
The OWL architecture introduced in modern Odoo PoS versions improves flexibility and frontend reactivity while reducing reliance on older serialization APIs. Odoo 19 PoS customization is now largely based on OWL patching techniques and reactive model extensions.
In this blog, we will demonstrate how to integrate a Customer Suggestion field into the Odoo 19 Point of Sale. We will cover the end-to-end process: from capturing the user's input in the OWL-based frontend to storing that data in the pos.order model in the backend.
Define the Backend Field
First, we need to create the field in the database where the suggestion will be stored.
from odoo import fields, models

class PosOrder(models.Model):
   _inherit = "pos.order"
   customer_suggestion = fields.Char(
       string="Customer Suggestion",
       readonly=True,
       help="Customer Suggestion added from POS session",
   )
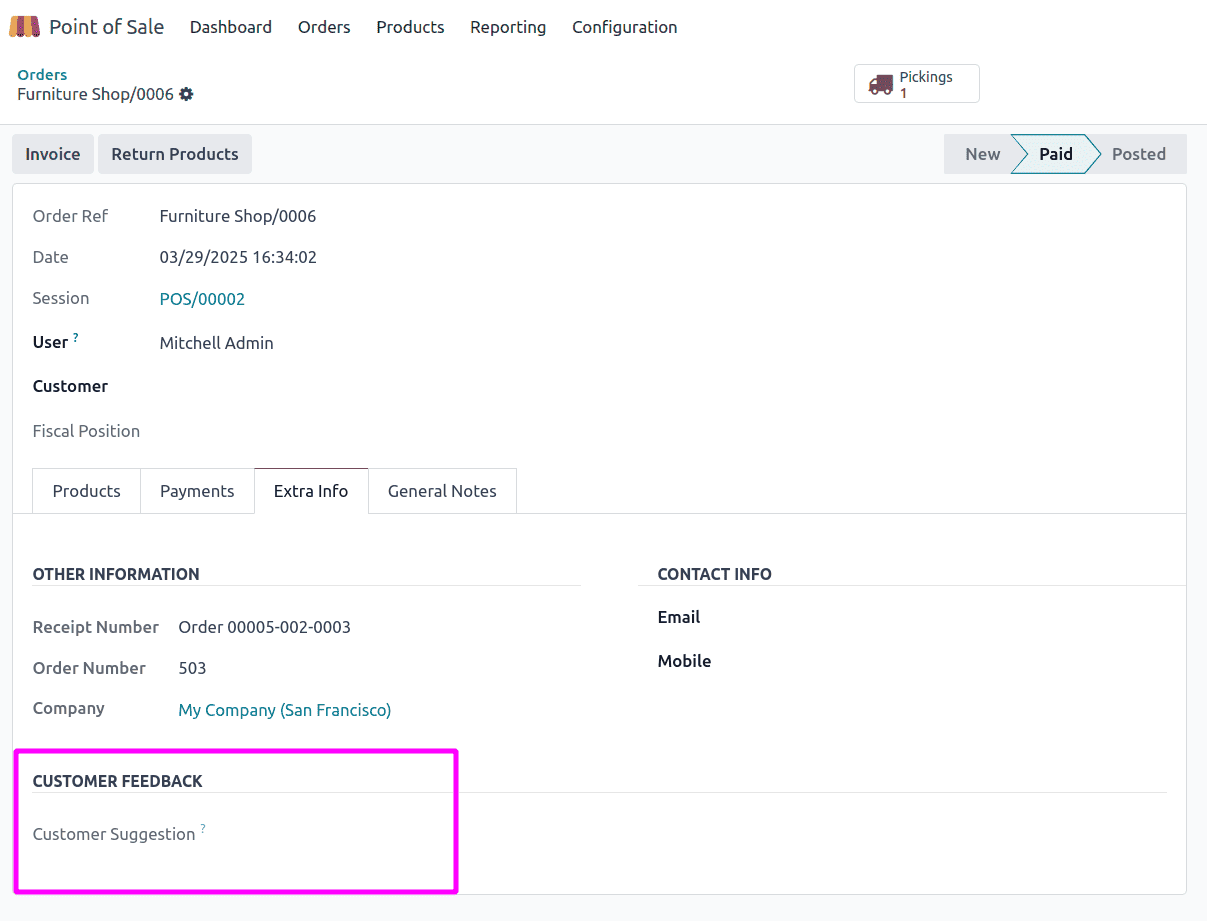
In order to store customer comments, we have now introduced a suggestion field. The POS order form view must then be changed to incorporate this field into the backend display.
<?xml version="1.0" encoding="UTF-8"?>
<odoo>
   <record id="view_pos_order_form_inherit" model="ir.ui.view">
       <field name="name">pos.order.form.customer.note</field>
       <field name="model">pos.order</field>
       <field name="inherit_id" ref="point_of_sale.view_pos_pos_form"/>
       <field name="arch" type="xml">
           <xpath expr="//page[@name='extra']" position="inside">
               <group string="Customer Suggestions">
                   <field name="customer_suggestion"/>
               </group>
           </xpath>
       </field>
   </record>
</odoo>
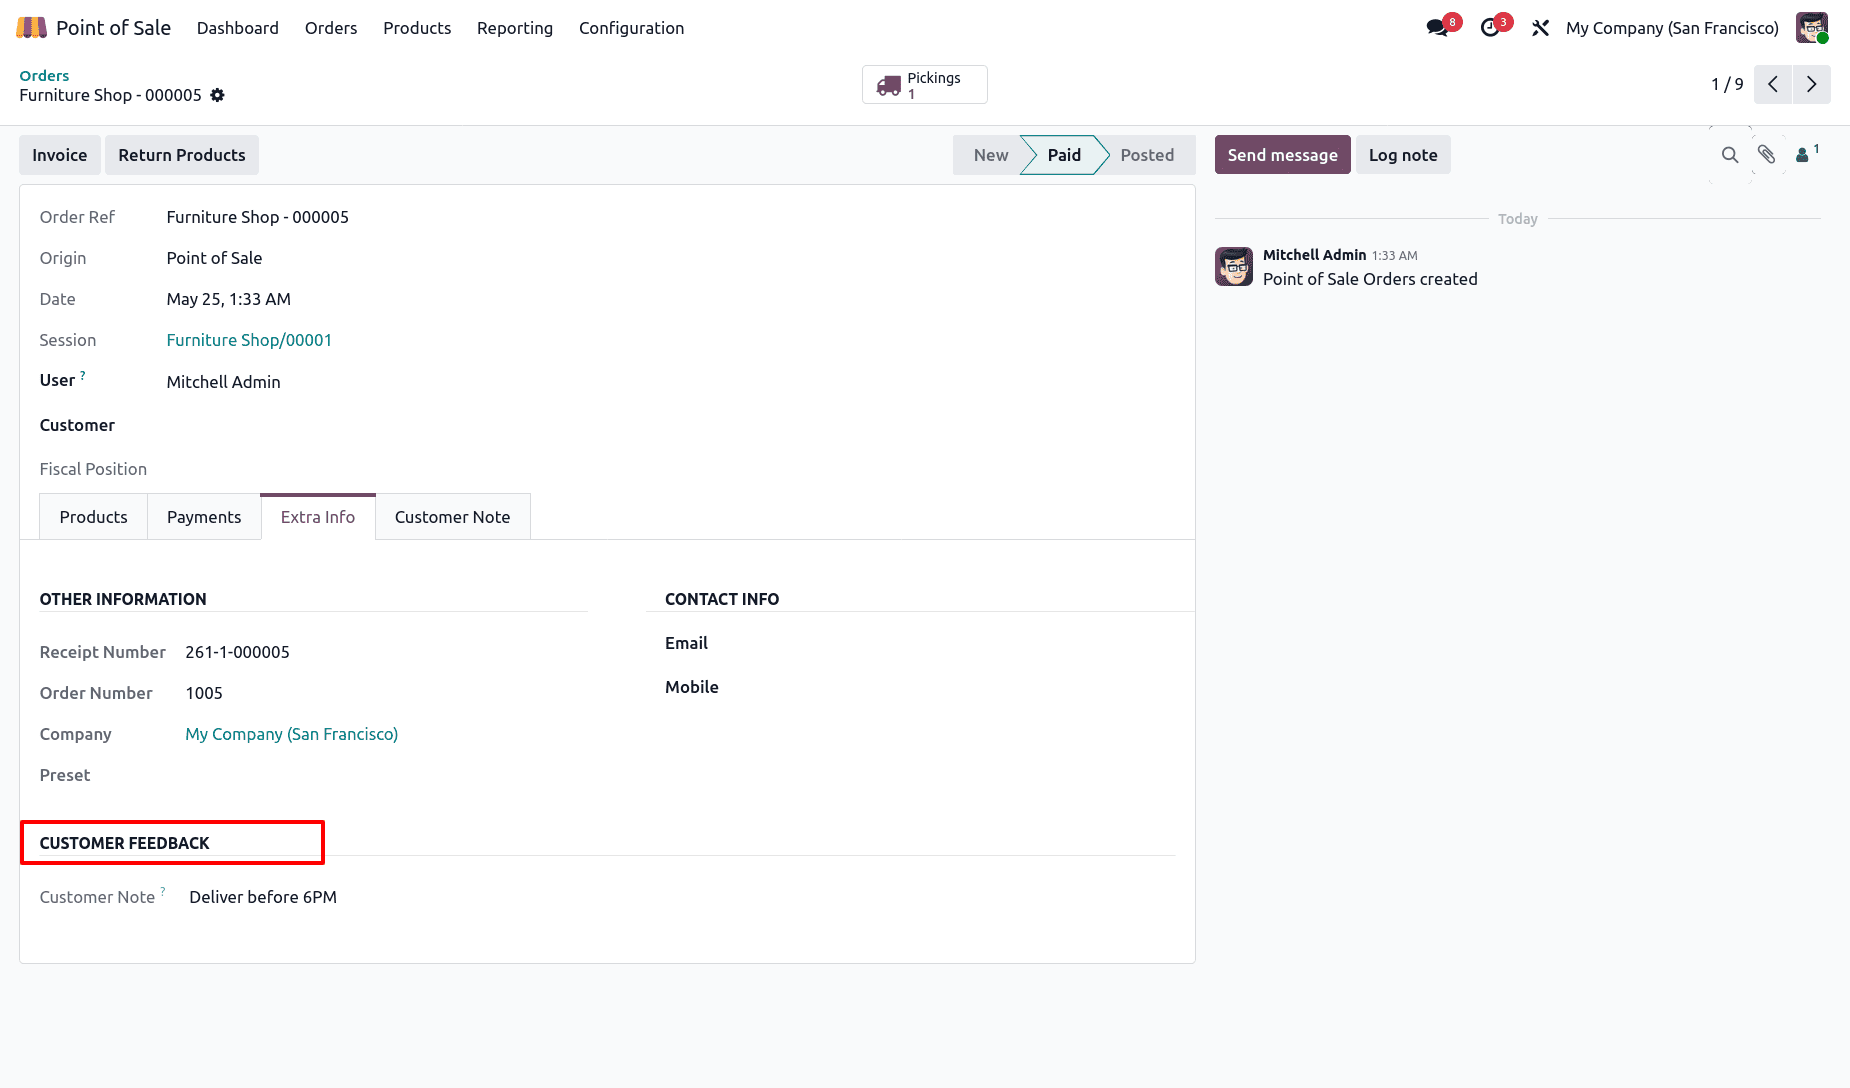
This ensures that customer suggestions show up on the Extra tab of the POS order form, as shown below.
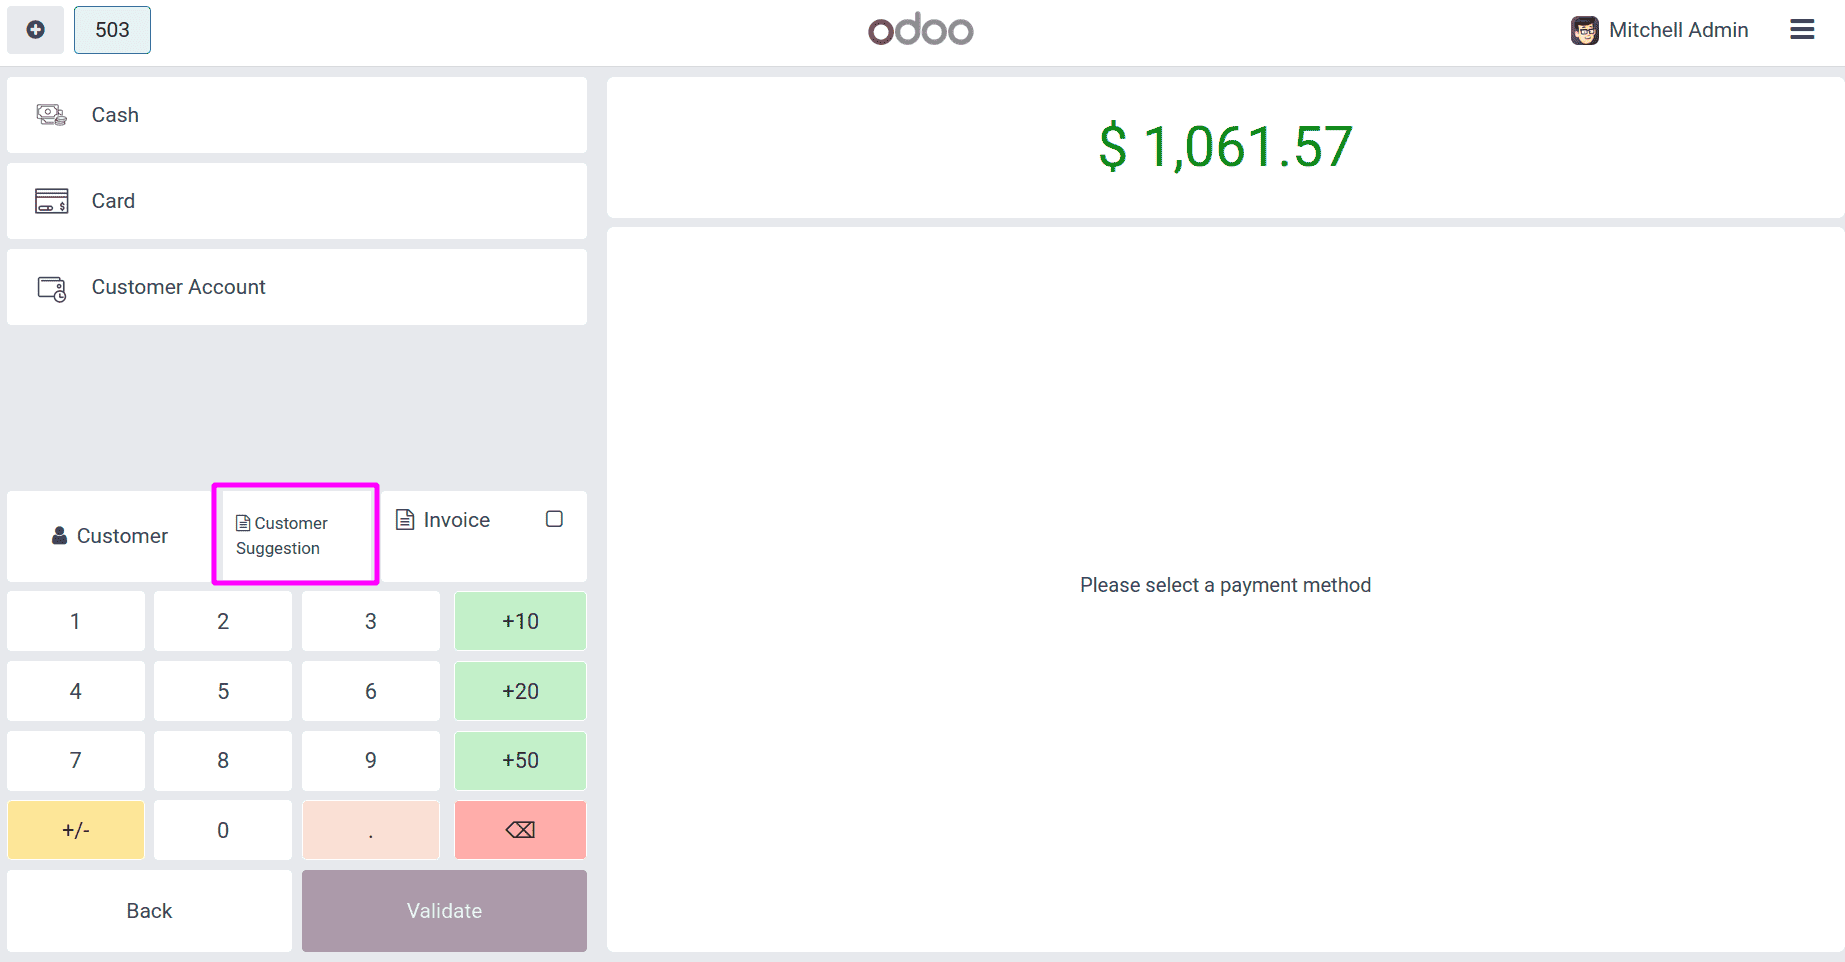
Add Button to Payment Screen
We want the cashier to be able to click a button and enter the customer's suggestion. We will add this button to the PaymentScreen.
<?xml version="1.0" encoding="UTF-8"?>
<templates id="template" xml:space="preserve">
   <t t-name="custom_pos_session_data.PaymentScreenButtons" t-inherit="point_of_sale.PaymentScreenButtons" t-inherit-mode="extension">
       <xpath expr="//button[hasclass('partner-button')]" position="after">
           <button
                class="button btn btn-light py-3 text-start rounded-0 border-bottom"
                t-on-click="CustomerSuggestionPopup">
                <i class="fa fa-file-text-o"/> Customer Suggestion
            </button>
           </button>
       </xpath>
   </t>
</templates>
This will add a Customer Suggestion button inside the payment screen as shown below:
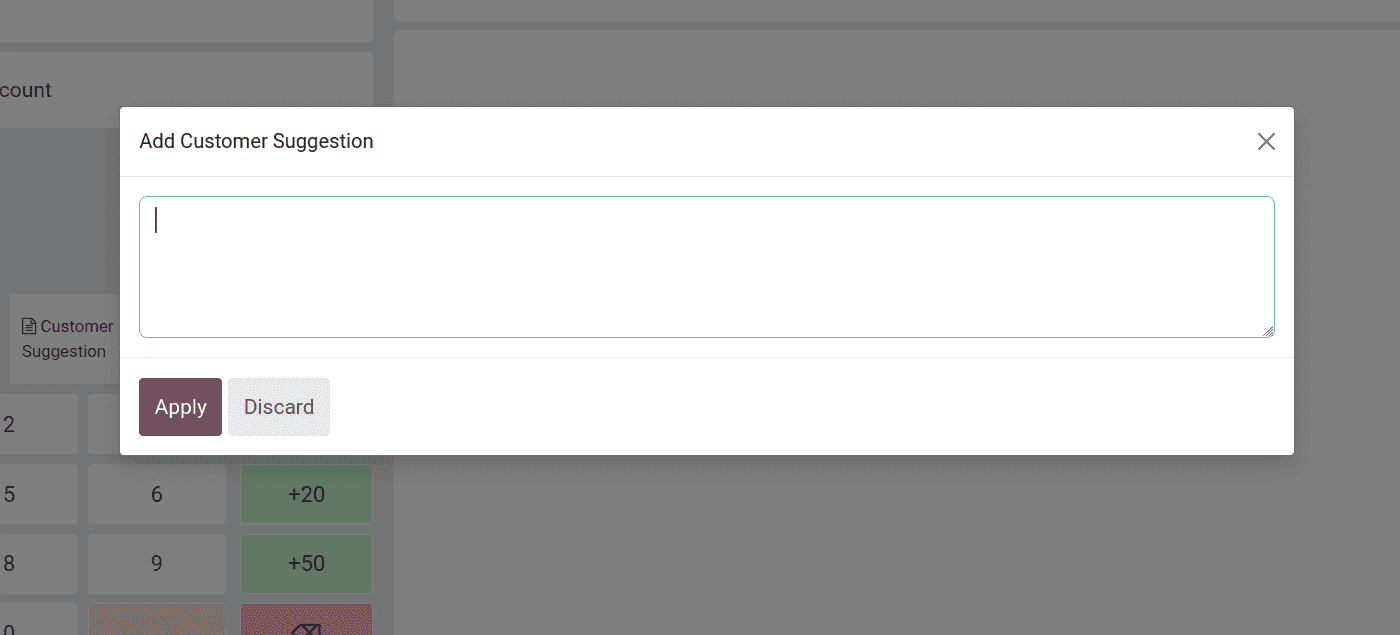
We patch the PaymentScreen to handle the button click and open a popup.
/** @odoo-module **/
import { PaymentScreen } from "@point_of_sale/app/screens/payment_screen/payment_screen";
import { patch } from "@web/core/utils/patch";
import { _t } from "@web/core/l10n/translation";
import { TextInputPopup } from "@point_of_sale/app/components/popups/text_input_popup/text_input_popup";
import { makeAwaitable } from "@point_of_sale/app/utils/make_awaitable_dialog";
patch(PaymentScreen.prototype, {
   async CustomerSuggestionPopup() {
       const order =this.pos.getOrder();
       if (!order) {
           return;
       }
       const payload =
           await makeAwaitable(
               this.dialog,
               TextInputPopup,
               {
                   title: _t(
                       "Customer Suggestion"
                   ),
                   rows: 4,
                   startingValue:
                       order.customer_suggestion || "",
               }
           );
       if (
           payload &&
           typeof payload === "string"
       ) {
           order.set_customer_suggestion(
               payload
           );
       }
   },
});
When you click the button, a popup window asking for suggestions will appear, and the input will be stored in the POS session.
Load Customer Suggestions from POS Session to POS Order
To ensure that the suggestions are saved in the backend, we will need to modify the order model so that it incorporates the suggestion into the data export process.
/** @odoo-module **/
import { PosOrder } from "@point_of_sale/app/models/pos_order";
import { patch } from "@web/core/utils/patch";
patch(PosOrder.prototype, {
   setup(vals) {
       super.setup(vals);
       this.customer_suggestion =
           vals.customer_suggestion || "";
   },
   set_customer_suggestion(suggestion) {
       this.customer_suggestion = suggestion;
   },
});
This guarantees the storage and transfer of suggestions made during the POS session to the backend order. Let's now create an order and add a suggestion to test the workflow.
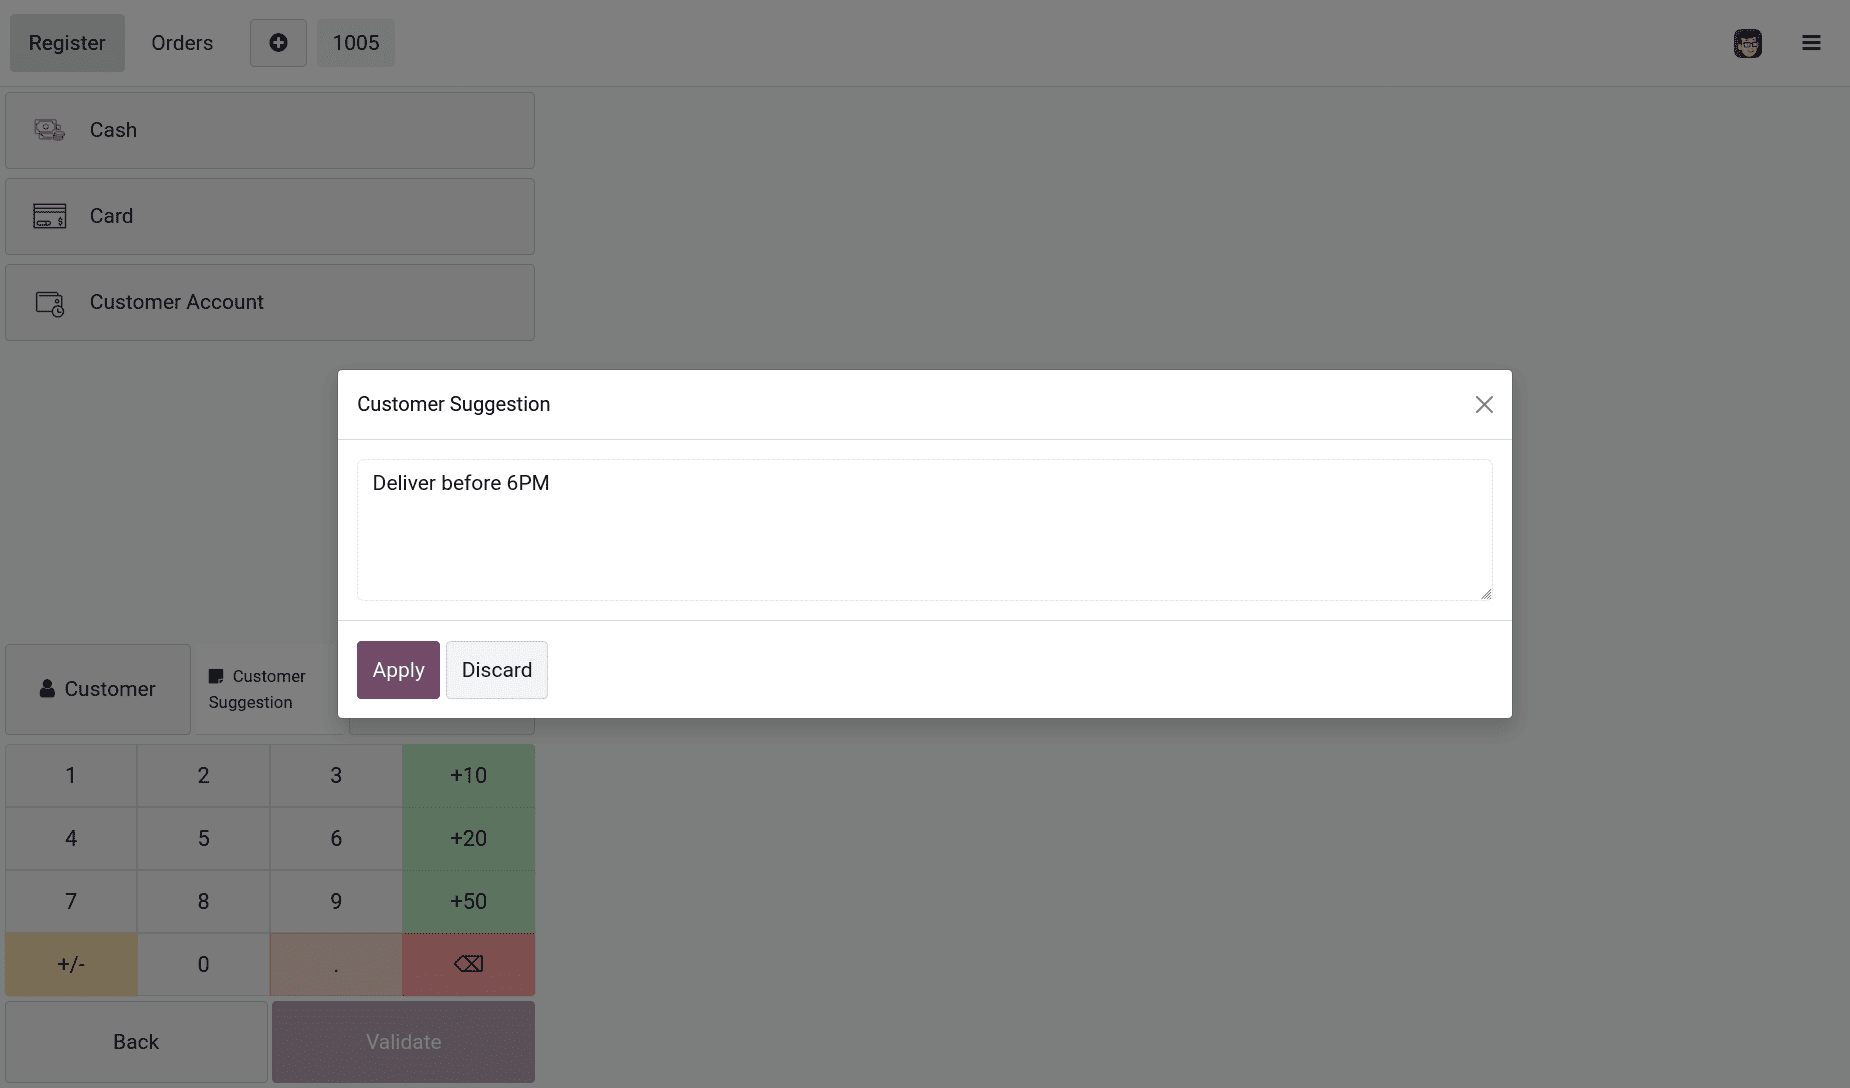
Once we validate the order, we can see that the entered Customer suggestion is added to the POS order form.
In Odoo 19, PoS customization is now based on OWL reactive architecture and automatic frontend synchronization. By extending the frontend PosOrder model using setup() and processing the synchronized values through _order_fields(), custom PoS session data can be transferred and stored efficiently in backend PoS orders. This approach is cleaner, upgrade-friendly, and fully compatible with the modern Odoo 19 PoS workflow, including offline sessions and reactive state management.
Using the same method, developers can easily implement additional PoS customizations such as delivery instructions, cashier remarks, customer feedback, loyalty information, approval references, and external integration data. Since the synchronization process is handled automatically by the reactive store system, the development process becomes more flexible and maintainable compared to older PoS architectures.
To read more about How to Load POS Session Data to POS Order in Odoo 18, refer to our blog How to Load POS Session Data to POS Order in Odoo 18.