Handling rental transfers efficiently in Odoo 19 is essential for businesses managing high volumes of rental products across multiple locations. With integrated inventory, rental, and accounting modules, Odoo 19 streamlines internal transfers, customer pickups, returns, and inter-warehouse movements. Proper configuration of routes, operation types, and automated workflows minimizes errors and delays. Rental companies can enhance asset visibility and maximize utilization by leveraging real-time tracking, barcode scanning, and intelligent scheduling. Efficient rental transfer management not only reduces operational costs but also enhances customer satisfaction through timely deliveries, accurate documentation, and seamless coordination between warehouse and rental teams. This blog explores practical strategies to handle rental transfers efficiently in Odoo 19, helping businesses reduce delays, improve asset tracking, and enhance overall operational performance.
Firstly, move to the Rental module from the Odoo 19 dashboard.
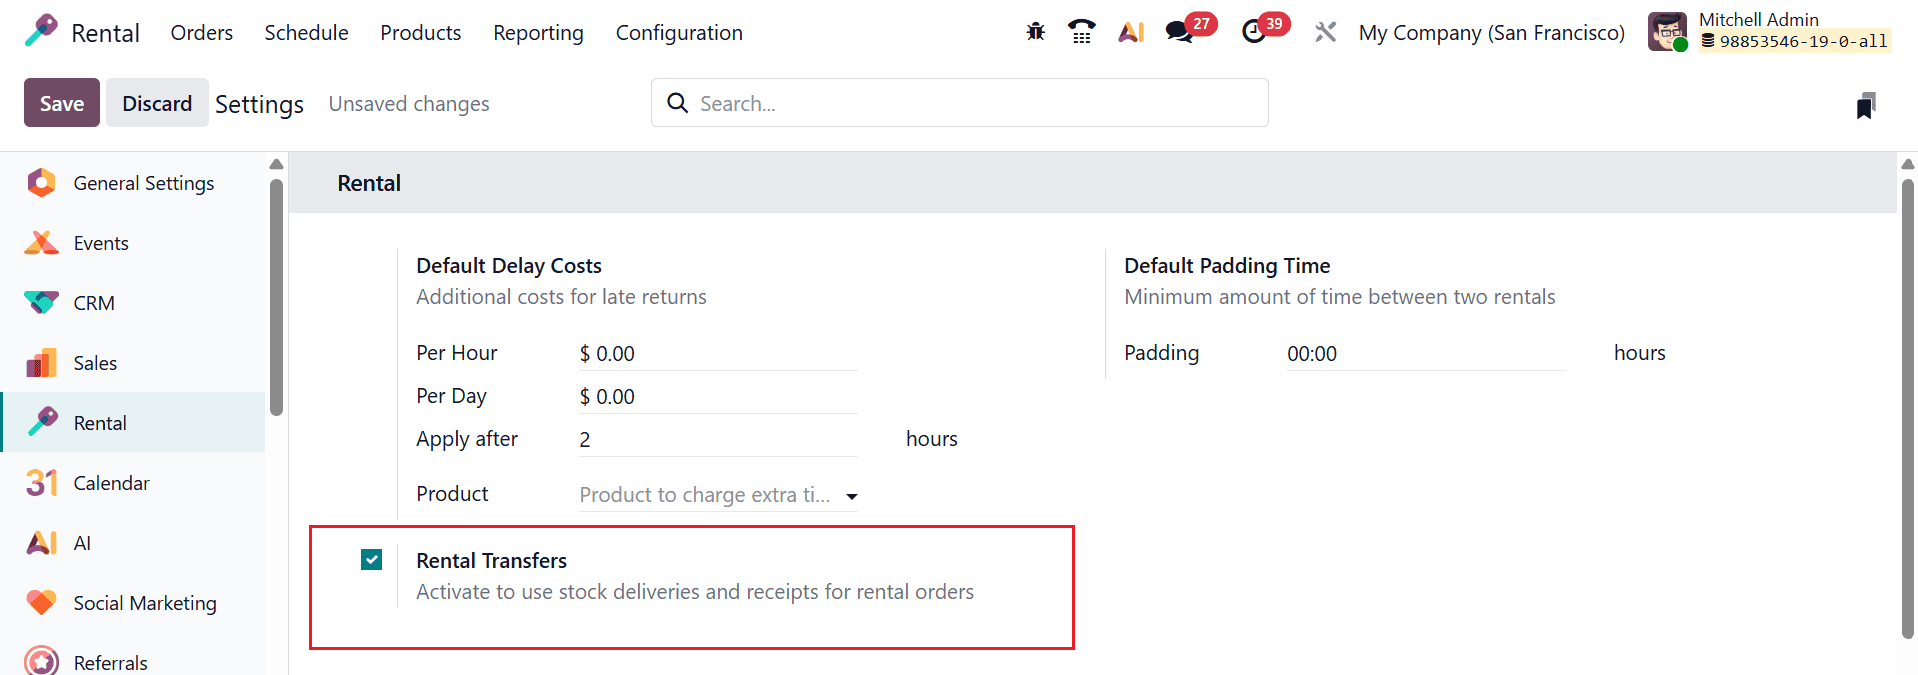
To activate rental transfers, open the Rental module and navigate to Configuration > Settings. Then, activate the Rental Transfers option as shown below. Then, save it.
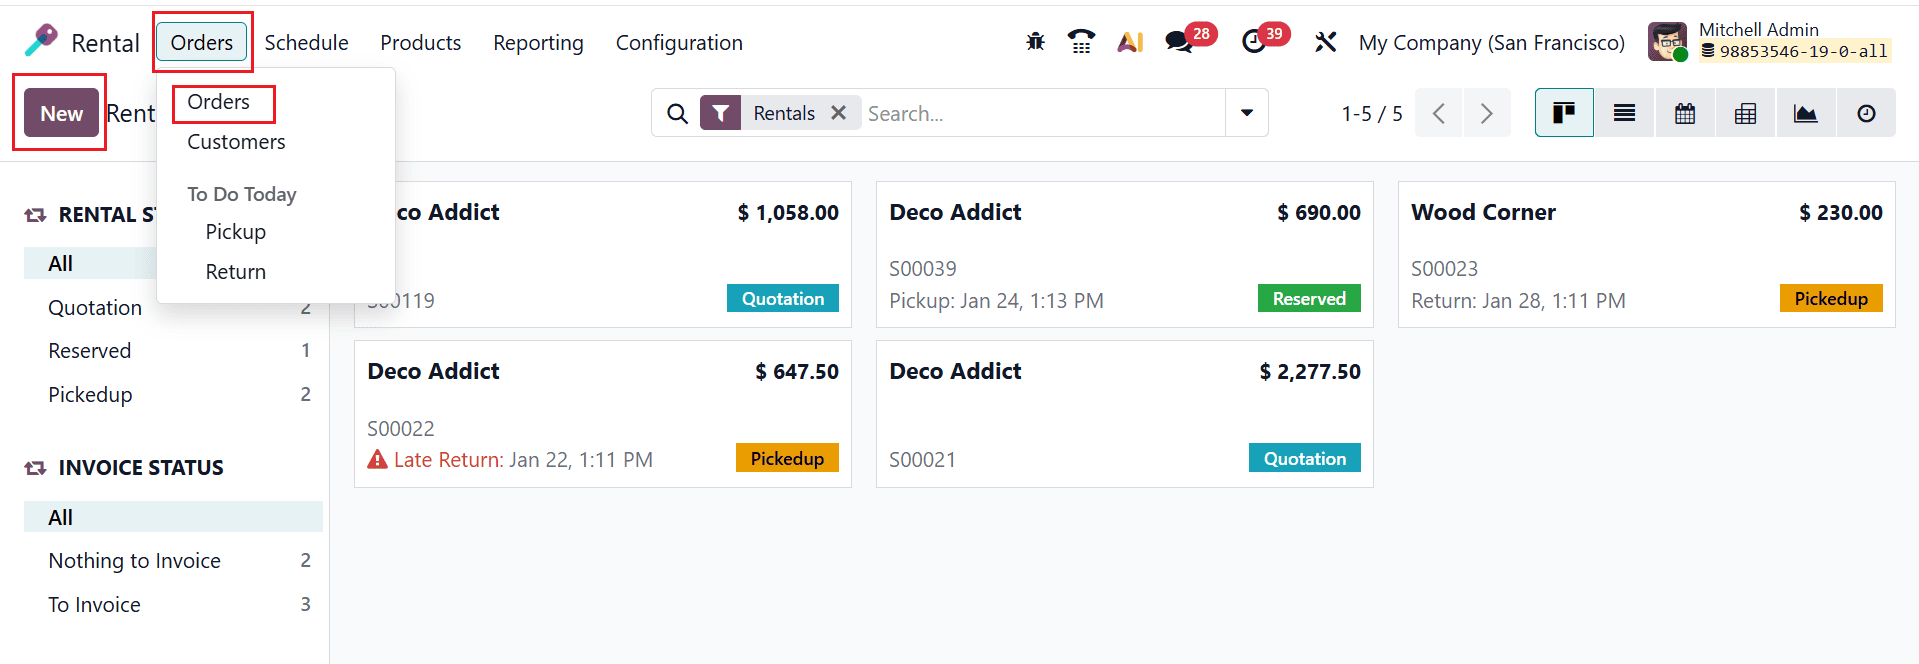
Then, navigate to the Orders > Orders and click on the New button to create a new order, as illustrated below:
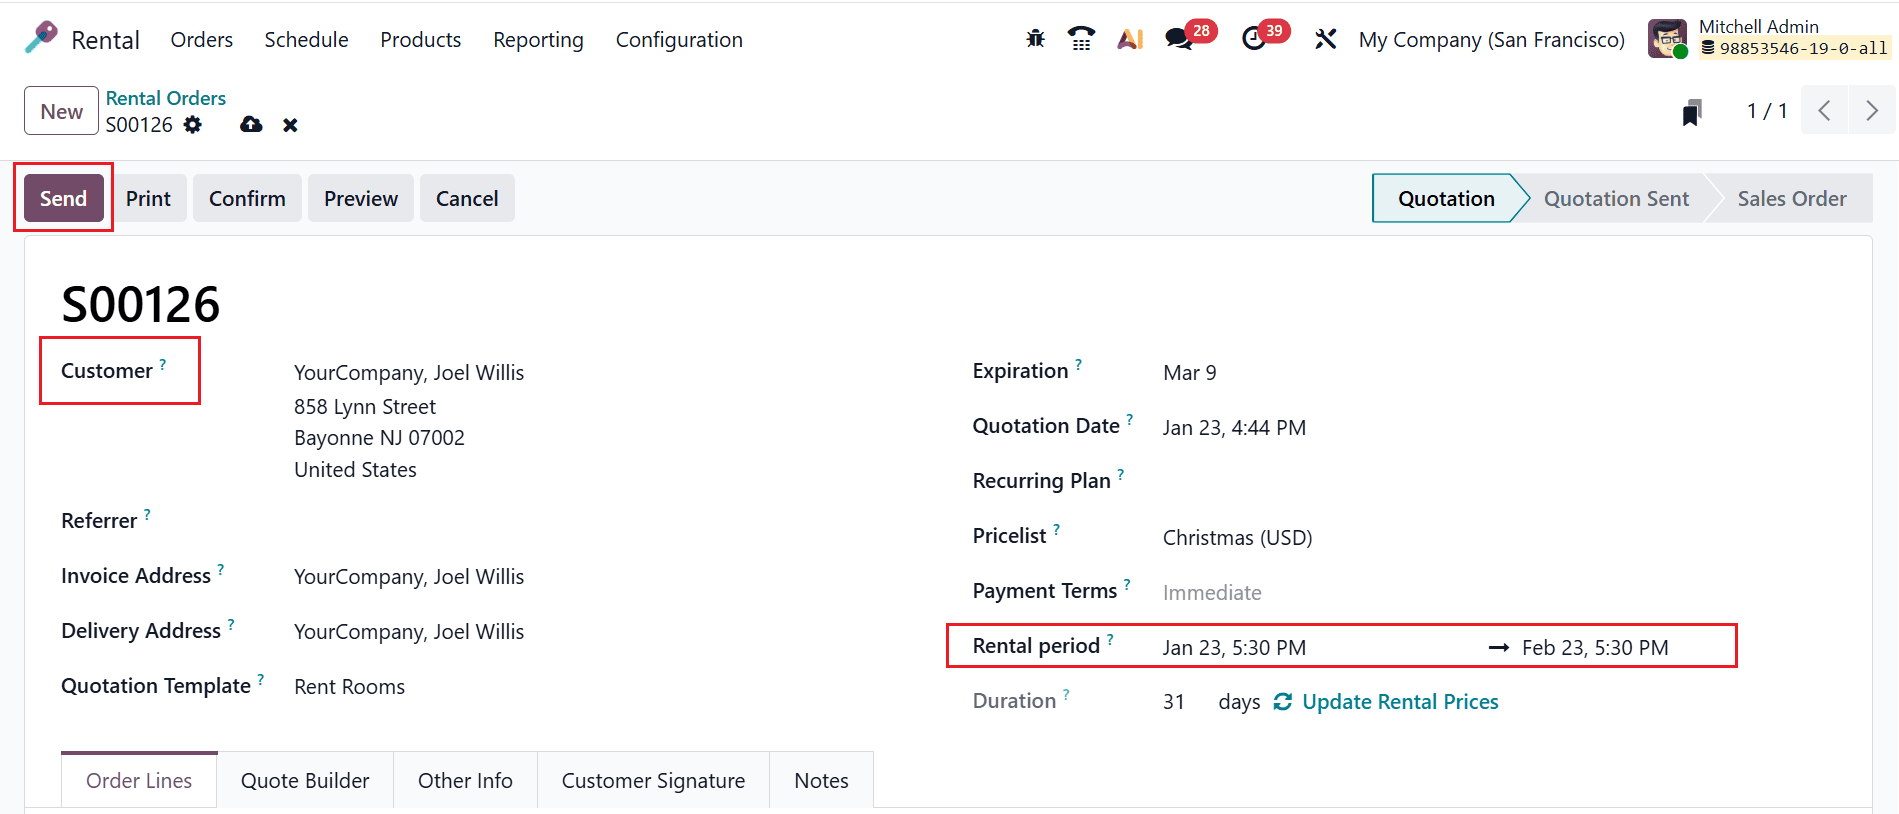
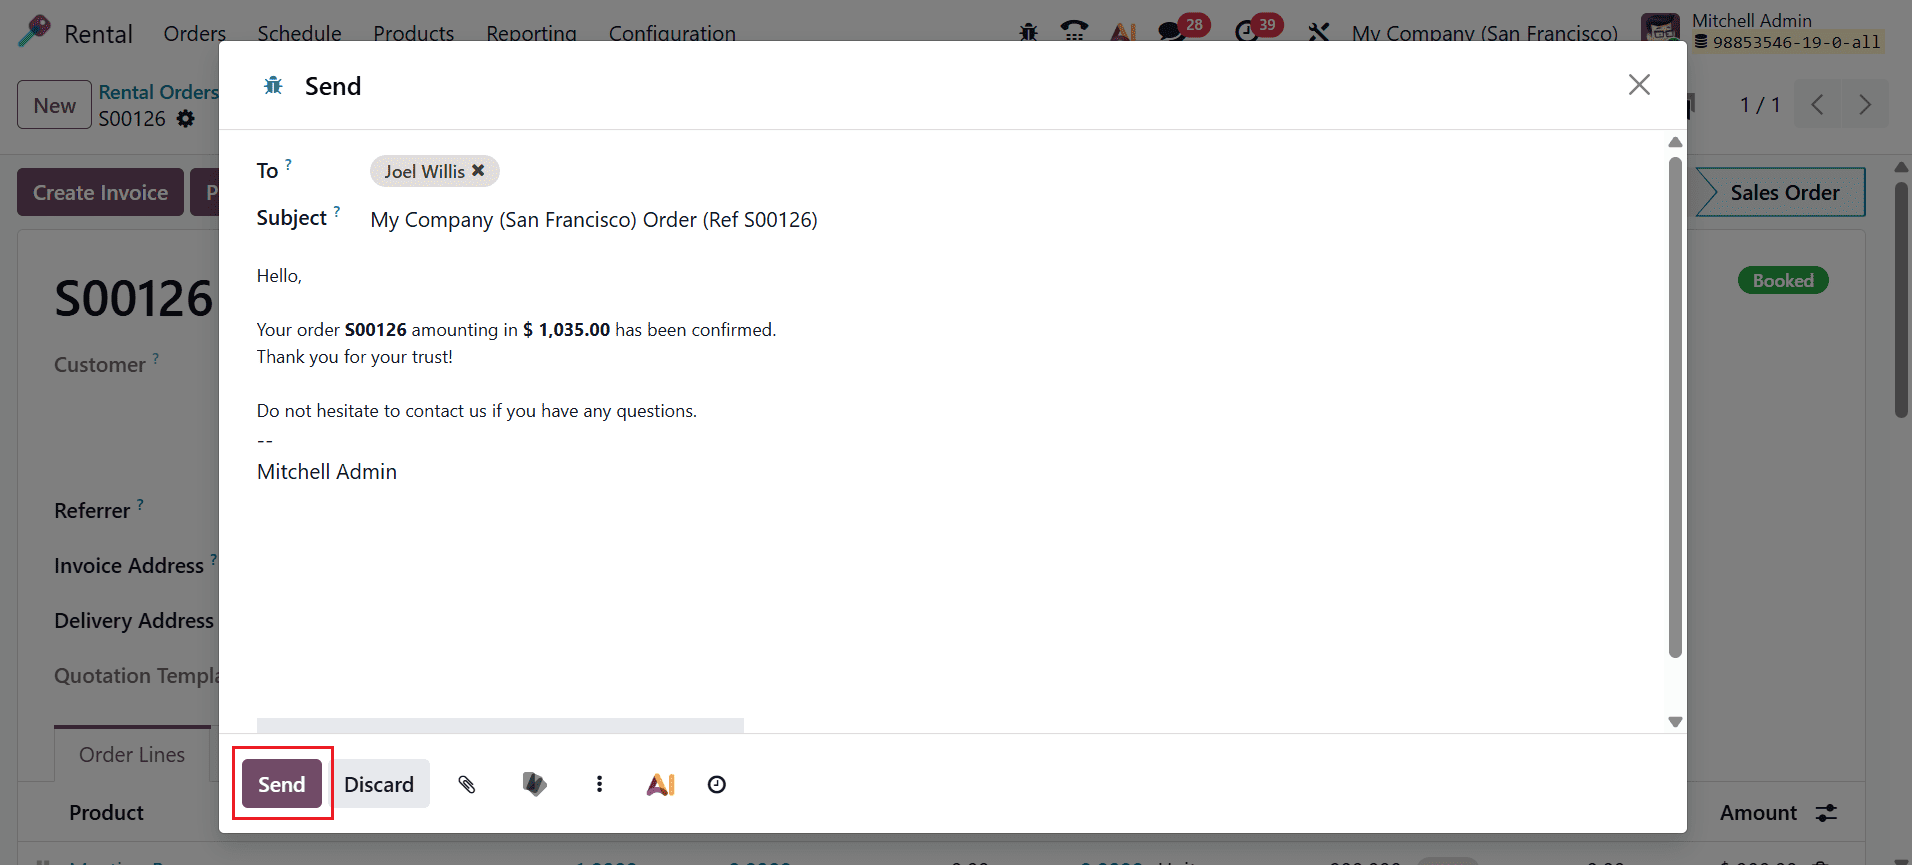
A new form will appear where you can select a customer for the order. The customer’s address will be automatically uploaded. Then, add the details such as Rental Period, Quotation Template, and Payment Terms. Select a product and mention its quantity under the Order Lines tab. Select the Send button as shown below.

A pop-up window will appear to view the details of the email and click on the Send button to send it to the customer.
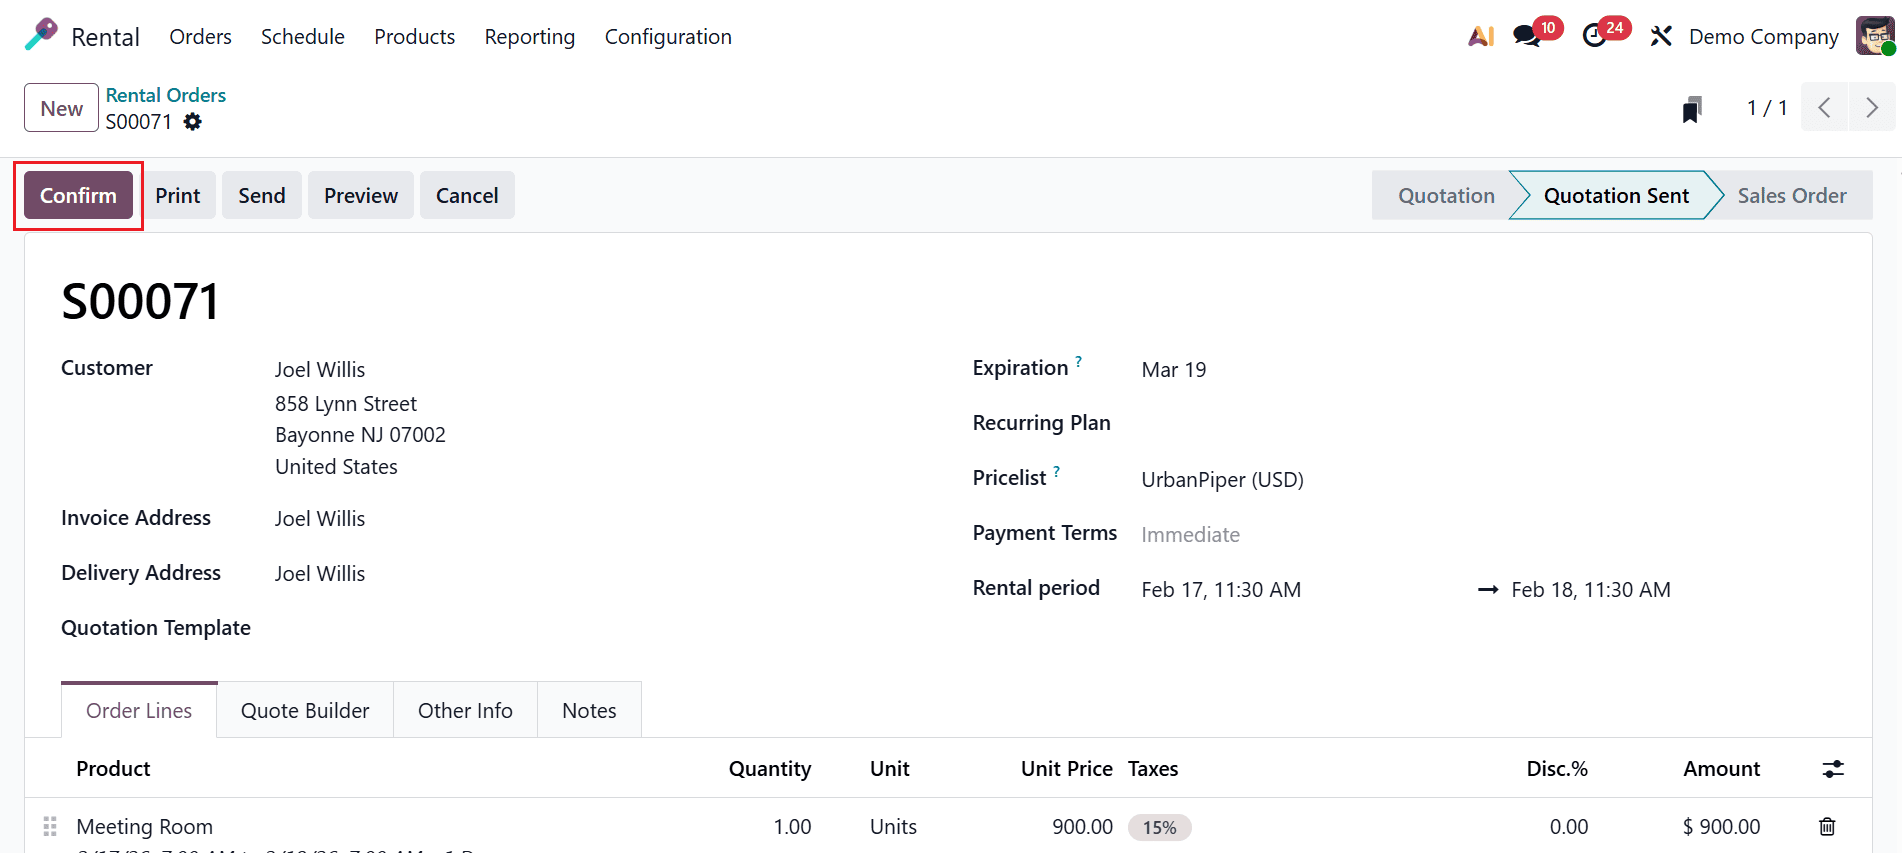
After sending the email, the rental order moves to the Quotation Sent stage. Click the Confirm button to confirm the rental order as shown below:
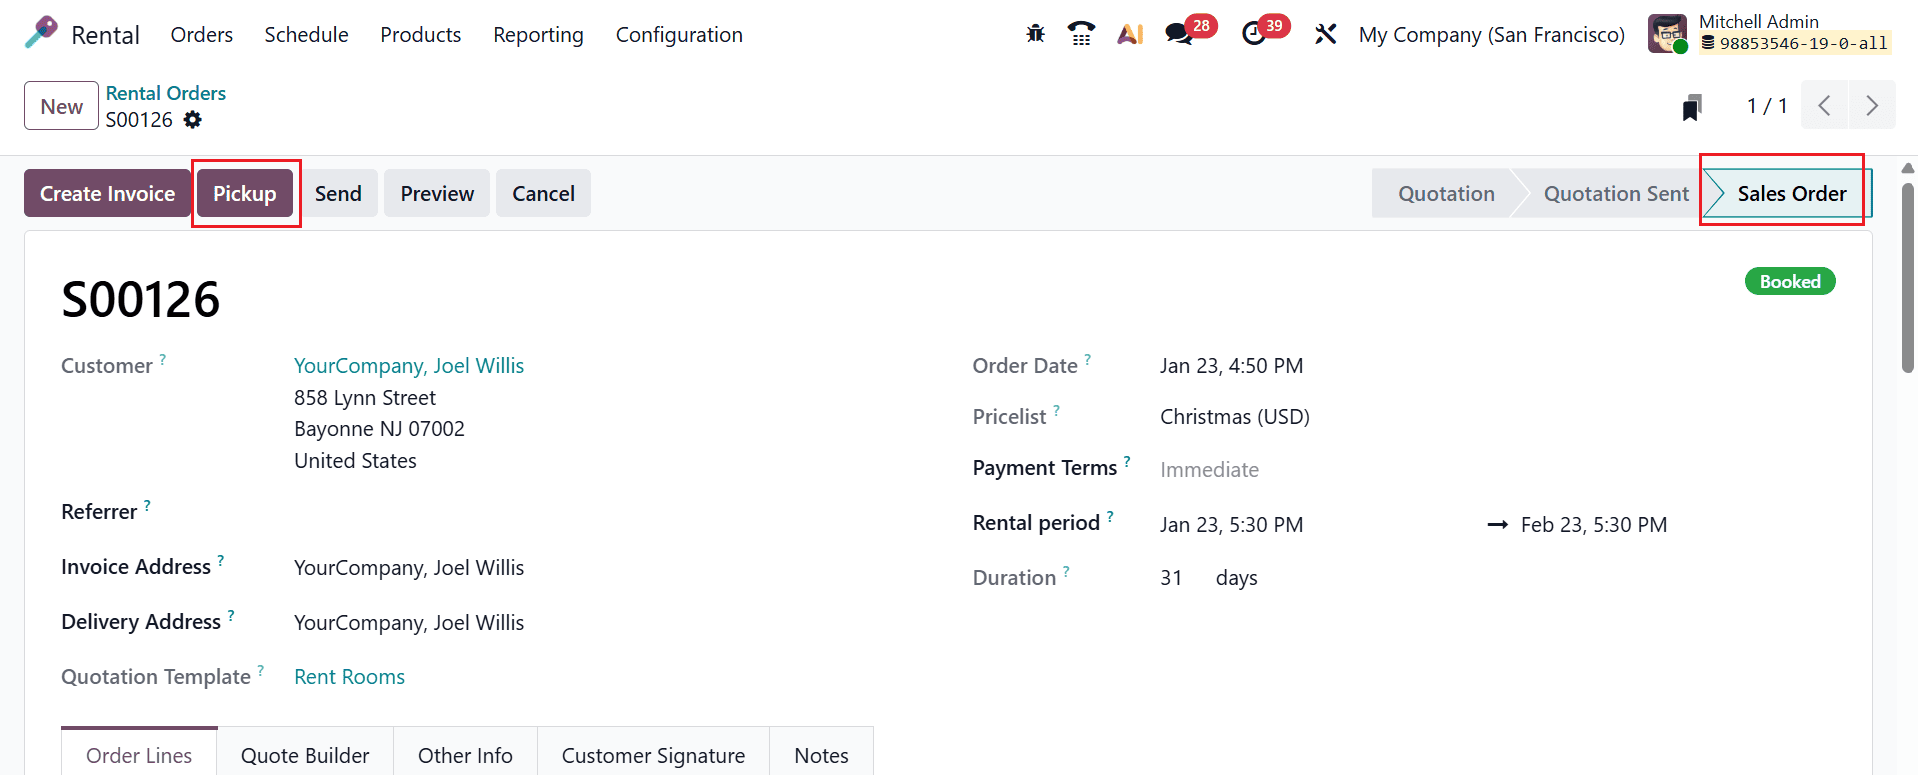
After confirming the rental order, it moves to the Sales Order stage as shown below. Then, click on the Pickup button when the product is ready for delivery.
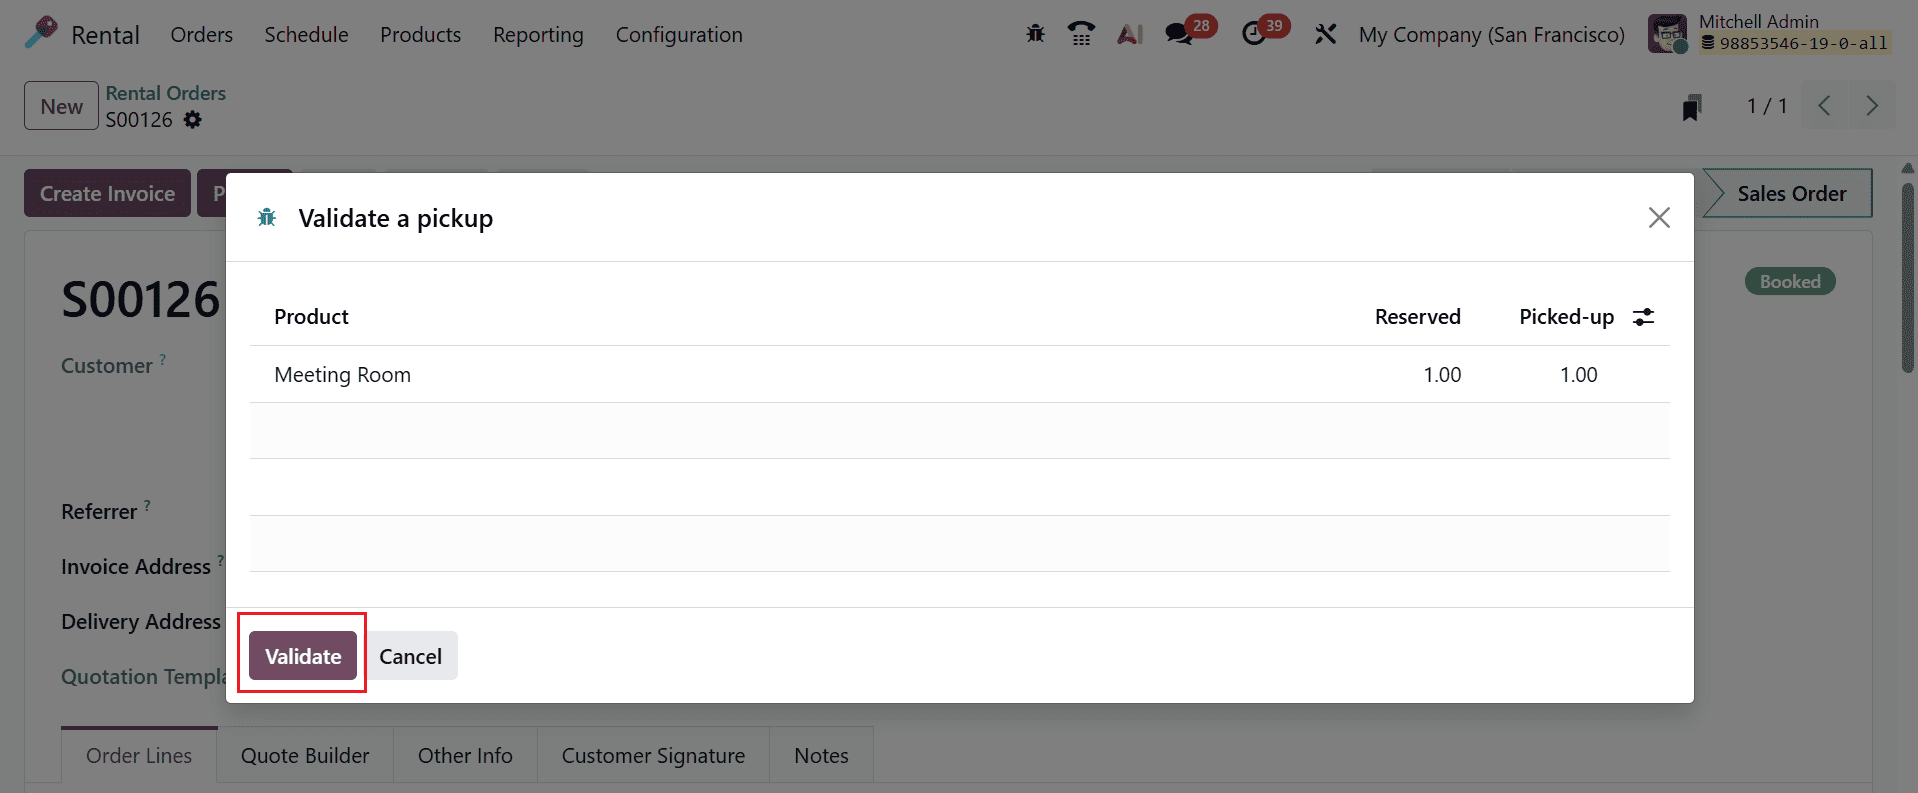
A new pop-up screen will appear where you can view the details of the product, such as Name, Reserved, and Picked-up. To confirm the pickup, click on the Validate button as shown below:
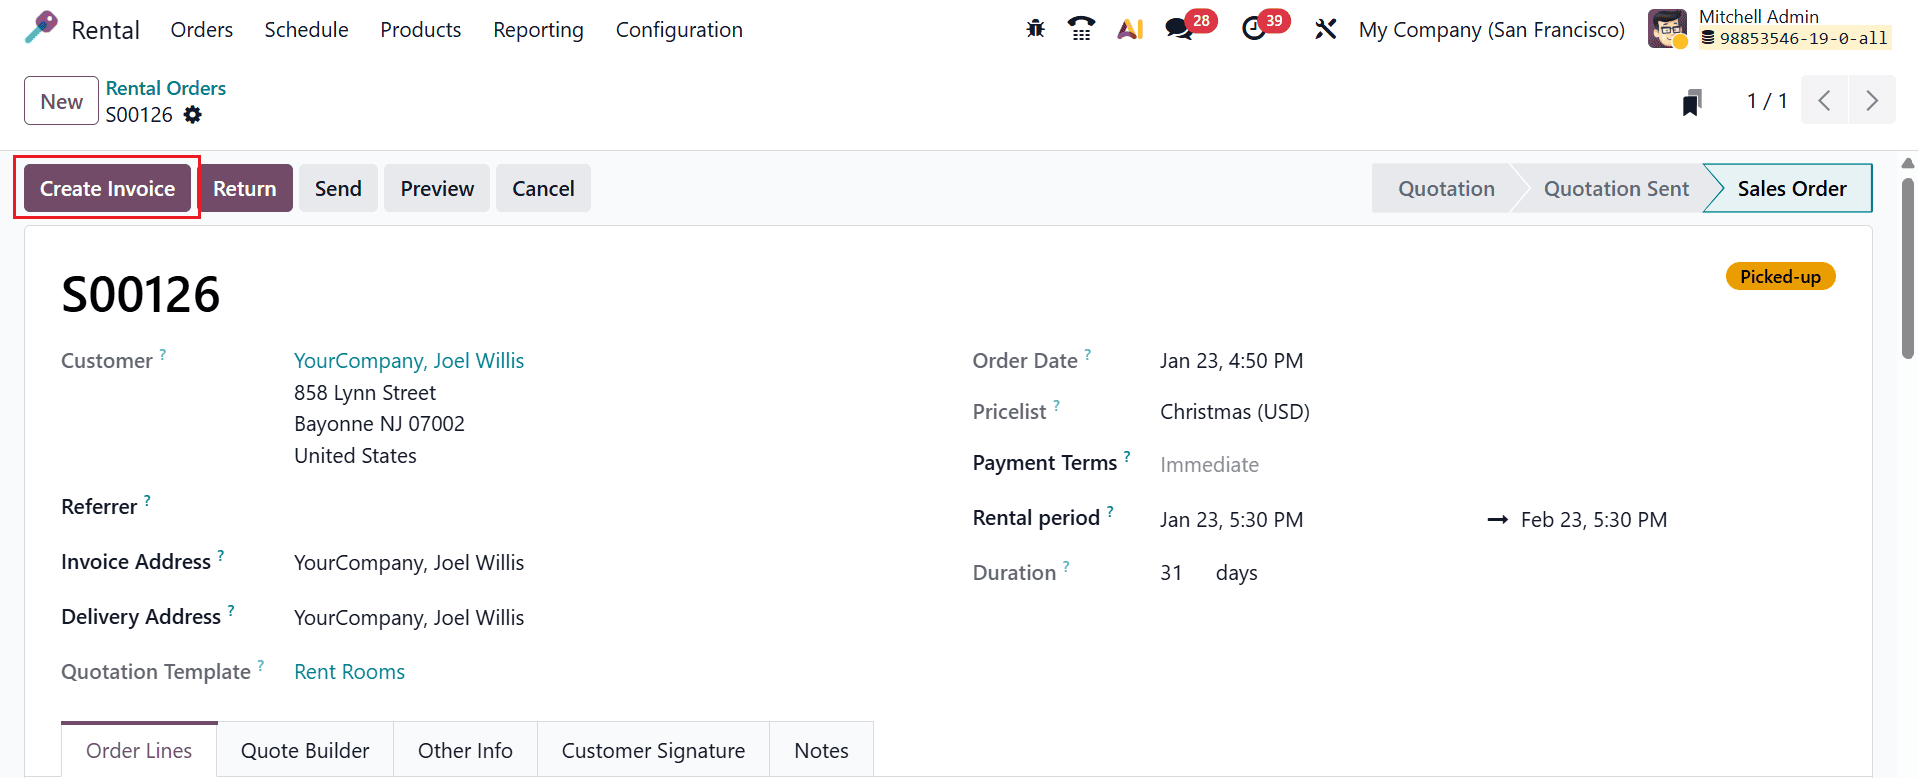
At this stage, the rental order is in the Picked-up status. To generate an invoice for the rental order, click the Create Invoice button as shown below:
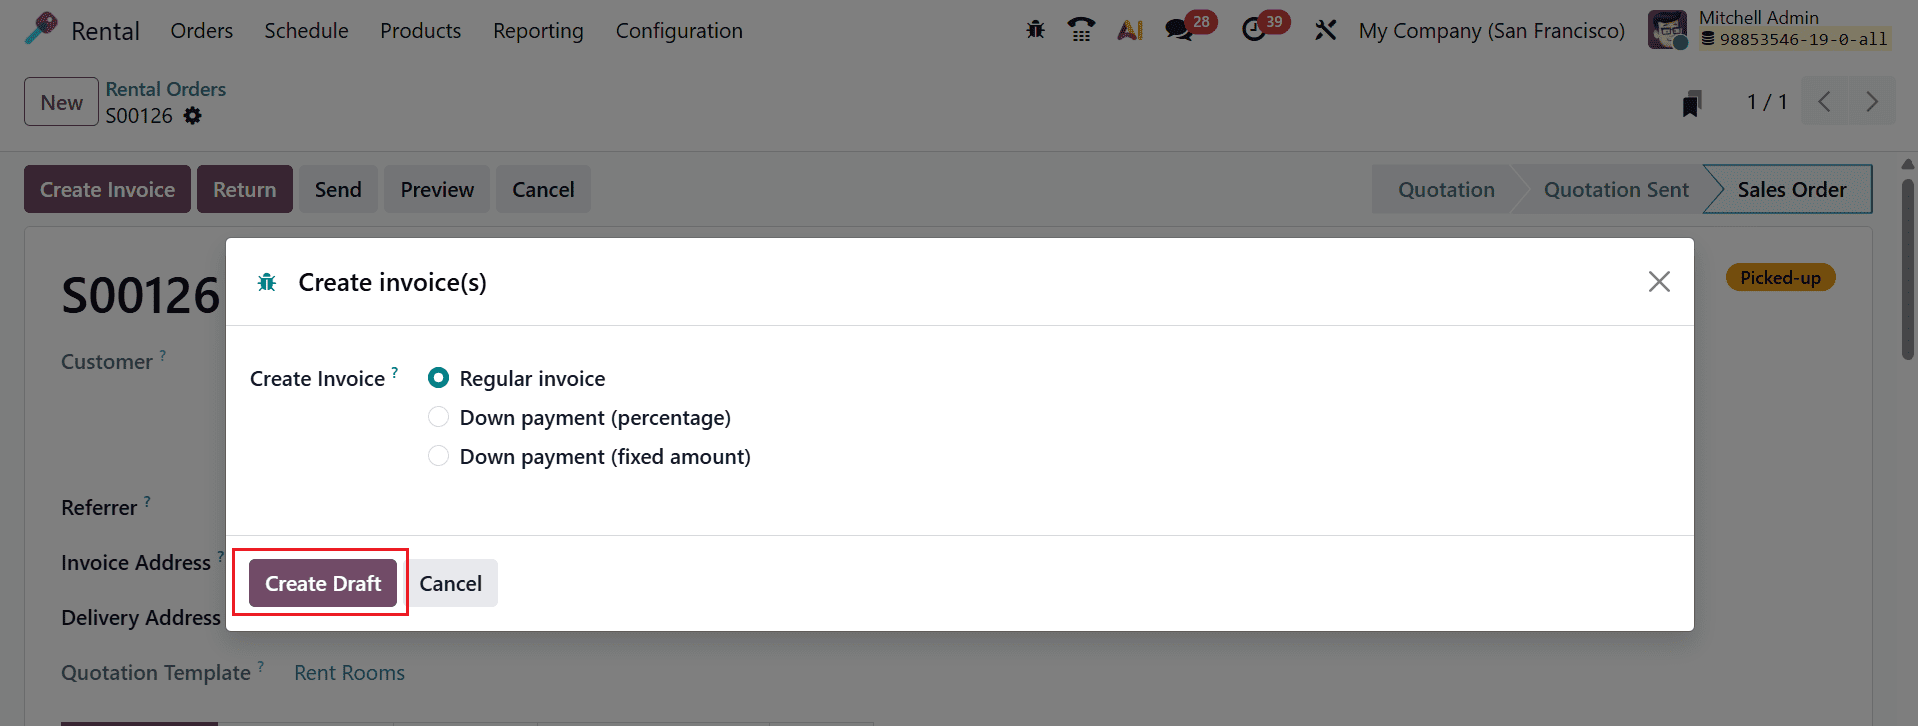
A pop-up screen will appear, allowing you to select the invoice method. Then, click the Create Draft button, as shown below:
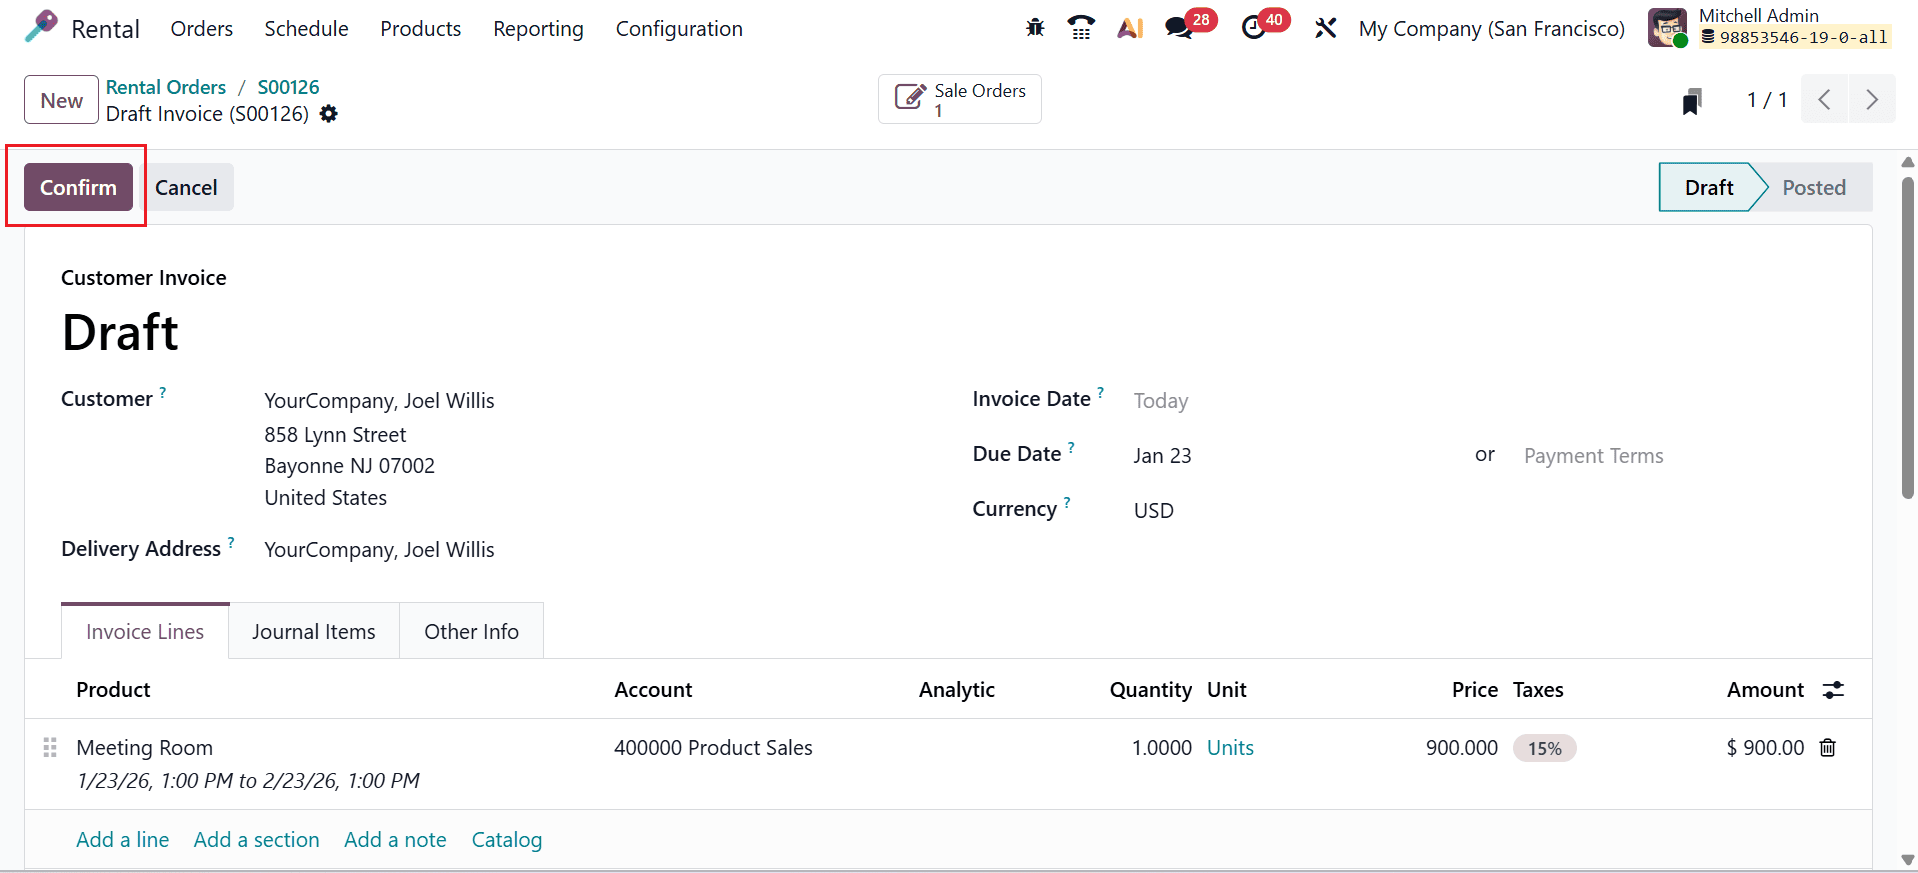
Here, you can review the customer invoice details for the rental order. Click the Confirm button to finalize the invoice, as shown below:
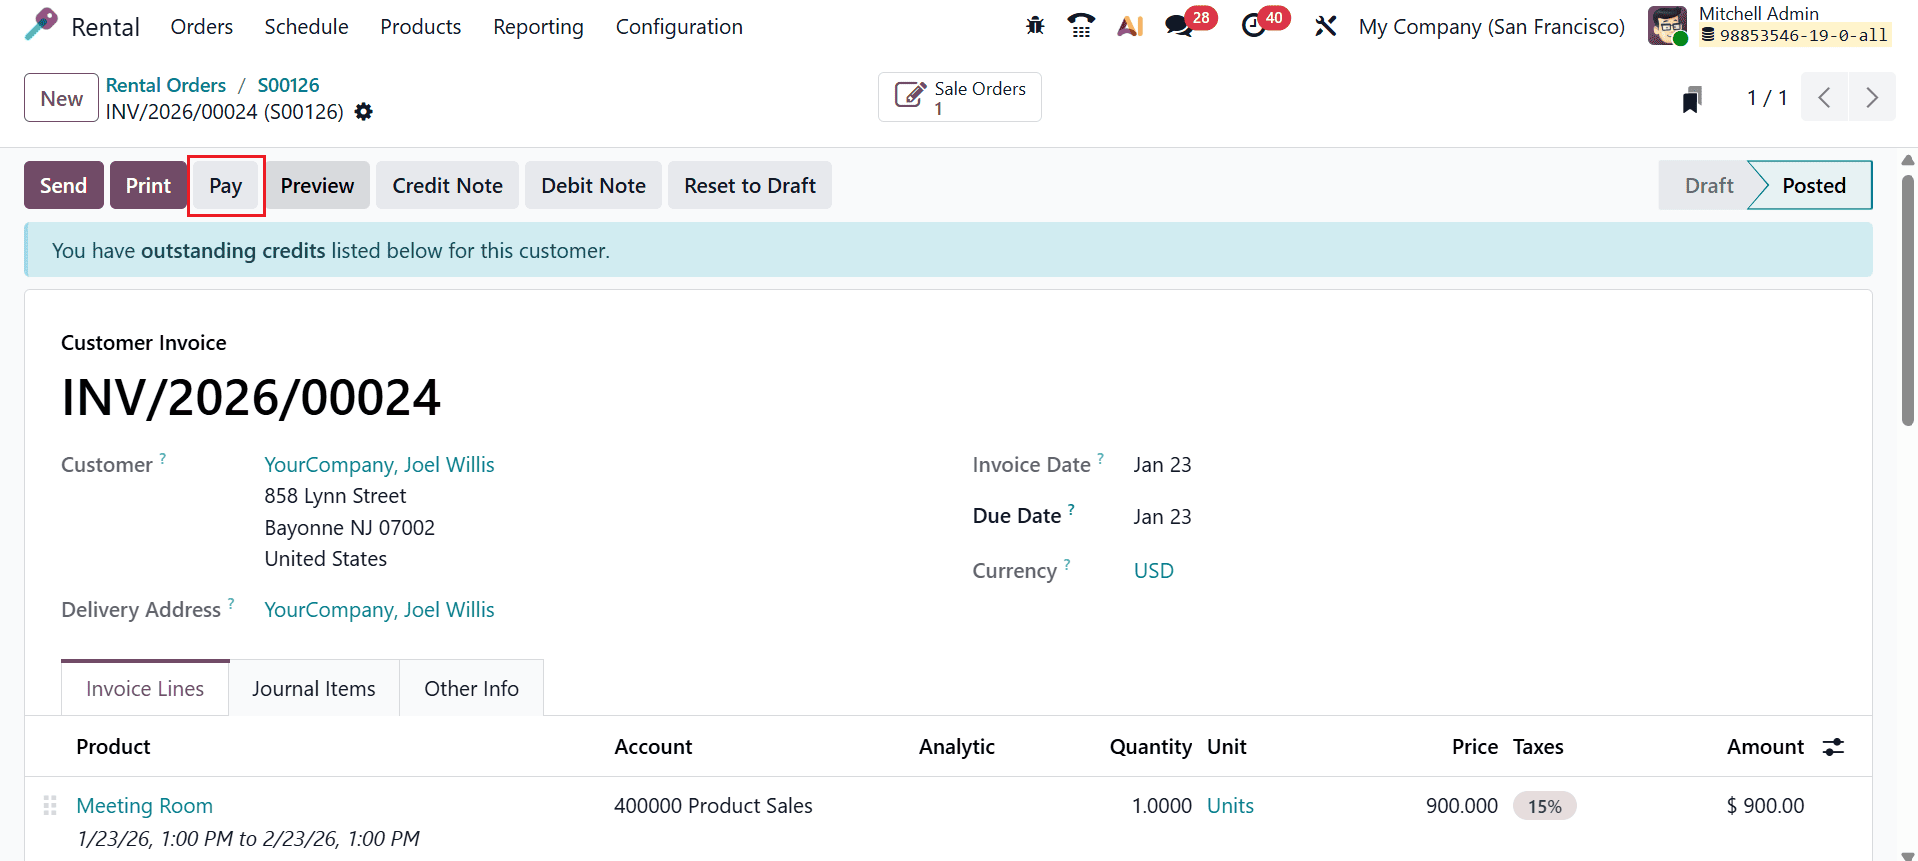
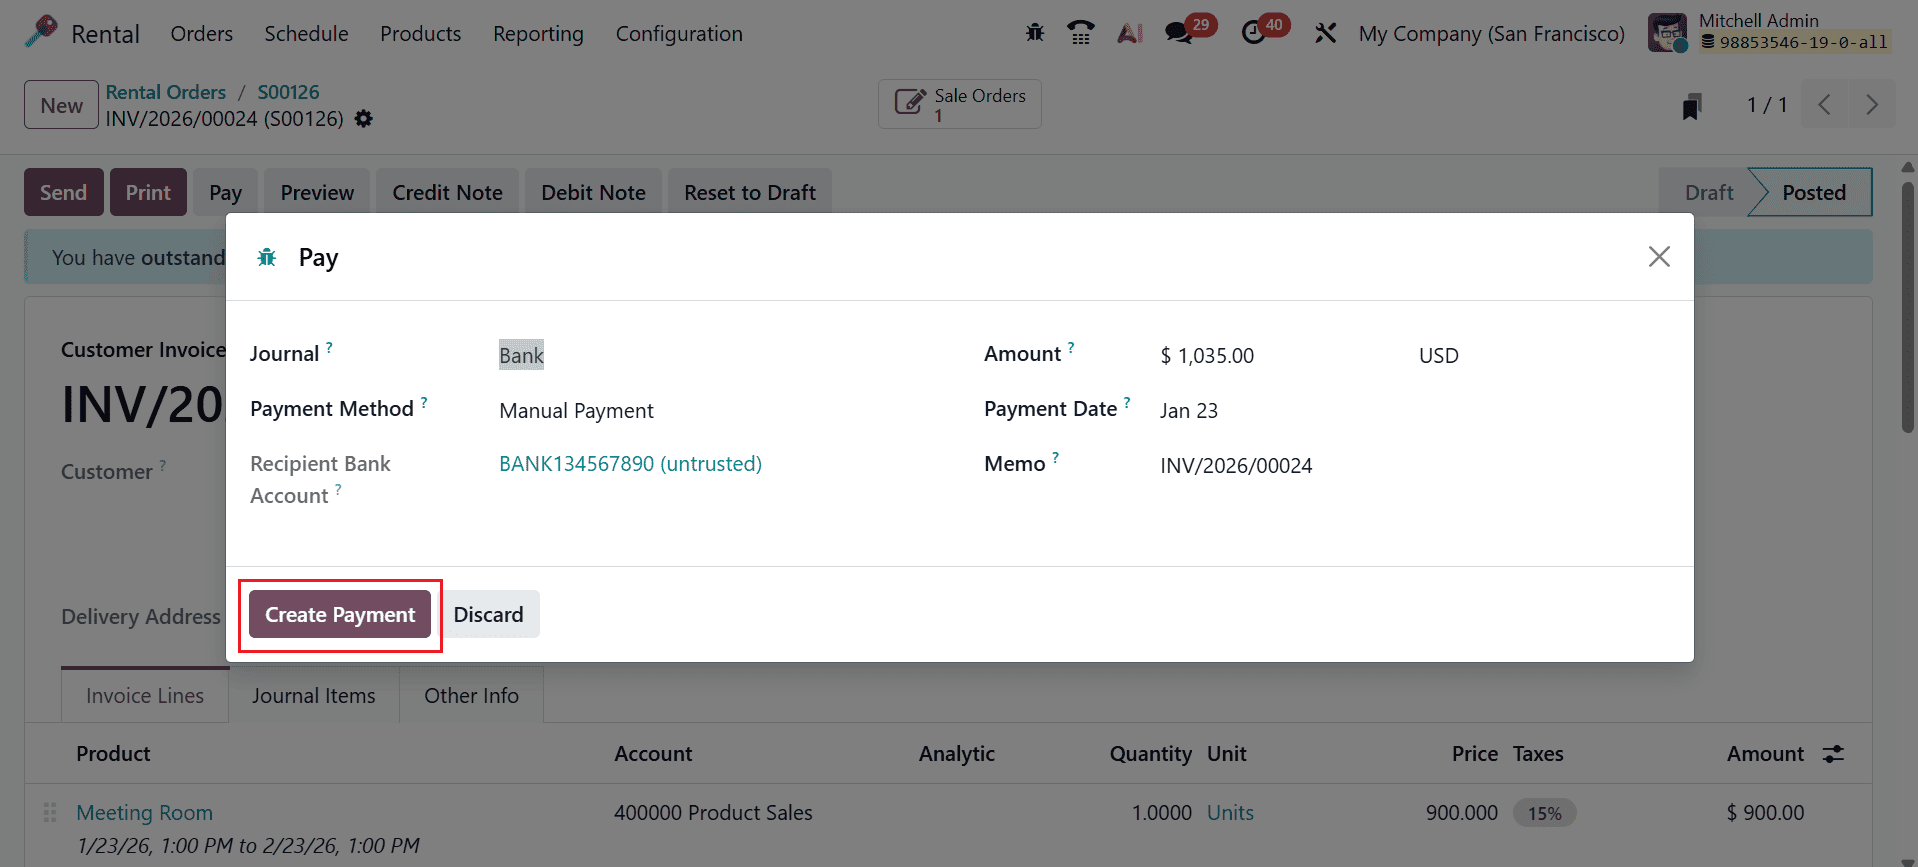
At this point, the customer invoice is in the Posted stage. The customer can pay the amount for the rental order by clicking on the Pay button, as shown below:
A pop-up screen will appear, where you can view the payment details of the invoice. The details include Journal, Payment Details, Amount, Recipient Bank Account, Payment Date, and Memo. Next, click the Create Payment button as shown below.
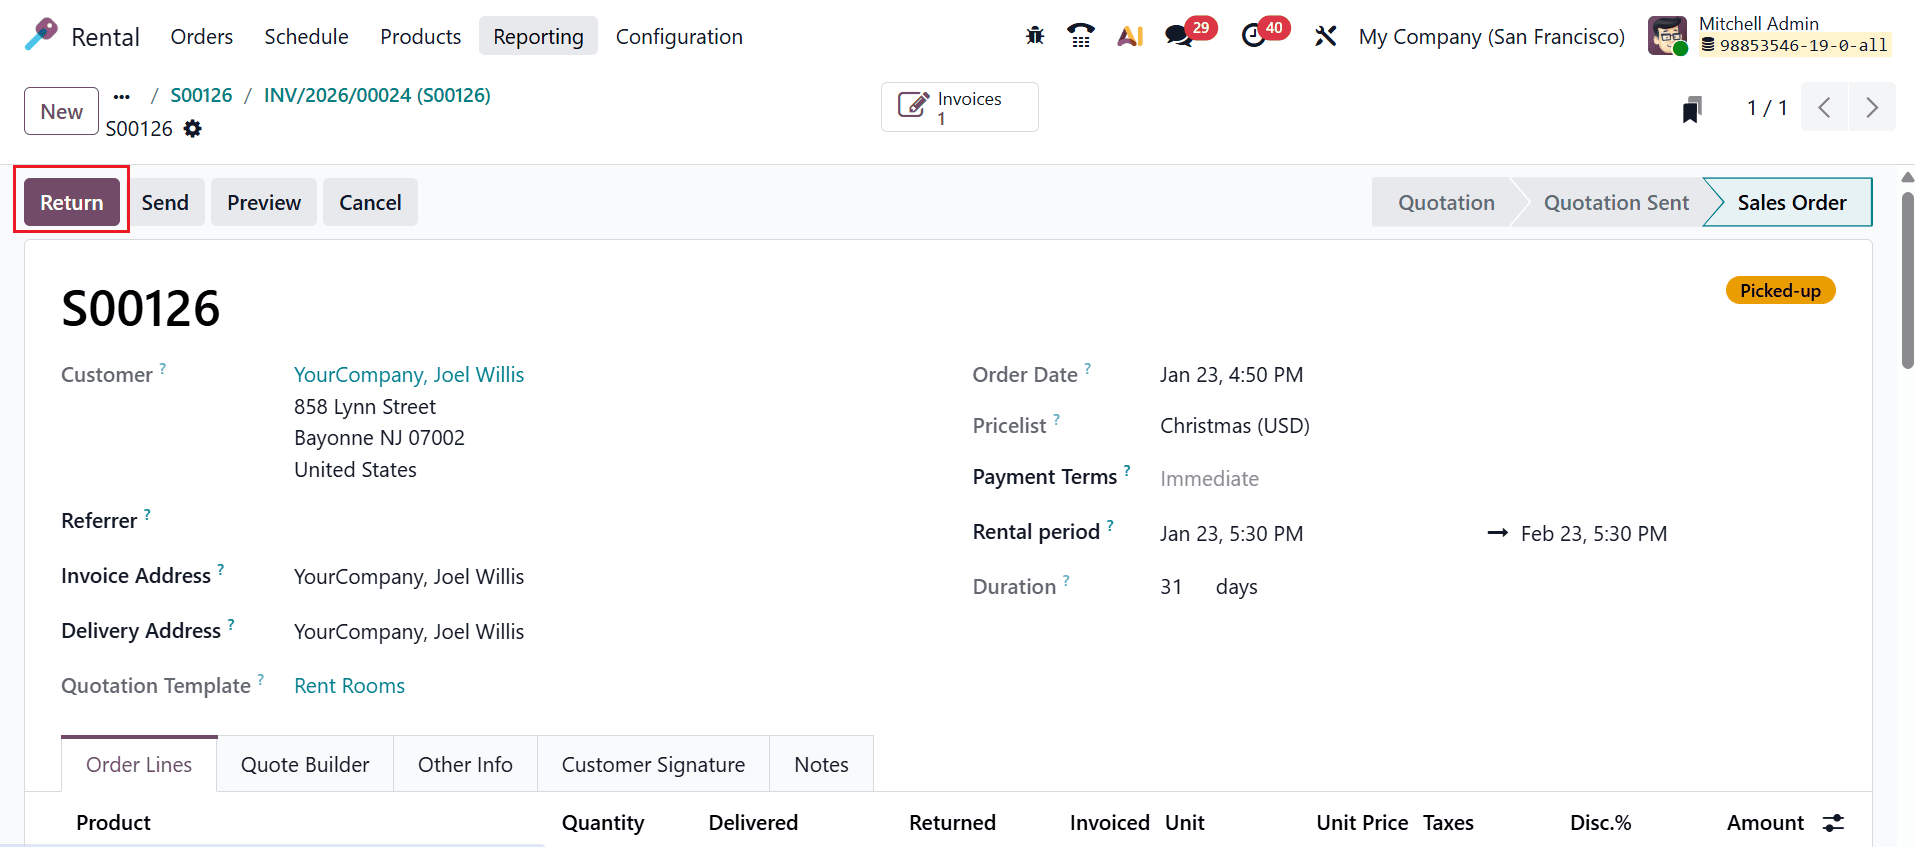
After the rental period is complete, click the Return button to process the return of the rental product, as illustrated below.
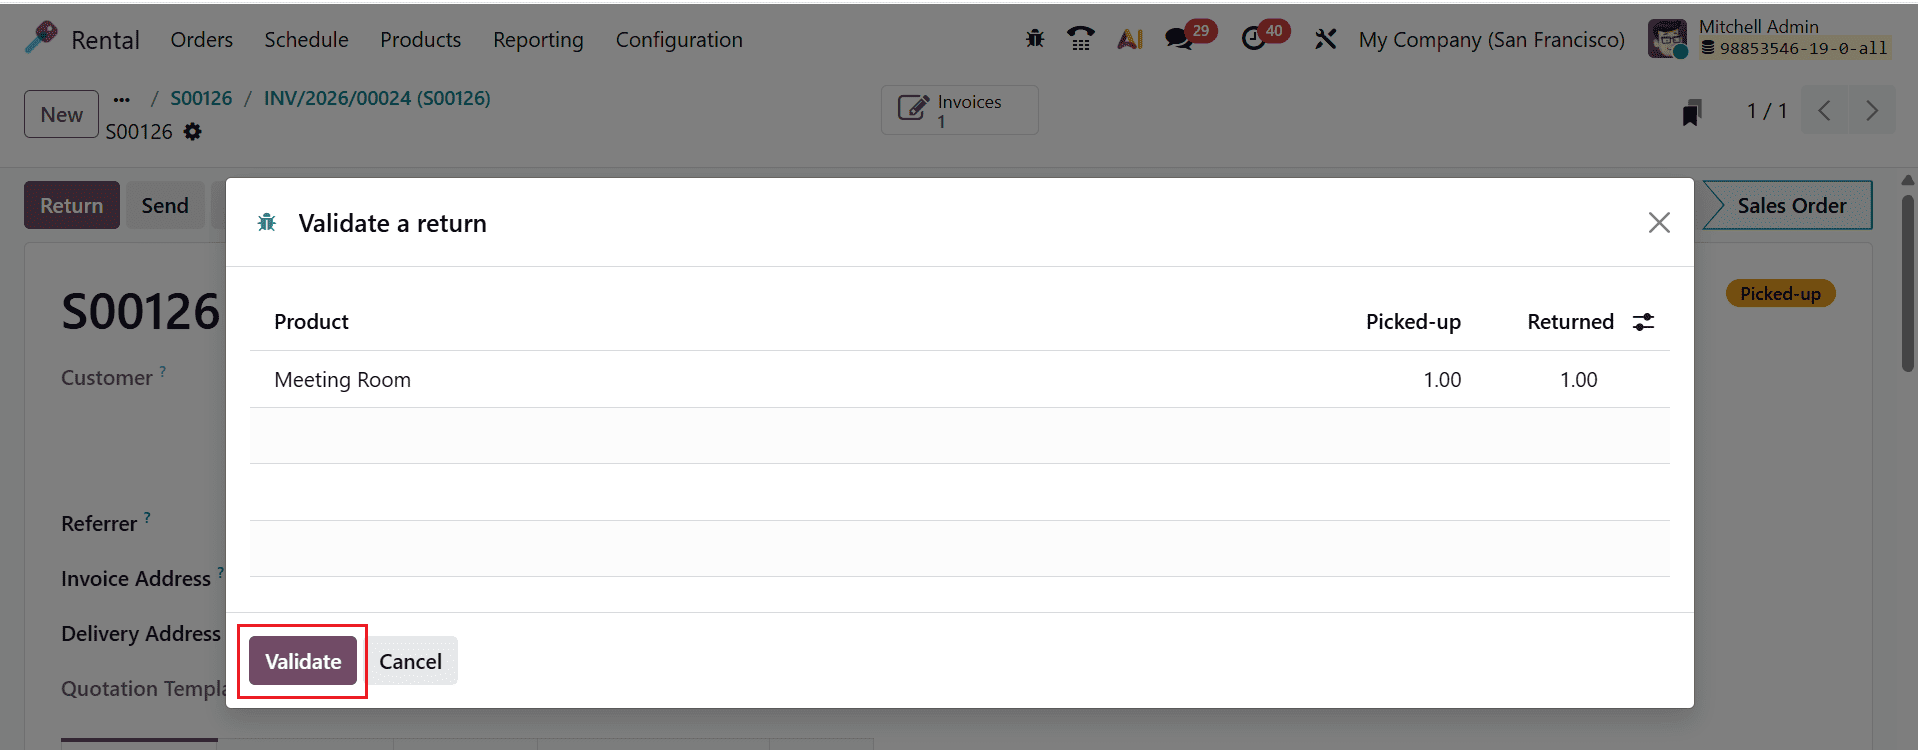
A pop-up window will appear displaying the return product details. To confirm the return, click the Validate button, as shown below.
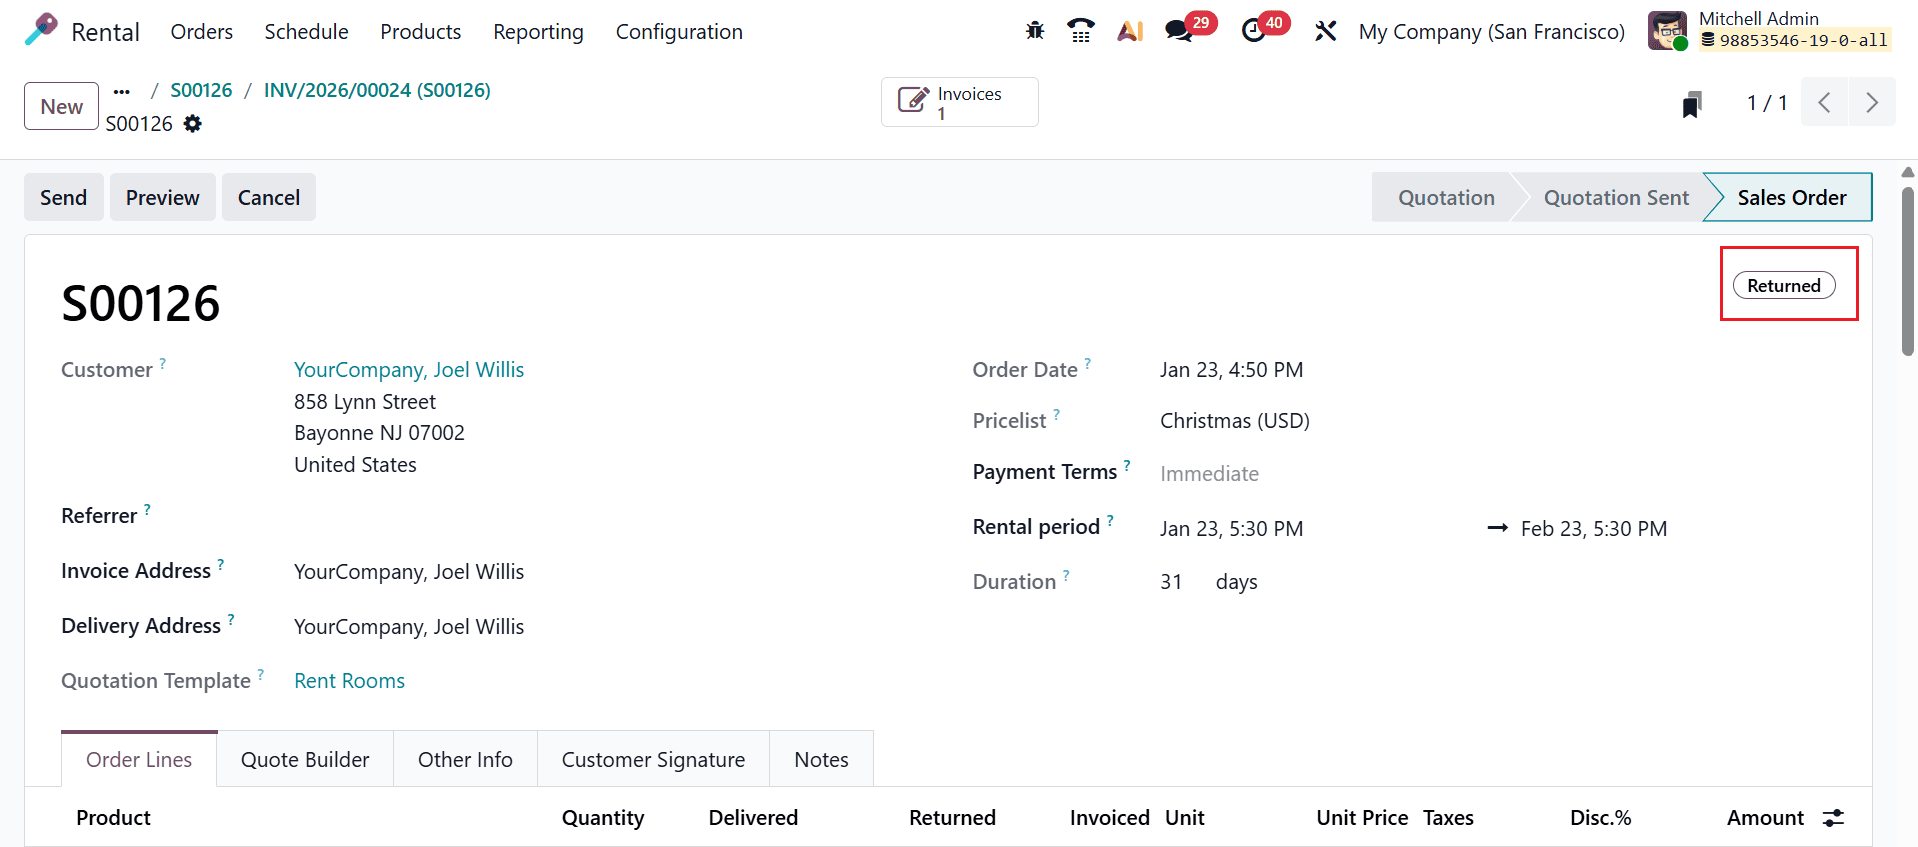
At this point, the rental order is in the Returned stage.
Efficient rental transfer management in Odoo 19 empowers rental businesses to maintain accurate inventory control, reduce downtime, and optimize logistics. By configuring warehouses correctly, automating transfer rules, and using barcode-enabled operations, companies can ensure smooth product movement between locations and customers. Clear workflows for pickups and returns further enhance accountability and traceability. Odoo 19 streamlines rental transfer operations into an efficient, data-driven process. This leads to improved asset utilization, fewer operational bottlenecks, enhanced reporting accuracy, and a superior customer experience that supports sustainable business growth.
To read more about How to Manage Rental Transfers in Odoo 18, refer to our blog How to Manage Rental Transfers in Odoo 18.