Odoo CRM, as a part of the comprehensive Odoo ERP system, provides robust integration features that help businesses align their customer relationship management processes with other operational functions. Odoo offers a wide range of business applications—including Sales, Inventory, Accounting, Rental, HR, and more—that work seamlessly together. The CRM module can easily integrate with these applications, creating a unified platform for managing customer interactions.
Integrating the CRM module with the Rental module in Odoo 18 enables a smooth flow of information between customer engagement and rental operations. This connection allows businesses to handle everything from lead generation to rental order completion more efficiently, while also keeping a detailed record of customer activity and rental history.
In this blog, we’ll walk you through how to manage rental requests using the CRM module in Odoo 18.
Configure Rental Products in Odoo
Setting up rental products in Odoo consists of creating product records tailored for rental services and defining their availability, pricing, and operational parameters. Follow these steps to configure your rental products:
* Log in to Odoo
Sign in to your Odoo instance using an account with administrative or product-manager privileges.
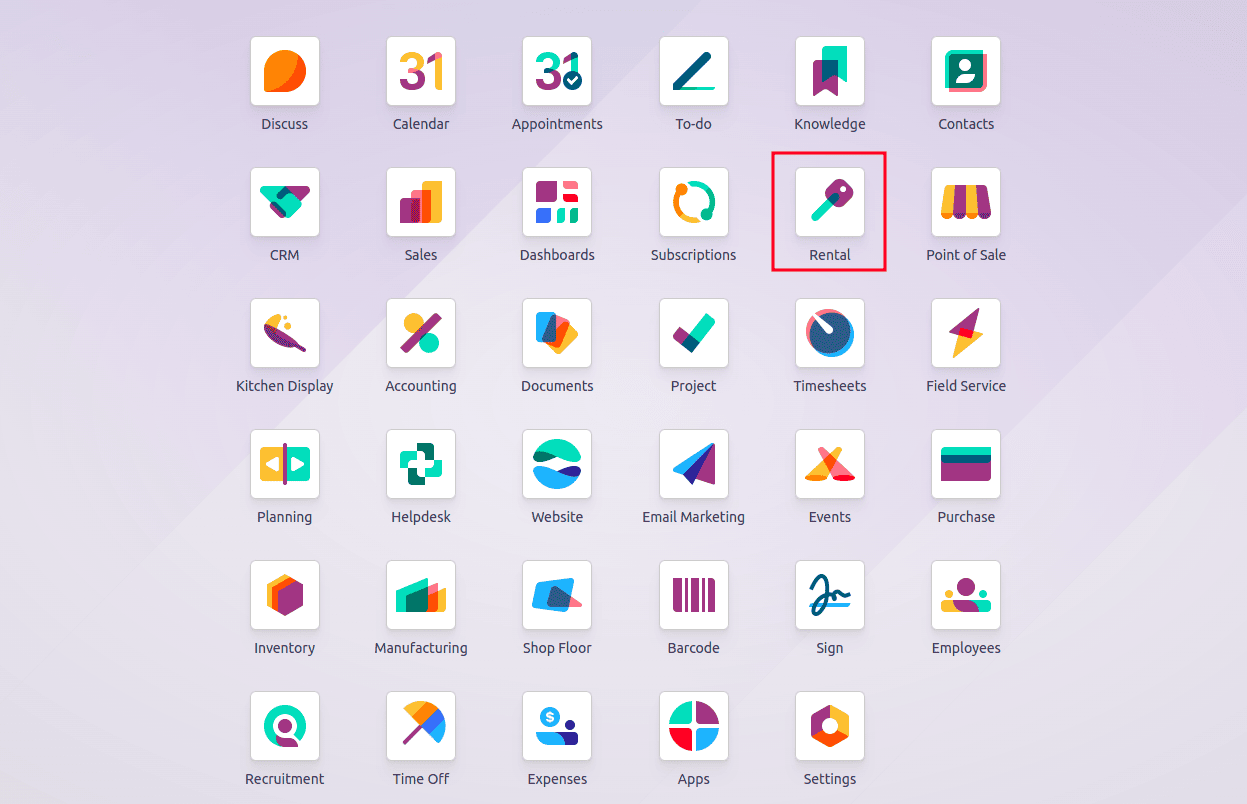
* Open the Rental Application
From the main dashboard, click the Rental app to launch the rental management interface.
* Navigate to Products
In the Rental app’s main menu, select Products. You will see a Kanban view of all products currently configured for rental.
* Create a New Product
Click the “New” button to open the product form.

* Enter Basic Details
1. In the product form, select the product category as “Can be Rented”. This will make the product available for rental.
2. In the Product Name field, enter a clear name for your rental item.
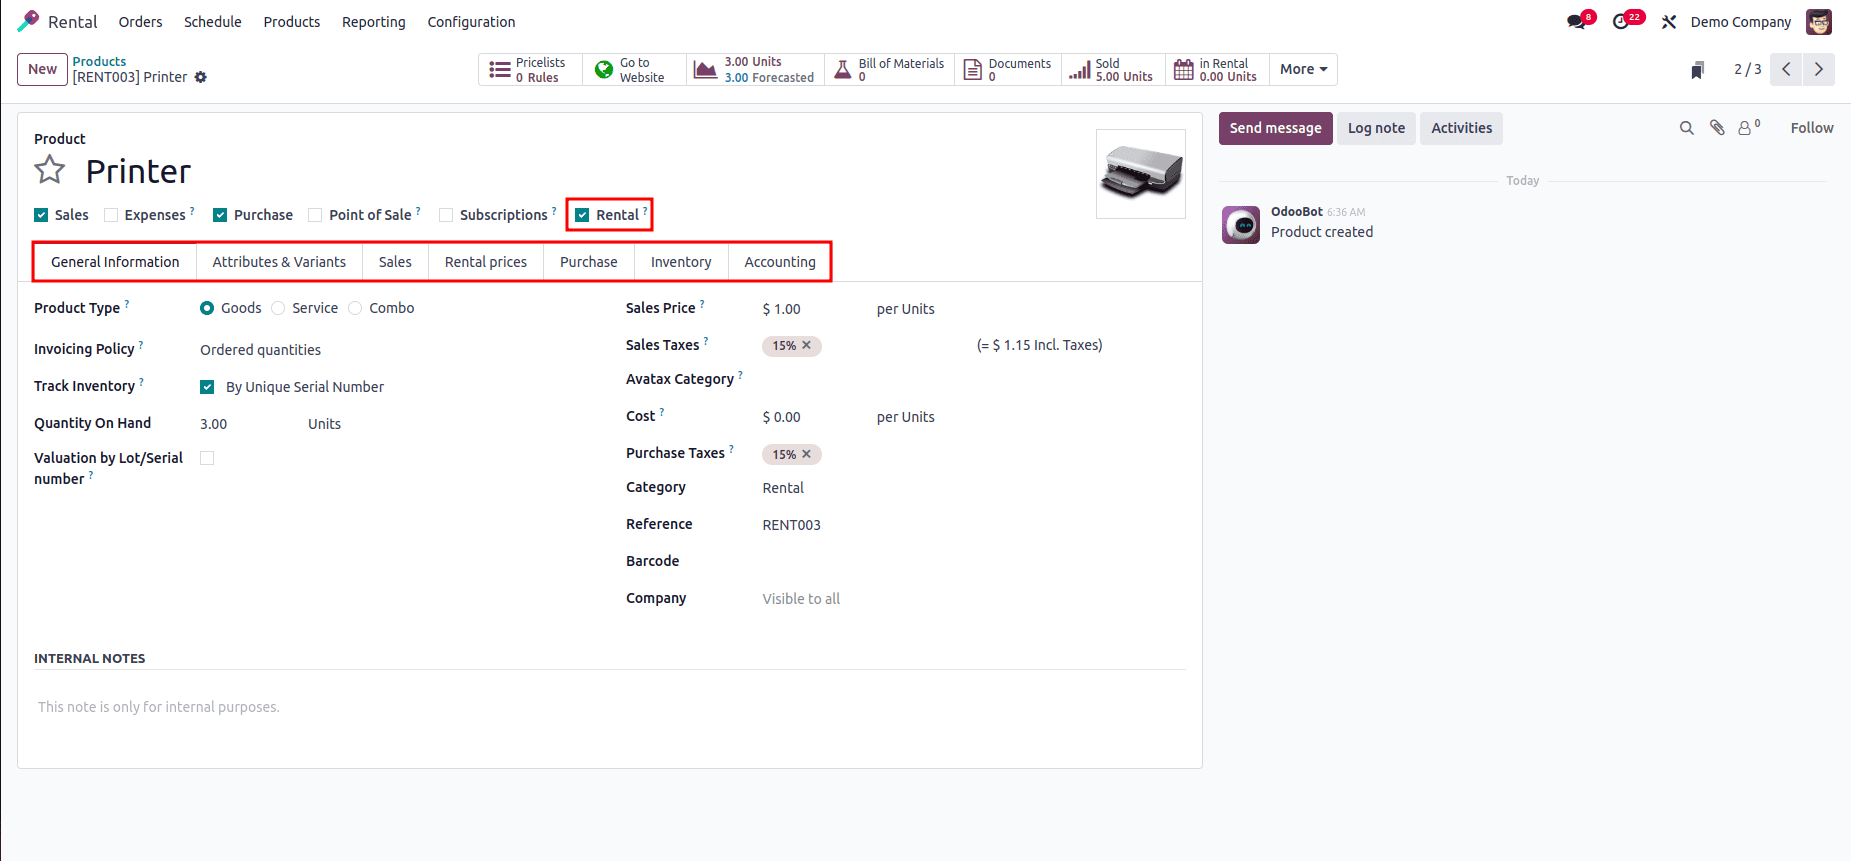
* Configure General Information
1. Under Product Type, choose Storable (if you track inventory) or Service (if inventory tracking isn’t required).
2. Set the Sales Price (your standard rental rate) and Cost (your internal cost, if needed).
3. Define any applicable Taxes under Sales Taxes or Purchase Taxes.
4. If required, enable Inventory Tracking and choose whether valuation is by Lot/Serial
* Attributes & Variants Tab
1. This tab is used to define the attributes (such as size, color, material, etc.) and their corresponding variants that help differentiate versions of the same product.
* Sales Tab
1. The Sales Tab contains essential details about optional items, supplementary products, and substitute products for upselling and cross-selling. This section includes areas such as “UPSELLING & CROSS SELLING,” “E-COMMERCE SHOP,” “E-COMMERCE MEDIA,” “QUOTATION DESCRIPTION”,and “ECOMMERCE DESCRIPTION”
* Define Rental Pricing
Switch to the Rental Prices tab and click Add a Price. For each rate tier:
1. Enter the Period name (e.g., Daily, Weekly).
2. elect the appropriate Pricelist if you use multiple price lists.
3. Enter the Price for that period.
Under Reservations, specify any Extra Hour, Extra Day, or Security Time fees.
* Finalize Purchasing Details (If Needed)
In the Purchase tab, select a Vendor, define Unit of Measure, Unit Price, and set the Delivery Lead Time. Choose whether bills are validated based on Ordered or Received quantities, and add any vendor-specific notes.
* Set Availability Rules (Optional)
In the Inventory tab, adjust Routes and Customer Lead Time to control how and when the product is delivered or restocked. Use Description for Receipts and Description for Delivery Orders to add any warehouse handling notes.
* Configure Accounting Accounts
In the Accounting tab, assign the appropriate Income, Receivable, Payable, and Price Difference accounts so that rental transactions post to the correct general-ledger accounts.
Generate Lead from Website for Rental Request
When a customer submits a rental request through the contact or inquiry form on your website, Odoo automatically creates a new lead in the CRM module. To enable this:
1. Create a Rental Request Form:
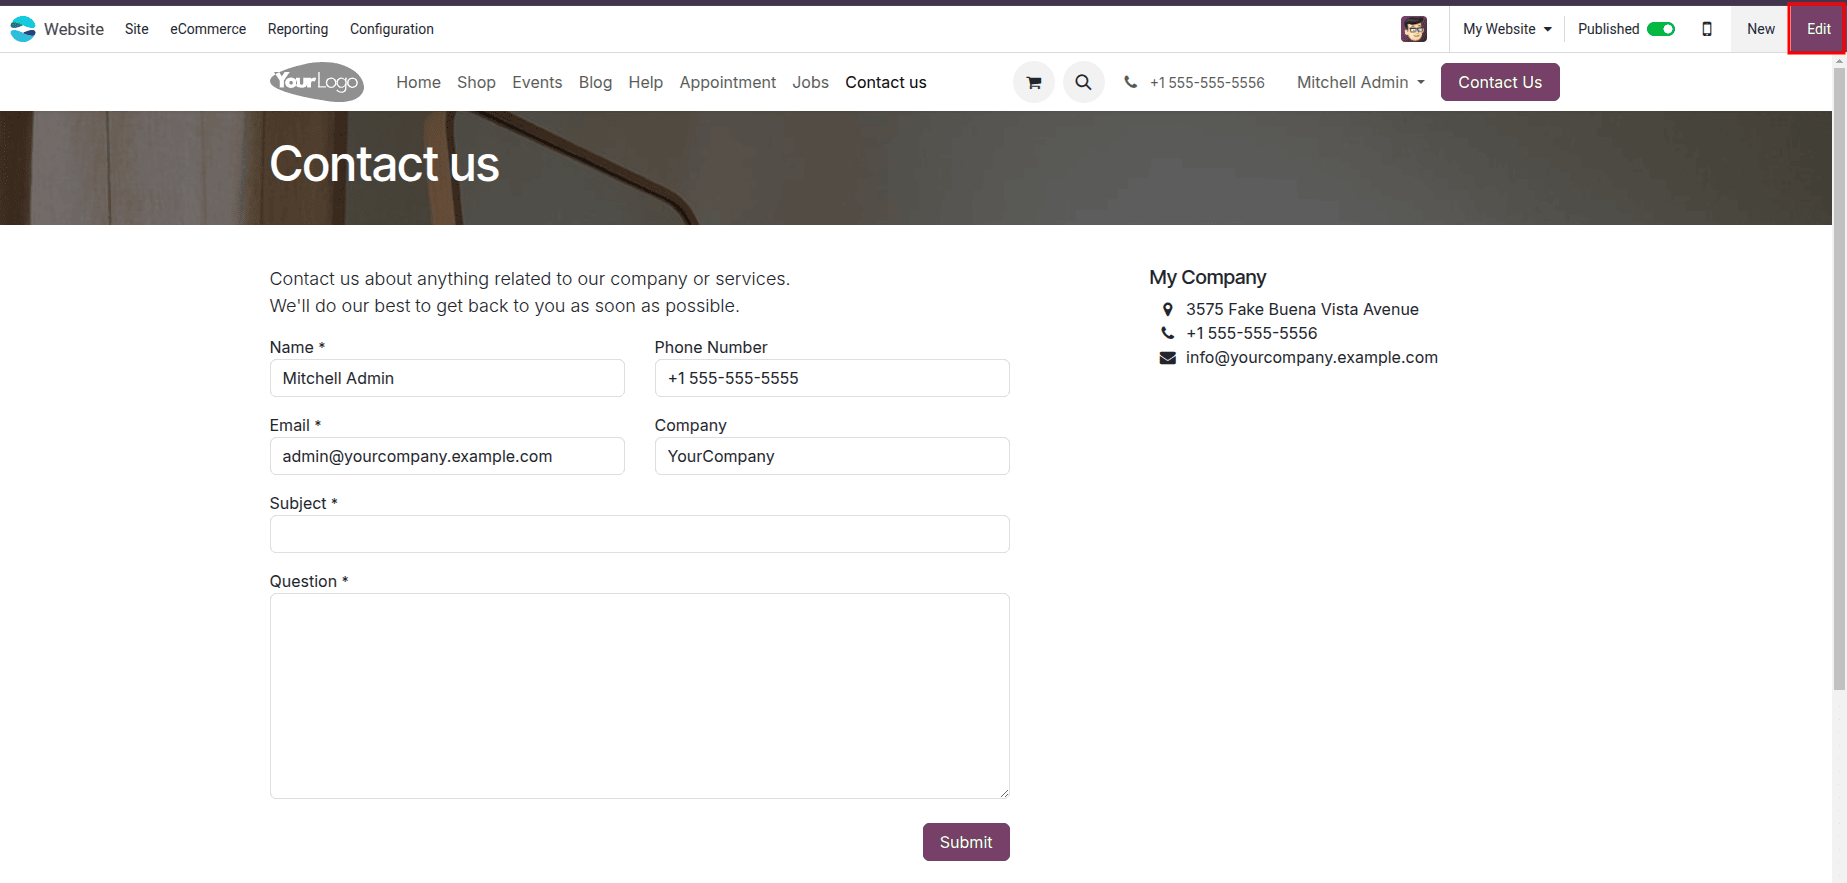
Log in to your Odoo website as an administrator.
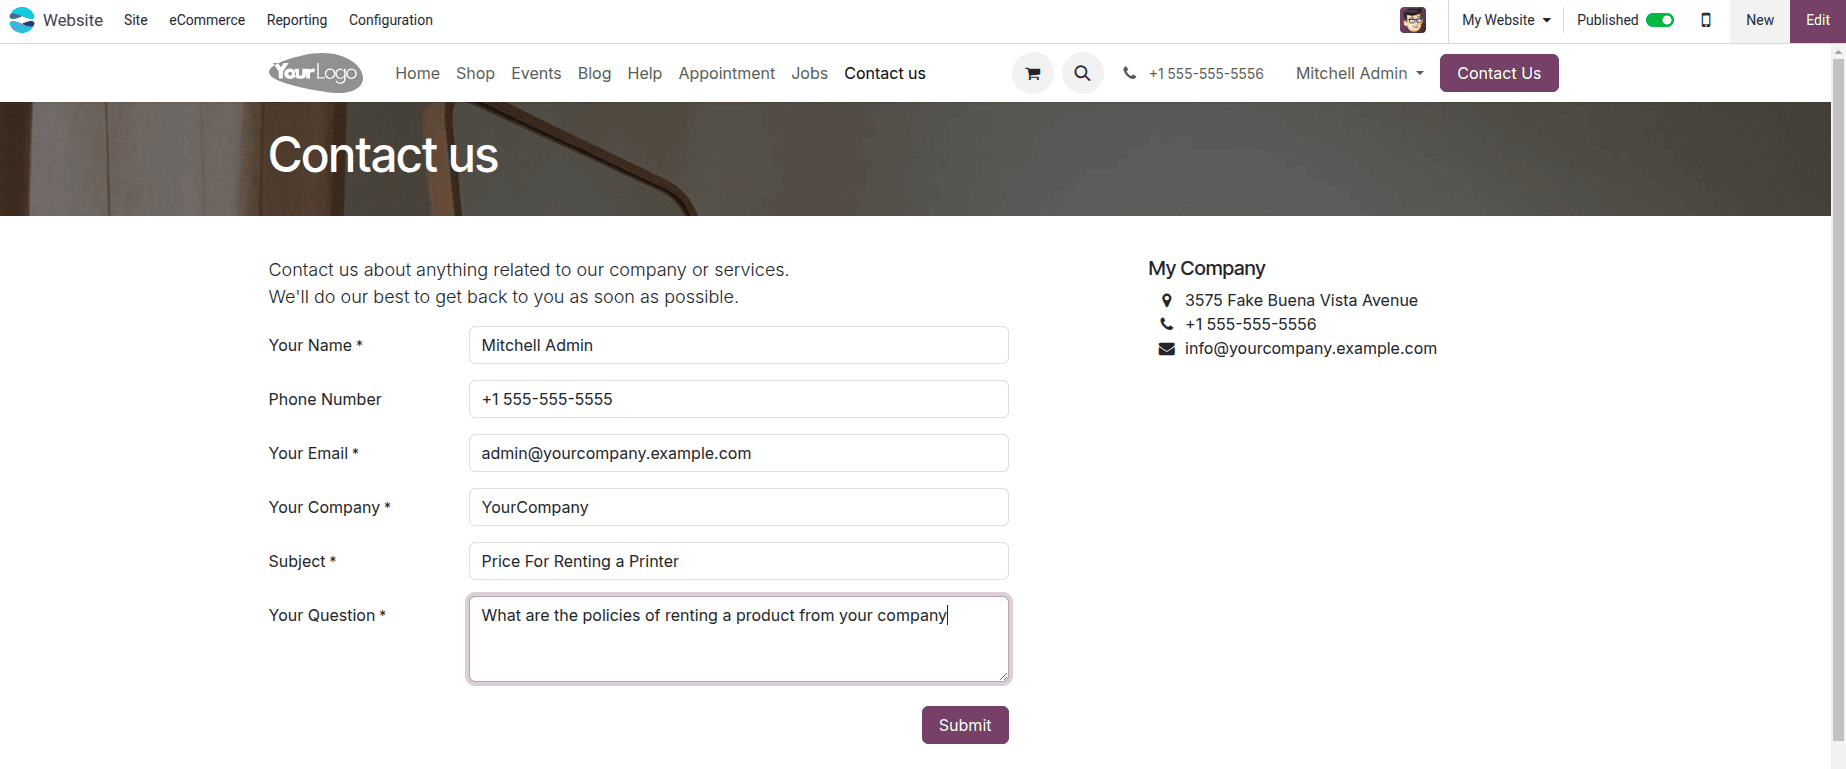
Use the website builder to create or modify a form that allows customers to submit rental requests. Include fields such as customer name, contact details, subject, and other necessary information.
You can add dropdowns,text fields and checkboxes as per your requirements.
You can access the options through the Edit button located in the top-right corner.
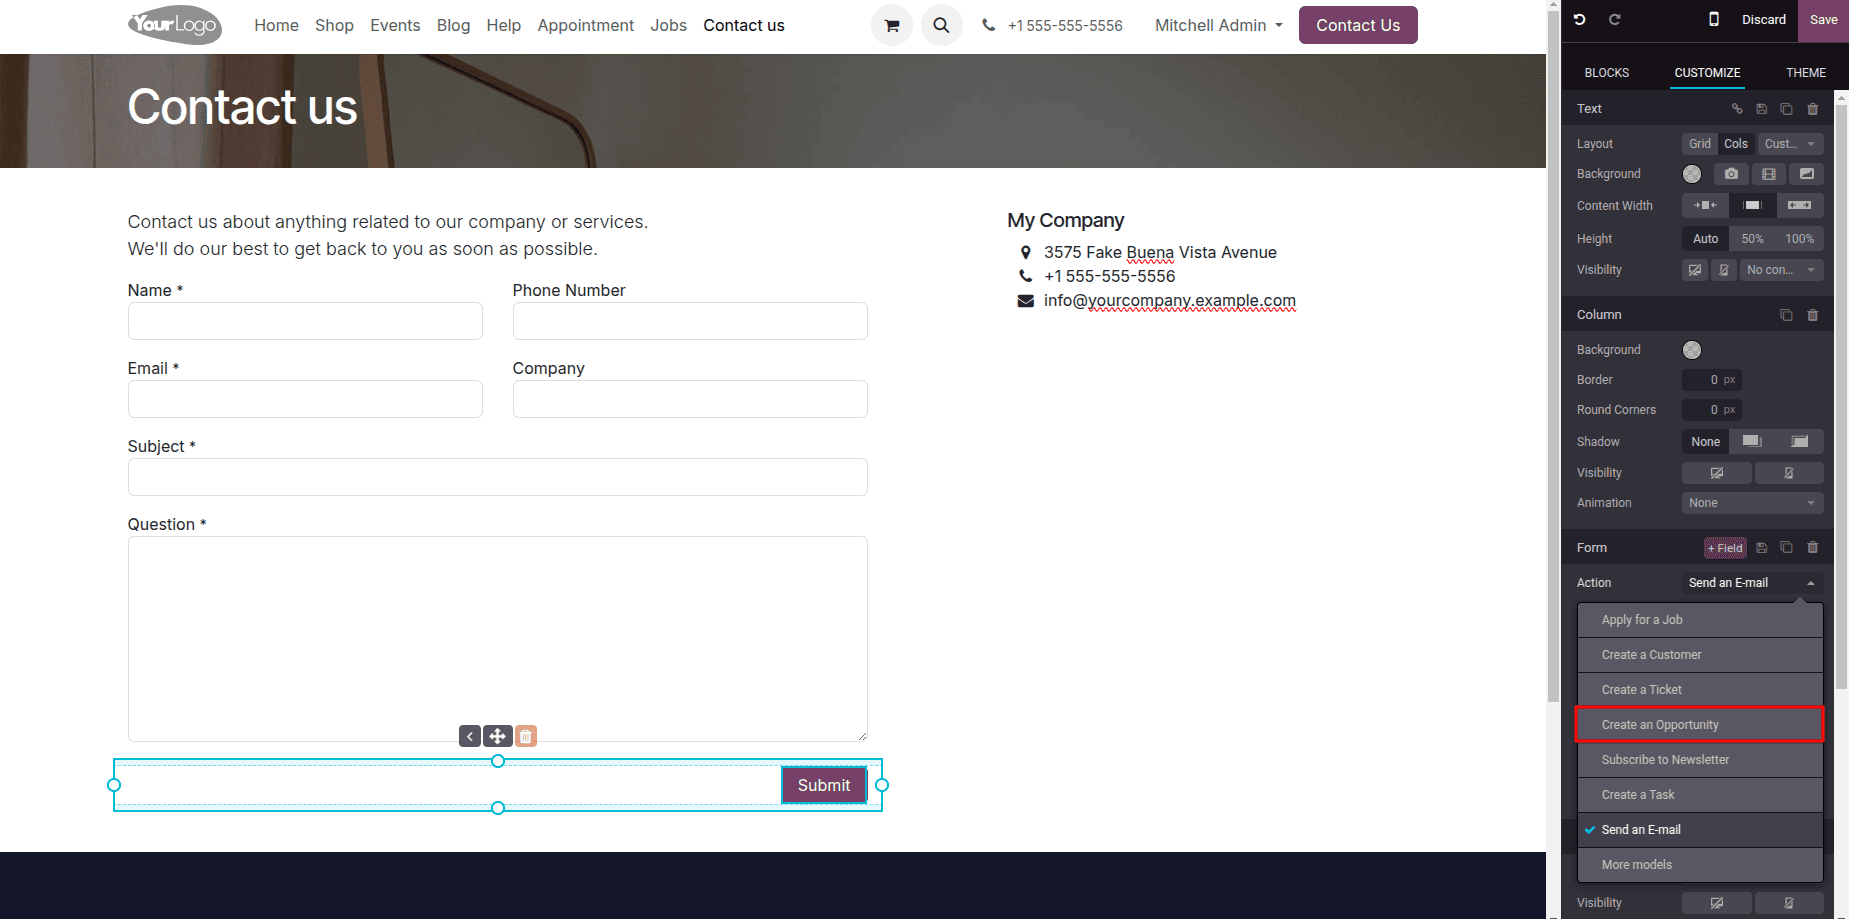
2. Edit the action of Submit Button:
After opening the Edit view, click on the ‘Submit button” in the form. This will display the related button options on the right-hand side.
In the Action section, you’ll find the Create Opportunity option, which allows you to create an opportunity in the CRM module through the button’s action.
If you don’t see it immediately, check under the More options to locate it.
Save it once you have done the changes.
3. Customers Submit Rental Requests:
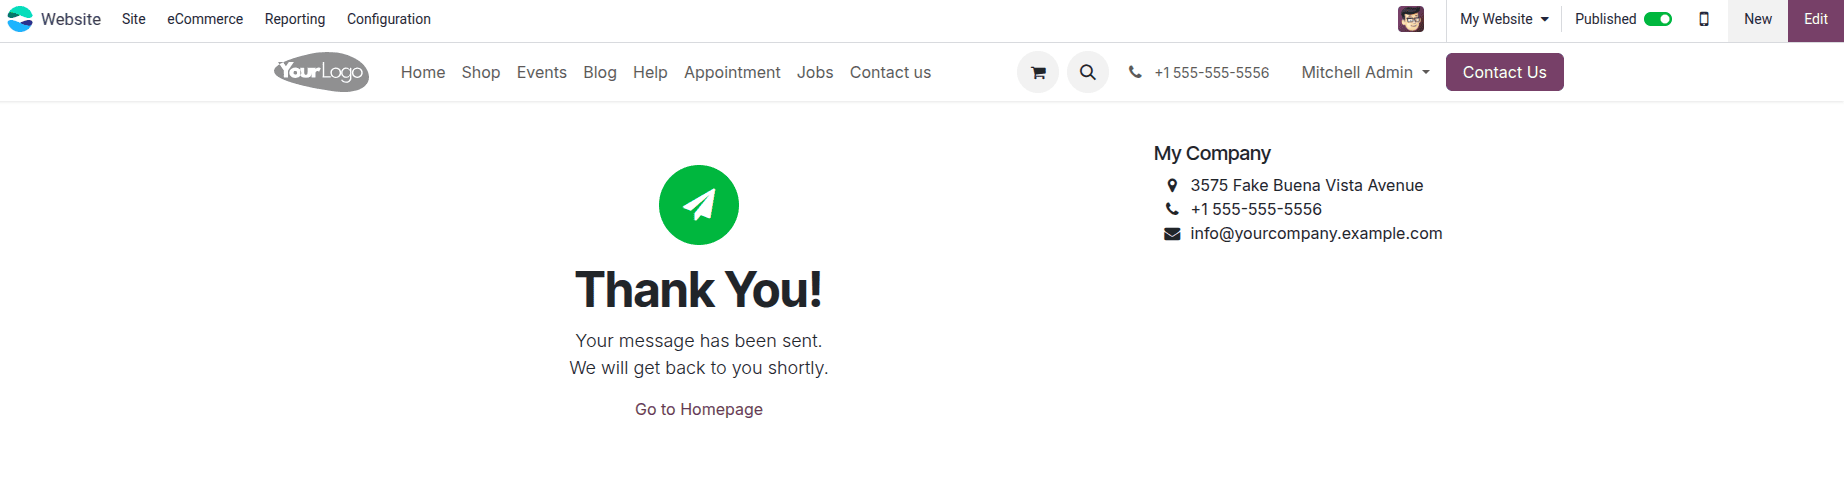
Customers can visit your website, complete the rental request form with their details and requirements, and submit it.
Once submitted, a new lead will be automatically generated in the backend, using the subject provided by the customer in the form.
4. Review and Respond:
Once a rental request is submitted, your team can access the requests in Odoo's backend and review the details provided.
5. Open CRM module
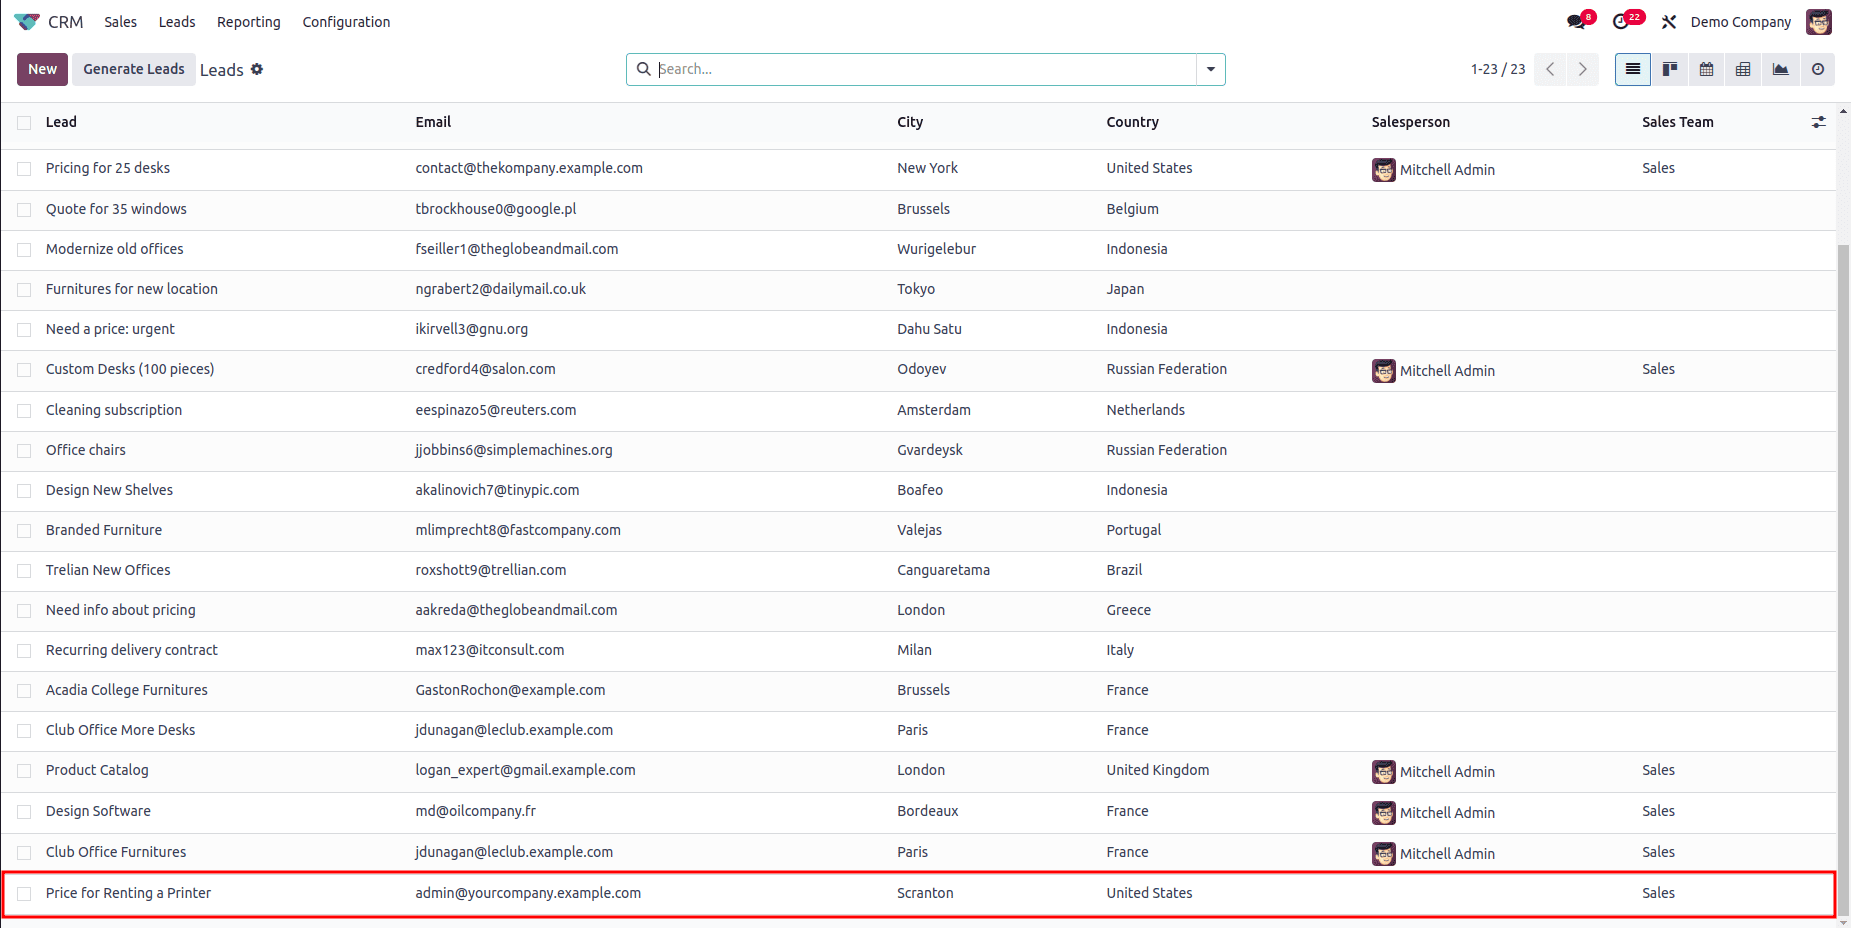
Leads generated through the Odoo website can be managed using the CRM module. The rental request submitted by the customer will appear as a new lead when you access the CRM module.
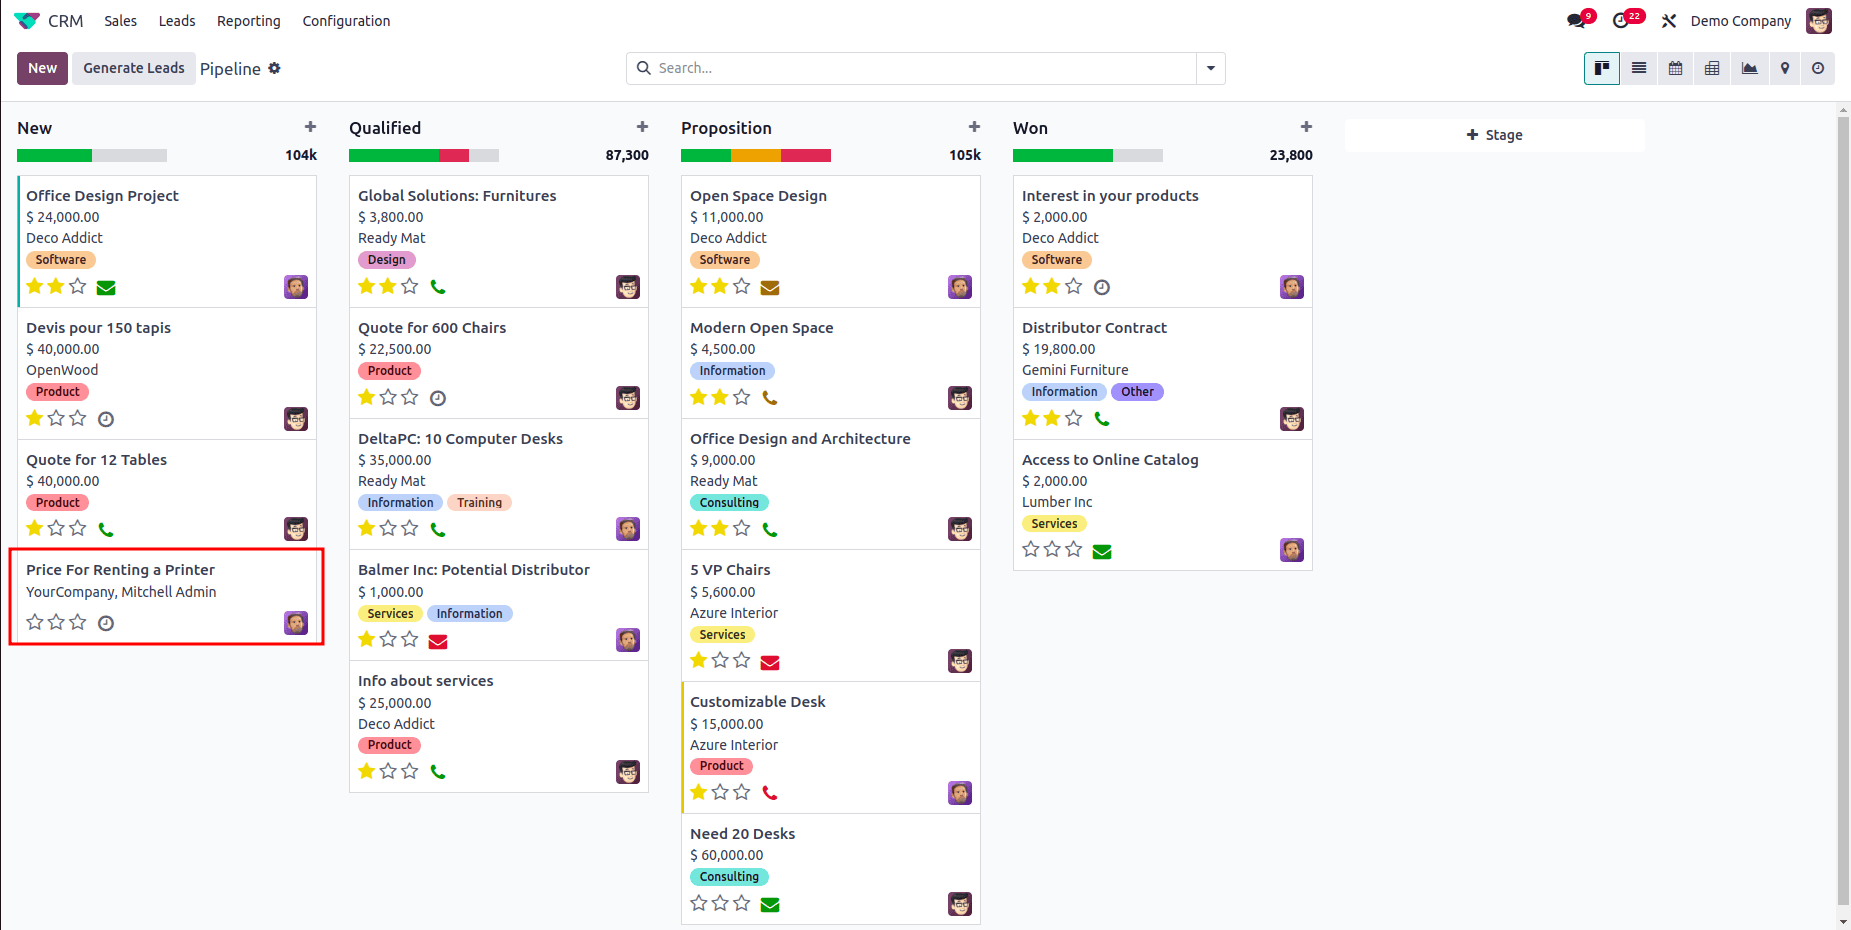
As shown in the image below, you can find the rental request for the printer in the CRM leads.
Click on the relevant lead to view more details. And we can convert this Lead to an Opportunity by a single click.
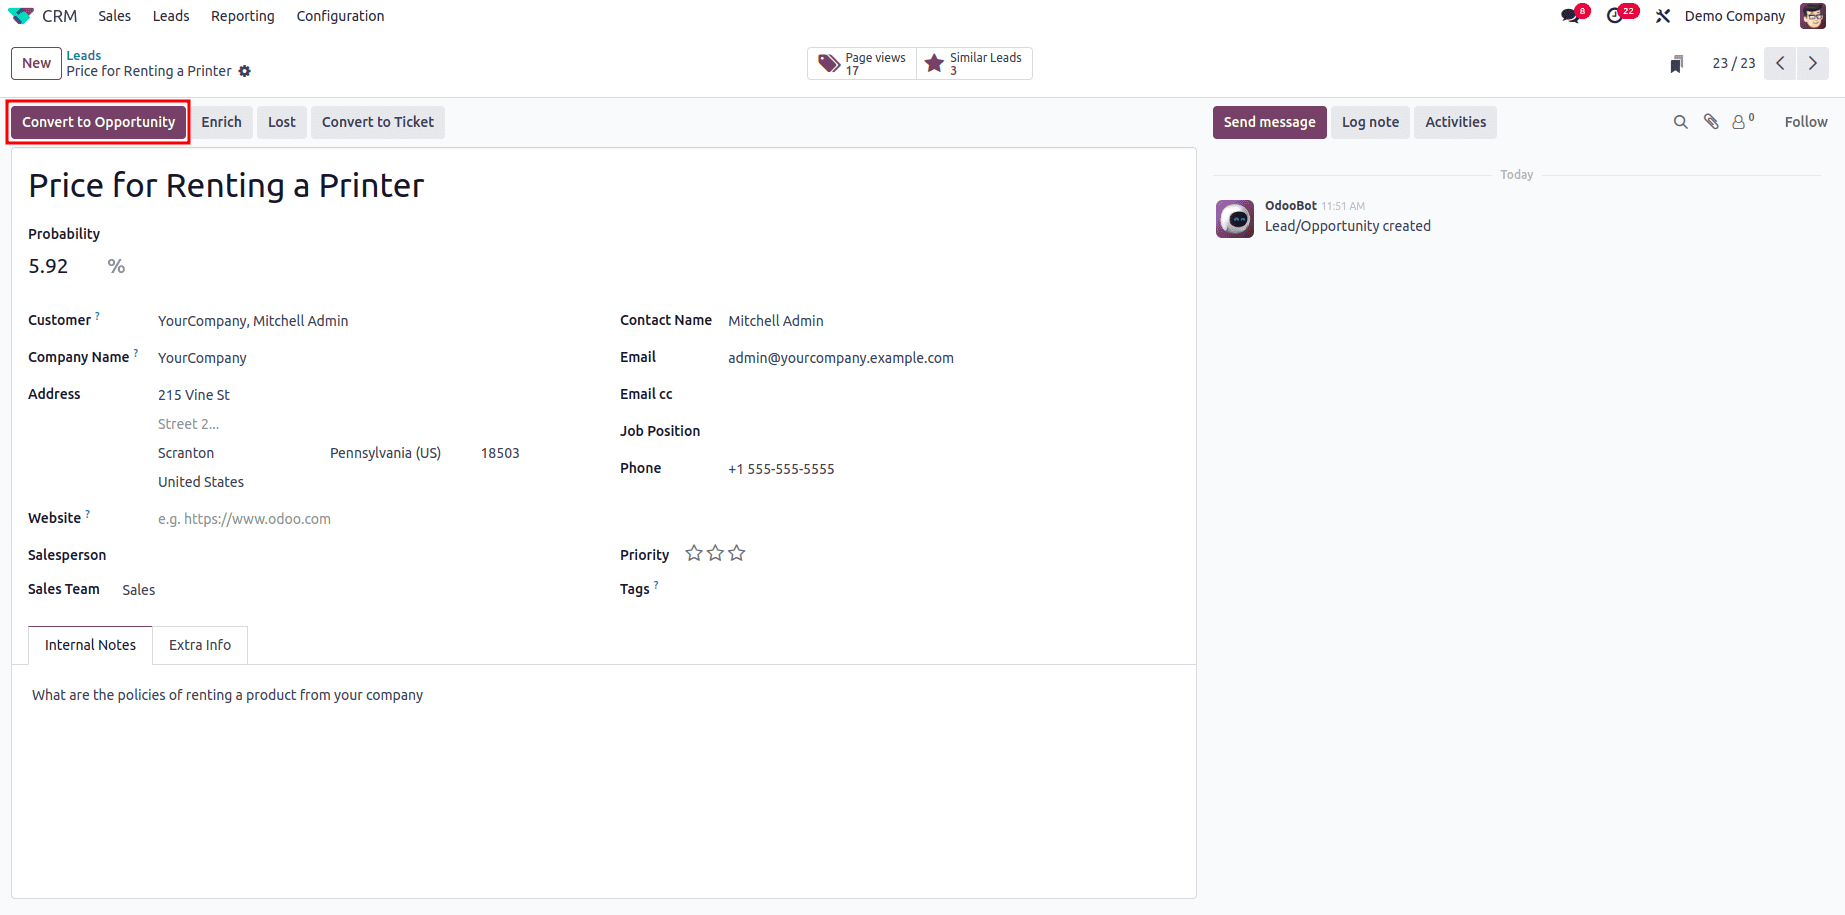
Once you have converted the Lead to an Opportunity,you can find it in the CRM pipeline.You can open it from here.
Manage Rental Request using CRM Module
Make sure the lead is properly qualified before moving ahead with a rental order. This involves checking the tenant’s preferences, budget, and any specific rental requirements. You can view additional information about the lead, such as estimated profitability, in this window.
As illustrated in the screenshot below, clicking the New Rental button lets you create a rental order directly from the lead.
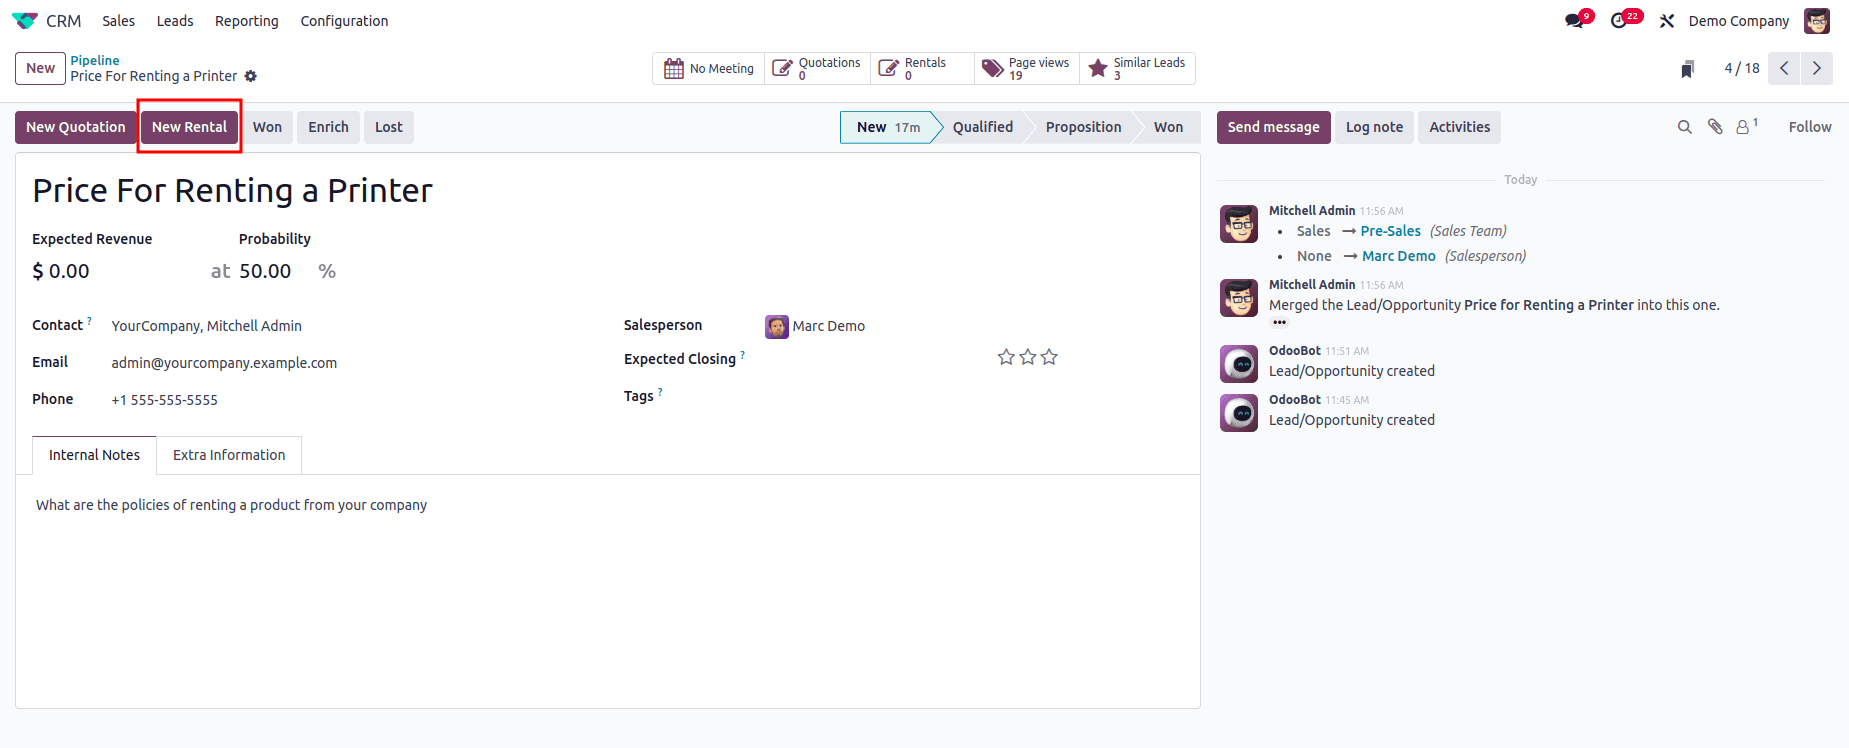
When you click the New Rental button, you’ll be taken to a rental order form that displays the Customer, Invoice Address, Delivery Address, and Pricelist. These details can be edited if needed.
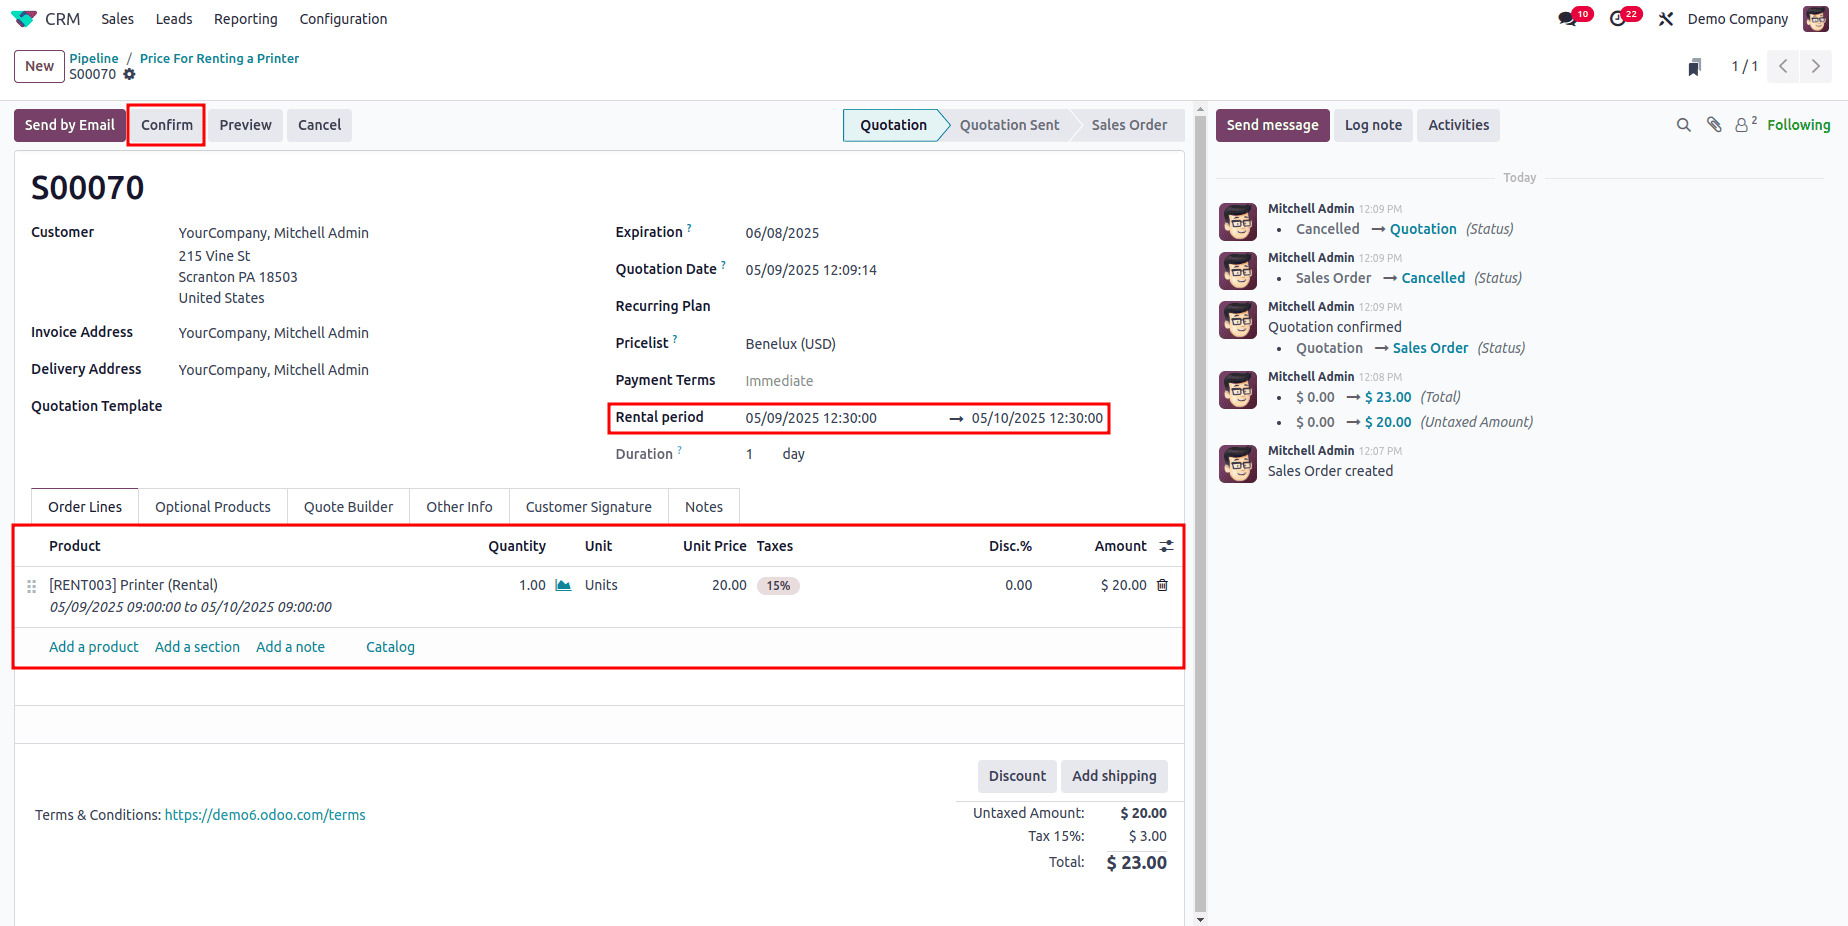
To add a rental product, click the “Add a Product ” button. For instance, if the customer requested a printer, you can enter the product details here. Specify the rental period in the appropriate fields—Odoo will automatically compute and display the Unit Price based on the selected duration.
Once all the details are reviewed and accurate, click Confirm to finalize and validate the rental order.
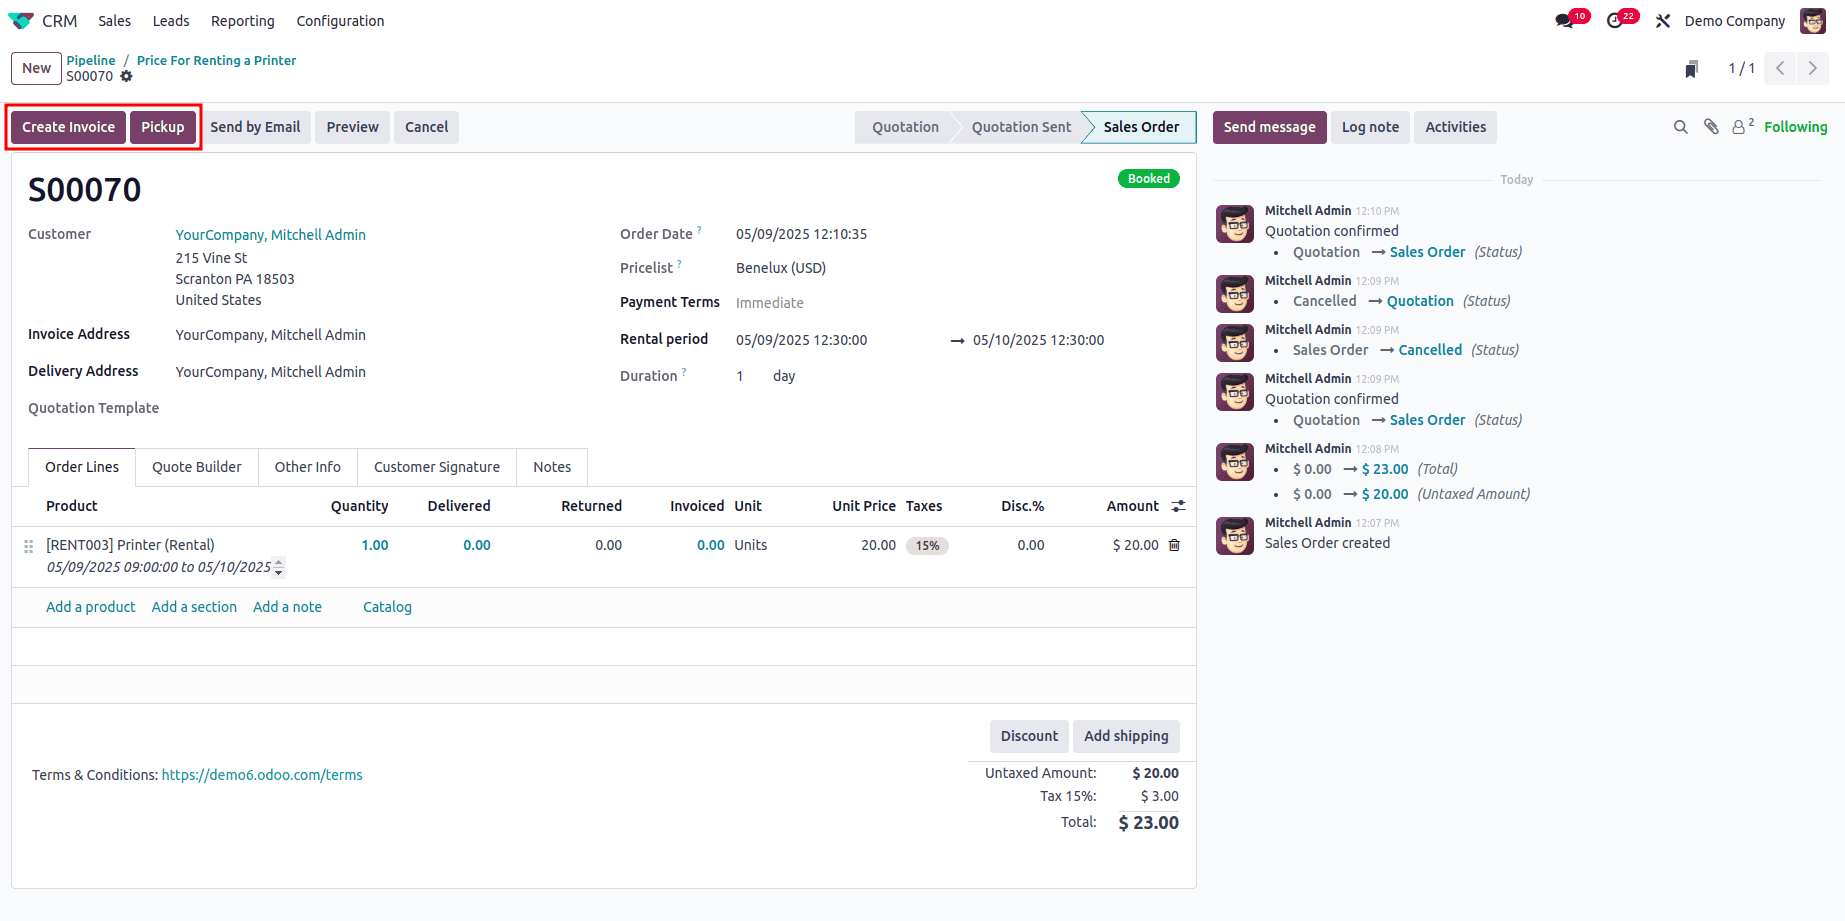
After converting the lead into a rental order, you can move forward with the payment and confirmation steps. Generate an invoice for the rental charges and proceed to collect payment from the customer.
This approach allows you to efficiently manage rental requests directly within the Odoo CRM module. The integration capabilities of Odoo CRM make it a powerful tool for businesses looking for a unified platform to handle customer relationships, sales, and operational processes. By connecting the CRM and Rental modules, you can deliver a more streamlined and customer-focused experience—from capturing leads to fulfilling rental orders—while keeping a detailed history of all customer interactions and rental activities.
To read more about How to Manage Rental Requests Using Odoo 17 CRM App, refer to our blog How to Manage Rental Requests Using Odoo 17 CRM App.