Odoo 19 provides a powerful and integrated approach to managing project budgets within its project and accounting modules. With the help of Odoo, businesses can plan, allocate, and monitor financial resources for each project in a structured way. Project budgeting ensures that expenses remain under control and resources are used efficiently. Users can create budgets based on analytic accounts, define planned costs, and track real-time expenditures. This enables project managers to compare actual costs with planned budgets and implement corrective actions when necessary. In Odoo 19, budgeting tools are closely connected with timesheets, invoices, and expense management, offering a complete financial overview. By properly configuring project budgets, organizations can improve decision-making, reduce cost overruns, and enhance profitability. This blog explains the importance of budget setup and how it integrates with project workflows in Odoo 19 for better financial control and transparency across all ongoing projects for improved business outcomes today.
To add and manage project budgets in Odoo 19, ensure that the Project and Accounting modules are installed and properly configured.
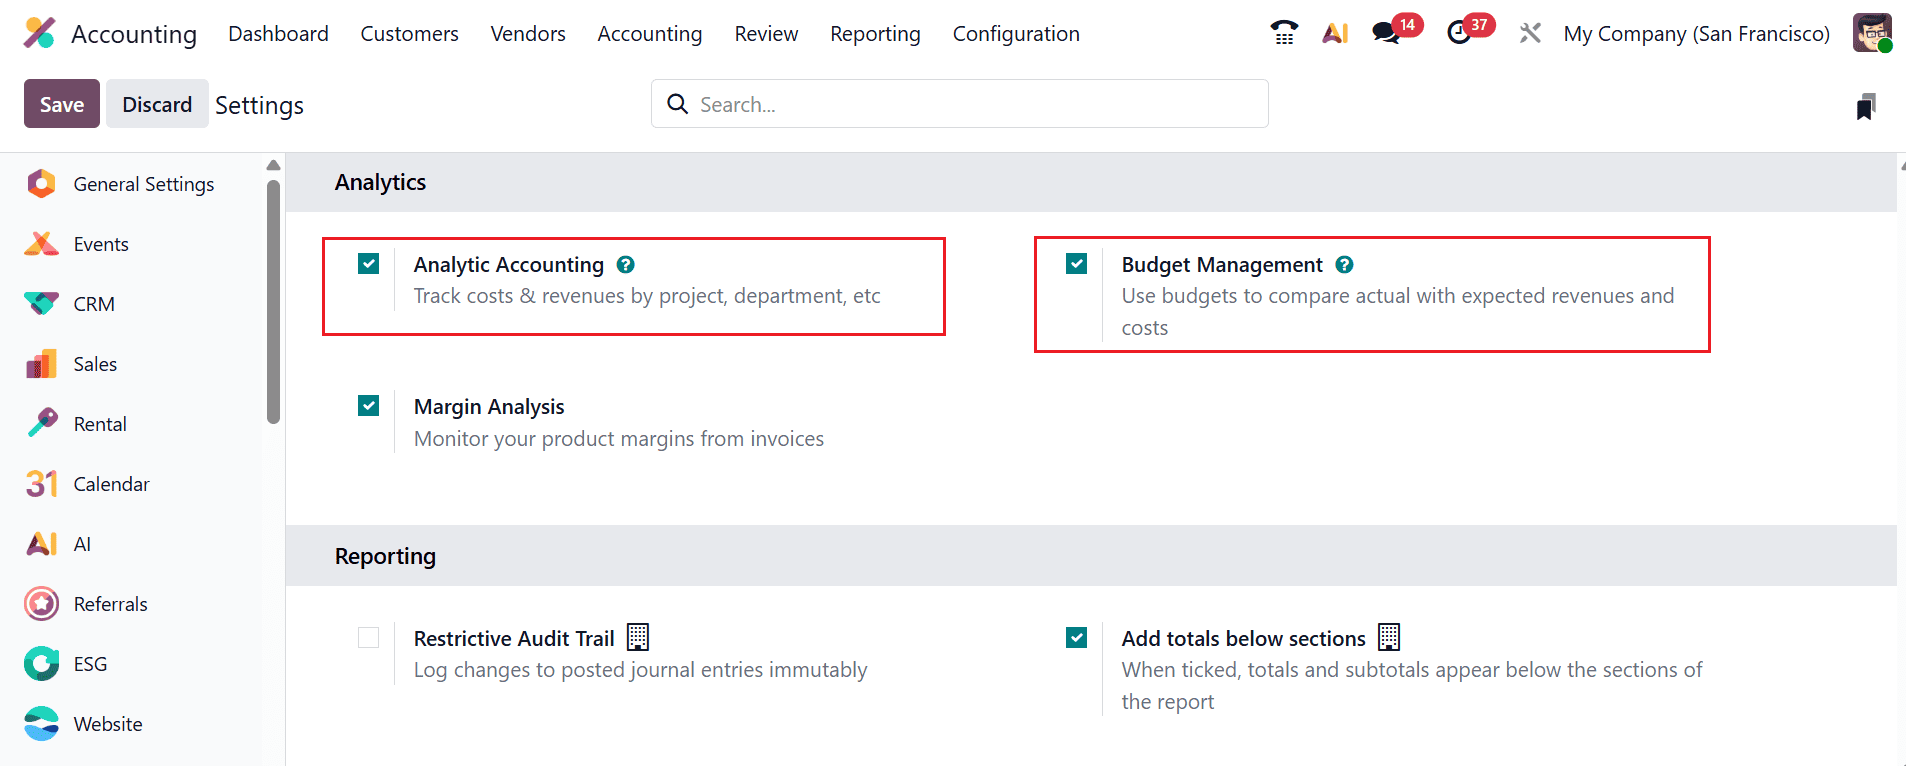
Firstly, open the Accounting module and navigate to the Configuration > Settings. Then, enable the options such as Analytic Accounting and Budget Management under the Analytics section, as shown below:
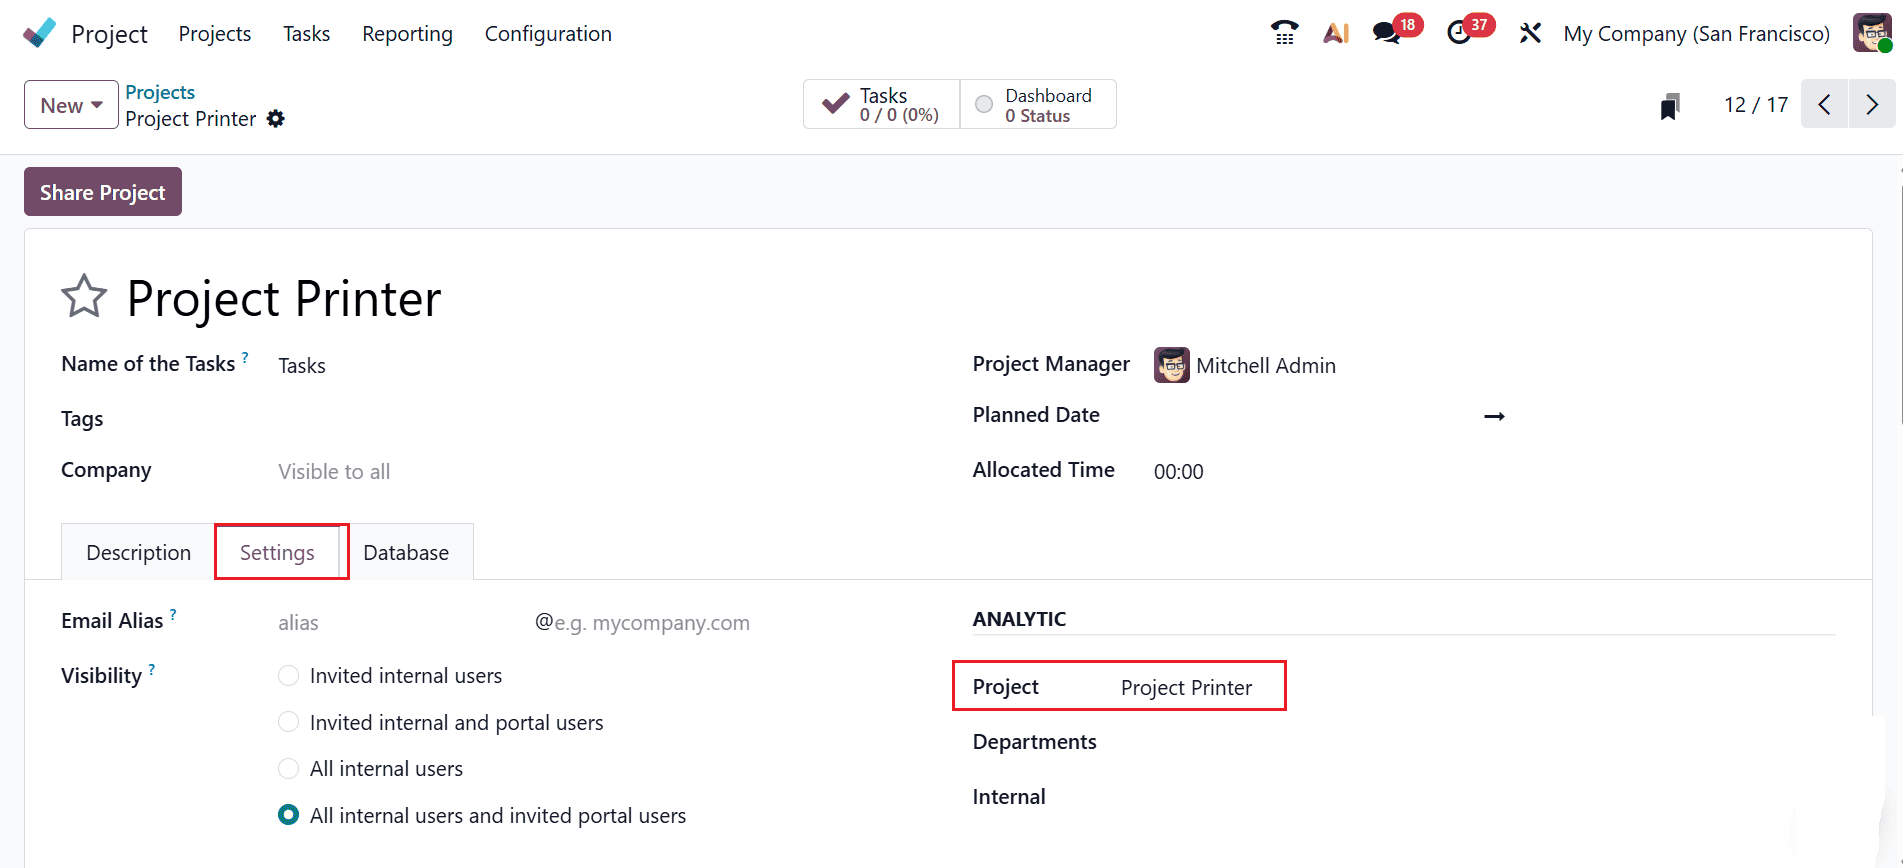
To create an analytic account, open the Project module and navigate to the Configuration > Projects and click on the New button to create a new project. A new window will open, allowing you to enter the details of the new project, as shown below. Under the Settings tab, add the analytic account in the Project field under the Analytic section.
Next, create budgets for both revenue and expenses for the project. This allows you to monitor the project's financial performance by comparing planned amounts against actual results.
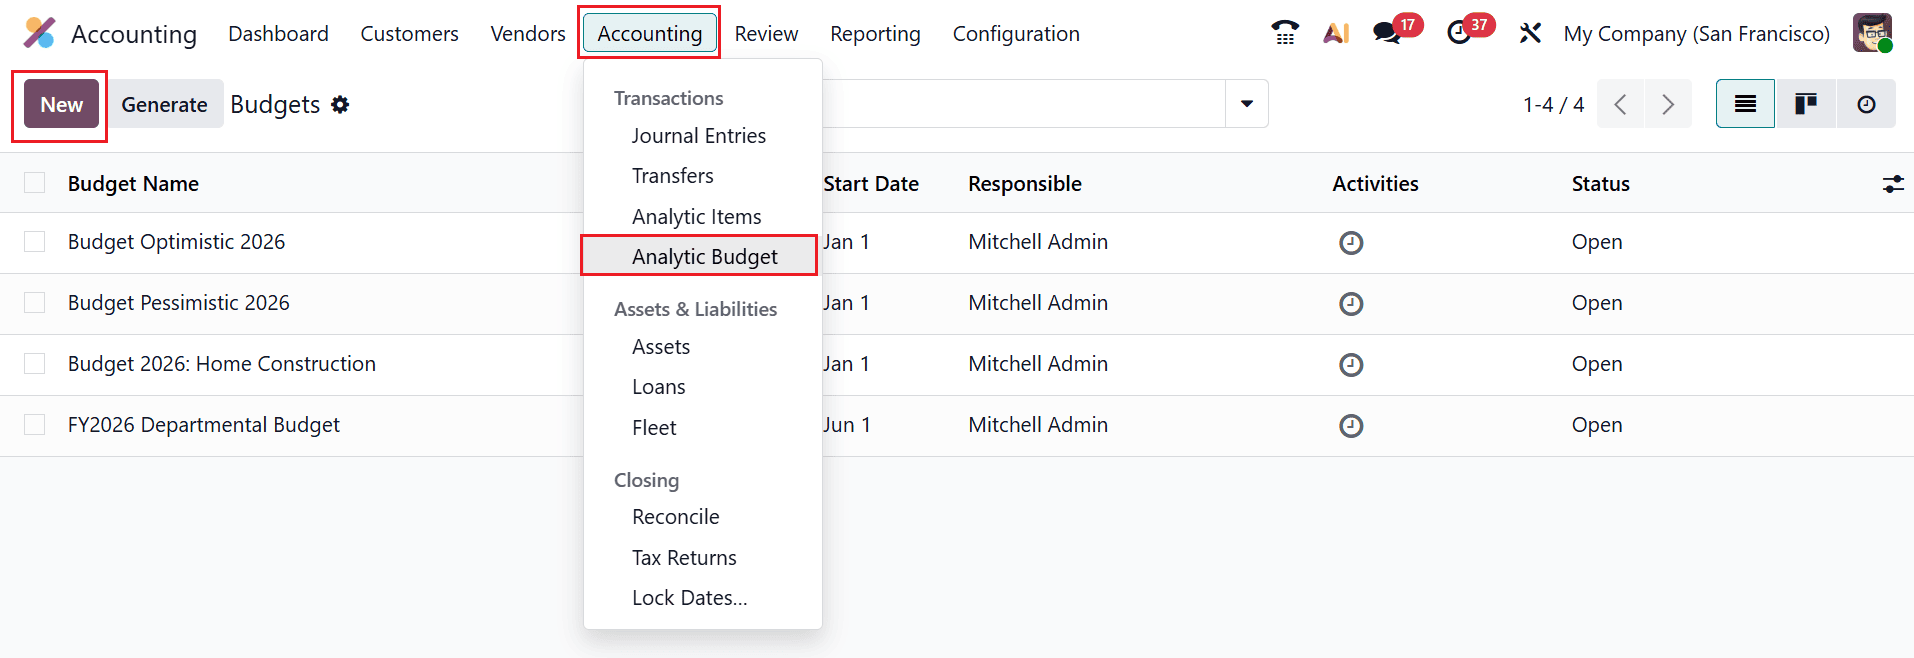
Open the Accounting module and navigate to the Accounting > Analytic Budget. Next, click the New button to add a new budget
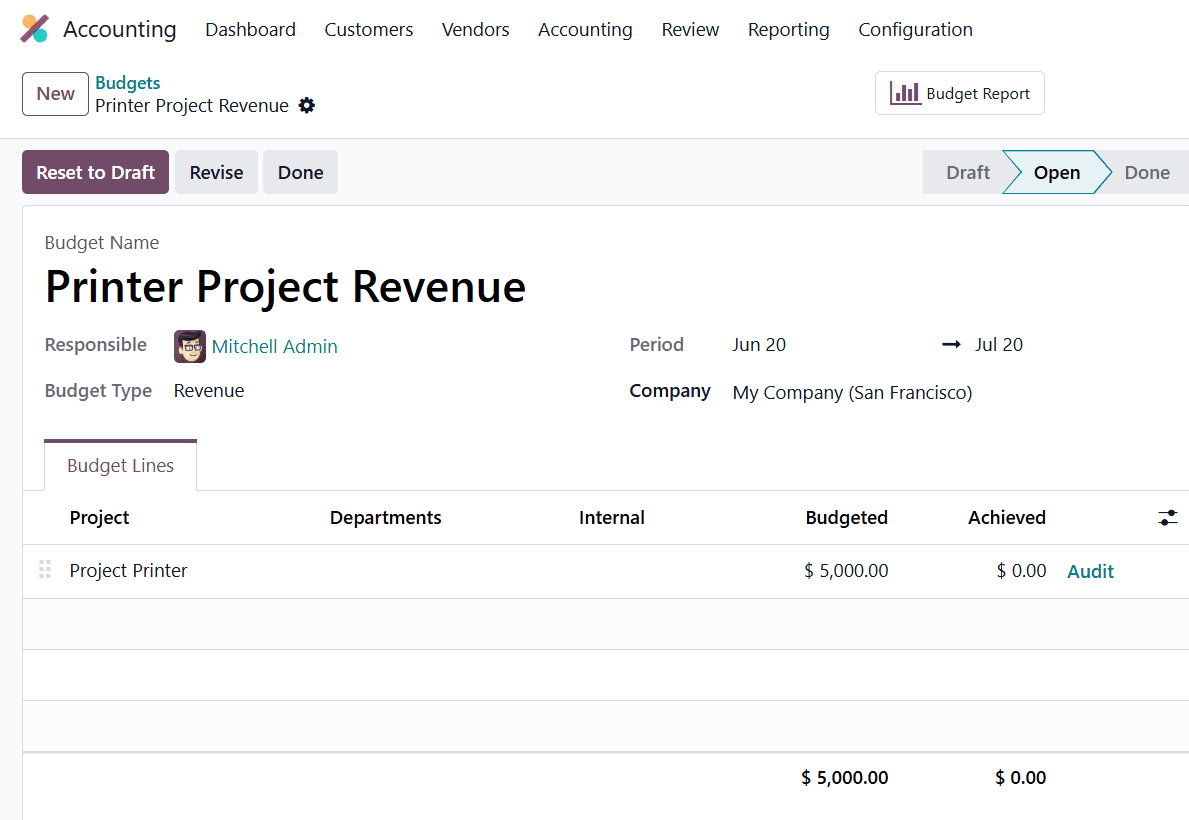
To create a Revenue Budget for the project, add the following details:
- Budget Name: Printer Project Revenue
- Responsible: The user assigned to manage and oversee the budget.
- Budget Type: Revenue
- Period: The date range during which the budget is valid and tracked.
- Company: The company entity to which the budget belongs.
Under the Budget Lines tab, add the analytic account ( Project Printer ) under the Project field and add the planned revenue ( $ 5,000) under the Budgeted field.
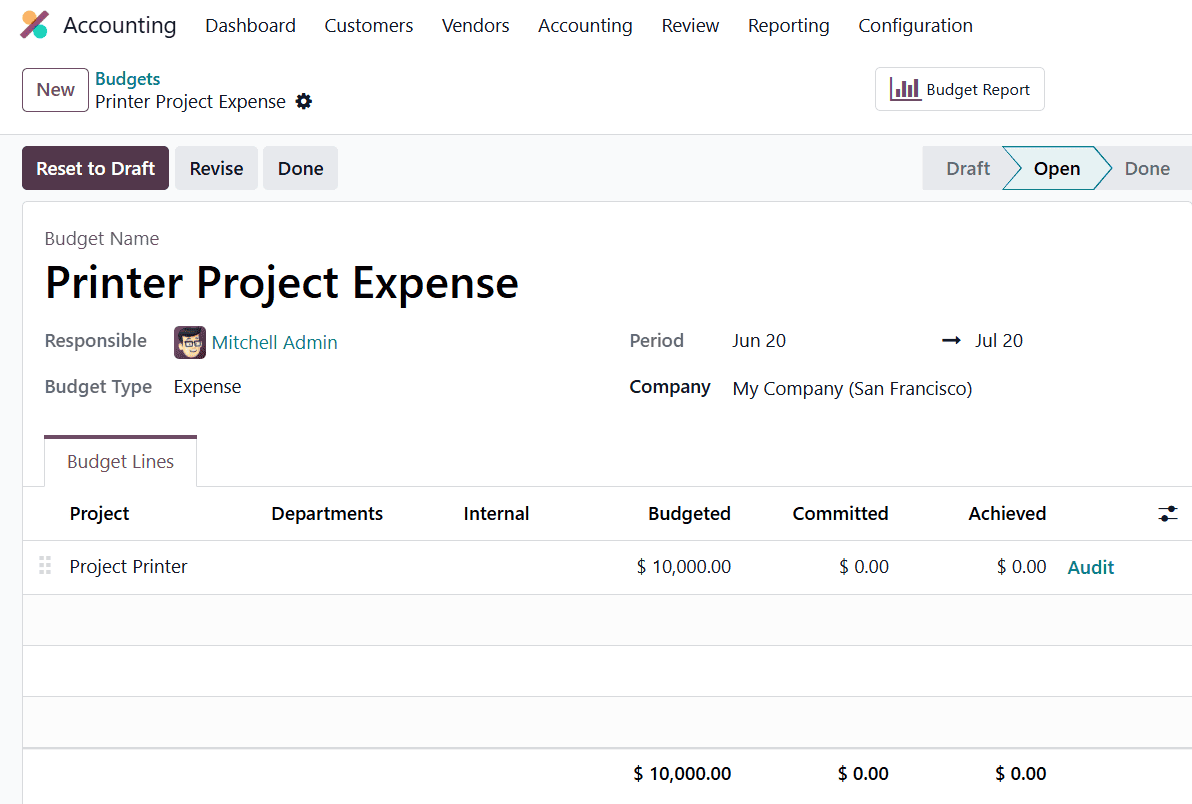
To create an Expense Budget for the project, add the following details:
- Budget Name: Printer Project Revenue
- Responsible: The user assigned to manage and oversee the budget.
- Budget Type: Expense
- Period: The date range during which the budget is valid and tracked.
- Company: The company entity to which the budget belongs.
Under the Budget Lines tab, add the analytic account ( Project Printer) under the Project field and add the planned revenue ($10,000) under the Budgeted field.
After both budgets are created and opened, Odoo tracks actual revenues and expenses against the planned amounts to help monitor the project's financial performance.
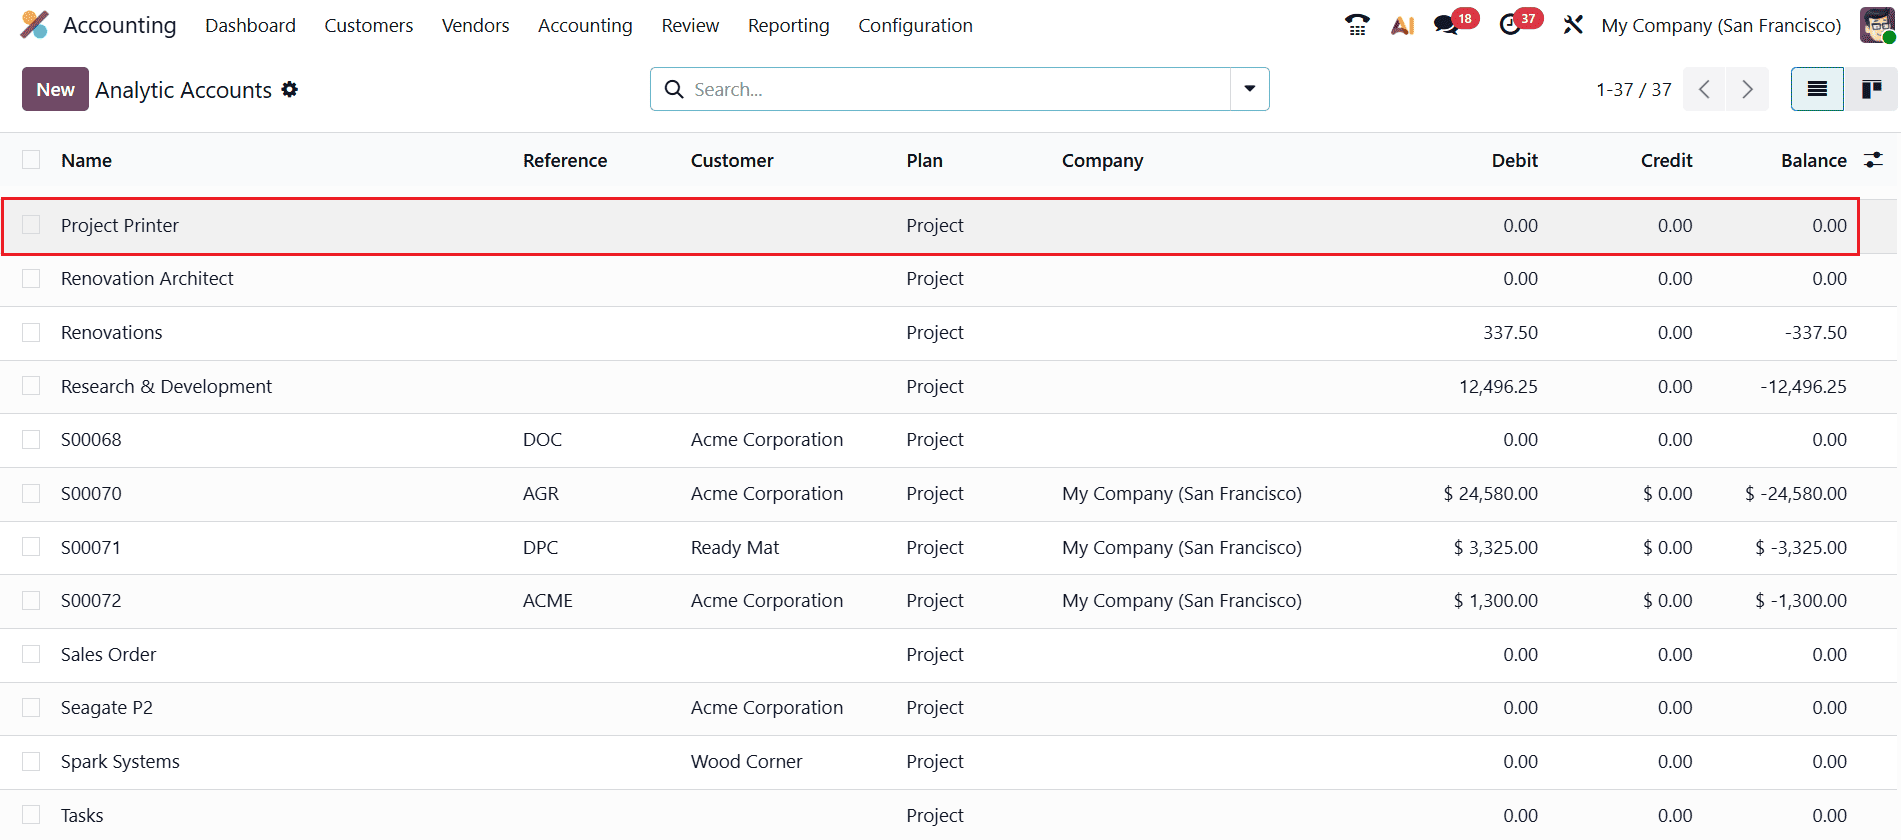
To review the analytic account, navigate to the Configuration > Analytic Accounts and open the Project Printer account as shown below:
Under the Budget tab, you can see the associated budget lines, which display the planned revenue and expense allocations for the project.
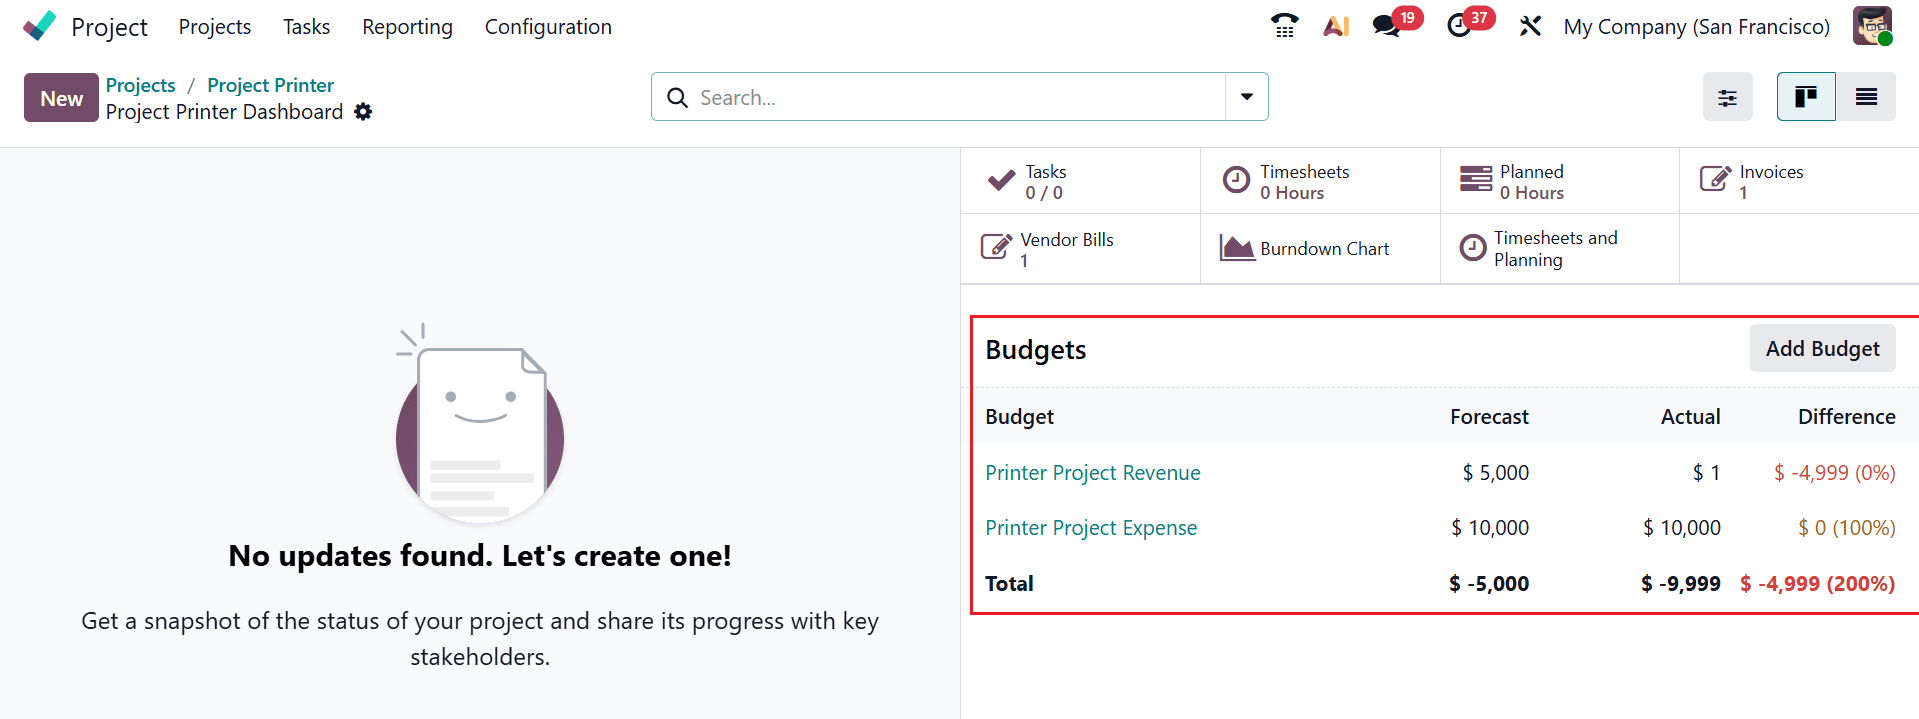
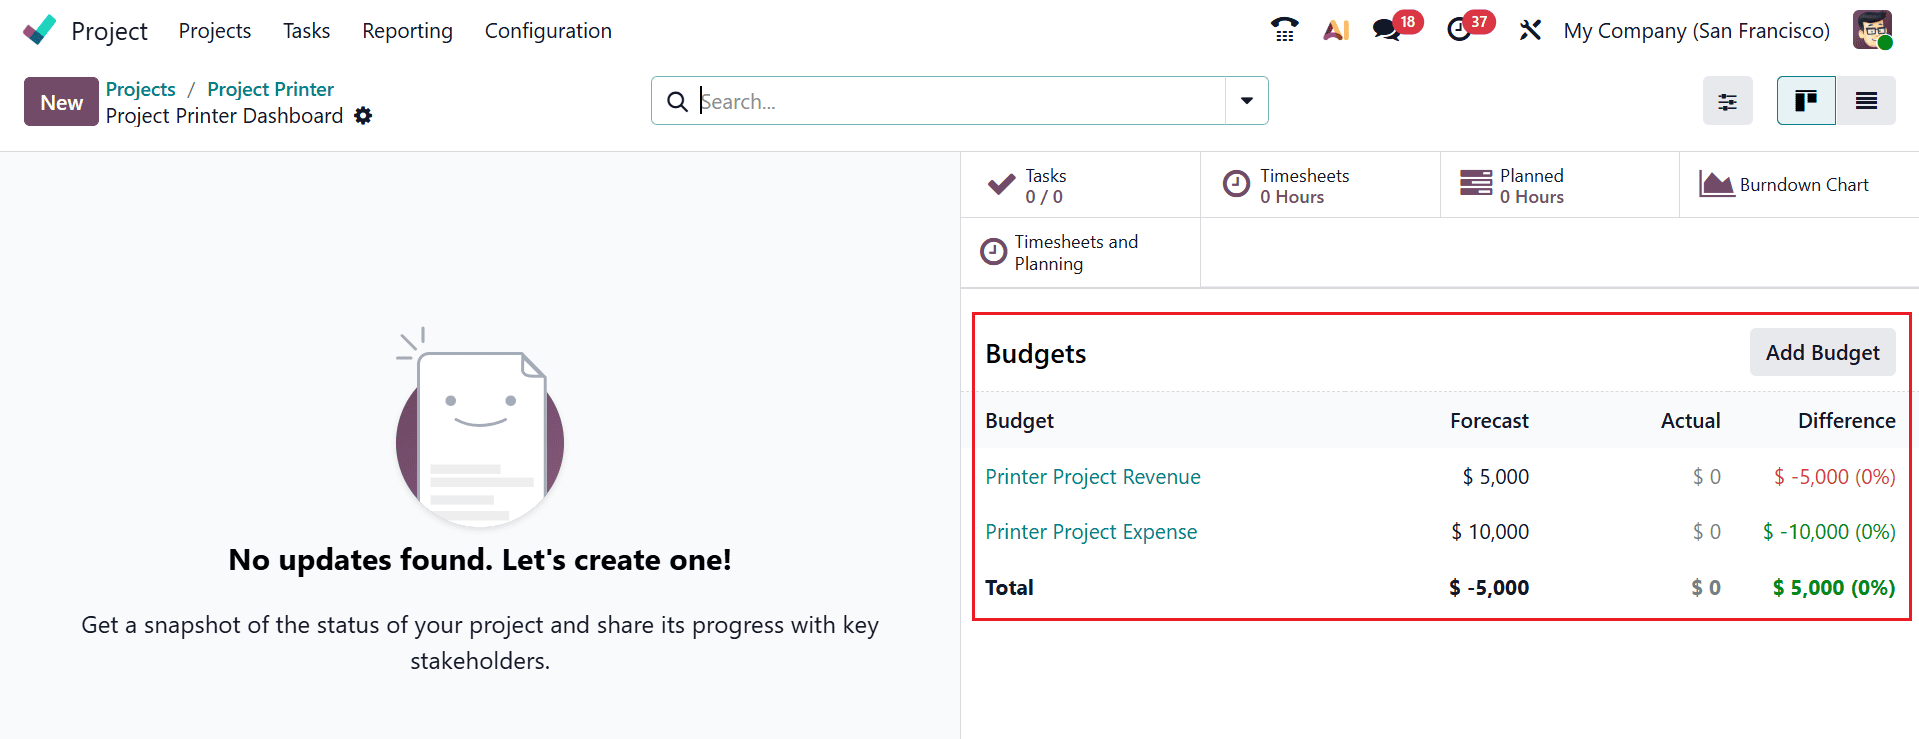
When you open the Project Printer Dashboard, you can view the project's budgeted amount and track its financial performance.

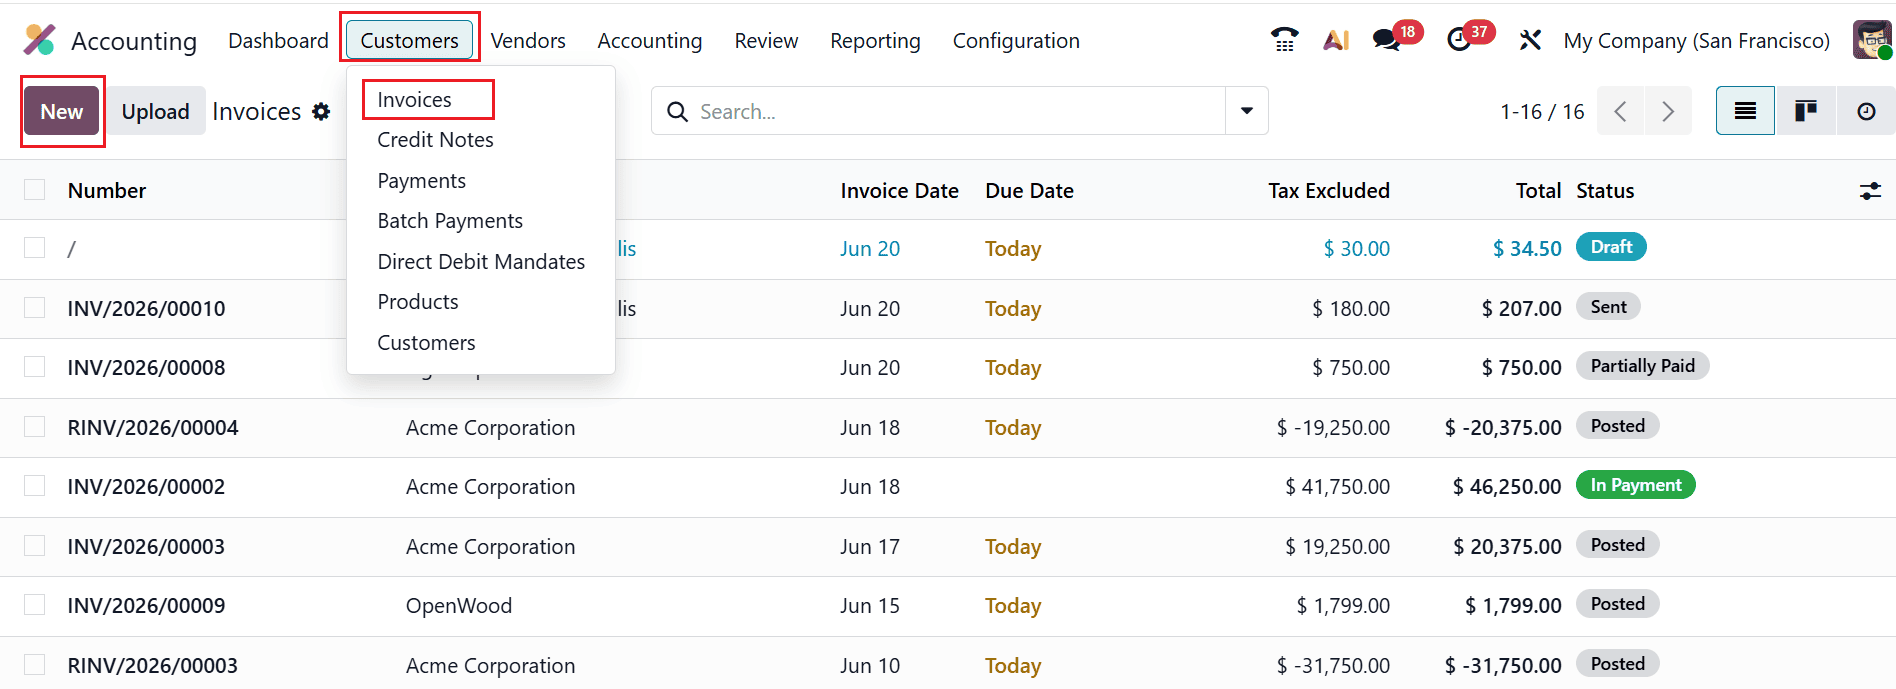
After creating the budget, the next step is to create an invoice for the revenue and a bill for the expenses. To create a customer invoice, open the Accounting module and navigate to the Customers > Invoices. Then, click on the New button as shown below:
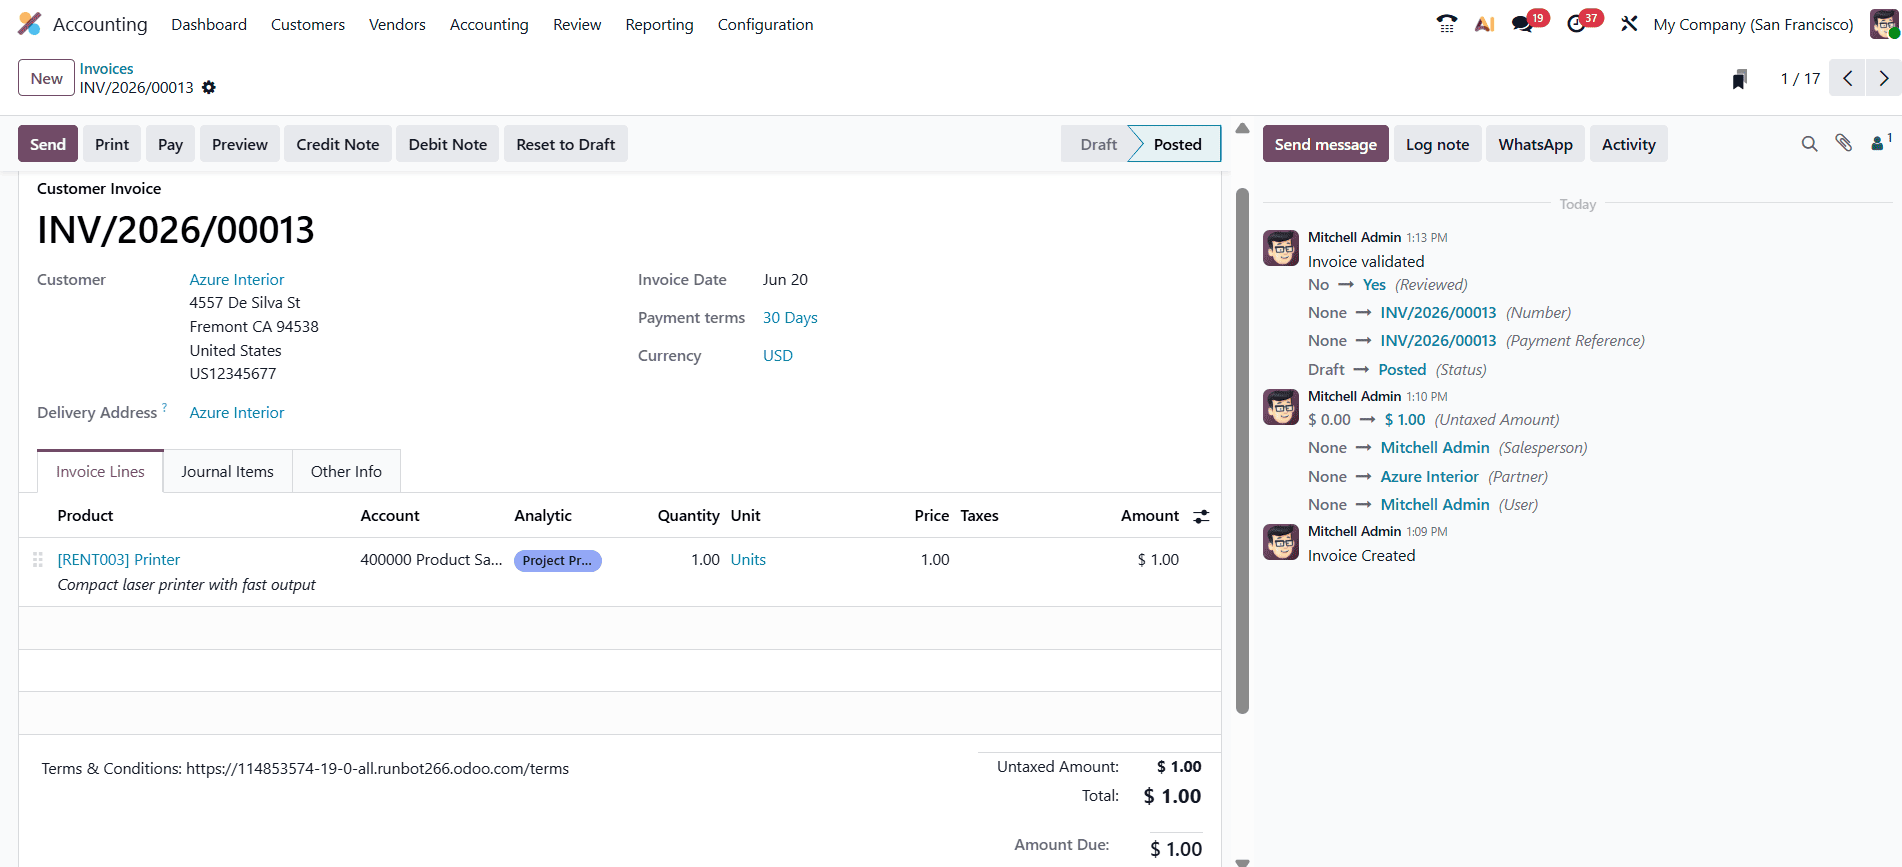
A new window will open where you can select a customer and add a product related to the project. Under the Analytic field, choose the analytic account Project Printer. Then, post the invoice.
This revenue will be recorded and monitored against the Laptop Project Revenue budget for budget-tracking purposes.
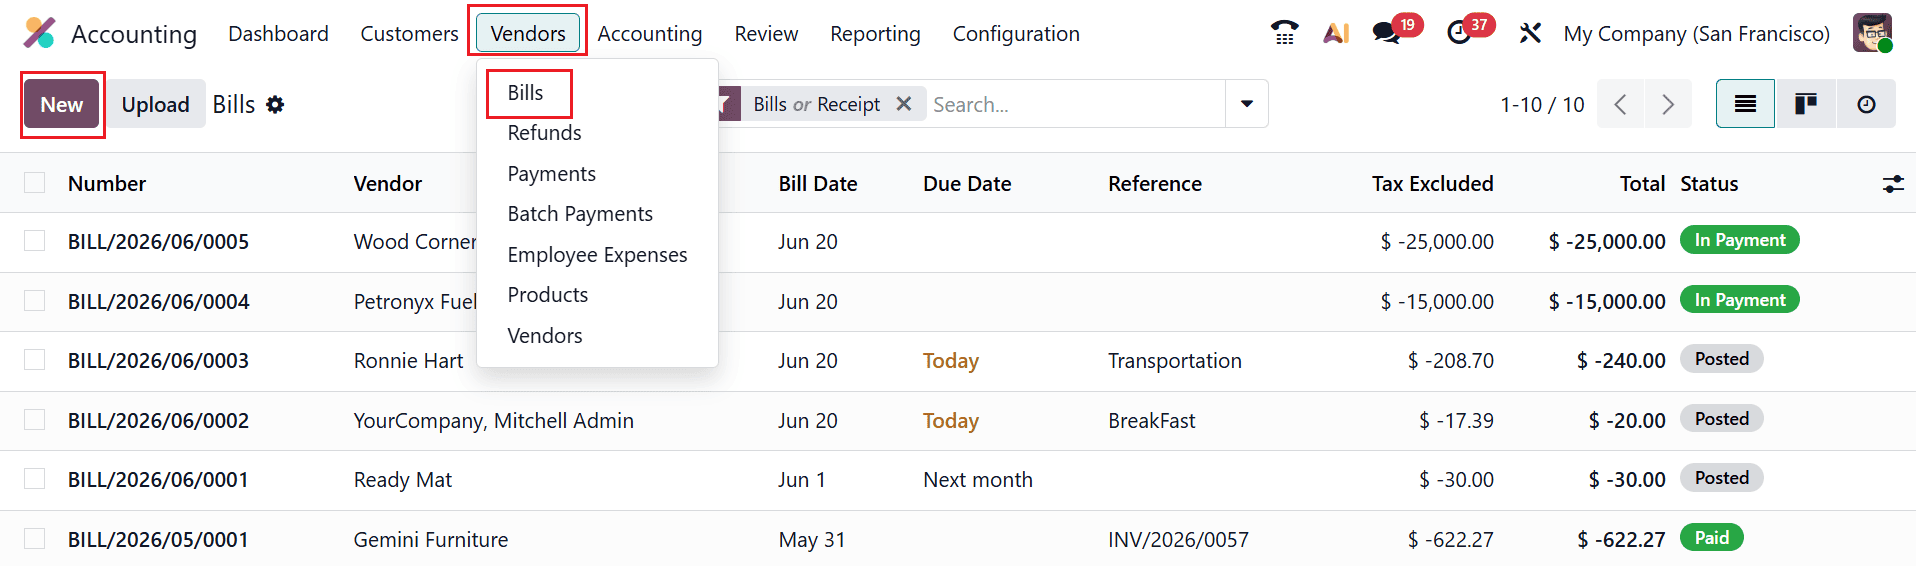
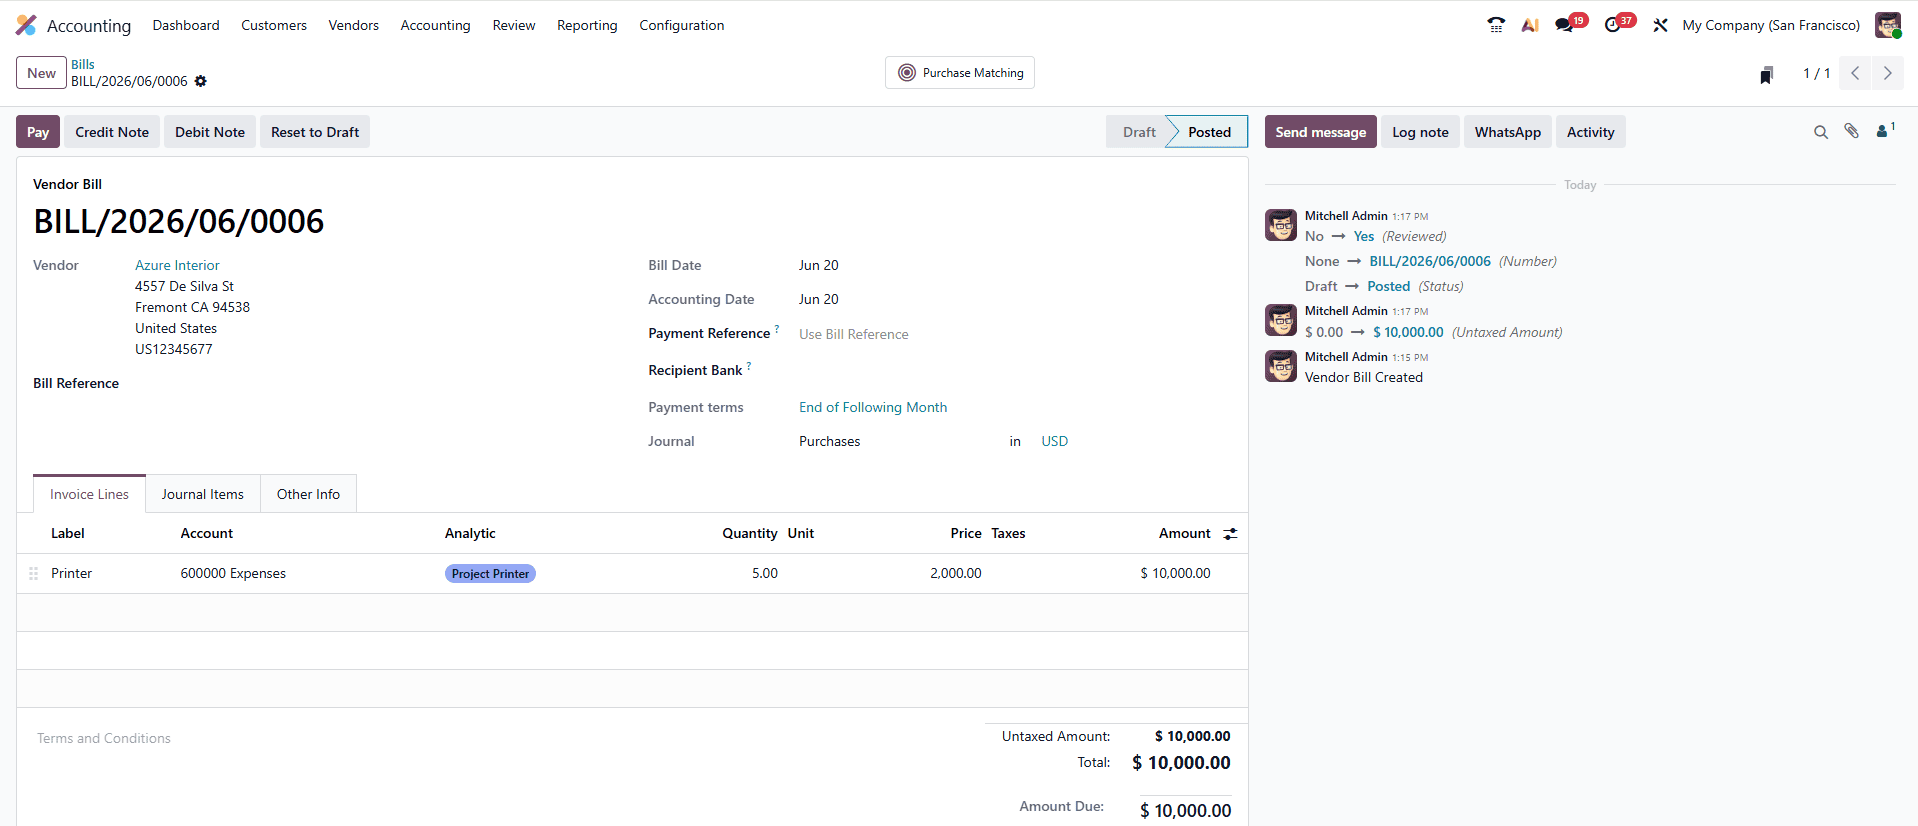
To create a bill for the expense, navigate to the Accounting > Vendors > Bills and click on the New button.
Then, add the expense item under the Label field and choose the analytic account Project Printer. After posting the bill, the expense is automatically recorded and tracked against the Laptop Project Revenue budget.
Once the invoice and bill are posted, navigate back to the Project Dashboard, where the Budgets section displays the updated information, such as Forecast, Actual, and Difference of the revenue and expense.
In conclusion, effective project budget management in Odoo 19 is essential for maintaining financial control and ensuring the successful execution of projects. The system enables organizations to efficiently plan budgets, track expenses, and evaluate performance in real time. By leveraging the integrated features of Odoo 19, including project management, accounting, and expense tracking, businesses gain full visibility into their financial operations. This allows teams to detect overspending early and take appropriate measures to stay within budget. Proper budget configuration also enhances collaboration between project managers and finance teams, ensuring transparency and accountability.With real-time data and automated reporting capabilities, companies can allocate resources more effectively and maximize profitability. Odoo 19 simplifies budget management by streamlining complex processes, allowing organizations of all sizes to monitor costs, control expenses, and achieve their financial objectives with greater efficiency Overall, adopting a structured approach to project budgeting in Odoo leads to better control, improved efficiency, and stronger financial outcomes across all business projects for long term growth success.
To read more about How Budget can be added to a project in Odoo 18, refer to our blog How Budget can be added to a project in Odoo 18.