In Odoo 19, Quality Checks and Alerts offer a streamlined way to monitor production processes, inventory, and deliveries. Quality checks allow businesses to define criteria that products or operations must meet, such as control points during manufacturing or random audits in warehouses. By setting up automated alerts, companies can immediately notify the right personnel when a product fails a check, ensuring swift corrective action. Odoo’s integrated approach reduces manual oversight, minimizes errors, and maintains compliance with industry standards. Moreover, it supports tracking performance trends over time, helping managers identify recurring issues and implement process improvements. In Odoo 19, businesses can create a structured, proactive quality management system that not only protects businesses but also optimizes operational efficiency and reduces wastage. It is also a valuable tool for manufacturing, distribution, and retail companies.
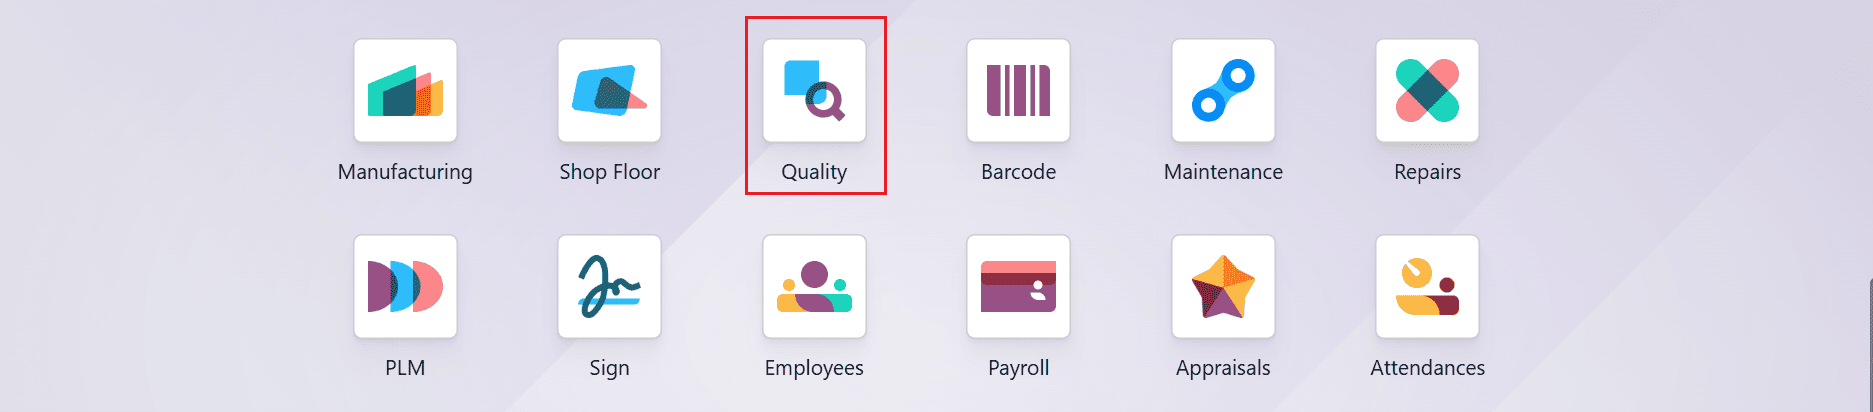
Firstly, select the Quality module from the Odoo 19 dashboard as shown below:
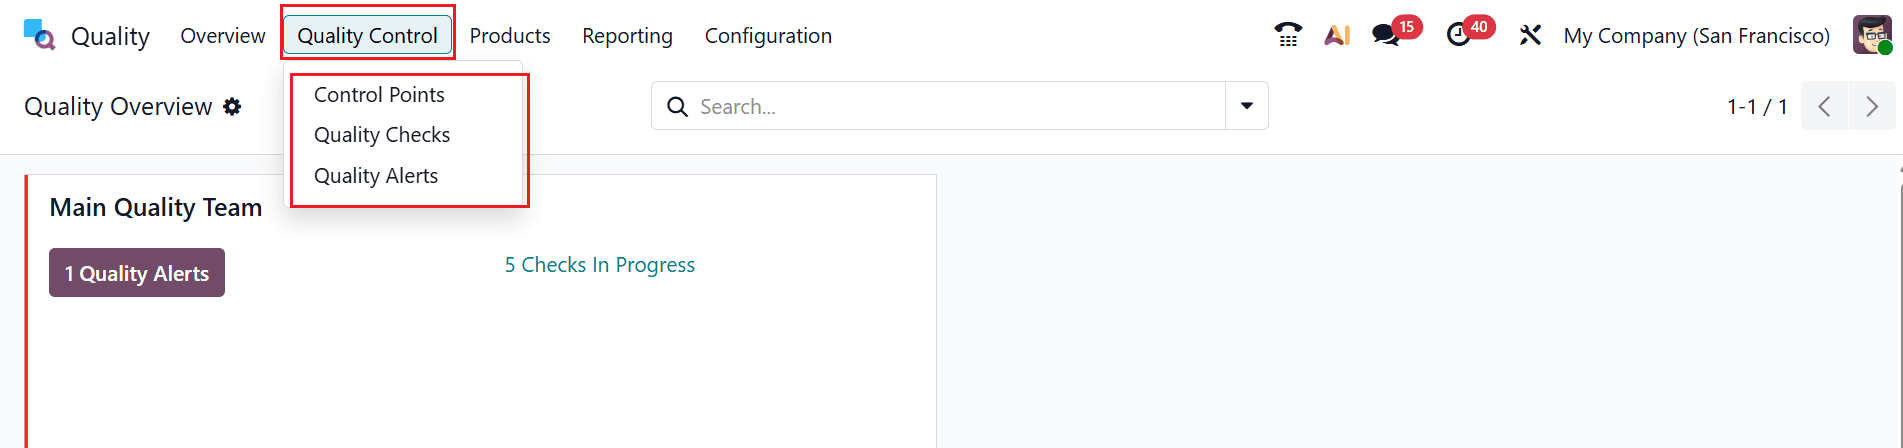
Then, navigate to the Quality Control menu where you can manage quality control points, perform checks, and track quality alerts to ensure product and operational standards are maintained.
You will find three options listed in the Quality Control menu:
- Control Points
- Quality Checks
- Quality Alerts
Quality Checks:
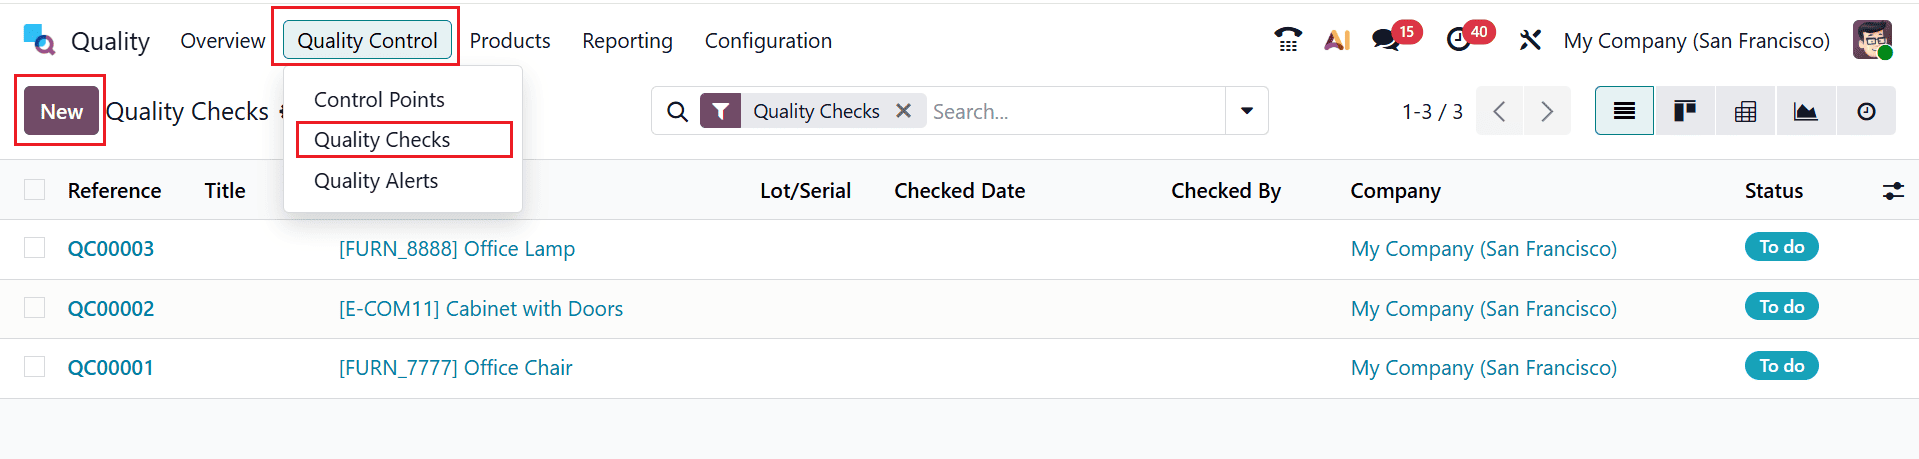
The quality checks option helps businesses to check products or processes at specific stages to ensure they meet predefined quality requirements before moving forward. To manage quality checks, move to the Quality Control > Quality Checks as shown below. Here, you can see a list of quality checks. To create a new quality check, click on the New button.
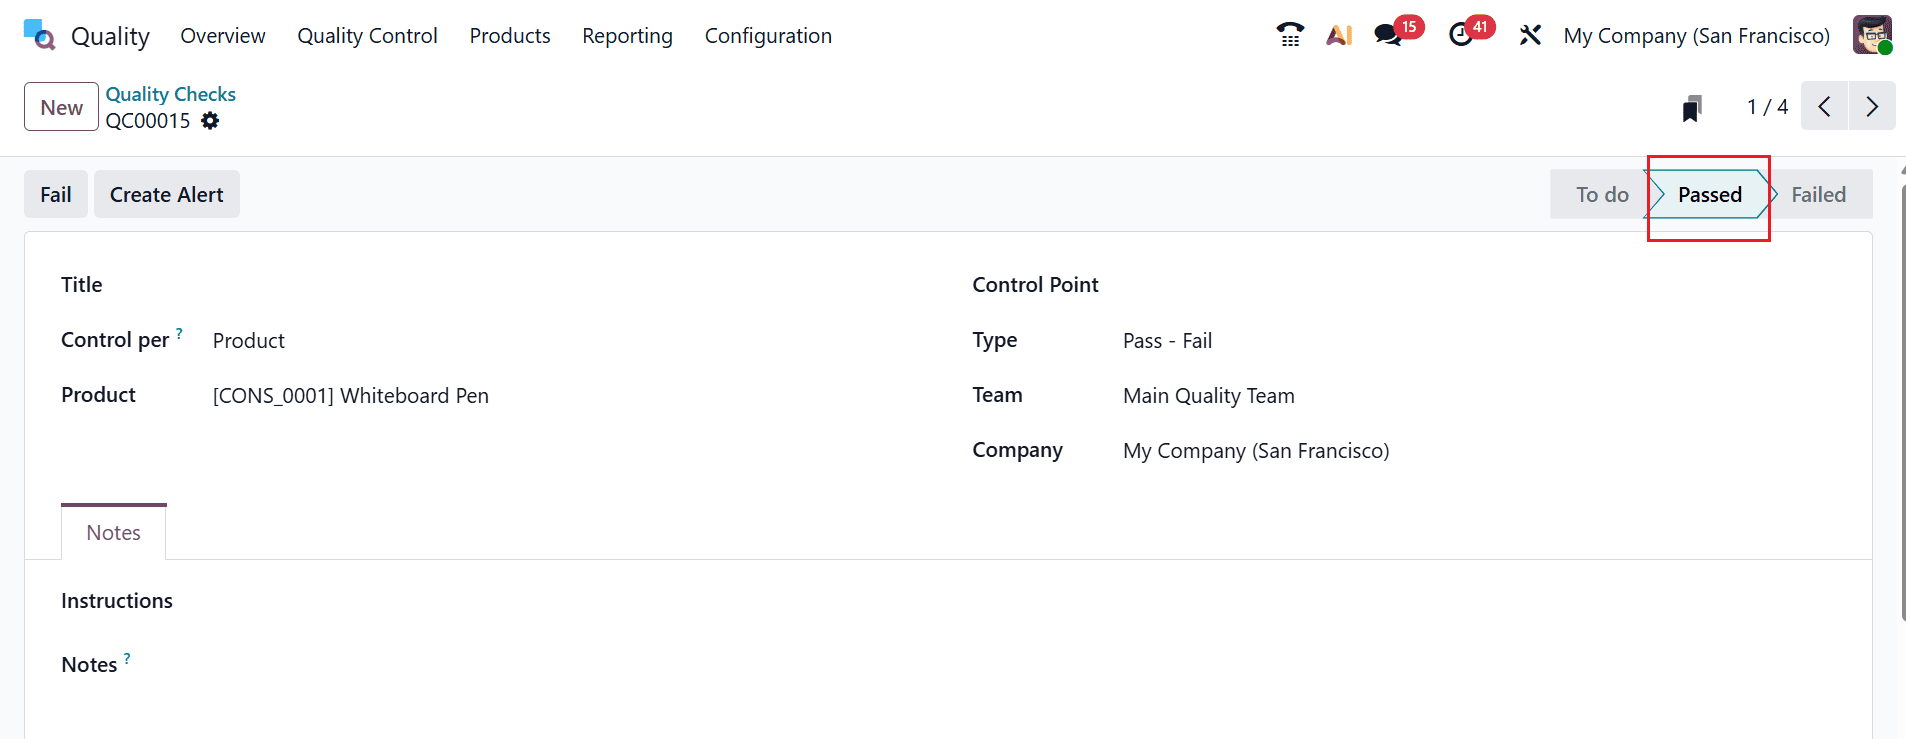
Select a product from the list in the Product field and specify the Control Per option as Operation, Product, or Quantity. In the Type field, choose the Pass-Fail option, and in the Team field, choose the Main Quality Team option. Here, additional options, including Title, Picking, Repair Order, Production Order, Control Points, and Company, can be added. Use the Notes tab to provide quality check instructions. Here, you can see the quality check is in the To Do stage. Use the Pass button, as illustrated below.
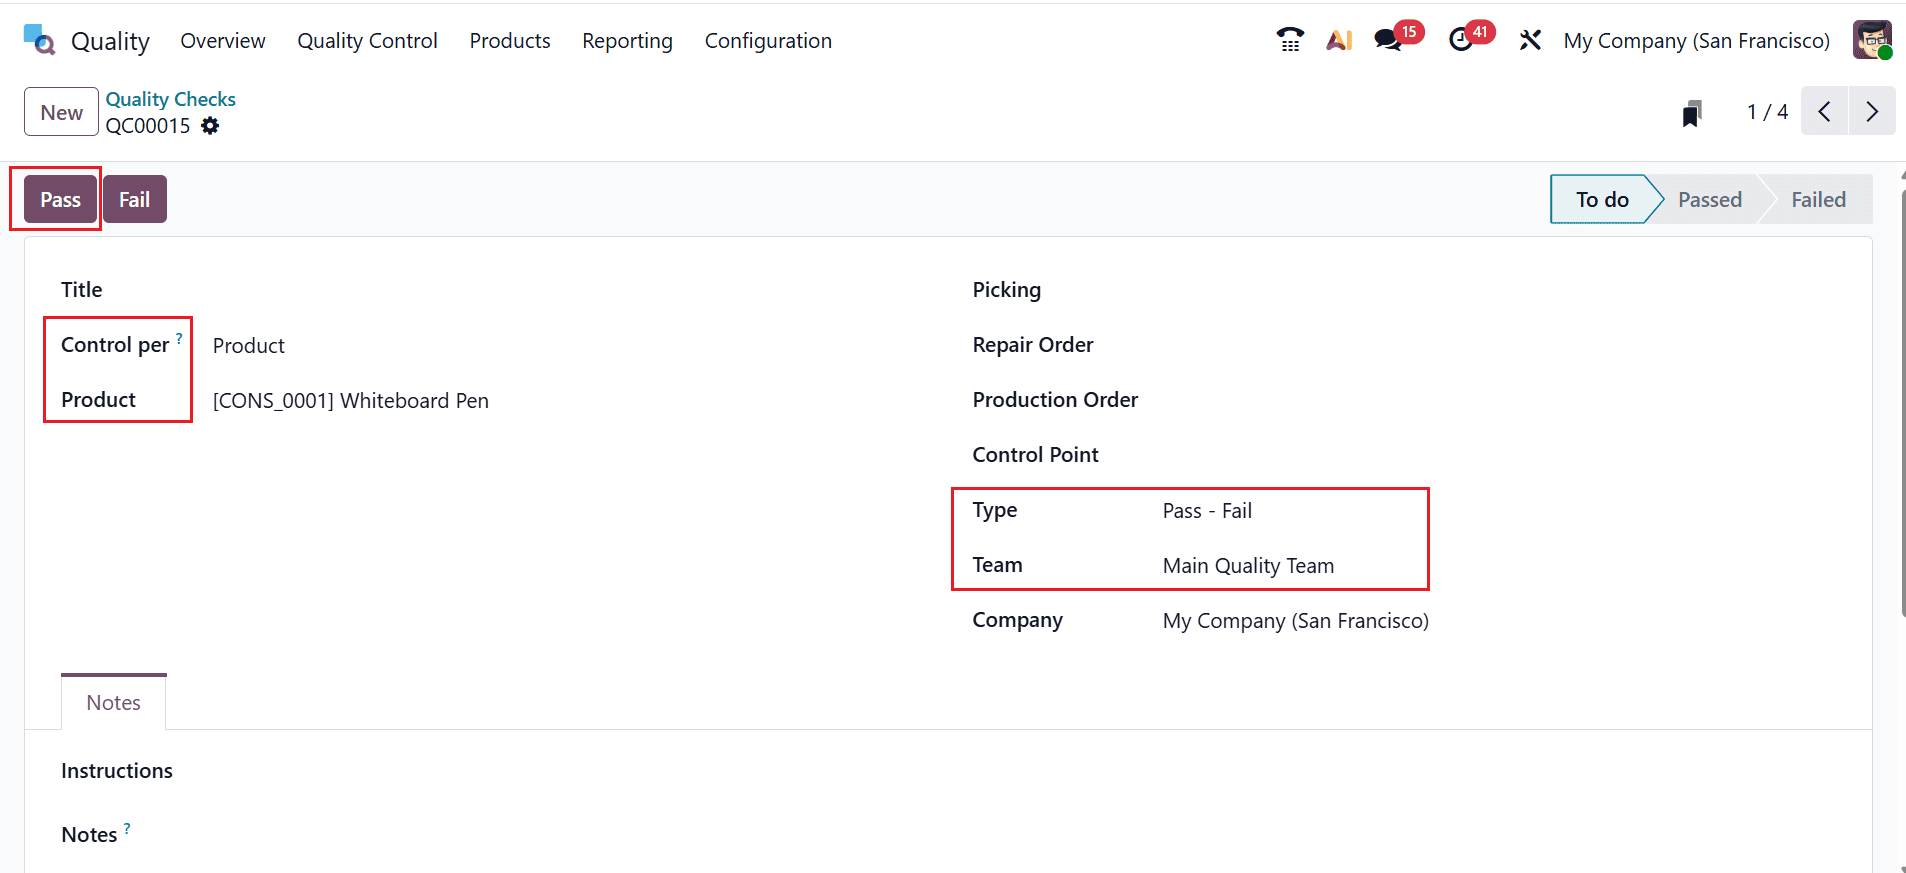
The record will shift to the Passed stage, as shown in the image below.
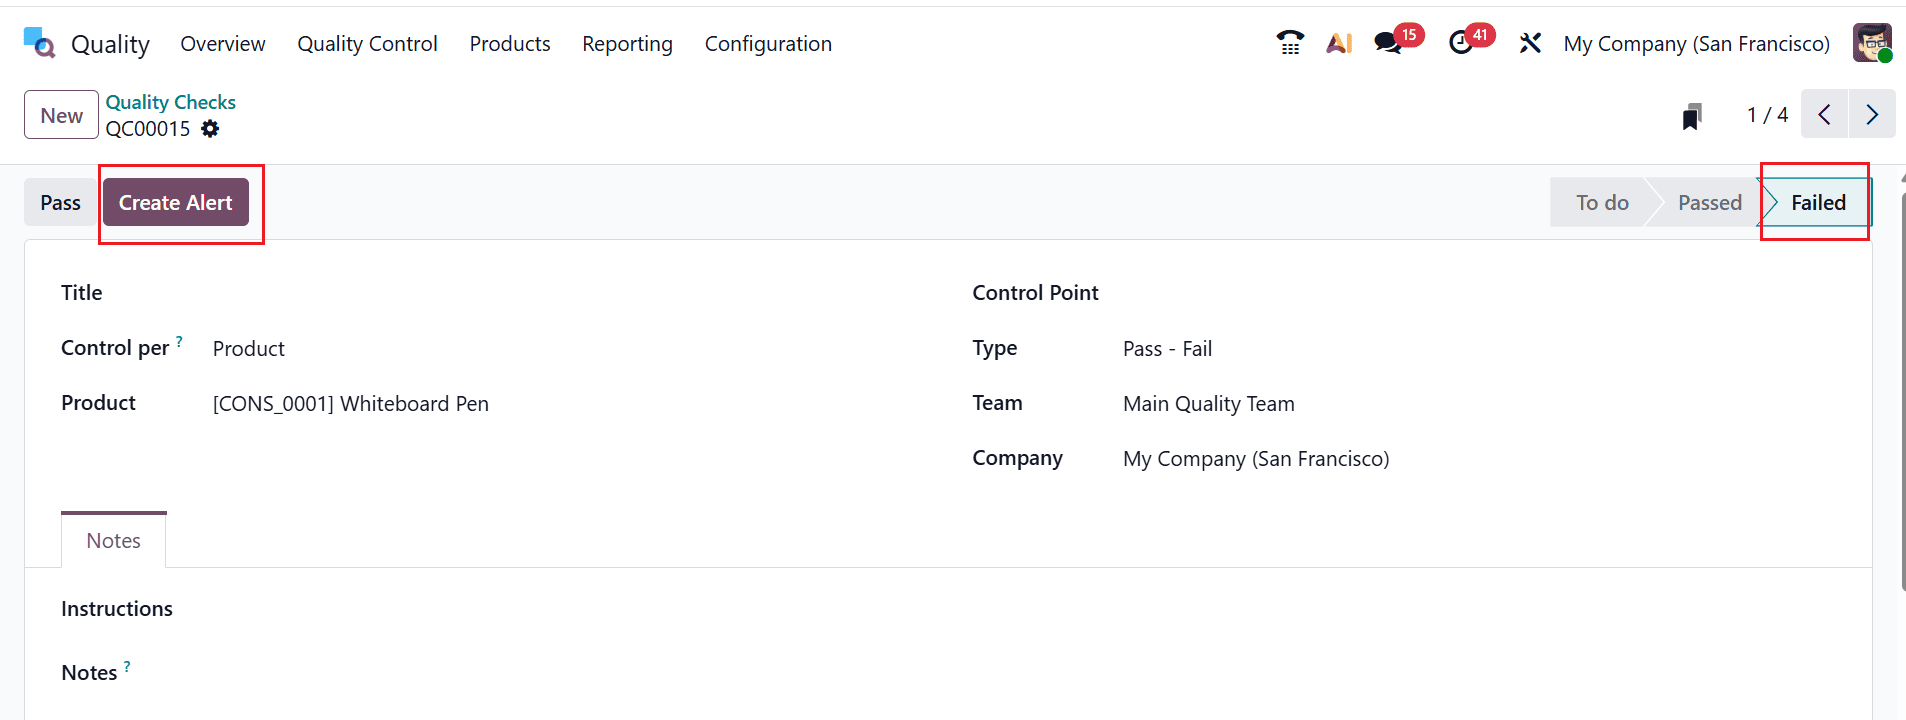
Choosing the Fail button sends it to the Failed stage. To raise an alert from the quality check, click the Create Alert button.
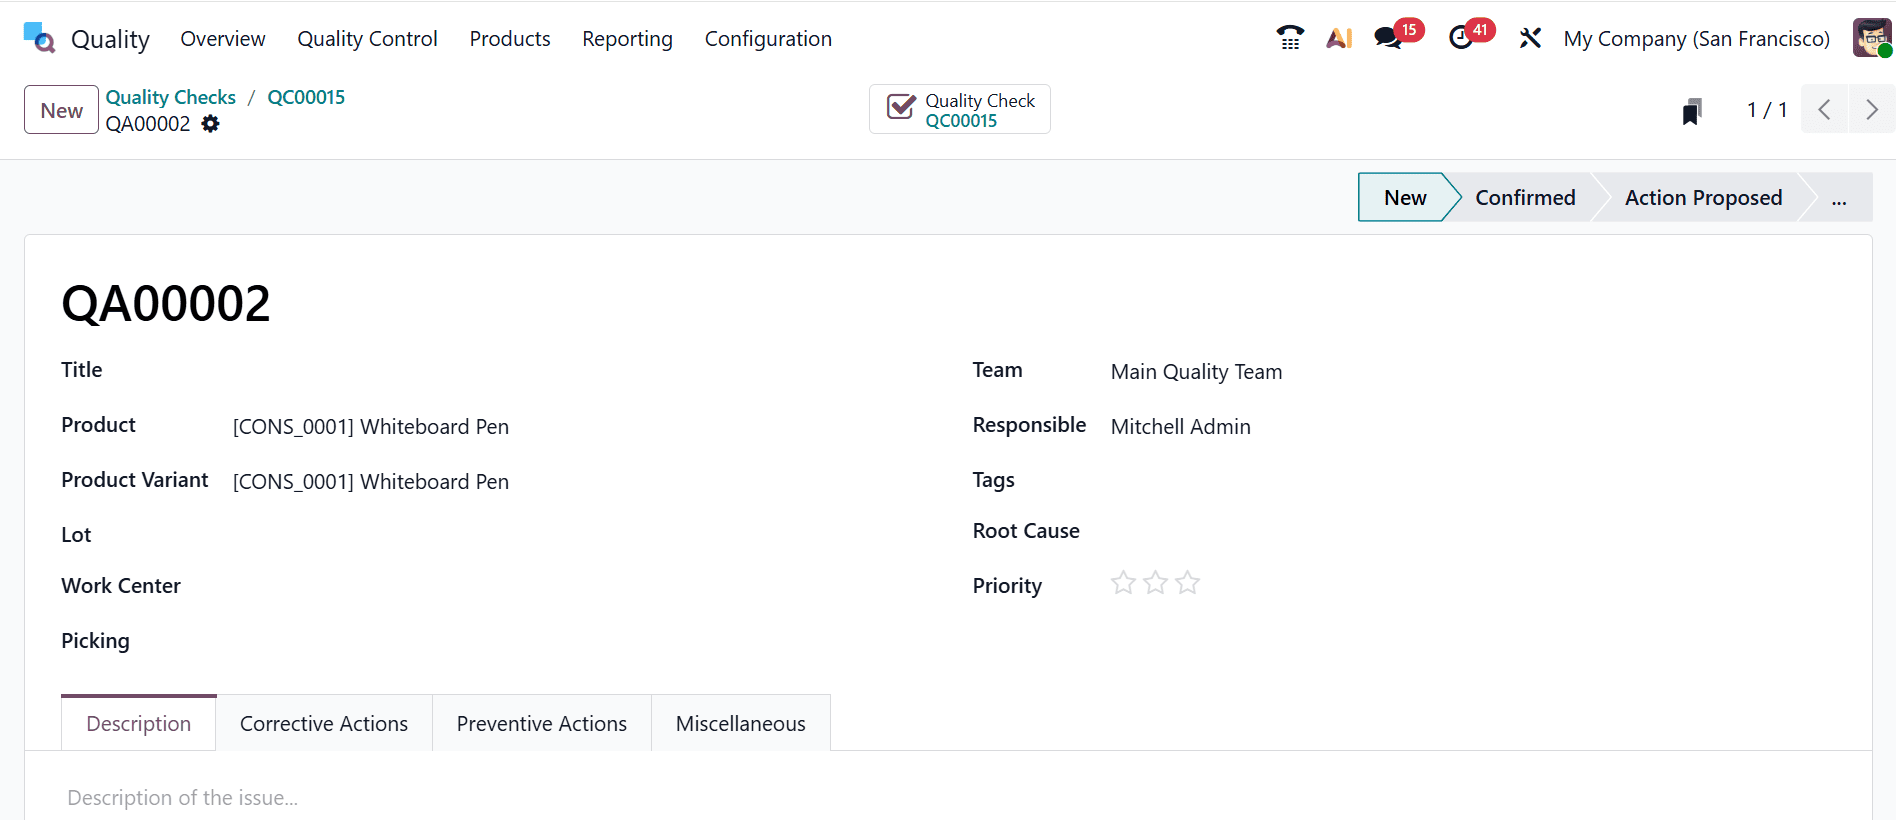
Here, a new window will appear where you can directly create alerts, which will be explained in the section below.
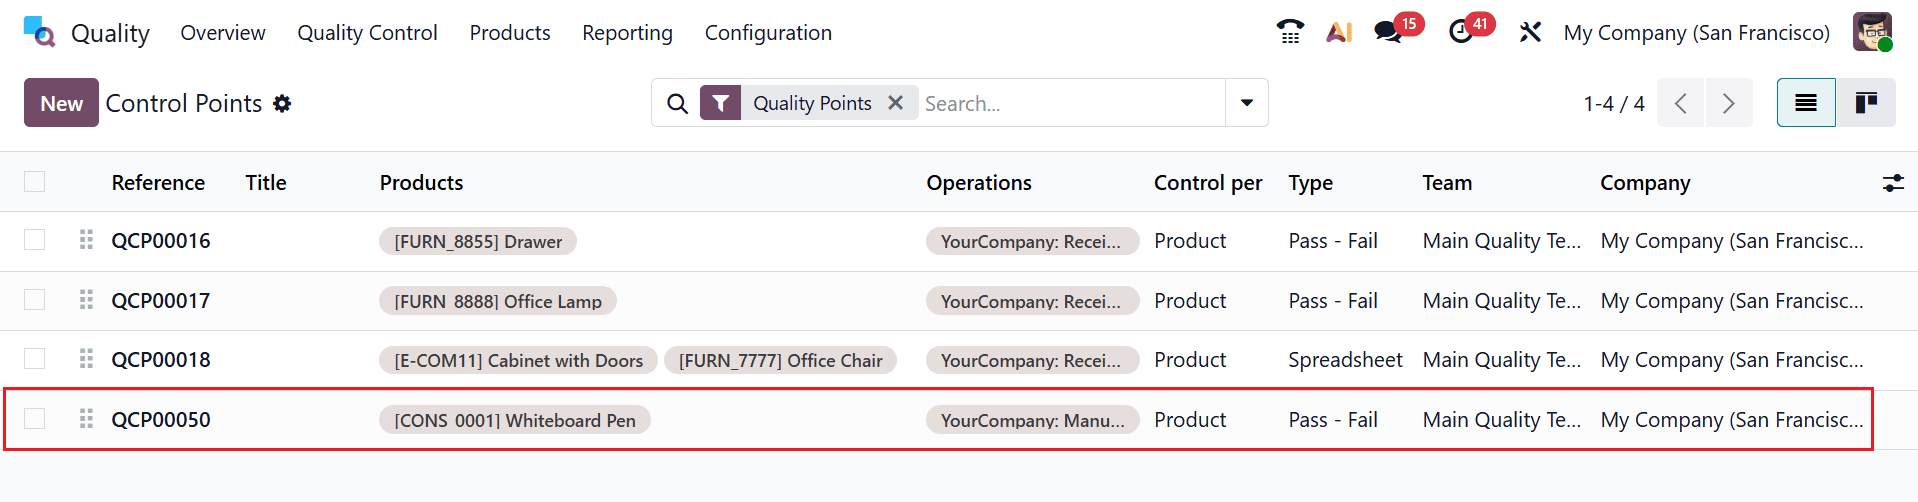
Control Points:
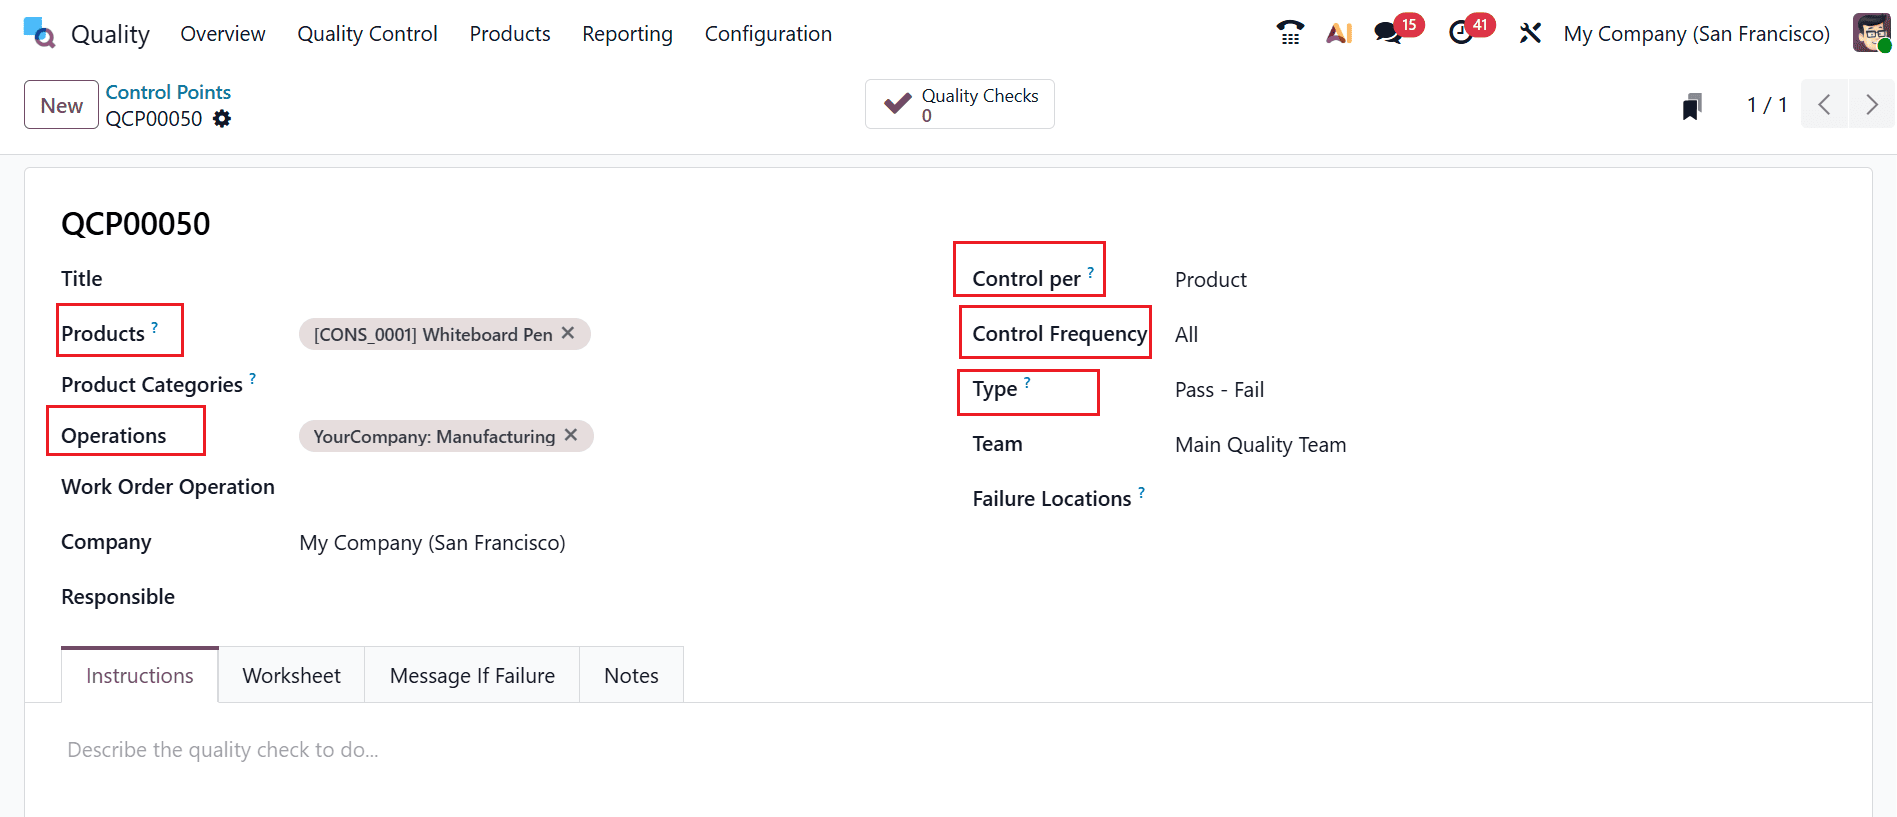
You can automatically create a pass-fail quality check using the Control Points option. Control Points are predefined rules that automatically trigger quality checks at specific stages of manufacturing, inventory, or delivery operations. Move to the Quality Control > Control Points and click the New button to create an automatic pass-fail quality check.

A new window will open, allowing you to select a product from the Products field. Select the Operations as Manufacturing. Select the Type field as Pass-Fail. Select Product in the Control Per field and set the Control Frequency to All.
Once you save, an automatic pass–fail quality check will be created.
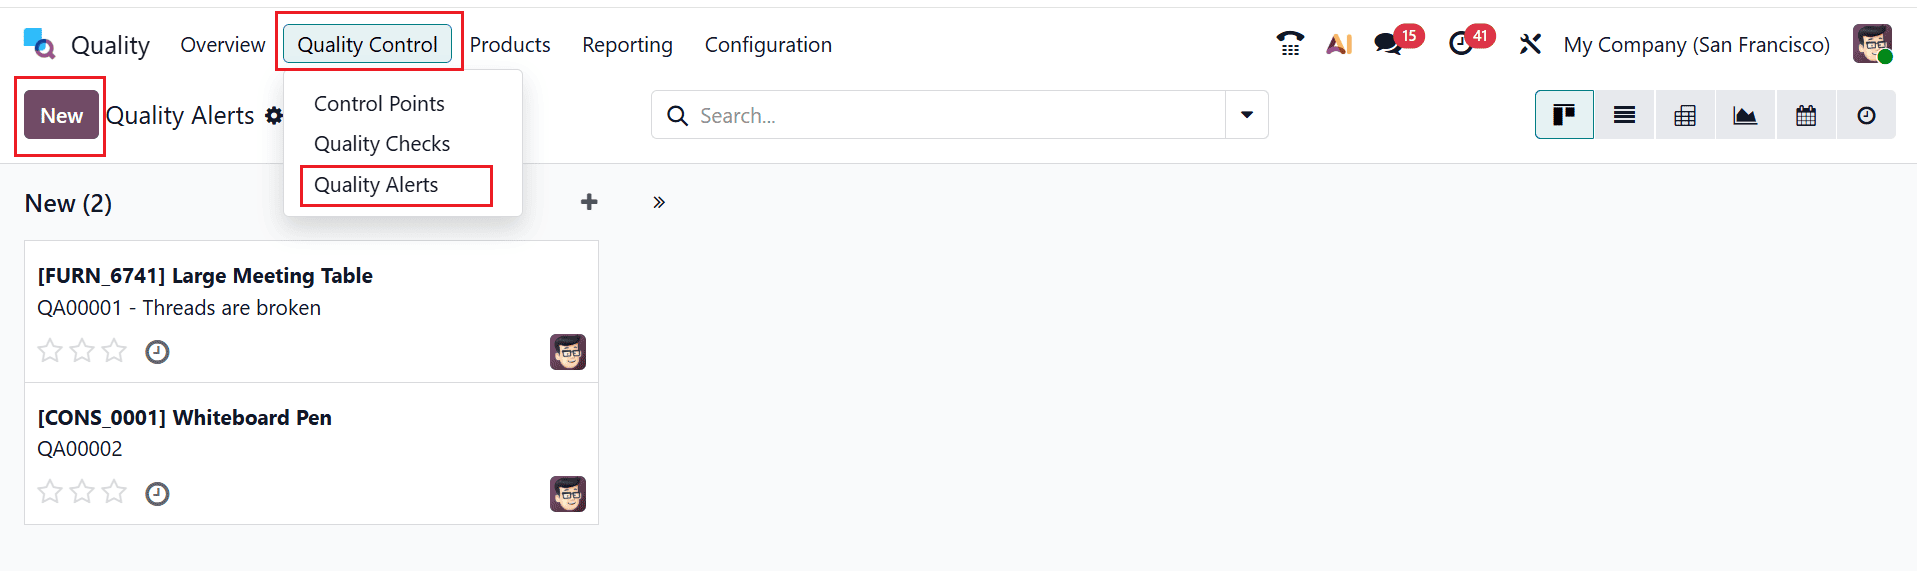
Quality Alerts:
Quality alerts are records created to report defects or issues, assign corrective actions, and track resolutions to prevent recurring quality problems. Open Quality Control > Quality Alerts, click New button as shown below:
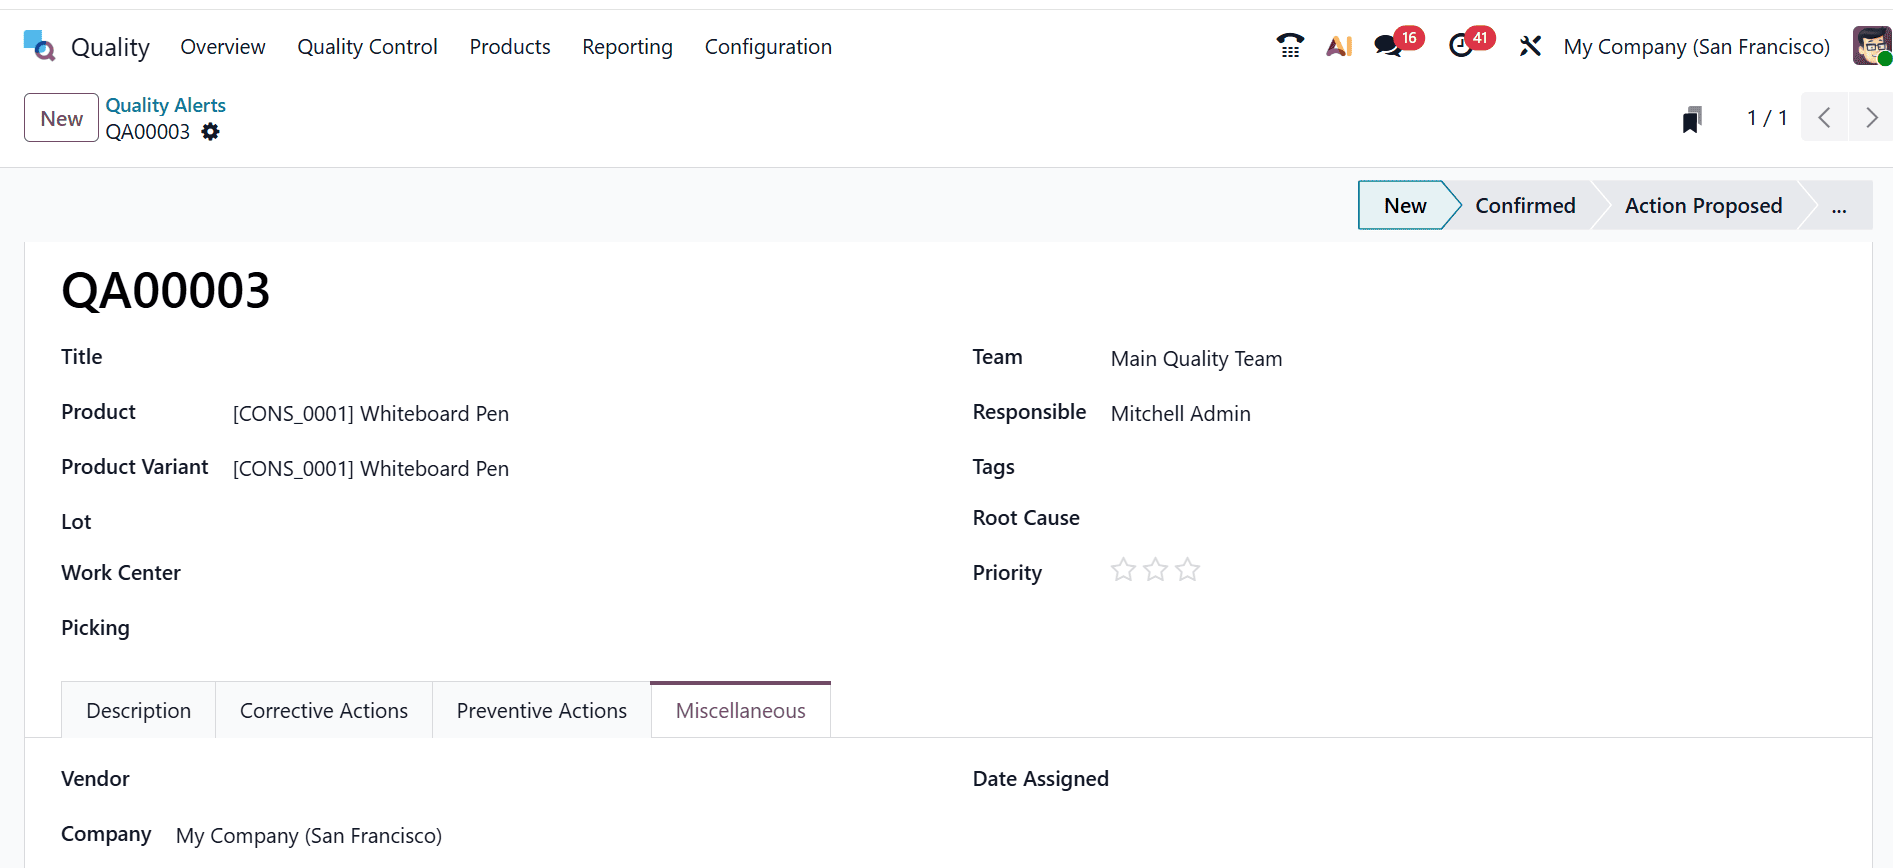
Here, add a suitable title to briefly describe the quality alert. Add the Product and Product Variant from the drop-down menu if the quality alert is related to the product. Add a work centre from the drop-down menu if the alert is issued to a work centre. Add a picking from the drop-down menu if the alert is issued to a picking order. In the Team field, add a team, and in the Responsible field, add the person who is responsible for the quality alert. In the Tags field, add appropriate tags for the quality alert, and you can also mark the Priority of the alert. You can provide the alert’s cause in the Root Cause field.
Under the Description tab, add information about the issue. Under the Corrective Action tab, add the guidelines to correct the issue. Under the Preventive Action tab, add the guidelines to prevent an issue. Under the Miscellaneous tab, select a Vendor and Company. Use the Date Assigned field to specify the date the quality team receives the issue.
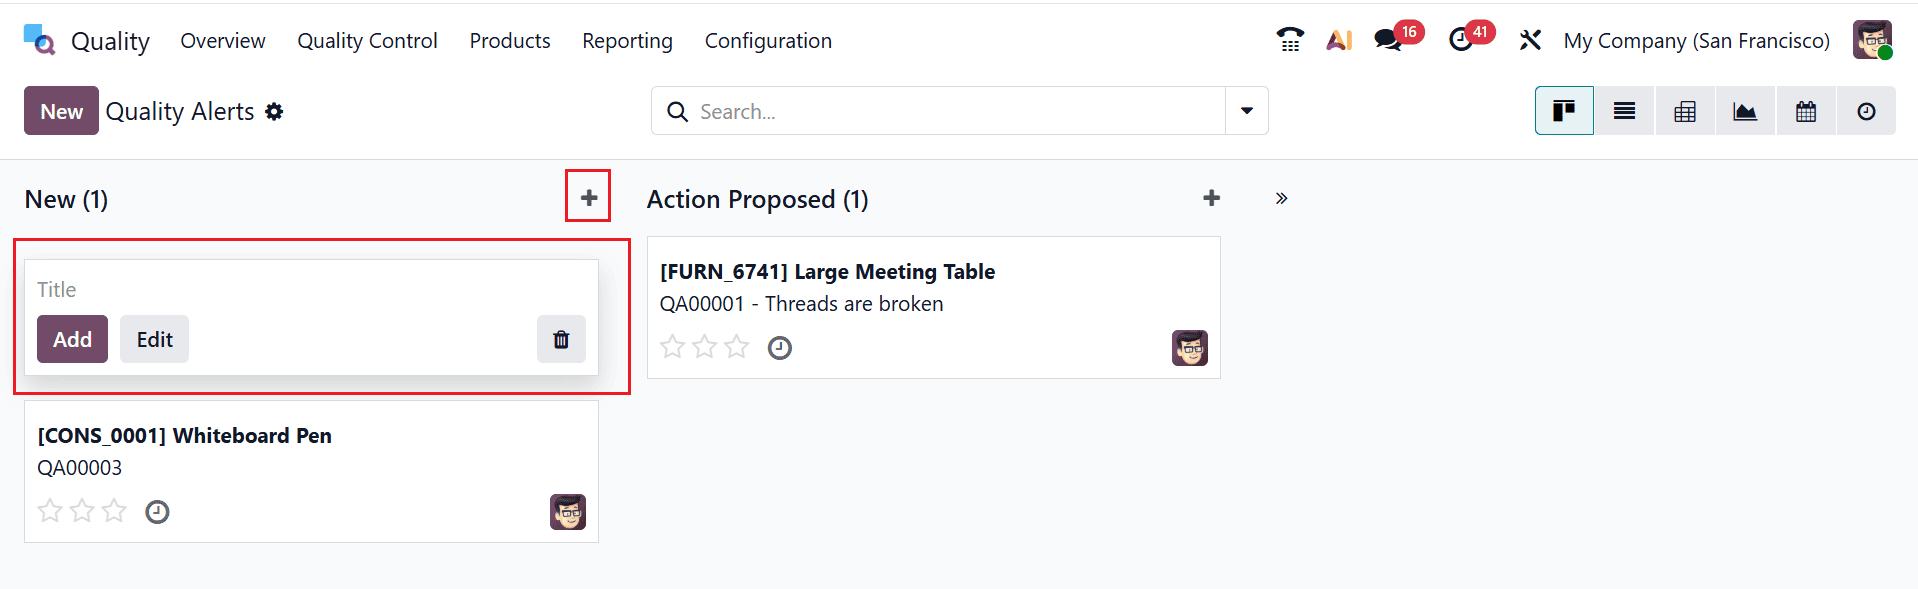
In the Quality Alert dashboard, the newly created issue appears in the kanban view, as shown below. You can move alerts between stages using the drag-and-drop feature.
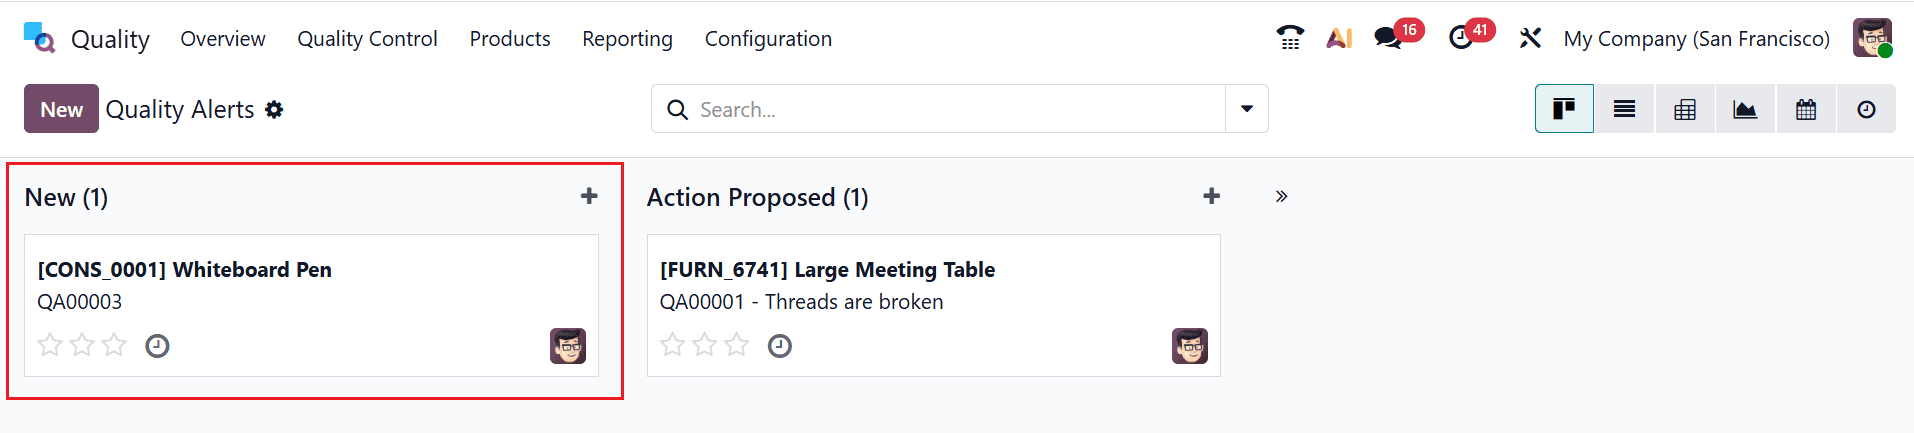
By clicking on the + icon on each stage, you can directly create a new alert for the particular stage. Here, add a new title for the alert and click on the Add button.
Quality checks and alerts in Odoo 19 empower businesses to maintain consistent product standards and operational efficiency. By automating checks and notifications, Odoo ensures that potential issues are detected early, preventing defects from reaching customers. The system allows companies to define multiple quality points across production, inventory, and shipping, tailored to their specific industry needs. Alerts facilitate quick responses, enabling managers and quality teams to take corrective actions immediately, reducing downtime and losses. Additionally, the platform’s reporting tools help track trends, identify recurring issues, and refine processes for long-term improvement. Integrating quality management within Odoo 19 eliminates continuous manual checks, streamlines workflows, and enhances compliance with regulatory standards. Ultimately, leveraging these tools not only safeguards product quality but also strengthens customer trust, optimizes resource utilization, and supports sustainable growth, making Odoo 19 an essential solution for modern enterprises focused on quality excellence.
To read more about How to Handle Quality Checks and Quality Alerts in Odoo 18, refer to our blog How to Handle Quality Checks and Quality Alerts in Odoo 18.